
How to Grow Sprouts at Home

Growing Sprouts at Home
Would you like a fresh food that grows in any climate, at any time of year and needs no soil or sunshine? One that you only spend 5 minutes a day with, matures in about a week and has more nutrients per calorie than any other type of food?
How about one that has no waste in preparation for eating and is tasty?
Welcome to the incredibly diverse, tasty and nutritious world of sprouts.
Whether it is well known leafy sprouts like Alfalfa and Red Clover, or the loved Mung bean sprouts used extensively throughout Asian cooking, sprouts are tender, crisp tiny plants that have flavors from mild and nutty to sweet, tangy and peppery. Their crunchiness and texture vary as well from the delicate Alfalfa and Clover to the thick and hearty Mung bean sprouts that hold up well to the heat of stir-frying.
Six Rules for Sprouts
- Rinse often.
- Keep sprouts moist but not wet.
- Keep at room temperature.
- Give sprouts breathing room.
- Avoid overcrowding.
- Keep covered – no light needed.
Sprouts don’t require any sort of “Green Thumb”, just pay attention to the rules above.
Rinse a couple of times a day to keep the seeds/sprouts moist. This also flushes away carbon dioxide and metabolic wastes that could cause spoiling. Use cool water when rinsing to ventilate and cool the sprouts to prevent overheating. Sprouts generate warmth as they grow. The optimum room temperatures are between 70 – 85°F.
Using the sprouting lid helps maintain proper drainage, preventing excess moisture that can cause mold. Young sprouts are very tender, so keep the sprouting container away from cold drafts, direct heat or light.
Sprouts expand 6 – 10 times their initial volume in just a few days, so give them plenty of room to grow. The 1 1/2 tablespoon volume of seeds grows to almost fill the quart jar!
Sprouts are very light sensitive and should be covered until the final day or two of the sprouting cycle.
Growing Sprouts
Now you know the rules, here’s how easy it is to grow your own sprouts! It only takes about 5 minutes each day.
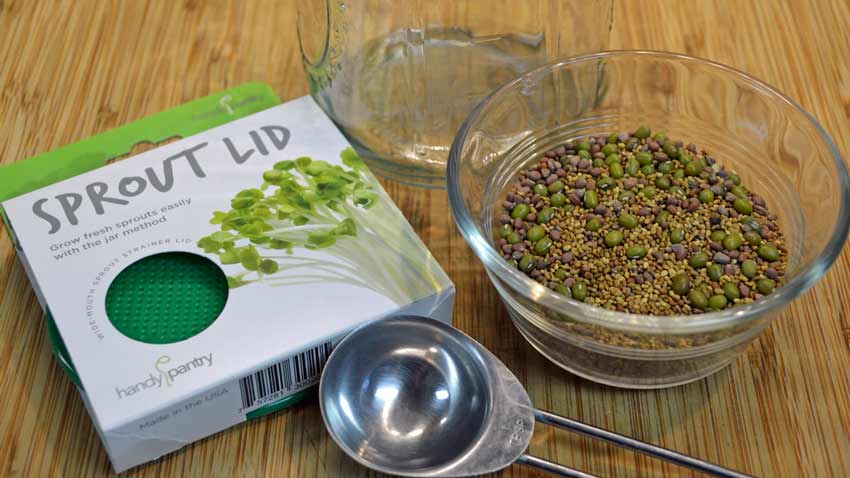
The tools and ingredients are super simple! You need a sprouting lid, a tablespoon measure, a glass quart jar and a towel to cover the jar.
What you sprout is up to you – we offer several different sprouts and mixtures to suit different taste buds.
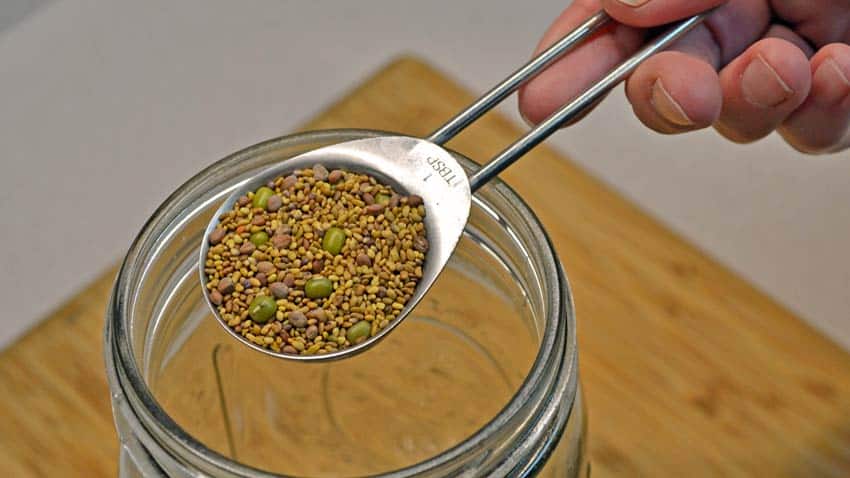
Start by measuring out 1 1/2 tablespoons of sprouting seeds into a glass quart jar.
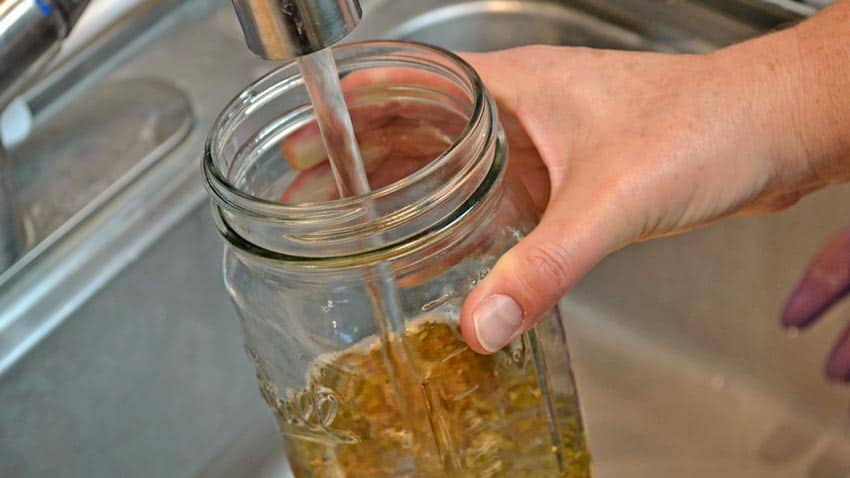
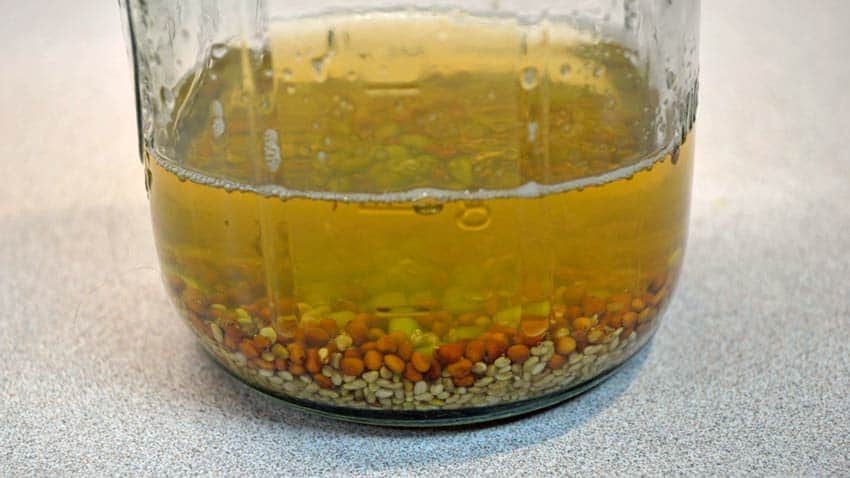
Fill the jar with warm water – not hot! This is the only time you will not use cool water in the sprouting process. The warm water helps start the sprouting process and speeds up the softening of the seed coat.
After the jar is full of warm water, screw the sprouting lid on, swirl the seeds well for several seconds and pour out the water through the lid.
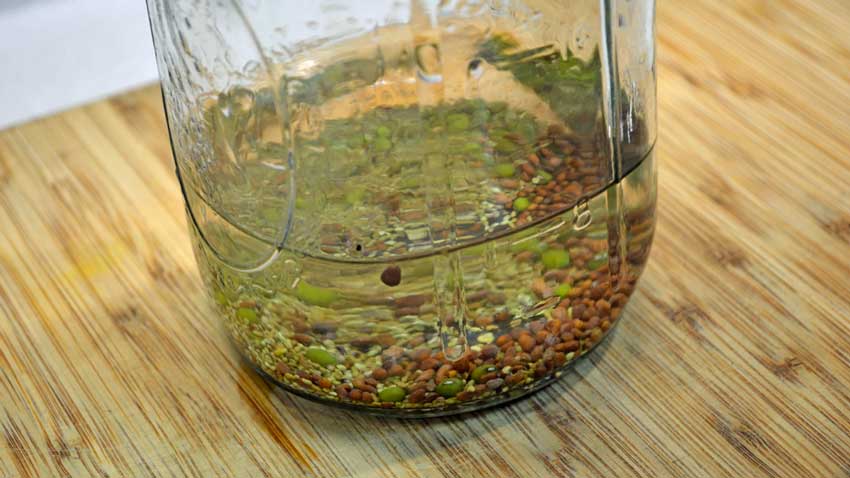
Refill with warm water to cover the seeds about 3 times their depth. Let soak overnight and keep away from light.
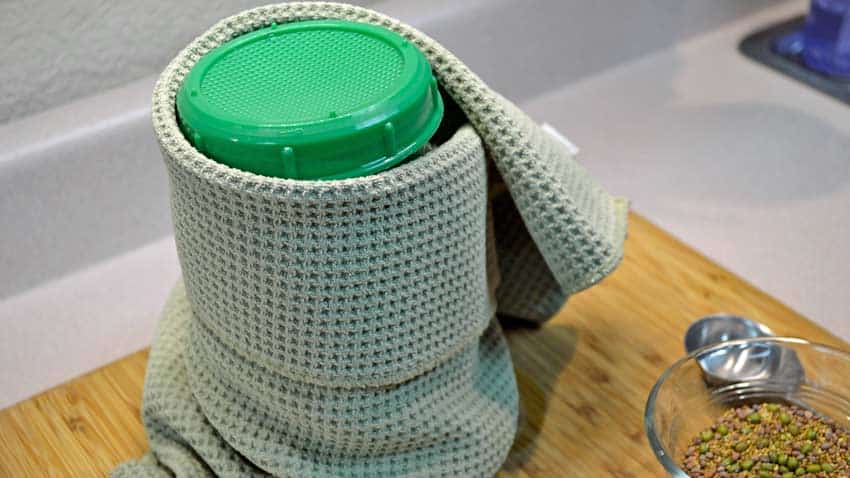
The easiest way to keep the sprouting seeds away from light is covering them with a towel. The sprouting process does not need light.
Let the jar and seeds sit overnight.
The next morning, this is what you should see once the towel is removed. The water will be slightly darker than yesterday and the seeds will be noticeably larger from absorbing water.
Dump the water out,
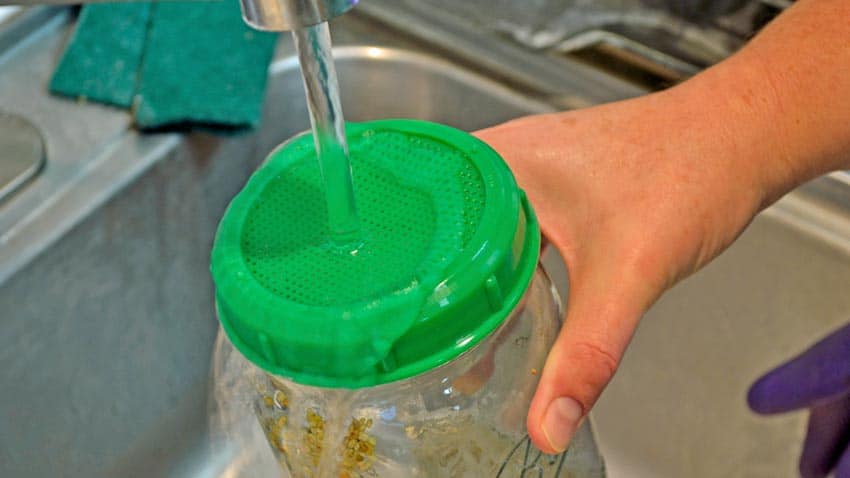
rinse with cool water, fill to about 3/4 full and swirl to separate any seeds stuck together,

then pour the water out again.

The sprouts look like this on the first day – still seeds! The sprouting process has started, and you’ll see the results on the second day.

After rinsing and draining, cover the jar with a towel and put in a convenient place where it is in a steady temperature with no cold drafts where it can drain without causing problems.
This place is often the kitchen dish drainer. We like to tip the jar lid downward to drain excess moisture off easily. Our duck eggs comfortably share the space!
This is the process you will repeat a couple of times each day. Rinse with cool water, pour out, cover with a towel and tip the jar lid downward to drain excess moisture.
At two days, the sprouts were just beginning to split their seed coats, with a few showing a small sprout tip peeking out here and there.
This is the third day. We rinsed and drained the sprouts and inspected them.

Sprouts at three days. Most of the sprouts have split the seed coats and have started growing.
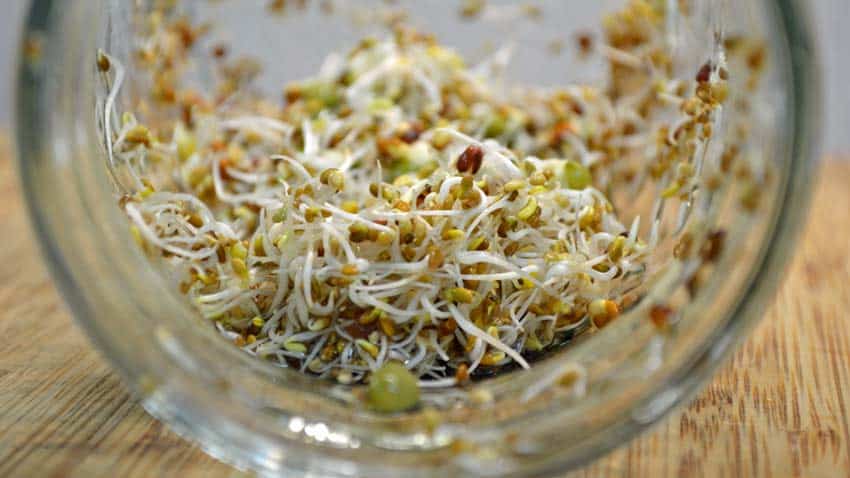
A closer view shows how dramatic the change is from seeds to sprouts in just three days. Most of the sprouts have long “tails” or roots, long enough to make the seeds look small in comparison. There are only a few seeds that have not sprouted at this point.
The growth continues over the next few days.
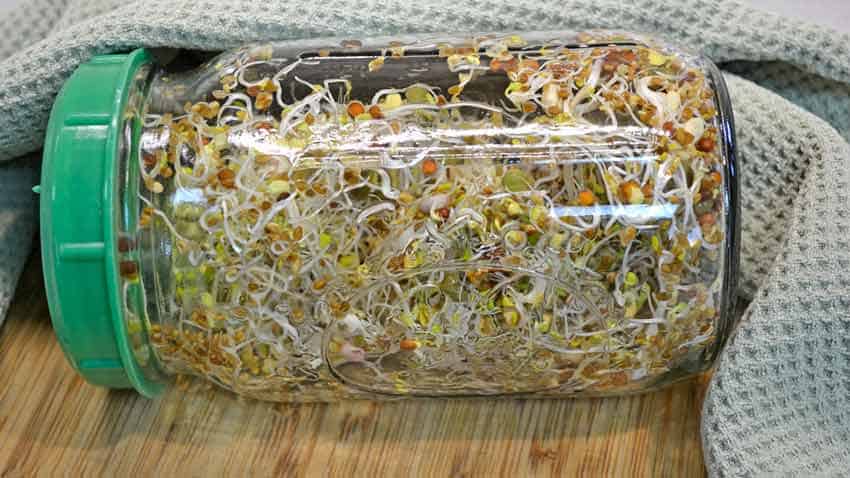
Sprouts at five days. There has been lots of growth in the past two days, compared to the day three photos above. The jar is almost filled now.
Each day we rinse, drain and cover the jar with the lid pointed downward to encourage good drainage.

The close-up view shows the difference in growth and volume over the past two days. At three days, they had filled almost 1/3 of the jar opening, while today they almost fill the jar opening.
The growing phase is finished, the sprouts need some ambient light to green up and boost their nutrition. You can eat them now – this is what is sold in the stores, but a couple of days with the towel off starts the production of chlorophyll and seriously increases the nutrition content!
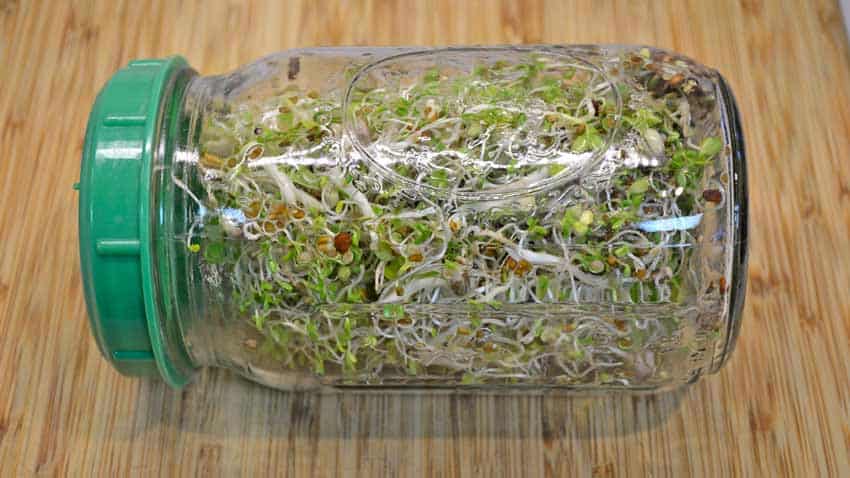
Sprouts at seven days. The growth has slowed down, but the sprouts are much greener now. We’ve left the towel off after day five. We continue the rinse and drain routine each day.
The young, tender cotyledons have turned from a pale light green to a richer, deeper green. This color indicates nutrition – amino acids, protein and carotene, among others.
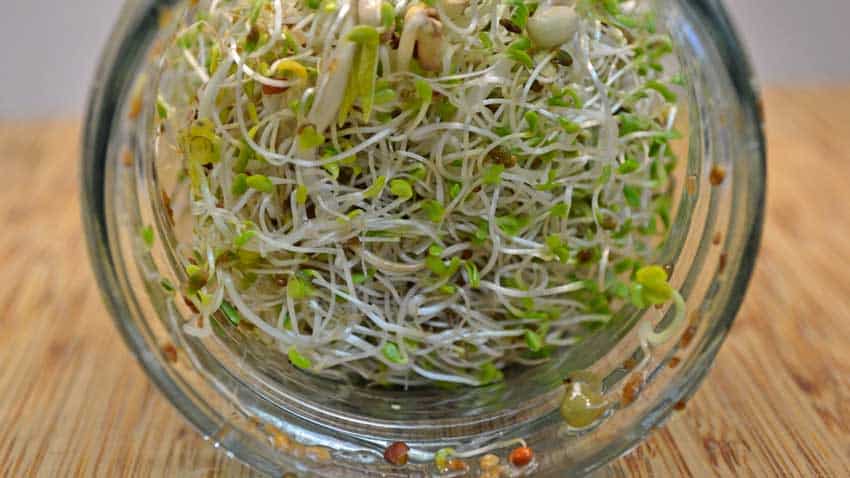
The close-up view shows how the sprouts have expanded a little more, but the colors are much greener.
The sprouts are almost ready to eat!

After the sprouts have greened up a bit, they are ready for harvesting. This just means a good wash in a colander or large bowl of water to remove the seed hulls.
There are two methods of doing the harvest wash – in a colander and in a large bowl of water.
If you use the bowl of water method, make sure to start with a bowl about twice the size of the sprouts so you have enough space to work. Gently dump the sprouts into the bowl and add cool water to almost fill the bowl.
Work your fingers into the sprouts, opening them up and releasing the spent seed hulls. Some will float to the top, while others will sink to the bottom. Skim the floating hulls, then remove the sprouts and drain the water and hulls.
Replace the sprouts and repeat the process until there are very few hulls left.
We show the colander method in our photos.
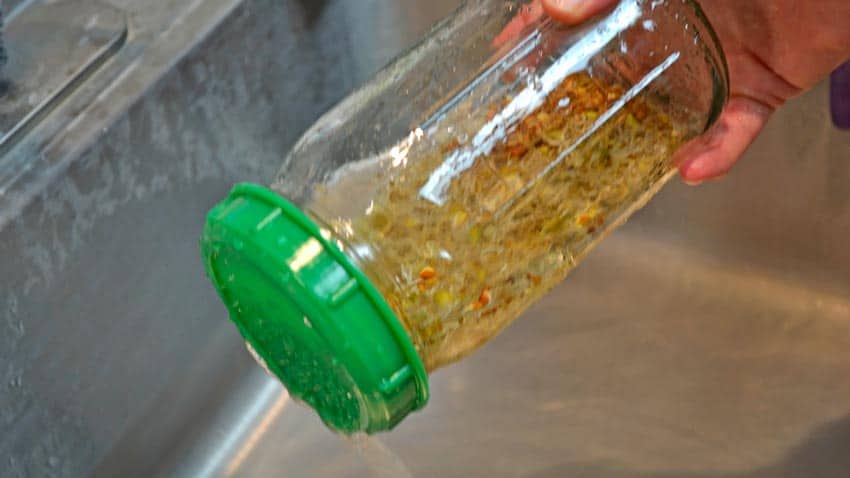
Gently dump the jar full of sprouts into a colander. It may take some gentle shaking or a chopstick to loosen the sprouts if they’ve grown to fill the jar.

Gently but thoroughly wash the sprouts with a running stream of water. We alternate between a solid stream and a spray and use our fingers to work the sprouts around to release the hulls. Some are visible at the bottom of the colander.
It usually takes a couple of cycles of wash/rinse with finger agitation, then lifting the sprouts out and washing the hulls out of the colander. Once you have very few hulls left the sprouts are ready to eat or store in the fridge.
Store sprouts in the refrigerator using the glass jar and sprouting lid as they still need to breathe and be rinsed once a day. Just make sure to set the jar lid down to drain for about 15 minutes before putting back in the refrigerator. They will last about a week, but usually will be eaten in just a couple of days!

Once the sprouts are cleaned they are ready to eat! We love our fresh sprouts on sandwiches of any kind – or on a fresh burger of locally raised heritage beef with homemade mayonnaise! Sprouts bring a fresh crunch and taste of fresh growth no matter what time of year it is.
If you find sprouts as delicious as we do, try succession sprouting. This is the same concept as succession planting in your garden but with sprouts.
Depending on how much you and your family eat, start a batch every third or fourth day to keep a fresh supply of sprouts on hand. You will need a sprouting lid for each batch, so you might need 2, 3 or 4 lids. With simple care the lids will last several years.
Start Your Own Sprouts
Now you see how simple it is to grow your own home-grown sprouts, saving you time and money while having delicious fresh greens any time of year! If you have a spare 5 minutes a day and enough room for a quart jar, you can grow sprouts.
Once you’ve sprouted a couple of times and have the timing down it will feel second nature to always have fresh sprouts on hand.


Leave a Reply
Want to join the discussion?Feel free to contribute!