Growing Tomatoes 101
The More You Know – the Better You Grow
Growing tomatoes is an enjoyable and rewarding experience that anyone can master. Whether you’re a seasoned gardener or just starting out, with the right knowledge and techniques, you can easily grow healthy and delicious tomatoes. By identifying and avoiding common mistakes and myths, you’ll be well on your way to becoming a confident tomato grower. So don’t hesitate; let’s grow some amazing tomatoes!
Today, we will be discussing the fundamentals of growing tomato seeds for your home garden.
After years of experience in our own garden and answering years of our customers’ gardening questions, we have found what is essential to successfully starting your tomato seeds at home. The good news is that it isn’t difficult once you understand what the seed needs.
The initial conditions you choose are critical to sprouting, transplanting, and growing success, no matter what seed you are planting. Here are some things to consider as you grow your tomatoes this season.
In most climates in the US, we need to start our tomato seeds about 6-8 weeks before our last expected frost date, six weeks in areas with moderate winters, and eight weeks with cold winters. This gives the seedlings plenty of time to grow and fill out so they are robust and ready to start flowering, as well as shrugging off unexpected late cold snaps.
Find your last expected frost date with this tool, using your ZIP code to see the historical weather patterns. The last expected frost date is traditionally the 50% chance of a 32°F night, which, for our location in Chino Valley, AZ, is May 4. We always wait a week and closely watch the weather forecast to see if a cold snap is expected. It never hurts to wait a week or two before transplanting!
Determine your seed starting date by working backward 6 or 8 weeks from this last frost date – May 4th in our case. That makes March 9th the 8-week mark or March 23rd the 6-week mark.
Keep in mind that this is a good starting point, but don’t think you are too late if you start your tomato seeds 4 or 5 weeks before your last expected frost date – weather varies from year to year, and you can wait an extra week or so until the soil is warm and no more late-season cold snaps are predicted.
Now that we know when to start our seeds let’s see how.
Starting Seeds
- Tomato seeds sprout quickly in the right conditions – as fast as 3-5 days. This lets you quickly know if you are on the right track without waiting long.
- Sow your seeds no more than 1/4” deep in well-moistened soil. We plant one seed per cell in a germination tray, so we don’t have to thin seedlings later.
- Tomato seeds don’t need light to germinate, but newly emerged seedlings need a lot of light to start photosynthesis. We’ll talk more about this in a couple of minutes.
The two essential parts of good tomato seed germination are soil temperature and soil moisture – this is where at least 75% of the problems we help troubleshoot begin.
Soil temperature in the range of 75-85°F is good, but the ideal soil temperature is 80-85°F. The difference between 75°F and 85°F can result in seed germination taking almost a week longer. At 85°F soil temperature, we typically see most tomato seeds sprouting in three or four days.
Use an inexpensive digital kitchen probe thermometer and insert it about 1/2” into the soil. If it reads 80-85°F, you are ready to plant your seeds!
Tomato seeds need moist soil for vigorous germination. The moisture softens the seed coat, activating the nutrients, enzymes, and growth hormones that initiate the process.
Soaking the seeds in a wet paper towel for 24 hours before planting can jump-start the initial germination process.
- If you notice, we specifically mention soil temperature, not just temperature. This is because the air temperature one inch above a seed tray can be at least 5-10°F higher than the soil, meaning the soil is colder – due to evaporation – and germination will take longer, sometimes much longer. For instance, a soil temperature of 70°F instead of 80°F can delay germination for two weeks!
- Invest in a seedling heat mat to keep the soil temperature consistent; some will have a thermostat attached. A quality heat mat will last for a decade or longer while increasing your seed germination to above 95% success.
- Test the soil moisture by touching the surface of the soil with your finger – you should easily see the moisture sheen on your finger and feel it by rubbing your fingers together. If not, it’s a little too dry.
- Don’t worry if you’re not completely sure – you’ll get the feel of it quickly!
- During germination, use warm water – warm to the touch – from above to minimize the evaporative cooling effect.
- Many germination trays come with a moisture dome – use it for the initial germination, then take it off after the seedlings emerge.
Seedling Care
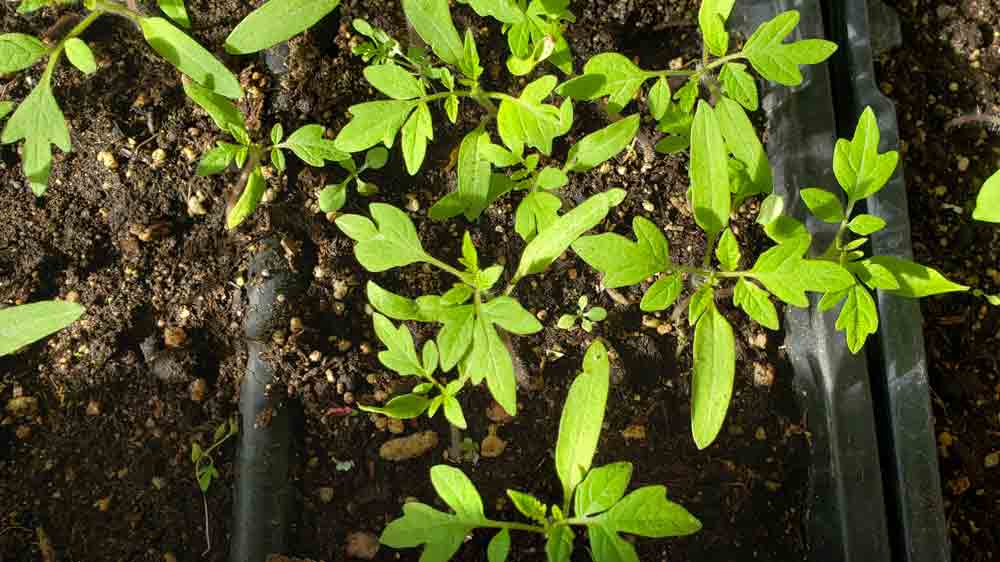
- Tomato seedlings need lots of light to start photosynthesis and feed themselves. Once they are up and growing their first true leaves, position a grow light about four inches above the top leaves. Leave it on for 12-16 hours daily, moving it upwards to maintain the four-inch gap as the seedlings grow.
- Tall, skinny seedlings are called “leggy” and indicate insufficient light. Therefore, they spend growth energy stretching to try to get more light. Keeping a bright, broad-spectrum grow light close to the tops of the leaves keeps your seedlings thriving.
- A brightly lit southern-facing window can substitute for a grow light; monitor for legginess and add supplemental light if needed.
- Once the seedlings are up, reduce the soil moisture and temperature to prevent mold and fungus issues.
- Reduce the soil moisture from moist to damp – instead of seeing and feeling a water sheen on your finger, you shouldn’t see the wet; you should only feel it.
- Switch from watering above the soil to bottom watering. This will encourage root growth and minimize wet surface soil problems.
- Reduce the soil temperature to about 70°F.
Transplanting
- Tomatoes are more sensitive to transplant shock than most vegetables, but you can minimize the effects by hardening them off. This means setting them outdoors in a warm, protected place for a week – preferably two – before transplanting. Start with a shorter time outside, gradually increasing each day as they acclimate. If the weather cooperates at the end of the first week, you should have your plants out for most of the day.
- Please resist the urge to transplant as soon as possible after your last frost date, as nothing will set a young tomato plant back than suddenly being in cold soil that it’s not used to. We like to wait at least a week after our expected last frost date, then check the soil first thing in the morning. If we can put our hand on the soil and it feels cool but not cold, then we know we are close to transplanting time.
- Space your transplants no less than 2’ apart to give them room to grow; this also gives you room to easily get into the spaces between plants during harvesting.
- Set your plant up for success by transplanting deep – about an inch below the bottom-most branch and leaves. The stem will send out additional rootlets into the soil to bring in nutrients.
- Give your new transplants a good drink of water, as they will be thirsty. Water slowly from a can instead of gushing from a garden hose. Monitor soil moisture often in the first few days after transplanting to determine how often your plants need water.
Growing
- Heirloom tomato plants are heavy with vigorous limbs that eat hardware store trellis and cages as snacks. We learned from several attempts at buying increasingly heavier cages, only to have the plant tangled up in the cage and lying on the ground. You realize just how heavy the plant is when you lift and move it around, trying to harvest the ripe tomatoes every other day!
- We started by buying cattle panels, cutting them into four-foot lengths, and wiring the ends together to make a sturdy, long-lasting tomato cage that doesn’t fall. We’ve used them for over a decade without any problems.
A good rule of thumb when looking at tomato cages or trellis is that if you can easily bend them, so will your tomatoes.
- You can also use heavy-duty stakes to tie the plant up in a container.
- Tomatoes grow just as well in a large container as in a raised bed or traditional row garden. If you are using a container, make sure it’s at least 10-12” across at the top and a foot or more deep for each plant.
- Heirloom tomatoes have thinner skins than supermarket hybrids, so pay attention to soil moisture and don’t over-water, as this causes the skins to crack.
- Use a drip system on a timer to keep soil moisture levels consistent. This reduces plant stress from temperature fluctuations that lead to moisture fluctuations. We start with twice a day for about 5 minutes after transplanting, then check soil moisture at 2-4” deep and adjust as needed. In the hottest part of the summer, we can have the drip system on four times for 5-7 minutes each time.
- Looking at the leaves is an excellent way to tell if your tomatoes need watering. When the edges start to curl, they are thirsty – this is the perfect time to water.
- Use a thick layer of mulch – 2” is good – around the base of your plants to reduce evaporative moisture loss, keep the soil and roots cooler, and reduce weed pressures. We like wood chip mulch, but pest-free hay and straw are good secondary choices.
- Once the fruit has set, the rate of tomato ripening is mainly due to the weather. A cool, cloudy weather stretch will significantly slow the ripening process, so be prepared to be patient.
- On the other hand, if you have early hot weather, the plants may be slow to set fruit. Providing afternoon shade can reduce the heat stress and re-start the flowering and fruiting process.
- Smaller tomatoes ripen faster and in bunches – turn your head for a minute, and you’ll swear those cherry tomatoes just ripened! Larger tomatoes take a bit more time to ripen fully, but the flavor of vine-ripened fruit is well worth the wait.
- Use clippers or garden shears to harvest the fruit – never tear the stem, as you’re inviting pests and disease into the plant.
- The best flavor is first thing in the morning, so harvest early. If needed, harvest before going to work and let your daily haul sit on the sink until you get back home. Don’t put freshly harvested tomatoes in the fridge, as you’ll lose much of the flavor you’ve worked hard to get.


