Cover Crops Q & A
Our cover crop mix has generated lots of questions on how to use it. This means we need to share more information with you. It is fantastic seeing so much interest about improving your soil and your garden!
I’ve taken the most frequent questions and condensed them into a Q&A format below.
“I want to order cover crop seed. I don’t know how much I need, how to prepare the garden before sowing the seeds and when to plant it.”
The Garden Cover Up mix page lists the coverage rates for each variety.
1 lb will seed 200 square feet, or a 10×20 garden bed or 2 5×10 beds. 8 oz will seed 100 square feet, or a 10×10 garden bed. This gives you a thick planting, boosting soil fertility and decreasing weed pressures.
Ideal planting times are early August through mid-September, depending on your growing season. Plant around mature garden vegetables or in spaces left from the removal of older plants.
Preparation is easy. Broadcast the seeds and rake them into the top half inch of moist soil, or cover with 1/2 inch of mulch or compost. Water equal to 1 inch of rainfall per week until seedlings become established.
The best time to plant is 6 – 8 weeks before your first frost date. If you don’t know your expected first frost date, use the First and Last Frost Dates tool from the National Garden Association.
Enter your ZIP code and find the weather station closest to you.
The first frost date is the intersection of the vertical 50% column and horizontal Fall 32°F line.
Count back 6 to 8 weeks to determine when you should sow the cover crop seed. By planting a few weeks early you’ll have bigger growth, but may need to clip the spent flowers to prevent re-seeding.
“Can/should cover crops be used in raised beds? Approx 3-4′ X 6-8′. Do they need to be turned in the spring? Do they go to seed and become intrusive?”
Cover crops are good for any sized garden larger than a container garden where it is easier to change the soil out. Your raised beds would benefit from our cover crop mix.
If you get a good freeze, the mix will “winterkill”, meaning they will die after a hard frost of around 24°F or so. Then the plant matter will fall down to become mulch for the soil, while the roots decompose. You can turn them under, but I don’t recommend it as tilling or turning disturbs the soil structure. You can plant right among the mulch in the spring.
The cover crops will set seed and scatter those seeds if you let them. Plant cover crops 6 – 8 weeks before the first frost so they get good growth and flower but usually don’t have the chance to set seed. If you see seed forming, just clip those seed heads off and throw them away.
This way the cover crop can’t be an unwanted guest next spring!
“I would like to start a cover crop on a small portion of my property and put in a garden next year. What do I have to do to prepare the soil to put in a cover crop. Also, when do I turn over the cover crop?”
You have a great thought in using the cover crops to help establish and improve the garden soil for next season.
This is the exact method used by organic farmers and growers to prepare fallow soil for a crop. Growers will plant cover crops in succession, or they allow the flowers to re-seed themselves.
Rake to loosen the top inch or so, broadcast the cover crop seed and rake again until just covered. Water the area equal to 1 inch of water per week until the seeds sprout and the plants establish themselves.
Let the plants flower and start setting seed, then clip the heads to prevent them from re-seeding. Allow the plant matter to die in the frost, creating its own mulch. The roots and topsoil mulch decompose over the winter, giving you with an excellent start to next gardening season!
“I am slowly working toward taking my area back from prairie dogs and building a garden plot on 4 acres that are usually dry and sandy. Do you have a general ground cover seed mix to assist in soil health and holding my sand back from flowing away during the monsoon season?
I keep chickens with portable netting so something edible for them would be good.”
Our Garden Cover Up Mix provides plenty of nutritious forage for your chickens. Plant a test plot close to where they are. Water the area equal to 1 inch of water per week until the seeds sprout and the plants establish themselves. Then you can trim some as fodder for the chickens as it grows and develops.
Our Backyard Chickens collection is another option. It has a variety of tasty edibles like sunflower, corn, Swiss chard, mustard and kale.
For erosion control, I would plant a straight (50/50) mix of buckwheat and cereal oats. Both are fast growing with good root systems that hold the soil in place. They provide good mulch after the plant dies off. You might test plant a strip about 3 – 5 feet deep crosswise to how the water flows during monsoon season. This acts as a catch strip, slowing the water down and reducing the amount of soil moved. It also creates a berm for future moisture retention. The roots create a “sink” for the water flow which diverts the water into the soil and away from flowing across it. This starts to build up the shallow soil and water reserves on your property.
I would not mow or kill this planting but allow it to re-seed and establish itself well. If the test works, you can replicate this downstream of where the water flows as many times as needed.
Once the initial berm starts to form, plant the Garden Cover Up mix up stream. This takes advantage of the extra moisture to reclaim and build some good soil!
This will only take 2 or 3 seasons to establish some excellent berms fully and then you can plant more.
“I have celiac disease and therefore cannot be around wheat, and am also sensitive to oats. Do you have any other recommendations?”
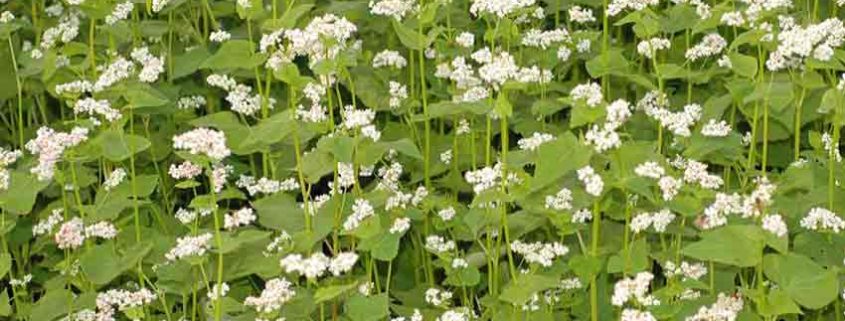
Buckwheat is not related to wheat at all, as it is in the Rhubarb family – if you can believe that! You should not have any reaction to buckwheat. You can avoid the oats by ordering the individual cover crop varieties. The Crimson clover and hairy vetch are strong nitrogen fixers, where the Buckwheat and Rye are fast growing ground covers.
You can make your own mix by ordering the smaller amounts of the individual cover crops, avoiding what you are sensitive to.
“After the cover crop dies or you kill it – should you till it into the ground?”
The cover crop mix will die after a couple of hard frosts. It becomes a mulch insulating and protecting the soil over the winter. During that time the roots decompose and increase the soil fertility. Depending on your climate over the winter the mulch should almost dissappear by next spring’s planting time.
I don’t recommend tilling a cover crop, it disturbs the soil you spent the winter improving. When planting, open a small space in the mulch. Then it continues covering and protecting the soil while smothering weeds.
If you do feel the need to till, raise the tines to only till the top 2 – 3 inches of soil and don’t disturb deeper layers. This will work the decomposed vegetative matter into the soil where it will be used quickly.
The process is to plant a fall cover crop, let it die and overwinter to improve the soil. Next spring, plant another after the garden crops are in and up. This covers the soil and shades out most weeds. Repeat this cycle yearly and the soil becomes incredibly fertile after a year or so.
In fertile soil weeds aren’t as much of a problem because they just don’t germinate as well. Fewer weeds leads to fewer insects, as many insects “partner” with specific weeds for habitat or to lay eggs on. Increased soil fertility means healthier plants which do not attract predatory insects.
“I planted clover one fall as a cover crop, and found that in spring it had formed such a dense mat of roots I had to use a pickax, and it never DID die back in winter! (Living in a warmer winter climate.)
I have clay in my soil and have been amending it for several years now. Wouldn’t tilling the soil deeply (about 12 inches) be beneficial for breaking it up and making it more accessible to my garden plants’ root systems? It’s really solid and unfriendly down there in the root zone!”
Thanks for your question! That’s why you need to kill the cover crops manually if the weather doesn’t freeze cold enough to kill them. Mowing or weed-whacking is the easiest way to do this. Otherwise, the plants don’t die, the roots don’t decompose and you struggle to plant your garden.
If you kill the cover crops from late October to mid-November, they will benefit the soil!
There are a couple of ways to open up the soil, especially with a clay component.
1 – You can deep till the soil. Realize you are destroying many micro-organisms as you are completely changing where they live. This is ok once or maybe twice when first establishing the garden, but is detrimental to the soil health if done often.
2 – Use a broadfork or other mechanical means to open up the soil without disturbing the layers. This is often done by hand, so will only work in a smaller garden. Because you won’t be able to drill down deep in a hard soil, this might need to be done a few times over a couple of seasons.
3 – Plant cover crops or aggressive root crops such as sunflower, wheat, sesame or Daikon radishes which drill down and open up the soil. This isn’t a one time, fix-all solution, but with replanting in spring and fall the cover crops can continue building and improving the soil.

