Tag Archive for: Bean


Whether you have a bounty of young green beans from your garden, or have gotten a great deal at the Farmer’s Market – here’s a quick and simply delicious way to make them into a very memorable side dish that will be talked about! The French name for the classic, tender green bean or filet bean is “haricots vert”. If you are looking for them at the market, look for young, slender and tender green beans that have just the faintest hint of the bean when you feel the shell.

Here’s what could come out of your garden for this recipe – Green Beans and Green Onions!

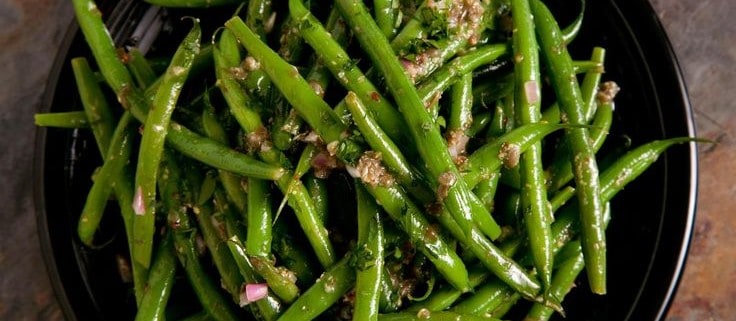
Young Green Beans with Dijon Vinaigrette
Your green beans will be a star attraction with this simple, quick and easy to make dish that is great for casual summer picnics or barbecues.
Author: Stephen
Ingredients
  • 1 lb. young green beans also known as haricots verts, trimmed
  • 3 tbsp. olive oil
  • 1 tbsp. red wine vinegar
  • 2 tsp. Dijon mustard
  • 1 shallot or 3 small green onions minced
  • Freshly ground black pepper
  • Kosher or freshly ground salt
Instructions
  1. Bring a large pot of salted water to a boil.
  2. Add the green beans and cook until bright green and crisp-tender, about 1 minute.
  3. Drain and transfer to a bowl of ice water for 1 minute.
  4. Drain the beans from the ice water and let sit in a colander while making the dressing.
For the dressing
  1. In a large bowl, whisk olive oil, vinegar, mustard and minced shallot.
  2. Transfer the drained green beans to a serving bowl, then pour the dressing over, toss to combine and season with salt and pepper to taste.
Recipe Notes

People often come back for second servings when they discover how delicious this unusual flavor combination is, so consider making extra!


Green beans can be a blessing in disguise – they are a welcome addition to the dinner table in the spring when they first arrive, but can soon wear out their welcome as their prolific nature is truly shown. Just how many ways can they be prepared without being the dreaded green vegetable on the plate?

We love them this way;  a very simple, easy and fast way to make them unique and delicious. They can easily balance a rich roasted chicken or grilled meats, but also add to a fish or seafood plate.

Consider this a base for exploring several different directions with the green beans – using toasted almonds, sauteed garlic and even taking the grated Parmesan approach and adding pasta for a light summer evening meal.

 Here’s what could come out of your garden for this recipe – Green Beans and Green Onions!

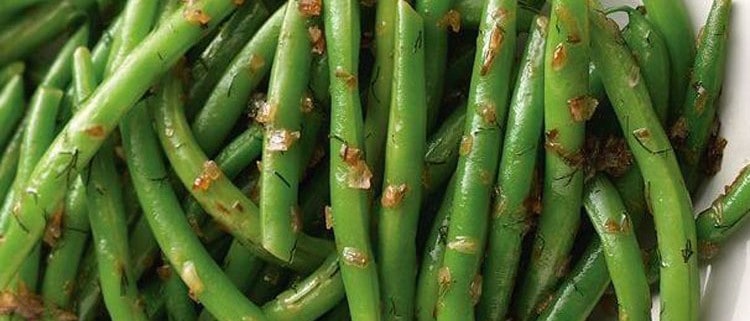
Lemony Green Beans
A quick and easy, but deliciously different side dish that will impress your dinner guests. The flavors are bright, fresh and enticing.
Ingredients
  • 1 lb fresh green beans
  • 2 tbs butter
  • 2 tbs olive oil
  • 1 - 2 shallots or small bunch green onions, minced
  • Freshly squeezed lemon juice
  • Salt to taste
Optional
  • Freshly ground Parmesan cheese
  • Fresh lemon zest
Instructions
  1. Bring a pot of well-salted water to boil. Add green beans and cook for 5 minutes, then drain and plunge into waiting pot of ice water to stop cooking. Drain when cold.
  2. Meanwhile, sauté shallots in butter and olive oil over medium heat until tender, about 5 minutes.
  3. Add beans to shallot mixture and continue to sauté until beans are warm and just tender, about 2 to 3 minutes.
  4. Sprinkle with lemon juice and season to taste with salt. Top with freshly ground Parmesan cheese if desired.
  5. Serve at once.
Recipe Notes

Blanching the green beans in boiling water keeps them from being over-cooked when sauteing them with the shallots.

Rossa di Treviso Radicchio


Radicchio is a member of the chicory family – along with Endive and Escarole – and is part of the dandelion group. Chicories are thought to help with digestion of rich foods and are often served as sides to hearty winter fare in Europe.

Many folks are familiar with radicchio, endive and chicory as a fall and winter vegetable, but their cool season tolerance makes them ideal for early spring planting as well, either starting the seedlings inside and transplanting once soil temperatures are above 45 – 50°F, or just direct sowing when the soil is above 50°F. They can also be planted in the fall and overwintered in a cold frame or heavy row cover and harvested early next spring.

Here’s what could come out of your garden for this recipe – Thyme, Radicchio and Romano beans!

Red Risotto with Radicchio
Risotto with radicchio is a very rich and delicious dish that is perfect for the cool spring and fall evenings. Hearty enough to stand on its own as a main course, but also works well with as a unique and delicious side dish.
Ingredients
  • 1/4 cup unsalted butter divided
  • 2 small shallots finely diced
  • 1 tbs. chopped fresh thyme
  • 4 cups thinly sliced radicchio
  • 1 1/2 cups arborio rice
  • 1 1/2 cups cooked Italian beans like Romano
  • 1 3/4 cups dry red wine
  • 3 cups rich chicken stock - can substitute a roasted vegetable stock
  • 1/2 cup Parmigiano Reggiano cheese plus more for topping
Instructions
  1. Melt 2 tbs. butter in a sauce pot over medium-heat.
  2. Add shallots and sauté until soft, about 5 minutes.
  3. Add thyme and radicchio and sauté until radicchio wilts, add rice and toast until slightly browned. Add wine and simmer until liquid is almost evaporated.
  4. Add chicken stock slowly with a ladle and stir the rice occasionally. Continue adding stock and stirring until rice is almost al dente and starts to become creamy.
  5. Add beans and Parmigiano Reggiano cheese to pot and a little more stock if needed. The risotto should be a little soupy.
  6. Stir in the remaining butter and serve in shallow bowls with more Parmigiano Reggiano cheese.
Recipe Notes

A little sautéed diced pancetta is also delicious in this dish. Cook it and remove prior to adding the shallot. Top the finished dish with the pancetta and cheese.

Adapted from La Cucina Stagionale


Here is another great recipe that takes advantage of the abundance of fresh vegetables out there now. This is an easy, foundational salsa recipe that is extremely tasty just as it is, but also lends itself very well to experimentation with whatever fresh vegetables you have available. Everything is roasted to bring out the fullness of the flavors, and to help them mingle better. I’ve been able to do an acceptable substitute in the winter with fresh frozen chiles from our garden, and canned Italian plum tomatoes!

This is one of those salsas that just grabs you by the taste buds and gets your attention. No matter if it is mild or hot, you keep coming back for “one more bite”, because it just tastes so good. When having guests over, a batch rarely lasts through the evening, when it’s at the height of its warm, rich goodness. Best cooked outside, this lends itself beautifully to doing fresh quesadillas, queso fundido, burgers or all three in succession on the grill, along with plenty of cold beer and good friends. Watching the late summer sun going down after a hot day and enjoying the salsa along with other great food is one of the memories that will be brought up many times.

I like using several kinds of chiles, some mild, medium and hot to bring more depth of flavor to my salsas. I will start picking the mild ones,  fewer of the medium, and less still of the hotter ones. This builds a base of flavor first, then heat. Don’t worry if it looks like you’re making tomato soup when you start roasting the tomatoes, everything will turn out just fine…

Roasted Fresh Garden Salsa

2 Lbs fresh tomatoes-diced.  Plum tomatoes are best, but use what is fresh- a couple of different kinds will give more depth of flavor! Dicing will help remove some of the excess juice.

3-4 Ripe red bell peppers– diced

10-15 Various Chiles to taste for heat- de-seeded, de-veined and diced

3-4 Ears fresh sweet or roasting corn– cut from the cob. About 1-2 Cups

5-6 Cloves garlic- sliced in 1/8 inch slices

1-2 Cups cooked Black beans (optional)

1 Tsp whole Cumin

1/2 Tsp whole Coriander

1/4 Cup Extra Virgin Olive Oil

1 Tsp salt

1/2 Tsp fresh ground black pepper

Splash of Balsamic Vinegar

You’ll need a couple of large, heavy, shallow pans for roasting- preferable cast iron, as it retains the heat well and is easy to keep at the best temperature for roasting vegetables. The grill or outdoor stove is the best place to do the cooking, as the heat stays outside, and you get to enjoy the late afternoon! A couple of large bowls to hold the roasted vegetables and a large food processor or blender will be needed after everything is roasted.

Heat the pans to a medium heat, add the tomatoes to one pan, the bell peppers and corn  to another, and if you have a third pan- the Chiles to that one. Let them roast until their skins start to turn dark. The skins should be a little black in spots and starting to loosen from the fruit. This can take up to a half hour depending on the heat of your grill or stovetop. Stir and turn with a wooden spatula occasionally. You will see some sticking, especially with the tomatoes- this is ok. When the Chile skins are starting to turn dark, add the garlic to that pan. Remove the veggies when they are fully roasted and have dark skins with a few black spots on them. The corn should have a dark yellow color to it. Put them all together into a large bowl and cover.

Toast the cumin and coriander in a small heavy pan over medium heat for 2-5 minutes, until they release their aromas. You will see the seeds start to darken and release their aromas- move the pan off of the heat for a second or two, then return to the heat. Continue this until the rich toasted aroma tells you they’re ready. Grind in a mortar and pestle or spice grinder to a coarse ground consistency.

Add the vegetables to the food processor in batches if needed and process with a chopping blade until a chunky consistency is reached. Do not over process to a smooth or fine consistency- you will lose flavor. Repeat until all the vegetables are processed, and return to a large serving bowl. Add ground spices, Olive Oil, salt and ground black pepper. Add splash of Balsamic Vinegar and mix well. Taste and adjust salt and pepper if needed.

Serve warm with chips, or in and on top of fresh hot quesedillas or accompanying queso fundido with chips.