Bloomsdale Spinach


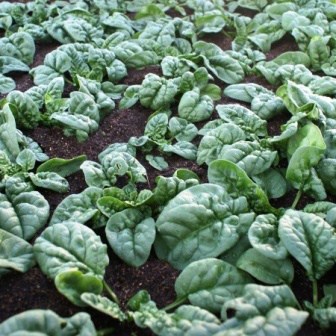
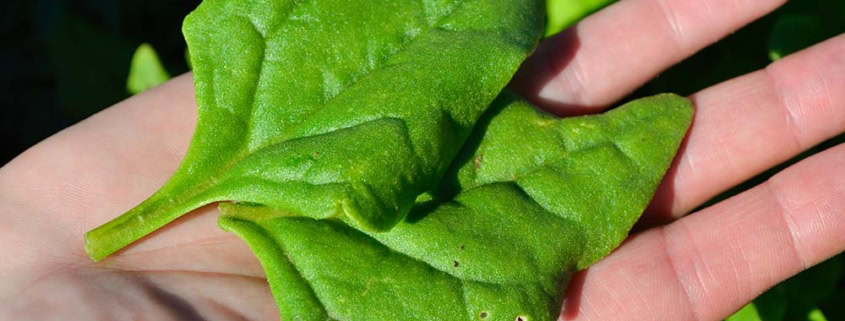
After Ellen’s article about “Alternative Spinach Greens” she now tells us more about the original spinach. Grown in the cooler season in a rich soil, spinach is delicious – juicy with a nice crunch to it; a mildly sweet flavor and no bitterness. Sort of like a bolder leaf lettuce.

There is little written about the history of spinach. It is a common sight in the grocery stores and at farmers markets. In most areas it is hard to find spinach year round at market, because its season is so short lived, just 6 weeks or so.

Spinach seed germinates best in soils that are 40- 70 degrees F and prefers cool days and nights. At 40 degrees F it may take spinach two-three weeks to germinate, but most seeds will sprout. Whereas waiting for warmer soil temps to plant spinach one will see a decrease in germination and faster emergence of seedlings.

Spinach does well from March through May and again September through November. Spring plantings should be planted 6 weeks before the last frost in moist, nitrogen-rich soils. Consistent watering will produce a long harvest and the best looking leaves. When temperatures get warmer, watering twice a day and the cooling effects of shade cloth will help prolong harvest. Spinach’s season is short and perhaps that played into its status as the first vegetable to be frozen for commercial use.

Fall plantings also do well and will regrow in the spring, providing a few extra and welcome harvests early in the spring when everything is just getting started.

There are two types of leaves on spinach. Smoothed leaf spinach produces an oblong, dark to light green leaf. Savoy-types have slightly crinkled leaves with thicker dark green leaves. Regardless of what kind of spinach you grow, spinach is a well-loved vegetable.

The vegetable was probably bred from Spinacia tetranda, a wild edible green found in Nepal. In 647 AD spinach was taken from Nepal to China where it was referred to as the “Persian green.” Spinach was introduced by the Moors of North Africa to Spain in the 11th century. By the Middle Ages, spinach was grown and sold throughout the rest of Europe, and in England was known as the “Spanish vegetable.” It was not until the 1400’s that spinach became a staple in Mediteranean cooking.

Catherine de Medici, Italian royalty of the 1500’s, preferred spinach over other greens. When she left her home in Florence to marry into the French royal family she brought cooks with her to prepare her favorite spinach dishes. Dishes that are served with a bed of spinach are known as “a la Florentine” in her honor.

Breeding work with spinach began in earnest in the early part of the 20th century when breeders started selecting and hybridizing spinach varieties with disease resistance and those that are slower to bolt. One of the best-known varieties came from that period: ‘Bloomsdale Long Standing,’ a slow-bolting, savoyed spinach that is popular today.

Peel Garlic in 10 Seconds


Can you peel garlic in 10 seconds? Not just one clove, but a handful or even a whole head? Can you do 5 or 10 in a row?

Sure you can, we show you how in our very short video! Extremely simple, works every time and completely eliminates the mess, fuss and frustration of peeling garlic.

A couple of tips- if the garlic isn’t quite as peeled as you need, simply shake it a little bit more. If it comes out looking a little crushed, just shake a little less next time. With just a couple of minutes of practice, you’ll be peeling garlic like a pro and will never hesitate to use fresh garlic in your cooking again.

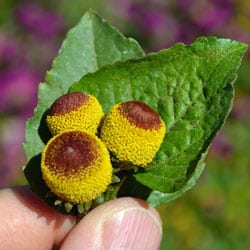
Szechuan Buttons in hand


Taste one of these little bright yellow jewels and you’ll immediately discover why they’ve gained a loyal following and a number of equally colorful names. They initially give a strong burst of citrus-like tang, quickly followed by a curious, tingly jolt of electricity sensation that spreads from your tongue to fill your whole mouth that ends in a numb feeling. This all repeats itself for about 15 minutes.

They have become very popular with restaurants that use the buds finely diced in fresh salads, with sliced chiles and lime as a condiment, lightly pickled or candied with desserts. Here is a unique, complex and attention-grabbing sorbet that will intrigue and delight your friends or a dinner party!

Here’s what could come out of your garden for this recipe –  Chile and Szechuan Buttons!

Szechuan Button and Mango Sorbet
This attention-grabbing "fizzy" sorbet makes a very unique tongue-tingling dessert or perhaps the ultimate between-course palate cleanser. Sure to bring the smiles and questions when your guests first taste it!
Servings: 4
Author: James Wong
Ingredients
  • 3 fresh mangoes peeled, pits removed and sliced
  • Finely grated zest and juice of 2 limes
  • 1 cup of superfine sugar Use regular sugar if you can't find superfine - powdered sugar has cornstarch in it
  • 1 small red chile finely chopped Remove seeds if you are sensitive to heat, or to try for the first time
  • 9 small Szechuan buttons finely diced for the sorbet 3 diced for the salt coating and a few extra (quartered or halved) to use as a garnish in each dish
  • Flaky sea salt
Instructions
  1. In a food processor, blitz the mangoes, lime zest and juice and superfine sugar to a smooth puree.
  2. Pour into a freezer safe container, stir in the chopped chile and Szechuan buttons and put into freezer.
  3. After 1 hour, stir the mixture with a fork to loosen and fluff. Do this every hour until fully frozen. The aim is to create an icy, fluffy slush instead of a frozen block.
  4. Once frozen, wet the rim of a Martini glass or small dessert dish with lime then dip the rim into a mixture of sea salt and diced Szechuan buttons. Scoop a small portion into the glass or dish.
  5. Serve immediately with a garnish of halved or quartered Szchuan buttons and a ring or two of sliced chile.
Recipe Notes

The chile should add intrigue and a dimension of flavor, not stand on it's own heat. Start conservatively, then add as flavor is needed.
The overall flavor should be one of sweet, then fruity, then slightly sour, then the chile flavor (not heat) and "buzz" of the Szechuan buttons should arrive together, raising eyebrows!

Adapted from Homegrown Revolution

Cucamelon


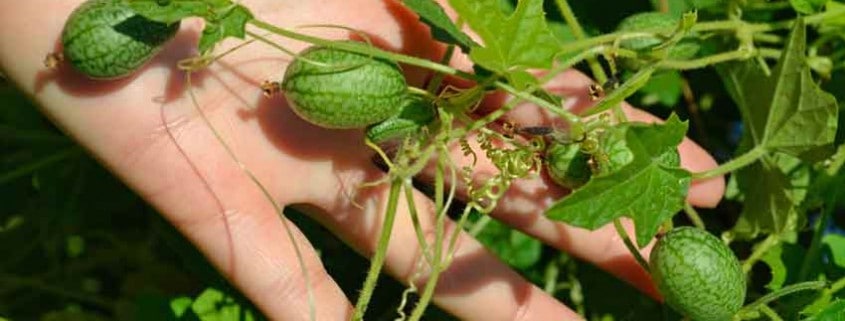
A Cucamelon is a tiny watermelon lookalike originally from Central America that is enjoying its spot in the limelight. Home gardeners are captivated by the look of these jewel-like melons and then often fall completely in love with their crisp, crunchy, cucumber-tinged-with-lime flavor.

After you’ve gotten your fill of fresh cucamelon in salads, salsas, appetizers in bowls of assorted olives, and as garnishes for high-brow Martinis, save some for the winter months with this delightful pickled cucamelon recipe!

 Here’s what could come out of your garden for this recipe –  Dill, Coriander and of course Cucamelon!

Pickled Cucamelon with Dill and Mint
A brilliant way to make these crisp summer fruit last well into the depths of winter, home pickling is far easier than you would ever think!
Author: James Wong
Ingredients
  • 1 1/2 cups white vinegar - distilled malt or white wine
  • 1 tsp salt
  • 4 tbsp raw sugar
  • 1 tbsp chopped fresh dill
  • 1 tbsp chopped fresh mint
  • 1 tsp coriander seeds
  • 9 oz fresh cucamelons
  • 1 fresh grape leaf or oak leaf
Instructions
  1. Pour the vinegar into a bowl and add salt and sugar, then whisk until they have completely dissolved. Stir in the dill, mint and coriander seeds.
  2. Wash the cucamelons in water and pour into a sterilized jar. (Run the jars through the dishwasher and dry in a warm oven set to its lowest temperature.)
  3. Scrunch up the grape or oak leaf and place it on top of the cucamelons. The tannins in the leaf will slowly disperse outwards and help keep the fruit crisp.
  4. Pour the seasoned vinegar into the jar and seal tightly.
  5. Refrigerate for 2 weeks. The cucamelons will be pickled and ready to eat. Once opened, store in the refrigerator. They will keep up to 3 months, but most likely won't last nearly that long!
  6. Yields about 1 quart.
Recipe Notes

Pick enough cucamelons to make several jars of pickles, as you will go through one jar very quickly once people get a taste of them!
Makes a most impressive and unusual gift, especially once the weather is cold. Your recipient will remember this gift for a long time!

Adapted from Homegrown Revolution


Stephen recently did an interview on seed saving with an emphasis on quality on The Survival Podcast with Jack Spirko. He does a different kind of podcast, what I call a “thinking persons preparedness” show. There is much more of the everyday, common sense preparedness approach; that of being ready for a severe weather event,  a loss of power for a short period of time or a traffic tie-up on the freeway and how to get through them with less drama and a higher level of comfort and security.

One major item for rational preparedness folks is gardening, as being able to provide food for yourself and your family or neighbors is a big thing. Not only in a disaster event, but if the power goes out or if there is some reason that the supermarket near you can’t be stocked for a few days, being able to enjoy good food is very powerful. Sure, a person can survive on MREs (officially known as Meals Ready to Eat, but we knew them as Meals, Rarely Edible in the Navy), but that is a very short term “survival” approach as you can’t grow them and they aren’t very healthy for extended periods of time. They were designed as combat rations where a person was getting maybe 1 – 2 hours of sleep a night, moving constantly with a lot of equipment on them and under the continual stress of combat. In these conditions, you really do need each and every one of those 3,750 calories that 3 MREs provide. Many of the folks I knew would eat 4 – 5 a day while in active combat conditions!

Seed saving is very popular today, but there are some gaping holes in much of the information and knowledge today. The techniques of seed saving are being addressed, with little attention given to the foundational quality of those seeds.  Saving seed is fairly simple to do, but the results from planting those seeds can be very mixed; without a basis of understanding of seed quality, people can be disappointed and confused as to why they got the results they did.

I show why there are no one-size-fits-all best solutions to the availability of quality seed. A resilient, robust and diverse seed and food economy requires home gardeners, regional and national seed exchange programs to participate alongside independent seed companies to contribute all of their unique advantages and skills. Only in this way can the full expression of the diversity and adaptability of open pollinated seeds be realized and utilized.

Listen to the Seed Saving for Quality Interview for the full story! Jack does an introduction that is about 14 minutes long, if you want to skip directly to the show. This was originally an article in Acres USA January 2014 edition, and has been developed into a presentation and will be taught as a class later this summer.


Elevate your summer meals with the crisp freshness of heat-tolerant greens. From Red Orach to Red Aztec Spinach, these greens will transform your dishes.

Humboldt Elementary School Garden


Today we have a wonderful story that was sent to us by one of our customers who spearheaded the rehabilitation of an elementary school garden in a small Arizona town.

What this story means to me are the far reaching impacts of positive ripples. Small actions that are taken thoughtfully and with full intention can have far reaching and amazing results, most of which won’t be seen by the person starting those ripples.

When we consider the potential results and implications from this small school garden, we can see effects on the young students, the parents and the faculty and staff. From something as simple as the garden brightening the day of a student or teacher; the crunch of a freshly dug carrot enlightening a parent on what good food should taste like, to the foundational change of a student’s life to pursue agriculture as a result of the experiences, tastes and memories of their first school garden, we cannot imagine the number of possibilities or the cumulative effects that they can have.

This is the perfect example of what we talk about in many different ways – that of personal choice, taking responsibility for our own actions, and helping to create a more positive, better and more healthy world through our daily lives, even if it is small things.

Bart wanted to make sure that we mentioned that all garden work takes place during recess, not instructional time, and that all expenses are paid from donations and not school funds. Here’s Bart’s story about Humboldt Elementary and their school garden!
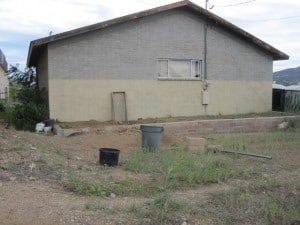
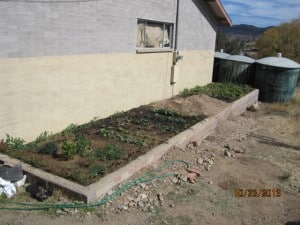
A plant growing in the dirt on a sunny day.The school garden at Humboldt Elementary School in Humboldt, AZ was started about 20 years ago by Linneal Nick, one of our former teachers, who raised some money to have the ground leveled and a raised bed built.  She is now retired and the garden has not been used for several years.  It consists of a raised bed, 40′ long, 8′ wide and two cement blocks high located on the south side of a warehouse building on the edge of our campus. 

   I teach music at the school, and wanted to start a garden club because of my own love of gardening, which began in the early 60s, despite my role as an “indentured weed puller” in my father’s garden.  A few years later I had a 4-H garden, and in college I worked in a greenhouse growing willow leaves for a professor doing research on subspecies of White Admiral butterflies.  As an adult, I’ve gardened in upstate NY since 1973, and here in Arizona for the last four seasons.
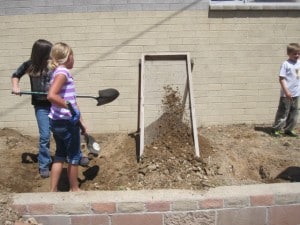
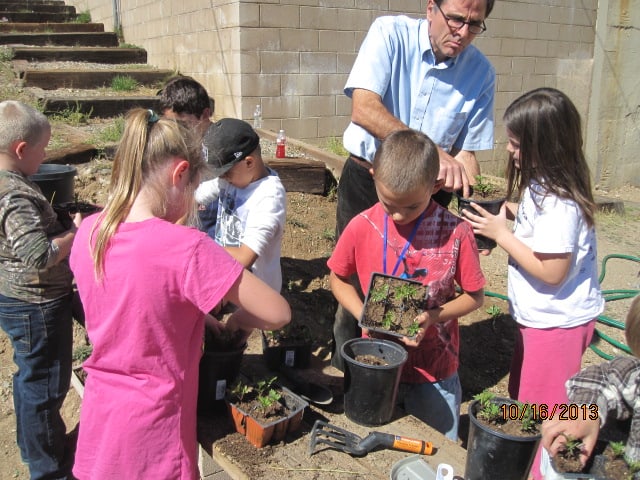
A plant growing in the dirt on a sunny day.   My wife (retired math instructor from NM State, Las Cruces) and I started the garden club in August, with 3rd graders, because my lunch period corresponds with theirs.  We have 20 minutes during the recess that follows lunch, 3 times a week, to work in the garden.  Unfortunately our ordinary Arizona soil was used to fill the original bed, so our original task was digging up the beds with pick and shovels, and shoveling the dirt through a homemade screen to sift out the rocks.  We mixed in peat-moss, compost and natural fertilizers, and planted radishes, beets, beans, peas and zucchini.  In flats, we started buttercrunch and romaine lettuce, onions, marigolds, and red and green cabbage.  We bought and transplanted a variety of herbs and three cherry tomato plants, and periodically the children get to transplant various plants into 2 quart pots to take home.
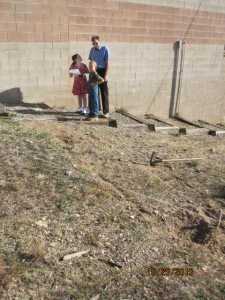
A plant growing in the dirt on a sunny day.   Every work period we have a variety of tasks to do:  watering the plants, weeding, planting, picking up litter, eating peas and radishes, tending the birds at three feeding and watering stations, sifting soil, planting bulbs for spring, and–our biggest project–digging the hill next to the garden into four terraces, just like farmers around the world have done for centuries.  This, believe it or not, is a favorite job.  Third graders LOVE to swing picks, rake rocks, and shovel dirt!   We lay out perpendicular lines using a knotted rope to make a 3-4-5 triangle, just like the Ancient Greeks did.  

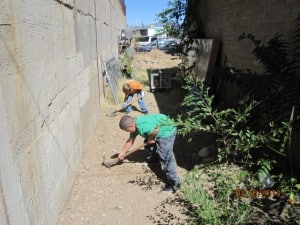
   On another side of the garden, we dug a bed for pole beans at the base of a 15′ high retaining wall, topped by a chain link fence.  This gives us room for a 20′ high trellis, so come spring, we’ll see how high a beanstalk can grow.

   Other plans for the future include a compost bin, worm bed, cold frame, pit greenhouse, gazebo, roof water catchment, shallow pond, and a 30 seat rustic amphitheater for use as an outdoor classroom; also roses, grapes, berries, fruit and shade trees; along with native plants to provide food and shelter for the birds.

   Parents and community members are welcome to help out, but I have done no direct organizing in this respect as it is not one of my strengths.

   We had few nights of vandalism by two kids new to the area.  Three school windows were broken, two of our garden pickaxes were stolen and used to destroy our soil sifter and a door, a portion of the garden was trampled, and plants in flats were strewn about.  The perpetrators were soon caught by our sheriff’s deputies, and we don’t expect further problems from them.  The garden area and school is surrounded by chain link fencing to afford some measure of protection.

   Anyone who would like to volunteer, donate, or ask questions is welcome to leave a message at my school phone, 928-759-4436 or contact me by email.

A plant growing in the dirt on a sunny day.The bulletin board is in the teachers’ workroom.  I change it every couple of weeks to let them know what we’re doing.  The garden, unfortunately, is on the edge of the campus, and off the beaten path.
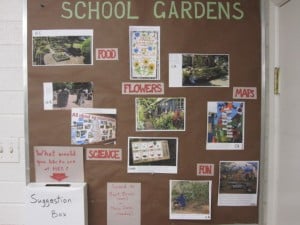
A plant growing in the dirt on a sunny day.Another update to the school garden!

A plant growing in the dirt on a sunny day.Our compost bin made out of pallets tied together, with the original school garden in the background.
A plant growing in the dirt on a sunny day.

How about the choreography of those two pickaxers?  They’re digging up a bed for pole beans next spring, at the base of this 15′ retaining wall, which has a chain link fence on top, so that allows for a 20′ trellis altogether.  How high will beanstalks grow?
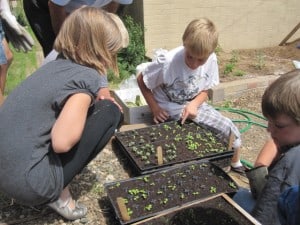
A plant growing in the dirt on a sunny day.Checking out the progress of recently planted seeds. Watch them grow day by day.
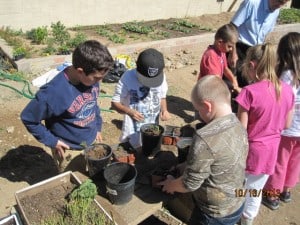
A plant growing in the dirt on a sunny day.Transplanting time! Learning how to carefully move the fragile seedlings into a larger container so it can continue to grow.
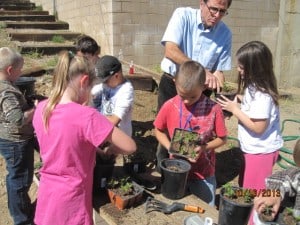
A plant growing in the dirt on a sunny day.More transplanting fun!

A plant growing in the dirt on a sunny day.The original school garden growing some fresh veggies once again!

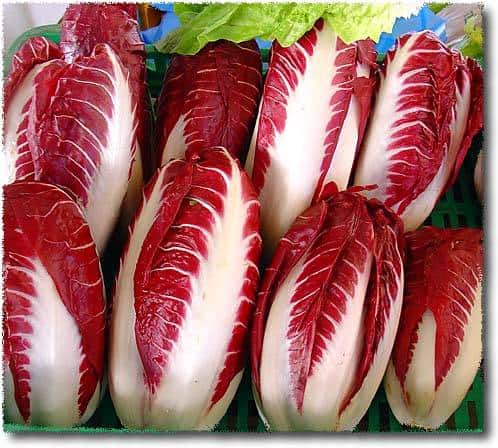
Rossa di Treviso Radicchio


Radicchio is a member of the chicory family – along with Endive and Escarole – and is part of the dandelion group. Chicories are thought to help with digestion of rich foods and are often served as sides to hearty winter fare in Europe.

Many folks are familiar with radicchio, endive and chicory as a fall and winter vegetable, but their cool season tolerance makes them ideal for early spring planting as well, either starting the seedlings inside and transplanting once soil temperatures are above 45 – 50°F, or just direct sowing when the soil is above 50°F. They can also be planted in the fall and overwintered in a cold frame or heavy row cover and harvested early next spring.

Here’s what could come out of your garden for this recipe – Thyme, Radicchio and Romano beans!

Red Risotto with Radicchio
Risotto with radicchio is a very rich and delicious dish that is perfect for the cool spring and fall evenings. Hearty enough to stand on its own as a main course, but also works well with as a unique and delicious side dish.
Ingredients
  • 1/4 cup unsalted butter divided
  • 2 small shallots finely diced
  • 1 tbs. chopped fresh thyme
  • 4 cups thinly sliced radicchio
  • 1 1/2 cups arborio rice
  • 1 1/2 cups cooked Italian beans like Romano
  • 1 3/4 cups dry red wine
  • 3 cups rich chicken stock - can substitute a roasted vegetable stock
  • 1/2 cup Parmigiano Reggiano cheese plus more for topping
Instructions
  1. Melt 2 tbs. butter in a sauce pot over medium-heat.
  2. Add shallots and sauté until soft, about 5 minutes.
  3. Add thyme and radicchio and sauté until radicchio wilts, add rice and toast until slightly browned. Add wine and simmer until liquid is almost evaporated.
  4. Add chicken stock slowly with a ladle and stir the rice occasionally. Continue adding stock and stirring until rice is almost al dente and starts to become creamy.
  5. Add beans and Parmigiano Reggiano cheese to pot and a little more stock if needed. The risotto should be a little soupy.
  6. Stir in the remaining butter and serve in shallow bowls with more Parmigiano Reggiano cheese.
Recipe Notes

A little sautéed diced pancetta is also delicious in this dish. Cook it and remove prior to adding the shallot. Top the finished dish with the pancetta and cheese.

Adapted from La Cucina Stagionale