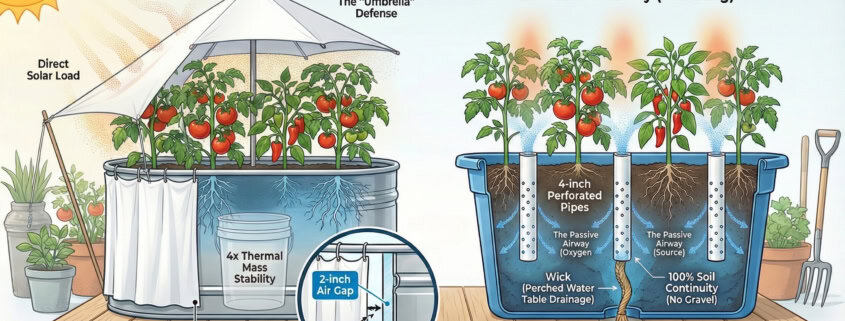
Why do most pots fail in August? It’s not water; it’s physics. Discover the 5 engineering principles of regenerative container gardening—from “Thermal Jackets” to “Wicking Beds”—and learn how to build a living soil system that thrives in the heat.

Why do most pots fail in August? It’s not water; it’s physics. Discover the 5 engineering principles of regenerative container gardening—from “Thermal Jackets” to “Wicking Beds”—and learn how to build a living soil system that thrives in the heat.
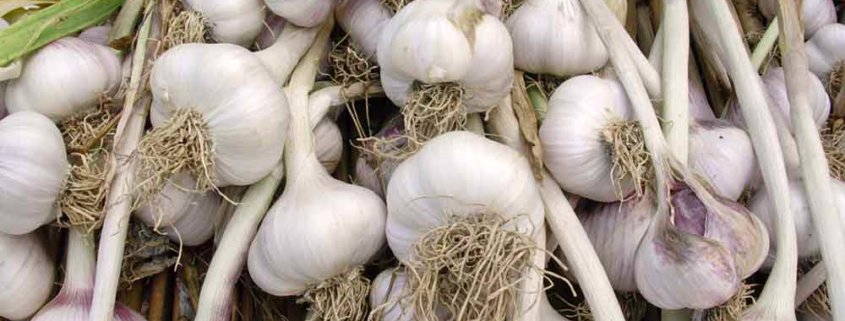
Hardneck garlic has a more complex, richer, spicier flavor that is more ‘garlicky’ than the supermarket types. We show you how to grow your own great garlic!

Struggling with gardening in a hot climate? Learn to sidestep the summer heat and unlock your best growing season. Our guide for warm-winter gardening shows you how to master the “second spring” for a bountiful fall and winter harvest.
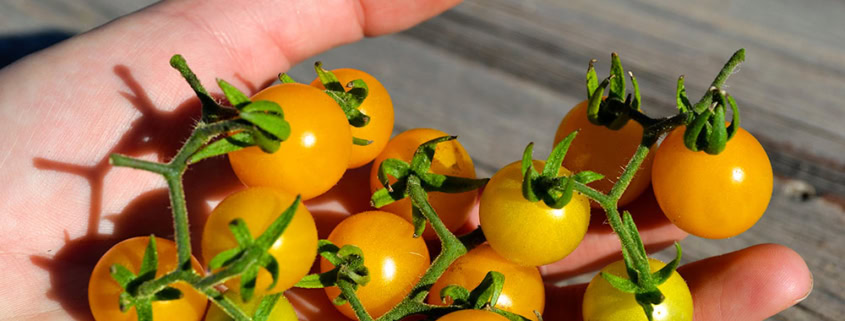
Discover the incredible resilience and adaptability of the Wild Galapagos Tomato. Learn about its history and how it’s being used in innovative research.
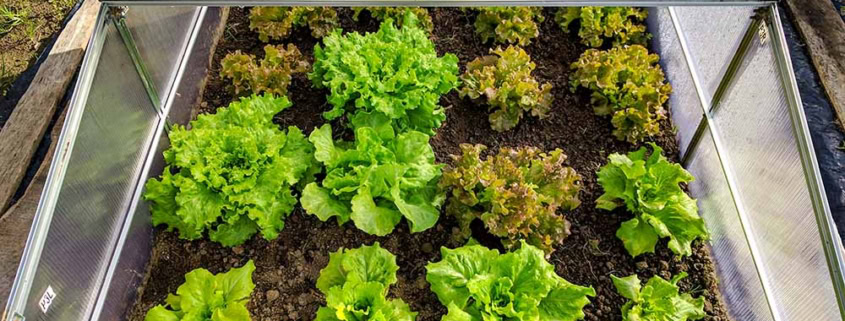
Maximize your gardening season with season extension techniques. Learn how to stretch your harvest and grow a variety of crops earlier and later in the year.
Successful Fall and Winter Gardening depends on summer planning for cool season harvests. We show you an easy way for great fall produce!
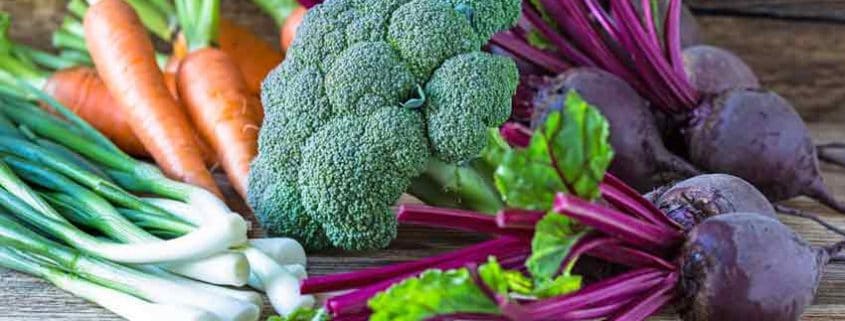
Unlock the potential of cool-season gardening. Learn how to grow flavorful crops like kale, carrots, and broccoli during fall and winter.
Growing tomatoes is an enjoyable and rewarding experience that anyone can master. Whether you’re a seasoned gardener or just starting out, with the right knowledge and techniques, you can easily grow healthy and delicious tomatoes.
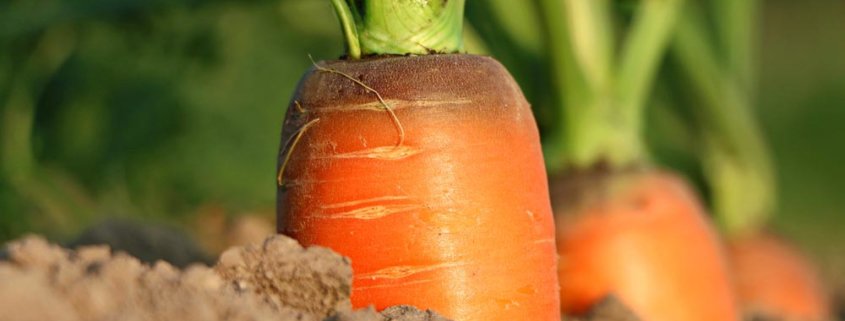
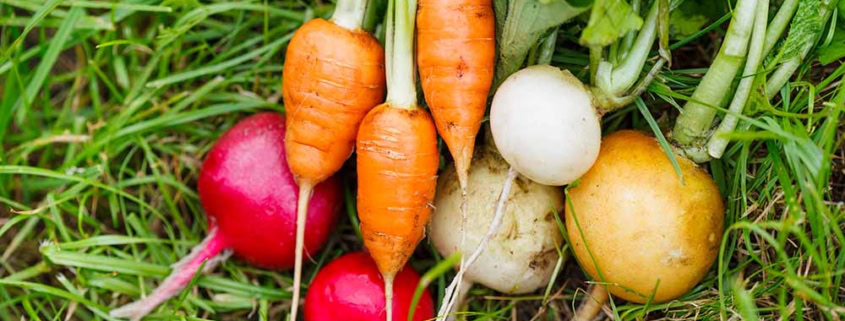
Discover the secrets of growing perfect carrots in your backyard. Our guide covers everything from seed selection to harvest time.
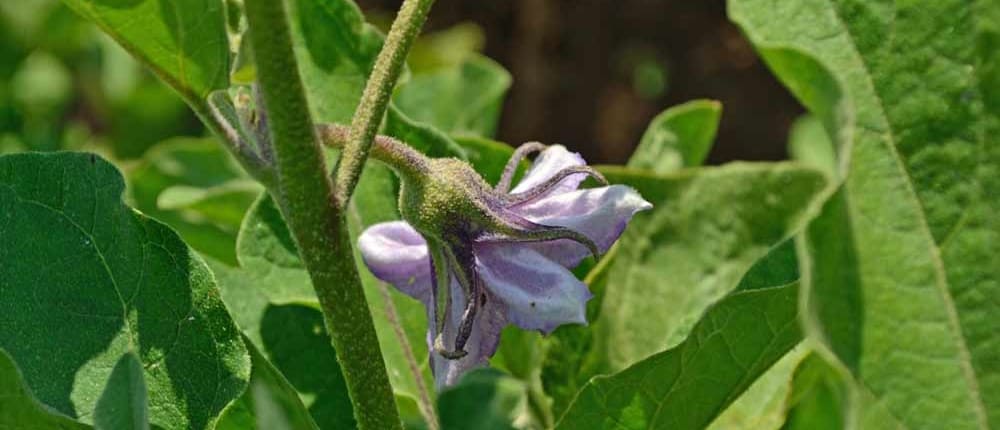
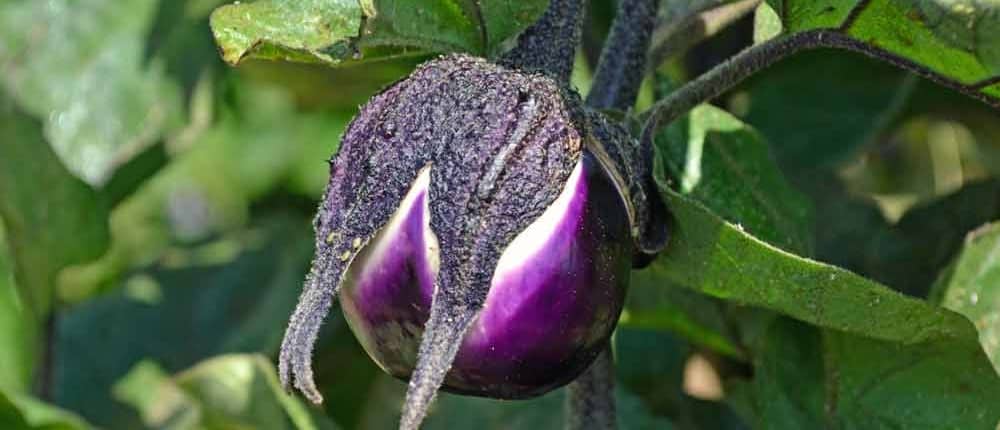
Eggplant gets its name from a small white Oriental variety that is rarely grown in the United States. We are used to seeing the large, shiny purple elongated globes, so the original name is somewhat of a mystery to most gardeners. It is known by other names around the world, including aubergine in Europe, brinjal in India, eggfruit, tomato-fruited eggplant,
Fresh-picked, home-grown eggplant is mildly sweet and delicious, taking up other ingredients into itself when cooked. The all-too-familiar bitter, off-putting flavors come from fruits picked slightly unripe, trucked to a store that are almost a week old before appearing on the shelves. Grow your own and taste the differences!
A member of the Solanaceae or nightshade family, its cousins are tomatoes, peppers, and potatoes. Southeast Asia – likely India, China, Thailand, or Burma – is considered to be the center of origin where it still grows wild; a spiny, bitter, orange, pea-sized fruit that has been cultivated and refined for over 1,500 years.
The earliest uses seem to be medicinal as some of the earliest written Ayurvedic texts dating to around 100 BC describe the health benefits of using eggplant. The Chinese spent much time domesticating and breeding for desirable traits, as Wang Bao’s writing in 59 BC details the transplanting of seedlings at the Spring equinox. Later Chinese documentation shows the specific changes that growers brought to the fruit, from small, round, green fruit to the recognizable large, long-necked, purple-skinned fruits we know today.
Trade spread the seeds into Europe, where Spanish explorers brought them to the New World and by the early 1800s, both white and purple varieties were common in American gardens.
Eggplant is heat-loving, growing happiest in gardens with five months or more of warm to hot weather. Choose a sunny location where the sun can warm up the soil early. Raised beds and large black containers work wonders in colder climates to warm the soil sooner than in-ground gardens. Cool temperatures below 60°F reduce fruit production. In hot weather climates, afternoon shade can prevent leaf and fruit scalding, as fruit production decreases above 95°F.
Three to four plants will supply a steady stream of fresh delicately sweet fruit for a family, with extra for friends, neighbors, and co-workers.
Like its tomato cousins, eggplant is a heavy feeder needing a rich, fertile soil to grow well and produce the best fruits. Adding well-aged compost into the bed the fall before planting provides nutrients all season. Fall cover crops improve the soil structure and fertility, as well as feeding the beneficial soil organisms doing the heavy work of transporting specific nutrients to the plant roots.
Soak the seeds overnight and plant in warm soil – ideally 80° to 85°F, but no less than 70°F – to greatly improve the germination rates. In warm soil, sprouts will appear in 7 to 12 days but can be delayed to three weeks or more in soil less than 70°F.
For almost all of North American gardeners, starting seeds indoors and transplanting them out after the soil warms up is the most successful method. Sow seeds indoors 6 to 8 weeks before your last expected frost date. Plant the seeds no deeper than twice their size in loose, moist soil then reduce the soil moisture to barely damp after the seedlings appear to reduce damping off and fungal issues. Transplant seedlings as needed into larger pots or containers to give the roots room to grow. Some gardeners will delay transplanting until a couple of weeks past last frost date to ensure bigger plants and earlier harvests, as well as avoiding early flea beetles.
Harden the young plants off by setting them outside on warmer days and bring them in the late afternoon, helping them become more robust and ready for transplanting into the garden. Transplant after the soil is warming up and not dropping below 60°F at night. Measure the soil temperature first thing in the morning to see what the minimum is.
Give the plants enough room to grow with good air circulation – eggplant doesn’t thrive in an intensively planted setting. 2 to 3 feet between plants is a good distance, allowing the sun to reduce molds and mildew while ripening the fruits faster and more evenly. Adding a bit of well-aged compost into the transplant hole helps feed the plants.
Eggplant has a shallow root system, so avoid cultivating too closely and pull or clip weeds carefully to not disturb their roots. Better yet, use a 2 to 3-inch layer of mulch for weed suppression that also insulates the roots and soil from excessive moisture loss while keeping them cool in hot weather.
Bigger yields come from starting the plants early and transplanting big, robust, healthy starts into warm soil in a sunny area. Keep them warm with moist roots and pest-free, otherwise, they can be set back and have a difficult time recovering. Producing lots of fruit requires lots of nutrition, so feeding a diluted liquid fish emulsion, milk & molasses snack, or other organic liquid fertilizer once a month will keep the plants in tip-top condition and health.
Companion planting is an excellent weed and pest control technique. An early season crop of lettuce, French parsley, or spinach followed by herbs like French tarragon, thyme, or Mexican marigolds. Beans and peas provide needed nitrogen and shade in hotter climates. In cooler climates, make sure the beans or peas don’t shade out the sun-loving eggplant.
One word of warning on companion planting beans and Mexican marigold – they are antagonistic, so don’t plant both with eggplant, choose one or the other!
Other nearby companion plants to consider are beneficial insect flower mixes to bring in ladybugs, lacewings, and others to keep aphids under control.
Colorado potato beetles can be a threat, but growing a companion crop of bush beans will help repel them. Inspect the undersides of leaves for the tell-tale yellow egg masses and pick them and any adult bugs off immediately.
Tomato worms can appear, so pick them off as you would on tomato plants. Knock aphids and red spiders off with a blast of water from the garden hose.
Flea beetles are the largest threat and can riddle young plants with tiny holes seemingly overnight. Small round holes in the leaves and tiny insects that jump like fleas are signs of flea beetles. In extreme infestations, the plants can lose their leaves and die. Young transplants are most susceptible and early detection is the key to preventing extensive damage.
From our personal experience, you can have very riddled leaves on your eggplant and still produce fruits. Do not give up hope, try to rid the plant of the beetles and give a little extra nutrition.
Trap crops of mustard planted near the area are helpful, as is interplanting with Daikon radishes to repel the flea beetles. If there is a sudden infestation, floating row covers and yellow sticky traps will help control the adult population.
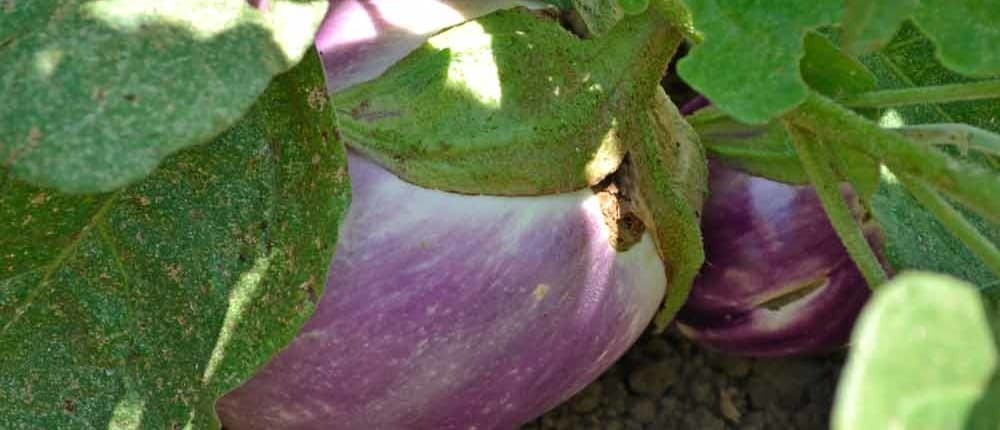
Fully mature fruit has a shiny, smooth skin and firm texture. If the skin is dull, has any wrinkles, or is not firm to the touch – it is over-ripe or old and will be bitter.
When harvesting, cut the stems with a sharp knife or shears, don’t twist or pull them off as that damages both the fruit and plant. Handle carefully as they are delicate and bruise easily.
Harvest can start once the fruit is about one third mature size and still be tasty. This is a saving grace in the fall when frost threatens, just pick the young ones and have one last feast of baby eggplant!
Flavor is at its absolute peak just after harvest, but they can usually be stored a day or two in a cool place before starting to turn bitter.
Sicilian Eggplant and Tomato Sauce is an easy and simple but brilliantly delicious way to showcase your home-grown, fresh-picked garden bounty!
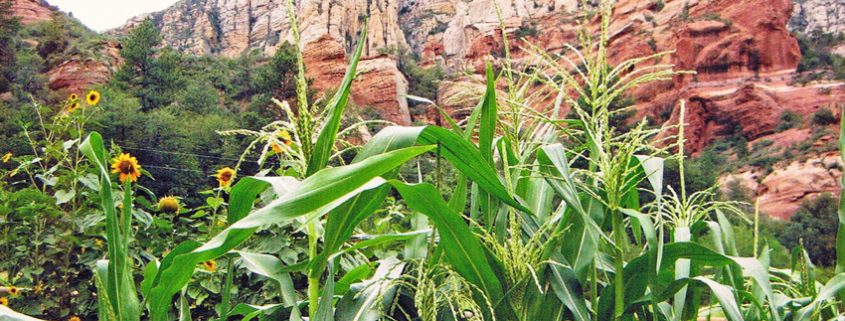
Heirloom corn is one of our oldest domesticated foods, feeding us for an estimated 7,000 years. Originating in Mexico, this cultivated grass is highly versatile and adaptable, providing so much more than simply food for our lives today.
Corn is ubiquitous, appearing in almost everything we use – from food, to fuel, to fiber, to medicine, to whiskey, and many more items.
When we think of corn today, we usually think of a uniform bright yellow row of kernels on a fat cob of sweet corn, but that’s only the modern face of this ancient and revered food. Tribes in Mexico still grow hundreds of varieties of corn each year and call themselves people of the corn.

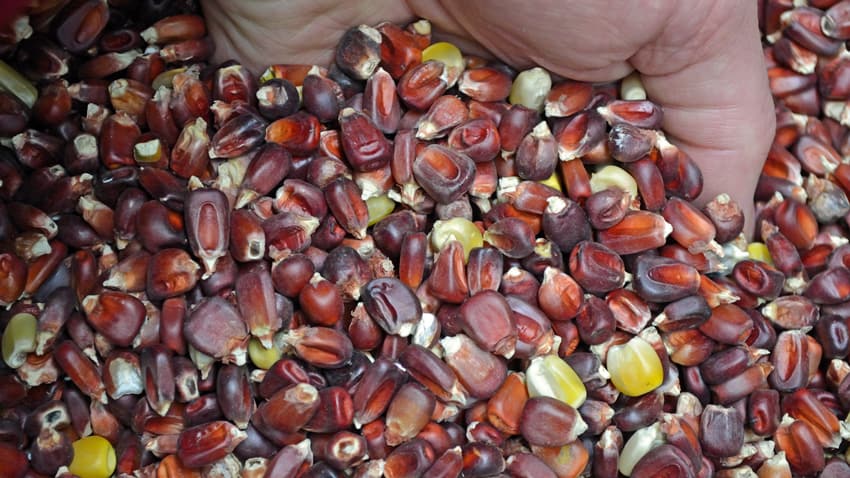
Peruvian Heirloom Corn Display
When we shared a photo from a Peruvian corn display on our Facebook page, it had lots of “likes”. It showed a rainbow of shapes, sizes,and colors like these Peruvian varieties and made us wonder how many gardeners who liked the photowere growing some of their own corn this season.
Peru grows more than 55 varieties of corn and indigenous Mexicans identify with around 60 varieties. In the hills to the east of Oaxaca, Mexico the farmers have grown corn for centuries, maintaining the varieties they consider sacred to their people. They have numerous small fields, each growing a single variety, tucked into hills and little pockets that are used only for one special dish during a specific feast day or holiday. This is one of the reasons they consider themselves to be “people of the corn”.
It seems like everyone likes to eat corn but fewerAmerican gardeners are growing it, depending on others to grow, transport, and market it. This creates a problem for all gardeners, but it’s one we can fix. This is a perfect examplewhere one person makes a difference, one garden at a time.
I want to take you on a short tour of a few of the unique and delicious varieties we offer, with a little about each one. Maybe you’ll feel inspired to try something new in your garden this season!

Bloody Butcher Heirloom Corn
Bloody Butcher has an unusual name with an equally unusual story. The Meadows family in West Virginia has maintained this variety since the late 1800s, with family history tracing its origins back earlier.
The common description is of a blood-red corn originating in the 1800s by the mixing of Native American corn with white settler’s seed. There is more to the story, however!
The origin of the seed seems to be when Betsey Gibson escaped her captureby Native Americans in the early 1800s, bringing the seeds of what became known as Bloody Butcher with her. That corn kept her grand-daughter Ebby alive through some tough times, as well as Ebby’s son’s and grandson’s families through the Depression. They still grow it every year todayand claim it makes the absolute best cornbread.
Bloody Butcher is now a recognized treasure from the Appalachia region, used to make a regionally celebrated polenta, distinctive cornbread, and even a Kentucky Bourbon.
Bloody Butcher Heirloom Corn Seed
This is a “dent” type, meaning it’s not a sweet, fresh-eating corn. Dent corn gets its name from the distinctive dent that appears in the top of the kernel as it dries. It has higher protein and lower starch and sugars than sweet corn, making amazing cornbread or pancakes.

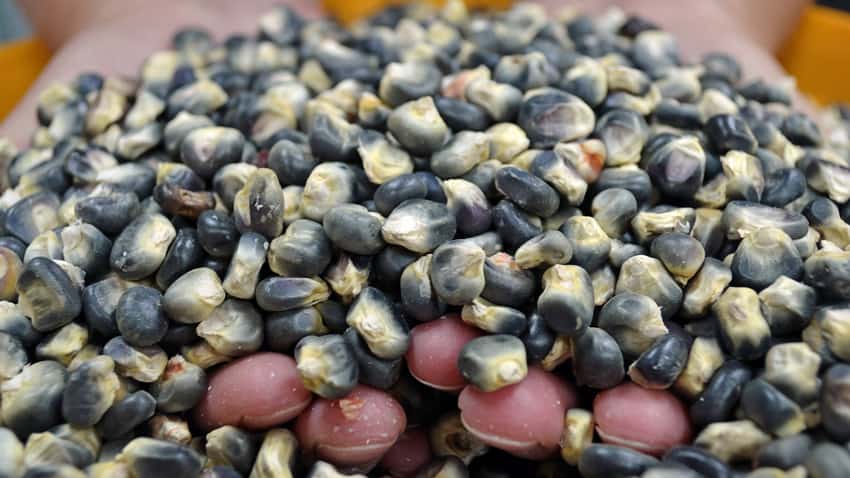
Hopi Blue Corn
Native American corn grows in many colors, which have special meanings. Each color corresponds to the cardinal directions – blue for north, red for south, yellow for west and white for east. White corn goes into traditional bread or is slow-roasted on coals buried underground or in mud ovens. Young women’s ceremonials use red corn, while yellow corn is for weddings.
Blue corn is sacred and held in high esteem by most of the Southwest Native American tribes. Historians believe the Hopi bred it from the ancestral varieties migrating through trade from Central America some 5,000 years ago. The Hopi language has many words for blue corn, based on the different shades and uses.
Hopi Blue Corn Seed
Blue corn is a key ingredient in many foods, some familiar like chips, pancakes, corn cakes, and cornbread, while others are newer innovations like bourbon.
This is a “flint” type, named for its hard texture once dried. It has less soft starch than dent corn and a hearty nature with a higher nutrient value. Traditional Italian polenta uses flint corn and most popcorn is a flint type. Navajo and Hopi roast the young corn in its “milk” stage when it is still sweet.
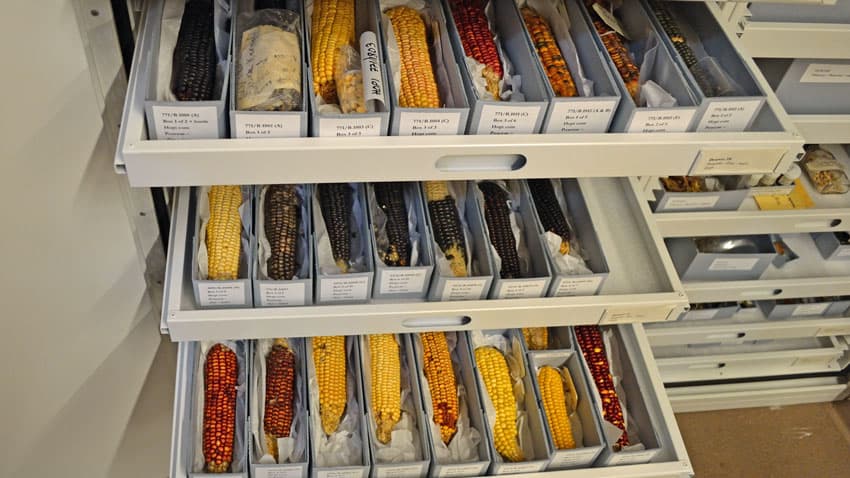
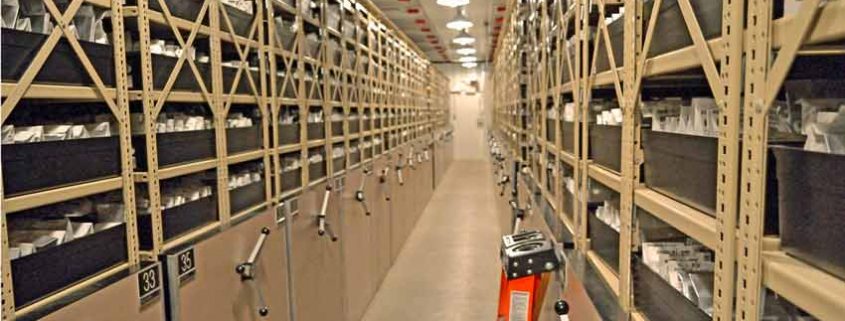
Heirloom Corn Herbarium
What happens when corn isn’t grown and kept alive in its natural state? First, it becomes a curiosity or novelty, grown for the colors or decorative qualities. Think about the “Indian corn” you see every fall, beloved by interior decorators for the bright colors and rustic feel it contributes. No one eats that corn anymore.
If it isn’t really popular as a novelty or decoration, then it might wind up stored in a museum as a piece of documentary evidence of how life was lived at a certain time in a certain place. The ears in the photo above are in an herbarium, or documentary storage at the Museum of Northern Arizona, showing how the cobs and kernels of particular varieties of corn looked when they were grown. Some of these cobs date from the early 1900s.
If these varieties haven’t been grown out elsewhere, then they are most likely lost, as these ears of corn are dead and can’t grow after being stored for so long. These are all samples from the Hopi and Navajo reservations – the colors and varieties are intriguing. There are eight varieties of blue corn in just these three drawers.

Hopi Corn Herbarium
A closer look shows the color variations among the ears. The flavors would be just as varied as the colors, and most likely used for different purposes in the life of the tribe.
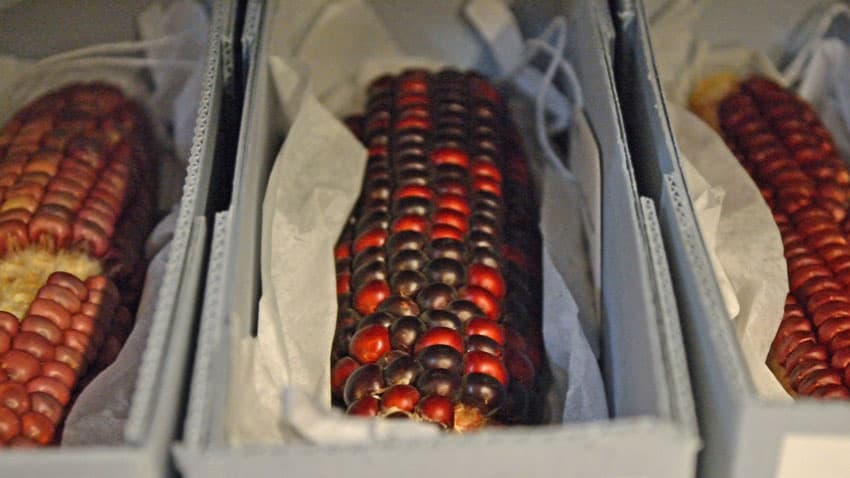
Hopi Corn Herbarium Closeup
As pretty as these colors are, their only existence shouldn’t be in a specimen box in a museum herbarium as a display of the past. They should be grown, eaten, and enjoyed for the living treasures they are.
It would be a travesty if this only place you could see this variety of corn and not be able to taste it anymore.

Oaxacan Green Dent Corn
Besides roasting fresh sweet corn, there are many delicious dishes you can make with dent or flint corn. Polenta, cornbread, pancakes, and chips have already been mentioned, but corn that’s been ground into flour or cornmeal is used in many more recipes.
This is Oaxacan green dent corn, from the Oaxaca (wah-HA-ka) area in central Mexico. Drought-resistant and very flavorful, it has been grown by the Zapotec for many centuries and is the key ingredient in green corn tamales, a beloved regional treat.

Grinding Oaxacan Corn
Oaxacan green corn tamales are made from green dent corn that has been lightly dried until the kernels are loose, then ground into masa to make the tamales, giving them a unique earthy, herbaceous flavor. American green corn tamales typically use regular yellow corn masa with green chiles – a much different flavor!
While you can buy instant masa at most supermarkets, fresh masa has an unparalleled sweet richness. Our friend Andy makes an annual fall tamale dinner for the Denver, CO area Slow Food group.
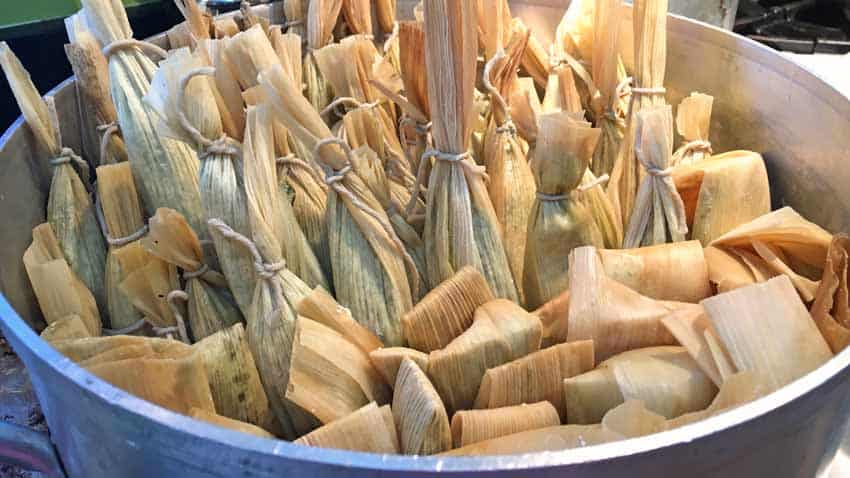
Green Corn Tamales
The tamales are filled and cooked by steaming. The green colors are peeking out from underneath the husk wrappers, waiting to surprise diners with their wonderful flavors!
We’ve shown you some delicious heirloom corn varieties, a little bit of their history & how to use them, what happens when we stop growing corn and how to prevent that – now it’s your turn!
You don’t need a large plot to grow a little corn – a 5-foot square will do nicely. Corn produces best growing in a block, instead of a row because it is wind-pollinated. As with most gardening, start small and get some experience before trying to grow enough to feed the neighborhood!
For further inspiration and to see how easy it can be to make your own fresh masa, here’s an article from Saveur magazine to get you started.
One of the best ways to grow a bigger or better garden is to start with robust, healthy seedlings and transplants. Starting them yourself allows you to select and control the conditions, which often means needing a seed starting station. Gardeners and growers looking to improve their seed germination rates and have stronger, healthier transplants that produce earlier and longer need this tool!
A seed starting station can be almost any size—from a single seedling tray to a full commercial table system. Most gardeners use a moveable wire restaurant rack as the frame, but there are many other ways to set one up.
A major advantage is that placement is not limited to a sunny and warm location because the light and heat are on the station itself. This gives you flexibility in placing it in your house, workshop, or garage—anywhere that remains above 50°F at night.
We’re sharing what we’ve learned from building and using our seed starting station for almost 25 years – what works, what doesn’t, and how to save some money!
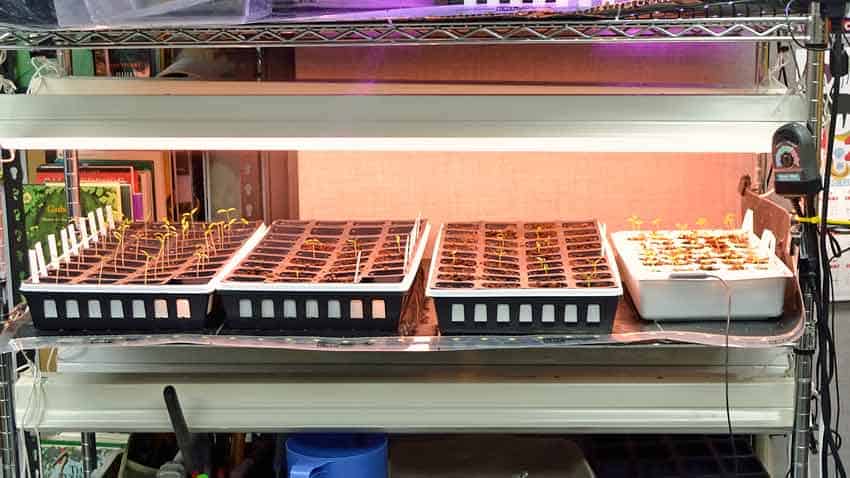
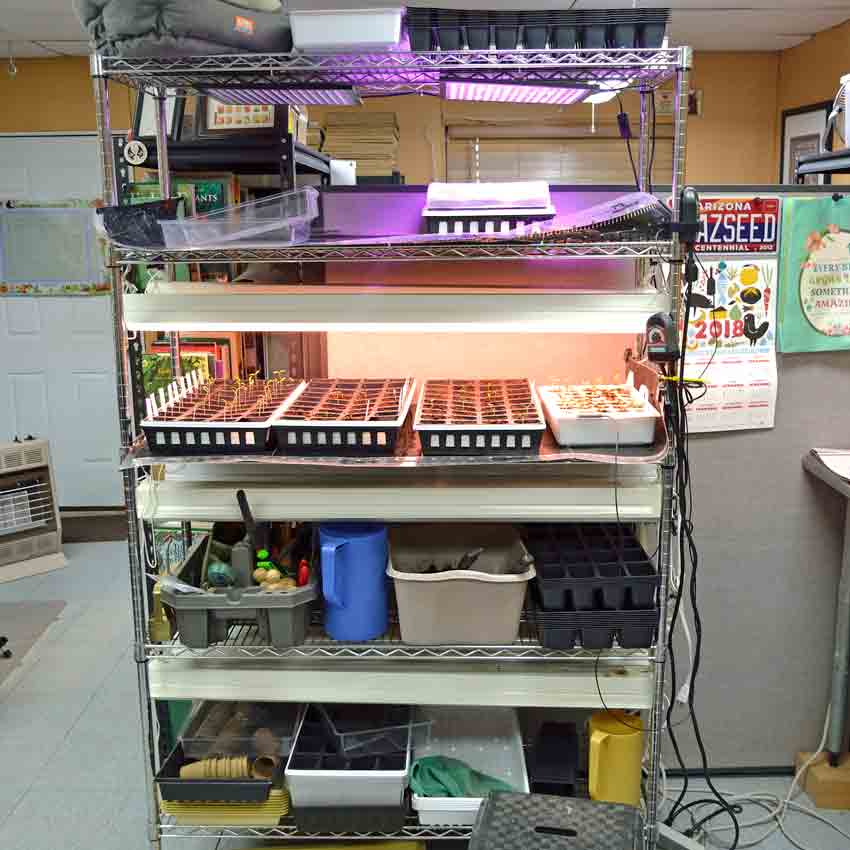
Seed starting station with seedling trays on top of heat mats with lights and thermostat.
A dedicated seed-starting platform isn’t required for a great garden, but it helps! A good seed starting station is self-contained, creates the perfect conditions for seed germination, and adjusts those conditions as the seedlings grow and develop. You easily control the warmth, moisture, and light in just the right amounts.
We invested in our initial seed rack almost 25 years ago; it still has most of its original parts, and we use it every season. A few parts have been replaced or upgraded as needed, but the money spent two decades ago is still paying out – every season – and will for the next couple of decades. That is money well spent!
Here are three more reasons to seriously consider your system –
1- Get a head-start on your season
Starting seeds like tomatoes, peppers, and eggplant earlier gives you bigger and stronger transplants than with a seed flat in the window. Instead of having a 4 – 6-inch tall seedling, you can have a 10-inch tall transplant, as you see at the garden center, which is robust and more resilient to weather fluctuations. An added benefit is earlier harvests as they go to work sooner than smaller seedlings – as much as a month earlier! In very short-season climates, a seed starting station is almost required to have vegetables like tomatoes, peppers, and squash that need longer to mature.
A seed starting station has adjustable lighting, so seedlings grow stronger and more compact instead of spindly and weak ones that struggle toward the light in a window. The protected environment keeps your young, tender, and delicious seedlings from becoming snacks for critters and insects looking for an easy meal outdoors.
The station works for spring, fall, or winter gardening—we start our spring seeds in mid-to-late February and the fall crops in August for transplanting in early September.
2- Dramatically improve your seed germination rates
The seed starting station has light and heat, and you provide moisture using germination trays with lids, adjusting as needed. Dial in heat and add moisture after planting your seeds, then add light when they sprout while reducing the moisture and heat to grow stronger, more robust seedlings than ever before.
Starting seeds becomes so easy that you can start transplants for your friends and neighbors with almost no additional effort, becoming the local garden hero.
3- Grow salad greens or microgreens indoors year-round
Lettuce, spinach, baby Swiss chard, and mustard are greens that grow well in little soil and cooler temperatures – making your seed rack the perfect location. Just dial the heat down – or turn it off in warmer climates – and keep the lights on with sufficient moisture. You’ll have fresh salads in January, even in Alaska.
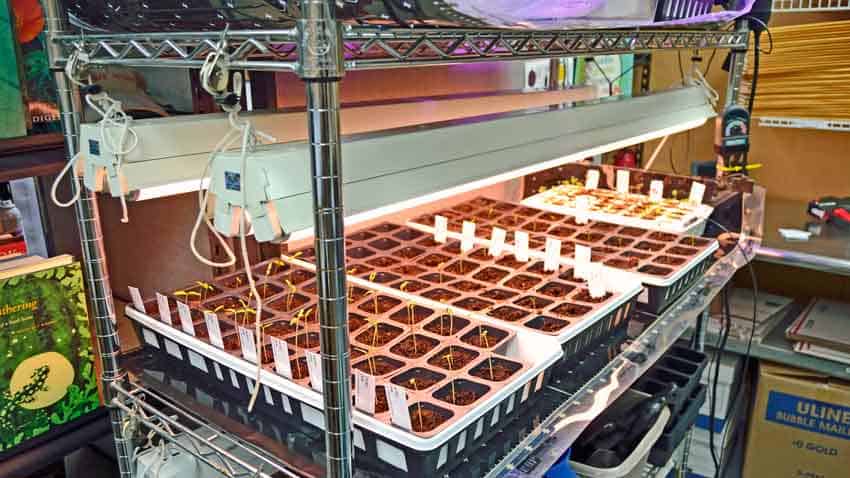
Another view of the grow rack with seedling trays, heat mats, thermostat, and adjustable lighting.
A growing station, grow rack, or seed starting station is any setup that provides light, heat, and moisture in a controlled environment and can be easily changed as needed.
Often made from commercially available wire racks on wheels, they can be as simple as a couple of hoops made from PVC tubing supporting lights over seed starting trays with lids and a heat mat or heating pad underneath.
They are usually very space efficient, only needing a couple to a few square feet, and can be tucked away in little-used areas because they provide their own light and heat. A spare room, unfinished basement, or even a garage will work to start your seeds, as long as the minimum nightly temperature is above 50°F.
A growing station – simply stated -helps you start seeds better and grow stronger transplants.
It really is that simple.
Anyone starting their own seeds gains an immediate advantage using a grow station. You have complete control over the specific conditions that seeds need to germinate – light, water, and heat. This means you provide the perfect environment at the perfect time for faster seed germination, then decrease the moisture and heat while increasing the light to grow stronger seedlings than ever before.
The foundation of any seed-starting system is the support structure that holds the lights above the seed trays, allowing them to move up and down over the young seedlings as they grow. Larger stations support the seed trays and heating mats, while simpler systems suspend the lights over any level surface.
If you have space, investing in a restaurant-style wire rack on wheels gives you a lifetime of use—and possibly more! Our rack is almost 25 years old and is still functioning just as well as the first day we assembled it. We’ve moved its location about 8 – 10 times and reconfigured the lighting system a few times as we tried different ways to hang and adjust the lights over the seed trays.
We easily see another 25 years of use from it because there isn’t much stress on the rack. We’ve removed two original shelves to give us more vertical space for growing seedlings and provide light above each shelf.
The five-shelf system that we use (74-in Tallx 48-in Wide x 18-in Deep) is ideal if you’re growing a larger garden or want to start and transplant several dozen seedlings indoors simultaneously. Depending on your needs, you have the flexibility in how many shelves are in use at once – from one to all of them. Here’s a materials list with sample pricing from Home Depot:
TOTAL COST: $355.04with Plant and Aquarium bulbs from Home Depot
OR
TOTAL COST: $295.26 with Daylight bulbs
Once you see the cost of a professional seedling cart (without heat mats), you’ll see what a difference building it yourself makes!
The consumables—items that are reasonably expected to wear out—are the power strips and bulbs. The power strips should last 3 – 5 years, possibly more, while the bulbs have an average lifespan of 20,000 hours. Using them 14 hours per day gives almost four years of continual use, but normal use is about four months for both spring and fall transplants, giving a potential 12 years. In our experience, we usually see about 8 – 10 years of use.
The pricing example above is for purchasing brand-new equipment simultaneously, but it doesn’t have to be built this way. Your local Craiglist is an excellent option, and you can set alerts for keywords—”wire shelving,” for example—to avoid having to search every day. Yard or garage sales, used equipment, or restaurant supply companies in your area are other choices. If you get creative, you’ll find several ways to save money over buying new.
Even if you buy new, you can build a shelf or two at a time as needed – nothing says you have to build it all at once!

Spectrum-tuned LED grow light – good idea, but it doesn’t last long enough for the price.
You’ll see two different choices in bulbs in the materials list – Plant and Aquarium bulbs vs. Daylight bulbs. Both are fluorescent and will last 20,000 hours, but they emit a different spectrum of light. Red and blue are the two most important colors that plants use, as most of the photosynthetic activity of chlorophyll is in the blue and red frequencies. In simple terms, blue wavelengths encourage vegetative growth, while red is best for flowering and fruiting.
The Plant and Aquarium bulbs are tuned toward the red end of the spectrum, while the Daylight bulbs are more blue. If you are using the grow station exclusively to start seedlings for transplanting, then use the Daylight bulbs. For those using the grow rack for growing greens for harvesting, choose one of each type of bulb for each fixture, giving you better coverage of the spectrum.
LED lights are available, and we are testing some, but we aren’t ready to recommend any particular brands yet. The advertised advantages are a longer-lasting light that uses less power than fluorescent bulbs. The disadvantages are usually higher initial costs and less than optimum real-world lifespan. For example, one light we tested cost $30—which is good—but started to fail in the second year of use, which is bad.
Commercial LED lighting is extremely expensive and has not – yet – lived up to all of its claims. Research is ongoing, and we expect to see a large shift to more affordable and better LEDs soon.
Most vegetable seeds don’t require light to germinate, but some herbs and flowers do. When we start vegetable seedlings, we don’t turn the lights on until they have popped up and opened their cotyledon leaves. This is when they switch from living off the stored food and energy in the seed to making their own through photosynthesis. 10 – 12 hours of light is good to start. The lights are lowered to about 3 – 6 inches above the seedlings or moisture domes to give them the strongest light possible.
Monitor the soil moisture levels, as the warmth from the lights can sometimes dry out the soil.
You can’t hurt the seedlings with too much light – they will not use what they don’t need. In photosynthesis, there are two cycles – a “light” and a “dark” cycle. The light cycle depends on light to function because it’s based on photosynthesis, but the dark cycle doesn’t require light. That doesn’t mean it needs to be dark for the “dark” cycle to function – it happens after a certain amount of energy is built up from photosynthesis during the light cycle, which then switches to the dark cycle to store that energy. This switching happens continuously, so don’t worry about giving your plants too much light!
Providing lots of light builds strong plants because they have lots of light energy to capture and store for future growth.
Early season view of our grow rack with two shelves for starting seeds.
Now that you know what you need, let’s walk through how to set it up and start your first batch of seeds!
Start with the wire rack – this is the foundation for everything else. Use the instructions and carefully assemble the rack, installing the rollers on the bottom. Moving the rack to install or adjust heating or lighting makes it much easier.
We allow about 18 inches between each shelf, installing the top at the very top and the bottom at the bottom to give us the most room possible. The top rack is used for storage and to support the top level of lights. This gives room to move the light, keeping it 3 – 5 inches above the seedlings.
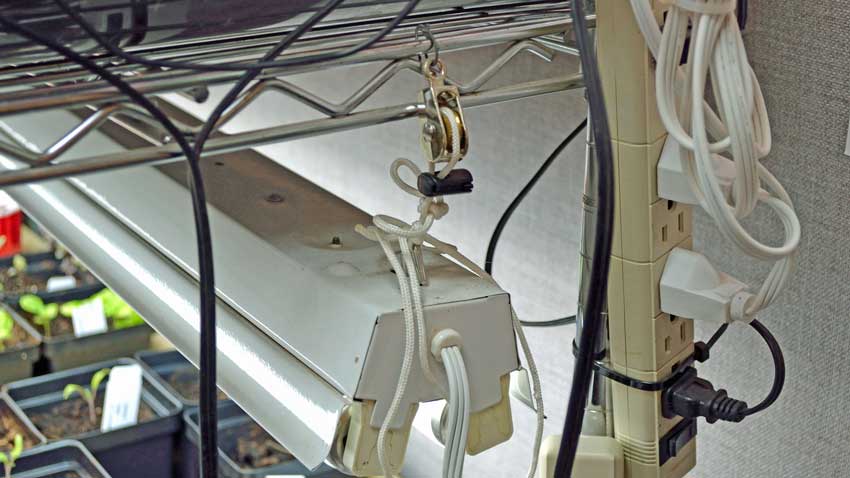
Lighting and electrical connections, showing pulley and cord on the light fixture.
Using the Zip ties, fasten the power strips to one of the wire shelves within easy reach. We use one set for the lights and another set for the heating mats—this way, we can turn all of the lights on with the flip of one switch.
Cut two pieces of the nylon cord into 24-inch sections and securely tie one end onto the provided hooks for the shop light housing. Then, install the hooks into the housing. Zip-tie the small pulleys onto the end of the shelves to support the shop lights, run the cord through the pulleys, and tie them off. If you aren’t confident with your knots, the optional cord locks might come in handy. Finally, install the bulbs into the fixtures and plug the cord into the appropriate power strip.

Heat mat and thermostat with temperature probe.
We use commercial heat mats on two wire shelves, setting the seedling trays directly on top to keep the soil warm. Thermostats with temperature probes keep the soil at a pre-set temperature range and are adjustable according to the needs of the seed or seedling. Both are commercial quality and last many years, but they are an investment as they are somewhat costly. We set them at 80-85°F after sowing, then reduced them to 75°F once the seedlings were up and lowered them to 70°F as they matured. Providing heat to the roots keeps the plants healthier and allows them to tolerate air temperatures as low as 50°F overnight with no adverse effects.
Gardeners in warmer climates may not need heat mats, as the fluorescent bulbs provide heat to the shelf above. If you are in a milder climate, experiment with this before investing in heat mats and thermometers!
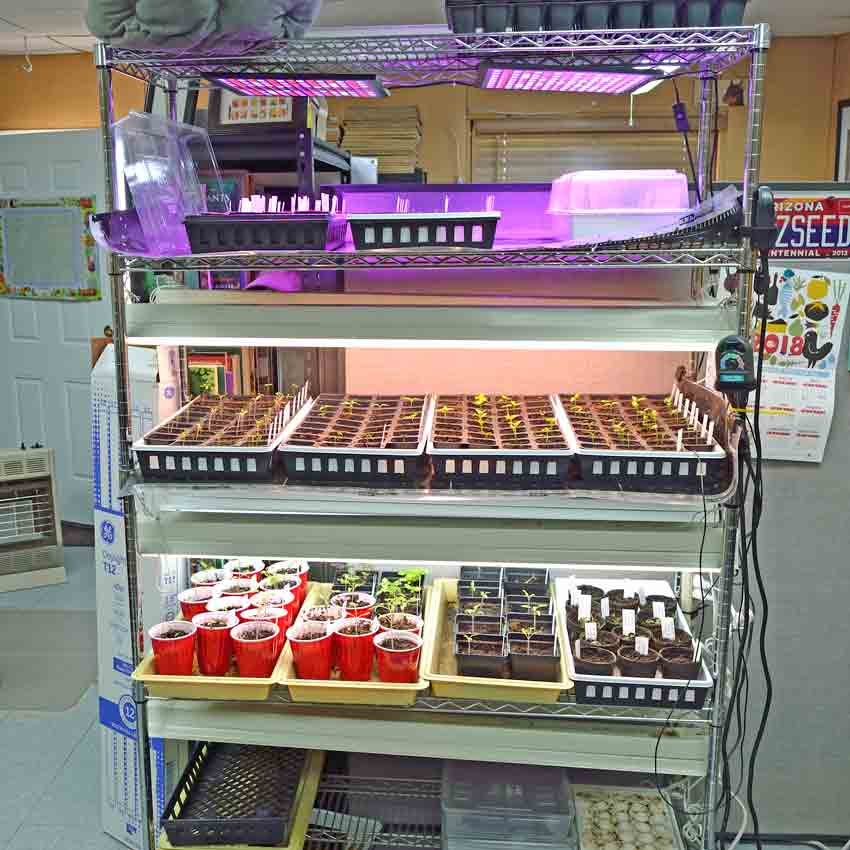
Mid-season growing station configuration with larger seedlings on non-heated shelves (click to see larger photo).
Once the seedlings are transplanted into larger cups, they are moved off the heating mats onto lower shelves, allowing them to grow in cooler conditions closer to those they will experience in the garden. We only have two shelves with heat mats for this exact reason.
Even if you have little (or no) extra space, you can get creative in setting up your seed starting station. A longtime friend lives in an apartment with little extra space and gardens in a community garden, so she has come up with a remarkably inventive method to start her transplants.

Starting seedlings under a table.
She uses the underside of a table to support the lights for her seed-starting station! Her apartment is naturally warm, so combined with the warmth of the lights, there is enough heat for the seedlings to thrive.

Larger seedlings mature before being transplanted. The heat mat is turned off.
We’ve provided you with lots of information and details on building your own seed starting station. Use this article as a checklist, and you’ll soon see the strongest and healthiest seedlings ready for transplanting into your garden!
As you progress, we’d love to see photos of your creativity and how you solved particular challenges with your climate or situation. We will share them with everyone to help others overcome similar issues!

Shade for a garden is a polarizing subject – it seems like we’ve either got too much or too little. Today we’re focusing on gardens that need some shelter – the ones with perpetual sun-scaldon tomatoes and peppers or cilantro that bolts almost immediately after sprouting.
Shading a garden often seems overwhelming, especially if you live in the very sunny zones of the US, Canada, Australia, or in other bright parts of the world, but it shouldn’t be complicated or expensive. Today we focus on simple and easy methods for giving your garden some relief – exactly where and when it is needed.
Vegetables like tomatoes, peppers – both sweet and hot, eggplant, lettuce, spinach, along with herbs like cilantro, all benefit from a little shade, especially in the sunny, hotter afternoons of mid to late spring through late summer or even early fall.
Full sun in the early to late morning gives plants plenty of energy through photosynthesis without excess heat stress, allowing them to grow and produce to their full potential. Providing afternoon shelter relieves a lot of the heat buildup, lowering the amount of moisture lost through leaves and the need for extra water to keep the plant healthy. This allows the plant to spend its energy on growing delicious fruits and vegetables, not in transporting water from the soil just trying to stay alive. We talk more about this specifically for peppers in Grow Better Peppers with Shade.

Oak tree shade
Now that you know why shade is beneficial for a sunny garden, what – exactly – is shade? Let’s look at the different types of shade through commonly used terms.
Deep Shade – there is no direct sunlight at all and only a small amount of reflected light, such as from the wall of a light-colored house, garage or fences. This would be under the canopy of several large, fully mature trees.
Light Shade– gets only one to two hours of direct sunlight a day, but has quite a bit of reflected light from nearby walls and fences. Most likely underneath large trees, but has either morning or afternoon sun reaching the ground.
Partial Shade– sees direct sunlight for two to six hours per day with dappled shade the rest of the day. This would be from less mature trees, a fewer number of trees close together or those without an extensive leaf structure.
Full Sun – receives at least six hours of sunlight per day but more likely eight to ten hours. This could be shorter or younger trees, wider spaced plantings, or species with smaller leaves and less shade structure, such as elms as compared to oaks.
Use this information as you plan on what varieties to plant where.
When do your plants need some shelter? Typically during the hottest parts of the day – afternoons – during the hottest parts of the year – May or June through August or September. The exceptions are the areas routinely above 110°F like Phoenix, Tucson, Las Vegas, and Palm Springs – they grow better with mid to late morning shading lasting all afternoon. For the rest of us, if our plants start seeing some shadows by about 1 pm, they are comfortable and produce nicely.
What this means is that permanent overhead shade structures are usually not needed. They can be a nice addition if part of the structure is over a picnic table or BBQ area next to your garden, but the garden doesn’t always need that much cover for that long.
The upside to temporary shade for part of the day is it can be removed for cool weather crops needing as much sun as possible to capture the warmth on the soil to grow earlier or later in the season.
Where is the best place for your shade? Most plants need some afternoon protection, meaning the shadows should come from the west side of your plants, or that you plant on the east side of the protection. Confused? Don’t be – think of it this way. As the sun moves to the west, it casts shadows to the east and that’s where you want your plants to be – in the shadows!

Achocha vine on west wall
In the photo above, the Achocha is growing on the west wall of this courtyard and has afternoon protection – this photo was taken about 11 am, with full morning sun. After about 1 pm, the shadows arrive and the area cools down, even though it reaches 100°F or more each afternoon during the summer. When we first tried growing it on the east wall, it received morning protection but was baked in the afternoon’s direct sun, struggling to grow and not producing any fruits. The fruit production exploded and it was much happier once we moved it!
Beyond east/west shade, you might consider giving your garden protection to the south. Shading a section of your garden along the south fence with each row having its own screening on the west side gives more sensitive plants extra protection from the sun.
Wind moderation is another advantage of shading, as each successive row slows down the prevailing breeze, making the growing conditions more favorable. Plant hardier plants upwind and less wind tolerant ones downwind.
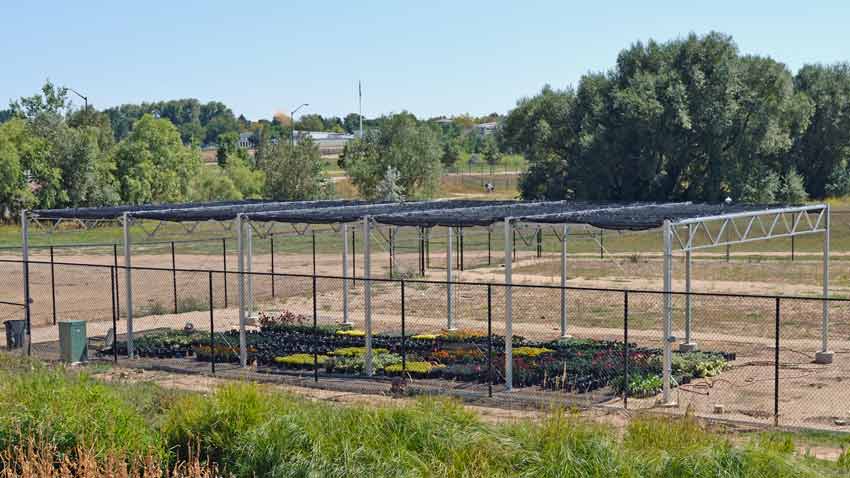
Commercial shade structure
Giving your plants some much-needed sun shelter can be easier than you might think. Here are some examples to get you thinking about your garden and how it is set up.
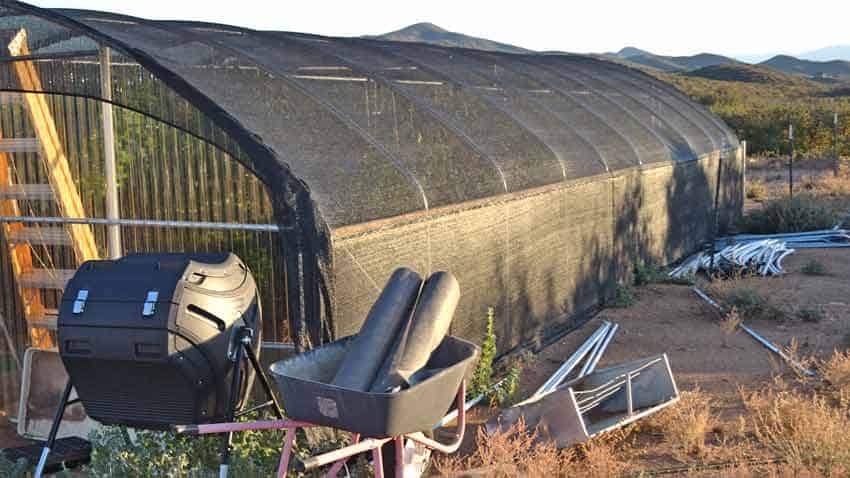
High tunnel with shade cloth
Permanent structures
This is what everyone seems to think about first when talking about shading a garden. The commercial type shade structure, supported by big square steel poles with the whole garden shaded is one approach.
Another is simply planting in containers on the east side of your house or garage. This is exactly how our container garden is set up, starting right next to the east wall and stretching out for about 10 feet. It gets full morning sun and starts seeing shade in the early afternoon, and by the hottest part of the day it’s in light shade – no direct sun and only reflected light. We’ve grown cilantro in the container closest to the house almost all summer without it bolting.
Yet another is a chain-link fence with privacy strips woven into it, either 6 or 8 feet tall. Some houses already have these as a border fence and all you need to do is add the privacy weave. A tall wooden fence gives you built-in shading.
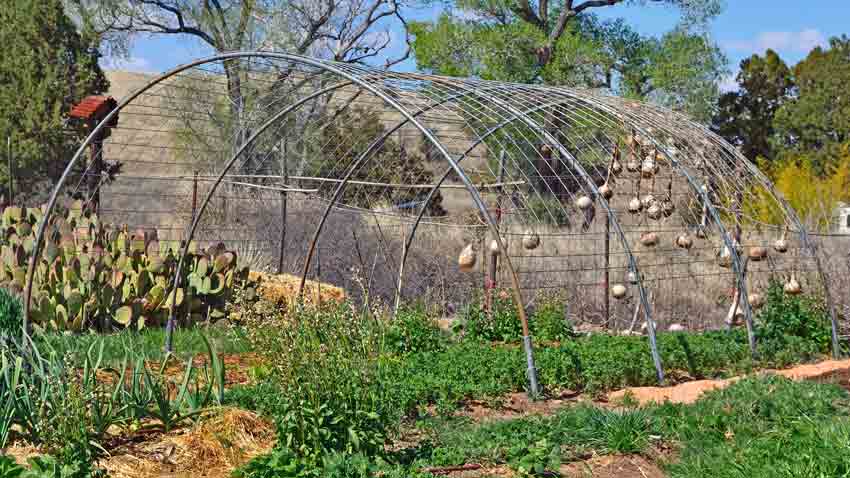
Cattle panel hoop house
Temporary structures
These are the most common types of non-living sun screen, easily put up and taken down as needed. One example is shade cloth zip-tied to the south fence of a garden, providing both shade and wind filtering. The amount of shade depends on the height of the fence.
Another is the T-post and shade cloth approach. 8-foot tall T-posts are pounded in on the west edge of the row or bed at 4 to 6-foot intervals, then shade cloth is zip-tied to them. This gives about a 7-foot tall shade wall, as the T-posts are driven in about a foot deep, giving a good shade and windbreak for vegetables. Removal is easy when fall approaches and the sun is needed all day.
Another example is a hoop house made from semi-rigid 20-foot long cattle panels arched over a bed or couple of rows and covered in shade cloth or clear plastic as needed. The plastic makes the hoop house into a large cold frame early in the season for lettuce, spinach, Swiss chard, and other cold-season greens, then is switched for shade cloth when tomatoes, peppers, and eggplant are transplanted in early spring. The plastic is re-installed in the fall for another season of cold-season crops before winter.
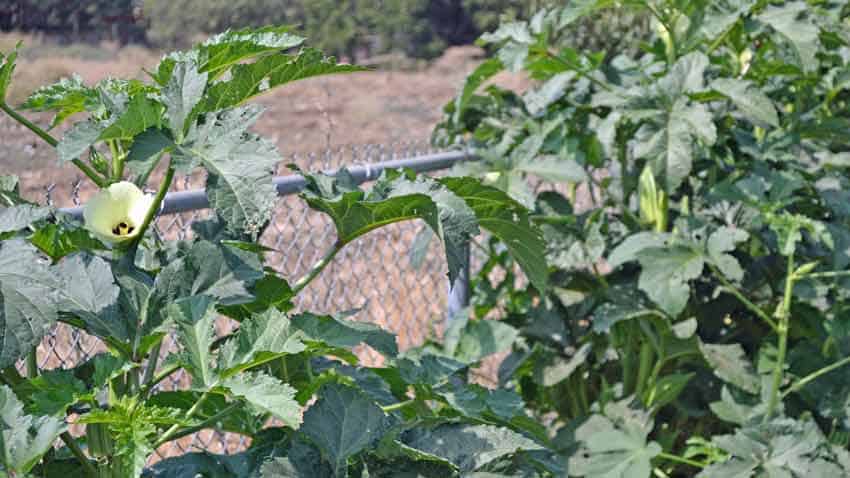
Okra as living shade
Living structures
These can be either temporary – as in a wall of Russian sunflowers on the south fence, or more permanent – like a large trellis or hoop house made from cattle fencing panels as above and planted with a vining, leafy vegetable that crawls up and shades the entire area. The trellis is permanently installed, while the vines are replanted. A planting of okra along a fence, as the photo above shows.
You’ve increased your knowledge and added another set of tools to your gardening toolbox, helping you be that much more successful this coming season! Use this article to plan where and when you need shade the most to boost your garden production and impress your family, friends, and neighbors.
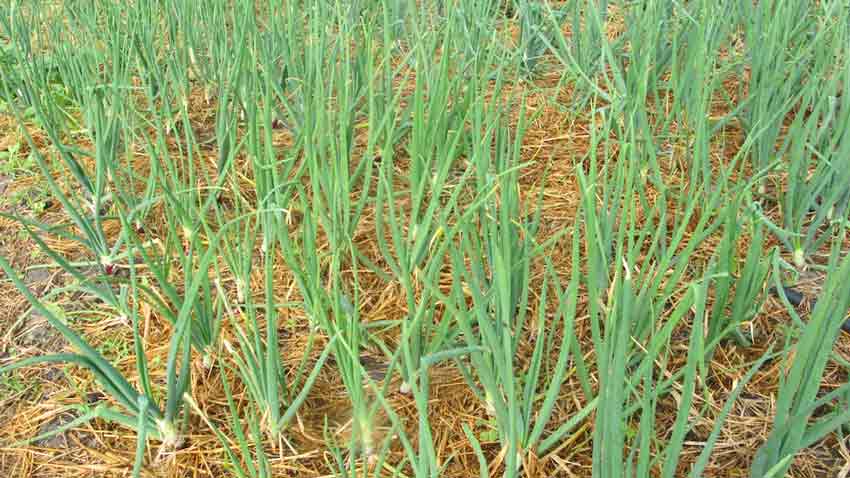
Many gardeners begin growing their onions from transplants or bulbs bought at their local garden center. They are convenient, easy to grow and a great way to learn about growing delicious onions in your garden, but they have some drawbacks. Like tomatoes and peppers, the selection is limited to what the grower chooses and freshness isn’t always a given.
Growing onions from seed opens up a world of diversity in shapes, sizes, flavors, and colors to grow. Starting from seed typically rewards you with bigger and better quality onions, with larger harvests being a bonus from the abundance of seed in a packet.
Onions grown from seed almost always perform better than those grown from sets. They are less prone to disease, store better, and bulb up faster, especially if you have some knowledge and tips to do it right. Growing onions isn’t quite like growing other vegetables, so here’s how you can grow better this season!

Long vs Short Day Onion Zones
Which onion varieties are best for you depends on where your garden is located. There are three different types of onions and picking the right type is key to growing a great crop.
Short-day onions need 10 – 12 hours of daylight to form bulbs. They’re perfect for gardeners in the southern US where summer days are not as long throughout the growing season. Growing short-day onions in the north results in tiny bulbs that go to flower early because the bulbs stop growing once the days lengthen.
Long-day onions need at least 14 hours of daylight to form bulbs. They’re best for gardeners in the northern tier of the U.S. and Canada. Just like growing short-day onions in the north, long-day onions won’t form bulbs in the south because the days aren’t long enough to trigger bulb formation and you wind up with small bulbs or bunching onions.

Intermediate Day Onion Zone
Intermediate-day onions form bulbs when the daylight ranges from 12 – 14 hours long. If you live somewhere across the mid-section of the US, day-neutral or intermediate onion varieties are the best fit.
There are three distinct ways to grow your onions from seed and the best way for you depends on your particular gardening style, equipment and available time. Onions grow best in loose, fertile soil that drains well.
The simplest method is direct to sow your onion seeds directly into the garden soil. Before sowing, refer to the garden bed preparation section below. Draw a line down the middle of the bed about 1/8 – 1/4 inch deep and sow the onion seeds with about 3-inch spacing to avoid crowding. Lightly cover the seeds and dampen well. Onion seeds will tolerate a light frost.
The pros of this method are its simplicity – sow your onions once, then harvest when ready. No transplanting for you!
The cons are making sure you plant the seeds early enough for the bulbs to develop by mid to late fall. You also have to deal with weather events and being able to possibly protect the seedlings if there is hail or heavy rains. Most northern states don’t have a long enough season to support direct seeding.
The good news is experimenting is inexpensive – a packet of onion seeds will set you back a grand total of anywhere from $3.15 to $3.35, and you get about 500 seeds to work with. You’ll also invest a little bit of your time in learning what works best for your garden.

Onion seedlings in tray
Starting your onion seeds in trays requires a small amount of equipment or conditions and some time on your part. You’ll need a tray to catch the excess moisture and either a flat with cells or individual pots such as peat pots, paper pots, or similar filled with a high-quality pre-moistened seed starting mix. If you aren’t sure which mix works well, read our Seed Starting Mix article. You can also use a container about 3 – 4 inches deep and fill it almost to the top instead of pots or flats. Used berry or take-out containers work well with holes poked in the bottom and lid. Start your seeds about 10-12 weeks before transplanting date, which is about 2-4 weeks before your last frost date.
Plant the seeds by placing 2 seeds per cell or pot and covering with about 1/8 inch of soil. If you are using the container method, scatter the seeds on top of well-moistened potting soil then cover with the 1/8 inch of additional soil. Label the containers or flats, place in the catch tray and cover with a humidity dome or lid. Place on a heat mat, heating pad, or warm area where it’s a constant 70-75°F. Once the seeds start sprouting – about a week – remove the humidity dome and move to a cooler area, about 60-65°F. Give them plenty of supplemental light with a grow light or other fixture for about 12 hours per day. Trim the tops back when they are about 5 inches tall to encourage stronger root and stalk growth.
Onions will tolerate cool spring temperatures but must be acclimated first – a process called hardening off. Start about 6 weeks before your last expected frost date (look yours up here) by giving them exposure to natural sunlight, cooler temperatures, and a less moist soil environment. Begin by placing the tray in a sheltered location outside during the day for an hour or two, increasing a little each day until they are outside from morning until night time. Onion seedlings will tolerate a light frost, so don’t worry if you get a late-season cold snap!
They are now ready for transplanting, and you should be about 2 weeks before your last expected frost date. Before transplanting, refer to the garden bed preparation section below. To transplant, remove the soil blocks or gently dump the tray out, then tease the seedlings out of the potting soil into clumps of no more than 2, placing them 3-4 inches apart next to the furrow. Stage or pre-place all of the transplants before planting them to save time and your back!
Using a dibber or other similar tool, poke a hole into the furrow about 3-4 inches deep and drop each clump in – don’t worry, this isn’t too deep! Gently firm the soil around the transplant and keep the beds well watered and weeded until the onions are well established.
The pros for this approach is you know exactly where your onions are, as you can see the green tops sticking out. You can also select the strongest seedlings to transplant, creating a better chance of a good harvest.
The cons are that seedlings will have some transplant shock and you’ll lose some – grow extra transplants to fill in the gaps. Young, tender greens are snacks for all sorts of critters in early spring, so you may need to provide some protective cover until they are more established.
This is perhaps the second easiest option as it takes little time on your part and almost no equipment. Winter sowing is basically cold-stratifying your onion seeds to the outside temperatures, then they sprout when conditions are right in the spring. You can plant your seeds this way anytime from early December to mid-February in most locations.
Seed sowing is similar to starting seeds in a container, except you skip the heat mats, grow lights and all of the other equipment. Start with a container that has some holes in the bottom for drainage, fill to within an inch of the top with good quality dry potting soil and sow your onion seeds across the top with a sprinkling motion, giving them about 1/4 to 1/2 inch spacing. Poke 1/4 inch holes in the lid for ventilation and put it on the container after labeling it with the date and type of onion you planted.
Now place the container in a shady, protected spot outside. It doesn’t matter if it freezes or snows – the onion seeds are acclimating to the changing conditions and will remain dormant until the conditions are right. This is why you use dry potting soil!
When the temperatures and day length are right, your onion seeds will start sprouting inside the container. As the weather starts to warm up during the day, check your seed container every couple of days for signs of sprouting. Once you see the tiny bits of green peeking out, then you’ll need to water the potting soil, keeping it slightly moist but not wet. As they grow, open the lid on warm days and close it at night, still keeping it out of direct sun. If you get a hard freeze once the seedlings have germinated, cover the container with a blanket or towel at night to protect them, but remove it next morning.
As soon as you can work your garden soil in early spring, transplant your seedlings just like if you had started them indoors. Before transplanting, refer to the garden bed preparation section below.You don’t need to harden them off because they’ve been outside all winter and are acclimated to the temperatures.
The pros to this method are the plants are used to the natural temperature and light cycles and are primed to germinate at the right time. They usually form larger bulbs more consistently as well.
The cons are remembering to check on the container that might be out of sight outside, especially when the temperatures warm up.
Prepare your garden bed for either sowing or transplanting before you need it to save time, back strain and headache. The basics are the same -dig a furrow about 4 inches wide and deep, then fill it with rich, well-aged compost. It’s best to do this in the fall before the ground is too hard, but it can be done in early spring as soon as the ground can be worked.
Mulched Onions
Start with fresh seed and seed starting or potting soil mix each year. Onion seed germination decreases after the first year, so why chance it? Fresh mix minimizes the chance of diseases during the long germination and seedling periods.
If starting inside, bottom heat really speeds seed germination up. 70-75°F soil temperature can create sprouts in about a week, versus 2 or 3 weeks at cooler temperatures.
Feed only the onion roots – just underneath the onion itself. They have short, shallow roots and can’t reach far, so provide the rich, well-aged compost where they can use it best.
Onions don’t compete with weeds very well because of their slow growth and small root structures. Weeds will significantly reduce your onion harvest, but there are better ways to fight weeds than weeding.Minimize weeding by mulching heavily between seedlings after transplanting.
Water onions efficiently with a drip system or soaker hose placed right next to the plants – remember their short roots. Doing this minimizes the amount of water they need, as well as reducing available water to potential weeds.
Congratulations! You now know a lot more about how to grow delicious onions from seed and why you would want to. You’ve got several tools to use in planning your garden for onions and how to set yourself up for success this season.
As always, please let us know your thoughts, experiences, or questions in the comments below. If you like this, sharing with your circle of friends helps us help them!
Growing peppers seems to come naturally for some gardeners, while others always seem to struggle. Sometimes this stems from easily-avoided mistakes or accepting certain myths or misinformation as correct.
Today we’re looking at the basics of growing peppers in your home garden and some mistakes and myths to be aware of and avoid. You might look at this as a how-not-to guide because occasionally it’s just easier showing what not to do than describing and explaining the right way. Plus, seeing other’s mistakes sometimes sinks in faster.
These are our observations from our 20+ years of gardening combined with the past 10 years of gardening questions we’ve answered.
The initial conditions you choose are critical to sprouting, transplanting and growing success, no matter what seed you are planting. Here are some things to consider as you grow your peppers this season.
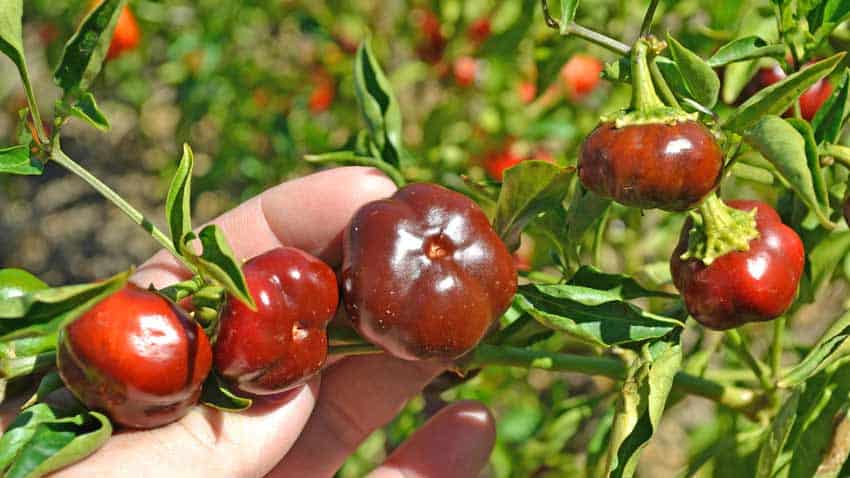
Chocolate Mini Bell Peppers
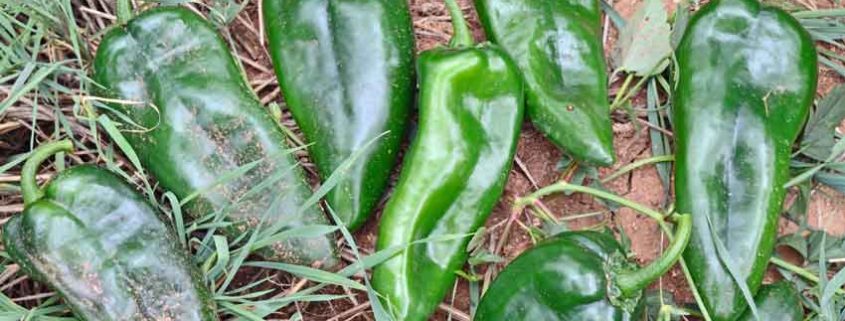
Alma Paprika Pepper
Serrano Peppers
Line of Capsaicin
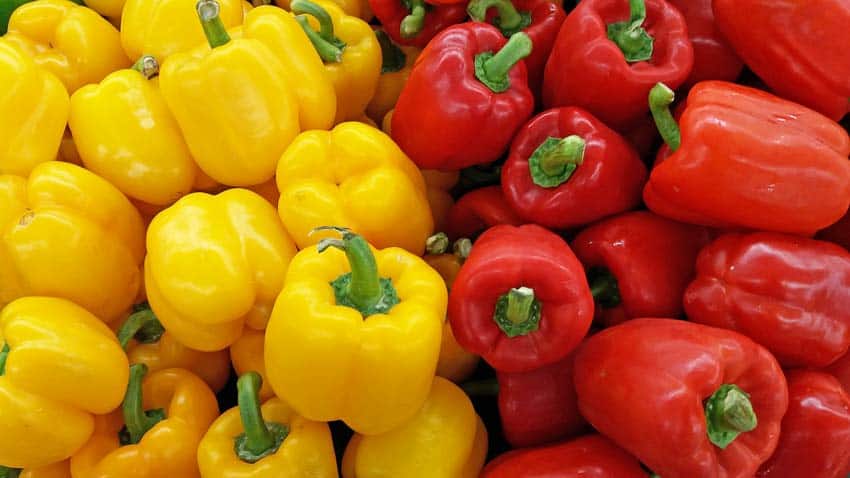
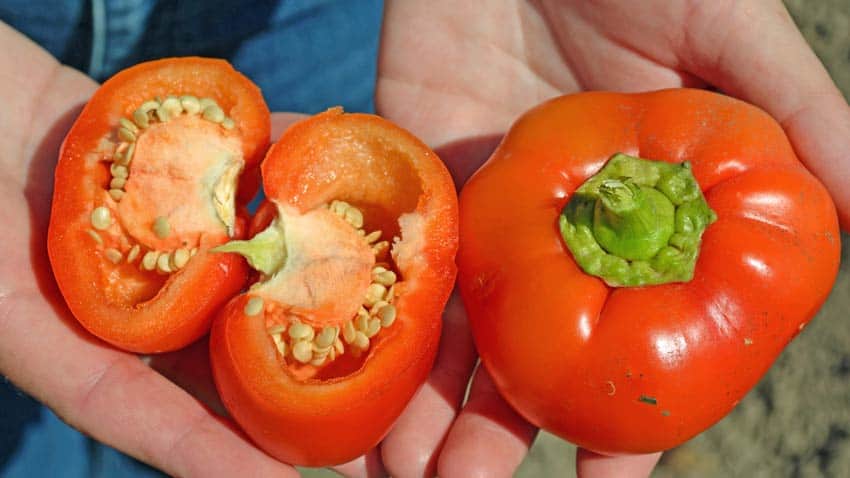
Red and Yellow Bell Peppers
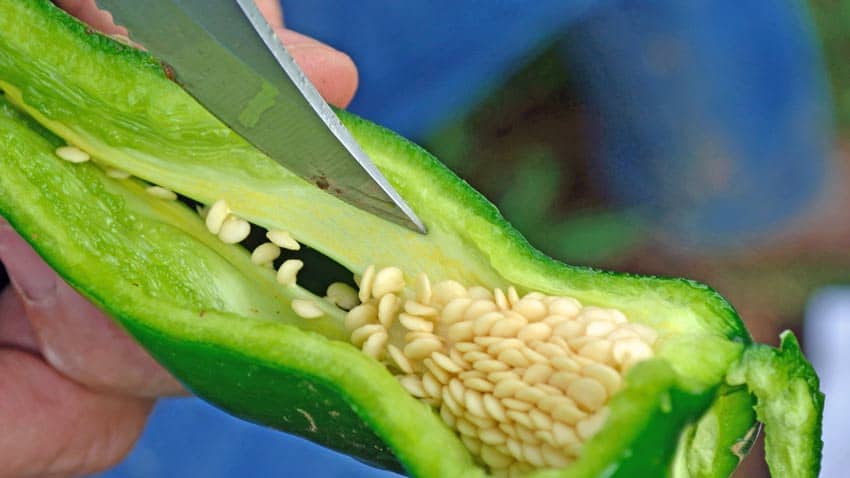
One of the biggest myths we’ve seen is the one that the different number of lobes on a bell pepper determines it’s sex – such as “3 lobes means it’s female and sweeter, 4 lobes is male and hotter”…
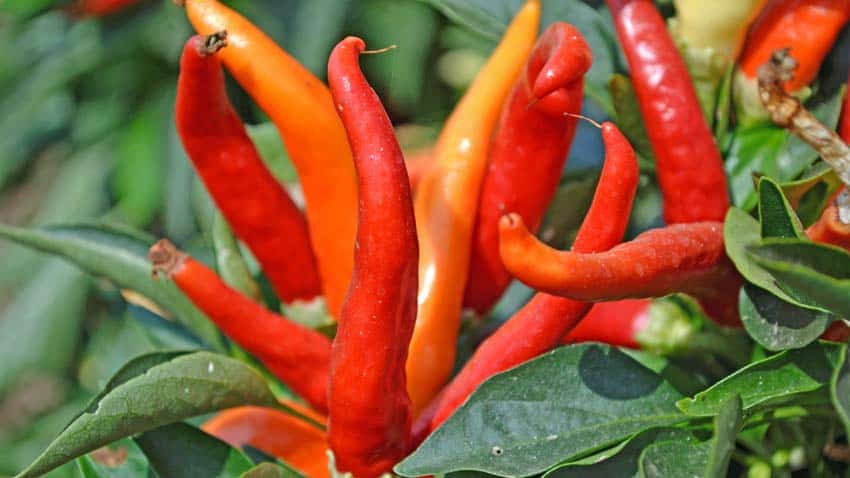
Another myth is that all red peppers are hot, while green peppers are sweet.
What are your proven, never-fail tips for growing the best peppers? Share your experiences below so we can all grow better peppers!
Gardeners are sometimes baffled when thinking about a cool season garden – either Fall and Winter or early Spring. We’ve put together this quick checklist to help you see the abundance that can be grown both before and after the traditional Summer garden.
Spend some time browsing these and making notes on what you like to eat and what varieties do well in what dishes you like to cook – pretty soon you’ll have a mouth-watering list to plant!
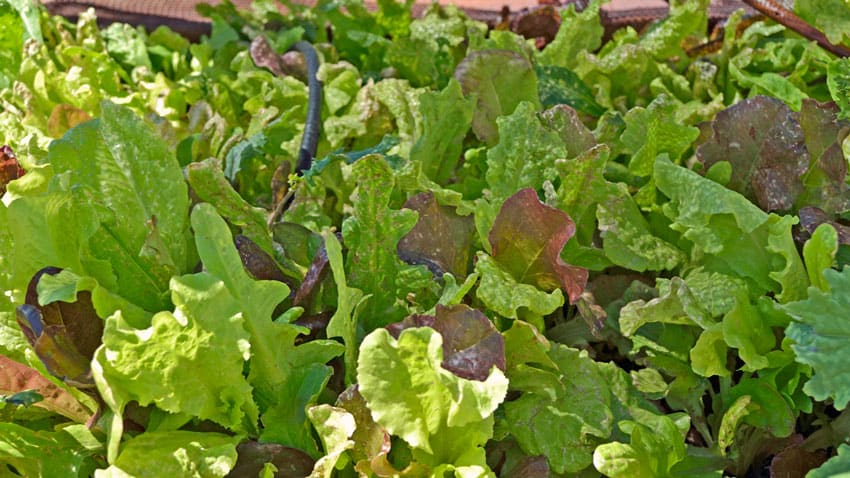
With a little knowledge and a tiny bit of preparation, you can grow lettuce throughout the summer without bolting. Imagine serving your own fresh-harvested, garden-grown lettuce throughout the summer!
Lettuce is a cool-season vegetable, meaning it grows best in temperatures around 60 – 65°F. Once temperatures rise above 80°F, lettuce will normally start to “bolt” or stop leaf production and send up a stalk to flower and produce seed. The leaves become bitter at this stage.
This is because the mainstay of our beloved salads is not a North American native, but an ancient part of our dinner table. Belonging to the daisy family, lettuce was first grown by Egyptians around 4,700 years ago. They cultivated lettuce from a weed used only for its oil-rich seeds to a valued food with succulent leaves that nourished both the mind and libido. Images in tombs of lettuce being used in religious ceremonies show its prominent place in Egyptian culture.
The earliest domesticated form resembled a large head of Romaine lettuce, which was passed to the Greeks and then the Romans. Around 50 AD, Roman agriculturalist Columella described several lettuce cultivars, some of which are recognizable as ancestors to our current favorites. Even today, Romaine types and loose-leaf lettuces tolerate heat better than tighter heading lettuces like Iceberg.
Two factors cause lettuce to bolt and become bitter – temperature and sun exposure.
The temperatures you are concerned about are both air and soil, as a lettuce plant (or any garden plant for that matter) tolerates a higher air temperature if the soil around its roots is cool and moist. Ensuring a cool and damp soil gives you more air temperature leeway. Because lettuce has wide and shallow roots, a drip system on a timer teamed up with a thick mulch keeps it happier in warm weather.
Shade is the third part to keeping lettuce growing vigorously later into warm weather. Reducing sun exposure lowers the heat to the leaves, but also to the soil and roots – creating a combined benefit. Deep shade isn’t good, but a systemallowing sun during the morning while sheltering the plants in the afternoon keeps your salad machines going much longer than you thought possible.
One last bit of knowledge. Most lettuce seeds become dormant (won’t germinate) as temperatures rise above 80°F, a condition called”thermo-inhibition”. This trait is a carryover from wild lettuce in the Mediterranean Middle East, where summers are hot with little moisture. If the lettuce seeds sprouted under these conditions, they would soon die out and the species would go extinct.
Thanks to research, there are some easy techniques to germinate lettuce seeds in warm weather – our article Improve Lettuce Seed Germination shows you how. Now you’ll be able to start lettuce when no one else can!
The three most effective elements in keeping your lettuce producing during warm weather are a drip system on a timer, a good bed of mulch and shade. Let’s look at each one and how they help.

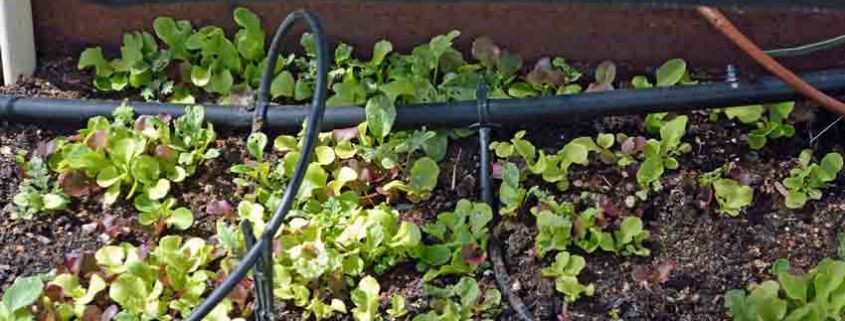
Lettuce growing with mulch, shade & drip system
A drip system on a timer maintains moisture levels much more evenly than hand watering, and the timer can be set for how much and how often water is needed. Checking the soil moisture levels is easy – just push your finger into the soil up to the second knuckle. If the soil feels moist and spongy the moisture is perfect for lettuce. Adjust the number and length of watering each time up or down to maintain this level. From experience, we usually start the timer once a day for 10 minutes in the spring and go to 2 and sometimes 3 times a day for 10 minutes during the heat of the summer. As the weather cools down, we decrease the amount of water accordingly.
This minimizes water stress on all your garden plants, not just lettuce. When the roots have moisture, they can withstand the heat and drying effects better without losing health and slowing production.
A thick bed of mulch reduces moisture loss at the surface of the soil from heat and breezes. Here in central Arizona, it’s not uncommon to have a 15-mph breeze with 90°F+ with 5 – 10% humidity levels. Basically, we garden in a giant hair-dryer!
We use two inches of wood chip mulch, but straw also works well and some gardeners have good success with well-aged compost. With mulch, the soil moisture levels are at the top of the soil where it meets the mulch. Without it, the moisture doesn’t appear until you’ve dug down at least two inches, with three inches having the same amount of moisture as the surface does with mulch. Another benefit of wood chip mulch is it provides needed nutrients to the soil and encourages earthworms and other beneficial soil life as it decomposes. The beds where we’ve put wood chips down have three times the amount of earthworm activity as those that have only compost or nothing at all.
The third element is shade, which might seem daunting but is surprisingly simple to provide. Shade can be from various sources – a living trellis of cucamelon, vine peach or Malabar spinach; a row of tall sunflowers on thewest side of the bed; a container garden on the east side of the house or garage to capture afternoon shade, or a shade cloth structure on the west side of the bed or over a container or raised bed. Trees can also give partial shade – grow on the east side to take advantage of shade during the hotter, more stressful afternoons.
You might be thinking – this all sounds great, but does it work?
Here are two examples showing that it does:
The first example is a study conducted by Kansas City area growers in cooperation with Kansas State University and the Organic Farming Research Foundation.
This project was conducted to test practical methods for extending the production of cool season leafy greens into the hot summer months in Kansas City, where high temperatures normally terminate production of these crops from June through August.
We used high tunnels covered with 40% shade cloth, combined with drip irrigation and were able to produce crops of lettuce (10 cultivars) and Asian greens (5 types) throughout the summer. Trials were conducted at three locations, two of them working organic farms, and the other an agricultural experiment station in order to produce statistically valid experimental results.We produced higher yields of marketable quality lettuce and greens over multiple harvests throughout the summer compared to outside plots, which produced lower yields of poorer quality crops.
As a result of this project, both growers have continued with summer greens production, recognizing that adapted warm-season vegetables may be more profitable under hot summer conditions. *1
The second example is a two-season grow-out test by the Sacramento County Master Gardeners at their Fair Oaks Horticulture Center during the summers of 2015 and 2016.
Grow loose leaf varieties that are heat-resistant or slow-bolting, rather than varieties that form heads.
Provide shade. Use shade cloth or plant on the shady side of taller vegetables.
Don’t skimp on water. Keep lettuce growing fast to prevent wilting, premature bolting, and bitterness.
Mulch lightly with an organic mulch to retain soil moisture.
Use cut-and-come-again harvesting of outer leaves.
Make successive plantings with transplants to replace spent plants.
During the season, replenish soil nitrogen to encourage growth. We used a mild liquid fish emulsion fertilizer.
Inspect plants for insects and diseases. Hand pick and destroy destructive insects. Remove diseased leaves or plants.
Merlot- 42 days to bolting – Dense heads of ruffled red leaves
Jericho – 73days to bolting -Romaine variety from Israel. *2
Here’s a quick and easy way to shade any container, raised bed or row in your garden:
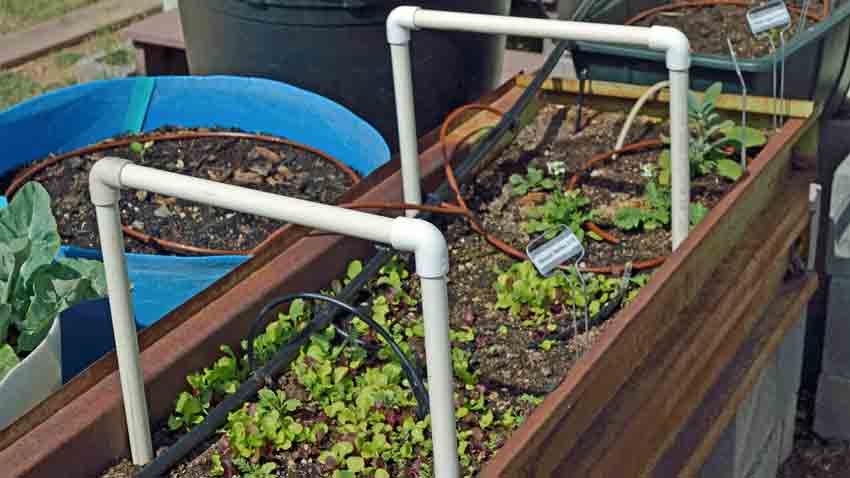
Simple lettuce shade structure
Use 1/2 inch PVC pipe from any hardware store. 1/2 inch is the least expensive and easiest to work with for this use.

Shade structure detail
Using PVC elbows, simply insert the tubing into the elbow and push the uprights into the soil at the edge of the planter or raised bed. No glue needed, so they can be taken down and re-used next season.
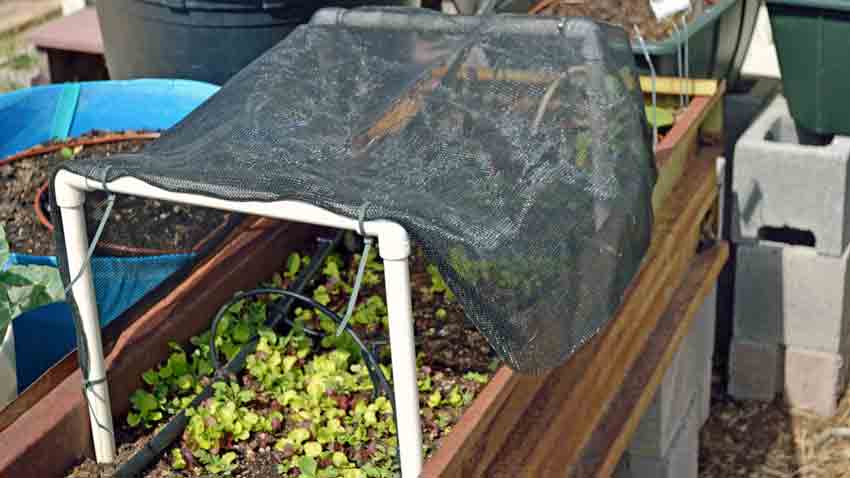
Planter with shade system
We used some leftover shade cloth from another project and cable ties to secure the shade cloth to the PVC tubing.
Shade cloth canopy
The front of the shade canopy is left loose so we can harvest easily.

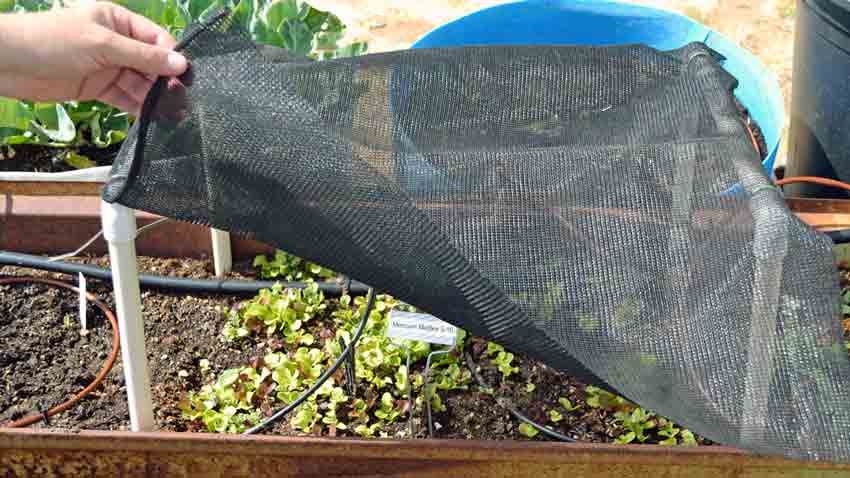
Lettuce shade detail
The right half of the lettuce is shaded, with the left half getting shade as the day progresses.
Now you have the tools and knowledge, so plan on successfully growing lettuce after everyone else has given up this season! As your accomplishments are recognized and compliments roll your way – make sure to share your tools and spread the success.

Lettuce after 3 weeks of heat
Our lettuce looks amazing, considering we’ve had continuous temperatures above 95°F for the past 13 days and above 100°F for the past 9 days. The Sweet & Spicy Mix hasn’t slowed down and is robust, crunchy, and still sweet with no bitter flavors. The growth is easy to see, comparing to the above photos.
Lettuce after 3 weeks of heat – detail of leaves
Looking closer, it isn’t perfect. There are some small holes and some of the leaf edges are a little toasty, but these conditions are so far outside of lettuce comfort zone, it’s like growing on Mars!
Lettuce normally starts to bolt at 80°F, but this has not only survived, but thrived at over 100°F for more than a week and more than 90°F for almost two weeks, this is a technique you should try.
References
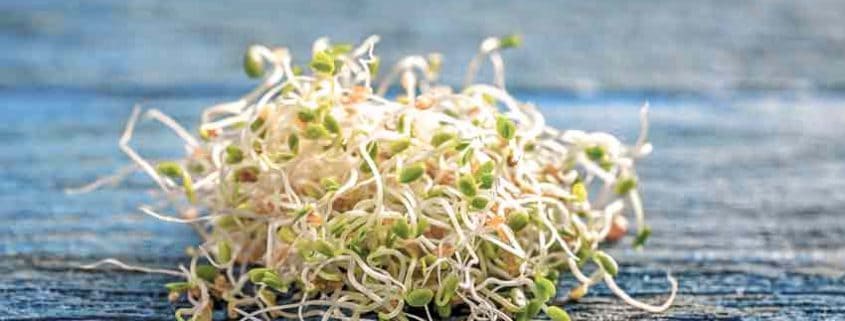
We’ve greatly enjoyed our own homegrown sprouts for the past several years. There’s just something about their fresh taste and crispy crunch that can be enjoyed any time of year, no matter the weather.
As with all our seeds, we make sure we know who our growers are and where our seeds come from. This is even more important with seeds used for sprouting as they are eaten directly as a food.
We chose our sprouting seeds supplier because of their commitment to the safest and healthiest seeds possible. They showed us their safety standards and testing protocols and we want to share them with you.
Growing your own sprouts at home is much safer than buying them off the shelf at a supermarket, and we’ll show you why.
-The safest sprouts are those you grow at home in a glass jar from a trusted, reliable source that screens the seed and tests both the irrigation water and sprouts for contamination.
-The next best is fresh sprouts from a local, trusted grower who buys their seed from a similar source as above.
-The least safe sprouts are from the supermarket where they have most likely been grown in a different state and trucked in. These sprouts are usually more than a few days old when they are first put on the shelves.
Sprouts are healthy, nutritious and are rich in vitamins, minerals, proteins, enzymes, bioflavonoids, antioxidants, phytoestrogens, glucosinolates and other phytochemicals. They are an excellent alternative to meat, especially for vegetarians and vegans.

Fresh Homegrown Sprouts
There are two main hazards associated with sprouts – E. coli and Salmonella. Both of these terms are used a lot, but what do they really mean? What are they and where do they come from?
From the CDC website:
“Escherichia coli (E. coli) bacteria normally live in the intestines of people and animals. Most E. coli are harmless and actually are an important part of a healthy human intestinal tract. However, some E. coli are pathogenic, meaning they can cause illness, either diarrhea or illness outside of the intestinal tract. The types of E. coli that can cause diarrhea can be transmitted through contaminated water or food, or through contact with animals or persons.”
From the USDA website:
“Salmonella is an enteric bacterium, which means that it lives in the intestinal tracts of humans and other animals, including birds. Salmonella bacteria are usually transmitted to humans by eating foods contaminated with animal feces or foods that have been handled by infected food service workers who have practiced poor personal hygiene.”
The best and surest method of reducing the risk of sprout seeds carrying bacteria is making sure the seeds are never contaminated. This starts with an ethical grower using good agricultural practices and organic standards. The next step is conducting rigorous testing, both in-house and independently.
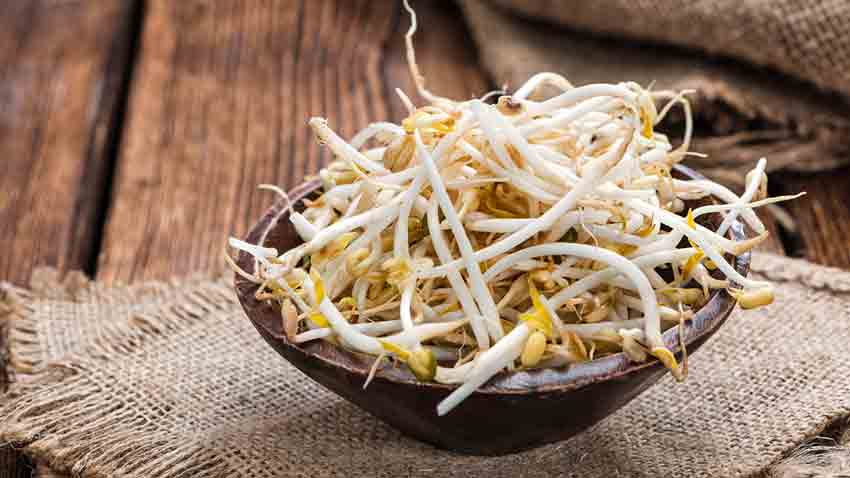
Mung Bean Sprouts
The testing done on our sprout seeds is different than any other testing protocols for food. There is no acceptable “percentage of contamination”, as is often the case with other foods. If any bacterial contamination is detected, testing is stopped and the entire lot is rejected – sometimes 40,000 pounds or more.
To ensure the sprouting seeds we offer are as safe as possible, our supplier extensively tests both the sprouting water and the seeds to verify if any bacteria is detectable after harvest. Our supplier and an independent lab both do multiple tests to safeguard our health safety.
Current pathogen tests are considered to be 97% accurate in detecting contamination. Duplicate testing at both 48 and 96 hours brings the accuracy and confidence up to 99.91% each time, for a final accuracy of 99. 999919%!
As of early 2017, our supplier is the only company doing these extensive screening and testing protocols. The FDA is studying this protocol and has begun advocating its adoption by sprout companies for testing.

Initial Sprouts Screening Results
Screening includes inspecting the bags for any urine or feces contamination, any holes in the bags, insect larva or other contamination. Afterwards, the seed is carefully inspected with both a magnifying glass and microscope.
Each and every bag is screened – this particular lot had 860 bags, each one weighing 50 lbs. for a total of 43,000 lbs.

In-House Lab Spent Irrigation Water Contamination Test
A small sample of seed is taken from each bag and added to the overall lot sample. The entire sample is sprouted for 48 hours, increasing any potential bacteria level approximately 1,000,000 times over the starting amount, substantially increasing the probability of detection.
Next, the sprout runoff water is sampled and tested by the in-house lab. This is called “spent irrigation water”. A sample of the sprouts is crushed and tested for contamination also. These tests are done in accordance with government food safety and industry accepted protocols.
The lab tests for both Salmonella and E. coli 0157:H7 after 48 hours and again after 96 hours of culturing the irrigation water.
Both bacteria do most of their growth in the first 2 days or 48 hours. This is when the first test is performed, with the second test at 4 days or 96 hours. The second test catches any late developments that might be missed on the first.

Independent Lab Spent Irrigation Water Contamination Test
A separate, larger sample of spent irrigation water is sent to an independent lab for more extensive testing. The independent lab performs a more in-depth analysis on a wider range of pathogens than the in-house lab because of their higher level of equipment.
Notice that the independent lab tests for the top seven strains of E. coli, where the in-house lab tests for the most common one. The lab uses a food microbiology genetic detection system.
This is possible because the specific genes or DNA of the different strains of E. coli have been mapped, so they are specifically targeted during this testing. This gives better accuracy, repeatability, and confidence in the testing than any previous methods.

Independent Lab Sprouting Test
Next, the independent lab tests four pounds of randomly obtained sprouting seed from the shipment. Having an independent, third-party lab analyze the sprouting seeds gives an additional measure of confidence.

Storage Confirmation
Finally, the storage facility is inspected and documented. This ensures the cleanliness and food safety of how the seed is stored to avoid insect or rodent infestation or damage.
In a home environment with only one person in contact with the sprouting seeds, cleanliness and food safety is much easier. Here are a few tips for sprouting safely:
Now you know the steps taken to ensure the highest quality sprouting seeds are available so you can enjoy the taste and nutrition of sprouts with peace of mind.
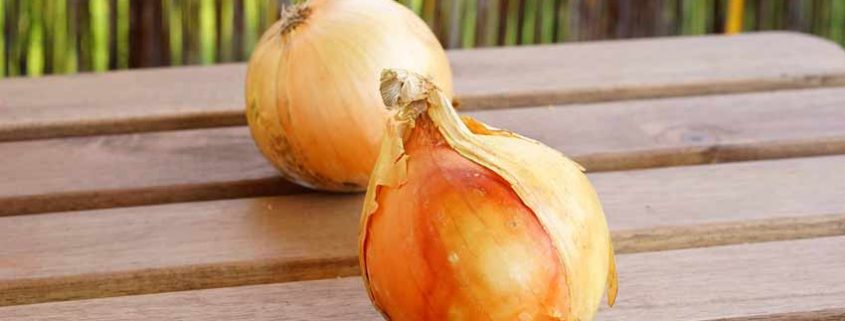
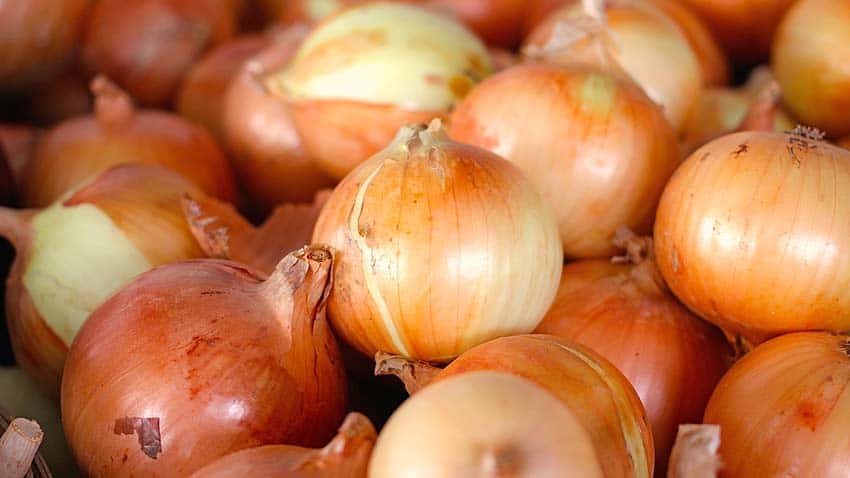
Spring onions have been grown for a long time – Egyptians grew them along the Nile during the time of the Pharaohs. One of the easiest vegetables to grow, onions sometimes confuse home gardeners as to the best type for their garden.
Three forms of spring onions can be planted: seeds, transplants and bulbs (or sets):
We recommend using onion bulbs, which can be planted without worry of frost damage and have a higher success rate than transplants. Bulbs are perfect for the home gardener as they guarantee onions for use or storage within a few weeks after planting.
As a member of the allium family they are a natural pest repellant to most foraging animals in the home garden.
Note: These details are for growing onion bulbs, not green or bunching onions. To grow green onions, simply plant the seeds and harvest when they are an appropriate size for your use!

Red Wethersfield Onions
Spring onions are usually sorted by the amount of daylight hours they need to grow bulbs; these are known as day-neutral and long day onions. Day-neutral onions form good size bulbs with 12 – 14 hours of daylight, while long-day onions need 14 – 16 hours.
The map above shows the approximate latitudes where long-day onions need to be grown. Day-neutral onions will also grow well in the more northern states in spring and summer.
Day-neutral onions are usually sweeter and juicier than their long-day counterparts. Their higher sugar and water content make them best suited for cooking and immediate use instead of storage. They are best planted from early spring to mid-summer in northern states and early spring to late fall in southern ones.
Candy is our day-neutral onion, being adapted to a wide range of day-lengths from north Texas to Maine. 12 to 14 hours of daylight will produce a good bulb. These can be grown in Zones 5 to 9.
Long-day onions are just the opposite with lower sugar and water content but higher sulphur, making them best for storage and cooking. These are planted in early spring in mid to northern states for fall harvest.
Growing long-day onions in the southern states will give small bulbs, more like scallions than full onions.
Our long-day selections include Yellow Stuttgarter (in the header photo), White Ebenezer and Red Wethersfield onions. They do best with 14 to 16 hours of daylight to form a good-sized bulb and are typically grown in colder winter areas. Zone 6 and colder is a good rule.
Sweet Candy Onions
Spring onions prefer abundant sun and well-prepared, healthy soil with good drainage.
While onions will grow in nutrient poor soil, they won’t form good bulbs or taste as good. If possible, till in aged manure the fall before planting. Onions are heavy feeders and need constant nourishment to produce big bulbs. If needed, add a natural nitrogen source when planting, such as fish emulsion or aged compost.
Plant onions as soon as the ground can be worked in the spring, usually March or April. Make sure overnight temperatures aren’t forecast to drop below 20°F.
Plant the bulbs about an inch deep and four inches apart. Plant no more than one inch deep, otherwise bulb formation can be restricted.
Feed every few weeks with nitrogen rich fish emulsion to get good sized bulbs. Synthetic nitrogen fertilizer will grow larger bulbs at the expense of flavor. Stop fertilizing when the onion starts pushing the soil away and the bulbing process begins. Do not put the soil back around the onions; the bulb needs to emerge above the soil.
Onions have short roots and need about an inch of water per week, including rain water to avoid stress from lack of moisture. Mature bulb sizes will be smaller if they do not receive enough water. Raised beds and rows are good growing locations.
It is important to keep onion rows weed-free until they become well established. Mulching helps protect them from weeds competing for water, as well as preventing moisture loss from sun and wind.

Stuttgarter Onions
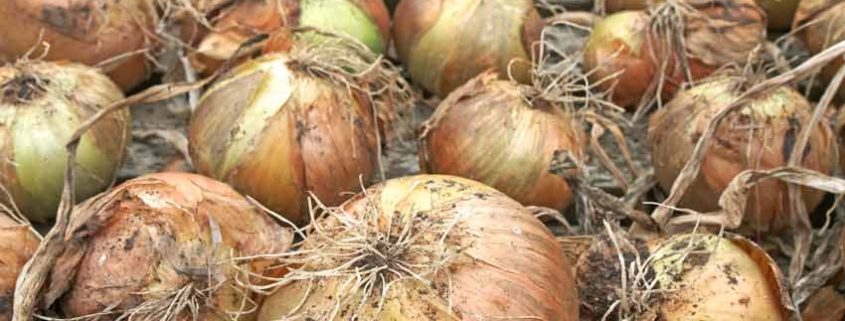
Spring onions are ready for harvest when the bulb has grown large and the green tops begins to brown and fall off. The plant should be pulled at this point, but handle them carefully as they bruise easily, and bruised onions will rot in storage.
Onions need to be cured before storing. Cure them with their tops still attached, in a dry location with good air circulation – they can hang on a fence or over the railing on a porch to cure if there is no rain in the forecast. During curing the roots will shrivel and the tops will dry back sealing the onion and protect it from rot. After 7 – 10 days clip the tops and roots with shears, then store them in a cool, dry environment or use for cooking.
With a little experimenting and succession planting, you will find it easy enough to grow most of your own onions throughout the year. After tasting home-grown onions, you won’t want “store-bought” anymore!

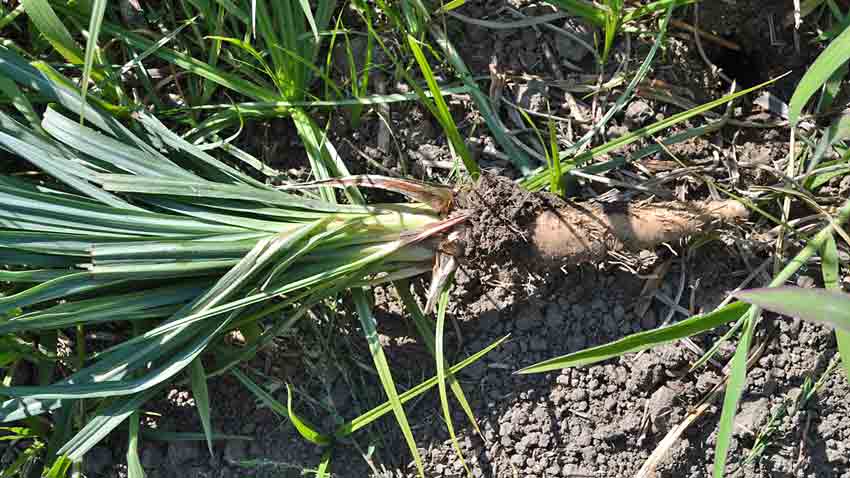
Salsify, also known as Oyster plant or vegetable oyster, was popular with the ancient Greeks who called it “the billy goat’s beard” for the silky filaments adorning the seed. The Romans increased it’s status, depicting it in frescoes in Pompeii. The famous Roman gourmet Apicius developed several recipes dedicated to Salsify and Pliny the Elder mentions it several times in his writings.
Europeans know the more common and darker scorzonera, meaning “black bark” in Italian. Salsify is regaining popularity with market and home gardeners for the delicately tasty roots and chicory flavored leaves.
Salsify Plant
This cold hardy biennial herb has a moderately thick taproot covered by a light brown skin. It has a purple flower, distinguishing itself from scorzonera by its black root and yellow flowers.
Salsify Root
The entire plant is edible when young and the root is eaten after maturing.
Young roots are eaten raw in salads, or are boiled, baked, and sautéed once mature. They are added to soups or are grated and made into cakes. The flower buds and flowers are added to salads or preserved by pickling. Young flower stalks are picked, cooked, dressed and eaten like asparagus. The seeds are sprouted and eaten like alfalfa sprouts for a refreshing and unique flavor addition.
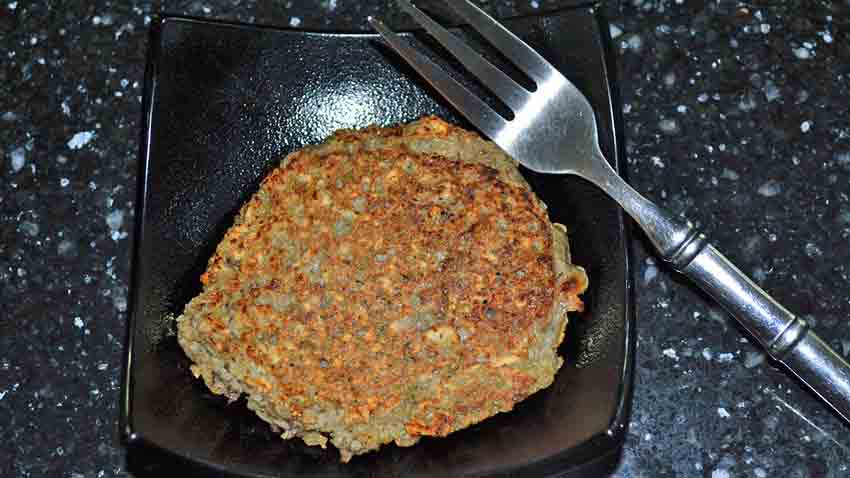
Salsify Fritter
Cooked and puréed roots coated in egg batter and flour then pan or deep-fried to a crispy golden brown make Salsify fritters.
The Salsify root stores its carbohydrates as inulin instead of starch, which turns to fructose instead of glucose during digestion. This is ideal for diabetics as it reduces their glucose load. Most enjoy the flavor of the cooked roots over the raw.
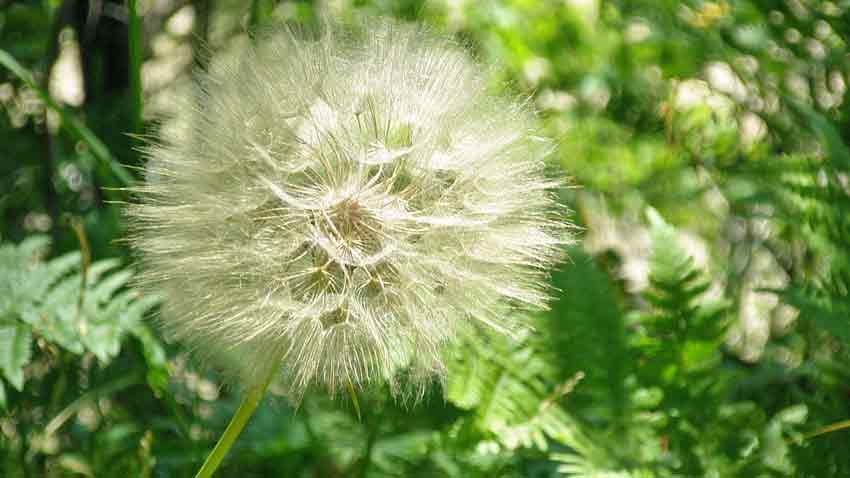
Salsify Seedhead
Seeds are direct sown in early March to April then harvested in October. The slender, grass-like leaves normally grow to about 3 feet tall and one purple petalled flower per stalk. As the seeds mature, the flower heads turn into fluffy white puff-balls like dandelion heads and scatter on the wind.

Young Salsify Root
The root is ready for harvest in the fall when the leaves begin to die back. Flavor improves after a few frosts. Dig the roots out whole with a garden spade or fork to avoid breaking them. Only dig what you need at one time, because the roots are best fresh. Salsify will overwinter, tolerating hard frosts and even freezes.
Stephen was invited to provide an article on seed quality for Acres USA’s January 2017 issue that focuses on seeds. This is the article that was published in that issue.
Everyone wants higher quality seed – from the seed company, seed grower, breeder and home gardener to the production grower. Even people who do not garden or grow anything want better seed, though they may not realize it.
Education and quality seed is the focus of our company – Terroir Seeds. We make constant efforts to continue learning and educating our customers about how seeds get from the packet to their garden. We recently had the opportunity to visit several cutting-edge seed testing laboratories and the USDA National Center for Genetic Resources Preservation to learn even more about seed testing and preservation. We want to share an insider’s look into a side of the seed world that the average person may not know exists.
Let’s look at this need for higher quality seed from a different perspective.
Everyone is a participant in what can be called the “seed economy”. Everyone, that is, who eats or wears clothes!
Anyone who eats depends on seed of some sort for their daily food – from fruits and vegetables to grains, beans, rice and grasses for dairy and meat production. Seed is intimately tied into all these foods and their continued production. Without a continued, dedicated supply of consistently high quality seed there would be catastrophic consequences to our food supply.
Cotton, cotton blends, wool, linen, hemp and silk fabrics all come from seed. Cotton comes from a cotton seed, wool from a sheep eating grass and forage from seed, linen from plant stalks grown from seed, hemp from seed and silk from silkworms eating leaves that originated as a seed.
Even those who grow and cook nothing need better seed! They still eat and wear clothes.

Chile de Agua for sale at market
The Chile de Agua pepper from Oaxaca, Mexico is a prime example of how seed preservation works. A well-known chef specializing in the unique Mexican cuisine of Oaxaca needed this particular chile for several new dishes. This chile wasn’t available in the US, so we were contacted through friends to work on sourcing the seed.
We found two sources in the US of supposedly authentic Chile de Agua seed and another in Oaxaca, Mexico. After the Oaxacan seed arrived, and those from Seed Saver’s Exchange network and the USDA GRIN station in Griffin, GA we sent them to our grower for trials and observation. All three seed varieties were planted in isolation to prevent cross pollination.
Authentic Chile de Agua has unique visual characteristics, the most obvious being it grows upright or erect on the plants, not hanging down or pendant. Both seed samples from the US were pendant with an incorrect shape. Only the Oaxacan seed from Mexico was correct. We then pulled all the incorrect plants, keeping only the seed from the correct and proper chiles.
The next 3 seasons were spent replanting all the harvested seed from the year prior to build up our seed stock and grow a commercial amount sufficient to sell. This process took a total of four years to complete.
There are two major approaches to improving seed quality – seed testing and seed preservation. One verifies the current condition of the seed, while the other works to preserve previous generations for future study and use.
There are several different methods of seed testing, from genetic verification and identifying DNA variations to diseases to the more traditional germination and vigor testing.
Likewise, approaches to preserving the genetic resources of seed are varied – from a simple cool room to climate and humidity controls for extended storage to cryogenic freezing with liquid nitrogen.
At its most basic, testing of seed simply verifies the seed’s characteristics right now. Whether testing for germination, vigor, disease screening, genetic markers or seed health, the results show what is present or absent today. Changing trends in important characteristics are identified by comparing with previous results.

Seed germination testing
This trend analysis is a perfect example of seed testing and preservation working together, as previous generations of seed can be pulled for further testing or grown out and bred to restore lost traits.
Modern seed testing labs perform a staggering array of tests and verifications on seed samples.
Germination, vigor and physical purity are the standard seed tests for agricultural crops, flowers, herbs and grasses.
These three tests are critical for determining a seed’s performance in the field, and satisfy the US seed labeling law showing germination, physical purity and noxious weed percentages.
Seed health testing screens for seed-borne pathogens like bacteria, fungi, viruses and destructive nematodes. Seed for commercial agriculture and home gardens are often grown in foreign countries and shipped into the US, and vice versa. Seed health testing verifies the incoming or outgoing seed is free of pathogens that could wreak havoc.

Seed vigor test
Plant breeders use the healthiest seed stock possible that is free of any pathogens which would compromise breeding efforts. Agricultural researchers use tested pathogen-free seed to avoid skewing results or giving false indications from unforeseen disease interactions.
Hybrid seeds need to be tested for genetic purity, confirming their trueness to type and that the hybrid crossing is present in the majority of the seed sample. Traditional open pollinated breeders will use genetic purity testing to confirm there is no inadvertent mixing of genetic variations, verifying the purity of the parental lines.
It is common to test heirloom corn for GMO contamination – called adventitious presence testing. This test identifies any unwanted biotech traits in seed or grain lots. This is an extremely sensitive DNA based test, capable of detecting very low levels of unwanted traits in a sample – down to hundredths of a percent. This relatively expensive test demonstrates the absence of GMO contamination, an important quality aspect in the heirloom seed market.
Genetic fingerprinting, also called genotyping, identifies the genetic make-up of the seed genome, or full DNA sequence. Testing with two unique types of DNA markers gives more precision and information about the genetic diversity, relatedness and variability of the seed stock.

Computer graph of DNA testing
Fingerprinting verifies the seed variety and quality, while identifying desirable traits for seed breeders. This testing identifies 95% of the recurrent parent genetic makeup in only two generations of growing instead of five to seven with classic breeding, saving time and effort in grow-outs to verify the seed breeding. Genotyping also accelerates the discovery of superior traits by their unique markers in potential parent breeding seed stock.
Using established open pollinated seed breeding techniques, genetically fingerprinted parents help produce the desirable traits faster and with less guessing.
To be clear, these are not genetically modified organisms – GMOs – they are traditionally bred by transferring pollen from one parent to the flower of another, just as breeders have done for centuries. No foreign DNA is introduced – a tomato is bred to another tomato, or a pepper to another pepper.
The difference is how the breeding is verified, both before and after the exchange of pollen from one plant to another. The genetic markers identify positive traits that can be crossed and stabilized, and those markers show up after the cross and initial grow-outs to verify if the cross was successful. If it was successful, the grow-outs continue to stabilize and further refine the desired characteristics through selection and further testing. If it wasn’t successful, the seed breeder can try again without spending several years in grow-outs before being able to determine the breeding didn’t work like expected.
There are several different types of seed preservation, just as with seed testing. The foundational level is the home gardener, grower or gardening club selecting the best performing, best tasting open pollinated varieties to save seed from. Replanting these carefully selected seeds year upon year results in hyper-local adaptations to the micro-climates of soil, fertility, water, pH and multiple other conditions.
Seed preservation work also happens with online gardening or seed exchange forums, regional and national level seed exchanges such as Seed Saver’s Exchange and governmental efforts with the USDA.
Many countries around the world have their own dedicated seed and genetic material preservation networks, such as Russia’s N.I.Vavilov Research Institute of Plant Industry. It is named for Nikolai Vavilov, a prominent Russian botanist and geneticist credited with identifying the genetic centers of origin for many of our cultivated food plants.
The Millennium Seed Bank Partnership is coordinated by the Kew Royal Botanic Garden near London, England and is the largest seed bank in the world, storing billions of seed samples and conduct research on different species. Australia has the PlantBank, a seed bank and research institute in Mount Annan, New South Wales, Australia.
The Svalbard Global Seed Vault on the Norwegian island of Spitzbergen is a non-governmental approach with donations from several countries and organizations. AVRDC – the World Vegetable Center in Taiwan has almost 60,000 seed samples from over 150 countries and focuses on food production throughout Asia, Africa and Central America. The International Center for Tropical Agriculture (ICIAT) in Colombia focuses on improving agriculture for small farmers, with 65,000 crop samples. Navdanya in Northern India has about 5,000 crop varieties of staples like rice, wheat, millet, kidney beans and medicinal plants native to India. They have established 111 seed banks in 17 Indian states.
It has been estimated there are about 6 million seed samples stored in about 1,300 seed banks throughout the world.
Seed banks aren’t the only ways to preserve a seed. Botanical gardens could be called “living seed banks” where live plants and seeds are planted, studied, documented and preserved for future enjoyment and knowledge. Botanical gardens range from established and well-supported large city gardens to specialized and smaller scale efforts to preserve a single species or group of plants.
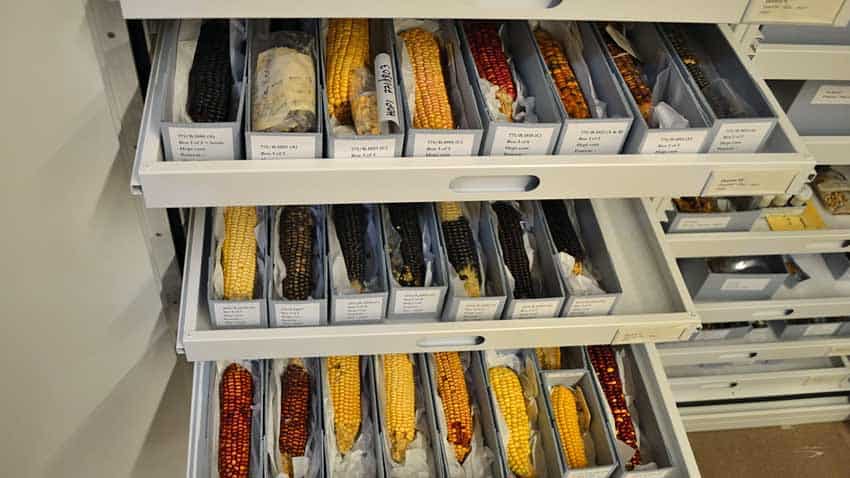
100 year old Native American corn in herbarium
An herbarium is another form of seed bank with a single purpose of documenting how a plant looked at a specific location at a specific time. Herbaria are like plant and seed archeological libraries with collections of dried, pressed and carefully preserved plant specimens mounted and systematically cataloged for future reference.
An herbarium can show what corn grown by the Hopi tribe a century ago looked like, or how large the seeds and leaves of amaranth were 50 years ago. Different herbaria focus on certain aspects such as regional native plants or traditional foods grown by native peoples during a specific time.
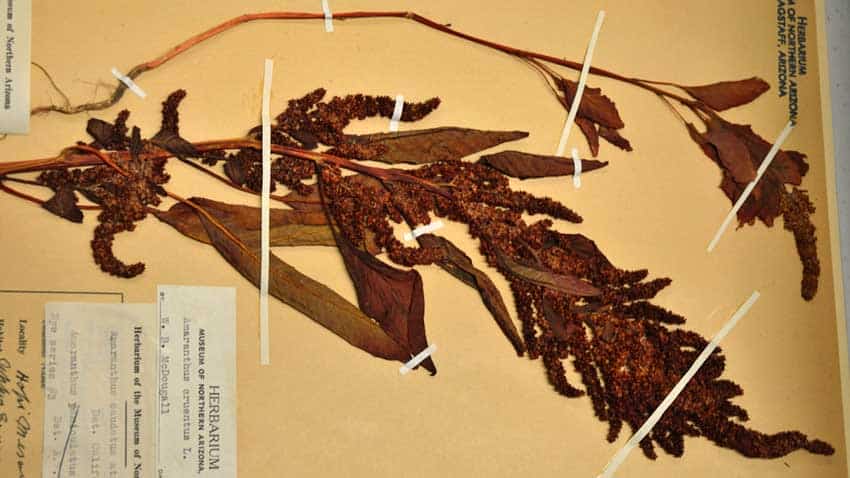
50 year old Amaranth in herbarium
The USDA plays two important roles in seed preservation that is little understood outside those in the seed industry.
The first is the Germplasm Resources Information Network or GRIN for short. It is also known as the National Plant Germplasm System. This collaborative system works to safeguard the genetic diversity of agriculturally important plants. Congress funds the program but it partners with both public and private participants. Many of the seed banks are on state university campuses with private sector breeders and researchers using the available seed resources.
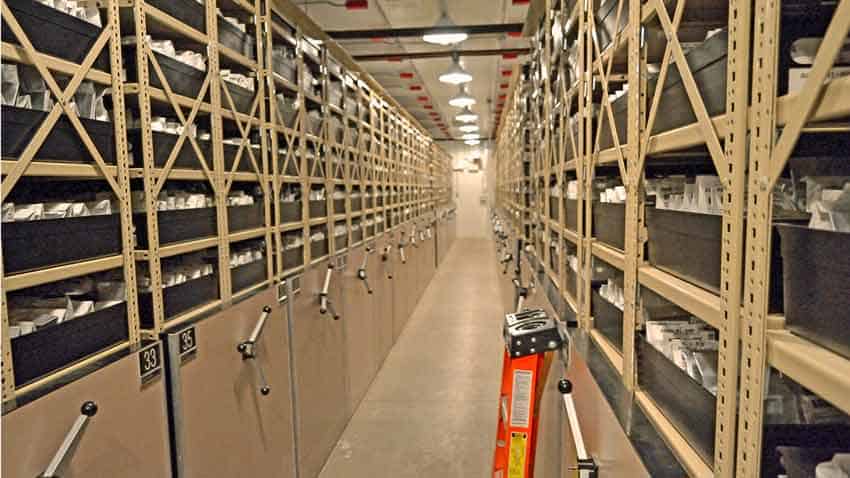
USDA National Center for Genetic Resources Preservation cold vault
There are 30 collection sites that maintain specific seed stock and conduct research on them. Some are dedicated to a single crop like the Maize Genetic Stock center in Urbana, IL which collects, maintains, distributes and studies the genetics of corn. Potatoes are maintained and studied in Sturgeon Bay, WI and rice is kept in Stuttgart, AR. Others maintain regional varieties like the UC Davis location that focuses on tree fruit and nut crops along with grapes that are agriculturally important in the central valley of California.
The second role is the USDA National Center for Genetic Resources Preservation (NCGRP) in Fort Collins, CO. This is the “back-stop” for the GRIN system as well as other private, public institutions and government programs around the world. They store the foundational collections of all the GRIN locations while also working with organizations such as the International Maize and Wheat Improvement Center in Mexico, the International Rice Research Institute in the Philippines and the International Plant Genetic Resources Institute in Rome.
Founded in 1958, the NCGRP maintains, monitors and distributes seed and genetic material samples from their long-term backup storage. After receiving seed samples, they test, clean and condition the seed for the proper long-term storage environment.
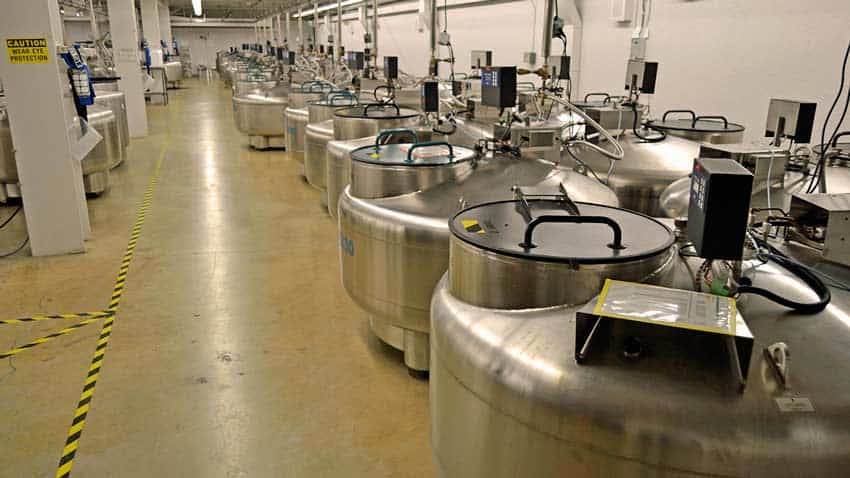
USDA NCGRP’s liquid nitrogen vault
Two long-term storage methods are used. One is a traditional low temperature/low humidity storage and the other is liquid nitrogen storage. The traditional storage is kept at 0°F and 23% relative humidity. Seeds are kept in heat sealed, moisture proof foil laminated bags.
Before seeds are stored in liquid nitrogen a sample is given a liquid nitrogen test to ensure the extreme cold won’t damage the seeds. The sample is exposed to liquid nitrogen for 24 hours, then germinated after coming back to room temperature and evaluated for any germination issues.
If the test results are normal the seeds are stored in clear polyolefin plastic tubes that are barcoded and sealed. The filled tubes are arranged in metal boxes, labeled and stored in liquid nitrogen tanks.
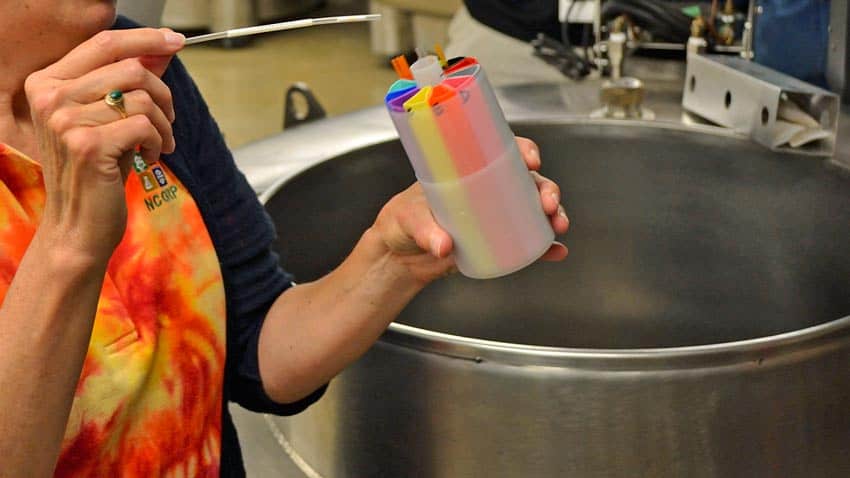
USDA NCGRP’s liquid nitrogen vault sample straw
The vault housing both storage areas is completely self-contained and separate from the adjoining buildings. It has its own backup generator, can withstand up to 16 feet of flooding, tornadoes and the impact of a 2,500-pound object moving at 125 miles per hour. It also has a full suite of electronic security.
If these approaches and techniques seem extravagant, it is with good reason. Our food availability and security increasingly relies on intensive production of fewer variety of crops that are very similar genetically. Along with increased production is increased vulnerability on a larger scale to pests, diseases and other stresses.
By collecting, preserving, testing, studying and distributing seeds and genetic materials immediate food system challenges can be met along with solutions and adaptations for future needs. Changes in growing conditions due to population growth, weather variability, transitions in land use and economic development all make the need for quality seed more important.
All the players in the seed economy support and advance the knowledge and quality of our seed used today. Just as the home gardeners and garden clubs preserve local seed varieties, seed companies are a “back-stop” for them. Seed banks and research facilities back up the seed companies and provide material for seed research.
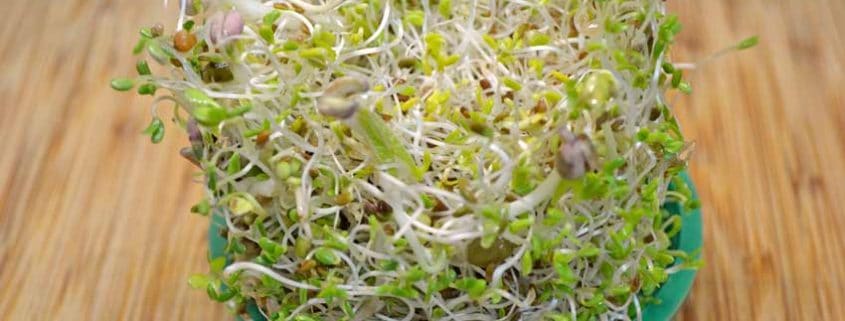
Would you like a fresh food that grows in any climate, at any time of year and needs no soil or sunshine? One that you only spend 5 minutes a day with, matures in about a week and has more nutrients per calorie than any other type of food?
How about one that has no waste in preparation for eating and is tasty?
Welcome to the incredibly diverse, tasty and nutritious world of sprouts.
Whether it is well known leafy sprouts like Alfalfa and Red Clover, or the loved Mung bean sprouts used extensively throughout Asian cooking, sprouts are tender, crisp tiny plants that have flavors from mild and nutty to sweet, tangy and peppery. Their crunchiness and texture vary as well from the delicate Alfalfa and Clover to the thick and hearty Mung bean sprouts that hold up well to the heat of stir-frying.
Sprouts don’t require any sort of “Green Thumb”, just pay attention to the rules above.
Rinse a couple of times a day to keep the seeds/sprouts moist. This also flushes away carbon dioxide and metabolic wastes that could cause spoiling. Use cool water when rinsing to ventilate and cool the sprouts to prevent overheating. Sprouts generate warmth as they grow. The optimum room temperatures are between 70 – 85°F.
Using the sprouting lid helps maintain proper drainage, preventing excess moisture that can cause mold. Young sprouts are very tender, so keep the sprouting container away from cold drafts, direct heat or light.
Sprouts expand 6 – 10 times their initial volume in just a few days, so give them plenty of room to grow. The 1 1/2 tablespoon volume of seeds grows to almost fill the quart jar!
Sprouts are very light sensitive and should be covered until the final day or two of the sprouting cycle.
Now you know the rules, here’s how easy it is to grow your own sprouts! It only takes about 5 minutes each day.
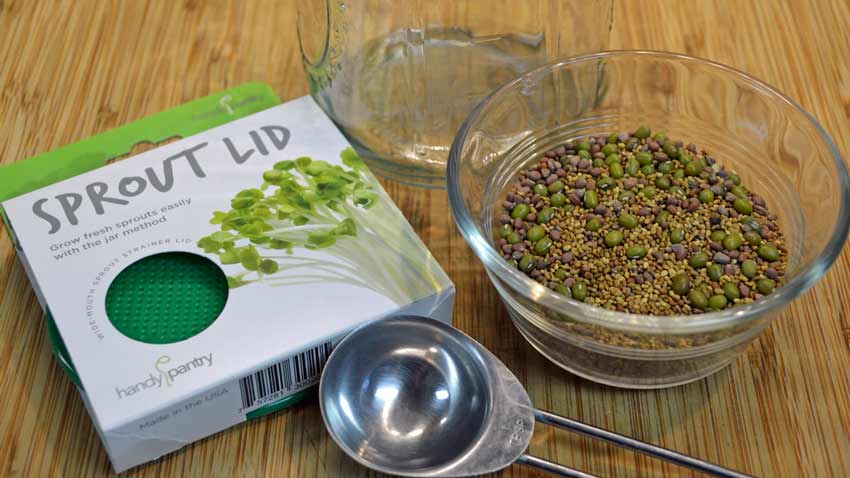
The tools and ingredients are super simple! You need a sprouting lid, a tablespoon measure, a glass quart jar and a towel to cover the jar.
What you sprout is up to you – we offer several different sprouts and mixtures to suit different taste buds.
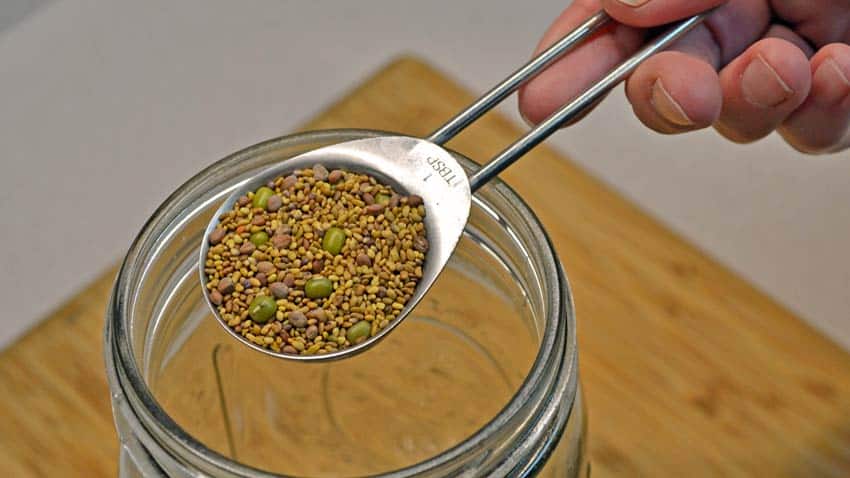
Start by measuring out 1 1/2 tablespoons of sprouting seeds into a glass quart jar.
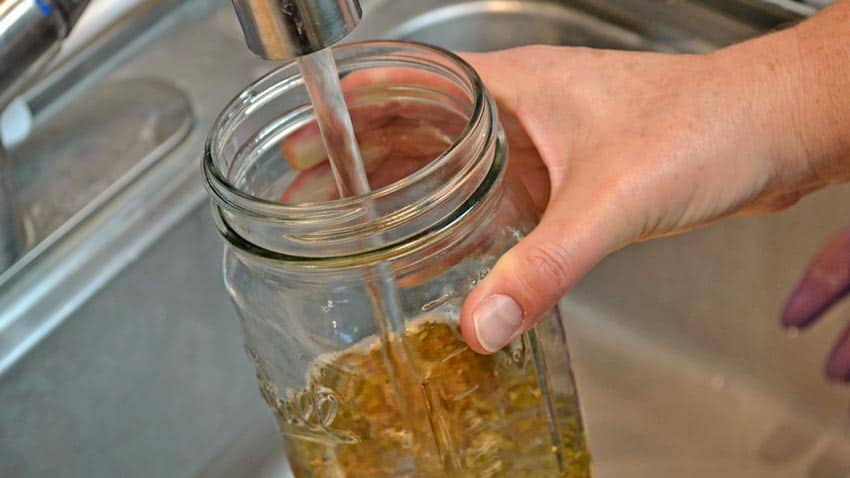
Fill the jar with warm water – not hot! This is the only time you will not use cool water in the sprouting process. The warm water helps start the sprouting process and speeds up the softening of the seed coat.
After the jar is full of warm water, screw the sprouting lid on, swirl the seeds well for several seconds and pour out the water through the lid.
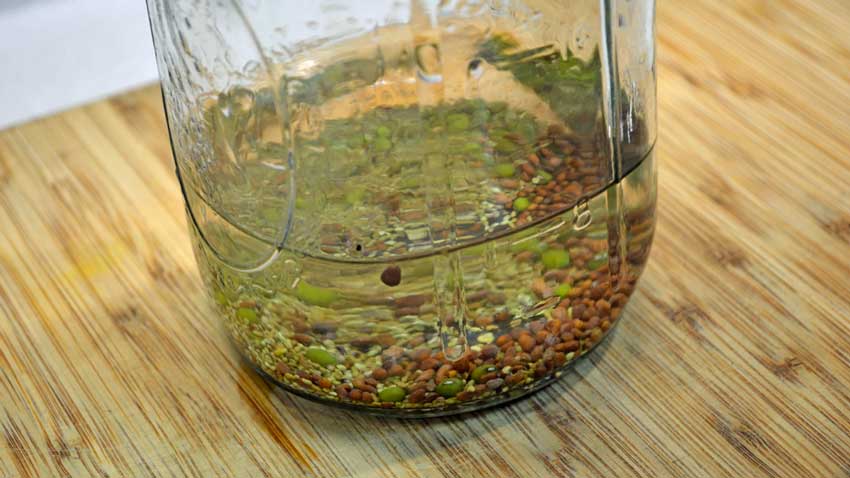
Refill with warm water to cover the seeds about 3 times their depth. Let soak overnight and keep away from light.
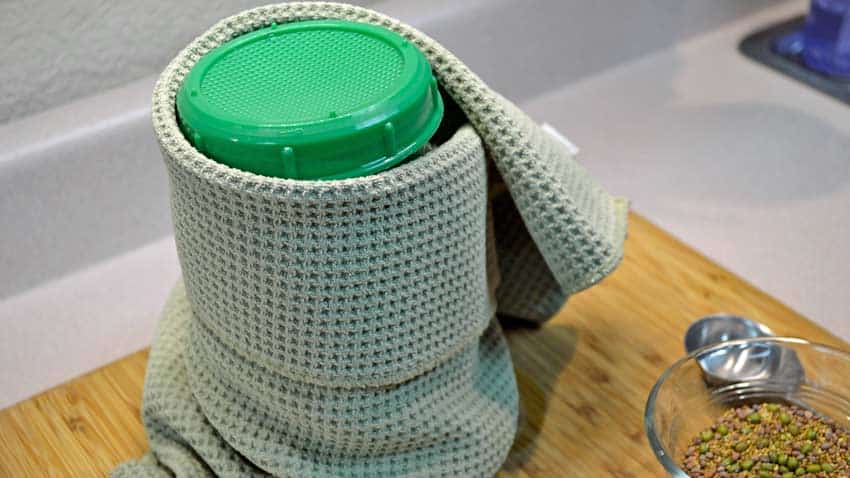
The easiest way to keep the sprouting seeds away from light is covering them with a towel. The sprouting process does not need light.
Let the jar and seeds sit overnight.
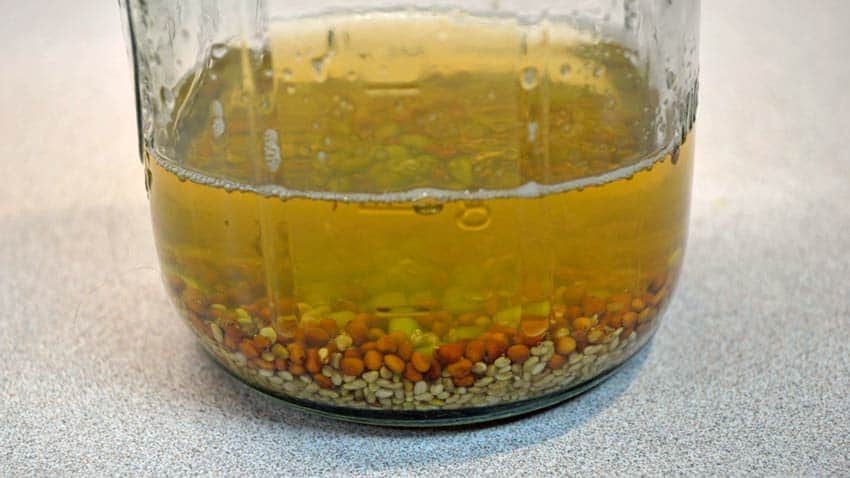
The next morning, this is what you should see once the towel is removed. The water will be slightly darker than yesterday and the seeds will be noticeably larger from absorbing water.
Dump the water out,
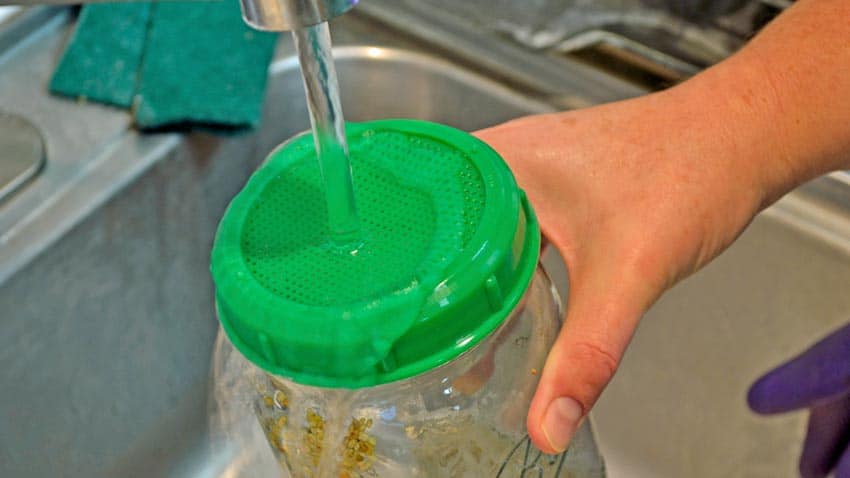
rinse with cool water, fill to about 3/4 full and swirl to separate any seeds stuck together,

then pour the water out again.

The sprouts look like this on the first day – still seeds! The sprouting process has started, and you’ll see the results on the second day.

After rinsing and draining, cover the jar with a towel and put in a convenient place where it is in a steady temperature with no cold drafts where it can drain without causing problems.
This place is often the kitchen dish drainer. We like to tip the jar lid downward to drain excess moisture off easily. Our duck eggs comfortably share the space!
This is the process you will repeat a couple of times each day. Rinse with cool water, pour out, cover with a towel and tip the jar lid downward to drain excess moisture.
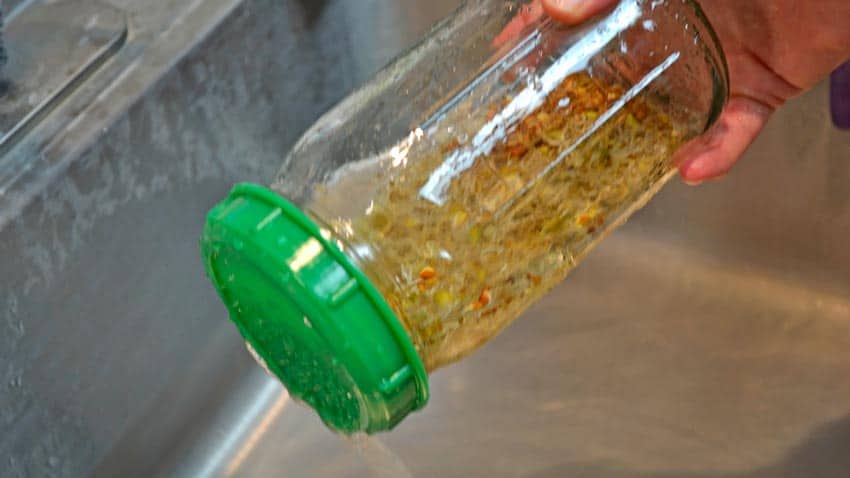
At two days, the sprouts were just beginning to split their seed coats, with a few showing a small sprout tip peeking out here and there.
This is the third day. We rinsed and drained the sprouts and inspected them.

Sprouts at three days. Most of the sprouts have split the seed coats and have started growing.
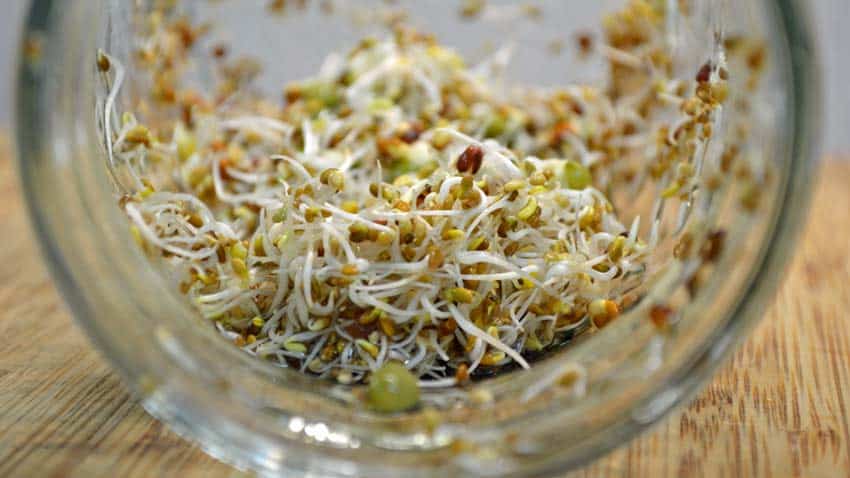
A closer view shows how dramatic the change is from seeds to sprouts in just three days. Most of the sprouts have long “tails” or roots, long enough to make the seeds look small in comparison. There are only a few seeds that have not sprouted at this point.
The growth continues over the next few days.
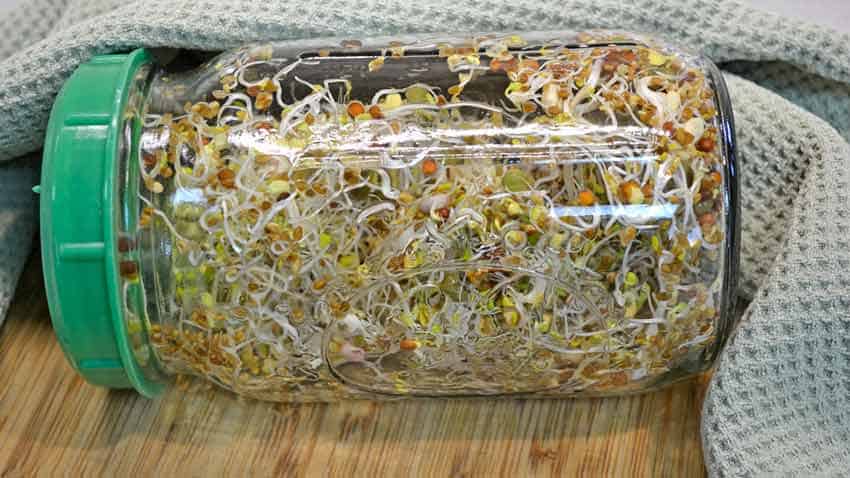
Sprouts at five days. There has been lots of growth in the past two days, compared to the day three photos above. The jar is almost filled now.
Each day we rinse, drain and cover the jar with the lid pointed downward to encourage good drainage.

The close-up view shows the difference in growth and volume over the past two days. At three days, they had filled almost 1/3 of the jar opening, while today they almost fill the jar opening.
The growing phase is finished, the sprouts need some ambient light to green up and boost their nutrition. You can eat them now – this is what is sold in the stores, but a couple of days with the towel off starts the production of chlorophyll and seriously increases the nutrition content!
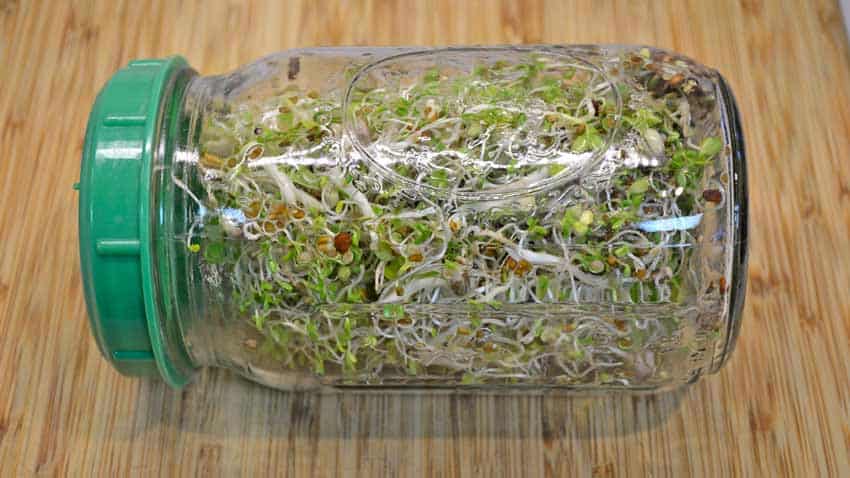
Sprouts at seven days. The growth has slowed down, but the sprouts are much greener now. We’ve left the towel off after day five. We continue the rinse and drain routine each day.
The young, tender cotyledons have turned from a pale light green to a richer, deeper green. This color indicates nutrition – amino acids, protein and carotene, among others.
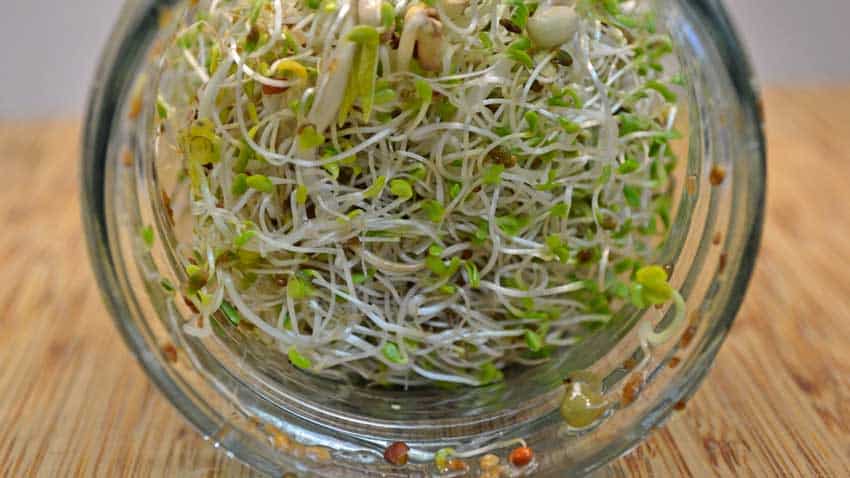
The close-up view shows how the sprouts have expanded a little more, but the colors are much greener.
The sprouts are almost ready to eat!

After the sprouts have greened up a bit, they are ready for harvesting. This just means a good wash in a colander or large bowl of water to remove the seed hulls.
There are two methods of doing the harvest wash – in a colander and in a large bowl of water.
If you use the bowl of water method, make sure to start with a bowl about twice the size of the sprouts so you have enough space to work. Gently dump the sprouts into the bowl and add cool water to almost fill the bowl.
Work your fingers into the sprouts, opening them up and releasing the spent seed hulls. Some will float to the top, while others will sink to the bottom. Skim the floating hulls, then remove the sprouts and drain the water and hulls.
Replace the sprouts and repeat the process until there are very few hulls left.
We show the colander method in our photos.
Gently dump the jar full of sprouts into a colander. It may take some gentle shaking or a chopstick to loosen the sprouts if they’ve grown to fill the jar.

Gently but thoroughly wash the sprouts with a running stream of water. We alternate between a solid stream and a spray and use our fingers to work the sprouts around to release the hulls. Some are visible at the bottom of the colander.
It usually takes a couple of cycles of wash/rinse with finger agitation, then lifting the sprouts out and washing the hulls out of the colander. Once you have very few hulls left the sprouts are ready to eat or store in the fridge.
Store sprouts in the refrigerator using the glass jar and sprouting lid as they still need to breathe and be rinsed once a day. Just make sure to set the jar lid down to drain for about 15 minutes before putting back in the refrigerator. They will last about a week, but usually will be eaten in just a couple of days!

Once the sprouts are cleaned they are ready to eat! We love our fresh sprouts on sandwiches of any kind – or on a fresh burger of locally raised heritage beef with homemade mayonnaise! Sprouts bring a fresh crunch and taste of fresh growth no matter what time of year it is.
If you find sprouts as delicious as we do, try succession sprouting. This is the same concept as succession planting in your garden but with sprouts.
Depending on how much you and your family eat, start a batch every third or fourth day to keep a fresh supply of sprouts on hand. You will need a sprouting lid for each batch, so you might need 2, 3 or 4 lids. With simple care the lids will last several years.
Now you see how simple it is to grow your own home-grown sprouts, saving you time and money while having delicious fresh greens any time of year! If you have a spare 5 minutes a day and enough room for a quart jar, you can grow sprouts.
Once you’ve sprouted a couple of times and have the timing down it will feel second nature to always have fresh sprouts on hand.

Pumpkins are an important fall mascot, from jack-o’-lanterns to home decorations to delicious foods. After all, what says Fall more than pumpkin spice lattes, pumpkin cookies, pies, soups and pancakes?
We love our pumpkin – farmers grew about 1.3 billion pounds in 2014, a 17% increase from the year prior. They aren’t the largest grown crop commercially, but pumpkins are still an important crop. Illinois grew over half of all commercial pumpkins with 745.8 million pounds, far outpacing California at 192.2 million pounds. Most are “processing pumpkins” going into pie fillings or other canned pumpkin uses.
Pumpkins are part of the gourd family along with summer and winter squash, cucumbers, melons, cantaloupes, watermelons, and zucchini. They originated in Central America and southern Mexico. Now they are grown in almost all parts of the world.
We’ll share tips to be more successful in areas with insect or disease pressures.
Planting high quality seed into warm fertile soil at the right time is the beginning of a successful harvest.
This takes a little bit of planning but isn’t difficult. Pumpkins like a loose, fertile loamy soil with a pH range of about 6.0 – 7.5 as an ideal condition. Well-aged compost added to the soil will improve flavor and production. They will grow in less than ideal conditions but may need extra nutrition or care to produce well. A drip system on a timer provides consistent soil moisture, important for good production and flavor. A good layer of surface mulch helps.
Planting two or more seeds then thinning the smaller seedlings used to be standard practice with growers and gardeners. High-quality seed makes that unnecessary now, saving time, effort and energy when planting. You normally only need to plant one seed per hill.
Get the most out of your seed by planting flat or with the pointed end down. This saves energy for the roots and shoots, giving them a head start in the right direction.

Aurora inspects a Connecticut Field Pumpkin
Pumpkin is a warm-weather crop – the seed is sensitive to soil temperature and won’t germinate in cold soils. Young seedlings are also easily frost damaged, making a later planting often more successful. The seed won’t start germinating until the soil temperature reaches 60°F and can rot in cold and moist conditions.
A pumpkin seed will sprout in about a week at 70°F soil temperature but can take 2 weeks or more at 60°F.
Traditional planting times are mid-June to early July in the Northeast. The Midwest sows mid-May to late June, depending on the weather. A June 15 planting date gives enough time for most pumpkins to mature for a mid-October harvest.
Read soil temperature with a simple digital thermometer accurate from 50°F to 90°F. Insert the probe just slightly deeper than how deep the seed will be planted – about an inch – and get the reading.
Most pumpkins need 90 to 120 days to maturity. This means they take 3 – 4 months of warm weather to grow, flower and produce pumpkins before a hard frost.
Here are a few tools to help boost your success:
The first is knowing when the first hard frost arrives in your area. This makes sure you’ve got enough time to get a good crop. Use the First and Last Frost Dates tool discussed in our How to Plan for Fall and Winter Gardening article.
The second is choosing a variety better suited to your growing season. Choose a smaller pumpkin or a faster-growing one when limited on time.
A third option is using pumpkin transplants you’ve started indoors – much like tomato transplants. This gives you more time in a shorter season as you’ve started the “clock” on a 90-day pumpkin 14 days earlier by starting it inside.

Australian Butter Squash
The large shade canopy from the leaves controls weed growth, but some weeds will still get a foothold.
Spraying for weeds doesn’t work well!
Pumpkins are sensitive to most herbicides for home gardeners, producing fewer and smaller pumpkins.
It is more important to keep on top of weeds early in the season than worrying about them later. Weeds steal nutrients and stunt growth with young pumpkin seedlings than with more mature plants.
Manual weeding with a hoe or by hand is the most effective but also most labor intensive. Early cultivation with a weeding tool when the weeds have just emerged is very beneficial. Slide your hoe just below the surface of the soil to slice the weed stems.
Very young weeds emit powerful plant hormones called auxins. One particular auxin delays other seeds in the immediate area from germinating for about 4 – 6 weeks.
Harness this time delay by cutting the weeds before they grow their second set of true leaves. This gives your pumpkins time to get up and running.
Black plastic mulch limits weed growth around the pumpkins. It needs to be put down just after the seedlings emerge and removed at the end of the season. Commercial growers commonly use this method, and some home gardeners have found it to be worth the effort in high weed areas.
Planting into cover crop residue also works well. Especially spring planted cereal rye that has been mowed or weed whacked and let dry down for 2 weeks. Open up a small space around the seed mound or transplant when planting.
Pumpkins need well-drained soil, good airflow and room to soak up the sun. Wet and humid climates contribute to disease attacks. Space plantings 5 – 6 feet between hills and at least 10 feet between rows of pumpkins. This ensures good ventilation and sun exposure to control humidity under the leaf canopy, decreasing disease potential.
Mold and mildews can wreak havoc on a pumpkin patch if left unchecked.
Use a 20% solution of milk and water to fight them while boosting the soil biology. Milk and Molasses – Magic for Your Garden has the full details!
The same insects that love squash also love pumpkins – including squash bugs, squash vine borers, cucumber beetles and aphids. Squash bugs are a major pest problem with any squash. We’ve shared a recipe that seems to help in Squash Bugs and Ways to Deal with Them. Recent research shows inter-planting buckwheat supplies food for the tachinid fly. This fly is a parasite of the squash bugs.
Improve your pumpkin production with crop rotation, removing and composting plant residue in the off season and increasing the beneficial insect populations.
One technique the home grower has is growing pumpkins or squash in large containers. Move them to a new area each season away from insects and disease. Use a planter witha good soil volume and keep plastic mulch under the vines to reduce insect pressures.
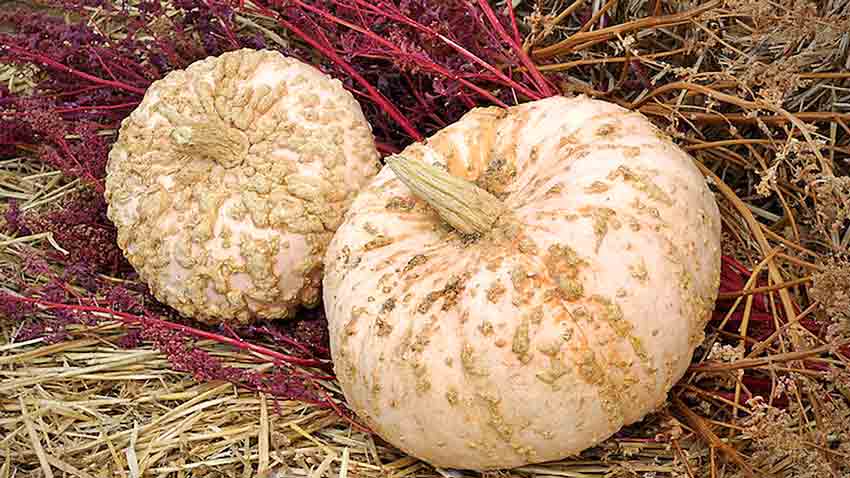
Galeux d’Eysines Pumpkins
Pumpkin and squash need to fully ripen on the vine to avoid tasting bland and watery. The leaves and vines will start dying back and the shells will become harder as the squash ripens. They will resist indentation when you press your thumbnail in.
Pick all the ripe fruits before the first frost, otherwise, the storage life is shorter. Mulch unripe fruit heavily with straw or a tarp in the garden as the first frost approaches. Pick when ripened.
Harvest in dry weather, using pruning shears or a sharp knife to cut the vine. Leave two to three inches of stem attached. Do not pull the vine off of the squash when harvesting, as this will damage the stem or fruit and lead to early rotting.
If you have had any diseases or insects – mildew, mold, blight or squash bugs – clean the shears or knife between each cut to prevent spreading diseases between fruit. A dishcloth soaked in a 10% bleach solution works well.
Dry or cure pumpkins in the sun until their stems shrivel and harden. If you harvest in rainy weather, cure them out of the rain in a well-ventilated area. Move them into the sun when it returns.
Handle the fruit carefully to avoid bruising the flesh, even though the pumpkin may look and feel tough. Bruised flesh leads to shorter storage and can ruin other squash stored nearby.
Store in a cool, dry area. Ideal temperatures are between 45 – 50°F with 65 – 70% humidity if possible. The temperature is more important than the humidity, so if you have a cool but drier location, that will work.
Check the fruit regularly, as one bad pumpkin can ruin several others or possibly the whole lot!
See how to make the most from your home-grown pumpkin with our Roasted Pumpkin Puree and Pumpkin-Orange Cheesecake!
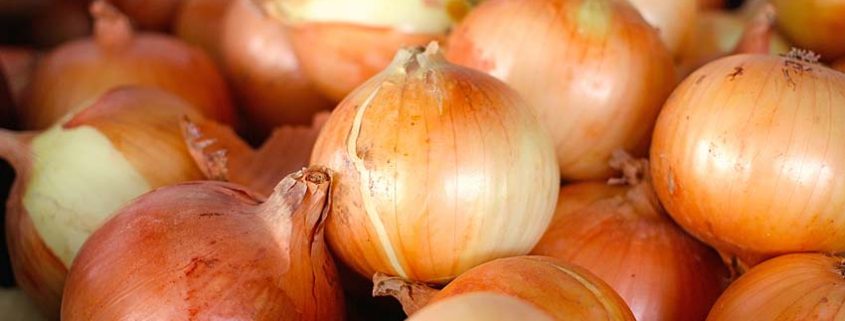
Growing fall onions is sometimes confusing – should you choose the long day or day-neutral ones? When should you plant? Does the color of the onion matter? How to avoid growing non-bulbing onions again this year?
Most questions come down to, “What onions can be grown this fall?”
The short answer is the sweet onions will do best in almost all locations, but there is more to the answer!
Most gardeners can successfully grow the sweet Candy onions for cooking.
There are three conditions fall-grown onions need – day-length, time to mature and temperature.
Candy is a day-neutral onion, meaning it forms a bulb with 12 – 14 hours of daylight. The map above shows approximately where the Candy onion will grow. The southern limits are short day length and the northern are too cold too early for a sweet onion in the fall.
Our grower has had excellent results in almost all regions of the US. The exceptions are south Florida, south Texas and the extreme northern states bordering Canada. Even parts of Maine have been able to grow good sweet onions in the fall!
Our sweet onion needs about 90 – 100 days to mature into good sized bulbs ready for harvesting. This is just over three months, so check your freeze dates to see if you’ve got enough time.
Light frosts aren’t a concern with onions as they continue growing until the first hard freeze.
If you aren’t sure of your medium frost dates, take a few minutes to read our article on understanding your frost dates. How to Plan for Fall and Winter Gardening will get you up to speed!
You are looking for the Fall 24°F date (the orange circle) from your local historical weather data.
This brings us to temperature…
Onions are remarkably tolerant of frosts and even moderate freezing weather. They go dormant and then resume growth when favorable conditions return. Winter temperatures down to the early 20’s won’t damage onions if mulched and protected.
An old grower once told me some of the sweetest onions he ever grew were over-wintered ones.
He planted bulbs in the early fall, let them grow and mulched heavily 6 – 8 inches deep just before the first frosts. They went dormant in the winter and when spring came he removed the mulch. The onions resumed growing as spring warmed up. He had the earliest harvest of incredibly sweet, delicious onions.
He would never sell these, as they were too special! He shared them with family and close friends.
Knowing these 3 factors, you will be more successful growing your onions this fall.
As the famous radio host Paul Harvey used to say, “Now you know the rest of the story!”

Beat the heat with your own second chance garden. Let’s look at why Fall gardening can be so much better!

Do you have extra space opening up in your garden right now? As you harvest crops think about replanting something in its place that does well in cooler weather. Now is the time to think about these planting techniques, to get the most from your garden!
Always have seeds or transplants ready to plant when you harvest. Filling the space of a harvested plant means less weeding and less moisture loss. A little planning goes a long way, pay attention to days to maturity for a cool season variety and you can stagger your plantings to get a bigger, longer harvest.

Plant a few spinach seeds every week from August to October, and you will have a continuous supply as the weather cools off into late fall. The same goes for many cool season crops like lettuce, carrots, beets and cabbage.

Do you know about growing onions over the winter? Fall planted onions yield a very sweet onion come next spring. Plant the seed in mid to late summer, then mulch heavily with straw just before the first frost. In the spring, the onions will continue growing and give you an early harvest of delicious onions.
Does your climate allow for some types of vegetables to easily grow through the winter, even if it needs some temperature protection? Is your climate conducive to year round tomatoes, with a little planning and frost protection?
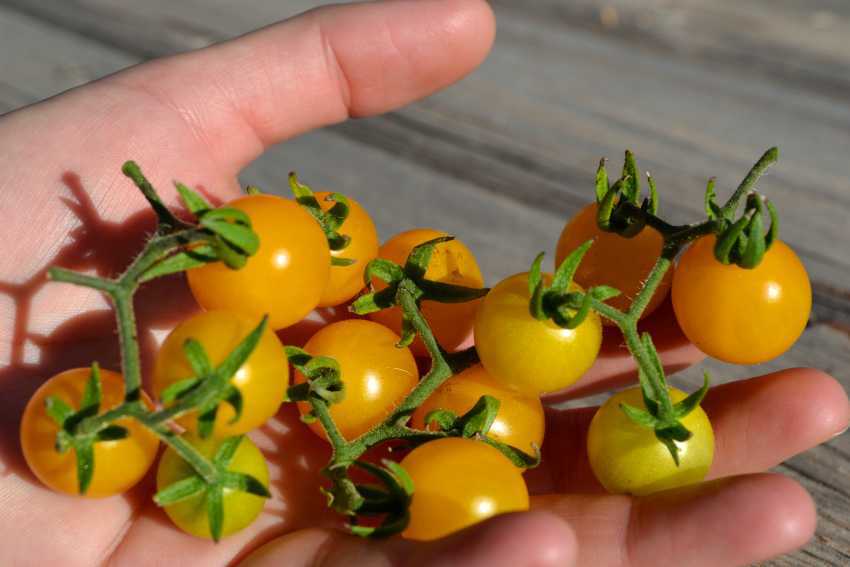
Save space for garlic, which is planted in the Fall and harvested early the next summer. Think about where you would want spring flowers to appear next season, attracting pollinators that help your garden. Many flower seeds enjoy being planted in the Fall and magically appear in the Spring.
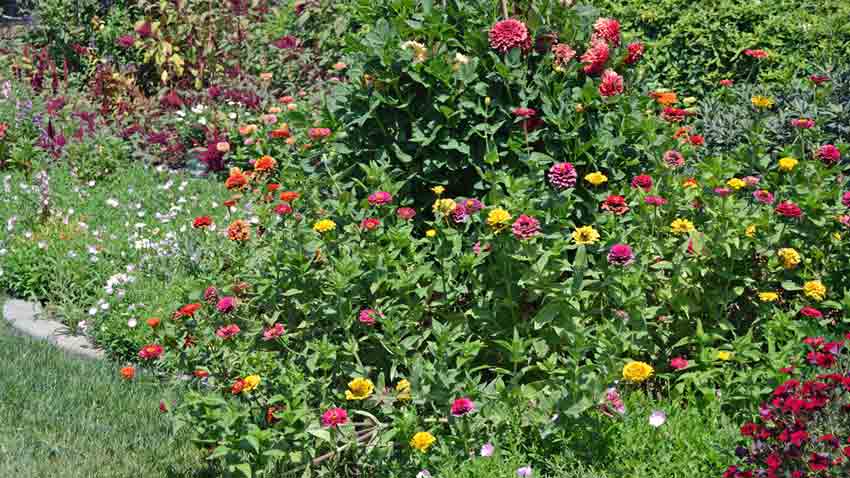
Turnips, radishes, carrots and beets can all be planted in late summer and early Fall. They grow quickly in the warmer weather, then turn really sweet as the nights cool off.

Plant some Fall lettuce, it will thrive in cooler temperatures. Mustards, kale, chard and spinach also thrive in the Fall. Try a second planting of sweet peas, as they will love the cooler weather. We love the versatility of Spinach Beet-Greens as they grow through our 100°F+ summer days and continue until hard frost stops them. They are one of the first greens to re-start early next season!

Parsley and chives are great year-round and planted in early Fall, they can last into early winter. Depending on your climate they might die back with the first strong freezes, but can be the first to reappear in the spring. Think about planting herbs in pots now and you can bring them inside during the winter and enjoy their flavors year-round!
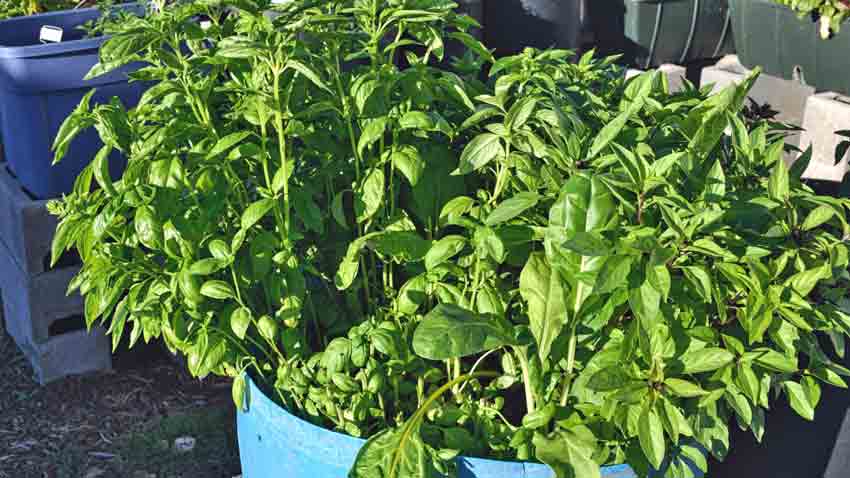
Enjoys these tips, the days may start to shorten as summer progresses but the cooler weather allows for so much more garden activity!
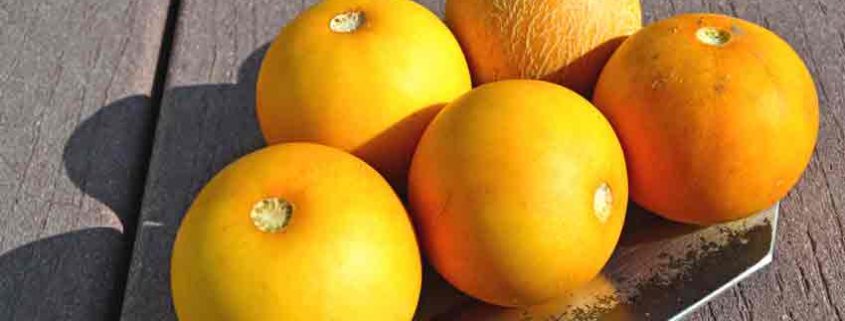
Vine Peach is a surprising melon of many names that is easy to grow, prolific and able to do several jobs in your garden. The small baseball size melons are highly aromatic with a mild flavor when grown in rich soil. The abundance of vines, leafy shade and fruit make an excellent trellis planting around the garden border providing shade and windbreak while acting as a decoy for thieving wildlife, who take the melons and often leave the rest of the garden alone. They are very hardy, drought tolerant and mostly insect resistant.
Their perfumed aroma will draw you in, sometimes from across the room or garden. Often mistaken for their kissing cousins – the inedible Queen Anne’s Pocket Melon – a couple of vine peaches in a bowl will perfume the room with their namesake scent – peaches and mangoes.
They are known by a wide variety of names, partially from their wide travels and partially from how they’ve been used over time. The most commonly used names today are vine peach and mango melon, but they’ve been known as Orange Melon, Vegetable Orange Melon, Melon Apple, Garden Lemon, Lemon Cucumber, Glass Melon, Melon Peach and Chito Melon – this last refers to the scientific name grouping – officially known as “Cucumis melo variety chito”.
As you might expect, these are planted and grown just like the cantaloupes and muskmelons everyone is familiar with. They need warm soil and good moisture to germinate with plenty of light once the seedlings are up.
These melons seem to have originated in China or ancient Egypt (or both) over 2,000 years ago from recorded evidence and travelled over the Silk Road through trade and migration to wind up in Turkey, where they have been identified through molecular variation testing. There is some mis-information floating around saying these were introduced to early settlers by Native Americans, which is not the case.
There is some discussion as to how they arrived in America, as William Woys Weaver shows Samuel Wilson, a seedsman in Mechanicsville (Bucks County), Pennsylvania, offered seed in the Farm Journal in February of 1889. Another source shows they were first describe in 1849 by Charles François Antoine Morren, a Belgian botanist and horticulturist, as well as the Director of the Jardin botanique de l’Université de Liège in the early to mid-1800s. He apparently obtained his trial seed from Cuba and brought them to Belgium for study. The vine peach became a well-known commercial variety in Europe soon after, where it might have come to America. Regardless of how vine peach arrived, in the early 20th century it was being commercially grown for pickled foods and preserves.
This brings us to the most common mistake made today with the vine peach. When complaints are made about them, the gardener is almost always growing in marginal soil and trying to eat them fresh. This is not their primary role – vine peach are much like a very mild honeydew, and then only if grown in nutrient rich soil. Throughout their long history, they have been recorded as being used as a cooking melon for pickles, relishes or preserves and jams – not eaten fresh as with most other melons. This is where they excel!
They have a naturally low sugar content, so there is no way possible they will be as sweet and juicy as a muskmelon or cantaloupe. Growing these for that reason only sets a gardener up for disappointment.
Our tasting experience was that of a mild honeydew – lots of sweetly scented aroma from the skin and flesh with a very mildly sweet flavor. We found them to be enjoyable – just a few bites to each half. Not nearly as bland or tasteless as some describe, but we also grew these in good fertile soil.
We were constantly surprised at the perfumed melon fragrance greeting us each time we walked into the house, even though the bowl of melons was in an adjoining room. For this reason alone, we feel the vine peach to be worth growing!
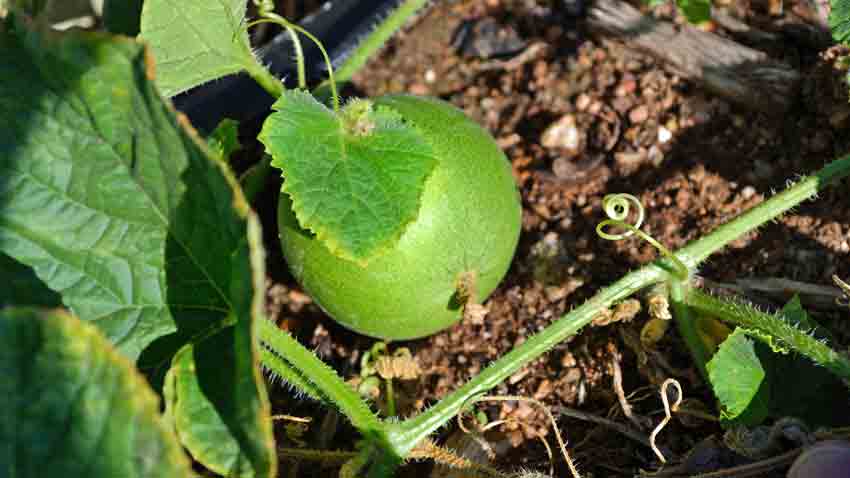
Maturing Vine Peach or Mango Melon
The young melons can be used just like cucumbers for pickling or relish. They won’t have as much scent yet, and make an excellent young cucumber substitute for bread and butter pickles or good old fashioned dill pickles. They must be peeled to remove the rind before pickling.
Gardeners who are experienced with growing and eating these tell us the real flavors only come through when cooking or preparing them and not fresh use. One gardener described them as “mediocre” when fresh, but as “superstars” when used with apples, peaches, pears or cantaloupe in jams. They describe the vine peach as enhancing the flavors, while adding a twist or boost to the overall flavor. There is a noticeable difference in jams made with and without the vine peach, as people will choose those made with them, even if they don’t know why the jams are different.

Vine Peach Blossoms
Once the plants are established they will start setting flowers. This is your sign to start researching and choosing jam and pickle recipes for the loads of baseball sized melons coming your way! It is common to have clusters of 5 to 7 flowers with almost as many melons ripening out. They will continually flower and ripen fruit until the frost stops them. One plant can easily produce more than a hundred melons over a season.

Vine Peach Flower Close-up
A close-up view shows the flower with the semi-soft spines of the vine, much like other melons. Small bees, flies and other pollinators love to visit the flowers and with so many flowers you’ll often hear a soft buzzing chorus as you walk up to the vines.
The leaf cover is extensive, and the vining tendrils are just seen at the top of the photo. This is what makes the vine peach such a good multi-purpose plant. It is rugged and hardy, easily tolerating 100°F+ with reasonable soil moisture. The plant will shade the soil, helping to preserve the moisture and keeping soil temperatures up to 15 or 20 degrees cooler.
When grown on a trellis, the melons are easier to spot and harvest. The heavy leaf canopy can provide shade and wind protection for more delicate plants or those needing less than full sun. The shape of the leaves moderates wind pressure by slowing the air movement through the leaves
Air movement through the leaves is slowed because the shape and texture of the leaves forces the air to move them from side to side, slowing the wind into a breeze and deflecting the harder gusts around the trellis as the leaves lock into place with higher wind pressures.
One of the more unusual jobs gardeners have given the vine is that of thieving wildlife decoy, or sacrificial food source. Because of their prolific production of fruit, wildlife will often steal the vine peach melons planted along the border of the garden and leave much of the rest of the garden alone. The melons are slightly sweet and crunchy, satisfying the wildlife while saving the rest of the garden’s production.
When cleaning out the garden at the end of last season, we found our Kunekune pigs had a very high preference for the over-ripe vine peach melons, going for them first while pushing and shoving each other out of the way to get more.

Ripe Vine Peach Melons
A double handful of ripe vine peach melons, ready to perfume the house or be made into pickles or preserves. The vine peach at the top of the photo shows some netting, leading credence to the theory that these have crossed with other types of melons during their travels, becoming what we know today.

Vine Peach Slice
When sliced open, the fairly large seed cavity with firm white flesh is seen. Because the vine peach was used almost exclusively in cooking and not eaten raw, the firmness and texture of the flesh was far more important than sweetness. One culinary use was to slice them in half, scoop out the seeds, peel and slice them into an apple pie, where the vine peach would absorb the flavors of the apple and spices while adding its unique flavors but not having a different texture than the apples.
They can also be sliced into rings for pickling after peeling and scooping out the seeds. A very excellent bread and butter pickle can be made, and if combined with young cucumbers will have an added flavor over using only one or the other.
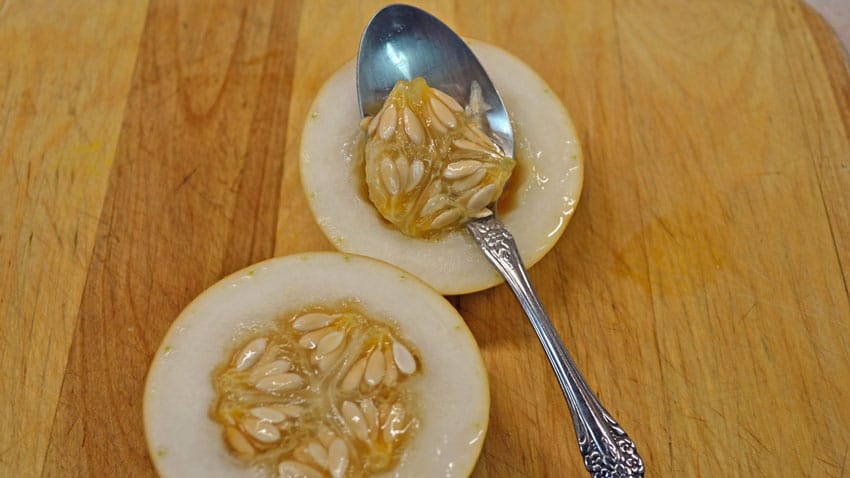
Scooping the seeds out
The size of the mature vine peach melon is seen with a regular size teaspoon used to scoop out the seeds.
The amount of seeds is also seen, something to be aware of at the end of the season. The vines and extra melons that have dropped to the ground need to be removed if you don’t want to find that area quickly becoming a dedicated vine peach patch! With as many melons are produced having this many seeds in each melon, it can happen in only a season or two!

Scoop of Vine Peach
The texture and firmness of the flesh is easily seen here, after using the teaspoon to scoop some of the flesh out. Some find the flesh a bit too firm when tasting it raw, but that firmness holds up very well when cooked as it does not become mushy or pulpy at all.
We found these are perfect as an edible dessert piece, being just the right size to hold a generous dollop of fresh made vanilla ice cream. To do this, simply cut in half and peel the rind, then slice a flat spot at the bottom so the open end will sit on a plate. Then gently slice down through the melon, leaving about a half inch of the bottom intact. This allows the ice cream to flow through the slits as it melts, flavoring the vine peach and perfuming the ice cream. Last, add a scoop of the best quality vanilla ice cream – fresh made is best – and add a mint leaf as garnish. Serve with a knife, fork and spoon for guests to enjoy all of the flavors and textures!
With all of the advantages the vine peach can bring to your garden – from windbreak and shade to wildlife decoy, home perfume and secret cooking ingredient – it make sense to try some and see what they can do for you!
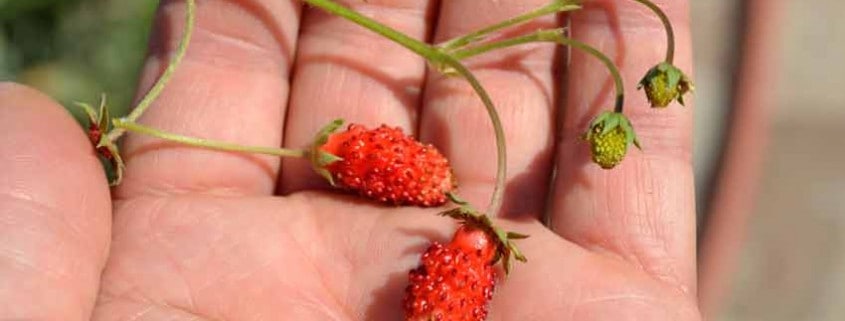
Alpine strawberries have captivated our taste buds for a very long time. They are tiny yet highly aromatic and hugely flavorful ancestors of our common strawberry. Archeological excavations have shown Stone Age people in Denmark and Switzerland enjoyed them immensely, as shown from the evidence of seeds in those sites.
What we would recognize as alpine strawberries were first domestically cultivated in ancient Persia, where they were considered delicacies fit only for royalty. As often happens, seeds made their way both east and west through trade along the Silk Road route, becoming widely grown and loved.
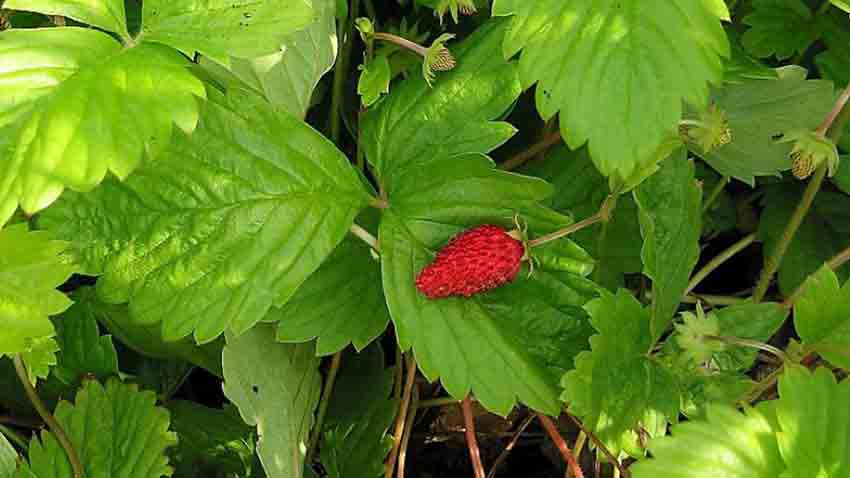 The Roman poet Virgil named the strawberry in works about country life, associating it with other wild fruits and citing the beauties of the fields in his third Ecologue. During the same period Ovid mentions the mountain strawberry in his description of the Golden Age in book one and again in book thirteen of his Metamorphoses narrative. Pliny is considered the last of the ancients to write of the strawberry, listing “Fraga”, the strawberry fruit, as one of the natural products of Italy in the twenty first book of his Natural History series.
From the 10th century until the early 19th, alpine strawberries were hugely profitable, highly regarded and very well known. After suffering from some mis-informed bad publicity in the mid-1100s, alpine strawberries became quite popular in religious paintings beginning in the late 1300s – often associated with Mary and the Baby Jesus in illuminated manuscripts and paintings. The Catholic Church and royal families from Italy, France, England and Germany were responsible for much of the promotion of the alpine strawberry as they tasted and fell in love with it.

Madonna among the Strawberries – with the carpet of alpine strawberries
A few excellent examples are located in the School of Cologne in Germany. “The Madonna of the Roses”, “The Garden of Paradise” and the “Madonna among the Strawberries” all portray the Madonna as a young girl in a closed garden with the infant Jesus in her lap. She is surrounded by roses, thistles, carnations, lily of the valley, iris, primrose and the entire plants of the alpine strawberry, showing its tiny, prolific red fruit and white five petal flowers along with its toothy leaves. The alpine strawberries are painted botanically correct and are exact, perfect replicas of what we see today. They are always portrayed in a place of honor and importance, reflecting the standing they held in elevated society of the day.
By the late 1300s the alpine strawberry was in widespread cultivation throughout Europe as more of the working classes began transplanting the alpine strawberry from the woods and wilderness to their gardens. Street vendors were selling the fruit to Londoners in 1430 when John Lidgate wrote the song “London Lickpenny” which mentions ripe strawberries and cherries for sale in London.
All strawberries up until the mid-1700s were all of the alpine or wood type; being very small, highly aromatic and having much more flavor than would be thought possible for their size. These characteristics are what made them so remarkable, along with their intense sweetness. Another interesting fact is not all of these strawberries were red; there were white and yellow varieties which were just as highly regarded as the red ones, having different flavors of their own.
This begin to change with the world exploration of the early 1700s, with plant and animal samples brought back to Europe from all over the world.
The modern domesticated large fruited strawberry got its start from these collecting expeditions, with a few strawberry plants brought back from a mapping trip to Chile by Amédée-François Frézier, a French naval engineer who noticed and enjoyed the tremendously large strawberries growing along the Chilean coast in 1712. He wrote the fruit were commonly as large as a walnut; almost three times the size of the alpine strawberry of the day. He brought back plants which were installed in the royal gardens and in Brittany, which grew well but did not set any fruit. It was later discovered the Chilean strawberries have male and female plants, and Frézier had only brought back female plants.
 It wasn’t until 30 years later when someone brought back male strawberry plants from Virginia that the Chilean strawberries began to produce fruit, creating the first hybrid strawberry. This new variety is the foundation of all domestic strawberries grown today with the large and familiar heart-shaped fruit.
As would be expected, alpine strawberries began a decline in popularity as their larger sized and heavier producing cousins gained recognition, both in Europe and America.
Alpine strawberries returned to their former, more exclusive roots, being highly valued by pastry and dessert chefs in France and across Europe for their highly concentrated flavors, balanced sweetness and heady aroma that would perfume a room. Eventually, French and Viennese pastry chefs would raise the use of “Fraises des Bois” to a high art form, competing with each other to make the most visually stunning, aromatic and delicious pastries and desserts possible.
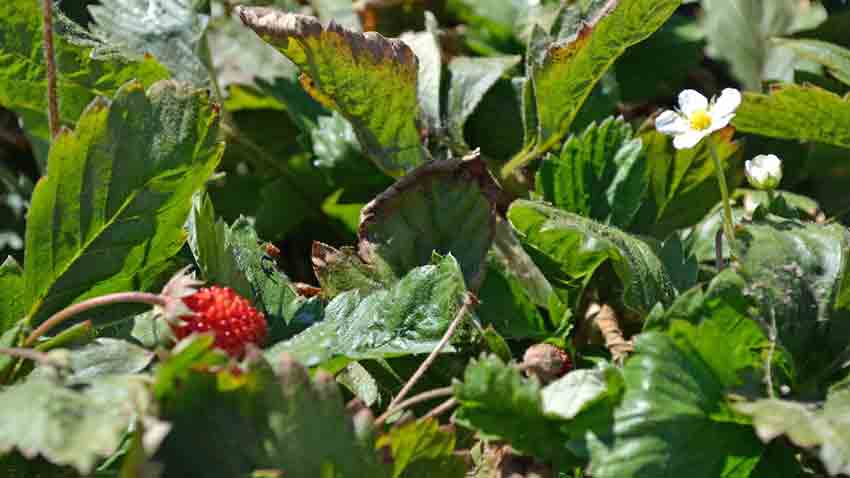 Today, alpine strawberries are almost nonexistent in grocery or specialty stores, but are imported from Europe as ingredients in gourmet jams, sauces, liqueurs and as a coloring agent in cosmetics. The best way to experience these flavors and scents – often described as “ambrosia” – for yourself is to grow them in your garden.
While alpine strawberries may not be as productive in weight as their domestic cousins, what they lack in quantity is more than made up for in quality. Given fertile soil, proper conditions and some care, they can be very productive. Enough so that some caterers, confectioners and resorts are buying from local growers specializing in alpine strawberries.
 Besides a good quality, fertile and well-drained soil, alpine strawberries need a good amount of sun. In hot areas, they will benefit from partial or afternoon shade. Consistent soil moisture is a key factor in encouraging production, along with a good layer of mulch along their roots to keep them moist. Another benefit is they readily grow true from seed, unlike domestic strawberries which must be started from vegetative propagation.
They don’t send out runners, instead concentrating their energies in flowering and fruiting. They will slowly increase their crowns and gradually grow into mounds about a foot in both diameter and height. They will often flower the first year, but normally won’t set fruit until the second year and will continue producing for several years if well kept. Because of their growth habits, alpine strawberries make for great border plantings as well as edging along a garden walkway or in larger patio containers. They are perennial and can be very cold tolerant if their crowns are heavily mulched to about eight inches before the first hard freeze.
With a little planning and care in planting and tending your plants, you can experience firsthand why mankind has had such an intense love affair with strawberries for so long. You get to taste the same explosion of flavors and be captivated by those intense aromas which Persian kings and European royalty enjoyed so long ago, right there in your home garden.
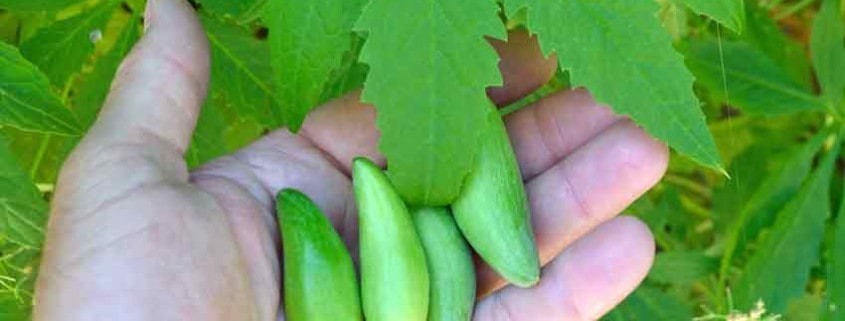
Achocha or Caihua (pronounced kai-wa) is an unusual and relatively unknown member of the cucurbit or cucumber family with a difference. Although they share family roots with cucumbers, squash, pumpkin, zucchini and melons, they arealmost completely immune to many of the diseases and pests that attack the other cucurbits – squash bugs, vine borers, cucumber worms and powdery mildew along with other fungal issues.
Achochaare hugely prolific both in leafy shade growth and fruit, making them a dual purpose plant for gardeners looking for a green shade or windbreak which gives a good supply of tasty food.
Originally domesticated in the Andes Mountains, the seeds travelled by trade from modern day Columbia in the north to Bolivia in the south. This ancient crop has been featured on pre-historic pottery and art and is discussedin the book “Lost Crops of the Incas” by the National Research Council. Today, they are widely grown all across Central and South America, as well as in many other parts of the world. For example, achocha is very popular in northern India, Nepal and Bhutan.

The seeds are very intriguing, looking much like flecks of bark or burnt chunks of a rough plant material. The color ranges from a medium brown to an almost black. Each mature fruit will have several seeds in it.
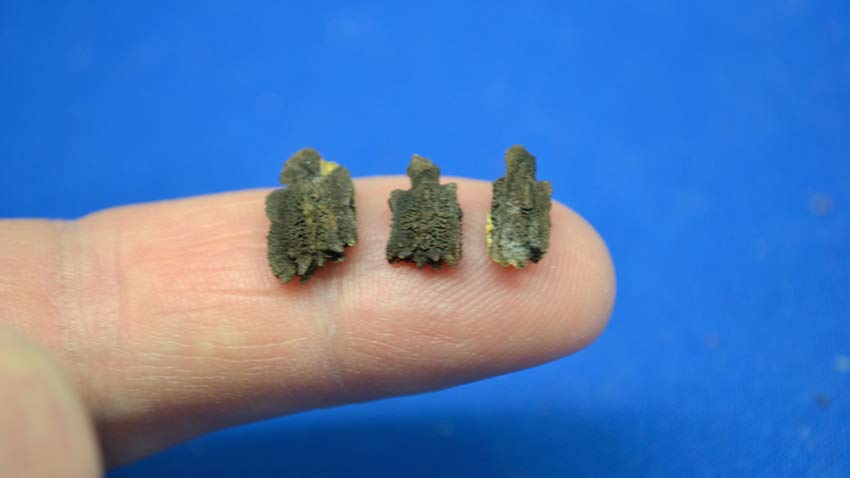
A close-up of the seeds shows how very different they appear from almost all other vegetables, and certainly other cucurbit family seeds.

Another look at the achocha seed. The majority of them have the little tail or protrusion seen here.
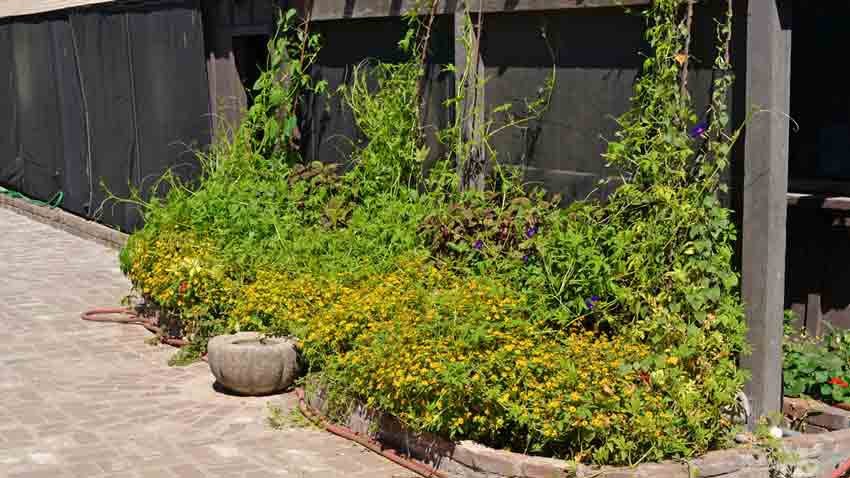
Achocha puts on vigorous vine growth with lots of leaves which provide a good shade for other crops. In areas with a long hot season, establishing them early will give better growth as they slow down during the hottest times. Giving them a bit of afternoon shade and protection helps them along, as they are seen growing up through a patch of Butter Daisies and climbing up a trellis.
This is a western facing wall, and they had a bit of a challenge in becoming well established with the afternoon heat. They had morning shade, but were exposed to full sun and heat during the hottest part of the day until almost sundown.
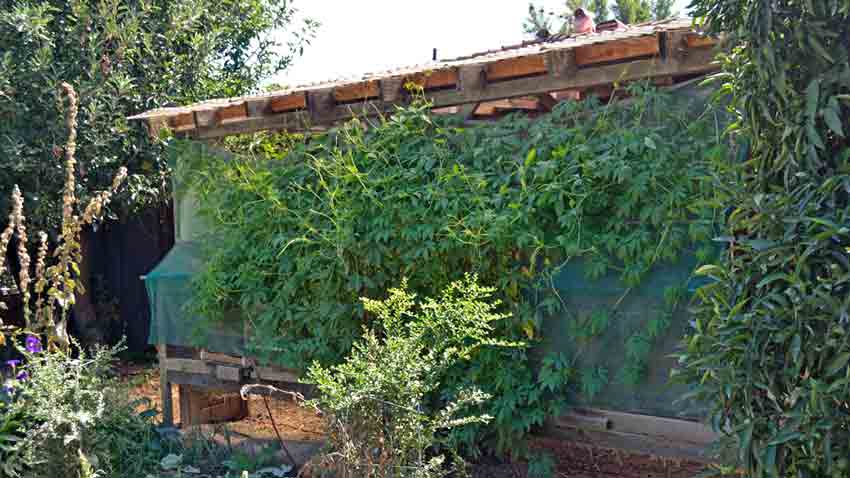
On the opposite side of the wide walkway, they are seen much more established and prolific. This is the east facing wall that is shaded from early afternoon, giving the plants enough protection from high heat and constant sun exposure to really take off.
This was the most productive planting, giving handfuls of fruit each harvest.

Cindy is holding a young fruit with the blossom cap still attached. At this stage the bark-like seeds are still fairly soft and immature. The fruit will not have completely hollowed out yet, but it is very edible and mild in flavor with a soft texture.
Once the plants begin setting fruit, they should be harvested regularly to encourage continued production. As they begin to produce, you will have handfuls of the fruit to work with!
The tiny, off-white flowers can be seen in the background. It is best to plant at least two plants so they can pollinate each other. The flowers will attract a number of smaller insects to help with pollination, among them the beneficial serphid fly which feasts on aphids, thrips and other soft bodied destructive insect pests.
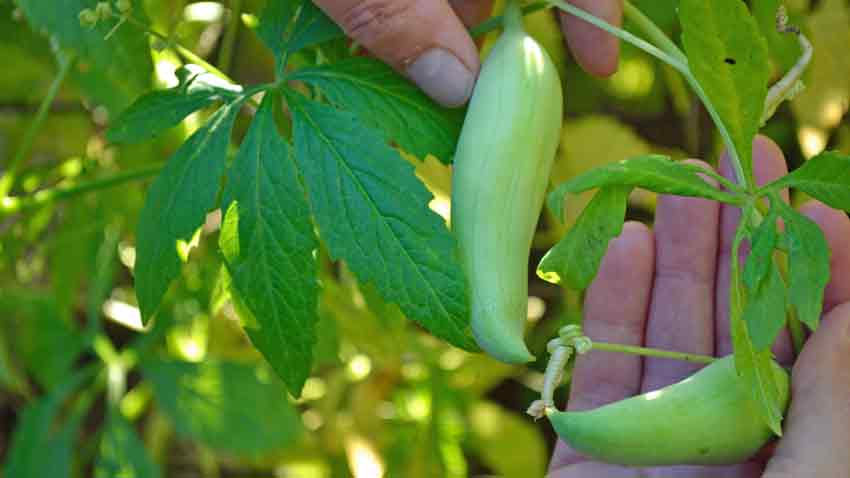
Another view of the size, shape and color of the achocha fruits, along with the foliage. There are a few different varieties of achocha – some with soft spines and a fatter fruit. Ours are more slender and smooth skinned with no soft spines.
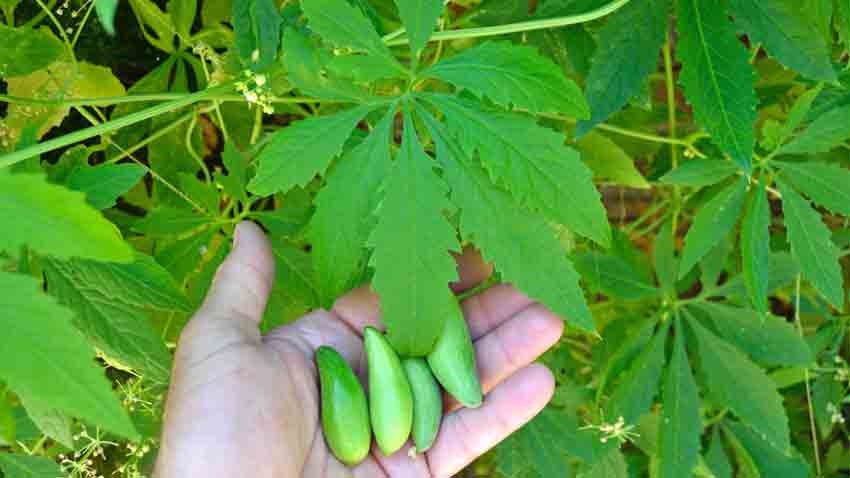
The foliage will sometime raise eyebrows and cause questions, as its long toothy leaves somewhat resemble another controversial plant. There is no relation, but it is a conversation starter!
One handful of fruit leads to discovering another, then another as well…

You’ll see why they have earned the name of “stuffing cucumber” when you slice them open and scoop out the seeds. There are enough recipes using them to fill a thick cookbook, but an easy and delicious starting point is to simply stuff them with sautéed sweet peppers and onions after slicing them open and just warming them up on the griddle.
Very colorful, unique and eye-catching along with being delicious, they will be the center point of the table.
In Central and South America the fruits are eaten either raw or cooked after removal of the seeds. They are also prepared as stuffed peppers; stuffed with meat, fish or cheese and then baked or fresh.
Kids often love to pick and eat them in the garden, and they make an excellent addition to salads. The tender shoots, tendrils and young vines are edible and eaten raw or very lightly cooked.
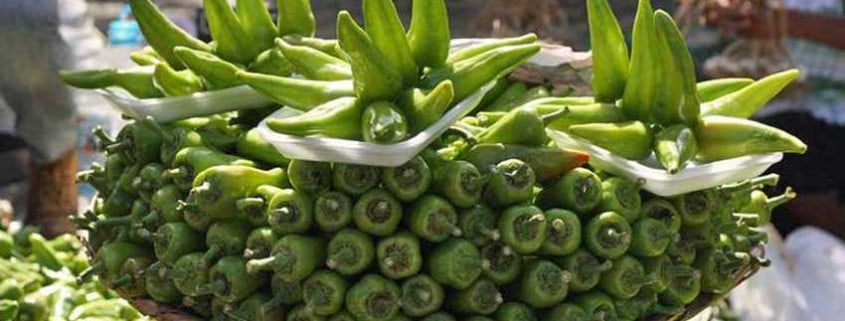
The Chile de Agua is a little known heirloom chile from Oaxaca, Mexico, grown in a small valley for at least three centuries and is slowly becoming better known and more popular in the US. It is one of the chile varieties grown in the ancient Milpa system of community gardening with companion planting using corn, beans, squash, amaranth, sunflowers and chile to feed and sustain the people in the community.
It is very much a local chile, until recently only grown in the valley of Oaxaca (wa-HA-ca) just north of the city of Oaxaca, Mexico. It is not grown commercially, so the production is relatively small and rarely makes it out of the surrounding area, explaining why so few people have gotten to know this remarkable chile.
Even though it isn’t well known outside of the area, the chile de agua holds a special place among other well-known chiles like the chile de arbol, serrano and jalapeño. Traditionally grown in semi-arid lands, it was planted when the seasonal rains began by transplanting seedlings into cone shaped beds made of adobe-like wet mud filled with leaf-cutter ant manure, then capped with more mud. The cap retained enough moisture in the soil for a few months if the weather didn’t cooperate, giving the village of Hidalgo Jaltepec fame for their yearly harvest of the chile de agua and their growing skills.
Chile de Agua roughly translates as “water chile” or “irrigated chile” and is grown almost year round now, selling for a large price premium in the open air markets of Oaxaca. They are sold in groups of six to twelve, fanned out in a circle on a small flat tray or large plate lined with a large green leaf. It isn’t uncommon to see the chile de agua selling for twice the price or more of any other chile at the market, selling out very quickly.
Characteristics
 They have a triangular, conical shape about 4 inches long and 1 to 1 1/2 inches wide at the shoulders, tapering to a pointed tip. The skin is shiny, smooth and slightly wavy with a moderately thick flesh. Almost all of the heat is located in the ribs which contain the seeds. The heat is moderated by sweet, almost herbal and slightly sour flavors overlaying the spiciness and giving the characteristic complex flavors. The chiles grow erect or pointing upwards and can be prolific in the right conditions. They have about the same heat as a jalapeño but with much more flavor, most often used fully ripe which is a medium-light green up to orange to moderate red in color.
The plants are bushy and mostly low growing, around 2 to 2 1/2 feet tall. The flowers are the usual white color, with a field of ripening chile de aguas a very colorful sight with the enormous numbers of chiles turning from a light spring green into yellows and oranges, finally finishing in a deep orange-reddish. They don’t all ripen at once, as the plant continues to set more flowers as the early season progresses, so the colors come in a palette of hues.
There has been some debate as to what is the “correct” form of the chile de agua, as there are some nurseries and seed companies selling seedlings and seeds with photos showing the chiles hanging down, or pendant. The physical form looks to be correct, but after researching the markets of Oaxaca and reading descriptions in current and historical literature, as well as chefs descriptions we concluded that the erect form is what has been known in Oaxaca for centuries and is the correct one.
Uses
 The fresh chiles are often fire-roasted, peeled and stuffed with a shredded meat and cheese filling; or cut into strips, sautéed with onions and epazote, then topped with fresh cheese and wrapped in warm tortillas. They are also commonly used freshly roasted in sauces, as well as being fully vine ripened and dried for a remarkably full-flavored powder, but less and less now as they are more valuable sold fresh in the market. Guajillo chiles have almost completely replaced the chile de agua as the main source of local dried chile powder, as they are more productive and less expensive in the market.
The Seed’s Journey
A search by a famous Chicago chef who specializes in authentic Oaxacan cuisine first introduced us to this unique chile. He needed the chile de agua for a special dish and couldn’t find the correct plants or seeds anywhere. One of our mentors who specializes on all things chile involved us in the search, as he thought we might be interested in finding an unknown but delicious chile to add to our offerings.
Through much searching and tapping into different networks, we came across a photographer working on a book about the restoration of the ancient milpa system just north of Oaxaca. This system has included the chile de agua for at least 300 years, as shown by Spanish documents, and most likely much longer.
The photographer obtained seeds from the local farmers, after email introductions and several explanations of why we were searching for this particular regional chile. There were initial concerns about our ethics and motives as farmers in the region had experienced theft of their seed sovereignty when corn they had grown and nurtured for centuries was obtained under false pretenses and later patented. After we explained our reasons for introducing the chile to American gardeners and restaurants, we were welcomed.
Evaluation and Grow-Out
Once seed from Oaxaca was in hand, we sourced seed from four other sources as comparisons in our grow-out trials. A grow-out is an evaluation of a potential new variety to see if it is true to its description and type, as well as if it meets quality standards for growth, vigor, production and flavor before it will be included into our growers rotation for seed production. Sometimes the initial evaluation takes a few years to really determine if the potential variety has the quality and characteristics needed.
After evaluating all four seed sources we found that only the original seed from Oaxaca met all of the standards, so it was rotated into the seed production schedule of one of our most experienced growers. Two years had been spent on the evaluations and another two years were needed to produce enough seed to be able to offer it to our market. The first year, all of the seed from the best plants were saved and replanted with the seed from the second year’s crop being offered for sale after seed from the best plants were held back as our foundation seedstock.
The entire process took four years to complete – from obtaining the different seeds for evaluation to having enough seed to offer for sale. This amount of time to introduce a new seed variety isn’t unusual in our line of work, as the last thing we want to do is race off to market with a brand new seed that we don’t have any experience with or knowledge of.
The true value of our work is shown in the comments of gardeners who rave about the flavors, production and gratefulness in being able to grow a variety which has sustained and nurtured a culture across several centuries. In choosing to grow these ancient and sometimes rare seeds over the more common and easily obtained modern varieties, gardeners continue a tradition started long ago and experience a direct connection to the flavors that could easily have been lost to history.
The beautiful thing for home gardeners today is the ability to easily choose and grow a number of heirloom vegetable varieties with amazing stories, beautiful colors, bountiful production and delicious flavors! Each time someone chooses to grow one of these heirlooms, they keep a particular piece of history alive in a real, tangible way.
Maybe you, too, will choose to grow a delicious bit of history in your garden this year!
This article was first published in Mother Earth News Organic Gardening Blog on January 14, 2016!
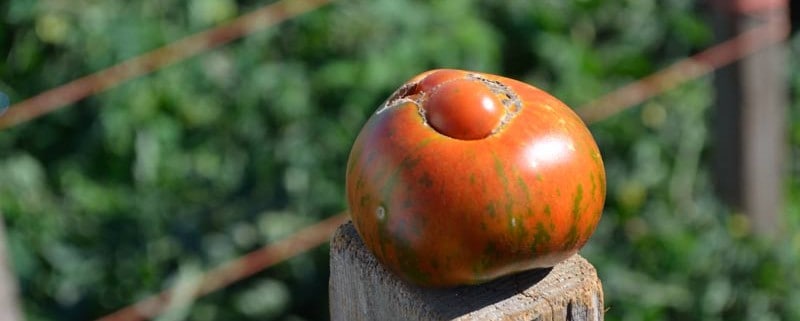
Heirloom tomatoes are available in a dizzying array of choices – colors, sizes, shapes, flavors and how they produce. Is a determinate variety best for your garden, or would an indeterminate be better for you? How to tell, and what do the terms mean, exactly?
While it may seem confusing, the terms are easy to remember and are pretty explanatory once you understand what they mean.
In a nutshell, the terms describe the growth and production habit of the plants. Determinate tend to be shorter and bushier, while indeterminate are taller and lankier. They also set or produce tomatoes completely differently!
What to choose and which type is best suited for your particular garden depends on a few things – how much space you have to devote to tomatoes, if you need or want to grow in pots or planters, how many tomatoes you can or want to handle at once and if you want most of your tomatoes in one harvest or prefer to get a few at a time.
Let’s look at the details.
 Determinate tomatoes are often called “bush” tomatoes, usually growing only about 3 to 4 feet high. These will grow to their full height, then start putting on tons of flowers – often covering the foliage with tiny bright yellow blossoms.
When they start setting blossoms at the very top of the plant, growth stops and all of the energy is put into producing lots of tomatoes at once. Usually the entire crop will ripen within one to two weeks, with the plant either dying or sometimes going dormant for a period before producing a second, smaller flush of flowers for a smaller follow-up crop. The second crop only happens in areas with a long growing season.
Because they are smaller and bushier plants, determinate tomatoes can be grown in containers, pots or buckets in small spaces where a taller tomato which needs staking won’t work. They don’t need pruning, as that only removes flowers and reduces production. Determinate tomatoes are great for gardeners who want or need a large harvest all at once or over a short time frame, such as for canning or making large batches of sauce or salsa. An added benefit is most determinate varieties are early producers. Some gardeners like determinate varieties as the early harvest allows them to get a good crop of tasty tomatoes and still enjoy a long summer vacation!
Some determinate tomatoes will benefit from staking or caging, but it isn’t as necessary as with indeterminate varieties. Those that need support don’t need much, just enough to keep them from toppling over if grown in a pot or container or from wind or rain.
Some of the determinate heirloom tomatoes we offer:
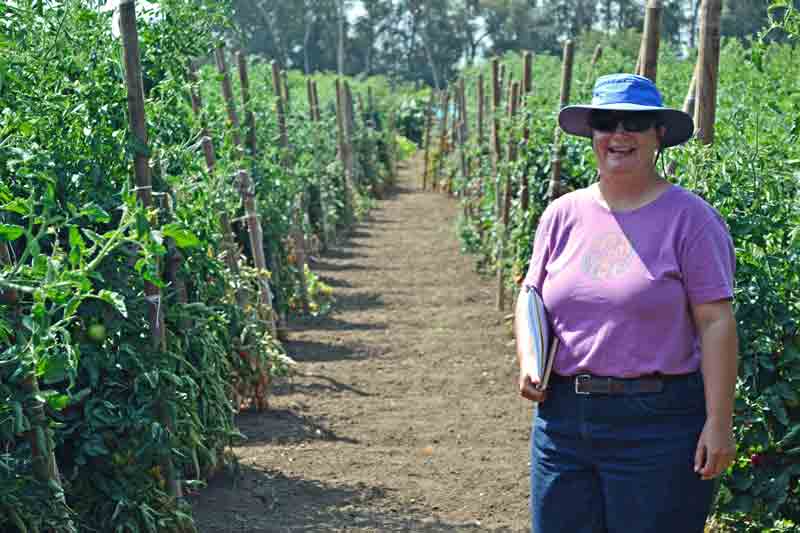 Indeterminate tomatoes are sometimes called “vining tomatoes”, as they will continue to grow throughout the season until frost kills them. These are what you’ve seen photos of showing tomato plants 10 or even 15 feet tall in a home garden. The greenhouse industry uses indeterminate tomatoes and will sometimes have tomato plants of 40 feet or more! The average height is about 6 to 8 feet for a home garden.
This type of tomato plant will grow some, set some flowers, produce fruit and continue to grow and repeat the process all season long. The amount of flowers and fruit set each time depends on the variety of tomato; some will only set a few flowers each time while others will easily put on 20 to 50 flowers for the smaller, cherry or currant size tomatoes. Indeterminate tomatoes really remind us these are tropical plants which are perennial in their native habitat. It isn’t unusual to find three year old tomato “trees” in Central America!
Indeterminate tomatoes are perfect for the home gardener who wants a smaller harvest several times during the season instead of one large batch at once. The amount of fresh tomatoes on your kitchen counter is easily controlled by how many plants are in the garden. Be warned, however, even indeterminate tomatoes can easily overwhelm the average home gardener’s kitchen with just a few too many plants in production!
Support for these tomatoes is essential for good harvests and to keep the plants healthy. Indeterminates can be allowed to sprawl – we have done it many times – but it becomes a lot of work to lift and move hundreds of pounds of vines to pick the tomatoes, and lots are lost to not being able to see them and they rot on the ground. Support systems like cages, staking, trellising and such will go a long way to keeping these monsters manageable. Heirloom tomatoes can easily have stems 1 ½ inches in diameter at ground level, so make sure the support structure is solid and able to hold a hundred pounds or more of tomato plant weight.
Pruning is optional, with some swearing by it while others don’t find it helps tomato output very much. Your climate has a lot to do with it, as those in humid climates will see benefits from pruning the bottom 10 – 12 inches to improve airflow and prevent the lowest fruit and leaves from touching the ground, inviting pests and disease into the fruit and plant. We have experimented with pruning and found for us in our climate early pruning prior to transplanting is beneficial, but we don’t see any improvement in production in pruning after transplanting and have actually seen a decrease in the size and amount of tomatoes on pruned plants.
One technique that helps end of season fruit ripen better is to prune late flowers that don’t have a chance of producing fruit before frost. This re-directs the plant’s energy into the ripening fruit and not into flowers that won’t bear anything.
Some of the indeterminate heirloom tomatoes we offer:
Many gardeners will grow both types, with an emphasis on one or the other depending on their needs. Some will do a few indeterminates for fresh slicing and salad tomatoes all season, with the majority of the plant being determinate for their well-known spaghetti sauce or signature salsa that is canned or frozen for the upcoming year. Others want to do smaller batches of different sauces or salsas or have a smaller kitchen and just can’t can a couple of hundred pounds of tomatoes at once.
Now you’ve seen how both types can be beneficial, you can choose what works best for your garden!
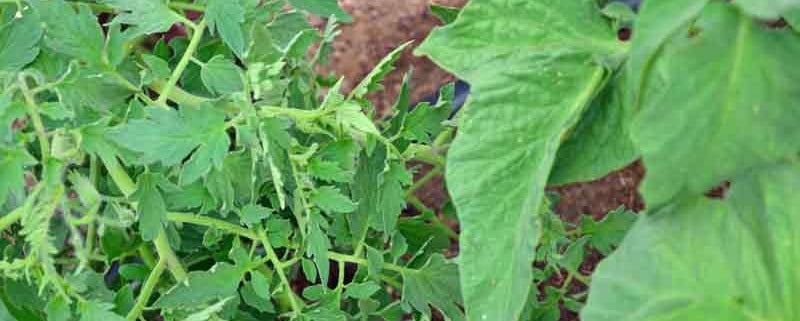
Heirloom tomato leaves have two main different and distinct types of leaves – potato leaf and regular leaf. Plants with regular tomato leaves are what we are all familiar with; multi-lobed, serrated and sometimes almost toothed branching off of the stem. Potato leaved plants have broader, smoother single leaves branching off of the stem, missing the multiple lobes and serrations.
Regular Leaf Tomatoes
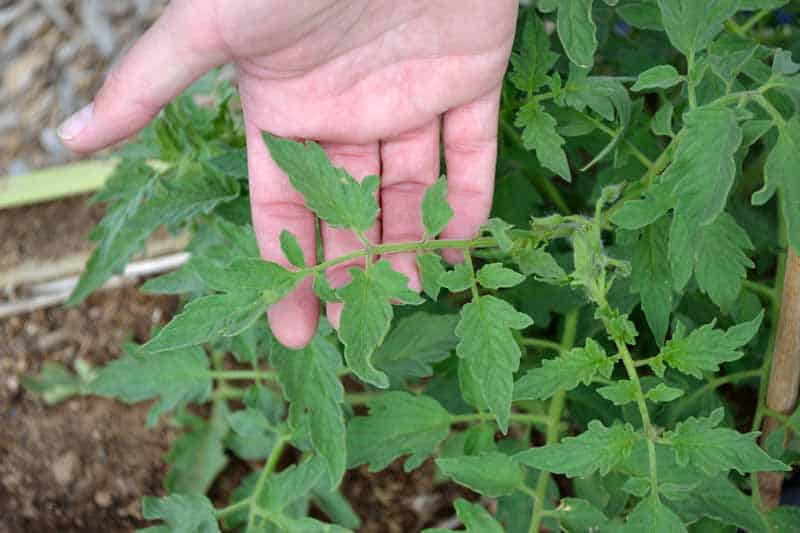
These are by far the most common and well-known type of tomato leaves – they are what we think of when we think of “tomato plants”. The shape and color of the leaves can vary – from slightly serrated to extremely and from a light pale green to a deep dark green and almost a bluish leaf. The width and length of the leaf can vary a lot as well from small narrow leaves which almost always curl to long and wide leaves that droop.
Potato Leaf Tomatoes

As mentioned above, these leaves are almost always much bigger and smoother on the edges than regular leaves, with more heft. They look much more like potato leaves than tomato leaves, thus the name. Potato leaves tend to give more shade to a plant than regular leaves, due to the larger area that the leaves have and more shade from each leaf.
Examples of potato leaf tomatoes are:
There doesn’t seem to be much difference in growing the two different types of tomato leaves; one is not more productive, flavorful or pest and disease resistant than the other, or tolerant of heat or cold. They just have different leaves.
One thing of note is that as far as we can tell, all potato-leaved varieties are heirloom or older varieties. We haven’t been able to find a hybrid that is potato-leaved.
Have some fun in your garden this season and try one (or more) of these unusual but delicious heirloom tomatoes!
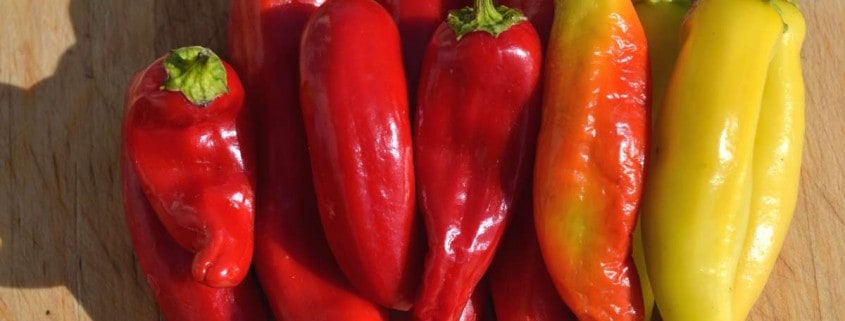
September in northern Arizona means a few things – the weather starts to cool off and the nights become very enjoyable, the garden seems to find another gear as the energy-sapping heat begins dropping off and we harvest some of the most amazing colors and flavors of vegetables.
We’ve taken some glamour shots of the garden’s bounty and wanted to share them with you, along with tips on how we’ve enjoyed preparing them in different dishes.
Remember as you look at these vegetables to not worry if you can’t plant and taste these this year or season; see what appeals to you and either buy them now or add them to your Wishlist. Seeds are good for more than one year, so buying them a few months before planting will not have any impact on their germination next season. Just store them in a cool and dry place, then you can plant and experience all of these colors and flavors for yourself, straight from your garden!
Click on the links in the descriptions to visit them in our online seed store!
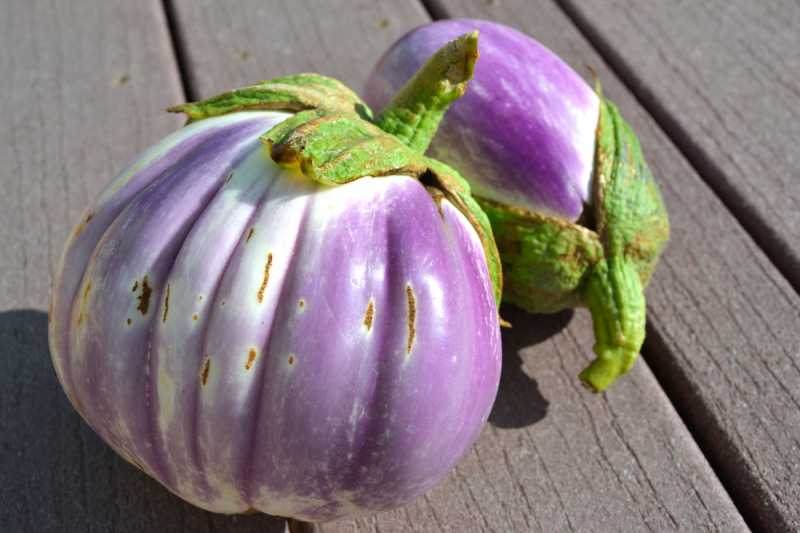
Fresh Rosa Bianca eggplant Рbeautiful, firm and tasty without any trace of bitterness. Eggplant can be quite delicious when grown in your own garden, harvested fresh and cooked soon after. We peeled and sliced this, slowly saut̩ed it in olive oil and added it into a fresh roasted tomato sauce. It easily stood with the intense roasted tomato flavors without getting lost or overwhelmed.
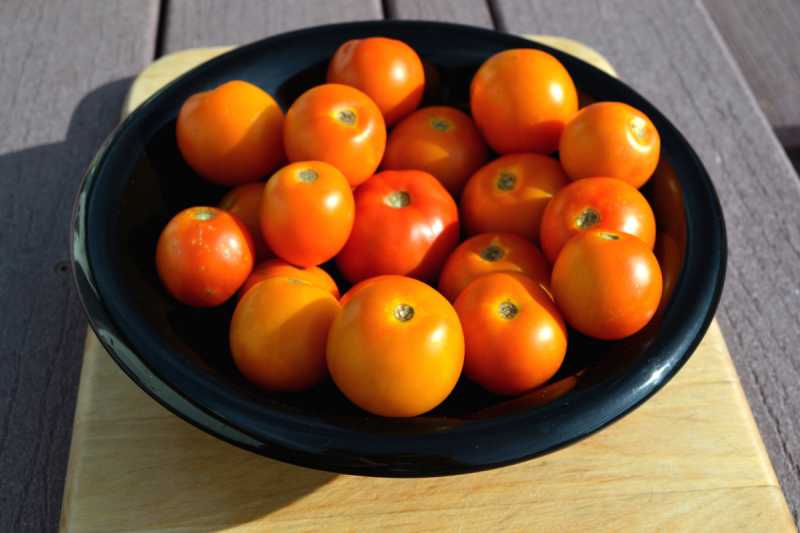
Flamme or Jaune Flamme Tomato – apricot size and color, French heirloom tomato that came on early and is still producing strong late into the season. Really a wonderfully delicious tomato with an immediate, intensely sweet flavor that is soon balanced by a smooth tartness and fruit overtones. The complex flavors last on the tongue, making a second and third bite inevitable.

A different angle on the Flamme tomatoes.

Jubilee tomato – Absolutely delicious golden tomato with very little gel, lots of meat and long lasting flavor. Flavor is immediate with a balanced tart and sweet profile and very full. Many yellow tomatoes have a milder or blander taste, as if the flavors were diluted – not the Jubilee! Excellent fresh as a slicer and as a unique flavor in a fresh roasted pasta sauce – doesn’t get lost in rich red paste tomatoes and adds a brightness to the sauce.
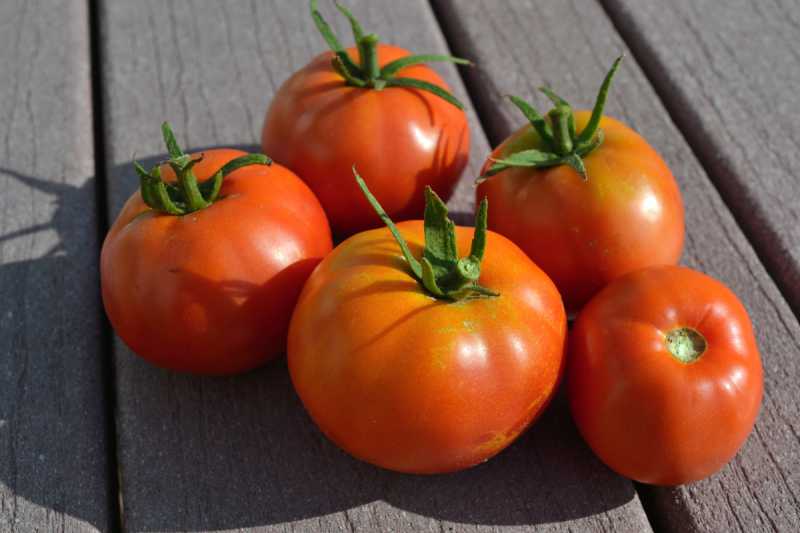
Box Car Willie tomato – Most “old-fashioned” heirloom tomatoes have a strong to very strong acid content that contributes a tartness that sometimes becomes quite a bite. Not Box Car Willie – it has an immediate, forward flavor that starts off with a moderate tartness quickly followed by a mild sweetness, balancing the flavors out. Overall the impression is a slightly tart, yet mildly sweet smaller beefsteak tomato that is really enjoyable sliced fresh or juiced. When sliced it retained most of the juiciness inside the fruit and didn’t leak all over the cutting board.

Box Car Willie Tomatos sliced open.

Speckled Roman tomato – Meaty and moderately sweet with little juice or seed cavity, these are great on salads or as an appetizer dish where their unique and eye-catching colors can be shown off. Their flavors back up the show, making this all the more valuable in the garden. One of the all-purpose tomatoes that we turn to – it is excellent freshly sliced, in salsas and adds a fruit note to sauces or soups as well.
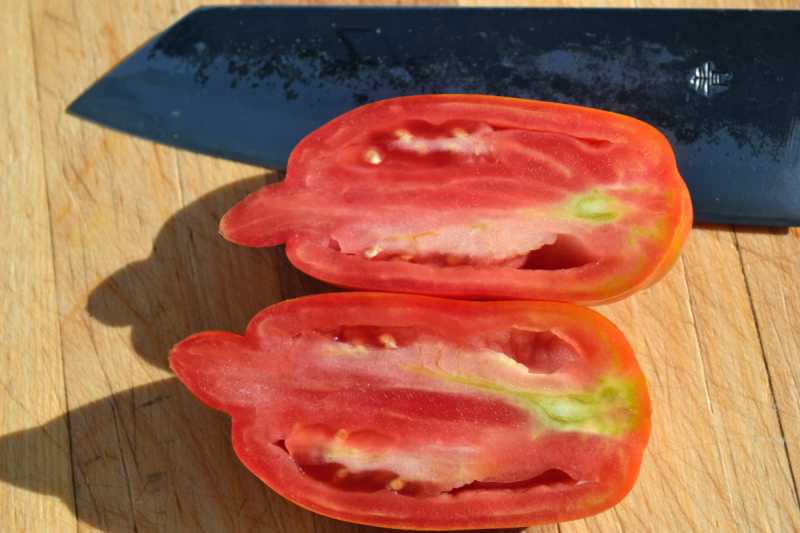
Another view of the Speckled Roman, showing the interior.
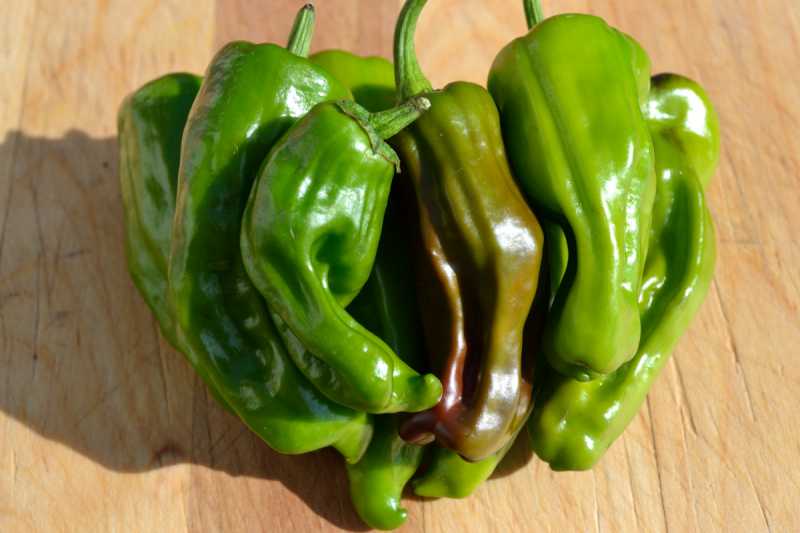
Pepperoncini Pepper – These are pretty common peppers, but the taste and flavors when grown at home are unlike anything you’ll find in the store. This probably explains why these continue to be a popular variety that continues to find new fans each year. Mild yet flavorful, these work well in many dishes that need a bit of pepper flavor without overbearing heat.
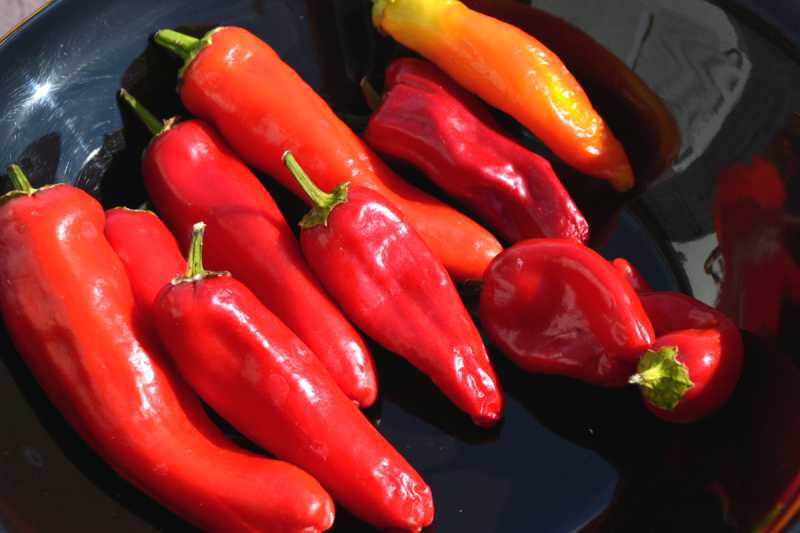
Hungarian Hot Wax Pepper – The wilder, spicier relative of the Sweet Wax pepper! Moderately warm without being overly hot with a tangy but slightly sweet flavor. Watered well, the heat is moderate but can be cranked up by restricting water. Excellent when de-seeded and dry-fried with garlic and onions on a hot cast iron pan, then added as a topping to a pizza.
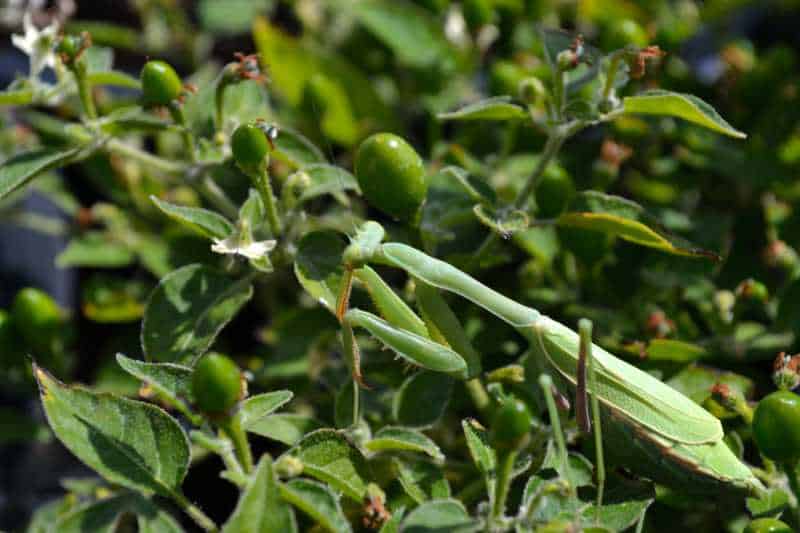
Long revered in Oriental cultures as a symbol of mindfulness, calm and patience, the preying mantis is also a good sign in the garden as a pest patrol.
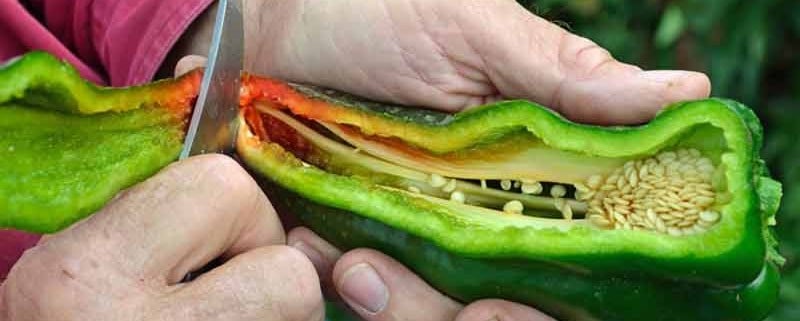
One of the wonderful things that we get to do in this business is visit seed growers. Most of the time the visit is to inspect the crops or harvest for that season, looking for potential challenges or quality issues that must be addressed. Open pollinated seed wants to “drift” or change and adapt to current conditions, and it is our job to keep true to the characteristics that made it so worthwhile to be passed down from generation to generation.
Other times we get to visit a grower or breeder to see what they are working on, which becomes a highly educational day in the fields for us. This is just such an occasion.
We were invited to south-eastern Arizona to spend the day with a world-class chile breeder. He currently supplies most of the chile seeds for the Hatch chile growers in New Mexico, and has been breeding and refining chiles for about 30 years. As an example, he obtained seeds for the “Sandia” chile from growers in the Albuquerque area almost 20 years ago and has doubled the production of that chile, while retaining it’s remarkable flavor and compact, bushy plant characteristics that have lots of leaf shade to prevent the young chiles from becoming sun scalded. He combines traditional plant breeding with extensive selection and very close observation, only choosing to keep the very best plants for seed.
We first met him at a Master Gardener conference where he presented a talk about the genetics of the breeding he was doing, explaining how much more complex a chile plant is than a tomato, with the resulting complexities in breeding and selecting to get certain characteristics to come through reliably. He has studied the DNA of the chile plant extensively, and has collaborated with university research projects working to identify and map the chile genome to better understand how and why it grows and reacts the way it does.
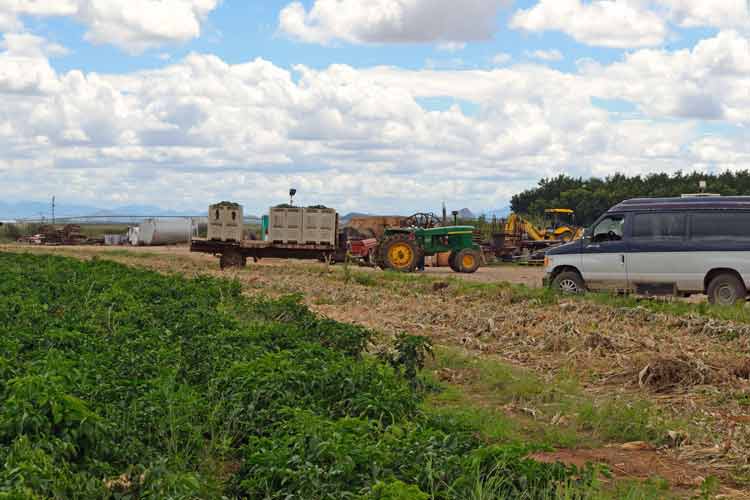
When we first pulled up to the growing field, we weren’t exactly sure what to expect. From our conversations with him, we knew he was growing several dozen chile varieties on a few hundred acres, but we didn’t know how. Chiles will readily cross pollinate, creating a mess for growers and especially breeders. As we parked, a tractor was already pulling a flatbed trailer out of the field loaded with freshly harvested chiles.
For all of the photos, click to see them full sized.
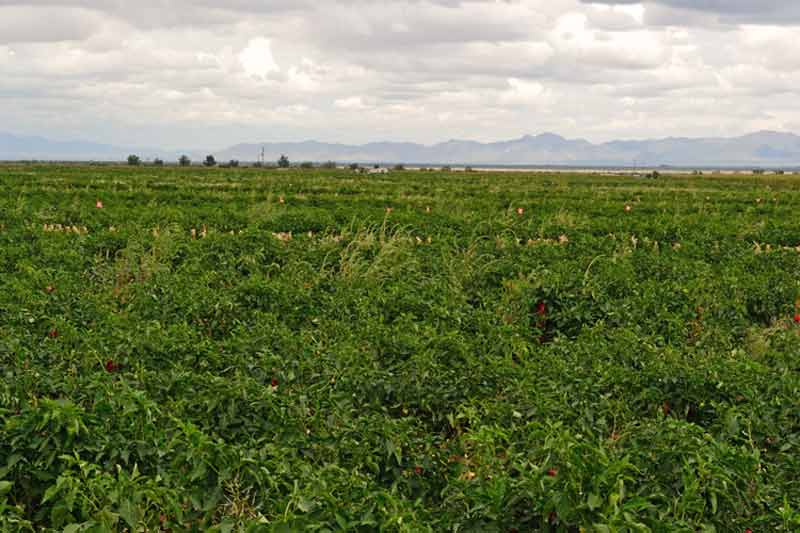
Looking out across the fields, you can see fluorescent flags in the middle distance. It is easier to see if you click on the photo for the full size. These are the primary plants that show all of the desirable characteristics or traits that the breeder is looking for, so they are tagged and will be allowed to fully ripen, then the seeds will be collected to be replanted next year. All of the surrounding chiles will be harvested for use as fresh green chiles.

This is where it all starts, with a single flower. One flower, successfully pollinated, will give you one chile with seeds. These particular chiles have a good amount of seeds, but there are some that we have grown for us that only produce a few seeds per chile pod, so they are much more labor intensive and more expensive to grow.
Chile flowers are classified as “perfect”, meaning that each flower has both male and female organs. The anther or male portion produces the pollen and is seen extending out from the flower in the above photo. The stigma is the female organ and it is beneath the flower petals and underneath the anthers.
Flowers begin appearing when the chile plant starts branching and the process of flowering is called “dichotomous”, meaning that the plant produces one flower, then two, then four, eight, sixteen and so on. There will be many, many more flowers than fruit, and a larger percentage of the early flowers produce fruit than those later in the season.
Chiles are surprisingly temperature sensitive, as they produce the most fruit when nighttime temperatures are between 65° and 80°F, almost stopping by 85°F and the pollen aborts when daytime temperatures are above 95°F. This is why home gardeners will shade their chile or pepper plants in the summer in hot locations. To read more about this, see Grow Better Peppers with Shade.
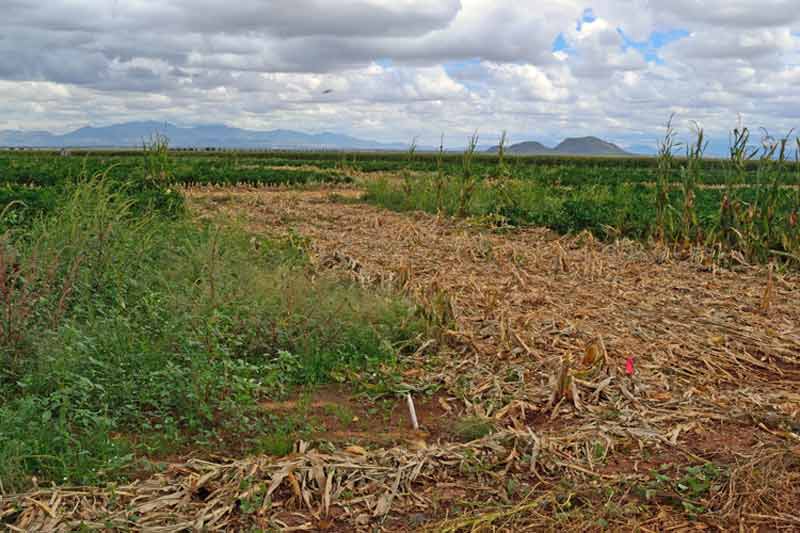
Gardeners with some experience often ask how we isolate the different varieties of tomatoes, peppers or any of the different cultivars we offer so they do not cross-pollinate. There are three main methods of isolation – time, distance and physical isolation. Our growers use all three of these techniques to grow more plants for seed, which increases production.
Swaths of corn are used at this location for isolation. It is planted earlier than the chiles in rows that are about 15 feet deep and seeded fairly thickly. The result is tall barriers that inhibits the travel of pollen from one plot of chiles to another and has proven itself to be highly effective through both field trials and laboratory testing.
When the corn has matured it is harvested and the stalks are removed, making it much easier to access the chile plots. By that time the chiles have flowered and produced the first couple of flushes of fruit which the seed will be saved from. Later pollination of fruit is picked and used as fresh chiles, with the seed not being saved.

We had camped in small secluded campground the night before, with a strong weather warning for the next couple of days due to a tropical storm working its way inland from the Pacific.
This is how we started our day, with clouds getting stronger and the wind picking up until the mountains to the west were getting drenched. The rains then turned toward us and we were forced out of the fields just after noon.
![]()
Keeping track of all of the individual plots is done both by hand and with modern technology. A hand drawn map is used in the field to verify and make notes, with the information being transferred to a computer file later.
There is a team that works to keep the quality high – the breeder and farm owner, a field foreman and two highly experienced plant identification specialists that spend lots of hours each day in the field with the foreman, looking at and evaluating each individual chile plant for the characteristics that are desired. Those plants are then identified, tagged and tracked throughout the season.
If a plant continues to perform to standards, the chiles will be harvested and the seeds saved for next season. If even one trait or characteristic is found to be below standards, the markers are removed and the fruit is harvested as fresh chile to be eaten and the seeds are not saved.
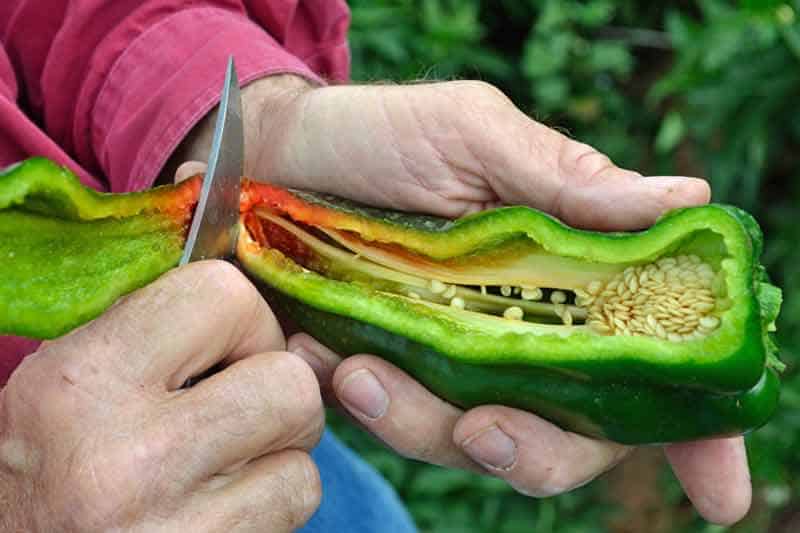
The field inspections of chiles was a highlight of our day! This chile is just starting to ripen past the green stage. There are sometimes 15 different characteristics that are desired and evaluated in a single chile – many not having to do with heat or taste.
If you click into the larger photo, you will see the thickness of the flesh better. This shows how fertile the soil is, as poor or unsuitable soil will not grow thick flesh and the skin will be slightly to noticeably bitter. The breeder has shown me photos of chiles that have a flesh 3/8 of an inch thick! This is extremely good soil for growing chiles.
This particular chile only grows two ribs down the center of the fruit where the seeds are attached to. They know to cut the chile open from the side to see into the chile for evaluation.

One thing we learned is that the capsaicin or heat is located along the ribs of the chile. Mild to moderate chiles will have the majority of the heat here. This is primarily true for most chiles, though some of the hotter varieties will contain additional capsaicin in the flesh.
Once again, clicking into the larger photo will show the yellow capsaicin better. It is located on the bottom rib and is a very light yellow color. It was very educational to taste the chile flesh, which was very flavorful and mild and then touch the rib with the capsaicin and taste it. The heat was immediate and surprising for such a mild chile and lasted for several minutes on the tongue. This is why many recipes will say to remove the ribs, as it strips out the majority of the heat!

The capsaicin can be easily seen on the top rib as a light yellow line that follows the flesh, with the tip of the knife pointing to a heavy spot. This chile has a good amount of capsaicin on both ribs and would give an unsuspecting person quite the surprise!
His focus with chiles is on the milder varieties, such as those grown in and around Hatch, NM.

We talked about different characteristics being selected for in the plots and here is a representation of some of them. At first glance, these four chiles seem to be all the same – large, green and fairly flat. In fact, these are all different cultivars; bred, selected and grown for different markets.
The top one is grown for fresh chile sales at Mexican markets – this is what traditional Mexican households are looking for in size and flavor for specific dishes with fresh green chile. It is too long for canning, as the chile will fold over in the can – making it undesirable for whole canned chile use.
The second from the top is grown for the canning companies – it has a “crown” where the stem is, making it easier to de-stem by machine. In fact, the term is called “de-stemability” when looking at the characteristics.
They will pick a chile, grab the stem and snap it off of the top. If it comes off whole without taking any of the chile with it, that is good. If part of the stem remains, or some of the chile is removed – that is not acceptable.
The third chile is preferred for fresh stuffing use as it is flat and wide and is perfect for Chile Rellenos.
The bottom one is perfect for fresh roasting, as it is rounder so that it will tumble in the flame roaster and is longer and wider than the canning chile. The stem is a bit smaller and tighter than the canning chile as well, which is desirable for roasting as you don’t want to lose the stems in the roaster.

It is easier to see some of the physical differences in this shot.
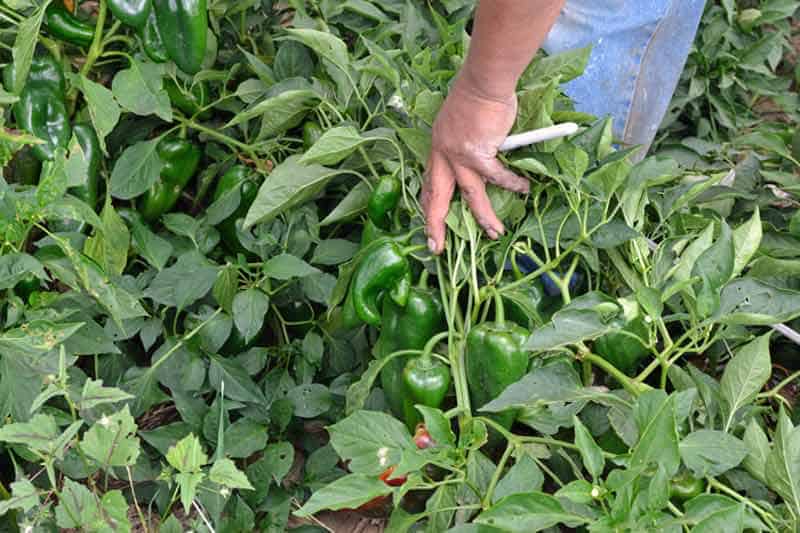
For the breeder, flavor is most important followed closely by productivity. We must have tasted a hundred chiles during our time in the field and left with both of our arms full of chiles that had been picked and tested for de-stemability or other physical traits and were then waste. We loved it!
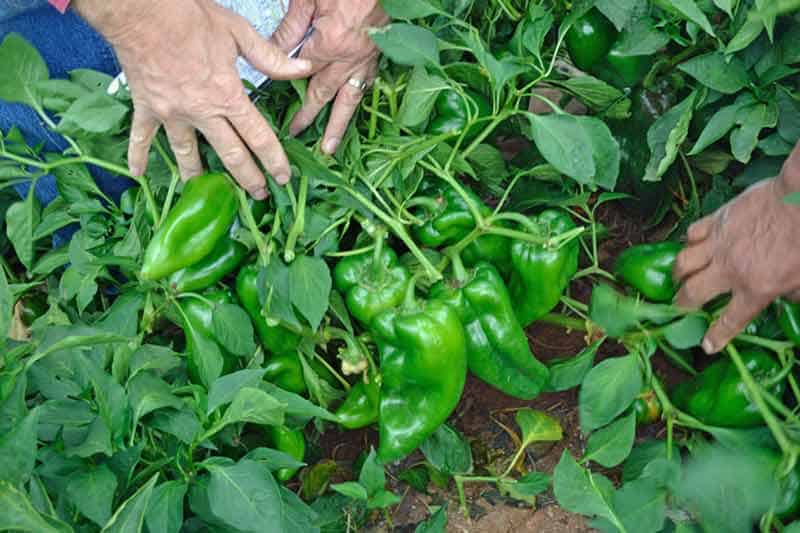
Another look at the production capability of a chile plant. They select for smaller, more compact plants with larger chiles and lots of leaf cover to shade and protect the chiles from sun scald and hotter temperatures. More leaf cover also keeps the soil cooler which keeps the flowers cooler, maintaining a better pollination and fruit production environment.
It quickly became apparent that there were many other traits that had been identified and were selected for beyond just flavor and size or appearance of the chiles that contributed greatly to the overall quality and flavor of the chiles. Lower plants that had thicker stems so that the chiles didn’t break the stems from the high production and large sizes were part of it. More leaf cover with larger leaves was another. Tolerance and resistance to disease, sun-scald and other challenges were more traits actively encouraged.

Remember how we talked about isolation in a previous photo? Here’s another example of isolation that is being used to actively improve the chiles in the field. These are isolation cages or tunnels, put over the chile plants after they are sown to exclude any insects or pollen drift from other chile plants. This prevents cross-pollination and only allows the chiles inside the cage to do the pollination. These cages were just slightly taller than the chile plants and some were hundreds of feet long – as long as the row of chile plants.
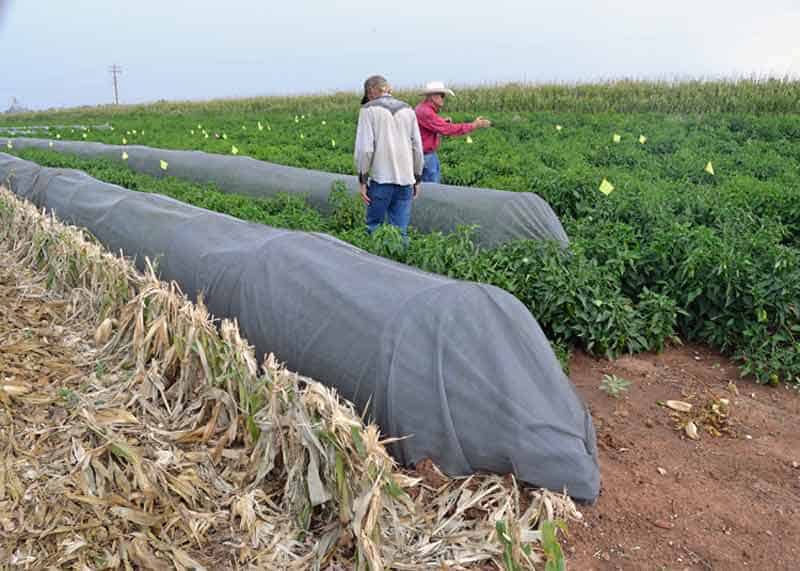
Here’s another look, showing two different types of isolation in one photo. The remains of the corn row isolation between plots is next to one of the isolation tunnels, with the field manager and breeder as we saw them most of the day – heads down looking at chiles with their hands full of chiles. The yellow flags are tags of specific plants that have been identified as having the traits or characteristics they wanted.

The isolation tunnels don’t prevent sun or water from entering, only insects and stray pollen.
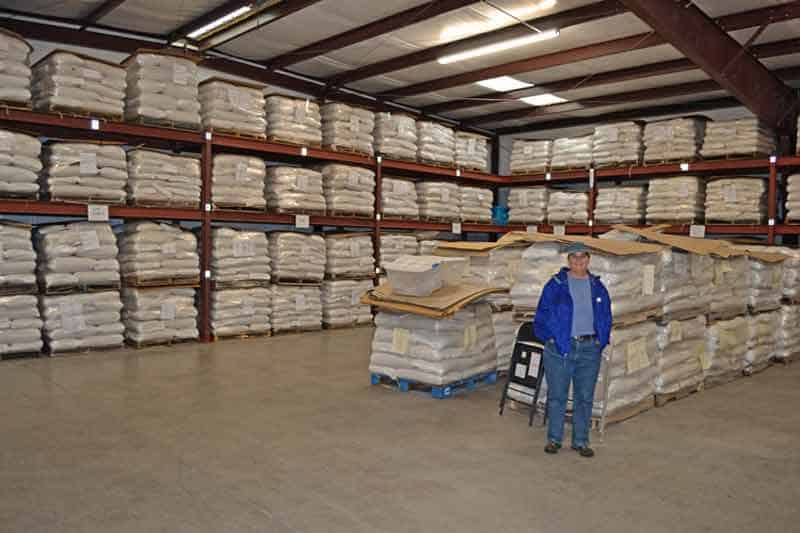
After we were chased out of the fields by the rains, we got a tour of the processing facility where the truckloads of ripe red chiles were cleaned, de-seeded and dried. The dried chile pods are sold to a company that makes chile paste and sauces, while the seeds are sold to the New Mexico chile canning companies and grown around Hatch, NM and surrounding areas.
We were treated to seeing how much seed is involved in an operation like this – lots and lots! The warehouse is climate controlled for temperature and humidity and is stacked full of chile seeds. Most will be sold to the commercial growers of fresh green chiles, but there is a deep store of multiple years worth of breeding stock seed. There are backups upon backups going several years back, all labelled and coded with details so that they can be easily reached if needed, or if there is a crop failure due to weather or insects.
This level of backup and redundancy is absolutely necessary as a breeder, as there is nowhere else to turn if a crop fails or things don’t turn out well. We felt very privileged to see and spend some time in the seed warehouse!
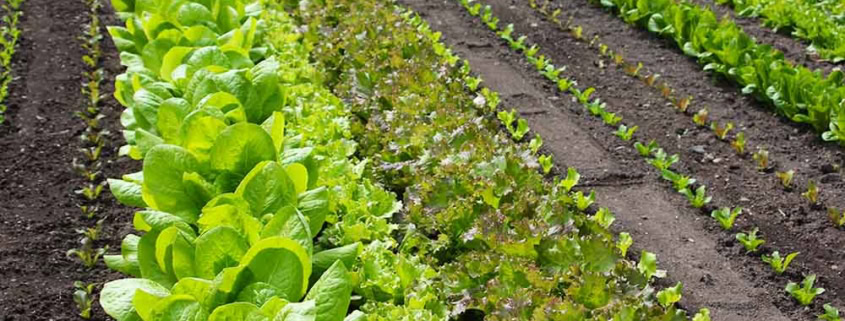
Transform your garden with succession planting. Learn how to create a continuous harvest of fresh vegetables, herbs, and flowers throughout the growing season.
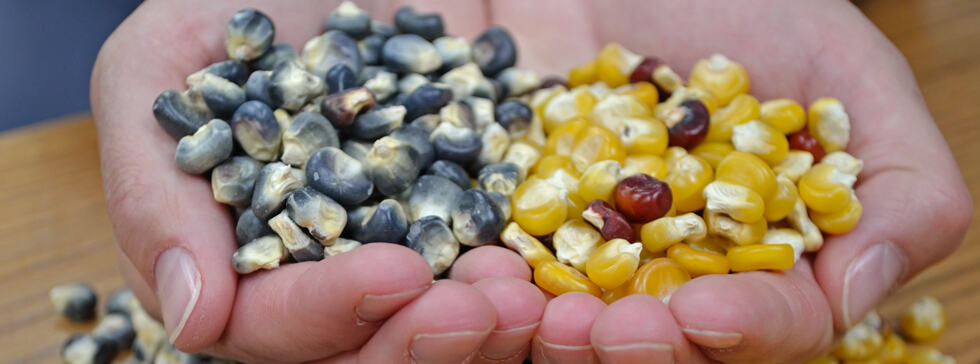
Heirloom corn is gaining in popularity as more people taste the vast differences and depths in flavors compared to commercially grown hybrid sweet corn. Comments like “It tastes more like corn than any store-bought corn I’ve ever had” and “The flavor lasts much longer and is much stronger than what I’m used to,” are common when people first taste roasted heirloom corn.
What many don’t realize is there is much more to discover in heirloom corn than just the sweet, fresh eating varieties. After all, corn has been the foundation of nutrition in Mexico and Central America, as well a surprising amount of North America.
William Woys Weaver does a marvelous job of introducing and explaining the different types of heirloom corn in his extensive book Heirloom Vegetable Gardening, the result of over 30 years of growing, tasting and cooking with heirloom vegetables.
Types of Corn
The Indians appear to have categorized their corns by intended use: for flour, for hominy and porridge, for popping, and so forth. Each corn had its adjunct ceremonies and festive recipes. We have inherited some of these corns from native peoples, and we have selectively borrowed some of their dialect names (such as flint) for types of corn, but we use them in much different ways. The profundity of the changes that occurred as the cultivation of corn shifted from the Indian to the white man is acutely evident in Porter A. Browne’s Essay on Indian Corn (1837), which cataloged thirty-five of the most commonly raised varieties at the time. Very few were pure Indian sorts, and only a couple are known today; the rest are probably extinct.
Browne organized his corns by color. Among the yellows he listed King Phillip Corn, which is still available. Under white corn, he mentioned Smith’s Early White and Mandan, in this case a sweet corn, not the Mandan corn familiar to seed savers today. His list of red corns was the largest, including Guinea Corn, William Cobbett’s Corn, Dutton Flint, and a curious Mexican corn “found in a mummy.” Perhaps the Mexican corn released in the 1860s by Massachusetts seedsman James J. H. Gregory attempted by virtue of its provocative name to cash in on a similar implied ancient authenticity, like the Anasazi bean of today.
Horticulturists divide corn differently than did either the Indians or the early corn specialists like Browne. All of the cultivated varieties belong to the same species and therefore readily cross with one another. In fact, corn is one of the easiest of all garden vegetables to cross, since it relies on windblown pollen for fertilization, and even the slightest puff of air can carry pollen a great distance. This promiscuity results in many varieties that fall between the five or six recognized types generally accepted by horticulturists. Of the garden varieties, these include popcorn (var. praecox), dent corn (var. indentata), flint corn (var. indurate), soft (flour) corn, and sweet corn (var. rugosa). If this discussion is shifted to Mexico, everything is turned topsy-turvy by the huge number of corns that evolved there. Their complicated pedigrees were analyzed in Paul Mangelsdorf’s Corn (1974), one of the breakthrough studies on the origins of this plant.
Popcorn is one of the oldest and hardiest of all the types and can be grown where many other corns do not thrive. It can be planted earlier in the spring than other varieties, but of course it will cross easily with any type of corn planted near it. Since popcorn pops best when the kernels are over a year old, this is a corn that must be allowed to ripen on the stalk, then properly dried indoors before storing in containers free of insects and moisture. Freezing it immediately before it is popped will increase the rate of popping. I have included two old varieties in my selection that not only pop beautifully but have a flavor not found in modern commercial varieties.
Dent corns are characterized by a dent or crease in the kernel, hence the Indian name “she-corn.” This type of corn is starchy and is generally used for roasting, corn bread, and hominy. It is a type best acclimated to the South and Southwest, where it seems to have developed the greatest number of varieties. Flint corns are the northern counterpart to this type. The kernels contain a high percentage of opaline, a mineral that gives the corn it’s gritty or “flinty” texture when ground. Flint corns are normally used for grits and hominy, as are many field corns.
Flour corns or soft corns are characterized by a kernel that is mostly starch when ripe, and therefore lends itself to grinding for flour. All North American Indians involved in agriculture maintained flour corns of one kind or another. Even though they are believed to have had a tropical origin, corns with this genetic feature were among the first to be dispersed by the Indians to all parts of our continent. The Tuscarora corn on my list is one of the classic Eastern corns of this type.
The Indians of North America distinguished between two types of sweet corn, the “green” or unripe corn of most corn types when they are in the so-called “milky” stage, and a corn with heavily wrinkled kernels that is naturally sweet by genotype. The sweet corn of white culture is this latter type. Historically, true sweet corn was a latecomer, reaching what is now the United States in the 1300s. It originated in Peru, where it is still used to make chicha, a fermented drink made in pre-Columbian times. Sweet corn derives its sweetness from a recessive gene, a mutation that has made it defective in converting sugar to starch. This characteristic was utilized by Native Americans for storing slow-ripening late-season varieties as “fresh” corn during part of the winter or for caramelizing the corn while in the husk over hot coals. This slow drying process resulted in a sweet-tasting dry corn that could be eaten as a snack or used in stews and vegetable mixtures.
According to anthropologist Helen Rountree (1990, 52), the Powhatans of Virginia made a corn-and-bean dish called pausarowmena that served as a staple dish during the winter. In the late summer, “green” corn or a variety of sweet corn was harvested and roasted in the husk over hot coals until dry and slightly caramelized, very much in taste and texture like the present-day dry sweet corn of the Pennsylvania Dutch. This dry sweet corn was stored in middens and reconstituted as needed with water. It was stewed with two types of beans, a large pole variety and a small bush bean. This combination of dried sweet corn and two distinct types of beans constituted the real “succotash” of the Powhatans and related peoples in the Middle Atlantic region.
Planting Corn
All open-pollinated heirloom corn must be planted differently from hybrids. For best results, plant the seed in blocks or squares 5 to 6 rows wide. John Brown, a farmer who lived on Lake Winnepesaukee in New Hampshire and who developed the variety known as King Philip Corn, noted in The Report of the Commissioner of Patents (1856, 175–76) that farmers in his region were still planting corn “the old way” in rows 4 feet apart in hills 3 feet from one another, four to six plants per hill. This method works well for heirloom varieties and will ensure good pollination with room between the hills for squash. Pole beans may be planted among the clumps of corn and allowed to climb up the stalks.
Among the Indians in the East, corn seed was generally treated in an herbal tea before it was planted. F. W. Waugh described some of these decoctions in Iroquois Foods and Food Preparation (1916, 18–20). After soaking in the tea, the corn was left wet in a basket so that it would sprout a little before planting. This treatment was thought to protect the corn, and may in fact have produced an odor to camouflage it from birds and insects. It had the additional benefit of separating viable seed from weak ones and avoiding seed that might otherwise rot in the ground.
From this, we hope you’ve gained a deeper appreciation for the extensive uses and different types of heirloom corn and are inspired to give one or two different types a try this season! Visit our online store to see some storied varieties of corn.
With watermelons, both size and flavor matter. Heirloom watermelons grown at home will give the absolute best flavor and taste, regardless of size.
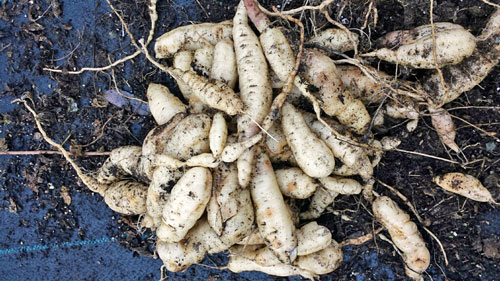
Cucamelons can act as a perennial if you are lucky enough to live in a climate where they can produce tubers, or radish-like roots. The first year they will produce as normal by starting to fruit around July until the first frost stops them. As they start to slow down, search around in the soil by gently exposing some of their roots to see if they have produced tubers. They will be a white to off white color and look something like radishes. If you see them, you can store them in a protected area over the winter and replant them next spring for extra early and larger harvests of cucamelons!
To store them, gently lift them out of the soil and stored in very slightly moist compost or potting soil in a cool but frost-free area. Next spring, wake them up by transplanting into pots early to mid-April in moist compost or potting soil and place them in a well-lit, sunny room. Plant in the garden into warm soil after the last frost date. These second year plants will take off sooner, producing flowers and fruit much earlier, giving you a longer season and greatly increased harvest.
If you live in an area that doesn’t get much frost, then you can overwinter the roots in place by insulating with 6 – 8 inches of straw mulch and lightly moistening it. They will be able to survive temperatures down to freezing with this approach. To ensure that the roots are less likely to rot in the cool moist soil, make sure that there is plenty of sand in the soil to allow the excess moisture to drain away.
If desired, the roots can be gently uncovered and transplanted much like above after overwintering in place to increase your yearly harvest.
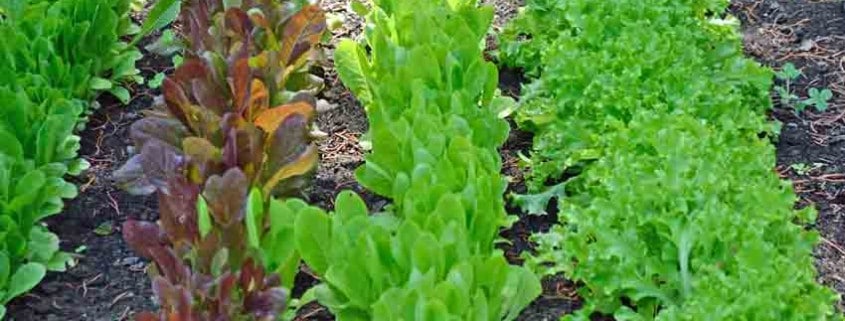
When lettuce is mentioned, many think of the standard iceberg lettuce found in supermarkets and restaurant salads. That is changing with the growth in popularity of the different types of lettuces from Romaine to head and leaf-type lettuces, mainly due to the flavors and colors that they offer from deep red to almost white and noticeably sweet to tangy and slightly bitter. Iceberg lettuce, originally bred as a hybrid, is now offered as an open pollinated variety and has been around long enough to be considered by some as an “heirloom”!
We have come to expect lettuce year-round, mainly due to being educated by the supermarkets as to what our vegetables should look like, taste like and when they should be available. Many are surprised to find that lettuce is a cool season crop and will bolt or go to seed readily during late spring and summer months. It is best planted early in spring and then again in late summer or early fall when the temperatures start to cool off.
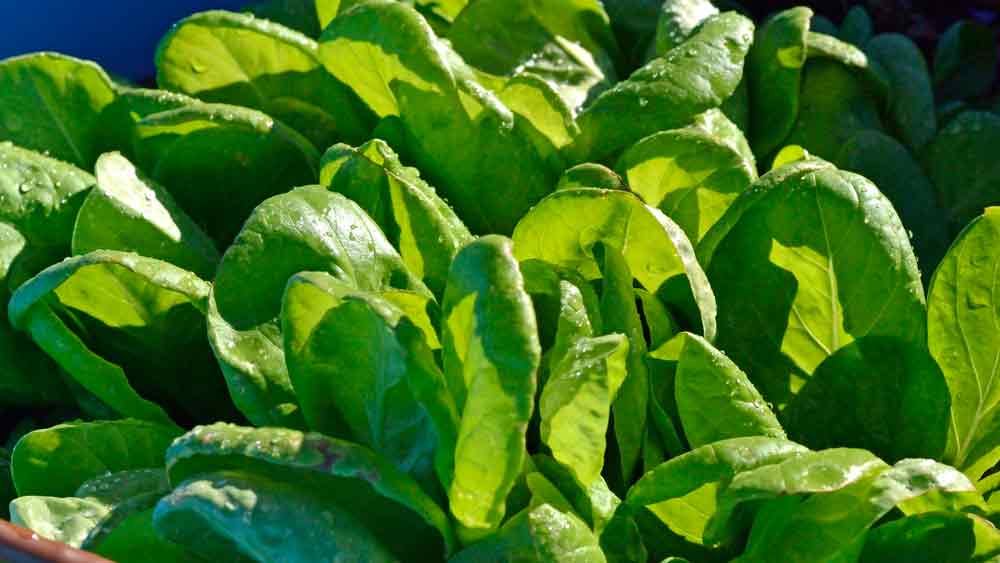
Saint Anne’s Slow Bolting Lettuce
Lettuce seeds won’t sprout when soil temperatures are above 80°F but they will start to germinate as low as 40°F, making it ideal for early and late season planting. A plant hormone is produced under warm conditions that stop the germination process, called “thermo-inhibition”. This is a carryover from wild lettuce that originated in the Mediterranean Middle East, where summers are hot with little moisture. If the lettuce seeds were to sprout under these conditions, they would soon die out and the species would go extinct.
Thanks to traditional plant breeding and selection of heat tolerant characteristics over a number of years, there are several varieties of lettuce that are more heat tolerant and are open-pollinated – meaning you can save seeds from year to year. Some examples are Saint Anne’s Slow Bolting, Summertime, Black Seeded Simpson and Jericho. Just because these are heat tolerant doesn’t mean that they will grow through the summer, only that they won’t bolt or turn bitter quite as quickly.
Thanks to ongoing research on lettuce traits, there are some techniques to extend the sprouting for lettuce seeds into the warmer months that home gardeners can use. The optimum soil temperature for most lettuce seeds is 68°F, with some varieties sprouting in the 40 – 75°F range. The temperature of the soil must be taken, not just the air temperature which can be several degrees different.

Jericho Lettuce
In warmer temperatures, imbibing or soaking the seeds in water for at least 16 hours before planting in a well-lit area will increase the germination percentages greatly. Red light has been found to be the best color, but many home gardeners won’t have access to a non-heating red light and sunlight or full-spectrum light was found to be almost as good. Soaking the seeds in the dark in warmer conditions decreased their germination rates. Another technique that has shown to be successful is to soak the seeds in cool water in a well-lit area for 16 – 24 hours. This approach has increased the germination rate up to 97% when planted in warmer conditions. Soaking for less than 16 hours has little to no positive effect on germination. For a closer look at what happens when a seed goes through germination, read our article “Starting Seeds at Home – a Deeper Look”.
Other successful methods of extending the season for lettuce in the garden include laying a thick mulch of straw or wood chips on the ground of at least 1 1/2 to 2 inches. This insulates the soil from becoming too hot and drying out too fast and helps to preserve moisture in the soil. Shading the lettuce plants can give enough of a temperature drop to keep them from bolting, sometimes up to 3 – 5 weeks. Shade can be from a shade cloth on a row cover or hoop type structure or companion planting of tall wide leafed plants such as some types of pumpkin.
The traditional rule of thumb of “plant early and plant often” for lettuce can also be said as “plant late and plant often”, but some of the more heat tolerant varieties, along with soaking in the light and providing some mulch and shade can greatly extend your lettuce season in the garden this year.
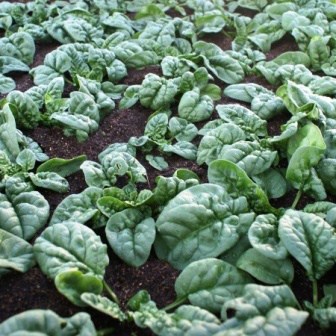
After Ellen’s article about “Alternative Spinach Greens” she now tells us more about the original spinach. Grown in the cooler season in a rich soil, spinach is delicious – juicy with a nice crunch to it; a mildly sweet flavor and no bitterness. Sort of like a bolder leaf lettuce.
There is little written about the history of spinach. It is a common sight in the grocery stores and at farmers markets. In most areas it is hard to find spinach year round at market, because its season is so short lived, just 6 weeks or so.
Spinach seed germinates best in soils that are 40- 70 degrees F and prefers cool days and nights. At 40 degrees F it may take spinach two-three weeks to germinate, but most seeds will sprout. Whereas waiting for warmer soil temps to plant spinach one will see a decrease in germination and faster emergence of seedlings.
Spinach does well from March through May and again September through November. Spring plantings should be planted 6 weeks before the last frost in moist, nitrogen-rich soils. Consistent watering will produce a long harvest and the best looking leaves. When temperatures get warmer, watering twice a day and the cooling effects of shade cloth will help prolong harvest. Spinach’s season is short and perhaps that played into its status as the first vegetable to be frozen for commercial use.
Fall plantings also do well and will regrow in the spring, providing a few extra and welcome harvests early in the spring when everything is just getting started.
There are two types of leaves on spinach. Smoothed leaf spinach produces an oblong, dark to light green leaf. Savoy-types have slightly crinkled leaves with thicker dark green leaves. Regardless of what kind of spinach you grow, spinach is a well-loved vegetable.
The vegetable was probably bred from Spinacia tetranda, a wild edible green found in Nepal. In 647 AD spinach was taken from Nepal to China where it was referred to as the “Persian green.” Spinach was introduced by the Moors of North Africa to Spain in the 11th century. By the Middle Ages, spinach was grown and sold throughout the rest of Europe, and in England was known as the “Spanish vegetable.” It was not until the 1400’s that spinach became a staple in Mediteranean cooking.
Catherine de Medici, Italian royalty of the 1500’s, preferred spinach over other greens. When she left her home in Florence to marry into the French royal family she brought cooks with her to prepare her favorite spinach dishes. Dishes that are served with a bed of spinach are known as “a la Florentine” in her honor.
Breeding work with spinach began in earnest in the early part of the 20th century when breeders started selecting and hybridizing spinach varieties with disease resistance and those that are slower to bolt. One of the best-known varieties came from that period: ‘Bloomsdale Long Standing,’ a slow-bolting, savoyed spinach that is popular today.
Elevate your summer meals with the crisp freshness of heat-tolerant greens. From Red Orach to Red Aztec Spinach, these greens will transform your dishes.
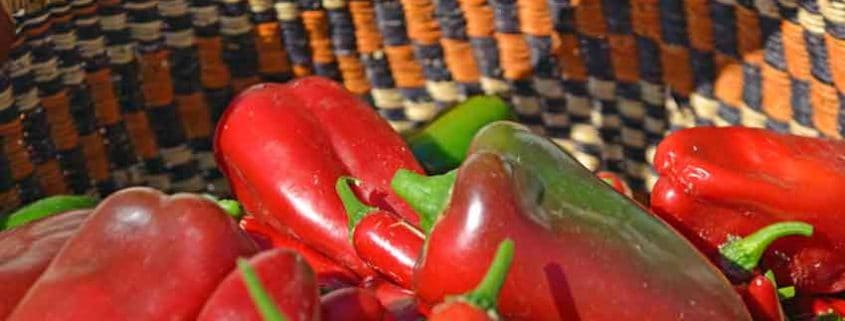
Sweet peppers and hot chiles are an important part of almost everyone’s garden, though in different ratios for many! Some really enjoy an abundant late summer and fall harvest of sweet bell peppers while others look forward to the hot chile harvest for months ahead.
One of the main concerns with growing peppers or chiles is the drop off in both quality and production during the height of the summer heat. As the long, hot days of summer set in production drops while diseases increase such as blossom end-rot and sunscald. There are some surprisingly simple approaches that can make a big difference in this year’s harvest of your beloved sweet peppers and hot chiles!
Mulching is one of the very first techniques that has been demonstrated as beneficial to both quality and quantity. Combined with a drip system on a timer, large improvements to the health and vitality of the plants can be seen quickly. These two factors improve the stability of the soil moisture levels, moderating the peaks and valleys from wet to dry. This reduces the stress levels on the plants as they are able to access water on a continuous basis. The mulch insulates the soil and top levels of roots from drying out too quickly and often brings the moisture level up to the surface of the soil, instead of a couple of inches down. Another benefit to mulching with at least an inch of straw type mulch is the temperature insulation of the soil. Reducing the heat gain in the upper levels of the soil improves the plant’s amount and quality of production.
Shading of the pepper plants was recently examined with experiments done in Mexico, Spain and Israel as well as by the University of Georgia. They studied different shade cloth levels impacts on pepper production from 2008 to 2010 with four different levels of shade alongside no shade as the standard. They measured the air temperatures and the soil temperatures and correlated these changes to improved or reduced quality and quantity of peppers. The amount of peppers lost to rejection for quality reasons were closely examined.
What the study has shown is a moderate amount of shade, such as a 30% shade cloth, is the ideal. More shade didn’t produce better peppers past the 30% shading. In fact, as more shade was applied, the plants grew more but produced less peppers with more defects that caused them to be rejected. The moderate shading reduced the heat stresses by lowering the air and root zone soil temperatures, while decreasing diseases such as sunscald and blossom end-rot.
It is interesting for us to note that these exact same approaches have proven to be the key to successfully growing tomatoes through the hot summers in Phoenix and Tucson, where daytime highs can reach 110 – 115°F! The use of raised beds, drip systems on timers, thick straw mulching and shade cloth allows the pollen to be under the critical 90°F for enough of the day to continue producing tomatoes.
If you have had problems in the past with peppers, chiles or tomatoes slowing production and having disease issues with the onset of hot weather, try these growing tips to get you back on track!
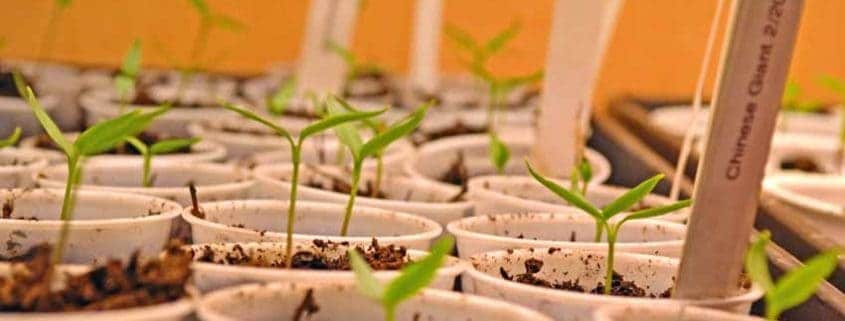
Are they called peppers or chiles, and why? I prefer to call them chiles and here’s my reasoning: In the Aztec’s Nahuatl native language, the word is “chilli”, which was changed to “chile” by the Spanish who were looking for a new source of black pepper and discovered these fiery little treasures. For me, chile is closer to the original name and meaning.
One of the mainstays of the garden, they are often started from seed or bought and planted right along with their travelling companions from the central Americas, the tomatoes. Humans have been eating chiles for at least 7,200 years, from archaeological evidence in Mexico and have grown them for around 6,100 years. For those that aren’t chile-heads, these sweet or hot little packets of history can be either boring or scary. Some gardeners will plant the same variety of green bell pepper year after year and not think too much of what else is on offer, while others are very concerned with the amount of “fire” some hot chiles pack. There is a lot of room to explore the world of chiles without being either bored or burned.
Chiles can be grown with great success in many varied garden climates across America. They are very adaptable to different conditions and have travelled widely, establishing themselves in many different locations and cuisines around the world. With a background understanding that they are a tropical plant originating in Central America and the following growing tips as a guide, you can have the tastiest, most colorful and most productive chiles or peppers from your garden this year. Here are some tips to help you along the way!
Use these tips for a great season of chiles or peppers, however you want to call them! Let us know how yours do this year, and if you have experiences or tips listed that would help others, please share them!

San Marzano tomatoes are world-famous with a long and storied history as the absolute best plum tomato for sauce and pizza. They are also excellent for canning, peeling and drying. Chefs worldwide prefer this variety to all others for making their signature sauces, and it is the only tomato that is acceptable for making true Neapolitan pizza. Many Americans are becoming fans and learning why this tomato created the peeled and sauce industry in Italy and across Europe.
San Marzano tomatoes are named for where they originate, the Campania region of southern Italy above the “toe” of the “boot”. Valle del Sarno is the valley where the recognized and protected variety is grown. The reason for this strict preference is the soil – a rich volcanic soil from Mount Vesuvius – that gives the tomato its distinct richness and depth of flavor. In fact, they are the only tomato that can be used for a true, recognized Neapolitan pizza! People who have tasted the native tomatoes grown in the volcanic soils claim that they can tell the difference between tomatoes grown there and those grown elsewhere, even if it is similar soils.
San Marzano tomatoes are thinner with a pointier end than Roma tomatoes, with a noticeably richer and mildly sweeter flavor. It has a thinner skin with fewer seeds and a meatier flesh than the Roma, with a higher pectin content that produces the thicker sauces it is famous for. This famous variety was developed from traditional breeding of three Italian tomatoes in the late 1800s; the King Umberto, Fiaschella and the Fiascona. Only the King Umberto tomato is still grown!
San Marzano tomatoes have been commercially popular since around 1875 when the first cannery was built to pack and ship these jewels across Italy and Europe. The popularity of the San Marzano declined during the 1970s as hybrids gained popularity for their thicker skins and tolerance of machine harvesting and marketability, but saw a resurgence in the late 1990s as people realized the flavor that had been lost with the original. Of 27 cultivars being grown in the Valle del Sarno area in the early 1990s, only 2 were selected as being the most representative of the traditional San Marzano. In 1996 the European Union granted Protected Designation of Origin status to the San Marzano tomato.
The San Marzano Redorta is one of the more popular cultivars of San Marzano due to its larger size and prolific production. The name creates some confusion, as this tomato comes from the Tuscany region, which is north of Campania where the tomato originated. It is supposedly named for a mountain – Pizzo Redorta – in the Lombardy region near the Italian Alps, which is much further north still. So, a larger version of the treasured San Marzano that is from Tuscany and not Campania, yet named for a mountain that is almost the length of Italy away? Stranger things have happened!
We do know that it is a great tasting and producing tomato with all of the traditional characteristics that have made the San Marzano tomatoes famous and have brought it back to being a heavyweight in the sauce tomato world. Whether you grow the traditional San Marzano or the Redorta, the flavors and production are sure to win you over.
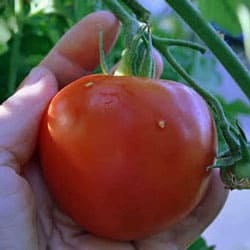
One has created a following based solely on its incredible flavor, the other has long been the benchmark of mediocre, tasteless, pithy but brightly colored tomatoes. Available 365 days a year, it’s only offering to the salad or sandwich is a bit of bright red. Why do these universally yucky tomatoes exist, and why do the supermarkets continue to sell such an obviously inferior product?
Consumer demand is the main reason, as most commercial growers state that they are only paid on the weight, not the flavor, of their tomatoes. This traces back to the tomato breeders, as they are responding to the grower’s inputs of what they need – a plant that will yield as much as possible over as long of a time as possible. The fruits must withstand being harvested, packed, and stored in a warehouse where they are turned orange with ethylene gas, then shipped by truck several states away and continue to look good a minimum of 7 – 10 days later when displayed on the grocery store shelves. If the grower has no financial incentive to produce flavor, they won’t.
Here’s a new wrinkle to the story. The growers are not completely at fault, it turns out. Recent research published in the journal Science isolates a gene mutation that is responsible for the almost artificially bright red, at the cost of flavor. This gene mutation was accidentally discovered by commercial tomato breeders and then bred into the majority of tomatoes used in supplying the food chain, especially in the off-season. This is not a genetically modified organism (or GMO) as the gene mutation happened spontaneously, and not through mechanical gene manipulation.
This is truly a story of unintended consequences, as it clearly shows the unwanted results of focusing and breeding too closely on one desired characteristic while ignoring others. The color mutation also turns off the ripening sequence gene, which disables the tomatoes’ ability to manufacture sugar in the body of the fruit, explaining why the lack of flavor. Dr. Ann Powell, a lead author in the Science paper offered this solution to the flavor issue – heirloom tomatoes, as they do not have the genetic mutation!
Flavor Is the Price of Tomatoes’ Scarlet Hue, Geneticists Say
Finding and picking perfectly ripe heirloom vegetables or fruit seems second nature to some, but those new to gardening can be confused and frustrated by the seemingly endless choices. One the one hand, you don’t want to pick too early and miss out on the scrumptious flavors, but you also don’t want to pick too late and not only miss the flavors, but lose the time and work of growing the vegetables in the first place. What’s a hard-working home gardener to do?
Do not use size (or color) alone to choose when to pick, as most of us are used to the size and color of the supermarket produce, which is not an honest or accurate measure to use for your veggies! Most home grown produce will be a bit smaller, more colorful and a bit less uniform in appearance than the supermarket equivalent. Heirloom vegetables grown at home will mature over a span of a few days to a couple of weeks, so you have time to let things get a bit riper if needed. No need to rush.
Use your sense of sight, touch, smell and taste to determine when to pick. Gently feel the tomato to see if it is soft and slightly yielding, or still just a bit firm. If it feels like it is ready to pick, gently pull the tomato just a bit. If it is truly ripe, it will almost fall off into your hand, if not it may need a day or two more. Give the melon vine the slightest pull to see if it slips from the melon. Smell the skin to see if it has that deliciously ripe tomato perfume, that heady melon scent or if it needs just a day or two more. Watch the colors change on the peppers, feel the skin and flesh change from firm and unyielding to slightly pliable to see when the flavor is best. Gently squeeze the okra, fondle the eggplant, watch the translucence of the pea pods fill with young luscious peas. Gardening is a full contact sport, and not just in the physical sense. It requires, engages and tunes all of your senses to learn when everything is at its absolute peak ripeness and therefore peak flavor and nutrition.
When in doubt, always take a taste test to see if your other senses are right, or they need a little education and fine tuning. Don’t be afraid to taste! Most of us have been educated on what to expect with vegetables from the supermarket, which is very misleading. Supermarket produce is specially selected to be picture perfect; everything else is discarded or used for other products. Every time you do a taste test, you become more in tune with the flavors and timing of your particular garden, and your particular vegetables that are growing there. This is called terroir, and your garden has its own special brand and flavor of terroir! With a little time, you will know exactly when everything will be at the peak of its flavor, and can plan some scrumptious meals around them. Once you have experienced the magic of a ripening garden, you will never forget the sights and smells.
It’s usually best to pick in the cool of the morning, as the evening’s growth is completed and flavor is at the day’s best. Cool evenings are a good time to pick as well. Make sure to plan ahead if you need chilled vegetables such as salad makings and pick ahead of time. Harvesting the day before will give plenty of time to get things chilled without losing any flavors that you’ve worked so hard to grow.
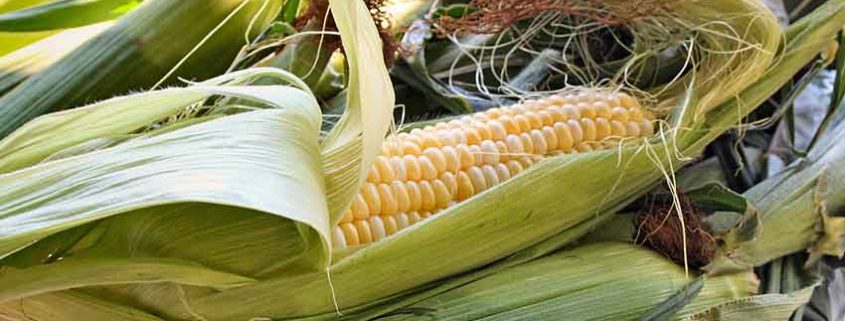
May is the traditional month to plant heirloom corn. A direct-sow crop, it must not be planted too early as it needs warm soil. Continuing with our historical heirloom history series, below is an excerpt on Sweet Corn from the 1884 “How The Farm Pays – The Experiences of Forty Years of Successful Farming and Gardening” by William Crozier and Peter Henderson.
Sweet Corn
“It may seem presumption in me to instruct the farmer how to grow corn; but as their methods of growing this special variety of corn for table use are probably not as well known as for the field varieties, I will here give them.
All the varieties of sweet corn may either be sown in rows four and one-half feet apart and about six or eight inches between seeds, or planted in hills at distances of three or four feet each way, according to the variety of corn or richness of the soil.
The smaller and earlier varieties as the Tom Thumb and Early Minnesota, may be planted in hills two feet apart each way. The taller variety of the richer the soil, the greater should be the distance apart. Such later varieties as Egyptian and Evergreen require to be planted at least three feet apart, or even more, on very rich soil.
We make our first plantings in this latitude about the middle of May, and continue successive plantings every two weeks until the last week in July. In more southern latitudes, or in warm, light soils at the north, planting is begun a month earlier and continued a month later.
I have repeatedly sold it in the New York markets, realizing as high as $200 per acre, and this, too, at the first wholesale price, the consumer paying about twice as much. An ordinary yield is about 11,000 ears to an acre. In such cases, however, it was either an early crop or a very late one, bringing two or three dollars per 100 ears, while the intervening crops, which came in competition with the full market, often sold as low as seventy-five cents per 100 ears.
The importance, then, will be seen, of striking the market at such seasons when the article will be scarce. The quantity of seed required per acre is from six to eight quarts.”
It is very interesting how much attention was paid to the “richness” of the soil. Also, some great pointers to think about if you are trying to bring corn to the local market.
Here are some thought-provoking yield comparisons to our modern corn production. The average yield for commercial hybrid corn in 2010 was 152 bushels per acre. In 2010 the average price of corn was between $3.50- $4.00 per bushel. A bushel of corn in ears is 70lbs.
Higher production yields have not actually produced more income for the farmer in 128 years, due to several factors! Inflation is one of the biggest, but commodity pricing structures are a close second.
Just for comparison, that $200/acre in 1884 would be worth about $4800/acre in 2010. This means that even with the increased yields of the hybrid corn, 152 bushels/acre at $4.00/bushel is only $608/acre, which is eight times less! Even if the income was $100/acre in 1884, that would be about $2400/acre in 2010- something that many farmers would jump at.
Plant some heirloom open-pollinated corn in your garden this year. OP corn may not have as high of production yield as the modern day super sweet hybrids but it sure does have a richness and depth of flavor that can’t be forgotten.
Here’s a few recipes to tempt your tastebuds!
Fresh Roasted Garden Salsa
Cajun Chicken Maque Choux
Heirloom Corn and Potato Chowder

The yearly gardening season is just about on us and for many gardeners that means a heavy focus on tomatoes. Specifically, heirloom tomatoes, as their meteoric rise in popularity over the past few years would have many a pop and rock star green with jealous envy. The heirloom tomato seems to be almost everywhere these days, from high end cooking shows with their ultra-close-ups and glamor shots to many new cookbooks focusing on home-grown and locally sourced produce to Farmer’s markets, CSA’s and almost everyone’s home garden. Even die hard hybrid “Better Boy” and “Early Girl” gardeners that have planted nothing else for years are giving these wondrous beauties a shot.
With all of this attention being paid to the “Love Apple” as it was known in Colonial times, we wanted to give you a better chance of harvesting all of that potentially rich, complex, juicy tomatoey goodness that are only seedlings at this point.
Tomatoes are complex creatures, needing rich and well mineralized soil that is well drained and not over-watered. The simple, ruinous yet well intentioned act of giving tomatoes too much water most likely accounts for fully 75% of all of the problems with them; from soil borne fungi and other micro-organisms attacking the roots to fruit splitting, cracking and blossom end rot and ultimately the worst- flavor wash-out. Ideally, tomatoes like a lightly moist soil. The best way to judge when to water is by getting to know your plants and paying attention to the leaves. When the leaves just start to curl at the very edges or tips is when the plant is telling you it’s thirsty. Different varieties of tomatoes will have naturally curling leaves, thus the need to get to know your specific plants. Give them a drink, but don’t drown them. There has been multiple studies done that have clearly shown that tomatoes do much better with a little less water than a little more. Production, taste and disease resistance all increase when the plant is watered a full 25% less than what is commonly believed to be the “right” amount.
Now that we have the biggest issue out of the way, let’s look at some other techniques to get the best out of this year’s tomatoes! This is not an exhaustive, encyclopedic resource. There are many, many books available that are devoted entirely to the subject of fixing your tomatoes. What we want to do is give you some good, proven and easily used tools to help you get the best out of your tomatoes this year. Some of the most effective remedies are the simple and easily applied ones, as they are the ones that get used more often. So here we go!
-If you see brown or black soft spots appearing at the blossom end (opposite the stem) of the tomatoes, you have blossom end rot. This is caused by a lack of available calcium and can be easily corrected. Tuck a Tums or other antacid tablet or two into the base of the roots and give them a little water to soften. The antacids are calcium carbonate and will quickly provide needed calcium to the plant. It won’t cure the existing blossom end rot- nothing can- but will prevent the next set of blossoms from having then same problems.
-A 10 – 20% milk solution used as a foliar spray is highly effective against mildews and tomato mosaic virus. This remedy was discovered by Wagner Bettiol, an agronomist from Brazil found that weekly sprays of a milk solution was faster and more effective than synthetic chemical fungicides. The milk solution controlled the fungi just as well, with the added benefit that it acted as a foliar fertilizer and boosted the plant’s immune system and production. This spray also works for zucchini, cucumbers and other cucurbits including melons. It seems to work on roses also!
1 Cup milk
9 Cups water
Mix well and spray on offending mildews, blights and assorted unwanted fungi.
-The baking soda/mineral oil approach has been around a long time and is familiar to long-time gardeners, but it bears sharing. Cornell University has research showing the effectiveness of this approach. The baking soda deters fungus spores, and the oil coats the leaves, holding the baking soda in place longer.
1 Tbs Canola or mineral oil
1 Tsp baking soda
1 Gal water
Mix well and spray directly on the fungal blights.
– To stop nematodes from attacking the roots of your tomato, insert old 1 to 5 gallon nursery pots that have been cleaned, disinfected and had the bottoms cut out into the soil leaving 2-3 inches showing. Transplant your tomatoes into these guards. For heirloom tomatoes, the larger the pots the better, as the root system can be extensive.
-Another preventative measure for blight and other diseases, sprinkle a handful of this mix into the planting hole before you insert the transplant.
3 Cups well aged compost or potting soil
1/2 Cup powdered milk
1/2 Cup Epsom salts
1 Tbs baking soda
Mix well and sprinkle a handful into each planting hole.
-For soft-bodied insects, the milk spray described above is very effective, as well as a simple home-made insecticidal soap spray. You must use soap and not a detergent. They are different in how they work. Soap will kill the bugs, detergent will often kill the bugs and your plants! You’ve been warned. One of the absolute best soaps out there is Dr. Bronner’s. You can get it in a liquid form, it is certified organic and won’t harm your plants.
1 Tsp liquid soap
1 Qt water
Mix well and spray on the unwanted critters.
-When the plants are really working setting flowers and fruit, use the Spring Garden Soil Elixir recipe and omit the Borax and cranberry juice. Mix as usual and give a light spray to the roots as a side dressing to give the tomatoes a boost in nutrients to keep the health and flavor up.
These techniques and tips will set you on the path of better, tastier and longer producing tomatoes this season. If you have an especially effective remedy or recipe that you’ve used to help your tomatoes do well, please share it with us!
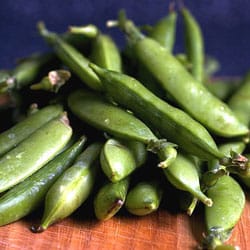
Heirloom peas or garden peas originated in middle Asia, from northwest India through Afghanistan and adjacent areas. A second area of development lies in the Near East, and a third includes the plateau and mountains of Ethiopia. In these areas wild field peas have been found, along with many cultivated forms of P. sativum, but wild P. sativum has never been found. Vast areas in southern Russia and southern Europe still have large tracts of field peas growing wild. The garden pea was an early introduction in northern Europe and Asia and as far west as England and east as far as China.
Early heirloom peas were cultivated for their dry seed, similar to today’s “split peas” for soup. The varieties known a thousand years ago had seeds that were much smaller, dark colored from the modern garden peas. They were an ideal supplement to an early hunter gatherer lifestyle that was just beginning to transition into agriculture. They were durable, easily carried and their germination lasted for several years. They needed only a short season to produce food for both man and animals and flourish in soils too poor for early cereal grains which were being adapted to early agriculture at about the same time. No doubt that during times of scarcity of animals to hunt, peas became a chief source of protein.
Primitive garden peas have been found during excavations beneath houses of the Swiss lake dwellers around Morssedorf, Switzerland dating back to both the Bronze and Stone Age. Peas also were found in a Hungarian cave dwelling, believed to date back even further. Charles Pickering says in his 1879 Chronological History of Plants, “Of culinary vegetables, Pisum sativum the only kind that can with certainty be traced as far back as the Stone Age;…” He also mentions a type of Fava bean, parsnips and carrots found in the excavation.
Garden peas have been found in the excavations of ancient Troy. The Aryans from the East are thought to have introduced peas to the Greeks and Romans, who grew them in ancient times. Theophrastus, considered by many to be the Father of Botany, described peas in detail and their cultivation in his Enquiry into Plants in Chapter 8 which is devoted to cereals and peas. He is the author of the oldest existing treatise on botany, having died in 287 BC. U. P. Hedrick wrote about Theophrastus in his 1928 book The Vegetables of New York, “He wrote at a time when gardening, farming, orcharding, and the cultivation of flowers and medicinal plants were far advanced, when all food plants derived from the Old World had been named, domesticated, had their varieties and had been cultivated for many centuries. He was writing in a advanced stage of agriculture and civilization; quotes other books about plants and had much of his information from predecessors whom he looked upon as ancient as we look upon him as belonging to an age long, long ago.”
Heirloom peas were one of the most widely grown vegetables of northern Europe during the Middle ages, as their description and cultivation was evident in almost every early gardening or agricultural book of any language in middle and northern Europe. They were almost as widely grown as the early cereals as an easily produced storehouse of nutrition for the population and for food for the armies of the time. In 1066 they were one of the chief crops grown in England, and by 1400 peas were frequently mentioned in the “Expenses of Collegiate and Monastic Houses”. From the 1400s to the mid 1600s, peas were so commonly eaten that “pottage” and “porridge” were terms meaning peas as well as the dishes made from them. Sugar peas were common and described in John Worlidge’s Systema Horticulture, or the Art of Gardening in 1677.
Eating freshly shelled peas, or what were called green peas became a very popular delicacy with the aristocracy after the restoration of Charles II when they were parched, fried or boiled. Louis XIV was highly fond of them, and so was his entire Royal court. In a letter written by Madame de Maintenon dated 10 May 1696, she describes, “The subject of Peas, continues to absorb all others, the anxiety to eat them, the pleasure of having eaten them, and the desire to eat them again, are the three great matters which have been discussed by our Princes for four days past. …It is both a fashion and a madness.” Commoners didn’t partake of “green peas” until the early 18th Century.
Heirloom peas were introduced very early on by European explorers, possibly starting with Columbus himself on his 2nd voyage. It seems they were widely traded and spread rapidly. In 1535 Cartier mentions the natives of Hochelaga (now Montreal) growing peas, and in 1613 French traders obtained peas grown by the Ottowa River by the native tribes. Francisco Vasquéz de Coronado mentions “small white peas” in New Mexico in 1540. In 1614 peas were a food staple of the New England native tribes.
Subsequently, American gardeners have embraced heirloom peas wholeheartedly with many breeders improving yields, flavor and pod size. We have a nice selection in our Heirloom Pea Department for you to enjoy!
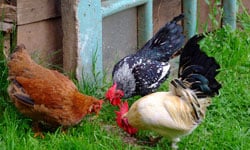
Raising backyard chickens is becoming increasingly popular, no matter where you live. There have always been rural chickens, but now there are small and large city chickens, happily living in coops and backyards all across the country. Chickens can do a lot for you, both in the garden and in the kitchen. First off, they give you a real measure of food security and increase your resiliency. The eggs are a great bartering tool, as very few folks that we’ve talked to weren’t interested in some fresh home-raised eggs. Chickens are great for bug control, light soil tilling and fertilization. The chicken manure is very high in Nitrogen and is a great addition to your compost. Home raised eggs are some of the highest nutritional content of any chickens, including free-range. The reason is that most home raised chickens are pampered and given extra nutrition and care. It is very easy to provide a highly nutritious and healthy diet for your backyard chickens from your home garden. We will look at several heirloom vegetables, herbs and flowers that you can easily grow in your garden that will not only provide some tasty treats for your chickens, but give you some great greens as well.
Almost any of the greens and vegetables that you enjoy your chickens will love. You have probably seen them get really excited if you share salad fixings or old veggies from your refrigerator. Think of how they will get when they know that the garden is providing treats for them all of the time! You don’t have to plant a special garden just for the chickens, as they will happily devour any greens that come their way.
The question is often asked of why grow your chicken’s food, why not just buy the 50lb. bag of chicken scratch and call it good? There is nothing wrong with going this route, and realistically you will most likely need to have some commercial feed available as your garden may or may not produce enough greens and grains for your flock. This will vary depending on the size of your garden compared to the size of your flock. The real answer to growing fresh greens for your chickens is the same answer as to why you would want to grow your own garden- taste, nutrition and choice.

Spring Chicken
Let’s look at several varieties of vegetables and herbs that are easily grown in a home garden setting that will provide some tasty and highly nutritious greens for both you and your birds. Starting off in the cooler season with some cold-hardy greens will help jump-start the hens energy levels. Kale, Swiss Chard, mustard greens and beet tops are a great start to the season. They all like a cooler soil, sprout quickly and will provide some serious nutrition. Speaking of sprouting, sprouts are an absolute powerhouse of nutrition and are ready to eat in 4-7 days. Alfalfa sprouts are possibly the best known, but there are several different types of sprouts such as radish, mung bean and red clover that work well. Sprouts take up minimal space, use little water and need only the most basic equipment to produce a couple of pounds of fresh food. This is a technique that works especially well in the depths of winter when other greens are scarce and expensive. You can produce plenty of sprouts for yourself and a half dozen chickens from a half gallon jar with a sprouting screen lid on your kitchen sink.
Once the weather starts warming up more options open up for different vegetables and greens. Cabbage, chicory, mustards, spinach and a number of greens do well in the early spring once the soil has started warming up. These include Miner’s Lettuce, French Purslane and Aztec Red Spinach. Once the true spinach starts to bolt in the warmer weather, switch to the spinach substitutes such as red and green malabar spinach, the Aztec Red spinach and New Zealand spinach. All of these love the heat, won’t bolt and produce all through the hotter weather. Traditional winter cover crops such as alfalfa, clover, vetch and annual rye should be considered for later in the year.
If you have the space, pumpkins and squash- both summer and winter- can be excellent feed choices. Winter squash and pumpkins that can be stored until later in the winter give you an additional resource for high quality feed when nothing else is growing. Corn is another great choice, space permitting, as it is the base for the commercial feeds. Other grains that will grow well in a smaller home garden set up is Mennonite Sorghum, Amaranth and Quinoa. Don’t forget Sunflowers, as they can provide both shade and a wind break for your garden along with seeds for your girls.
Many folks don’t think of herbs when it comes to providing food for chickens, but there are some great choices here. Borage is one such, as it has lots of mineral-rich leaves as well as flowers that are edible and make excellent additions to a chicken’s diet. Comfrey is in the Borage family and is another great choice.
To help you get started, we have created a section on our website called “Backyard Chickens Collection”, appropriately enough. We list all of the varieties that are mentioned in this article to save you the time of looking throughout the website to find them. It is really easy to incorporate the chicken feed aspect into your existing gardening plan. Planting one or two extra plants of each variety for each half dozen chickens is usually sufficient, with grains such as Amaranth and sunflowers going almost exclusively to the chickens. As with most things gardening related, a little experimentation will prove the way as you see what volumes of fresh garden produce you particular flock of chickens needs.
Discover the captivating history of Savoy perfection cabbage. Learn about its origins and why it’s considered the best in the world.
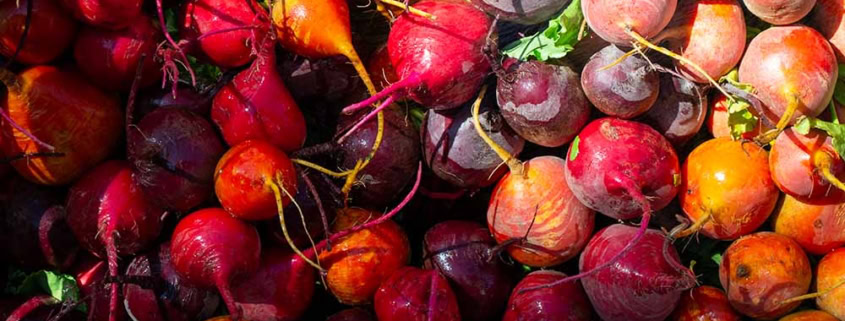 © 2024 Terroir Seeds | Underwood Gardens
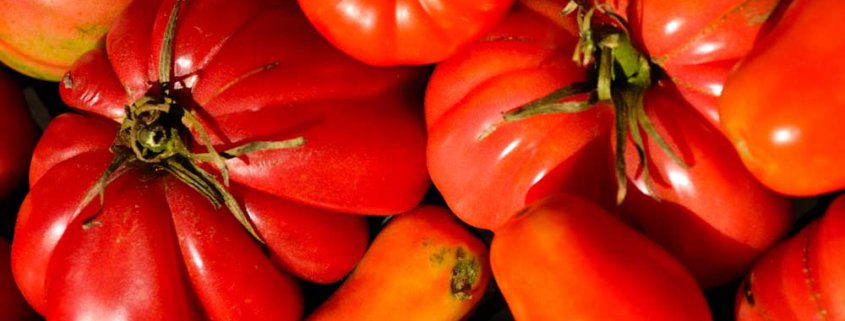 © 2024 Terroir Seeds | Underwood Gardens.
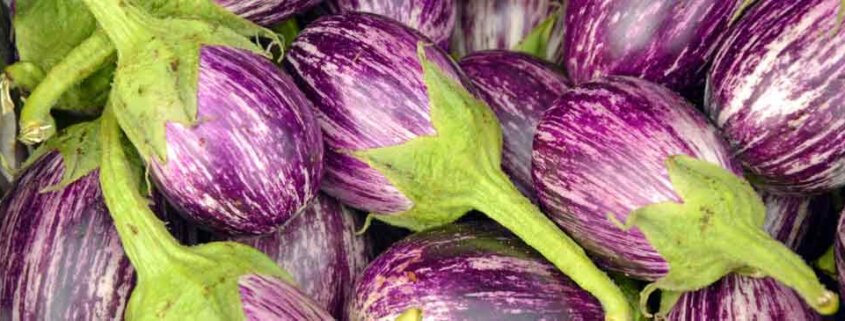 2019 Terroir Seeds | Underwood Gardens
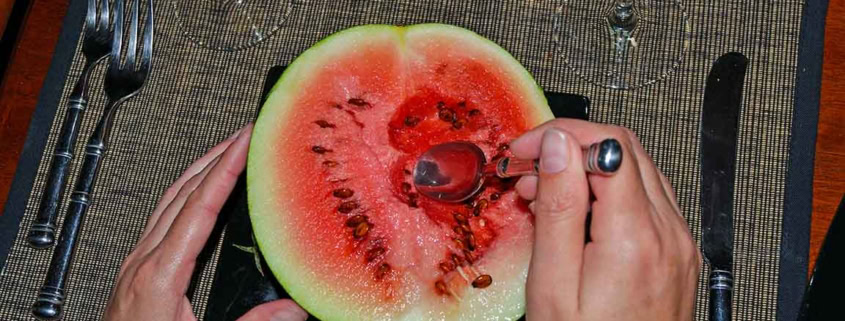 © 2024 Terroir Seeds | Underwood Gardens
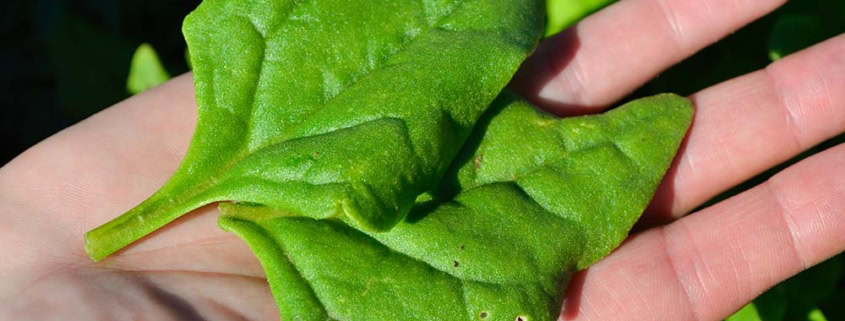 © 2024 Terroir Seeds | Underwood Gardens
 © 2024 Terroir Seeds | Underwood Gardens