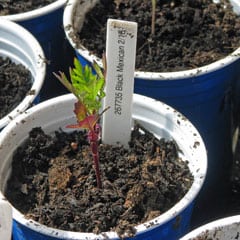
Seedlings

A seed starting station gives you advantages

One of the best ways to grow a bigger or better garden is starting with robust, healthy seedlings and transplants. You have more selection and control of the conditions when starting them yourself, and that often means needing a seed starting station. Gardeners and growers looking to improve their seed germination rates and have stronger, healthier transplants that produce earlier and longer need this tool!

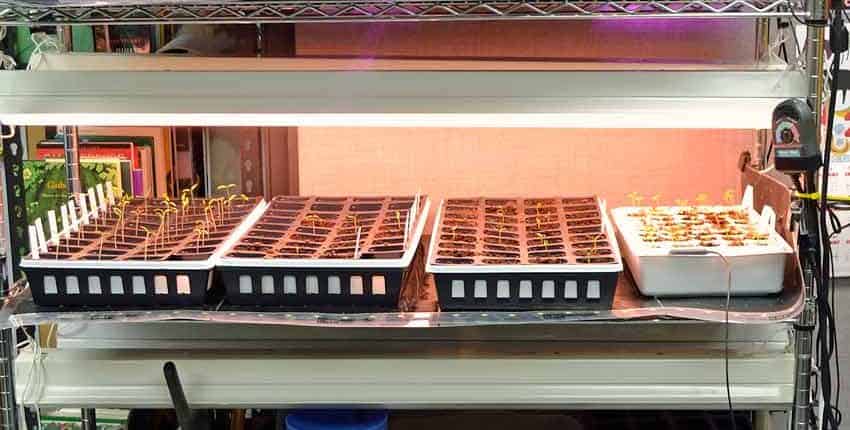
A seed starting station can be almost any size – from a single seedling tray up to a full commercial table system. Most gardeners use a moveable wire restaurant rack as the frame, but there are many other ways to set yours up.

A major advantage is placement is not limited to a sunny and warm location because the light and heat are on the station itself – giving you flexibility in placing it in your house, workshop, or garage – anywhere that remains above 50°F at night.

We’re sharing what we’ve learned from building and using our seed starting station for almost 25 years – what works, what doesn’t, and how to save some money!


Seed Starting Station

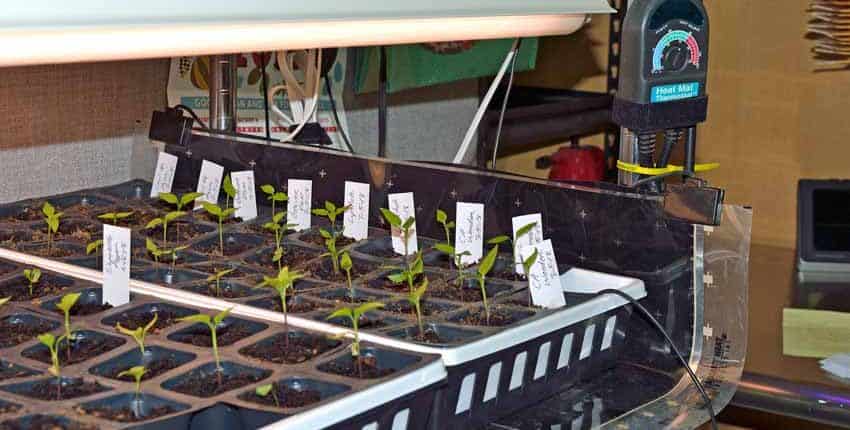
Seed starting station with seedling trays on top of heat mats with lights and thermostat.

Grow like a pro with your own seed starting station

A dedicated seed starting platform isn’t required for a great garden, but it sure helps! A good seed starting station is self-contained, creates the perfect conditions for seed germination and adjusts those conditions as the seedlings grow and develop. You easily control the warmth, moisture, and light in just the right amounts.

We invested in our initial seed rack almost 25 years ago; it still has most of its original parts and we use it every season. A few parts have been replaced or upgraded as needed, but the money spent two decades ago is still paying out, each and every season, and will for the next couple of decades. That is money well spent!

Here are three more reasons to seriously consider your own system –

1- Get a head-start on your season

Starting seeds like tomatoes, peppers, and eggplant earlier gives you bigger and stronger transplants than with a seed flat in the window. Instead of having a 4 – 6-inch tall seedling you can have a 10-inch tall transplant like you see at the garden center that is robust and more resilient to weather fluctuations. An added benefit is earlier harvests as it goes to work sooner than smaller seedlings – as much as a month earlier! In very short-season climates a seed starting station is almost required to have vegetables like tomatoes, peppers, and squash that need a longer time to mature.

A seed starting station has adjustable lighting to grow stronger, more compact seedlings instead of the spindly and weak ones that struggle toward the light in a window. The protected environment keeps your young, tender, and delicious seedlings from becoming snacks for critters and insects looking for an easy meal outdoors.

The station works for both spring and fall or winter gardening – we start our spring seeds in mid- to late February and the fall crops in August for transplanting in early September.

2- Dramatically improve your seed germination rates

The seed starting station has light and heat, and you provide moisture using germination trays with lids, adjusting as needed. Simply dial in heat and add moisture after planting your seeds, then add light when they sprout while reducing the moisture and heat to grow stronger, more robust seedlings than ever before.

Starting seeds becomes so easy, you can start transplants for your friends and neighbors with almost no additional effort, becoming the local garden hero.

3- Grow salad greens or microgreens indoors year round

Lettuce, spinach, baby Swiss chard, and mustard are examples of greens that grow well in little soil and cooler temperatures – making your seed rack the perfect location. Just dial the heat down – or turn it off in warmer climates – and keep the lights on with sufficient moisture and you’ll have fresh salads in January, even in Alaska.


Grow Rack

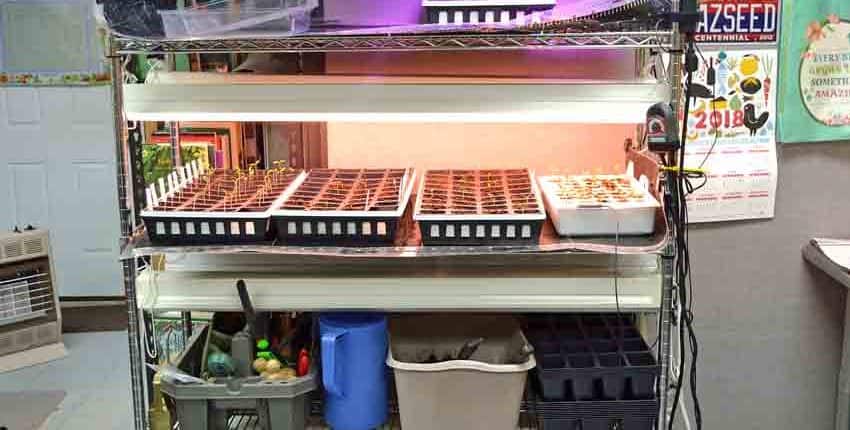
Another view of the grow rack with seedling trays, heat mats, thermostat, and adjustable lighting.

What is a grow rack?

A growing station, grow rack, or seed starting station is any set-up that provides light, heat, and moisture in a controlled environment and is easily changed as needed.

Often made from commercially available wire racks on wheels, they can be as simple as a couple of hoops made from PVC tubing supporting lights over seed starting trays with lids and a heat mat or heating pad underneath.

They are usually very space efficient, only needing a couple to a few square feet and can be tucked away in little-used areas because they provide their own light and heat. A spare room, unfinished basement or even a garage will work to start your seeds, as long as the minimum nightly temperature is above 50°F.

Who needs a seed starting station

A growing station – simply stated –  helps you start seeds better and grow stronger transplants.

It really is that simple.

Anyone starting their own seeds gains an immediate advantage using a grow station. You have complete control over the specific conditions that seeds need to germinate – light, water, and heat. This means you provide the perfect environment at the perfect time for faster seed germination, then decrease the moisture and heat while increasing the light to grow stronger seedlings than you’ve ever done before.

Advantages of a seed starting station

  • It is relatively inexpensive and usually pays for itself in a single growing season
  • Can be built in stages as budget permits
  • Is easy to set up and quickly converts to storage of seed starting equipment in the off-season
  • Is made with parts that are easily found locally at Lowes or Home Depot
  • Once built, parts are rarely replaced – giving a very long return on your initial investment
  • Is adjustable to raise or lower each shelf or each light individually

How to build your own seed starting station

The foundation of any seed starting system is the support structure that holds the lights above the seed trays, allowing them to move up and down over the young seedlings as they grow. Larger stations support the seed trays and heating mats, while simpler systems suspend the lights over any level surface.

If you have space, investing in a restaurant-style wire rack on wheels gives you a lifetime of use, and possibly more! Our rack is almost 25 years old and is still functioning just as well as the first day we assembled it. We’ve moved its location about 8 – 10 times and have reconfigured the lighting system a few times as we tried different ways to hang and adjust the lights over the seed trays.

We easily see another 25 years of use from it because there isn’t very much stress on the rack itself. We’ve removed two of the original shelves to give us more vertical space for growing seedlings and providing light above each shelf.

The five-shelf system that we use (74-in Tall x 48-in Wide x 18-in Deep) is ideal if you’re growing a larger garden or if you want to start and transplant several dozen seedlings indoors at the same time. You have the flexibility in how many shelves are in use at once – from one to all of them, depending on your needs. Here’s a materials list with sample pricing from Home Depot:

Materials List for Five Shelf Seed Starting System:

  • (1) 48″ Wide Multi-Tier Steel Shelving Unit:
    • A 72″ high steel unit with 5 adjustable tiers and wheels – $99.97. Product Link
  • (3) 6-Outlet Power Strip – $3.97 ea. Product Link
  • 3 Ft Nylon Cord – $3.92. Product Link
  • (16) Small Pulleys – $2.36 ea. Product Link
  • (16) Cord Locks (optional)
  • Zip Ties or Tie Wire – $7.32. Product Link
  • (8) 48″ Fluorescent Shop Light Housing – $13.30 ea. Product Link
  • (8) 48″ Plant and Aquarium Fluorescent Bulbs – $10.97 ea. Product Link
  • OR
  • (8) 48″ Daylight Fluorescent Bulbs – $9.97/ 2 pack. Product Link
  • OR
  • (10) 48″Daylight Fluorescent Bulbs – $27.98/ 10 pack. Product Link
    • *see Choosing the Right Bulbs below

Costs – 

  • Shelving unit – $99.97
  • Power Strips – 3 x $3.97 = $11.91
  • Nylon Cord – $3.92
  • Small Pulleys – 16 x $2.36 = $37.76
  • Zip Ties – $7.32
  • Shop Light Housing – 8 x $13.30 = $106.40
  • Plant and Aquarium Bulbs – 8 x $10.97 = $87.76
  • 10 pack Daylight Bulbs = $27.98

TOTAL COST: $355.04 with Plant and Aquarium bulbs from Home Depot

OR

TOTAL COST: $295.26 with Daylight bulbs

Once you see the cost of a professional seedling cart (without heat mats), you’ll see what a difference building it yourself makes!

The consumables – items that are reasonably expected to wear out – are the power strips and bulbs. The power strips should last 3 – 5 years, possibly more, while the bulbs have an average lifespan of 20,000 hours. Using them 14 hours per day gives almost 4 years of continual use, but normal use is about 4 months for both spring and fall transplants giving a potential 12 years. We usually see about 8 – 10 years in our experience.

Building on a budget

The pricing example above is for purchasing brand-new equipment all at once, but it doesn’t have to be built this way. Your local Craiglist is an excellent option, and you can set alerts for keywords – “wire shelving” for example – to avoid having to search every day. Yard or garage sales are other choices, as are used equipment or restaurant supply companies in your area. If you get creative, you’ll find several ways to save money over buying new.

Even if you do buy new, you can build a shelf or two at a time as needed – nothing says you have to build it all at once!


LED Grow Light

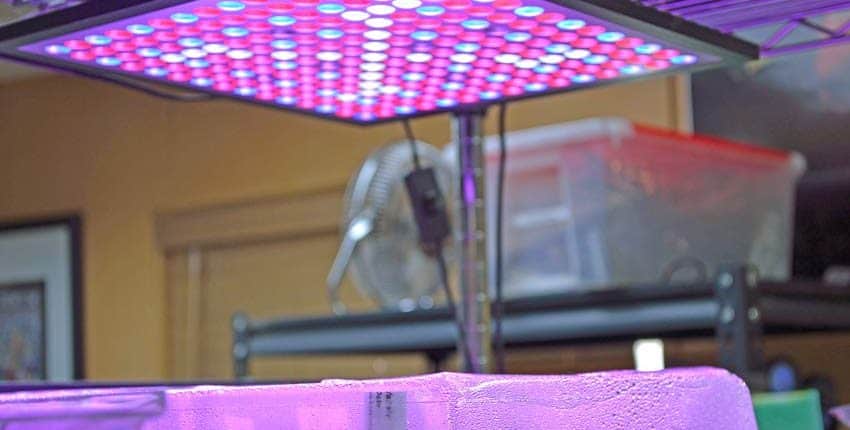
Spectrum-tuned LED grow light – good idea but doesn’t last long enough for the price.

Choosing the right bulbs

You’ll see two different choices in bulbs in the materials list – Plant and Aquarium bulbs vs. Daylight bulbs. Both are fluorescent, will last 20,000 hours, but have a different spectrum of light they emit. Red and blue are the two most important colors that plants use, as most of the photosynthetic activity of chlorophyll is in the blue and red frequencies. In simple terms, blue wavelengths encourage vegetative growth while red is best for flowering and fruiting.

The Plant and Aquarium bulbs are tuned towards the red end of the color spectrum, while the Daylight bulbs have more of the blue color to them. If you are using the grow station exclusively to start seedlings for transplanting, then use the Daylight bulbs. For those using the grow rack for growing greens for harvesting, choose one of each type of bulb for each fixture – giving you better coverage of the spectrum.

LED lights are available and we are testing some, but aren’t ready to recommend any particular brands yet. The advertised advantages are a longer-lasting light that uses less power than fluorescent bulbs, with disadvantages being usually higher initial costs and less than optimum real-world lifespan. For example, one light we’ve tested cost $30 – which is good – but has started to fail in the second year of use – which is bad.

Commercial LED lighting is extremely expensive and has not – yet – lived up to all of its claims. Research is ongoing and in the fairly near future, we expect to see a large shift to more affordable and better LEDs.

How much light is needed?

Most vegetable seeds don’t require light to germinate, but some herbs and flowers do. When we start vegetable seedlings, we don’t turn the lights on until the seedlings have popped up and have opened their cotyledon leaves. This is when they switch from living off the stored food and energy in the seed to making their own through photosynthesis. 10 – 12 hours of light is good to start. The lights are lowered to about 3 – 6 inches above the seedlings or moisture domes to give them the strongest light possible.

Monitor the soil moisture levels, as the warmth from the lights can sometimes dry out the soil.

You can’t hurt the seedlings with too much light – they will simply not use what they don’t need. In the photosynthesis process, there are two cycles – a “light” and a “dark” cycle. The light cycle depends on light to function because its based on photosynthesis, but the dark cycle simply doesn’t require light in its process. That doesn’t mean it needs to be dark for the “dark” cycle to function – it happens after a certain amount of energy is built up from photosynthesis during the light cycle, which then switches to the dark cycle to store that energy. This switching happens continuously, so don’t worry that you might be giving your plants too much light!

Providing lots of light actually builds strong plants because they have lots of light energy to capture and store for future growth.

Grow Station Setup

Early season view of our grow rack with two shelves being used for starting seeds.

Setting up your station

Now you know what you need, let’s walk through how to set it up and get your first batch of seeds started!

Wire Rack

Start with the wire rack itself – this is the foundation for everything else. Use the instructions and carefully assemble the rack, making sure to install the rollers on the bottom. This makes it much easier to move the rack to install or adjust heating or lighting.

We allow about 18 inches between each shelf, installing the top at the very top and the bottom at the very bottom to give us the most room possible. The top rack is used for storage and to support the top level of lights. This gives room to move the light, keeping it 3 – 5 inches above the seedlings.


Lighting & Electrical Connections

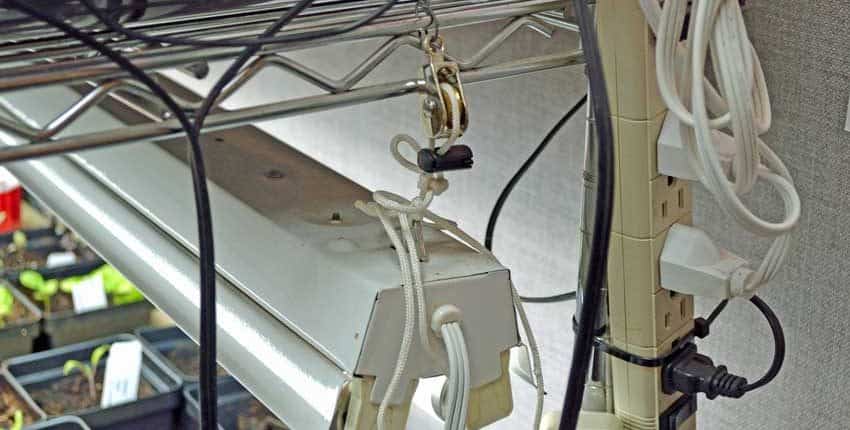
Lighting and electrical connections, showing pulley and cord on the light fixture.

Electrical

Using the Zip ties, fasten the power strips to one of the wire shelves that are within easy reach. We use one set for the lights and another set for the heating mats – this way we can turn all of the lights on with the flip of one switch.

Lighting

Cut 2 pieces of the nylon cord into 24-inch sections and securely tie one end onto the provided hooks for the shop light housing, then install the hooks into the housing. Zip tie the small pulleys onto the end of the shelves to support the shop lights and run the cord through the pulleys and tie them off. This is where the optional cord locks might come in handy if you aren’t confident with your knots. Finally, install the bulbs into the fixtures and plug the cord into the appropriate power strip.


Heat Mat & Thermostat

Heat mat and thermostat with temperature probe.

Heating

We use commercial heat mats on two of the wire shelves, setting the seedling trays directly on top to keep the soil warm. Thermostats with temperature probes keep the soil at a pre-set temperature range and are adjustable according to the needs of the seed or seedling. Both are commercial quality and last many years, but are an investment as they are somewhat costly. We set them at 80-85°F after sowing, then reduced to 75°F once the seedlings are up and further lowered to 70°F as they start to mature. Providing heat to the roots keeps the plants healthier and allows them to tolerate air temperatures as low as 50°F overnight with no adverse effects.

Gardeners in warmer climates may not need heat mats, as the fluorescent bulbs do provide heat to the shelf above. If you are in a milder climate, experiment with this before investing in heat mats and thermometers!
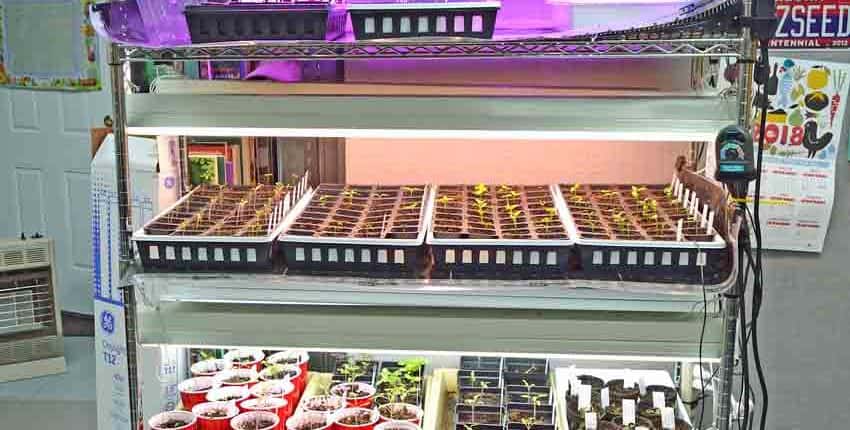
 

Mid-Season Grow Rack Configuration

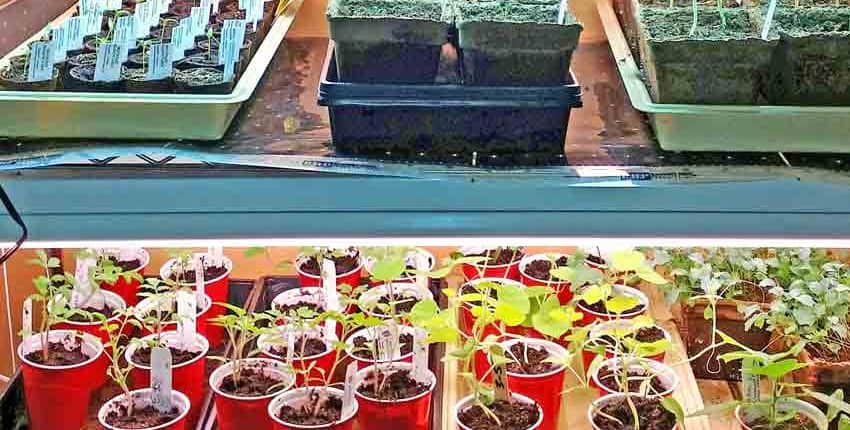
Mid-season growing station configuration with larger seedlings on non-heated shelves (click to see larger photo).


Once the seedlings are transplanted into larger cups, they are moved off of the heating mats onto lower shelves – allowing them to grow in cooler conditions that are closer to what they will experience in the garden. We only have two shelves with heat mats for this exact reason.

Get creative

Even if you have little (or no) extra space, you can get creative in setting up your seed starting station. A longtime friend lives in an apartment with little extra space and gardens in a community garden, so she has come up with a remarkably inventive method to start her transplants.


Seed Starting Under Table

Starting seedlings under a table.


She uses the underside of a table to support the lights for her seed starting station! Her apartment is naturally warm, so combined with the warmth of the lights there is enough heat for the seedlings to thrive.


Larger Seedlings

Larger seedlings maturing before being transplanted. The heat mat is turned off.

Now it’s your turn

We’ve given you lots of information and details on building your own seed starting station. Use this article as a checklist and you’ll soon see the strongest and healthiest seedlings ever ready for transplanting into your garden!

As you progress, we’d love to see photos of your creativity and how you solved particular challenges with your climate or situation. We will share them with everyone to help others overcome similar issues!

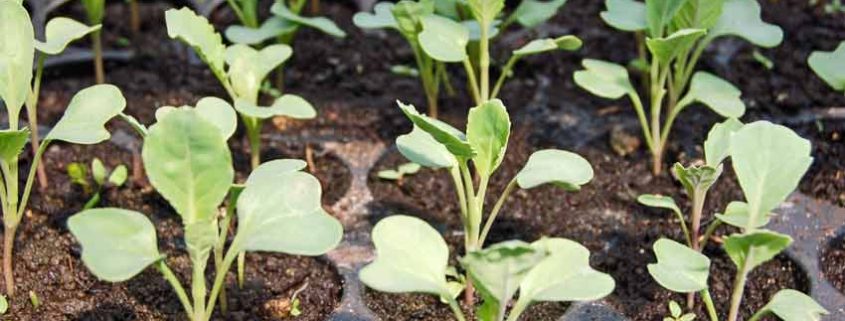
USDA Cold Vault

Stephen was invited to provide an article on seed quality for Acres USA’s January 2017 issue that focuses on seeds. This is the article that was published in that issue. 

Better Seed for Everyone

Everyone wants higher quality seed – from the seed company, seed grower, breeder and home gardener to the production grower. Even people who do not garden or grow anything want better seed, though they may not realize it.

Education and quality seed is the focus of our company – Terroir Seeds. We make constant efforts to continue learning and educating our customers about how seeds get from the packet to their garden. We recently had the opportunity to visit several cutting-edge seed testing laboratories and the USDA National Center for Genetic Resources Preservation to learn even more about seed testing and preservation. We want to share an insider’s look into a side of the seed world that the average person may not know exists.  

Let’s look at this need for higher quality seed from a different perspective.

Everyone is a participant in what can be called the “seed economy”. Everyone, that is, who eats or wears clothes!
Anyone who eats depends on seed of some sort for their daily food – from fruits and vegetables to grains, beans, rice and grasses for dairy and meat production. Seed is intimately tied into all these foods and their continued production. Without a continued, dedicated supply of consistently high quality seed there would be catastrophic consequences to our food supply.

Cotton, cotton blends, wool, linen, hemp and silk fabrics all come from seed. Cotton comes from a cotton seed, wool from a sheep eating grass and forage from seed, linen from plant stalks grown from seed, hemp from seed and silk from silkworms eating leaves that originated as a seed.

Even those who grow and cook nothing need better seed! They still eat and wear clothes.

Pepper with Purpose

Chile de Agua For Sale

Chile de Agua for sale at market

The Chile de Agua pepper from Oaxaca, Mexico is a prime example of how seed preservation works. A well-known chef specializing in the unique Mexican cuisine of Oaxaca needed this particular chile for several new dishes. This chile wasn’t available in the US, so we were contacted through friends to work on sourcing the seed.

We found two sources in the US of supposedly authentic Chile de Agua seed and another in Oaxaca, Mexico. After the Oaxacan seed arrived, and those from Seed Saver’s Exchange network and the USDA GRIN station in Griffin, GA we sent them to our grower for trials and observation. All three seed varieties were planted in isolation to prevent cross pollination.

Authentic Chile de Agua has unique visual characteristics, the most obvious being it grows upright or erect on the plants, not hanging down or pendant. Both seed samples from the US were pendant with an incorrect shape. Only the Oaxacan seed from Mexico was correct. We then pulled all the incorrect plants, keeping only the seed from the correct and proper chiles.

The next 3 seasons were spent replanting all the harvested seed from the year prior to build up our seed stock and grow a commercial amount sufficient to sell. This process took a total of four years to complete.

Creating High-Quality Seed

There are two major approaches to improving seed quality – seed testing and seed preservation. One verifies the current condition of the seed, while the other works to preserve previous generations for future study and use.

There are several different methods of seed testing, from genetic verification and identifying DNA variations to diseases to the more traditional germination and vigor testing.

Likewise, approaches to preserving the genetic resources of seed are varied – from a simple cool room to climate and humidity controls for extended storage to cryogenic freezing with liquid nitrogen.

Seed Testing

At its most basic, testing of seed simply verifies the seed’s characteristics right now. Whether testing for germination, vigor, disease screening, genetic markers or seed health, the results show what is present or absent today. Changing trends in important characteristics are identified by comparing with previous results.

Seed Germination Testing

Seed germination testing

This trend analysis is a perfect example of seed testing and preservation working together, as previous generations of seed can be pulled for further testing or grown out and bred to restore lost traits. 

Modern seed testing labs perform a staggering array of tests and verifications on seed samples.

Germination, vigor and physical purity are the standard seed tests for agricultural crops, flowers, herbs and grasses.

These three tests are critical for determining a seed’s performance in the field, and satisfy the US seed labeling law showing germination, physical purity and noxious weed percentages.

Seed health testing screens for seed-borne pathogens like bacteria, fungi, viruses and destructive nematodes. Seed for commercial agriculture and home gardens are often grown in foreign countries and shipped into the US, and vice versa. Seed health testing verifies the incoming or outgoing seed is free of pathogens that could wreak havoc.

Seed Vigor Testing

Seed vigor test

Plant breeders use the healthiest seed stock possible that is free of any pathogens which would compromise breeding efforts. Agricultural researchers use tested pathogen-free seed to avoid skewing results or giving false indications from unforeseen disease interactions.

Hybrid seeds need to be tested for genetic purity, confirming their trueness to type and that the hybrid crossing is present in the majority of the seed sample. Traditional open pollinated breeders will use genetic purity testing to confirm there is no inadvertent mixing of genetic variations, verifying the purity of the parental lines.

It is common to test heirloom corn for GMO contamination – called adventitious presence testing. This test identifies any unwanted biotech traits in seed or grain lots. This is an extremely sensitive DNA based test, capable of detecting very low levels of unwanted traits in a sample – down to hundredths of a percent. This relatively expensive test demonstrates the absence of GMO contamination, an important quality aspect in the heirloom seed market.

Genetic fingerprinting, also called genotyping, identifies the genetic make-up of the seed genome, or full DNA sequence. Testing with two unique types of DNA markers gives more precision and information about the genetic diversity, relatedness and variability of the seed stock.

DNA Testing

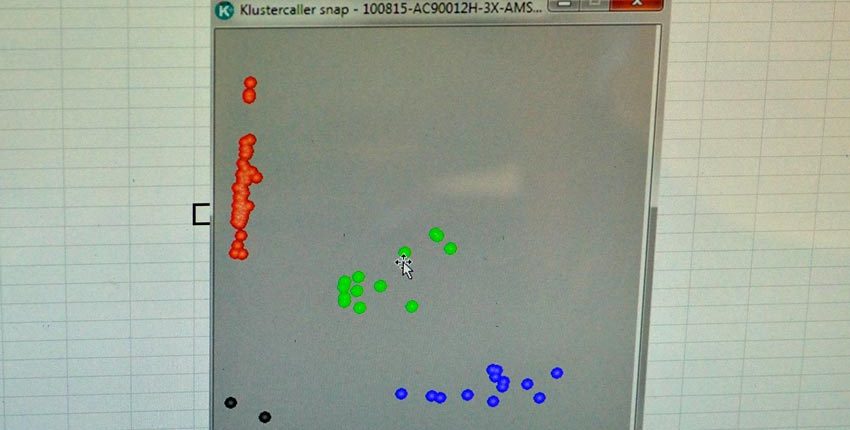
Computer graph of DNA testing

Fingerprinting verifies the seed variety and quality, while identifying desirable traits for seed breeders. This testing identifies 95% of the recurrent parent genetic makeup in only two generations of growing instead of five to seven with classic breeding, saving time and effort in grow-outs to verify the seed breeding. Genotyping also accelerates the discovery of superior traits by their unique markers in potential parent breeding seed stock.

Using established open pollinated seed breeding techniques, genetically fingerprinted parents help produce the desirable traits faster and with less guessing.

To be clear, these are not genetically modified organisms – GMOs – they are traditionally bred by transferring pollen from one parent to the flower of another, just as breeders have done for centuries. No foreign DNA is introduced – a tomato is bred to another tomato, or a pepper to another pepper.

The difference is how the breeding is verified, both before and after the exchange of pollen from one plant to another. The genetic markers identify positive traits that can be crossed and stabilized, and those markers show up after the cross and initial grow-outs to verify if the cross was successful. If it was successful, the grow-outs continue to stabilize and further refine the desired characteristics through selection and further testing. If it wasn’t successful, the seed breeder can try again without spending several years in grow-outs before being able to determine the breeding didn’t work like expected.

Seed Preservation

There are several different types of seed preservation, just as with seed testing. The foundational level is the home gardener, grower or gardening club selecting the best performing, best tasting open pollinated varieties to save seed from. Replanting these carefully selected seeds year upon year results in hyper-local adaptations to the micro-climates of soil, fertility, water, pH and multiple other conditions.

Seed preservation work also happens with online gardening or seed exchange forums, regional and national level seed exchanges such as Seed Saver’s Exchange and governmental efforts with the USDA.

Many countries around the world have their own dedicated seed and genetic material preservation networks, such as Russia’s N.I.Vavilov Research Institute of Plant Industry. It is named for Nikolai Vavilov, a prominent Russian botanist and geneticist credited with identifying the genetic centers of origin for many of our cultivated food plants.

The Millennium Seed Bank Partnership is coordinated by the Kew Royal Botanic Garden near London, England and is the largest seed bank in the world, storing billions of seed samples and conduct research on different species. Australia has the PlantBank, a seed bank and research institute in Mount Annan, New South Wales, Australia.

The Svalbard Global Seed Vault on the Norwegian island of Spitzbergen is a non-governmental approach with donations from several countries and organizations. AVRDC – the World Vegetable Center in Taiwan has almost 60,000 seed samples from over 150 countries and focuses on food production throughout Asia, Africa and Central America. The International Center for Tropical Agriculture (ICIAT) in Colombia focuses on improving agriculture for small farmers, with 65,000 crop samples. Navdanya in Northern India has about 5,000 crop varieties of staples like rice, wheat, millet, kidney beans and medicinal plants native to India. They have established 111 seed banks in 17 Indian states.

It has been estimated there are about 6 million seed samples stored in about 1,300 seed banks throughout the world.

Seed banks aren’t the only ways to preserve a seed. Botanical gardens could be called “living seed banks” where live plants and seeds are planted, studied, documented and preserved for future enjoyment and knowledge. Botanical gardens range from established and well-supported large city gardens to specialized and smaller scale efforts to preserve a single species or group of plants.

Herbarium Heirloom Corn

100 year old Native American corn in herbarium

An herbarium is another form of seed bank with a single purpose of documenting how a plant looked at a specific location at a specific time. Herbaria are like plant and seed archeological libraries with collections of dried, pressed and carefully preserved plant specimens mounted and systematically cataloged for future reference.

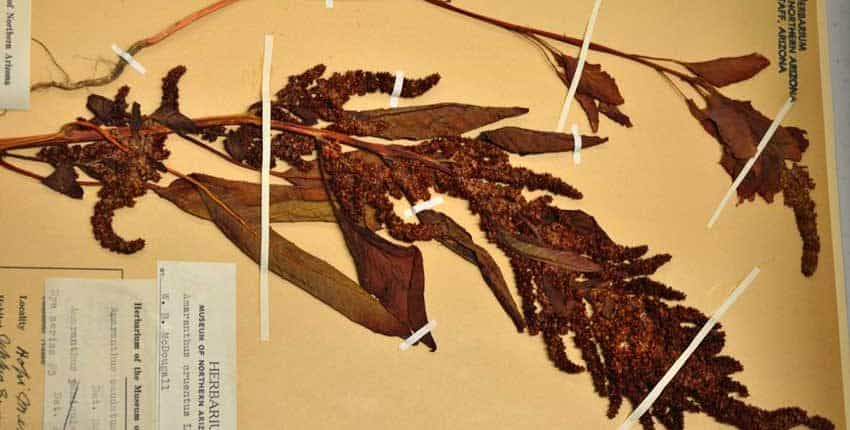
An herbarium can show what corn grown by the Hopi tribe a century ago looked like, or how large the seeds and leaves of amaranth were 50 years ago. Different herbaria focus on certain aspects such as regional native plants or traditional foods grown by native peoples during a specific time.

Herbarium Amaranth

50 year old Amaranth in herbarium

The USDA plays two important roles in seed preservation that is little understood outside those in the seed industry.

The first is the Germplasm Resources Information Network or GRIN for short. It is also known as the National Plant Germplasm System. This collaborative system works to safeguard the genetic diversity of agriculturally important plants. Congress funds the program but it partners with both public and private participants. Many of the seed banks are on state university campuses with private sector breeders and researchers using the available seed resources.

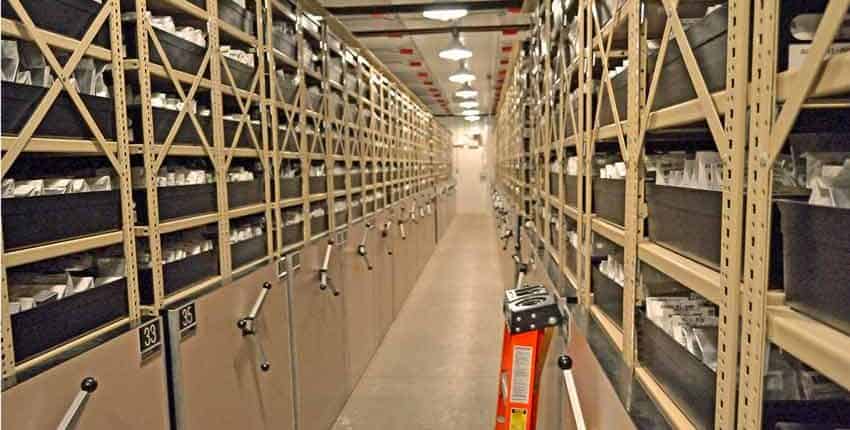
USDA Cold Vault

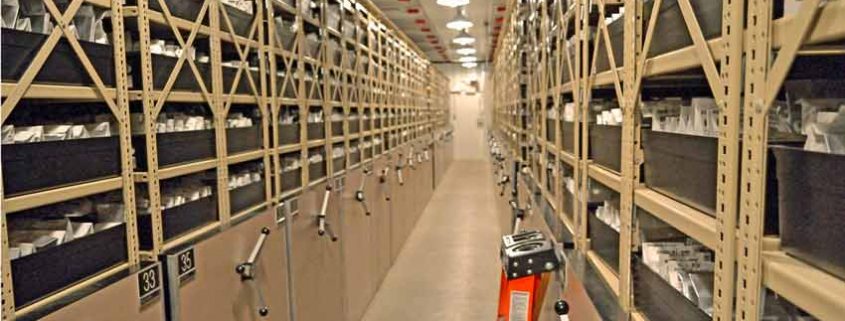
USDA National Center for Genetic Resources Preservation cold vault

There are 30 collection sites that maintain specific seed stock and conduct research on them. Some are dedicated to a single crop like the Maize Genetic Stock center in Urbana, IL which collects, maintains, distributes and studies the genetics of corn. Potatoes are maintained and studied in Sturgeon Bay, WI and rice is kept in Stuttgart, AR. Others maintain regional varieties like the UC Davis location that focuses on tree fruit and nut crops along with grapes that are agriculturally important in the central valley of California.

The second role is the USDA National Center for Genetic Resources Preservation (NCGRP) in Fort Collins, CO. This is the “back-stop” for the GRIN system as well as other private, public institutions and government programs around the world. They store the foundational collections of all the GRIN locations while also working with organizations such as the International Maize and Wheat Improvement Center in Mexico, the International Rice Research Institute in the Philippines and the International Plant Genetic Resources Institute in Rome.

Founded in 1958, the NCGRP maintains, monitors and distributes seed and genetic material samples from their long-term backup storage. After receiving seed samples, they test, clean and condition the seed for the proper long-term storage environment.

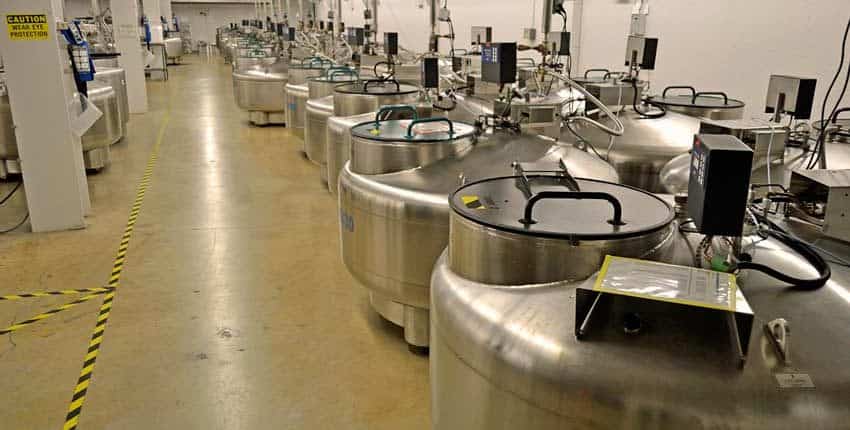
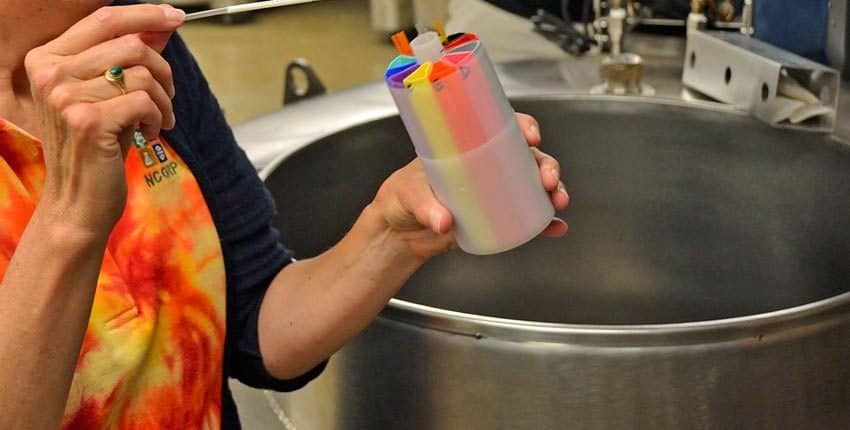
USDA NCGRP's liquid nitrogen vault

USDA NCGRP’s liquid nitrogen vault

Two long-term storage methods are used. One is a traditional low temperature/low humidity storage and the other is liquid nitrogen storage. The traditional storage is kept at 0°F and 23% relative humidity. Seeds are kept in heat sealed, moisture proof foil laminated bags.

Before seeds are stored in liquid nitrogen a sample is given a liquid nitrogen test to ensure the extreme cold won’t damage the seeds. The sample is exposed to liquid nitrogen for 24 hours, then germinated after coming back to room temperature and evaluated for any germination issues.

If the test results are normal the seeds are stored in clear polyolefin plastic tubes that are barcoded and sealed. The filled tubes are arranged in metal boxes, labeled and stored in liquid nitrogen tanks.

USDA NCGRP's liquid nitrogen vault sample straw

USDA NCGRP’s liquid nitrogen vault sample straw

The vault housing both storage areas is completely self-contained and separate from the adjoining buildings. It has its own backup generator, can withstand up to 16 feet of flooding, tornadoes and the impact of a 2,500-pound object moving at 125 miles per hour. It also has a full suite of electronic security.

Outcome

If these approaches and techniques seem extravagant, it is with good reason. Our food availability and security increasingly relies on intensive production of fewer variety of crops that are very similar genetically. Along with increased production is increased vulnerability on a larger scale to pests, diseases and other stresses. 

By collecting, preserving, testing, studying and distributing seeds and genetic materials immediate food system challenges can be met along with solutions and adaptations for future needs. Changes in growing conditions due to population growth, weather variability, transitions in land use and economic development all make the need for quality seed more important.

All the players in the seed economy support and advance the knowledge and quality of our seed used today. Just as the home gardeners and garden clubs preserve local seed varieties, seed companies are a “back-stop” for them. Seed banks and research facilities back up the seed companies and provide material for seed research.

Direct Sowing Anasazi Bean

When to Direct Sow

Direct sowing can be done almost any time of the year – in early to late spring for the summer garden, mid to late fall for the cool season garden, as well as succession planting a row after a crop has been harvested to grow something else delicious!

Direct sowing simply means planting the seeds directly into the garden soil, instead of starting them inside, nurturing and then transplanting into the garden once they are several weeks old and several inches tall.

If you are in doubt as to when your last frost date is, read Planning and Planting Your Spring Garden.

For more on cool season gardening, read How to Plan for Fall and Winter Gardening.

To discover how succession planting can help you grow more, read Succession Planting – Boosting Garden Production.

Some gardeners think they have no “luck” when it comes to direct sowing certain vegetables, while others are hesitant to try again after past challenges or outright failures. Inexperienced gardeners sometimes think their lack of experience dooms them to failure.

The root causes of most challenges, problems or outright failures can be traced to a shortage of good information, incomplete understanding of seed germination and a lack of patience.

Direct Sowing Lemongrass Seed

Direct Sowing Lemongrass Seed

All of these can be overcome, and we’ll show you how!

At its most basic, direct sowing is simply inserting a seed into the garden soil so it can grow. There are factors which affect how successful the results are, but they are easily understood so you can set yourself up for success by using them.

There are three main parts to direct sowing – preparation, sowing and care.

1. Preparation

Well Aged Compost

Well Aged Compost

Amend the soil

Soil or bed preparation sets the stage for the seed and is usually done a couple of weeks to a month before direct sowing. This includes amending the soil with well-aged compost, minerals, fish emulsion, milk and molasses or anything else the soil needs.

“Amending” means to add the nutrients to the soil, then work them in with a garden fork or roto-tiller. If using a roto-tiller, make sure it is set to a shallow depth to avoid disrupting too many of the soil layers and the micro-organisms that live in those layers. 

A comprehensive soil analysis can be extremely valuable here, as you’ll know exactly what the soil needs to be at its best. A simpler approach is to add the commonly used nutrients mentioned above and closely observe the plants to see if they are showing a lack of specific nutrients.

Weed the beds

After amending the soil, wait a few days for the first weeds to sprout, then remove them with a small hoe just below the surface of the soil. Weeds thrive in disturbed soil, so you won’t wait long!

When the weeds have just sprouted, they will have released a very potent plant hormonal signal – called auxins – into the soil, signaling all of the other weed seeds to remain dormant. The soil has a tremendous amount of weed seeds in it, just waiting for the right conditions to sprout, and the first weeds up send this signal to keep other weed species from competing with them. This hormone lasts from 4 – 6 weeks, giving you a head-start with little competition for the seeds you want to grow! 

Weeds have the most serious effect on garden production during the first week to ten days after sprouting – this is why it is so important to spend more energy and time up front in weeding than it is later in the season.

After your seedlings have sprouted, they add their own particular auxins to the soil, inhibiting other seeds from germinating for another couple of weeks. After the garden crop is a foot tall, weeds have much less affect on their growth and can’t as easily out-compete for water and soil nutrition. 

Yet another way is to use a flame weeder to kill the young weeds, while damaging the uppermost, soon to germinate weed seeds in wait. No hoe is used and this method is quite fast.

Row Marking Tools for Direct Sowing

Row Marking Tools for Direct Sowing

Layout the bed

Some gardeners prefer to create furrows to sow their seeds in, while others use a garden row marker – two pegs with string attached – to lay out where they will direct sow their seeds.

There are several different approaches, and there is no one “right” way. If you are growing a smaller garden a row marker makes it easier to plant seeds closer together than creating rows. It’s also easier to do succession planting closer together with a row marker, as you plant the seeds along the line of the string without trying to open and then close a furrow and not disturb neighboring seeds or young plants.

2. Sowing the seeds

Direct Sowing Basil Seed

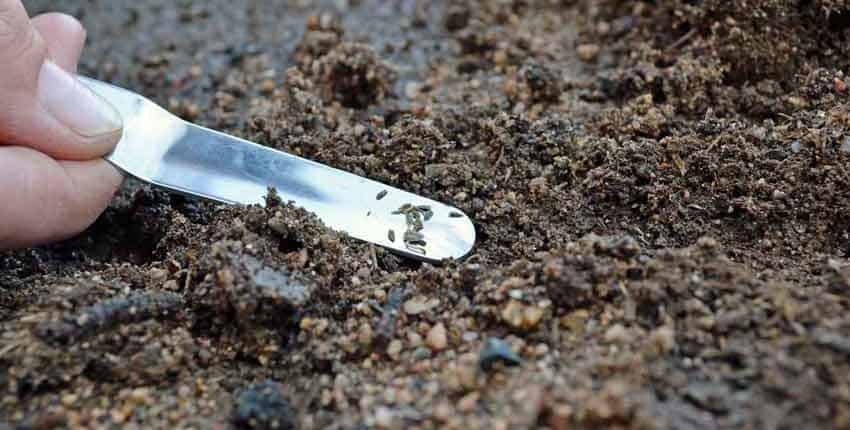
Direct Sowing Basil Seed with a Widger

Direct Sowing

Before direct sowing your seeds, consider how the vegetable will grow and be used. If you will be harvesting the entire crop for young greens, then plant fairly close together, as you want the most production possible. If the plant will be harvested regularly and allowed to mature, like leaf lettuce, spinach, kale or leafy broccoli, then give a little more space for the plant to mature without crowding.

Water the soil the day before planting to make sure it is properly moist to start the germination process.

Read the spacing recommendations on the back of the seed packets as a good starting point. If in doubt, plant two seeds at a time to ensure the best growth, as you can always thin once the seedlings are up. When thinning, never pull the seedlings out as this seriously disturbs the roots of the neighboring seedling – just snip off the unwanted seedling with a pair of small scissors.

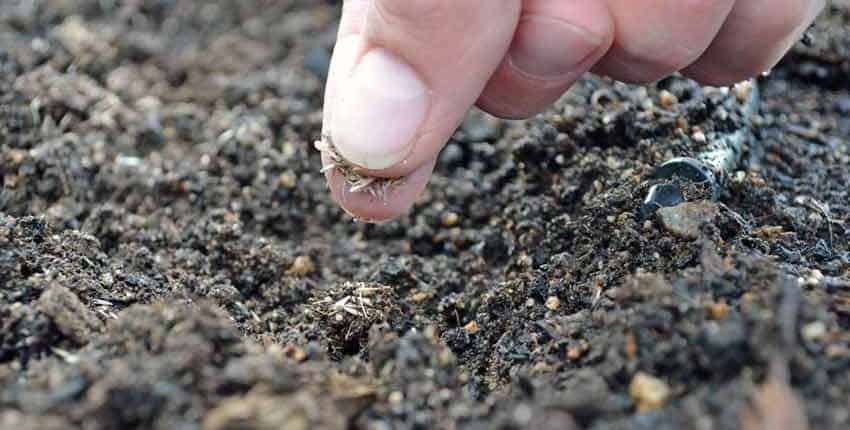
One of the more important things in planting any seeds is to be aware of the proper depth to sow them. An excellent rule of thumb is no more then 2 – 3 times their diameter.

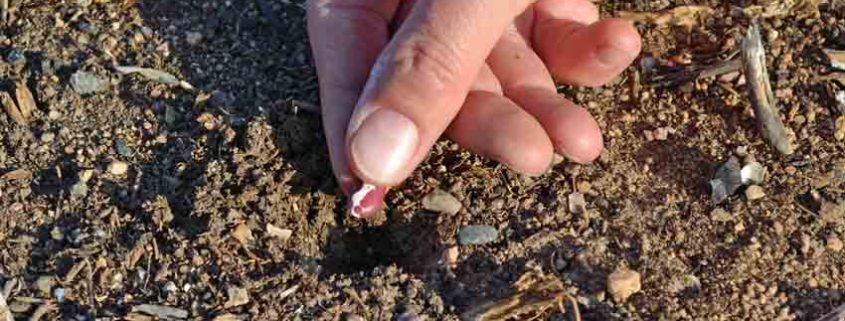
Seed orientation is also an overlooked, but equally important thing to be aware of when sowing. The radicle – or part of the seed that was attached to and fed by the plant or fruit – should be planted pointing down, as this is where the root will emerge from. Corn, pumpkin and squash are easy to see – just plant the pointed end down. Smaller or more rounded seeds don’t matter as much, as there is equal distance all around.

After sowing, gently press the seeds into the soil for small seeds, or press the soil on top for larger seeds. This allows for better moisture transfer to the seeds as they start the germination process.

Direct Sowing Okra Seed

Direct Sowing Okra Seed

Water the seeds

After sowing, give the seeds a good drink. Make sure the soil is well moistened on the first watering, then wait about 24 – 48 hours to water again, depending on your climate. The most common mistake all gardeners of any experience do is to over-water the garden.

It’s simply a human trait to want to make sure the garden is watered!

Seeds need three things to germinate – moisture, temperature and light once they are up.

The soil moisture needs to be very damp initially, then slowly decreased after the seeds sprout until it is slightly moist. You won’t have much control over the temperature unless you can provide some weather protection such as a plastic row cover or black plastic on the soil a week before planting to warm it up. Light is needed once the seedlings are up, but the sun will take care of that!

3. Care after sowing

After sowing care is pretty simple, but needs to be well-attended during the first month after the seeds start sprouting. Care can be split into three areas – weeding, re-sowing and weather protection.

Handmade Garden Row Marker

Handmade Garden Row Marker

Weeding

Keeping your emerging seedlings free from weeds when they are young will give them a serious boost, as young weeds can effortlessly out-compete your vegetables for needed nutrients and water. This severely limits their future growth, strength and production.

Removing young weeds is very easy, especially if using a sharp, thin hoe to slice them just under the surface of the soil. If you’ve allowed the initial crop to sprout and then removed them, you should have less weed pressure to worry about, but still keep on top of them!

Make sure to distinguish between the weeds and what you planted. If in doubt, wait a few days to see the shape of the leaves and how it matches (or doesn’t) the seedlings where you planted.  

Re-sowing

Due to the variabilities of weather outside, some of the seeds may not germinate, or do so very slowly. This may require some re-sowing in the thin spots to make up, but is easy and usually only needs doing once.

Keep a sharp eye on your young seedling crop, as they are absolutely tasty for wild critters – birds, mice and squirrels all love to munch on young, tender seedlings. If you see chewed or “disappeared” seedlings, look very closely to see if you can determine what ate them and take appropriate action – excluding them with netting or row cover or groundcloth, then re-sow.

Weather protection

You don’t have as much control the temperature and humidity of the garden, but you can moderate some of the temperature swings – all season long.

For cooler weather such as spring or later fall, row cover is a lightweight plastic sheeting which is easily spread over the seed bed, capturing some of the warmth from the sun and soil and raising the temperature for the seeds just a bit. As the seedlings grow, a small hoop house can be made from bent wire or 1/2 inch pvc pipe inserted into pvc elbows, creating a square hoop to support the row cover plastic.

Cooling in warmer weather can be done with shade cloth and the frames mentioned just above. Leave the ends open with shade cloth to allow for air circulation and so pollinators can get in.

Seed Germination at Seed Savers Exchange

Why Test Your Seeds 

Do you have some old packets of seed around, with doubts about the viability; or have you saved seed for a few years and wonder if they will still sprout?

Do you know if those seeds will grow?

Have you ever wished for a way to make sure?

We will show you how to know for certain whether that older packet of seed is still good, or how long you can keep those tomato seeds around before needing to pitch them.

There is a way, it is easy and simple to do. It’s called a seed germination test and you probably have all of the supplies needed in your kitchen. 

Here’s How to Do It

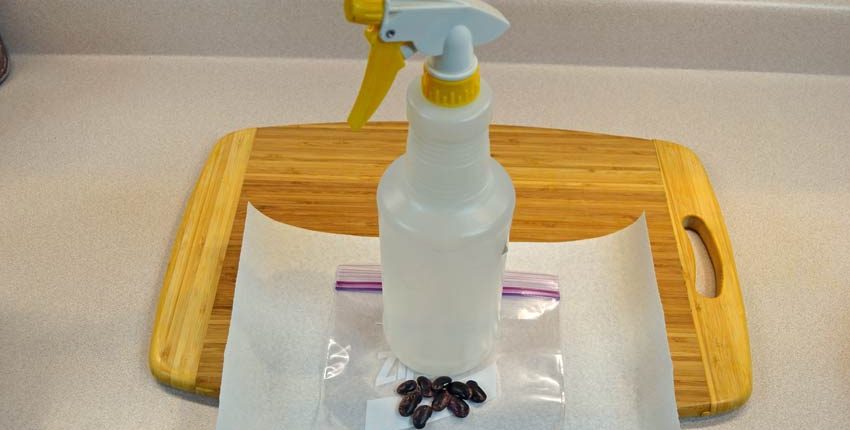
Germination Testing Supplies

Germination Testing Supplies

You will need these 3 things, plus the seeds you want to test for germination – 

  • Paper towel
  • Spray bottle of water
  • Ziploc type plastic bag
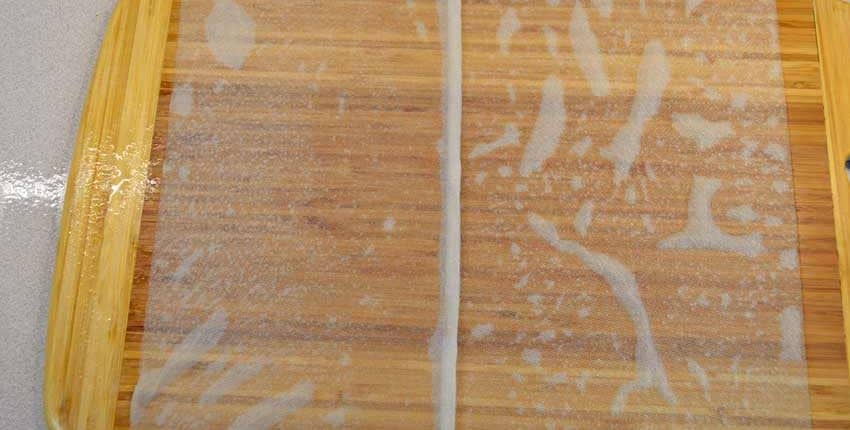
Wetting the Paper Towel

Wetting the Paper Towel

The first – and most important – step is to thoroughly wet the paper towel. This is the first and easiest step, but most mistakes are made right here, leading to poor germination. Smaller seeds don’t need as much water for germination, but larger seeds do. The extra moisture will create a humid environment in the plastic bag, helping the germination process.

The dry towel is on the left, with the properly wetted towel on the right side. You should be able to see through the towel to the surface underneath – then it’s wet enough. If it’s drippy when you pick it up, it’s wet enough. If you wet the towel like on the middle left side – damp but not wet – there’s not enough moisture for the seed to absorb and begin the germination process.  

If you want to learn more about what happens during a seed’s germination, read Starting Seeds at Home – a Deeper Look! 

Folding Paper Towel

Folding Paper Towel

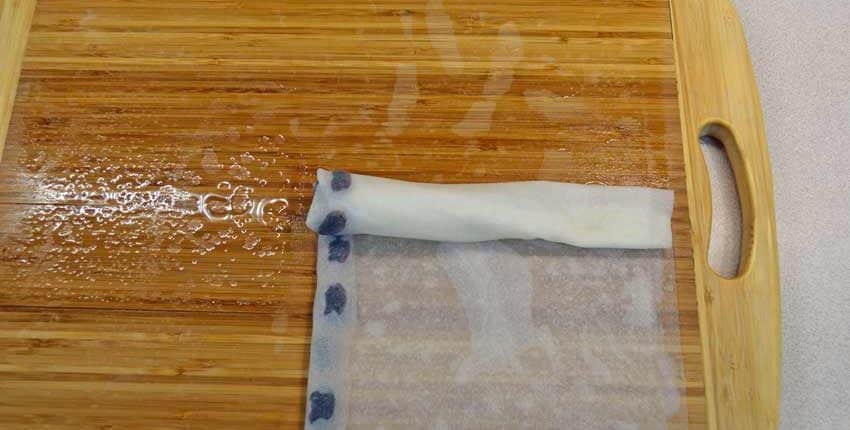
Next, after the paper towel is thoroughly wet, fold it in half. You can see just how wet the towel is by the amount of water left on the board after folding it over. 

Unfolded Paper Towel

Unfolded Paper Towel

Open the towel back up, leaving a fold to mark the center of the towel. 

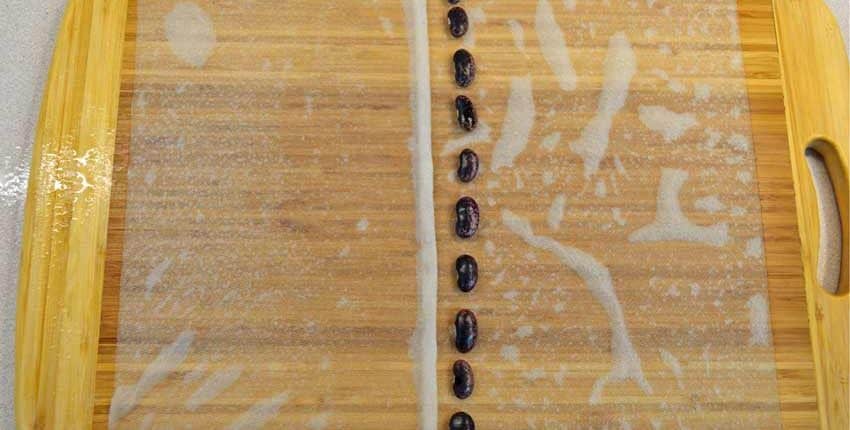
Seeds on Paper Towel

Seeds on Paper Towel

Third, place the seeds along the fold, leaving room for them to sprout so they don’t become tangled up. 

If you are doing a germination test use enough seeds to make the math easier, such as 10, 20 or 25 seeds. When we are doing a germination test, we follow established testing guidelines, but  as a home gardener a smaller amount will verify if your seeds are viable and can sprout. 

Folded Paper Towel

Folded Paper Towel

Re-fold the paper towel, enclosing the seeds.  

Rolling Paper Towel

Rolling Paper Towel

Roll the paper towel up….

Paper Towel in Ziplock

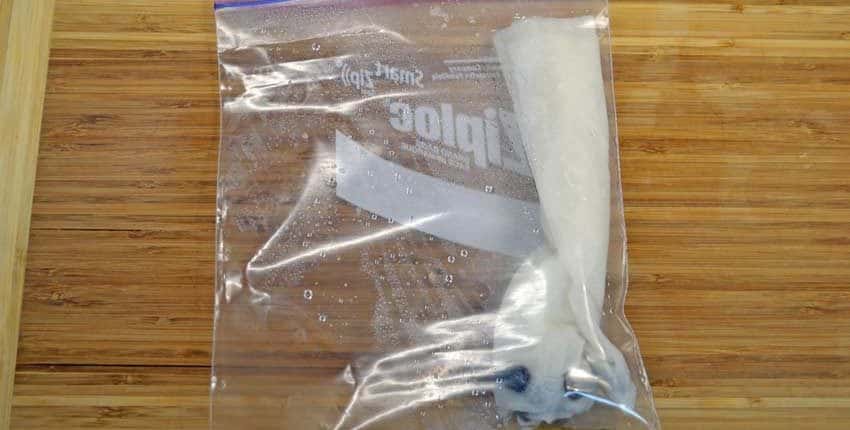
Paper Towel in Ziploc

…and place it inside the Ziploc bag. There should be a good amount of moisture in the bag to start the germination process, so if you don’t see moisture droplets inside after a few minutes, open the bag and give it a squirt of water. 

Finally, place the bag in a consistently warm place – like the top of the refrigerator or in a warm window. Most vegetable seeds do not need light to germinate, so a darker place is fine to begin with. 

Check every couple of days for moisture levels and the start of germination. If the moisture levels drop significantly – this is a good sign the seeds are absorbing the water and beginning to sprout. Add a spritz or squirt of water as needed, usually only once or twice a week. 

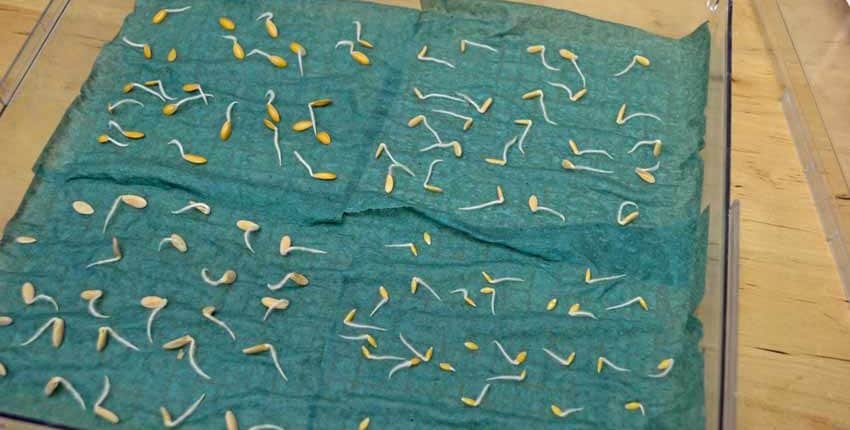
Once the majority of seeds have sprouted, open the paper towel up,  count them and do the math to get a percentage. For instance, if you started with 10 seeds and 7 sprouted, you have roughly a 70% germination rate. If 20 out of 25 seeds sprouted, there is about an 80% germination rate. 

Other Seed Germination Tests

Germination Testing Results

Germination Testing Results

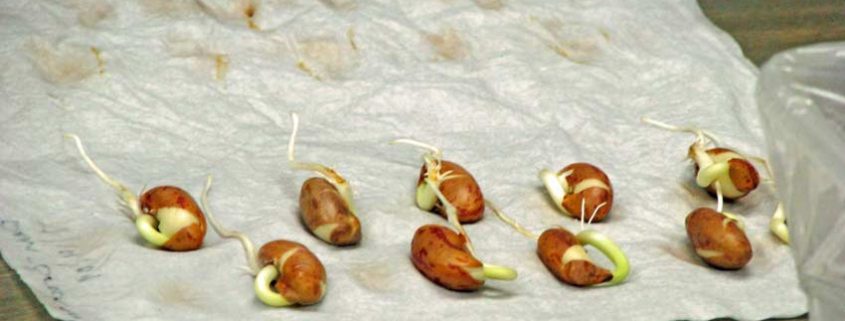
This is what one of the germination tests we do looks like – pretty good! These seeds are viable with a better than 90% germination rate. 

Multiple Seed Germination Testing Results

Multiple Seed Germination Testing Results

For smaller seeds, we will often divide the germination chamber into half or quarters to make the process more efficient. Some seedlings will mold faster than others, this is why you monitor the progress closely if you are pre-sprouting for transplanting. 

Seed Germination Testing at Seed Savers Exchange

Seed Germination Testing at Seed Savers Exchange

The “Paper Towel Method” is almost universally used. Here are the results from a germination test at Seed Saver’s Exchange. Note the labeling of variety of seed and date the test was started. If you are keeping track of your germination percentages, like we do, it is important to keep clear notes and details!

Germination Results at Seed Savers Exchange

Germination Results at Seed Savers Exchange

Please Note:  Depending on the type of seed you are testing, you may see very different results and they may take more time than the average vegetable seed.

For instance, herbs and flowers usually take much longer – sometimes weeks – to germinate, and can have lower germination rates. This is normal and not something to be concerned with.

Next Steps:

Learn moreSeed to Seed Book is our go-to reference for all things seed related, including germination times, needs and regional recommendations.

Get Started – The Seed Saving Basics kit has everything you need to begin saving seed with a reference chart, our Garden Journal and germination paper.

Cucumber Seedling Germination

Seed germination is affected by several factors – moisture, temperature, light, soil or seed starting media, time, observation and last but not least patience. We have covered most of these elements in “Starting Seeds at Home – a Deeper Look”, “Seed Starting Media for the Home Gardener” and “Are Seed Starting Mixes Worth Your Money?”  What we haven’t covered are time, observation and patience.

Recently we wrote an article on seed starting mixes, linked above, and did a small experiment to see how they compared to each other in germination of a single seed of the same variety in the same conditions. What we learned is interesting, but also taught us some things we want to share with you.

Two of the seed starting mixes had very good seed germination in about the same amount of time, while one did not. At the same time, a different variety of seed was planted in an adjoining tray with the same temperatures and very similar moisture and the seed germination was very good and consistent, yet was the same seed starting media that did poorly in the single seed test.

This is where time, observation and patience enter into our story.

Seeds need the exact right conditions to germinate. If one or two of the conditions are right, but another is not, the seed will simply remain dormant or in worst case start to decompose. It is only when every condition is right the seed germination occurs.

We gardeners make the mistake of thinking only we can provide those perfect conditions with our heated pads and thermostats, moisture probes, soil thermometers and lights. We forget the seeds left in the garden, untended and unmonitored which germinate in their own time, when the conditions are just right. The same goes for the seeds in the forest, in the ditch by the side of the road or anywhere we aren’t planting them.

Seed Starting MIxes Germination

This is the initial test – three sets of seed starting mixes with two cups of each mix. We planted the Crystal Apple cucumber as the test seed, since cucumbers have a good strong seed germination and we know the germination percentage as we had just finished doing seed germination tests on the new seed stock.

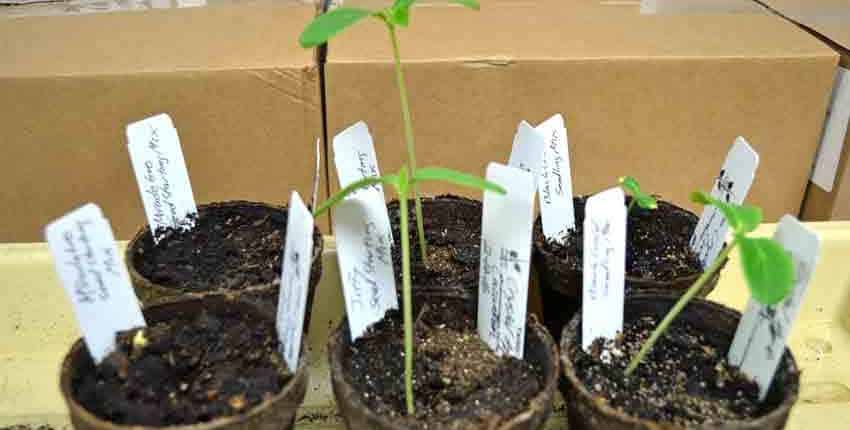
After 14 days, this is what the test looks like. The six seed starting cups have been in the same tray with the same heat from a heat mat underneath and with the same amount of water, as they were watered from the bottom by adding water to the tray.

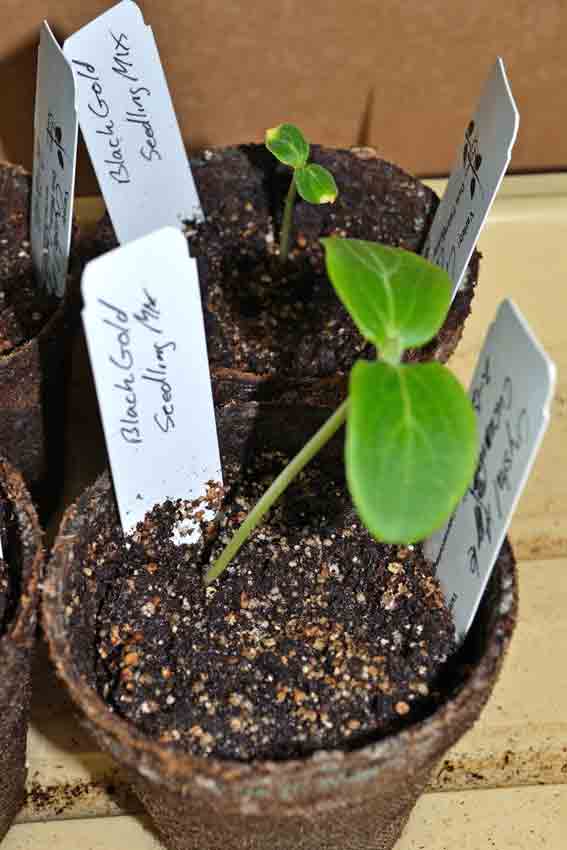
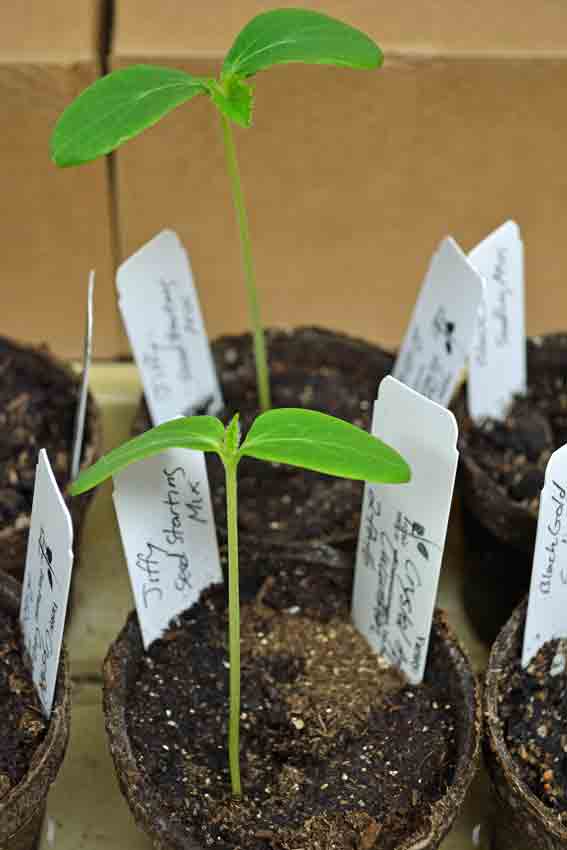
The Jiffy mix has the tallest seedling, followed by the Black Gold and the Miracle-Gro cups only having one seed just starting to peek itself out.

Miracle Grow Seed Germination

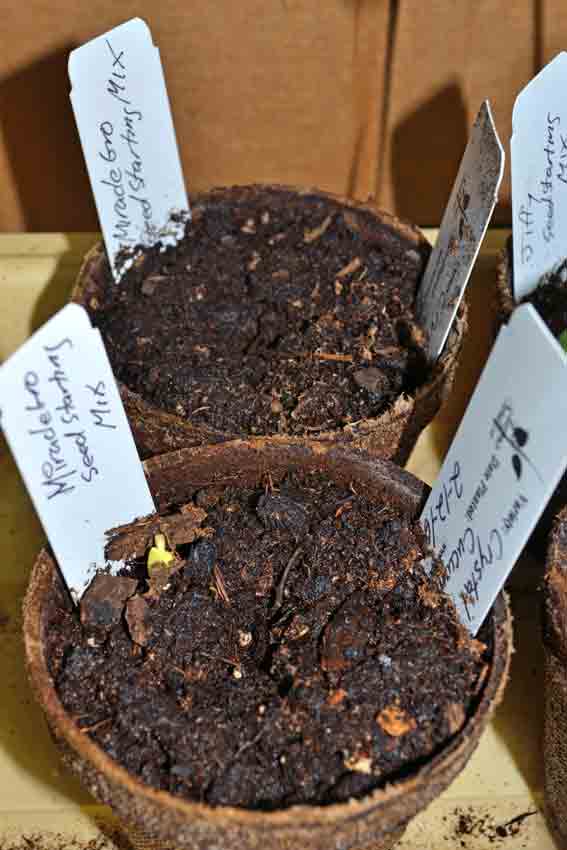
A closer look at the Miracle-Gro cups with the tiny little yellow spot being the seedling just starting to peek out. There is no indication of seed germination from the other cup.

There is also no sign of mold or fungus that might be inhibiting the seed germination, either. 

Black Gold Seed Germination

The Black Gold cups have really good seed germination in one cup, with a much delayed seedling in the other. Both look strong and healthy, with the two yellow spots on the smaller seedling in the background from where the seed was holding on after sprouting and emergence.

The soil looks good in this set as well, no mold or fungal issues.

Jiffy Seed Germination

The Jiffy seed starting mix was the clear winner in this test, with both seedlings coming up within a day of each other and both growing strong and at about the same rate. Both have started putting on their first true leaf with the one in the background being just a little bigger.

What we found really interesting was Jiffy was the hardest seed starting mix to work with, being very water repellent, very light and fluffy. It was difficult to get into the cups without spilling it and Cindy had to really water it and work the water in for the first couple of times to get the media moist before planting the seed. The water would pool up and run over the lip of the cup, without any getting into the media. She had to dump the excess water out, add a little bit and carefully mix it in with a small tool to get the media to start to absorb the water. It took a few times of this to get the initial wetting done and after that there were no more problems.  

This soil looks really good as well with no mold or fungal issues.

Miracle Gro Pepper Seed Germination

The seedling tray next to the six pot test tray looks like this – it’s a test planting of another new Oaxacan chile we hope to bring to market and this is the grow-out test planting. All of these seeds are planted in Miracle-Gro and as you can see, they are doing well. The seed germination has been good and at an even rate, with almost all of the cups having a seedling at almost exactly the same stage.

If we hadn’t observed the difference in seed germination rates between the two flats, we could easily conclude the Miracle-Gro is a poor choice for starting seeds in. However, the chile seedling tray disproves that.

Cindy had almost given up on seeing any seed germination from the Miracle-Gro in the cucumber seed test, but then three days later the first seedling peeked out.

This is the lesson of patience; so many times we’ve gotten calls or emails from semi-panicked or frustrated gardeners saying their (our) seed hasn’t come up yet. Most of the time, the needed seed germination period hasn’t elapsed yet, so we ask them to wait until the normal germination time has passed, then let us know. Almost without fail, we hear back in a couple of days the seeds have sprouted.

Please realize, just because we had these results with our very small and informal test doesn’t mean you will get the same results. Seed starting mixes and potting soils are formulated differently in different regions across the country, and those ingredients often change from one supplier to the next, depending on the time of year and availability. It is well worth doing a similar test of your own to see what works best for you in your location. Buy a few different bags of seed starting mix and potting soil to see if you have different seed germination rates, then you’ll have a better understanding on how this part affects sprouting. 

Now you’ve seen our experiments and experiences, what are yours? Have you had a similar situation turn out completely different than you expected it to?

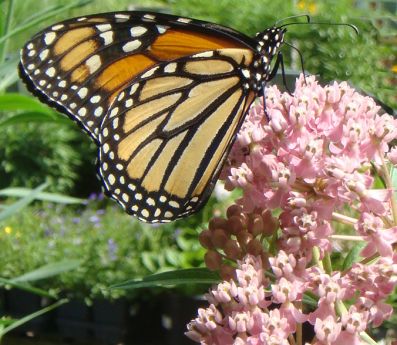
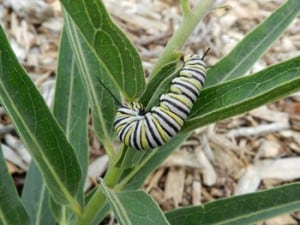
Monarch Butterfly on Milkweed

Milkweed Cold Stratification

Our friends at Painted Lady Vineyard and The Xerces Society have provided these detailed instructions to cold soak and stratify your milkweed seeds to get better and faster germination!

Slow soaking and rinsing milkweed seeds removes a naturally occurring chemical from the seed surface to enable quick germination. In nature, this chemical prevents premature sprouting during extreme conditions such as prolonged drought or extreme cold.The  stratification process mimics environmental conditions for the seeds that would naturally germinate at the end of a long wet winter.

A sterile, clean environment is required to prevent mold from growing in the stratification process. Mold destroys the seeds. Handle seeds and vermiculite in sterile conditions. Rubber, non-latex, gloves should be used. Use sterile water, containers, and tools.

Note: It is best to read through the entire process once or twice to familiarize yourself with the process, then assemble the tools needed before starting.

Procedure

1. Pre-chill one gallon of distilled water. If more than one species of seed is being germinated keep species separate—label the jars, one for each species. Mix each species with one cup of pre-chilled distilled water. Soak for 24 hours in the refrigerator. By keeping species separate throughout process, site specific planting will be an option and plant identification is made easy.

2. After 24 hours, pour seeds into a clean strainer. Wearing sterile gloves, rinse with distilled water. Drain excess water.

3. Add one cup vermiculite into the sterile containers with lids. Slowly add approximately 1/3 cup distilled water to each container of vermiculite until just moist but not dripping. Mix rinsed seeds into vermiculite using your gloved hands. Seal container and label accordingly. Store in refrigerator for 30 days.

4. Plant entire mixture of seeds and vermiculite or sift seeds out. Plant at 1/4” depth in prepared seed bed when soil temps are warm (70°F+). These temperatures usually occur when the daytime air temperature reaches around 80 degrees. When nighttime temperatures are 65 – 70 °F your soil temps should be very close to the same temperature. Water the newly planted seeds often until germination becomes evident. Keep up with your watering until plants are established.

Monarch Larvea on MilkweedFor germination, water lightly and frequently to prevent top of soil from drying out. When seedlings are about 1 inch tall, reduce the frequency of watering to 2 or 3 times weekly.

Increase the amount of water per application to achieve greater soaking depths for development of healthy tap roots. Alternate soil moisture from good deep soakings to moderately dry in between watering. Roots need a balance of oxygen. Reduce frequency of watering over time as plants become established. Supplemental water may be discontinued as seasonal rains return.

Encourage and enjoy! By doing this you are playing an important role in life on earth. And watch your milkweed patch for monarchs, their eggs, the caterpillars and then …. the butterfly again!

NOTE: Please do NOT use pesticides on milkweeds. Monarch caterpillars must munch on milkweed leaves in their natural lifecycle. Established perennial milkweeds grow back year after year from same roots.

Thanks to Native American Seed  for these instructions which have been modified only slightly to suit the seeds grown here.

Many thanks to the Xerces Society for Invertebrate Conservation for their support of this milkweed seed production program, and to Painted Lady Vineyard for growing the Spider Milkweed for seed.

Seed Germination – Challenges and Rewards

Seed germination issues happen every spring and challenge many new and experienced gardeners and growers. Over the years we have found a lot of commonality in why our customers have problems with seed germination. The four biggest issues are soil temperature, moisture levels, knowledge or experience and patience. We’ve put this guide together to help everyone learn where the problems lie and make changes to become more successful.

We have a vested interest in you being successful both in starting seeds and in your gardening efforts. After all, we put our name and reputation on each and every one of the seed packets we send out. If you fail, we also fail; so we really want to help you succeed!

We know our seed quality and spend a lot of time, energy and effort to make sure you get the best possible seeds. When you have problems with seed germination, if we simply send you replacement seeds without helping to correct the issues, you will get the same results and no one will be happy! We aren’t asking these questions to make things difficult, but to help you. Also, if you learn some of these critical skills and steps, you will be much more successful overall.

Seeds are amazing; they have everything needed to continue their species stored right inside their seed coats. From their accumulated travels they have all the adaptations, the environmental and seasonal conditions they have encountered and grown through encoded into their DNA. Everything they need to sprout when the time is right is built right inside their shells. Within that hard seed coat is enough food energy to help them break dormancy and carry them into their first several days as seedlings. All the enzymes they need to convert the stored energy into food is there as well; they have the fats, carbohydrates, protein, enzymes and hormones needed to get the seed off to a great start. As home gardeners and small scale growers, our job is to provide the proper conditions, ensuring maximum germination into strong and healthy seedlings ready to be transplanted into the garden when the conditions are right.

Seed Germination Basics –  What You Need To Know

Not all seeds are alike; likewise, many of them need somewhat different conditions to germinate. Some seeds are simply more difficult to germinate and require patience, attention to detail and time to be successful with. Pay attention to the seed packet directions – if it says, “Outdoor sowing recommended,” there is a reason! You will have a much harder time getting them to start inside, regardless of the professional greenhouse set-up you might have. Corn, melons and cucumbers are great examples.

Other seeds really need to be planted in the fall, lightly covered with soil and left alone – like most herbs and flowers. Duplicate the natural systems of seeds scattering in the fall and overwintering in the soil, then sprouting in the spring, and you will have less work and worry with a better, more vibrant garden.

Very few varieties of seed will have 100% germination. Under carefully controlled conditions, we might see 97% germination rate for tomatoes, but you might see 90% in your home. This doesn’t mean the seeds you get are weaker, just that your conditions are most likely different than what we used in our germination tests. We always beat the Federal Germination Standards!

This is why we pack more seeds in a packet for some varieties; it reflects the Federal germination rate. For instance, the standard germination rate for Okra is 50% – which is why we give you around 100 seeds – there is plenty of seed to ensure an abundant harvest. The minimum germination rate for peppers is 55% – we will stop selling it long before it drops to 70% in our tests. This is one of the reasons we pack 40 seeds per packet for peppers, as not all will germinate. We pack our seeds to give you the best germination rate possible, combined with our knowledge of how that variety grows to ensure a great crop in your garden; another reason to wonder what results you will get with 10 seeds per packet from other companies.

What Happened To My Seed Germination?

New Seed GerminationNow that we have some information, where do we start in evaluating why our seed germination failed? When seed germination doesn’t happen, there are a few things to consider.

Have none of the seeds germinated? If this is the case, there is one of two potential answers. The more likely answer is an environmental condition is preventing the seeds from sprouting. We will look at those below. The second cause is that the seeds are old, leftover from several years ago, forgotten in a box or cupboard or stored in extreme temperatures that have destroyed the seed germination potential. Extremes of heat can kill seeds in a short time, which is why we recommend storing them in a cool, temperature and moisture stable environment.

If only a few of the seeds germinate, it is most likely from being impatient or planting older seeds that have less viability. Most garden seeds have a high germination rate for the first 2 – 3 years, with the exception of hulless pumpkins, leeks and onions. Once the germination drops to about 75%, their ability to sprout will drop considerably faster. Of course, when you see the first few pepper seeds pop up in 3 – 4 days, then nothing for another day or so and you give up, you lose out on the rest of the seeds emerging at the end of the week! Have a bit of patience, observe the seeds progress each day and check our Germination Guide or the back of the seed packet to see how long they really should take. Many times a couple more days makes all the difference in germination rates.

Other conditions such as improper soil temperature and moisture, or a combination of the two, are the majority of the reasons that seeds don’t germinate in a timely manner. Planting too early, too deep, watering too much or too little are common mistakes made. Other factors include soil preparation, birds and/or rodents stealing the seeds.

If you are in doubt as to the viability of seeds, whether they are an unknown seed that was given or traded to you, or you’ve “discovered” them in a closet or back shelf, do a paper towel seed germination test.

Wet a paper towel and wring most of the moisture out of it. Fold it in half and then lay it open. Arrange the test seeds – usually 10 or so –  along the fold, then re-fold the towel over the seeds. Roll the folded towel into a tube, then seal it into a zip-lock type of clear plastic bag. Put the bag of seeds in a constant, very warm temperature location – such as the top of a refrigerator, freezer or in the oven that has a pilot light. You need about 85 – 90°F. Record the date started and check the progress daily, opening the bag to check the moisture level. You should see water droplets on the inside of the bag, add a little more water when you don’t. Check the germination rate and amount of days needed against our Germination Guide. If the seeds germinate well, you can plant them directly by cutting them out of the paper towel, and then you know they are viable.

Seed GerminationLet’s look at the major factors that a seed needs for germination. They are moisture, temperature, air, light and soil. For a more in-depth look at these factors, read our article “Starting Seeds at Home: A Deeper Look.”

Moisture – A dormant seed only contains about 10 – 15% moisture, so it must draw water from the soil that surrounds it. As the moisture is absorbed from the soil or seed starting media through the seed coat, enzymes are activated that convert the stored nutrition reserves and softens the seed shell, allowing oxygen to penetrate the seed coat, starting the process of growing. The moisture levels are critical at this early stage – they must remain constant for the sprouting process to continue and for the seedling to survive.

Uneven moisture levels can seriously delay sprouting of a seed, and even a few minutes lack of moisture as a seedling can kill it, as it has no method of storing water like a mature plant does. During the germination process, a seed needs much more moisture in the soil than when it has sprouted, so be aware and decrease the moisture levels as young seedlings emerge and mature.

Temperature – Germination will only occur in a specific range of maximum and minimum temperatures for each variety. Our Germination Guide lists these, along with the optimum temperature each one needs. The temperature we are talking about is the soil temperature, not the air temperature above the seed tray or garden row. Slightly cooler temperatures can double or triple the time needed for germination – even as little as 5°F cooler can be the difference between a 7 day or a 14 day seedling emergence!

When starting seeds inside, a bottom heat such as a seed sprouting heating mat on a thermostat is invaluable. In the garden, double check the soil temperature with a soil thermometer before spending the time and effort in carefully planting your seeds and being disappointed later.

Air – Seed germination requires large amounts of oxygen to activate the metabolic process of converting the stored nutrients into energy. Oxygen that is dissolved in water and from the air contained in the soil is used. If soil conditions are too wet, an anaerobic condition can be created and seeds may not be able to germinate due to lack of oxygen.

Light – Some seeds need light for germination, while some other seed varieties are hindered by light. Most wild species of flowers and herbs need darkness for germination and should be planted slightly deeper in the soil while most modern vegetable crops prefer light or are not affected by it, and are planted shallowly to allow small amounts of light to filter through the soil.

Soil – It is the medium for successful seed germination. In the germination tray, it may be absorbent paper (blotting paper, towel or tissue paper), soil, sand or a mixed media made specifically for seed germination. The substratum absorbs water and supplies it to the germinating seeds. It should be free from toxic substances and should not act as a medium for the growth of micro-organisms. It needs to be loose, allowing the moisture to easily reach the seed and for the seed to move as it grows without spending lots of energy in moving the soil to reach the surface.

A few things to consider –

1. Keep seed packets in a cool dry place. Do not store in your garage, potting shed or near a heat source such as a heater or appliance.

2. Review the seed packets individual instructions and develop a planting schedule based on your local weather and growing season.

3. Re-seal any seed packets that you are starting indoors, such as pepper, eggplant, and tomatoes. This will allow you to start more seeds later if you want to stagger your plantings, etc.

4. It may be better to over plant and then share plant starts with neighbor and friends, than to under plant and be caught short.

5. Download the  Terroir Seeds Garden Journal to get a jump start on tracking your garden this year.

 Questions to Answer

And finally, a few questions to answer to help us help you in determining what went wrong and how to correct it:

Did you follow the germination instructions on the seed packet? Go back and read them again; we sometime spend hours in researching and experimenting to find the best methods, temperatures, etc.

What was the soil temperature? Not the air temperature, but the soil temperature? Were there fluctuations? If so, how much? Not knowing this is a critical error that is a major cause of seed germination failure.

How moist/damp was the soil? For seed starting, the soil needs to be damp to the touch. You should be able to see a small pad of moisture on your fingertip after you lightly touch the soil. It shouldn’t be a drop of water, but an easily observed spot of dampness. Was it too dry/too wet? Did it get dry during the day/night, or was there constant moisture?

What seed starting mix are you using – a complete soil, Miracle-Gro mix. sterile seed starting mix, home-grown or something else?

Are the seeds still physically in the ground? If you don’t know, dig a few up to check. Are birds, squirrels, rodents eating/stealing the seeds or seedlings? Many times we have heard that our seeds aren’t germinating, when they have been eaten! You may need to use a paper cup with the bottom cut off to protect the seedling from birds/rodents until it is more mature.


Once you have answered these questions, we can help you determine what has prevented your seeds from germinating. More often than not you will know what to change just from reading this.

Discover the secret to successful seed planting. Learn how the orientation of seeds can significantly impact their germination and growth.

Home gardeners are starting to get the itch to get their yearly heirloom seed starting tradition under way about now. In some parts of the country it is warm enough that folks are able to direct sow cool season crops into their gardens, while in others it is time to start seeds inside to get them big and sturdy enough to transplant once the frosts have passed.

This leads to something of an eternal question- how do I start my seeds and what is the best method? If you are new to this series of articles, you might want to read Successful Heirloom Seed Starting for the Home Gardener where we show the equipment and space needed to be successful in starting your seeds at home, and Seed Starting Media for the Home Gardener, which examines the different materials used in making up a great seed starting media, and why you should use them. This will bring you up to speed on everything that brings us to this article and video.

Heirloom seed starting is actually pretty easy and straight forward, once a couple of basics are understood. The whole reason for starting seeds inside is to get a jump-start on the season by growing vegetable plants like tomatoes, peppers and eggplant inside to a stage where they are able to produce much earlier than if their seeds were directly sown into the garden soil once the frosts have passed. For example- it is common to start tomatoes 6-8 weeks or up to 2 months early inside, then transplant them into the garden. This means for many parts of the country that tomatoes will be ripe in late June or early July instead of September, as they would be if planted directly.

You can use this technique to your advantage and start a few select plants much earlier and have a small harvest within a couple of weeks of transplanting, then stagger some starts every couple of weeks for a month. What this will accomplish is the same as succession planting in the garden with carrots, beets, radishes, etc.- it gives you a continuous harvest of the vegetables that are in demand over a longer season without flooding you with too much at once, then having it all run out later. This is exactly the technique that highly successful market growers use to have a full stand for the first Farmer’s Market, as well as having produce for the year-round CSA. They will start everything– lettuce, beets, tomatoes, peppers, kale, Swiss chard, mustard, spinach- inside and transplant to the hoop-house or high tunnel once they are big enough to handle whatever season they are being planted into. Eliot Coleman has been perfecting this method for 30 years in Maine where he grows year-round without heating the growing houses.

We have prepared a new video showing how we do seed starting for our trial garden and food production here at Terroir Seeds. There are several methods that we share with you, as there are many ways to reach the same goal. Please enjoy and as always let us know your questions and thoughts!

Tomato Seedling

When it comes to starting their own heirloom seeds, home gardeners seem to be in two distinct camps- those that are really positive about the process and results, and those that aren’t. The folks that aren’t too excited about starting their own seeds usually have a good reason- they’ve had some failures with die-off and had to scramble to buy starts at the local garden center and wound up with something that they didn’t really want. Others haven’t tried their own starts, but feel that it is complicated or difficult. There are some very compelling reasons to start your own seedlings, but there are some challenges to overcome as well. We will look at several items to consider in making the decision of whether or not to do your own starts, along with some tips to get you started successfully.

Why start your own seeds? What advantages/disadvantages are there?

  • You have a much greater range of choice on what to grow as you are not limited to what’s available at the local garden center, hardware store or Farmer’s Market.
  • Gives a great creative outlet to “cabin fever” that sets in before the garden can be worked, allows you to be “growing something” early on.
  • There is greater flexibility on timing to get them started. You can start them to work with your schedule, or to take advantage of getting bigger, earlier producing plants in the garden sooner.
  • Starting your own seeds gives earlier veggies from the garden, as you start on your schedule, not depending on a regional greenhouse schedule.  For example- here in AZ, most starts come from the central valley of CA, where timing is completely different, sometimes by a factor of several weeks.
  • Home gardeners can usually  grow bigger, healthier plants than a commercial greenhouse, as there is more attention per plant. Less diseases/issues than from large scale grower.
  • Seed starting does require some planning and effort, not as easy as going down and picking out what seedling to buy.
  • Does require some set up and equipment, but not much to get started. Will require some space, but not much on start-up.
  • Transplants give you a head start on weeds and the weather. A tomato or pepper that is 2 feet tall will have little to no competition from weeds that are just getting started.

Now that you know the pro’s and con’s of starting your own seeds, how does one go about actually doing it? As with just about anything, there is some planning and preparation involved, but not too much. Remember how we talk about getting started in the garden- start small, start simply, but get started? The same thought process applies here as well. Set yourself up for success, not frustration, headaches and failure. Take the time to do some initial planning  and set up and you’ll be off to a great start.

Plan and arrange the seed starting area

  • Start simply and easily, you may have most of the items on hand.
  • A key factor for successful germination is a warm area to sprout seeds- can be the top of a refrigerator, freezer, window sill in south-facing room. etc. Most of the calls we receive about seeds not germinating is traced to this factor. When the temperature of the soil is optimum- seeds can and will “pop” in 5 days, no matter if they are tomatoes, peppers or eggplant! When the soil temperature is less than 70F, it can take 2 weeks to sprout- there is that much of a difference!
  • Supplemental heat may be needed. Soil temperatures need to be above 80F for faster germination. The ideal soil temperature for tomatoes, peppers and eggplant is 85F. Rarely are people comfortable at that temperature!  Air temperature may be 5-10F different than soil temperature due to evaporative effects of moist soil. Heating pads, germination heat mats, old electric blankets, etc can work to raise soil temperature to where it needs to be. Monitor soil temperatures to avoid over-heating. A heat mat will work even if the air temperature is 60-65F.
  • Supplemental lighting may be needed after seeds sprout and develop true leaves. This can range from specific grow lights to common fluorescent fixtures with grow bulbs. Lights need to be moveable to keep about 2-4 inches above plants. Seedlings need 14-18 hours of light per day.
  • Humidity levels need to be high when seeds are sprouting, then less so as they develop and continue to grow. Domed lids on grow trays are great and have adjustable vents to maintain humidity levels. Plastic sheeting, such as painter’s drop cloth, will work just as well. Make sure to inspect the seedlings for mold or fungus growth on top of the soil, which is an indication of too much humidity and too little air circulation. After the seedlings grow their second set of true leaves, humidity is less important.  Of course, in areas of high humidity, often nothing else is needed.

Once the area is planned and prepared, the equipment is all that is left and you’re ready to start some seedlings! The equipment can be very basic of pretty involved, but again- start small and simple. It is amazing how well seeds sprout in a soil block that is free or paper pot that is next to free! Sometimes they sprout better than in much more expensive and complex equipment.

Gather the equipment needed

See our Seed Starting Department for books and tools to help you be more successful in starting your seeds.

  • Plastic trays for seedling sets and containers for individual seedlings. Domed lids or plastic sheeting may be needed in low humidity areas.
  • Seed cups or containers. These can range from peat pots to homemade paper pots to handmade soil blocks to recycled yogurt/dixie cups. What is needed is something that will support the individual seedlings and feed them until they are ready for transplanting.
  • Soil or seed starting mix. These range from several readily available commercial ready to use seed starting mixes that have no soil and are sterile to lessen the chance of fungus and diseases, to a number of ingredients that make for a great homemade seed starting mix.  We will cover some of these in more depth in another article.
  • Misters or sprayers. A small squirt bottle sprayer or mister works great to apply very small amounts of water to the seedlings. A small hand pump sprayer can be valuable as well to give a bit more water without having to pump constantly, especially for larger amounts of seed trays.
  • Soil thermometer. This gives you an accurate indication of what the soil temperature is, regardless of the air temperature.

Introduction to Seed Starting video with Terroir Seeds

We have created a short video showing how we have started seeds for several years now. This is the result of many experiments and really works well for us. By no means is this is the only way to do it, as we know of several different but equally effective ways to get seedlings started at home. This is just what works for us, and the expense didn’t break the bank. We constructed this in stages after experience and experiments taught us what works in our situation. This takes up little space and produces a lot of seedlings for our trial garden. Take a look and please let us know your thoughts, ideas and experiences that we can share with everyone else!