Blue & Yellow Polenta


Making polenta takes a bit of time, care, attention and love but the results are delicious and will become highly valued by friends and family. It is a peasant dish, a close relative to cornmeal mush that has been refined and is no longer just a starvation staple of poor subsistence farmers. Polenta is featured in highbrow restaurants with exotic ingredients anchored to the cornmeal base. Done the traditional way, polenta takes work – about an hour straight of constant stirring – but there is another method that is simply delicious without all of the work. There is still some stirring and a good timer is needed, but you won’t be chained to the stove the entire time.

Northern Italy is where polenta is a staple, made from corn brought over from the New World and grown ever since the mid-1500s. As with many Italian dishes, there are many regional variances from a light Venetian recipe to the Lombardy buckwheat and corn tradition that is mixed with garlic and aged cheese.

Being invited to a home in Northern Italy and having polenta is an honor, a sign that you are not simply a guest but are considered as one of the family as polenta is home cooking and not for “company”. Part of it is the work involved to make it in the traditional way; the other is that until recently polenta was looked down upon as food for the poor and not to be served to honored guests. Now that those same Northern Italian areas have achieved wealth and status, polenta is eaten for enjoyment, to remember and as a comfort food.

I’ve been a fan of Marcella Hazan for years. It was in one of her earlier cookbooks that I learned the simple method of successfully making homemade noodles. It isn’t difficult, but I found out that I was rushing the process and not allowing the noodles to relax between rolling them out. After reading her process where she walks through the process and explains why things need to be done in a certain way and at a certain time, I made the most delicious fresh noodles and became a fan of her writing. I was never able to take one of her cooking classes, but her books have always had that way of explaining why things are done the way they are, helping me to be a better cook and capture the essence of those flavors.

Marcella has developed an easier method of making polenta that tastes like the traditional way. It still takes about an hour to make, but you can walk away from the stove for sections of time, going back to stir and monitor the process. You will see the cornmeal mixture turn silky and soft from coarse and grainy about half way through!

In the spirit of cooking with more locally sourced ingredients, we’ve changed this recipe from corn and buckwheat flour to yellow and blue cornmeal with homemade smoked chicken broth instead of just water. Growing your own corn just for polenta will make complete sense during the very first bite! The flavors cannot be compared to any cornmeal that is store-bought. They will be richer, bolder, earthy and sweet with a substantial feeling after tasting. Making extra takes no more work and will give you extras for the next few days to use as an appetizer, side dish, breakfast foundation or snack.

Here’s what you could grow in your garden for this recipe –

Blue and Yellow Polenta
Our Southwest adaptation of Marcella Hazan's Polenta Taragna - Buckwheat and Cornmeal Polenta.
Servings: 6
Author: Marcella Hazan
Ingredients
  • 10 cups of liquid - 1 - 2 quarts of homemade chicken broth 4 - 8 cups supplemented by water to make the total
  • 1 3/4 cups coarse ground yellow cornmeal
  • 1 3/4 cups blue cornmeal - will usually be finer ground
  • 2 yellow or white onions - diced
  • 3 cloves garlic - diced
  • 1 1/2 tablespoons salt - preferably sea salt or RealSalt
  • 1 cup dry white wine
  • 1 tablespoon extra virgin olive oil
  • 1 cup aged Italian grating cheese
Instructions
  1. Add the water and broth to a large heavy pot that has at least 3 - 4 inches of room above the liquid and bring to a boil over medium high heat.
  2. While water is heating, mix both colors of cornmeal in a bowl.
  3. When the liquid is boiling slowly, slowly add the cornmeal to the water while stirring with a wire whisk. It is important to add the cornmeal in a thin trickle to avoid clumping. You can add it a fistful at a time or use a 1/2 cup measuring cup, just make sure to add it slowly, being able to see the grains as they trickle in. This step may take several minutes, just be patient.
  4. Once all of the cornmeal has been added, stir well for a couple of minutes with a strong long-handled spoon. Add onions and garlic and stir in. After stirring well, cover with a tight-fitting lid and adjust heat to a low steady simmer.
  5. Set the timer for 10 minutes. After 10 minutes, uncover and stir for at least 1 minute, preferably 2. Make sure to mix the mixture well and from different directions.
  6. Add wine and olive oil at the 20 minute mark
  7. Repeat timer 3 times, stirring well for 1 - 2 minutes each time. You will feel the mixture firm up each time. If needed reduce the heat slightly.
  8. After 40 minutes you should see the mixture lose it's grainy, course texture and become silky, soft and creamy. If you are stirring at the time you will see it happen. It will also begin to pull away from the sides of the pot into a single mass.
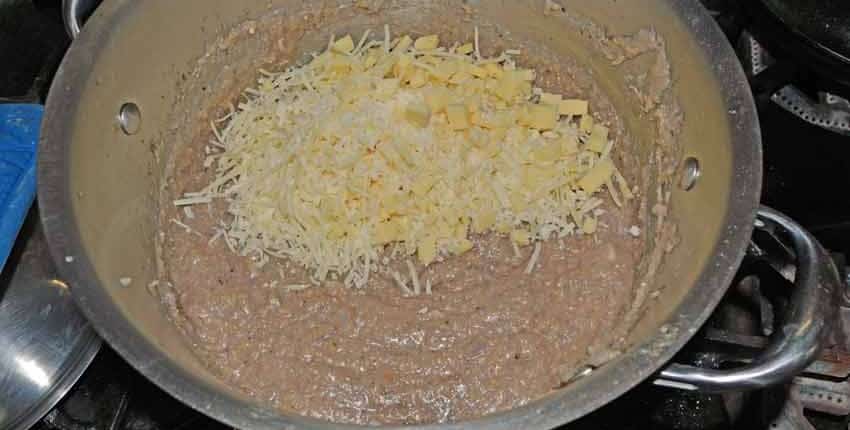
  9. When it becomes soft and creamy, add cheese and stir vigorously for 1 minute, cover it, turn the heat off and let sit for 3 - 5 minutes to firm up.
  10. Serve hot with a rich roast, sausages, or roasted chicken.
  11. Allow extra to firm up either in the pot or scoop out onto a moistened board or counter top for use with other meals.
Recipe Notes

Polenta is extremely versatile - grilled, pan-fried, with eggs for breakfast or warmed and drizzled with olive oil and Balsamic vinegar for an appetizer.

Adapted from Marcella Cucina

 A plant growing in the dirt on a sunny day.

Amazing flavors come from such simple ingredients! A closer look at the main ingredients.

A plant growing in the dirt on a sunny day.

This is how you should add the cornmeal – trickle it in slowly enough to see the individual grains of cornmeal.

A plant growing in the dirt on a sunny day.

The mixture will begin to get thicker at the end of adding the cornmeal, so you might have to change your grip on the whisk! I changed to the long spoon just after adding the rest of the cornmeal to make it easier to stir.

A plant growing in the dirt on a sunny day.

This was at about 40 – 45 minutes. I added the cheese and gave it a good stir for about a minute. You may or may not be able to see that it has turned silky and creamy at this point. I turned off the heat, covered it and let it sit for about 5 minutes after stirring the cheese in.

A plant growing in the dirt on a sunny day.

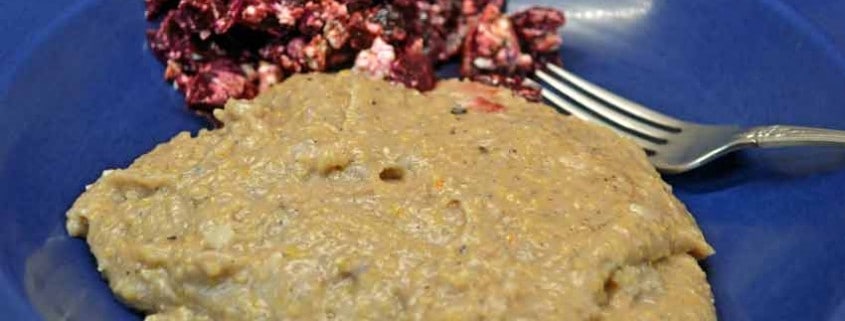
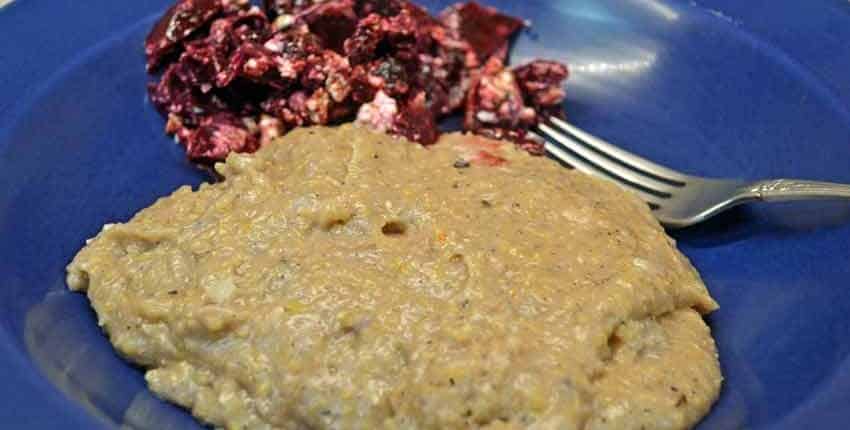
The finished result, accompanied by roasted beet and feta cheese salad dressed with olive oil and Balsamic vinegar.


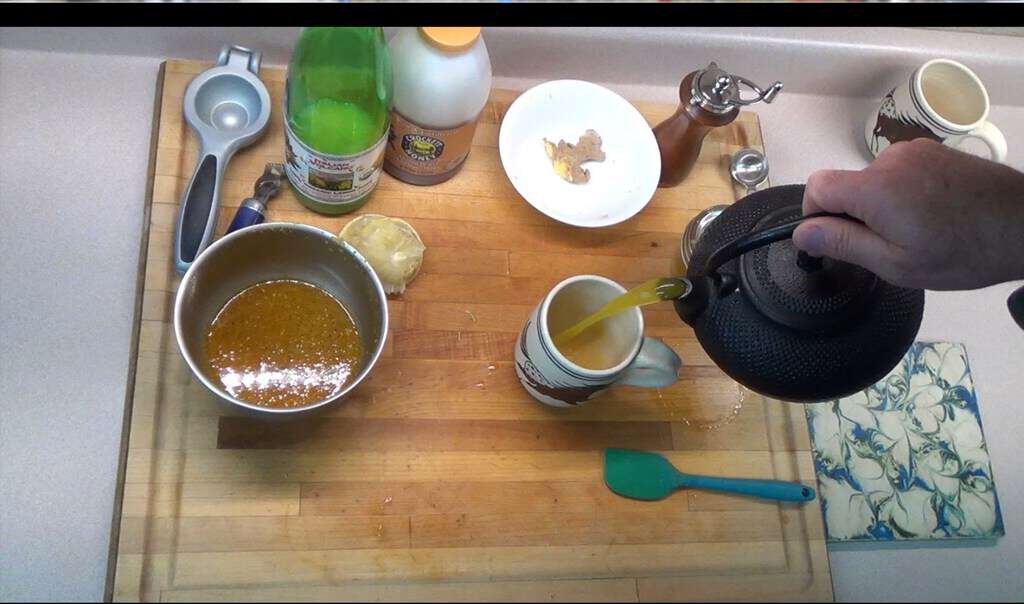
What happens when you combine the traditional honey and lemon juice sore throat or cold remedy with the powerful benefits of ginger and turmeric? You get an easy to make and highly effective cold killer! Stephen shows how to make it in just a few minutes:

This is the basis of a very flexible recipe. You can add chile powder for sinus issues and to boost the cold and flu fighting power or garlic for more benefits.

5 from 2 votes
Honey Lemon Ginger Turmeric Cold Killer
Prep Time
5 mins
Total Time
15 mins
 
Easy to make and highly effective, this recipe combines honey, lemon juice, ginger and turmeric to help you feel better fast. This will make two servings - save the second in the refrigerator for just before bedtime.
Servings: 2
Ingredients
  • 1/2 cup honey - preferably raw unfiltered and as local as possible
  • 1/2 cup lemon juice - fresh squeezed is best
  • Zest from one lemon
  • 1 - 2 tablespoons fresh grated ginger
  • 1 - 1 1/2 tablespoons ground turmeric
  • Fresh ground black pepper
Instructions
  1. Mix all ingredients together
  2. Heat enough water for a couple of cups of tea
  3. Add half of mixture to tea strainer, steep in hot water for 4 - 6 minutes
  4. Remove strainer with ginger pulp, or let steep for another 5 minutes then remove
 

Coconut Geranium on Seed Screen


Seed quality matters, whether you are a home gardener, small-scale grower or large farmer; whether you buy all of your seeds, save some for next season or a combination, this information can help you be better informed, make better choices and buy more wisely.

The marriage of the concepts of heirloom seeds and seed saving is not new by any means, but rather one that has been growing and gaining ground in the past several years. For some, this is a welcome return to a more traditional method of agriculture, while others use heirlooms for their flavor and diversity to improve the breadth of their products and offerings to the public.

Cindy and I have been home gardeners for 18 years and involved with soil restoration and rangeland improvement projects with local ranchers for 20 years. Our interest in food, especially good food, goes back a bit further than that! Our appreciation for seed quality and seed saving came from both our work with soils and interest and enjoyment of good food. Tasting the flavors of our garden produce sparked the interest of how to keep those characteristics that the seed produced for the future, to be able to enjoy them and share with others. Thus our seed saving education began.

Several years after taking over, refining and expanding an established family owned heirloom seed company of 20 years, we’ve gained knowledge from the differences and similarities in seed quality, production and seed saving from these two different perspectives. We want to share some of these with you; along with lessons we’ve learned along the way that can help improve everyone’s seed quality.

We will work from a point-to-point framework, showing the goals, concerns, differences, and similarities in both types of seed production and preservation approaches.

The foundational goal is the same for both the home gardener and seed company – having a sufficient quantity of high-quality seed stock of each variety needed for next year that is pure and true to type. This sounds simple enough, but in practice is not always easy to accomplish for either one.

We are approaching this from a seed quality standpoint, not just a seed saving one. Saving seed is fairly simple to do, but the results from planting those seeds can be very mixed; without a basis of understanding of seed quality, people can be disappointed and confused as to why they got the results they did. Both the home gardener and the seed company must understand seed quality to be successful in their respective endeavors.

Goals
A plant growing in the dirt on a sunny day.

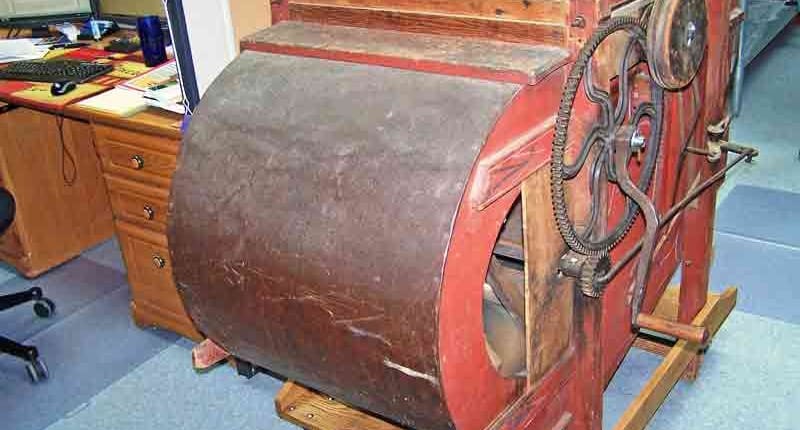
Antique Hand-Cranked Seed Cleaner


Let’s look at the goals and concerns from both points of view:

The home gardener might state the reason for saving seeds as, “Enough seeds for next year’s planting, reduce the amount of seeds needed to buy, take advantage of selection and adaptation to achieve better production in our local climate.” These reasons are the very roots of why home scale seed production is important on a local and regional scale. A diversity of varieties are kept alive that are simply not possible on a national scale, as some regional adaptation can only happen in a small geographical area and won’t be applicable to a larger audience, but are no less important for the local people in that area.

As a seed company, our goals might be, “Produce a sufficient quantity of enough varieties and volume of seed to sell next season, introduce several new varieties, provide a wider selection for gardeners than they can produce themselves and provide a high-quality standard that maintains our reputation.” This reflects how the seed industry started, by offering varieties that were new, unusual or were not available in an area and offering a professional standard of germination and production that benefitted the gardener and grower.

These are similar goals, but on completely different scales and for different results. Their achievement and success depends on how the concerns or challenges are recognized and approached. We have economies of scale as a seed company with our network of growers, but the home gardener has some advantages that we would have a hard time taking advantage of, like keeping a locally adapted regional variety alive.

There are no one-size-fits-all best solutions to the availability of quality seed. A resilient, robust and diverse seed and food economy require home gardeners, regional and national seed exchange programs to participate alongside independent seed companies to contribute all of their unique advantages and skills. Only in this way can the full expression of the diversity and adaptability of open-pollinated seeds be realized and utilized. This might be considered the definition of seed quality!

An obstacle for the home gardener used to be the lack of access to solid, proven and reliable seed saving information and resources. There were lots of introductory articles, booklets, and classes on seed saving, but little in the way of intermediate or advanced classes, books, forums or articles for the home gardener. Thankfully, this is not the case anymore, as the internet has given the home gardener access to more detailed and advanced information.
A plant growing in the dirt on a sunny day.

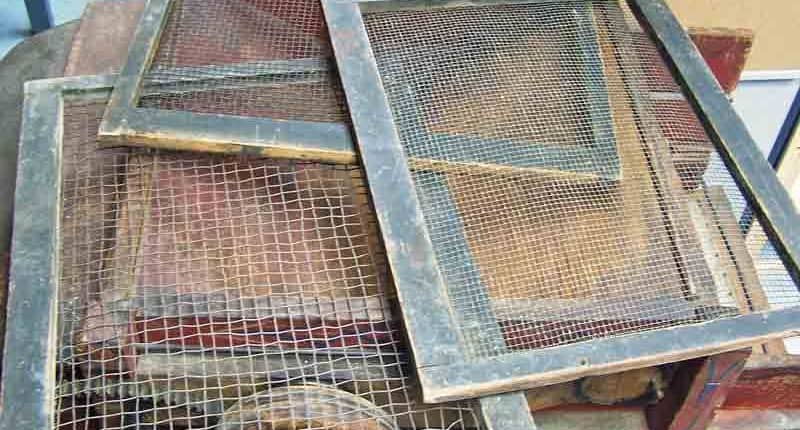
Antique Seed Cleaner Screens


A few examples are Seed Savers Exchange, an excellent resource for the home gardener to learn from and exchange seed stock with. There are also online resources usually used by seed professionals but accessible by anyone such as GRIN, the Germplasm Resources Information Network of the USDA and PFAF, Plants for a Future. There are several books available that are excellent in their education of producing seeds; one is “Seed to Seed” by Suzanne Ashworth that has been one of the standards for seed production and saving for over 20 years. Another newer one is “The Complete Guide to Saving Seeds” by Robert Gough & Cheryl Moore-Gough, which covers flowers, trees, and shrubs.

In addition to the above-mentioned resources, as a seed company, we have access to our growers and other professionals – a group of experienced food and seed producers who have learned through years of training, experience and trial-and-error how to produce the best seeds to continue the traits and characteristics of each variety they grow. These resources are closely guarded, as a highly experienced seed grower is a very valuable resource for any seed company.

Challenges

When looking at the challenges of producing high-quality, viable seed in enough quantities for next year, both the home gardener and seed company face similar concerns. Seed quality should be the primary concern for both. Without high quality, true seed there would be too much variability in all aspects of agriculture, from seed germination, growth, health, pest and disease resistance, food production and the harvesting of more seed. The quality is achieved through proper management, isolation, harvesting, and testing ensuring the viability, vigor and growing true to type of next year’s seed crop.

Management methods

Management for the home gardener starts with the decision of how many plants to use for seed production as opposed to food production, which can be quite different. Ripe vegetables often have immature seeds, while mature seeds are normally found in inedible, overripe or almost rotting vegetables. Some varieties can produce both food and seed by simply letting chosen specimens ripen and mature their seeds on the vine or bush, while the rest are harvested for food, such as a perfect tomato tagged to let ripen for its seeds. Others will need to be kept solely for producing seed, such as a lettuce plant that needs to be allowed to bolt to set seeds.

Minimum Viable Population

A sufficient number of plants, called a minimum viable population, should be used to avoid a genetic bottleneck or the loss of genetic adaptability and diversity that inevitably occurs over time. Sometimes this is hard for the home gardener to do, as often there isn’t enough space for the population needed while allowing for other vegetables to be grown. Our tomato example serves here, as the minimum viable population is 100 plants, way too many for most home gardeners. The rule of thumb is that outcrossing varieties such as tomatoes need 100 plants as a minimum genetic population, while inbreeding ones like peppers need 20 plants. So what is a home gardener to do?

Even modest home garden seed production often results in much more seed than one gardener will use in several years. One very effective solution is participation in member to member seed exchanges either locally, regionally or nationally. This has the dual benefit of introducing a greater amount of genetic diversity to overcome a smaller plant population from any one garden while dispensing extra seed.

As a seed company, this concern is overcome by the number of plants needed to produce the quantity of seed for next year’s sales, and most seed growers who are also food producers have separate fields for seed production, so there is no conflict with seed vs. food growing.

Isolation and Selection

A plant growing in the dirt on a sunny day.

Isolation Cages


To keep seed quality high, isolation and selection are both used as part of quality management. Isolation simply means keeping two similar varieties, such as peppers, from cross-pollinating. Selection chooses the most desirable characteristics to save seed from or removes undesired characteristics from the seed producing population.

Isolation methods can be time, distance or physical. The time method is simply planting two cross-pollinating varieties at different times so that they aren’t flowering at the same time. Distance isolation involves planting far enough apart so that the pollen or pollinators cannot reach each other. Physical barriers prevent the spread of pollen from one plant population to another by cages, pollen sacks or socks, a thorough but time and labor-intensive approach.

Home gardeners often use time isolation by either planting at different times during a growing season, or only planting one variety each season. Distance isolation can become a challenge, depending on the size of the garden or property. Usually, only very dedicated seed savers will use physical barriers.

Our seed company utilizes a network of seed growers to solve the different seed crop isolation requirements. Time isolation is used by those with longer growing seasons while larger growers use the distance approach, having the needed space on their properties. Another solution is several growers producing different seed varieties at the same time. Physical isolation is used extensively when correcting undesirable traits in a variety, during grow-outs to re-introduce a new or rare variety or for traditional seed breeding and stabilization.

Selection is another aspect of quality management in seed production, with two approaches – negative and positive. Negative selection, or rogueing, removes undesirable aspects, characteristics or traits from the seed producing population to maintain the established variety. An example of this is a potato-leaved tomato. Any regular-leaved tomatoes growing in the row would be removed as undesirable for that particular tomato’s characteristics. Another might be the color of the flowers of a vegetable – the purple ones would be removed, as yellow is the color of the correct characteristics. Positive selection involves saving seed with desirable aspects, characteristics or traits such as a large, sweet, striped, early paste tomato. Positive selection over a period of a few years is how local adaptation can be enhanced for the home gardener, and new varieties brought onto the market for seed companies.

Both the home gardener and seed company grower would over-plant slightly to account for selection losses, and perform the selection process as part of their daily gardening and inspection activities.

Germination Testing and Trialing
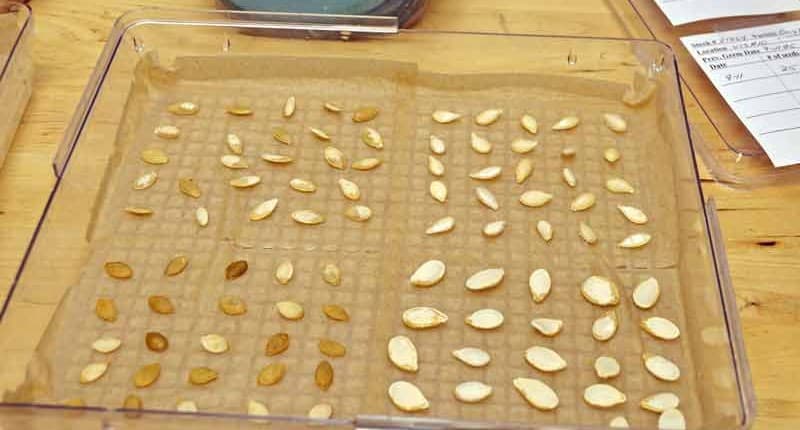
A plant growing in the dirt on a sunny day.

Seed Germination Testing


Two final aspects of quality seed management are germination testing and trialing or grow-outs, which give proof of the seed sprouting quickly with lots of vigor and growth energy, growing true to type with weather tolerance, disease resistance and good production amount. This becomes “the proof in the pudding”, as it shows any weaknesses and confirms the desired characteristics of the variety being produced.

The home gardener can easily test the germination of the current crop of seed early in the winter, as most seed needs to dry completely and age a few weeks before showing the best germination. For most crops a moist paper towel in a sealed plastic bag works very well to test germination. The grow-out can be as a food crop next year so that the production and garden space are not wasted.

We as a seed company will either have the germination tests performed by the grower so that any issues can be addressed before the seed is shipped to us, or we will perform them once we receive the seed from our smaller growers. Either way, all of our seed is tested for germination prior to being sold to our customers. Next spring’s grow-out will be done either by us or the grower, depending on the grower, the seed variety and seed volume.

There are those that would argue that the heirlooms we have today are the result of families saving their seeds and passing them down from generation to generation. This is partly true, but only partly. We have the abundance of heirlooms today thanks to the families that saved them, the local and regional seed exchanges that helped keep them alive and the seed companies that grew them out, advertised them to a wider audience and sold them across the country.

Aunt Ruby’s German Green tomato is a perfect example – grown in northern TN for over 200 years, passed to a great-grandniece, they would have been lost if they hadn’t been passed to Bill Minkey who donated them to Seed Savers Exchange. They grew the seeds out, told their story and they survive today because of that collaboration. Another excellent example is that of the Concho chile from northeastern Arizona. It was grown in the tiny town of Concho, AZ for several hundred years after being traded by the Espejo expedition in 1563 to the local Hopi Indians. Around 2000 it was almost extinct with only a couple of families continuing to grow it. A local lavender farm resurrected it and shared the seeds with us, and we have helped it to reach all across North America and several other countries.

It took the effort of everyone – the gardener, the seed exchange and the seed company to keep these and many other heirlooms alive; one alone wouldn’t have been able to do it. This is the circle of life of the seed, along with those who care for the seed.

This article was originally published in the January 2014 issue of Acres USA magazine!


Pest and Disease Prevention Before Treatment

Pest and disease prevention is a major topic for many gardeners and for good reason. We spend countless hours in planning, planting, tending and harvesting our gardens only to sometimes have a disease or insect bring much of our efforts crashing down.

What many gardeners don’t know or fully realize is the powerful benefits of a systematic, thoughtful and determined effort in cleaning up the garden, tools and debris that remains after the season ends. Properly done, this can significantly reduce the occurrence and damage done by pests and diseases, increasing the enjoyment and production of the garden.

Let’s take a top to bottom look at things that you can do in the very late fall and early winter after the garden is dormant to give your garden a much better head start next season.

Food and Shelter – Two Big Keys in Pest and Disease Prevention

The biggest reasons for cleaning up the garden, removing dead materials and weeds and thoroughly cleaning and treating your gardening tools is to remove the food and shelter that is the foundation of pest and disease prevention. The first steps are sanitation in the colder season, and then preventing their introduction into the garden next growing season.

Pests and diseases don’t just magically show up out of nowhere, though they may seem to! Pests especially need a place to survive the winter and food to keep them alive. Diseases can be a bit more involved to treat, but with some forethought and understanding, it isn’t difficult.

Removing dead plants, weeds, and debris from the garden after it is finished growing is essential in preventing pests from having a convenient winter “home” where they wait for the new season’s growth to show up. Potato beetles, squash bugs, squash vine borers and certain species of aphids are very destructive examples of pests that will overwinter in the garden bed if their shelter isn’t removed. The perfect environment is shown in the lead photo.

We found this out to our detriment with squash bugs, as we use wood chips for our walkways in the trial garden – the perfect winter housing for them! We now only grow squash and pumpkins in the garden every third or fourth year, using straw bale raised beds outside the garden other years. This starves them of a yearly, reliable food source and keeps their population under control.

Another example is the fungus responsible for damping off in young seedlings. The fungus will survive in dead organic matter, often producing spores that can survive over the summer in unwashed and sterilized seedling flats and coming back with a vengeance when new seedlings are planted.

Once the housing is removed, next we need to look at the food sources for pest and disease prevention. Weeds are not only a nuisance, but they are very important sources of food and housing for both pests and diseases, often with the diseases piggy-backing on the pests to get into the garden. One example is cucumber mosaic virus overwintering in chickweed and groundsel, and then coming in next spring. Others are pigweed that harbor grasshoppers, flea beetles and aphids; annual grasses that aren’t grazed or mowed housing cutworms, armyworms, flea beetles, grubs, several species of aphids and the Colorado potato beetle; Russian thistle (tumbleweeds) is an especially good example as it harbors the sugar beet leafhopper, which in turn is a common host for the curly top virus that decimates many garden crops like tomatoes, beets, green beans, squash, cantaloupes, and spinach.

Removing the housing often removes a major food source at the same time, and vice versa, so you don’t often need to do twice the work to be effective in sanitation and prevention. Removal and control of weeds and unmanaged grasses is very important for pest and disease control, not only in the garden but adjacent to it as well.

Clean and Sanitize – Prevention and Treatment

A close up of a saw with a brush on it

Cleaning a Hori-Hori Knife

We now have a good handle on taking care of the food and housing for pests and diseases, so what next? One of the biggest culprits for the introduction of pests and diseases is from them being carried in, either from contaminated plants bought at big box stores or garden centers, from insects that overwinter in firewood, smokers spreading tobacco mosaic virus throughout the garden, or from contaminated tools spreading diseases to other plants and trees.

For smokers, the tobacco mosaic virus can easily stick to the fingers or clothing and be spread to plants in the garden. After smoking, wash hands thoroughly with warm soapy water and ideally wear a different shirt or over-shirt than the one smoked in.

Pruning shears and tools can inadvertently be the cause of a disease spreading, as it picks up and distributes the virus or fungus from one branch and tree or shrub to another. If you are working on cankers or other diseased portions of a tree or shrub, sanitize the tools after each cut to prevent spreading the disease to other parts of the tree with a simple spray or dip of rubbing alcohol or commercially available sanitizing solution. Wiping with antibacterial wipes is also very effective. Do not use bleach or bleach solutions as it will cause accelerated corrosion of metals. If you are fighting an outbreak of disease in your garden it is very prudent to sanitize your tools and gloves after each use in the affected area, especially before using them in other, disease-free parts of the garden.

A person holding a pair of pliers next to a yellow marker.

Sanitizing Pruners with and Alcohol Spray

Sanitizing all of your garden tools – hand tools, shears, pruners, rakes, shovels, wheelbarrows (including tires) is always a good practice at the end of the season, especially if you have had an attack of disease during the season or have an ongoing issue. Many plant diseases only need one single pathway into the garden, and we often unknowingly bring it in season after season; working against ourselves.

Shovels, rakes and larger tools can be cleaned by scraping away any residual mud or dirt, then plunging them in and out of a bucket of sand to remove rust and small amounts of dirt before spraying with alcohol to sanitize before putting away for the winter. Smaller hand tools like pruners and trowels can be wire brushed to clean and remove rust, then alcohol sprayed as well. The bucket of sand treatment might work with some tools. Wheelbarrows should be cleaned inside and out, dirt removed and wire brushed or sanded before spraying with alcohol or sanitizing solution. Don’t forget the tires and handles!

A bunch of tools sitting in the dirt.

Cleaning Gardening Tools with Sand

With these proactive techniques, you will find that dealing with pest and disease issues will become much easier as you close the door to easy entry. A side benefit of doing these procedures will show you different ways that pests and diseases gain entry, making it that much easier and effective to stop them early on.