Preserving that overly abundant harvest has been one of the major challenges that gardening and agriculture has always had. In today’s world we are much more familiar with the processes of canning, drying and freezing as acceptable methods of preserving our garden’s harvest for the winter season and longer. These methods have their own set of challenges, though. Canning requires time, experience and knowledge to be successful. Freezing is pretty simple, but has its own set of needs to ensure the garden bounty isn’t lost to freezer burn or premature thawing. Drying is also simple, but benefits from modern drying equipment that can be expensive as an initial purchase.
What if there was another way, a method of preserving the harvest that is not only simple, non-intensive for both labor and equipment and was proven safe? One that is location and temperature independent, doesn’t care if you forget the exact timing and still produces an absolutely delicious product? There is! That method is fermentation. It has been proven safe over several thousand years, with at least that many different approaches and many more recipes. Almost every culture across history has contributed something to the art of fermentation.
Fermenting vegetables is an extremely simple, effective and tasty way to start experimenting and gaining knowledge, taste and experience. In addition to being easy and quick it is also highly nutritious and beneficial to your health.
Some folks are hesitant or outright afraid of trying fermentation for fear of accidentally growing the “wrong” bacteria and sickening or even killing themselves or their families. This is completely understandable in today’s world of anti-microbial soaps, detergents and wipes.
At least in the world of raw vegetables, this fear is unfounded. “As far as I know, there has never been a documented case of food-borne illness from fermented vegetables. Risky is not a word I would use to describe vegetable fermentation. It is one of the oldest and safest technologies we have.” This is from Fred Breidt, a USDA microbiologist specializing in vegetable fermentation.
In fact, fermenting commercially available vegetables will kill any pathogens that we’ve seen in the news as contributing to food-borne illnesses, as they simply cannot survive in the lactic acid environments of fermentation!
This is going to be a slightly different recipe format than we usually do. We will give you a foundational approach to fermenting any vegetables, and then give a basic recipe for a sweet and hot fermented pepper sauce or paste. The beauty of these recipes is that they are entirely scalable. Do you have an extra quart of hot chiles, a handful of sweet peppers and some garlic or onion? Great, we can work with that! Or do you have a couple of 5 gallon buckets of hot chiles and 3 more of sweet peppers, more onions than you know what to do with and you’re worried about them all going bad? No worries, we can work with that as well – all from the same recipe! The flavors from each recipe will be different, but equally delicious and nutritious.
There is a new book on fermentation on the market, and it is most excellent. The Art of Fermentation by Sandor Katz is his newest exploration of this ancient form of preserving foods. His tagline on the book reads, “An in-depth exploration of essential concepts and processes from around the world.” The basic concepts of fermenting come right out of his book, and they are easy!
Vegetable Fermentation Made Easy
Chop or grate vegetables.
Lightly salt the chopped veggies (add more as necessary for taste) and pound or squeeze until moist; alternatively, soak the veggies in a brine solution for a few hours.
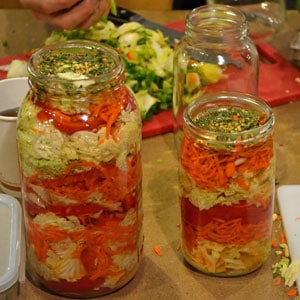
Pack the vegetables into a jar or other vessel, tightly, so that they are forced below the liquid. Add water, if necessary.
Wait, taste frequently, and enjoy!
It doesn’t matter if you have one or a dozen veggies, the above recipe works. Add spices, herbs or edible flowers and experiment. You will be surprised at just how tasty almost everything comes out.
Now that we have the basics down, let’s look at how to handle that bumper crop of hot chiles and sweet peppers. These, along with tomatoes, are one of the most expensive vegetables to buy in the store, but taste so much better out of your garden. It is an absolute crying shame to let any of these go to waste!
Let’s look first at a hot fermented chile sauce, much like Sri Ra Cha or “Rooster Sauce” as it’s called after the rooster on the bottle. The only ingredient ratio to keep in mind is the chile to garlic. Don’t go crazy on the garlic, as it gains pungency as it ferments and can throw off the overall flavor.
A note on the salt – use anything but Iodized salt, as this will cloud the color of the brine and can leave a metallic aftertaste.
Optional: 1/4 Cup fish sauce in place of vinegar. Use Vietnamese for a stronger flavor or Thai for a milder one.
Optional: Tapioca starch for thickening
Remove the stems from the chiles, leaving the green “cap” where the stem meets the chile. It adds a unique flavor during fermentation.
Chop the chiles and garlic lightly, using a food processor if needed until mixture is largely chunky. Do not process too much, just minimally.
Add chile mixture to a half-gallon Mason jar or other non-metal container. Sprinkle salt in while packing chiles. Pack down with a wooden spoon or spatula. Add just enough water to submerge mixture and cover with a dish towel secured by the ring.
Ferment for a month, more or less as taste dictates. Taste about every week to see when it is “done” for your tastes. You will see how the flavor changes with time. Keep chile mixture submerged and remove any mold that forms on top by lifting it out with a spoon, fork or spatula.
When the fermentation is finished, liquefy in a blender or food processor. Strain out the seeds and pulp with a cheese-making cloth and let hang for a few hours or squeeze to get all the liquid out. Discard the pulp and seeds. Heat the liquid on low heat, adding the sugar and vinegar or fish sauce and stirring them in.
Once the sugar, vinegar or fish sauce are melted in you can lower the heat and reduce the sauce to the consistency you like or use a little tapioca starch to thicken it, much like using corn starch. Tapioca will add just a touch of sweetness, won’t be bitter and is GMO free. Let cool and bottle.
Store in the refrigerator.
Will keep for 6 months or more, but you’ll eat it long before then!
Recipe notes: Wait until the chiles are fully ripe and red, as they will have the most complex flavor profile and yield the tastiest sauce.
Use the general ratio listed to scale up or down to suit your particular needs at the time.
Now let’s look at a larger batch with more ingredients and a completely different flavor.
Sweet and Spicy Fermented Pepper Sauce
3 Lbs Ripe red chiles, much the same as above
1 Lb Ripe sweet bell peppers – Jupiter, Melrose, or Lipstick
1/4 Cup apple cider vinegar or fish sauce for additional flavor
The procedure is much the same as for the above recipe. Chop the chiles, sweet peppers, garlic and onion.
Submerse in a suitable container, pack down with a wooden spoon and cover with water. If using a large, open container it may help to use a plate on the top weighted down with one or two heavy-duty freezer Zip-lock bags filled with a brine solution of 3 Tbs salt to 1/2 gallon water. This way if the bags do spring a leak, you don’t dilute the brine of the fermentation. This also allows the bubbles to get past the plate and bags without building up pressure.
Ferment for a month, tasting weekly.
Liquefy in a blender, strain out the pulp and seeds.
Heat on low and add sugar and vinegar or fish sauce.
Thicken if desired.
Enjoy!
Now you have the basic foundation of how to make some incredibly delicious chile or sweet fermented pepper sauce. You can go from mild to shockingly hot and experiment with different spices and amounts of complementary vegetables to add their flavors. You will quickly become something of a hero to your family and friends once they taste your unique sauces!
As you improve the health and fertility of your soil, you should start seeing some impressive vegetable harvests. This can be a blessing as well as a curse though. Many people know the old but highly accurate joke about the neighbor that leaves a bag of zucchini on the doorstep, rings the doorbell and runs. This is all well and good, but what to do with 100 pounds of fresh plum tomatoes? Or 150 lbs., 200 lbs. or more? The old doorbell trick will only go so far, so let’s look at a delicious alternative! Tomato conserve is a perfect choice.
Drying and canning are always options, very good ones that should be used. There is another ancient method of preserving the bountiful harvest to capture the fresh flavors for the cold winter and gray early spring months when there wasn’t much of anything fresh available. Fermenting fresh vegetables opens up so many flavors and paths to storing this summer’s bounty for the coming winter. We will look at one such method that not only ferments the over-abundance of tomatoes, but concentrates their flavors as a bonus.
A word about fermenting before we begin is in order, so that you don’t come home one day and throw out the entire project due to a misconception or lack of understanding of how the process works. This particular process uses a wild fermentation, meaning the combination of wild airborne yeasts and the naturally occurring bacteria that is on the tomatoes. This wild fermentation is spontaneous; you don’t do anything to help it along. The acid in the tomatoes provide the perfect environment to support lactic acid fermentation. There will be a surface mold which is white and completely normal. Indeed, the white surface mold is needed to protect the tomatoes from rotting. You should not see any colored mold or offensive “rotting” odors.
This process has been used for several hundred years in Italy; probably the first time was shortly after the tomato made its way from America to Italy in the early 1500s. It is still being used today, all across Italy, as small scale home growers put up their harvests to have the flavor of summer to remember during the coming winter.
The beauty of this method is that it is very scalable, able to handle 20 lbs. in one batch and 100 lbs. or more the next one.
Fresh Tomatoes for Conserve
Start with all of the tomatoes washed, stems and any bad spots removed. Get a container that is larger than the amount of tomatoes, so that when all of the tomatoes are crushed there are several inches of space to the top of the container. If necessary, use more than one container.
Packing Fresh Tomatoes
Crush all of the tomatoes and add them to the container. Stir well and cover with a towel, dishcloth or such to keep insects out while allowing air circulation.
Fermenting Tomatoes
The fermentation happens within a few hours and bubbles will appear, with the solids coming to the top and a white mold forming on them. Remember, white mold is good! Stir twice a day, mixing in the mold. (Note, we did not stir the tomatoes, just let them sit for 5 days and everything turned out fine!)
Fermented Tomatoes
The fermentation will take from 4 to 5 days, depending on temperature and then stop. Remove the solids from the top and strain the mixture through a strainer. One of the best ways to do this is by using a hand cranked device that separates the skins and seeds from the pulp, called a Squeezo or Roma food strainer. The Squeezo is all metal and more expensive but will last several lifetimes!
After straining, keep the pulp and compost the seeds and skins. (As a side note, it you are wanting to save the seeds from those wonderful tomatoes, just transfer them into another bucket for a second ferment for a couple of days, scoop off the mold on top and strain out the seeds. Rinse thoroughly and dry on paper towels with the seeds spread out.)
Fermented Tomato Pulp
The pulp will still have a lot of moisture that needs to be removed. Do this by further straining the pulp in a fine mesh bag or cheese making bag over the sink or a catch bowl. Tie the bag closed, let it hang and drip liquid for a day. It may become covered with a layer of white mold again, just “shave” it off after it finishes the drip process.
Draining Tomato Pulp
The pulp will be noticeably drier and reduced in volume. If the consistency is thick enough for you, stop here. If not, put the bag between two boards or plates with a weight on top to compress it and further drain moisture out for another day or two.
Drained Tomato Pulp
When it is the consistency that you want, traditionally that of firm dough, remove any mold on the bag, open it up and peel it off of the now-firm pulp.
Fermented Tomato Conserve
The Italians add 25 percent salt to the tomato pulp, but most Americans find this to be way too salty. 10 percent is a good starting point, as it is much easier to add salt than to remove it! Mix the salt in well and let sit. After a few hours knead the mixture just like dough to develop the texture and store it in a jar. It does not need to be refrigerated and will last for several months. In Italy it is usually stored in waxed paper. If you do choose to store it in the refrigerator, it should last for a year.
Fermented Tomato Conserve
The end result will be a preserve that is about 8 – 10 percent of the amount of tomatoes you started with. The flavors will be highly concentrated, so a very small amount will add a tremendous amount of flavor to your dishes, from soups, stews and sauces to omelets, dressings and marinades.
“You have to live a life without fear; and to be fearless, you have to have a very clear conscience that guides you on a daily basis. If you are fully aware of doing the right thing everyday, there is no power on earth that can make you afraid.” ~ Vandana Shiva, Mt. Allison University, New Brunswick Feb. 26, 2012
“We live today where creating fear is the political governing style today. Cultivating fearlessness I think is one of the most important trainings of democracy and citizen freedom.”
We share this short video of Vandana Shiva telling her story of the struggle to preserve heirloom seeds in her native India from the wonderful folks at The Perennial Plate.
Engineering Salt, Sugar and Fat to Create Food Addiction
“Today, one in three adults is considered clinically obese, along with one in five kids, and 24 million Americans are afflicted by type 2 diabetes, often caused by poor diet, with another 79 million people having pre-diabetes. Even gout, a painful form of arthritis once known as “the rich man’s disease” for its associations with gluttony, now afflicts eight million Americans.”
-Michael Moss in The Extraordinary Science of Addictive Junk Food
How did we reach this stage of poor health as a nation? The answer may surprise and anger you. As with most complex issues, the answer is not as simple as many talking heads in the media and nightly news would have us believe. It isn’t just a matter of willpower, or knowledge, or education, or alternatives to the junk food that is, quite literally, killing us. The answer is far deeper, wider reaching and more sinister.
Most processed foods these days are “optimized”, or engineered for better sensory perceptions that drive us to eat more. These sensory perceptions include but are not limited to the physical appearance, packaging, shape, mouth feel, taste and array of flavors, aftertaste, smell and satisfaction of a food. One of the most important factors that are considered is the strength of the urge for a second bite, sip or swallow, or a third.
Everyday people spend hours in tasting rooms where they touch, feel, sip, smell, swirl and taste whatever product is being optimized. Their opinions are fed through a very sophisticated program that not only produces an optimized formulation for the food in question, but also addresses marketing concerns such as colors and packaging. All of this is done to gain more “stomach share”- the amount of processed food that a consumer will eat from a certain company. These are not small concerns in an industry that measures stomach share in the billions of dollars annually.
The Holy Grail for food companies is what is termed the “bliss point”, that spot where consumers like a product the most, but are not satisfied enough with the flavor combination to stop eating it. Foods and drinks cannot be too flavorful, as consumers quickly get bored with them. The brain is quickly overwhelmed with big, intense and distinct flavors and shuts down the “want more” portion, thus stopping eating.
This has become one of the major guiding principles of the processed food industry. The biggest players owe their success to very complex and secret formulas that pique the taste buds but don’t have a distinct, intense flavor that shuts down the desire for more. This is the science of engineering addictive junk food at its most focused and intense.
For example, Frito-Lay employs about 500 chemists, psychologists and technicians to conduct research that cost up to $30 million a year that focuses on questions of crunch, mouth feel and aroma for each of their product lines. One of their tools simulates a chewing mouth to test and perfect their chips, like the perfect “break point”; people crave chips that crunch at about four pounds of pressure per square inch. You just can’t make stuff like this up!
With market shares reaching multiple billions of dollars, highly aggressive marketing tactics such as Coca-Cola make twisted sense. Their goal was simple; outsell every other beverage that people drink, including milk and water! From this goal they developed one question for the marketing division – “How can we drive more ounces into more bodies more often?” This explains the door-to-door sales of Coke to Brazilians living in slums and frontier shanty-towns.
With all of this high technology, psychological and physiological research running into hundreds of millions of dollars, strategic placements and extremely focused marketing campaigns all supporting highly addictive processed foods, what chance do we as everyday people have?
Somewhat surprisingly, we actually have a pretty good chance. Alternative research has shown that people can “recover” from their junk food addictions simply by abstaining from them for a period of time. Eating normal meals, eliminating or restricting snacking on junk food, or replacing that food with real, healthy food recalibrates our taste buds. Skipping meals is one of the leading causes of increased junk food intake, not by desire but simply because of convenience. Snacking on fresh vegetables such as carrots, apple slices, celery or such that provides the crunch that we have come to desire helps ease us out of the salt/sugar/fat cravings and into appreciation of new tastes and flavors that have been lost as we overload our taste buds with junk processed foods. The brain has a chance to realize that the food being eaten has nutritional content and can once again establish a reasonable signal of when the stomach is “full”. It is no longer tricked into over-eating multiple times a day.
Once a recovery period of a couple of weeks to a month had been established, most people found the tastes of the same junk food they previously had highly enjoyed were too salty, fatty or sweet and lacked the real flavors that they had re-discovered and come to appreciate. They also had pleasant side effects of increased concentration, higher energy that lasted throughout the day, decreased weight, blood pressure and headaches, among many others.
https://underwoodgardens.com/wp-content/uploads/2013/03/Potato-Chips.jpg225300Stephen Scotthttps://underwoodgardens.com/wp-content/uploads/2019/06/Survey-Header.jpgStephen Scott2013-03-04 18:01:552024-04-30 17:34:02Junk Food Designed to be Unhealthy And Addictive
There is a groundswell among home gardeners looking to grow their gardens in a less chemically intensive and more biologically responsible way. They spend hours reading and researching the best ways to build the health and fertility of their soils, improve the microbial communities in the soil and attract earthworms and beneficial insects and pollinators. The appearance of more earthworms, a new species of butterfly or pollinating moth is cause for celebration.
Seeds are a high priority for these gardeners. The purity, quality and provenance are paramount. After all the work and care that goes into the soil and preparation, they rightly want the best and highest quality seeds possible.
Surprisingly, this is exactly where the home gardener and small scale grower may be getting shorted on quality. Growing for seed as opposed to growing for food has its own unique challenges. For a plant to set seed it must reach full maturity, set flowers and produce seed. This takes much longer than a plant grown for food which is usually harvested at a much younger stage, succulent and tender. Producing seed exposes the plant to a whole host of insects and diseases that younger plants may not experience, due to the phytochemical changes that take place as the plant matures sexually in order to reproduce.
“In my own vegetable beds I use no chemical heroics, and yet I had been using some conventionally produced seed that is often coddled and adapted to a life of “high inputs” that it won’t get from me or from an increasing number of other chemical-averse home gardeners.
That packet of seed may not grow as well in my garden as one that wasn’t grown with chemicals, and it also probably contributed to upstream pollution.”
Agricultural regulatory agencies allow an expanded use of petro-chemical pesticides, fungicides and fertilizers if a grower specifically grows for seed production and not food production. Many large-scale seed growers take advantage of this loophole, with the unintended consequence of creating a population of seeds that have become dependent on high-input, chemically intensive agriculture that many home gardeners are moving away from.
This has been ongoing for several decades now and is just being discovered as more and more gardeners and small scale agriculturalists are growing with less chemically intensive methods and are looking for sources of seed that are in line with their vision.
The end result of using seed grown under these conditions is that they usually don’t perform as well. They don’t germinate as strongly, are slower to put on growth, develop fewer flowers and are much more pest, disease and weather susceptible. In short, they simply aren’t as strong and resilient as those seeds grown in more biologically active soil with little to no chemical inputs.
While modern chemical agriculture initially looks very promising with better growth and increased yields, it is always discovered that plants grown with amply available macro-nutrients afforded by the chemical fertilizers become lazy and lose the ability to work for their nutrition, growing ever more dependent on the applied fertilizers for food and pesticides to control the insect populations.
The solution to these issues is to find seed sources that concentrate on growing their seed in a natural and low-input manner. These are often smaller, family-owned companies that are happy to answer questions on how their seeds are grown. They know the story of the seed they offer and willingly share it. Patronizing these companies only helps to strengthen the entire system by rewarding those that are congruent with the natural order of agriculture.
https://underwoodgardens.com/wp-content/uploads/2013/03/Handful-of-seedWeb1.jpg234250Stephen Scotthttps://underwoodgardens.com/wp-content/uploads/2019/06/Survey-Header.jpgStephen Scott2013-03-03 09:43:442024-04-30 17:34:02All Seeds Are Not Equal
Are they called peppers or chiles, and why? I prefer to call them chiles and here’s my reasoning: In the Aztec’s Nahuatl native language, the word is “chilli”, which was changed to “chile” by the Spanish who were looking for a new source of black pepper and discovered these fiery little treasures. For me, chile is closer to the original name and meaning.
One of the mainstays of the garden, they are often started from seed or bought and planted right along with their travelling companions from the central Americas, the tomatoes. Humans have been eating chiles for at least 7,200 years, from archaeological evidence in Mexico and have grown them for around 6,100 years. For those that aren’t chile-heads, these sweet or hot little packets of history can be either boring or scary. Some gardeners will plant the same variety of green bell pepper year after year and not think too much of what else is on offer, while others are very concerned with the amount of “fire” some hot chiles pack. There is a lot of room to explore the world of chiles without being either bored or burned.
Chiles can be grown with great success in many varied garden climates across America. They are very adaptable to different conditions and have travelled widely, establishing themselves in many different locations and cuisines around the world. With a background understanding that they are a tropical plant originating in Central America and the following growing tips as a guide, you can have the tastiest, most colorful and most productive chiles or peppers from your garden this year. Here are some tips to help you along the way!
Start seeds indoors at least 8 weeks before the last frost date. This can change year to year; they can be started a bit later in a hard winter and earlier during a mild one. A soil temperature of 75 – 85F will give the best germination. They are not nearly as fast to germinate as tomatoes, and will take from 14 – 21 days to germinate at the optimum temperature. Use heat mats under the seedling tray if needed. For a more in-depth look at what seeds need for germination, read Starting Seeds at Home – a Deeper Look.
Peppers dislike transplanting or disturbance of their roots. Paper pots, yogurt cups or similar are a good start, having a large enough soil volume to give the root system enough time and space to develop well before going into a larger pot or into the garden. They can be started in seedling trays, but plant extra to account for those lost to transplant shock.
Peppers really need warm soil to transplant into and warm weather for best growth and ripening. Full sun is preferred, but a light shade for part of the day should be all right.
Make sure the weather is warm and all danger of frost has passed before transplanting into the garden. Daytime temps of 65F and night-time of 55F are minimums. If you find that you have to transplant under less than ideal situations, use what’s called “hot caps” or “cloches” at night to keep the termperature a few degrees warmer. These range from plastic milk jugs with the bottoms cut out to glass bells made for the purpose. Another alternative is to create a temporary row cover over the new transplants, taking it off in the morning and covering them at night. Use this until the night-time temperatures are warm enough for the young plants.
Don’t worry about waiting an extra week or even two before setting the plants out, it will be worth it if you don’t lose half your peppers to a late-season frost!
Peppers aren’t particularly picky about the type of soil, preferring a sandy loam of moderately high fertility. They will grow well in other types of soil, however.
Critical factors are temperature and water, both factors need to be fairly steady. Don’t transplant starts from a warm growing condition into a cold soil, or let them dry out. They can tolerate high temperatures, but need a moist soil for best flavors and production.
Days to maturity usually refers to the time from transplanting to harvest, similar to tomatoes.
Magnesium is an important mineral, so add a dusting of Epsom salts to the hole when transplanting, working it into the soil around the plant.
Transplant the peppers about 15 – 18 inches apart for best growth and to avoid crowding. This also makes it easier to see the ripe fruit.
Separate sweet and hot varieties as far apart as practical, with neither upwind of the other if possible to avoid cross-pollination. If this is unavoidable, put the sweets upwind of the hots, unless you want really hot sweets!
A 2 inch thick dressing of well-rotted compost around the base of the plant acts as both a mulch to keep the moisture levels more constant and act as a slow release fertilizer. For more on how to create great compost, read Compost- Nourishing Your Garden Soil.
During the growing season, your peppers will benefit from feedings of a natural fertilizer, especially during the height of pepper production. You can make some of the best fertilizer yourself with our recipe for the Best Homemade Fish Emulsion.
Green peppers will keep a bit longer than fully ripe yellow or red ones.
Riper ones have more flavor and nutrients, are usually sweeter and have a more complex flavor. They also have much more Vitamin C. Hot varieties will have much more flavor with usually less apparent heat.
Harvest when you think the fruit is ripe – either green, yellow or red. Try some of each color to see what you like the best. When picking fruit, don’t pull them off the plant, use a sharp knife or scissors to prevent damage to the plant, slowing growth and inviting pests and diseases.
Companion plants are Basil, Carrot, Mint, Nasturtium, Spinach, Sweet corn and Tansy.
Use these tips for a great season of chiles or peppers, however you want to call them! Let us know how yours do this year, and if you have experiences or tips listed that would help others, please share them!

Fermented Pepper Sauce
Preserving that overly abundant harvest has been one of the major challenges that gardening and agriculture has always had. In today’s world we are much more familiar with the processes of canning, drying and freezing as acceptable methods of preserving our garden’s harvest for the winter season and longer. These methods have their own set of challenges, though. Canning requires time, experience and knowledge to be successful. Freezing is pretty simple, but has its own set of needs to ensure the garden bounty isn’t lost to freezer burn or premature thawing. Drying is also simple, but benefits from modern drying equipment that can be expensive as an initial purchase.
What if there was another way, a method of preserving the harvest that is not only simple, non-intensive for both labor and equipment and was proven safe? One that is location and temperature independent, doesn’t care if you forget the exact timing and still produces an absolutely delicious product? There is! That method is fermentation. It has been proven safe over several thousand years, with at least that many different approaches and many more recipes. Almost every culture across history has contributed something to the art of fermentation.
Fermenting vegetables is an extremely simple, effective and tasty way to start experimenting and gaining knowledge, taste and experience. In addition to being easy and quick it is also highly nutritious and beneficial to your health.
Some folks are hesitant or outright afraid of trying fermentation for fear of accidentally growing the “wrong” bacteria and sickening or even killing themselves or their families. This is completely understandable in today’s world of anti-microbial soaps, detergents and wipes.
At least in the world of raw vegetables, this fear is unfounded. “As far as I know, there has never been a documented case of food-borne illness from fermented vegetables. Risky is not a word I would use to describe vegetable fermentation. It is one of the oldest and safest technologies we have.” This is from Fred Breidt, a USDA microbiologist specializing in vegetable fermentation.
In fact, fermenting commercially available vegetables will kill any pathogens that we’ve seen in the news as contributing to food-borne illnesses, as they simply cannot survive in the lactic acid environments of fermentation!
This is going to be a slightly different recipe format than we usually do. We will give you a foundational approach to fermenting any vegetables, and then give a basic recipe for a sweet and hot fermented pepper sauce or paste. The beauty of these recipes is that they are entirely scalable. Do you have an extra quart of hot chiles, a handful of sweet peppers and some garlic or onion? Great, we can work with that! Or do you have a couple of 5 gallon buckets of hot chiles and 3 more of sweet peppers, more onions than you know what to do with and you’re worried about them all going bad? No worries, we can work with that as well – all from the same recipe! The flavors from each recipe will be different, but equally delicious and nutritious.
There is a new book on fermentation on the market, and it is most excellent. The Art of Fermentation by Sandor Katz is his newest exploration of this ancient form of preserving foods. His tagline on the book reads, “An in-depth exploration of essential concepts and processes from around the world.” The basic concepts of fermenting come right out of his book, and they are easy!
Vegetable Fermentation Made Easy
It doesn’t matter if you have one or a dozen veggies, the above recipe works. Add spices, herbs or edible flowers and experiment. You will be surprised at just how tasty almost everything comes out.
Now that we have the basics down, let’s look at how to handle that bumper crop of hot chiles and sweet peppers. These, along with tomatoes, are one of the most expensive vegetables to buy in the store, but taste so much better out of your garden. It is an absolute crying shame to let any of these go to waste!
Let’s look first at a hot fermented chile sauce, much like Sri Ra Cha or “Rooster Sauce” as it’s called after the rooster on the bottle. The only ingredient ratio to keep in mind is the chile to garlic. Don’t go crazy on the garlic, as it gains pungency as it ferments and can throw off the overall flavor.
A note on the salt – use anything but Iodized salt, as this will cloud the color of the brine and can leave a metallic aftertaste.
Homemade Fermented Sri Ra Cha Sauce
Will keep for 6 months or more, but you’ll eat it long before then!
Recipe notes: Wait until the chiles are fully ripe and red, as they will have the most complex flavor profile and yield the tastiest sauce.
Use the general ratio listed to scale up or down to suit your particular needs at the time.
Now let’s look at a larger batch with more ingredients and a completely different flavor.
Sweet and Spicy Fermented Pepper Sauce
Now you have the basic foundation of how to make some incredibly delicious chile or sweet fermented pepper sauce. You can go from mild to shockingly hot and experiment with different spices and amounts of complementary vegetables to add their flavors. You will quickly become something of a hero to your family and friends once they taste your unique sauces!
Fermented Tomato Conserve (Conserva Cruda Di Pomodoro)
As you improve the health and fertility of your soil, you should start seeing some impressive vegetable harvests. This can be a blessing as well as a curse though. Many people know the old but highly accurate joke about the neighbor that leaves a bag of zucchini on the doorstep, rings the doorbell and runs. This is all well and good, but what to do with 100 pounds of fresh plum tomatoes? Or 150 lbs., 200 lbs. or more? The old doorbell trick will only go so far, so let’s look at a delicious alternative! Tomato conserve is a perfect choice.
Drying and canning are always options, very good ones that should be used. There is another ancient method of preserving the bountiful harvest to capture the fresh flavors for the cold winter and gray early spring months when there wasn’t much of anything fresh available. Fermenting fresh vegetables opens up so many flavors and paths to storing this summer’s bounty for the coming winter. We will look at one such method that not only ferments the over-abundance of tomatoes, but concentrates their flavors as a bonus.
A word about fermenting before we begin is in order, so that you don’t come home one day and throw out the entire project due to a misconception or lack of understanding of how the process works. This particular process uses a wild fermentation, meaning the combination of wild airborne yeasts and the naturally occurring bacteria that is on the tomatoes. This wild fermentation is spontaneous; you don’t do anything to help it along. The acid in the tomatoes provide the perfect environment to support lactic acid fermentation. There will be a surface mold which is white and completely normal. Indeed, the white surface mold is needed to protect the tomatoes from rotting. You should not see any colored mold or offensive “rotting” odors.
This process has been used for several hundred years in Italy; probably the first time was shortly after the tomato made its way from America to Italy in the early 1500s. It is still being used today, all across Italy, as small scale home growers put up their harvests to have the flavor of summer to remember during the coming winter.
The beauty of this method is that it is very scalable, able to handle 20 lbs. in one batch and 100 lbs. or more the next one.
Fresh Tomatoes for Conserve
Start with all of the tomatoes washed, stems and any bad spots removed. Get a container that is larger than the amount of tomatoes, so that when all of the tomatoes are crushed there are several inches of space to the top of the container. If necessary, use more than one container.
Packing Fresh Tomatoes
Crush all of the tomatoes and add them to the container. Stir well and cover with a towel, dishcloth or such to keep insects out while allowing air circulation.
Fermenting Tomatoes
The fermentation happens within a few hours and bubbles will appear, with the solids coming to the top and a white mold forming on them. Remember, white mold is good! Stir twice a day, mixing in the mold. (Note, we did not stir the tomatoes, just let them sit for 5 days and everything turned out fine!)
Fermented Tomatoes
The fermentation will take from 4 to 5 days, depending on temperature and then stop. Remove the solids from the top and strain the mixture through a strainer. One of the best ways to do this is by using a hand cranked device that separates the skins and seeds from the pulp, called a Squeezo or Roma food strainer. The Squeezo is all metal and more expensive but will last several lifetimes!
After straining, keep the pulp and compost the seeds and skins. (As a side note, it you are wanting to save the seeds from those wonderful tomatoes, just transfer them into another bucket for a second ferment for a couple of days, scoop off the mold on top and strain out the seeds. Rinse thoroughly and dry on paper towels with the seeds spread out.)
Fermented Tomato Pulp
The pulp will still have a lot of moisture that needs to be removed. Do this by further straining the pulp in a fine mesh bag or cheese making bag over the sink or a catch bowl. Tie the bag closed, let it hang and drip liquid for a day. It may become covered with a layer of white mold again, just “shave” it off after it finishes the drip process.
Draining Tomato Pulp
The pulp will be noticeably drier and reduced in volume. If the consistency is thick enough for you, stop here. If not, put the bag between two boards or plates with a weight on top to compress it and further drain moisture out for another day or two.
Drained Tomato Pulp
When it is the consistency that you want, traditionally that of firm dough, remove any mold on the bag, open it up and peel it off of the now-firm pulp.
Fermented Tomato Conserve
The Italians add 25 percent salt to the tomato pulp, but most Americans find this to be way too salty. 10 percent is a good starting point, as it is much easier to add salt than to remove it! Mix the salt in well and let sit. After a few hours knead the mixture just like dough to develop the texture and store it in a jar. It does not need to be refrigerated and will last for several months. In Italy it is usually stored in waxed paper. If you do choose to store it in the refrigerator, it should last for a year.
Fermented Tomato Conserve
The end result will be a preserve that is about 8 – 10 percent of the amount of tomatoes you started with. The flavors will be highly concentrated, so a very small amount will add a tremendous amount of flavor to your dishes, from soups, stews and sauces to omelets, dressings and marinades.
Two Options with Vandana Shiva
We share this short video of Vandana Shiva telling her story of the struggle to preserve heirloom seeds in her native India from the wonderful folks at The Perennial Plate.
Junk Food Designed to be Unhealthy And Addictive
Engineering Salt, Sugar and Fat to Create Food Addiction
How did we reach this stage of poor health as a nation? The answer may surprise and anger you. As with most complex issues, the answer is not as simple as many talking heads in the media and nightly news would have us believe. It isn’t just a matter of willpower, or knowledge, or education, or alternatives to the junk food that is, quite literally, killing us. The answer is far deeper, wider reaching and more sinister.
Most processed foods these days are “optimized”, or engineered for better sensory perceptions that drive us to eat more. These sensory perceptions include but are not limited to the physical appearance, packaging, shape, mouth feel, taste and array of flavors, aftertaste, smell and satisfaction of a food. One of the most important factors that are considered is the strength of the urge for a second bite, sip or swallow, or a third.
Everyday people spend hours in tasting rooms where they touch, feel, sip, smell, swirl and taste whatever product is being optimized. Their opinions are fed through a very sophisticated program that not only produces an optimized formulation for the food in question, but also addresses marketing concerns such as colors and packaging. All of this is done to gain more “stomach share”- the amount of processed food that a consumer will eat from a certain company. These are not small concerns in an industry that measures stomach share in the billions of dollars annually.
The Holy Grail for food companies is what is termed the “bliss point”, that spot where consumers like a product the most, but are not satisfied enough with the flavor combination to stop eating it. Foods and drinks cannot be too flavorful, as consumers quickly get bored with them. The brain is quickly overwhelmed with big, intense and distinct flavors and shuts down the “want more” portion, thus stopping eating.
This has become one of the major guiding principles of the processed food industry. The biggest players owe their success to very complex and secret formulas that pique the taste buds but don’t have a distinct, intense flavor that shuts down the desire for more. This is the science of engineering addictive junk food at its most focused and intense.
For example, Frito-Lay employs about 500 chemists, psychologists and technicians to conduct research that cost up to $30 million a year that focuses on questions of crunch, mouth feel and aroma for each of their product lines. One of their tools simulates a chewing mouth to test and perfect their chips, like the perfect “break point”; people crave chips that crunch at about four pounds of pressure per square inch. You just can’t make stuff like this up!
With market shares reaching multiple billions of dollars, highly aggressive marketing tactics such as Coca-Cola make twisted sense. Their goal was simple; outsell every other beverage that people drink, including milk and water! From this goal they developed one question for the marketing division – “How can we drive more ounces into more bodies more often?” This explains the door-to-door sales of Coke to Brazilians living in slums and frontier shanty-towns.
With all of this high technology, psychological and physiological research running into hundreds of millions of dollars, strategic placements and extremely focused marketing campaigns all supporting highly addictive processed foods, what chance do we as everyday people have?
Somewhat surprisingly, we actually have a pretty good chance. Alternative research has shown that people can “recover” from their junk food addictions simply by abstaining from them for a period of time. Eating normal meals, eliminating or restricting snacking on junk food, or replacing that food with real, healthy food recalibrates our taste buds. Skipping meals is one of the leading causes of increased junk food intake, not by desire but simply because of convenience. Snacking on fresh vegetables such as carrots, apple slices, celery or such that provides the crunch that we have come to desire helps ease us out of the salt/sugar/fat cravings and into appreciation of new tastes and flavors that have been lost as we overload our taste buds with junk processed foods. The brain has a chance to realize that the food being eaten has nutritional content and can once again establish a reasonable signal of when the stomach is “full”. It is no longer tricked into over-eating multiple times a day.
Once a recovery period of a couple of weeks to a month had been established, most people found the tastes of the same junk food they previously had highly enjoyed were too salty, fatty or sweet and lacked the real flavors that they had re-discovered and come to appreciate. They also had pleasant side effects of increased concentration, higher energy that lasted throughout the day, decreased weight, blood pressure and headaches, among many others.
The Extraordinary Science of Addictive Junk Food – NYTimes.com
All Seeds Are Not Equal
Your Garden is Chemical-Free, Are Your Seeds?
There is a groundswell among home gardeners looking to grow their gardens in a less chemically intensive and more biologically responsible way. They spend hours reading and researching the best ways to build the health and fertility of their soils, improve the microbial communities in the soil and attract earthworms and beneficial insects and pollinators. The appearance of more earthworms, a new species of butterfly or pollinating moth is cause for celebration.
Seeds are a high priority for these gardeners. The purity, quality and provenance are paramount. After all the work and care that goes into the soil and preparation, they rightly want the best and highest quality seeds possible.
Surprisingly, this is exactly where the home gardener and small scale grower may be getting shorted on quality. Growing for seed as opposed to growing for food has its own unique challenges. For a plant to set seed it must reach full maturity, set flowers and produce seed. This takes much longer than a plant grown for food which is usually harvested at a much younger stage, succulent and tender. Producing seed exposes the plant to a whole host of insects and diseases that younger plants may not experience, due to the phytochemical changes that take place as the plant matures sexually in order to reproduce.
Margaret Roach wrote a great opinion piece in a recent New York Times Sunday Review:
Agricultural regulatory agencies allow an expanded use of petro-chemical pesticides, fungicides and fertilizers if a grower specifically grows for seed production and not food production. Many large-scale seed growers take advantage of this loophole, with the unintended consequence of creating a population of seeds that have become dependent on high-input, chemically intensive agriculture that many home gardeners are moving away from.
This has been ongoing for several decades now and is just being discovered as more and more gardeners and small scale agriculturalists are growing with less chemically intensive methods and are looking for sources of seed that are in line with their vision.
The end result of using seed grown under these conditions is that they usually don’t perform as well. They don’t germinate as strongly, are slower to put on growth, develop fewer flowers and are much more pest, disease and weather susceptible. In short, they simply aren’t as strong and resilient as those seeds grown in more biologically active soil with little to no chemical inputs.
While modern chemical agriculture initially looks very promising with better growth and increased yields, it is always discovered that plants grown with amply available macro-nutrients afforded by the chemical fertilizers become lazy and lose the ability to work for their nutrition, growing ever more dependent on the applied fertilizers for food and pesticides to control the insect populations.
The solution to these issues is to find seed sources that concentrate on growing their seed in a natural and low-input manner. These are often smaller, family-owned companies that are happy to answer questions on how their seeds are grown. They know the story of the seed they offer and willingly share it. Patronizing these companies only helps to strengthen the entire system by rewarding those that are congruent with the natural order of agriculture.
Look Carefully At Those Seeds – NYTimes.com
Chile and Pepper Growing Tips
Are they called peppers or chiles, and why? I prefer to call them chiles and here’s my reasoning: In the Aztec’s Nahuatl native language, the word is “chilli”, which was changed to “chile” by the Spanish who were looking for a new source of black pepper and discovered these fiery little treasures. For me, chile is closer to the original name and meaning.
One of the mainstays of the garden, they are often started from seed or bought and planted right along with their travelling companions from the central Americas, the tomatoes. Humans have been eating chiles for at least 7,200 years, from archaeological evidence in Mexico and have grown them for around 6,100 years. For those that aren’t chile-heads, these sweet or hot little packets of history can be either boring or scary. Some gardeners will plant the same variety of green bell pepper year after year and not think too much of what else is on offer, while others are very concerned with the amount of “fire” some hot chiles pack. There is a lot of room to explore the world of chiles without being either bored or burned.
Chiles can be grown with great success in many varied garden climates across America. They are very adaptable to different conditions and have travelled widely, establishing themselves in many different locations and cuisines around the world. With a background understanding that they are a tropical plant originating in Central America and the following growing tips as a guide, you can have the tastiest, most colorful and most productive chiles or peppers from your garden this year. Here are some tips to help you along the way!
Use these tips for a great season of chiles or peppers, however you want to call them! Let us know how yours do this year, and if you have experiences or tips listed that would help others, please share them!