Discover the incredible resilience and adaptability of the Wild Galapagos Tomato. Learn about its history and how it’s being used in innovative research.

Discover the incredible resilience and adaptability of the Wild Galapagos Tomato. Learn about its history and how it’s being used in innovative research.
We want to share GrowHaus with you. During recent travels, we toured this amazing micro-farm in the northeast section of Denver, CO. Starting with an old flower greenhouse in an isolated immigrant neighborhood, this is now a model of innovative urban farming.
GrowHaus is a non-profit indoor farm, marketplace and educational center in north Denver, CO. The neighborhood of Elyria-Swansea is a historically working class immigrant community. It is surrounded by industrial manufacturing and transportation industries. As a result the neighborhood is listed as the most polluted ZIP code in Colorado.
The Elyria-Swansea neighborhood has been a first home for recent immigrants since the 1880s. It has always had one of the lowest household incomes in the city with low education and employment levels.
The area has endured a lack of access to healthy and affordable food with high rates of diet-related illnesses. This is due to their isolation within the industrial manufacturing and heavy industry areas.
Their motto is “Healthy food is a right, not a privilege.”
GrowHaus developed out of an old flower greenhouse. It incorporates several methods of growing food for local residents and restaurants in Denver.

We saw this is still a very busy industrial area with a large roofing and asphalt company and 4 lines of railroad tracks across the street.
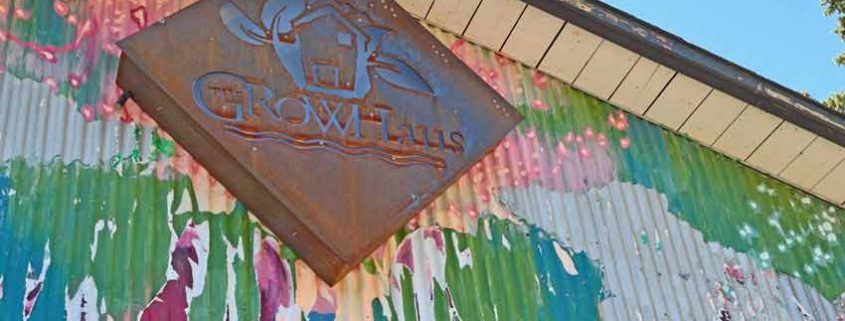
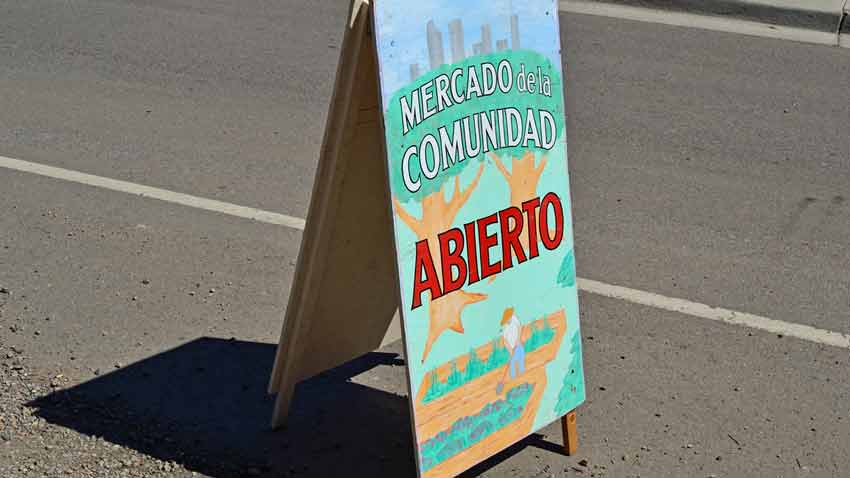
The large hand-painted “Mercado” sign above a roll-up garage door indicated something unusual. The sign shows that vegetables, fruit, meat, dairy and more are available inside. Spanish and English are the predominant languages spoken here now, but historically this area has been a settling place for many different nationalities.
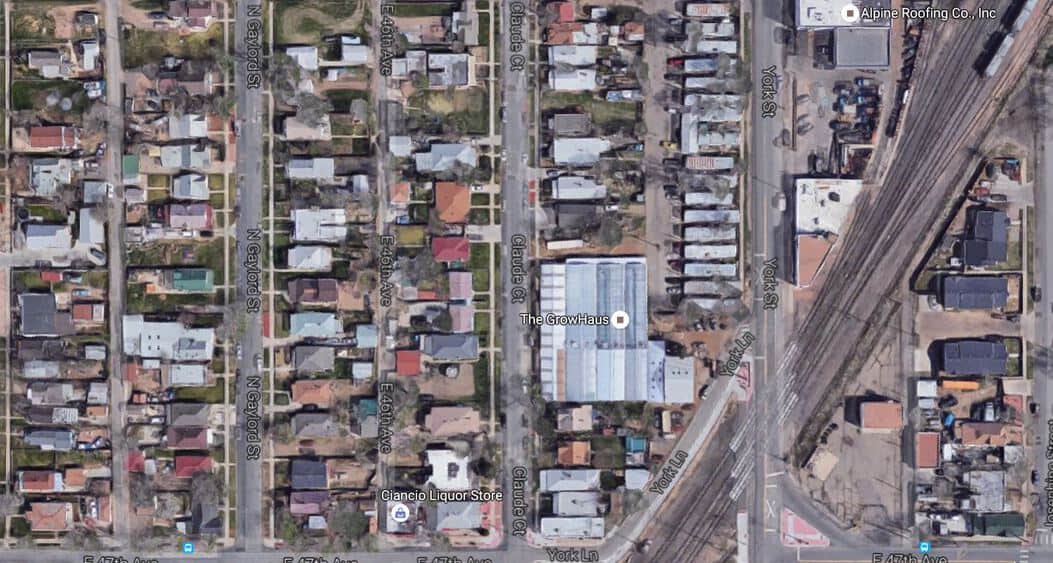
The map shows just how crowded things are. A major rail line with multiple tracks is less than 50 feet from the front door. A large roofing and asphalt company are across the street to the east.
The modest sized homes are clear, with the line of older single wide mobile homes just to the right in the photo.
Just outside of the photo to the bottom is I-70, with its update and expansion just beginning. Much of the neighborhood to the south of the GrowHaus will be lost to the expansion and re-alignment.
When completed, I-70 will come within a couple hundred feet of the greenhouse. Two new light rail lines will be built in the next 10 years, cutting through the neighborhood.

Click to expand the close-up photo of the greenhouse and see just how tightly packed in the GrowHaus is.
The amount of food, education and community improvement that happens in this space is nothing short of amazing!

Our tour guide was an employee who is also a local resident. His insights and comments were very beneficial, having grown up in the neighborhood.
The food grown in the greenhouse is a world better than the boxed and fast foods he grew up eating!
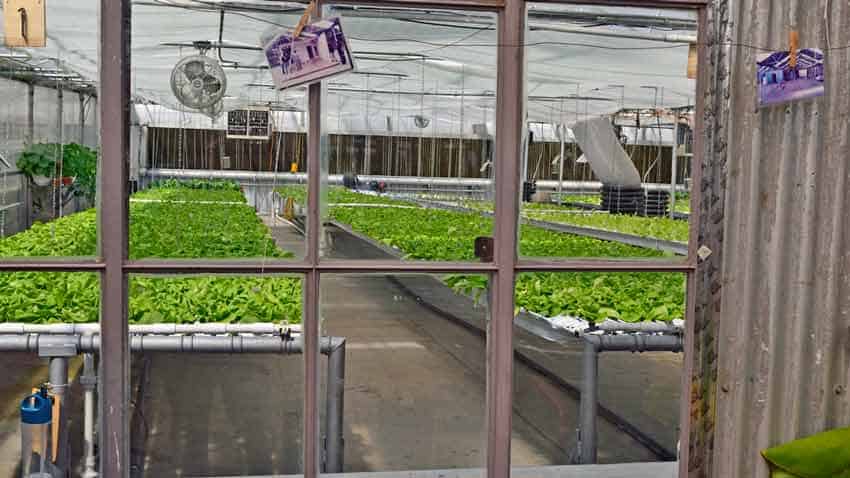
There is both a hydroponics and aquaponics operation in the greenhouse. By partnering with local residents to grow food, provide jobs and education, everyone lives better.
Residents gain a valuable skill while earning money growing food they share with their families.
The hydroponics operation is 5,000 square feet and grows leafy greens. The customers are residents and local markets and restaurants throughout Denver. They grow about 1,200 heads of leafy greens per week using 90% less water than conventional farming.
The aquaponics side is 3,200 square feet, growing more leafy greens.
A commercial mushroom farm produces fresh specialty mushrooms year round for local use, restaurants and markets.
There is also a seedling starting nursery that’s just getting started. The nursery provides seedlings and young plant starts to area gardeners.
GrowHaus is a vibrant and essential part of both the local and extended community in Denver.
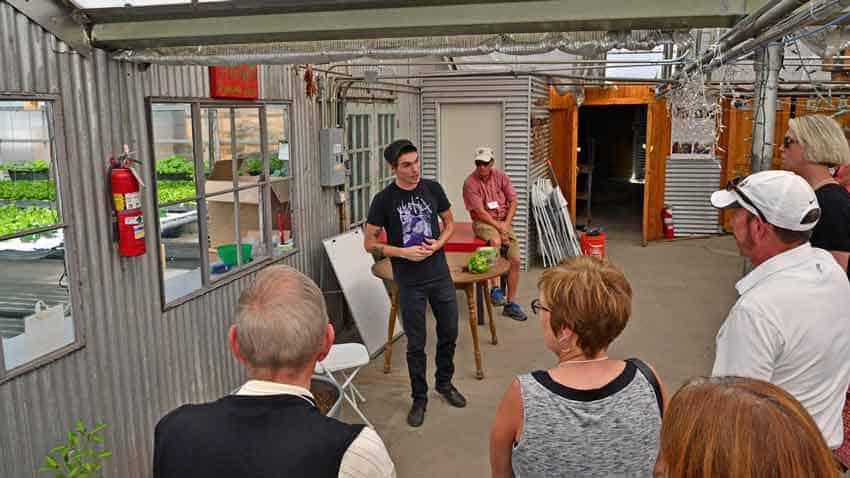
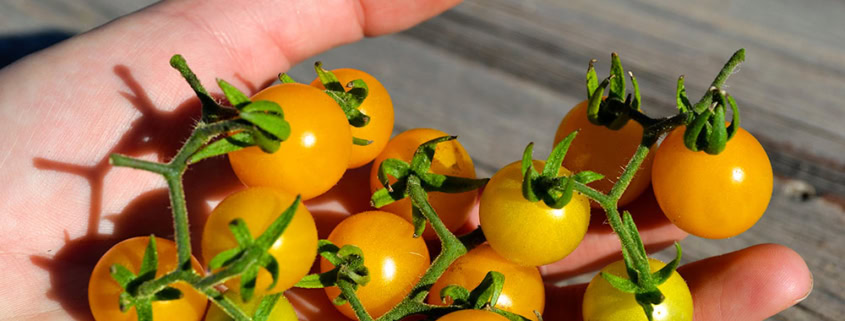
Our tour guide explains the growing, marketing and distribution of the butter lettuce from the hydroponics farm. Local residents who qualify buy food at cost with a sliding scale for other customers.

A closer look at the butter lettuce and packaging. It is marketed as “living” lettuce because the roots are still attached. It stays fresher longer than conventionally grown lettuce that is cut from its roots when harvested.
This brings a premium price from restaurants and markets in Denver, increasing the earnings of the hydroponics farm.
The Elyria-Swansea neighborhood is classified as a “food desert”. This is defined as “an urban area in which it is difficult to buy affordable or good-quality fresh food.”
GrowHaus works to overcome this through three food distribution programs. They are food boxes, the GrowHaus market and Cosechando Salud, a free food pantry and cooking class.
Food boxes are like a traditional CSA with food from GrowHaus and partner organizations. They have fresh fruits, vegetables and other items. The program is open to anyone in the greater Denver area.
The Mercado de al Lado is the neighborhood market, offering fresh produce, meat and dairy products year round.
The pricing is unique, using a tiered pricing system so that everyone has the maximum access to the healthiest foods possible.
Those that qualify can buy food at cost or a small percentage above the production cost. This gives greater access to healthy and fresh food to those who really need it.
Those who can afford to pay slightly below retail up to full retail prices, bringing profits to the program and keeping it running.
The Cosechando Salud is a free food pantry and cooking class. It is supported by the profits of the distribution programs. It teaches cooking essentials while providing healthy food that was not sold at the markets, avoiding excess food waste.
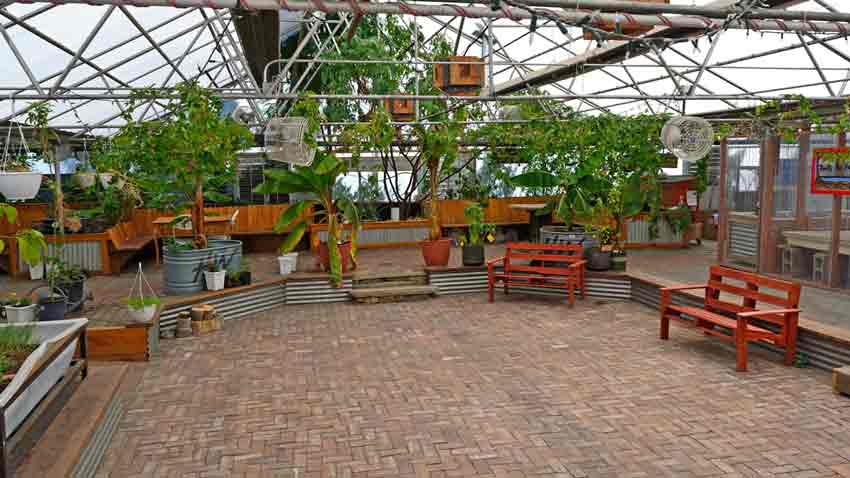
The class space and common area are a permaculture design. It is a self-regulating edible ecosystem with figs, bananas and papayas. There are composting systems with worms, along with rabbits and chickens.
Growing bananas and papayas at a mile high in Denver’s climate is pretty impressive!
It is inspiring seeing the scope of the operations at GrowHaus, along with the number of programs and organizations they partner with.
A small group of dedicated individuals have accomplished much with a challenging environment in an isolated neighborhood.
They have created a working, local, sustainable healthy food system which lives up to its mission. In doing so, they have also created a model of how inclusive participation and open cooperation with other like-minded organizations can expand the positive impact.
We left with the realization that one person can make a difference, even if it is in one other person’s life. That difference, and the results, are worth it!
Growing a surprising amount of food at home with aquaponics can be very simple, but there are a few basic things to know before getting started. We want to introduce you to the techniques of seed starting and how to keep the growth cycle continuing so that you get the most out of your system.
You can grow most vegetables that you enjoy eating in your aquaponics system. Vegetables that grow the best and easiest are those that grow above ground, such as herbs, greens, tomatoes, peppers, eggplant, cucumber and squash as examples. Please realize that this is not an entire listing, as there are over 300 different types of vegetables that have been grown in aquaponics systems over the past 20 years!
The major foods that are not suitable for aquaponics systems are corn, wheat, soy and rice. Root crops can be a challenge, however a lot of people have grown delicious carrots, beets and radishes after gaining some experience, but they are not recommended for a beginning aquaponics grower. It is best to gain some experience on the easier vegetables, then work into the more challenging ones.
Getting Started
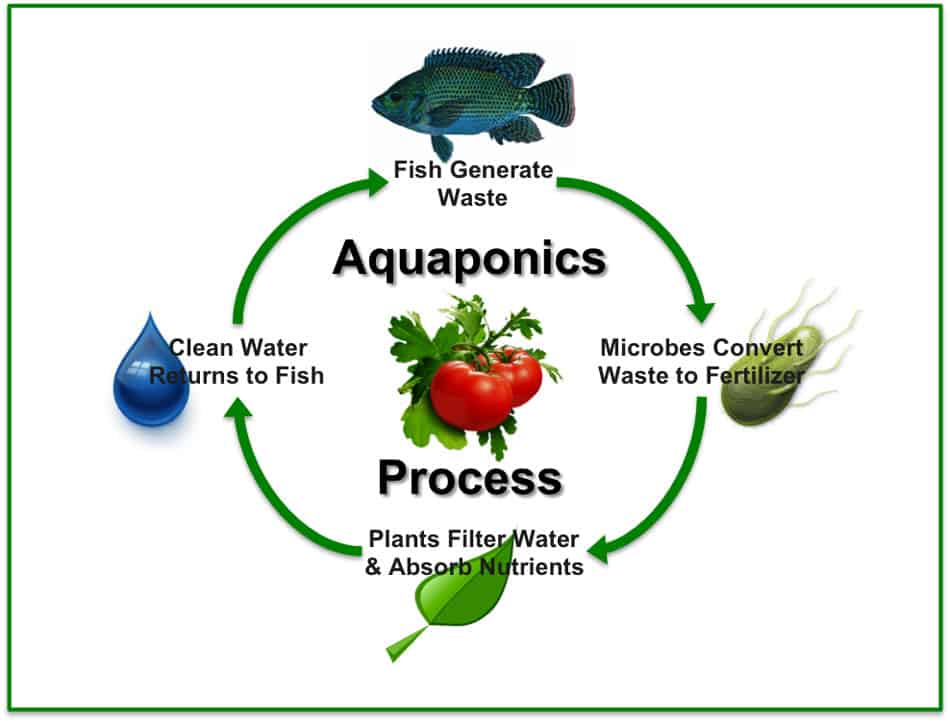
So where to start? Once you have the system assembled, you need to get the system to start “cycling” or converting the raw nutrients from the fish into a form that is available to the plants you’ll be growing. Don’t worry, this isn’t difficult! It might be a bit different than what you are used to, but is easy to understand and monitor. The cycling process will happen automatically in almost all cases, and the testing needed to monitor the process is minimal, only taking a couple of minutes of time.
Cycling begins when the fish start adding ammonia to the aquaponics system through their waste. Ammonia is made of nitrogen and hydrogen (the chemical formula is NH3) and is not easily used by plants. Untreated ammonia is toxic to fish unless it is either diluted to a non-toxic level or converted into a different form of nitrogen.
The presence of ammonia attracts two naturally occurring bacteria in the air that will populate the surfaces of your system. The first bacteria, nitrosomonas, convert the ammonia into nitrites (the second curve in the chart below). This is the first step in the aquaponics cycling process. The presence of nitrites attracts the second naturally occurring bacteria, called nitrospira (the third curve in the graph below). These bacteria convert the nitrites into nitrates, which are generally harmless to the fish and excellent food for your plants. You can see the progression of nutrients in the water, from ammonia to nitrites to nitrates in the chart below, as well as the time frame needed. Click on the photo to enlarge it.

Aquaponic Ammonia Cycling Levels
Using a readily available aquaponics water sampling kit, once you detect nitrates in your water and the ammonia and nitrite concentrations have both dropped, your system will be fully cycled and aquaponics will have officially begun! This is the best time to transplant your seedlings, as the nutrients needed by the plants will be fully available to feed them while they filter and clean the water for the fish. This mutually beneficial relationship is what makes aquaponics unique.
Now you are ready to start your seeds! One caution before we begin – don’t plant all of the available space in your system at once. You will need a graduation of plants to absorb the nutrients and filter the water for the fish. If all of your veggies are ready for harvest at once you will nutrient load the water when the veggies are removed, causing stress on the fish as the new plantings begin to establish their roots. You want a mixture of veggies and maturity levels in your planting. Some fast growing, some medium and some slow. You will only plant a few of the slower growing ones such as herbs, tomatoes, peppers and eggplant, with more of the dark leafy greens like kale and Swiss chard, with more of the faster growing lettuces. Using succession planting, or planting a few of a fast-growing green every 2 – 3 weeks, allows for them to mature and be harvested while newer ones are growing and coming in behind.
What Your Seeds Need for Germination
Seeds have everything they need to continue their species built right into them. All of the accumulated adaptations, the wide range of environmental and seasonal conditions that they have encountered and grown through are encoded into their genetic material, their DNA. Everything they need to remain dormant, and then sprout when the time is right is built right inside their shells.
Within that hard seed coat is enough food energy to help them break dormancy and carry them into their first several days as seedlings. All the enzymes they need to convert the stored energy into food is there as well; they have all of the fats, carbohydrates, protein, enzymes and hormones needed to get the seed off to a great start. As home gardeners, our job is to provide those proper conditions to ensure maximum germination into strong and healthy seedlings.
What does a seed need for germination? Moisture and temperature are the two most important aspects for vigorous seed germination, followed by a few other factors. Let’s take a closer look!
Moisture must be at a constant level for the seed and young seedling as they have no moisture reserves in themselves like a mature plant does. A mature plant can go without moisture for a short period of time, sometimes up to several hours, but a seedling will die if it loses its critical moisture level even for a few minutes. The seed needs enough moisture to soften and split the seed coat during germination; but not too much as to prevent oxygen from reaching the seed, as respiration increases dramatically. Water initially starts the process by softening and splitting the seed coat, then activates nutrients, enzymes and hormones to convert stored foods into energy. Finally it serves as a means of transporting nutrients to all parts of the newly emerging plant. When starting seeds in a tray, watering from the bottom is the best method of keeping the moisture levels more consistent. Misting can help correct smaller areas that aren’t quite moist enough. Many seedling trays will have a bottom tray to help water the soil or grow cubes.
The soil or grow cube temperature where the seed is must be correct to initiate the germination process. The key is the temperature at the seed, not the surrounding air. A room that has an air temperature of 70F may have a seed temperature of 60F or less, as the moisture acts as an evaporative cooling medium, reducing the seed temperature below what is needed. At too low a temperature the seed remains dormant, often for an extended amount of time. Not only the ideal temperature is needed, but for the correct amount of time. This prevents the seed in the wild from germinating too early and being killed by the next frost or cold front that moves in. If the temperature swings too much from the daytime high to the nighttime low, the seed will not germinate, or do so very slowly. A constant temperature for a week to 10 days will have almost all vegetable seeds up and going well.
The relationship between temperature and light changes as seeds germinate. Seeds need a high moisture and warm environment to germinate. Both moisture and temperature levels need to be pretty constant to get good germination. If the temperature is high during the day and cooler at night, the germination will be delayed. Ideally, tomatoes and peppers need 85F seed temperature to sprout. Most cool season vegetables we eat today need a seed temperature above 70F for best germination, with varieties like carrots and cauliflower needing 80F. For more specific temperature needs, refer to our Seed Germination guidelines.
Seed Starting Techniques
Now that we’ve covered some basics of seed germination, let’s look at specific ways to start the seeds for your aquaponics system. There are 3 main ways of starting seeds – broadcasting them, using a support system like paper towels or cotton balls, and seed starting media for those varieties that do best being transplanted after they are a little bigger. Here’s how each of them work:
Broadcasting the seeds is just like it sounds, taking a small quantity of seeds in hand and sprinkling them around the grow bed. This technique is obviously used with a clay or gravel bed, as it has the nooks and crannies that will support seed growth. This technique works well for lettuce and other leafy greens, as well as herbs and would probably work for other small seeds that are typically planted in the early spring and are adapted to being very wet. You can choose to randomly scatter the seeds across the entire grow bed, or just in certain areas like along one side or in a corner. Be aware that the broadcasting approach can have lower overall germination rates than the other approaches, as the seed is likely completely covered in water for a significant part of the time.
Support systems like paper towels or cotton balls work well with slightly larger seeds that germinate quickly such as beans, peas, melons, and cucumbers. This method can also be used to start the smaller seeds mentioned above – experiment and see what works best for you. Some people like to broadcast some seeds, while others prefer to plant individual seeds or seedlings in specific spots in their systems.
Planting these larger seeds directly into the bed sometimes doesn’t work as well, as they don’t reliably germinate there and are longer lived plants with more food production, so it pays to focus a bit more on where they will be located in the growing bed. They will usually germinate and grow very quickly given some support, they don’t need the added work and material of the grow media. One approach is to wad up a small piece of paper towel or part of a cotton ball and place it in the grow media where it will be moistened by the flow of water. Another is to fold a paper towel in half to crease it, unfold it, then place the seeds about 1 – 2 inches apart just above the fold. Refold it, moisten it and place it in a plastic Zip-lock bag. Check the moisture level and germination daily. You should see moisture droplets on the wall of the bag when you pull the towel out to check germination. When you see a 1 inch or longer root, trim the seedling out of the paper towel and place the root into the grow media where it will get a good flow of water.
Seed starting media is best used for seeds that are sometimes harder to germinate in an aquaponics environment (like spinach or chard) or need a little more time and care (tomatoes, peppers and eggplant) before going into the grow bed. There are different types of seed starting media, such as rock-wool or a peat based “sponge” material. Rock-wool is the most common, is inexpensive, sterile and is the easiest to find. It can be broken into smaller chunks for smaller systems or to use less material. The media is pH balanced by wetting in water that has been adjusted to between 5.8 and 7.0, then the seed is inserted into the media and kept moist, much like above. Make sure to use some sort of marker to keep track of what it is you’ve planted! After the seedlings reach about 1 1/2 inches tall, they are transplanted into the grow bed, rock wool and all.
When transplanting the seedlings and planting the seeds for the first time, it is best to add liquid seaweed for some nutrients to get them established. As the growing progresses, adding a small amount at regular intervals will help keep the trace elements and micro-nutrients in balance, producing better vegetables.
After the initial excitement of getting the system cycling and converting nutrients, then planting the initial selection of vegetables and herbs that you want to grow, don’t stop! Now is when you can harvest the first of your home-grown veggies and start the succession planting process to make up for their removal. As you harvest the lettuce or Swiss chard, watch for openings that will be good for another variety. This way you can have a continual harvest year-round of the tastiest, freshest and most nutritious food possible.
Like anything truly worth having in life, a garden requires some work. It is a continual project, an experiment. Always evolving, growing and expanding. The results will amaze and humble you, as the vibrant, rich colors show themselves. Then the aromas and flavors arrive, stunning with the depth and intensity of the garden show. The deep-seated sense of accomplishment resulting from a job well done lasts, urging you back to the work of succession planting new varieties. Each new year is familiar, yet entirely new.