
 2019 Terroir Seeds | Underwood Gardens
Moroccan Preserved Lemons
Lemons have captivated us for millennia with their bright yellow globes and sour juices, yet using the whole fruit is uncommon today. Preserved lemons boast their own virtues – its juice is tart and acidic with bright notes, while its fragrant oil lives in the peel, where the essence of the fruit is. Taken together, juice and peel offer a bright, aromatic, sweet-sour jolt of life and interest to any dish they touch.
Preserving whole lemons is a centuries-old tradition throughout India, North Africa, the Middle East, Turkey, and Iran where salt and extra lemon juice mellow the bitterness and create highly addictive sweet, salty, and sour flavors heavy with savory citrus aromas. Finely diced preserved lemons are ideal ingredients anywhere lemon juice is called for, and they are an excellent accompaniment to everything from grilled meat and fish to salads and marinades.
Once preserved, the lemons take on a completely different aspect, almost as if they were a different fruit with enhanced flavors.
Making Preserved Lemons
It’s much easier than you might think! We’ll share the recipe first, then walk you through the process in photos.
A unique way to keep the flavor and aroma of fresh lemons for up to a year, ready to bring a bright lemony note to any dish.
- 5 Organic lemons for preserving – scrubbed and dried to remove any wax
- 5 Organic lemons for fresh lemon juice
- 1/2 cup Kosher salt
-
Slice juicing lemons in half and juice well, discarding any seeds in juice.
-
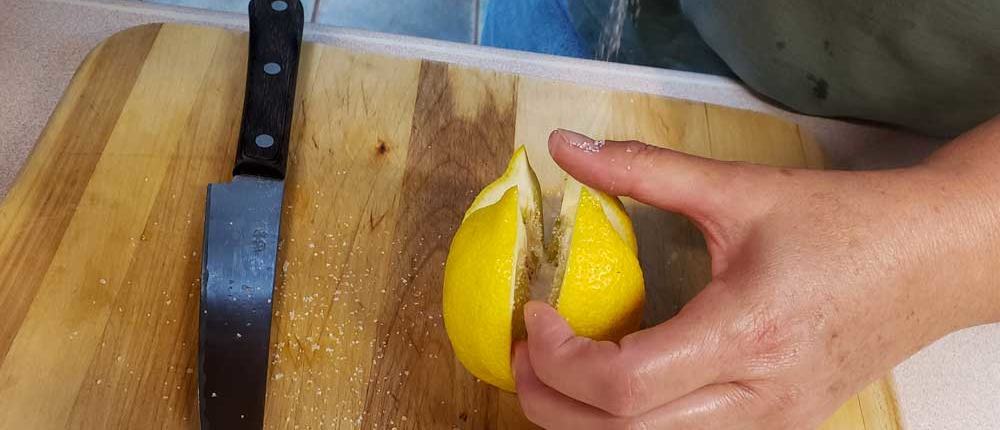
Soften the preserving lemons by rolling them back and forth on a wooden cutting board. Quarter the lemons from the bottom down to within 1/4 inch of the top, open them up and sprinkle salt on the exposed pulp, then close back up.
-
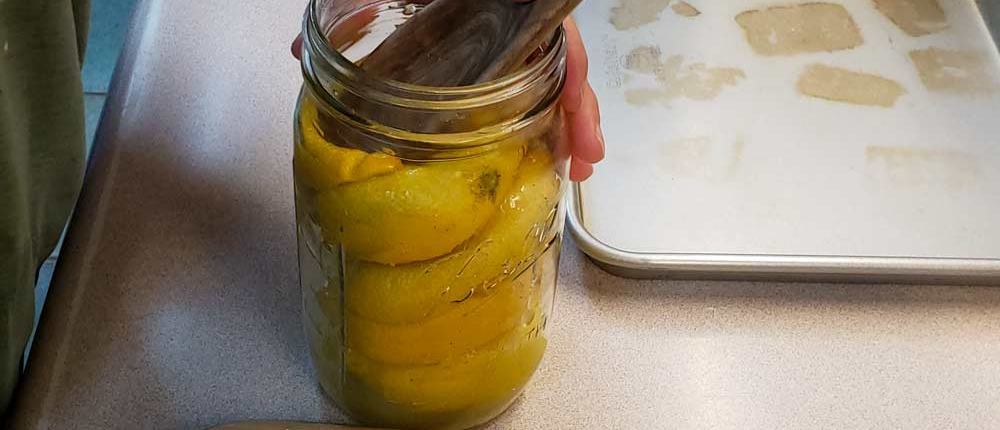
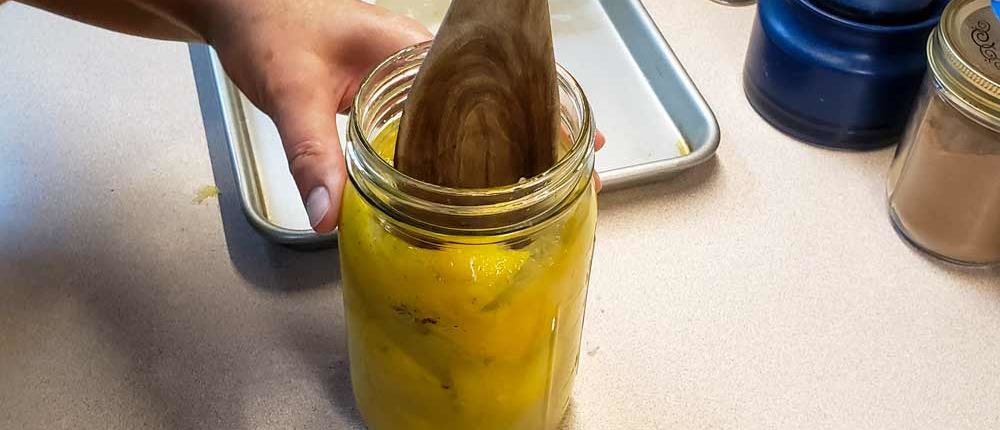
Pack the salted lemon into a quart glass canning jar, pushing each lemon down with a wooden spoon. Sprinkle salt between each layer of lemon.
-
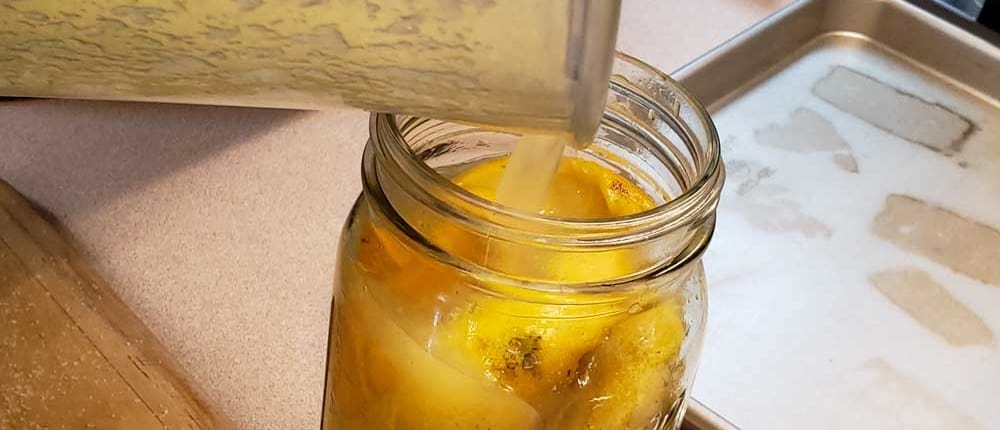
Top off with fresh-squeezed lemon juice, making sure that the lemons are covered but leaving an air space of about 1/4 to 1/2 inch before closing with lid.
-
Leave the lid slightly loose and place the jar in an overflow bowl to catch any lemon juice that seeps out during the preserving process.
-
Let the lemons ripen and preserve in a warm place for 30 days, turning the jar upside down once a day to distribute the salt and juice. Open the jar and add lemon juice if needed to keep lemons covered.
-
After 30 days, make sure lemons are covered with juice and store in the refrigerator for up to a year. The preserved lemons will be good for a year, and the leftover pickling juice will be good for another year.
Turn the jar upside down from time to time to redistribute the juice. Make sure that the lemons are covered by juice at all times.
-
If you notice a lemon has become exposed to air in the jar and has a white lacy substance clinging to it, this is a harmless byproduct of preserving and can be removed.
-
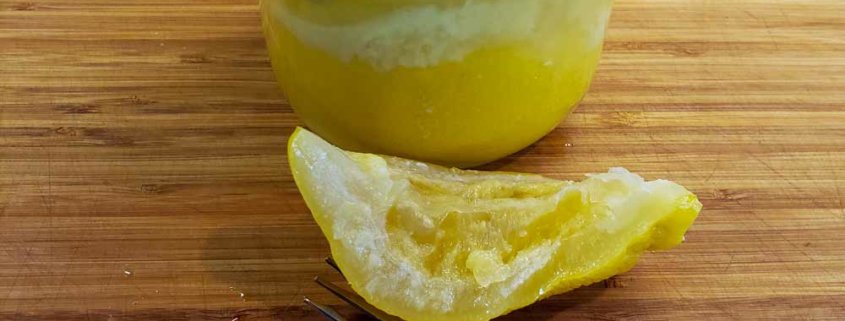
Pull out a lemon with a fork, slice off what is needed for your recipe and rinse under cold running water to reduce the saltiness. Return the unused portion to the jar.
The amount of salt you use is up to you, depending on your level of salty taste preference. The 1/2 cup listed in the ingredients is the minimum to keep the juice brined enough to preserve and protect the lemons, but you can add more if you like a saltier lemony flavor.
We have fallen in love with the beautifully bright hit of lemon scent and flavor these give with the minimum of salt, and we don’t rinse before use but adjust the amount of salt used in the recipe accordingly.
Adapted from Paula Wolfert’s The Food of Morocco
How to Make Preserved Lemons
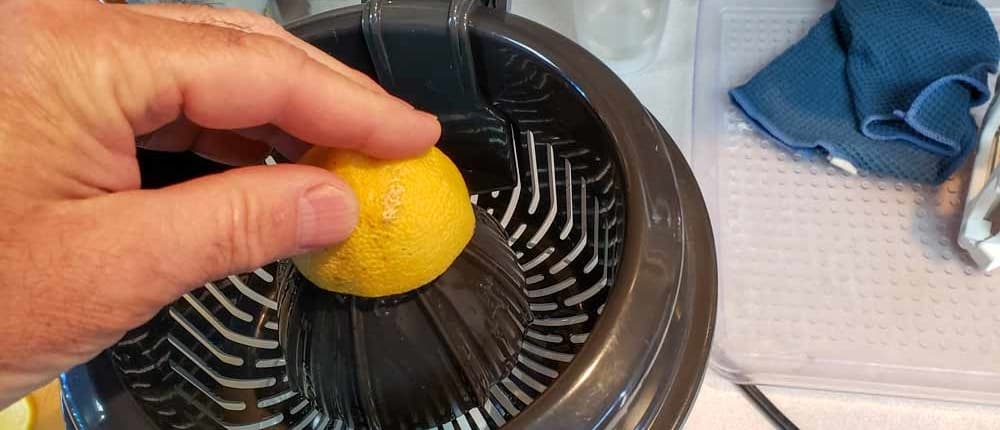
Start by making the fresh-squeezed lemon juice. Slice 5 lemons in half and juice them, then remove any seeds but keep the pulp.
Get more juice out of the lemons by rolling them back and forth on a wooden cutting board with the palm of your hand for about 20-30 seconds each, then slice in half.

Juice the lemons, removing any seeds but keeping the pulp. Set juice aside to use later.
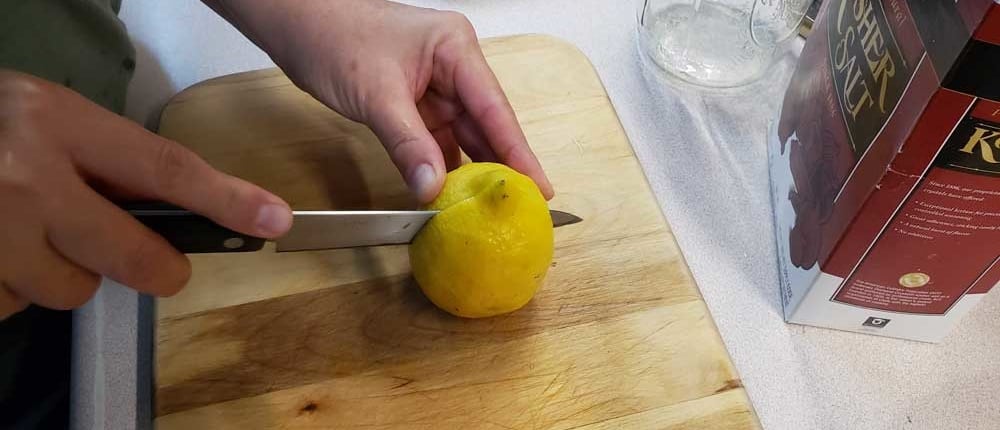
Next, prepare the lemons for preserving by slicing from the bottom end to about 1/2 to 1/4 inch from the top or stem end. Do this twice to quarter the fruit.
Open each lemon for salting. The amount of salt depends on your taste preference. We found that we like the flavors especially well when 1/2 cup of salt is used for the recipe. This allows the preserving action to take place but doesn’t impart any extra salt to the flavors. We find that we don’t usually need to rinse the lemons before using them.
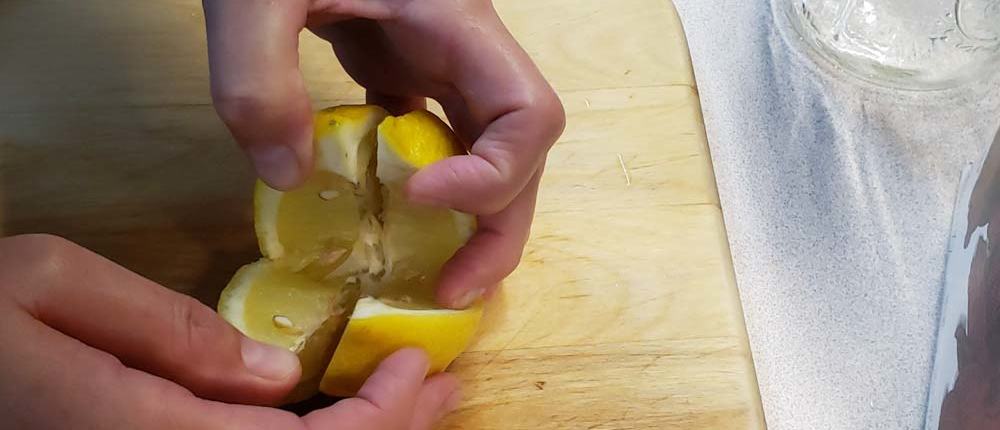
Lightly but evenly salt the interior of each lemon.
Pack the lemons into a quart glass canning jar, packing them down to make room for all 5 lemons. Add a light sprinkle of salt on top of each lemon in the jar.
Four normal-sized lemons will almost fill the jar, so you’ll need to pack the fifth lemon pretty well.
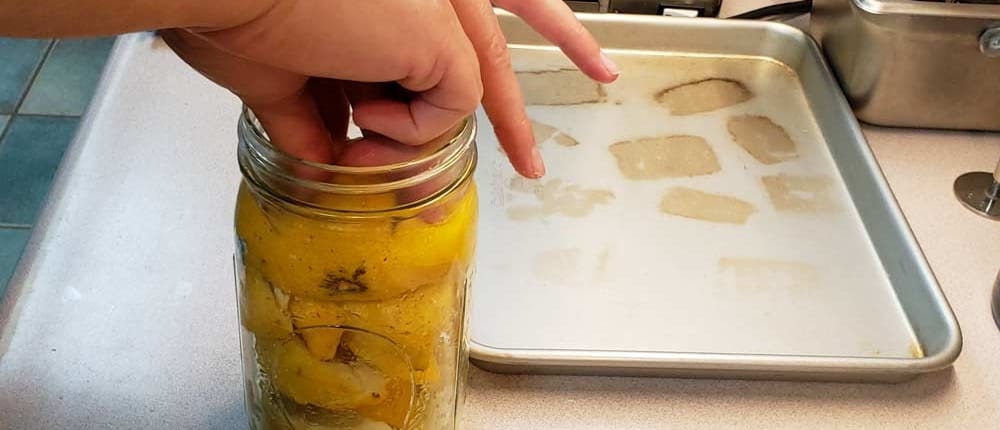
Using a combination of fingers and a wooden spoon, make sure the lemons have enough headspace for the juice to completely cover them.
Add the fresh-squeezed lemon juice, making sure that the lemons are completely covered.
Fresh lemons are springy, so you’ll usually need to pack them back down with a wooden spoon after adding the lemon juice.
Make sure the lemons are covered by juice, tighten the ring and cap loosely to allow for any expansion during the preserving process. Put the jar in a bowl to catch any overflow.
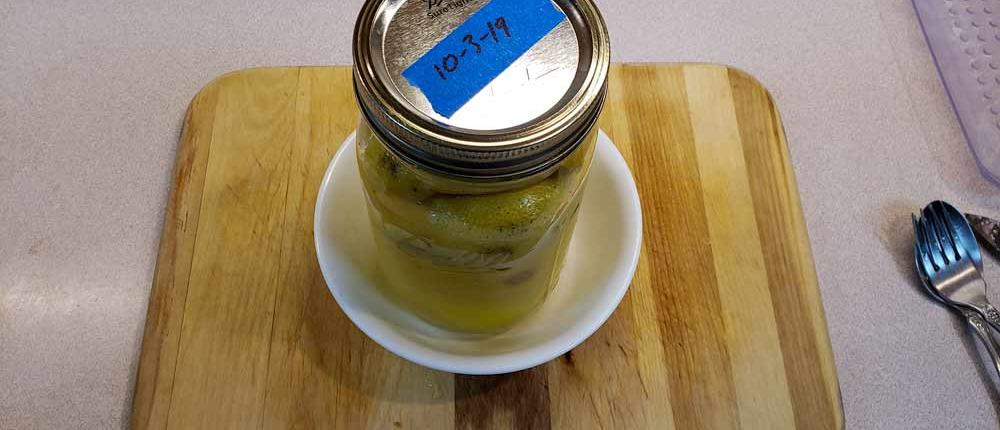
Now you wait! Invert the jar once daily to allow the juice and salt to trickle through the lemons, then set it back in the bowl.
After about a week, give the lemons a sniff test. You’ll notice the aroma starting to change from an overall sour lemon smell to overtones of sweet and almost fruity. It brings to mind the smell of a freshly opened Italian lemon soda – sweet, sour, and sparkling.

Let the jar sit out in a warm area for 30 days, then store in the refrigerator. The lemons will be good for up to a year, and the pickling juices will be good for another year. Once you taste them and start using them, they’ll be gone within a couple of months!
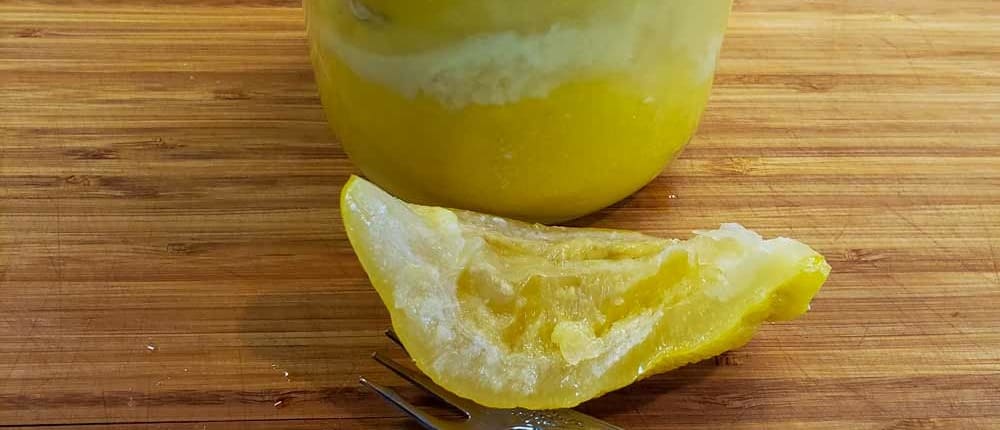
The rinds soften during the preserving process, allowing you to use the complete lemon – rind, pulp, and juice – in any recipe that calls for lemon zest or juice. We use a finely diced 1/4 inch slice of lemon when a recipe calls for a tablespoon of lemon juice. The preserved lemon adds a glorious citrus perfume with a very pleasing lemony punch that doesn’t disappear during cooking.
After we made our first batch and cooked our first lemon roasted chicken, we immediately made a second batch!
