Transform your garden with effective garden cleanup strategies to prevent pests and diseases for next season’s success.

Transform your garden with effective garden cleanup strategies to prevent pests and diseases for next season’s success.
The counterintuitive gardening technique that gives you cleaner beds with less work. Discover the secret of stale seedbeds.
Discover the truth about homemade weed killers. Are social media recipes safe and effective? Find out before you try them in your garden.
Field bindweed, also called perennial morning glory, has the scientific name of Convolvulus arvensis and is widely considered to be one of the most invasive and destructive weeds in cropland and gardens. It was first found in Virginia as early as 1739 and is thought to have originally brought to Kansas and the Midwest from the lower Volga region in Russia, hitching a ride in the oats and wheat brought by immigrants starting new lives. It and its close cousin hedge bindweed (Convolvulus sepium) are both perennials, reproducing from both seeds and shallow creeping roots which make control and eradication much more difficult than if it was an annual.
Bindweed has been so pervasive that in 1937 Kansas wrote official legislation outlawing field bindweed – among a number of other persistent weeds – requiring farmers to use every effort to remove them from their fields and state agencies to do the same with public lands. Several Midwestern states followed suit and adopted this legal approach, approving and vigorously promoting an “eradication through poisoning” approach. As you might assume, all of these laws and efforts were unsuccessful. Perhaps the legislators forgot, if they ever knew, that Mother Nature rarely obeys mankind’s laws.
Bindweed competes very aggressively with adjacent crop plants for water, nutrients, and light, reducing crop yield and quality as well as interfering with harvesting by intertwining with crop plants and clogging up farm equipment – thus giving its name of “bind-weed”. In farming, bindweed infestations can reduce grain crop yields by 20 – 50% and row or vegetable crops by 50 – 80%, with similar reductions in the home garden. This is not a weed to be taken lightly!
Identification and Growth

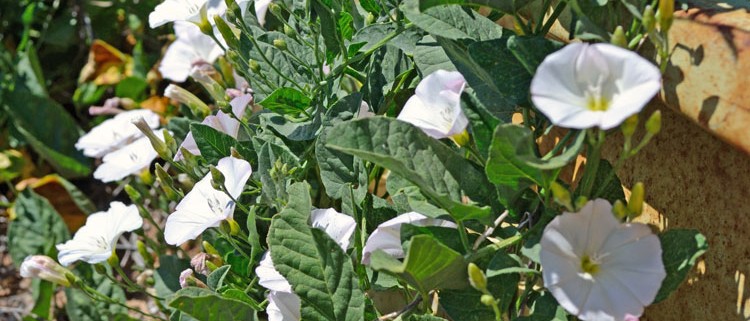
Bindweed Wrapped Around Morning Glory
It is pretty easy to identify field bindweed and its several cousins. If you’ve ever grown morning glory, then you are already familiar with what bindweed looks like because they are in the same family – Morning Glory. Bindweed has narrower leaves and smaller flowers than Morning Glory, as can be seen in the photo of bindweed vine wrapped around morning glory, and the photo at the top of the article. It is a low growing, drought tolerant with medium green narrow arrowhead-shaped leaves on vigorous vining slender stems. The flowers are funnel-shaped with colors from white to pink. The flowers produce small round capsules with 1 – 4 seeds in each, which can survive in the soil for up to 50 years due to their exceptionally hard and durable seed coats. There is a long central taproot on each plant that can drill down as far as 20 feet or more for moisture that develops numerous lateral roots, mostly in the top 2 feet of soil. Field bindweed reproduces from seed and from buds that form along the lateral roots, sending shoots up to the surface which then become entirely new independent plants. Lateral roots can spread about 10 feet per season, sending up new shoots along the way.
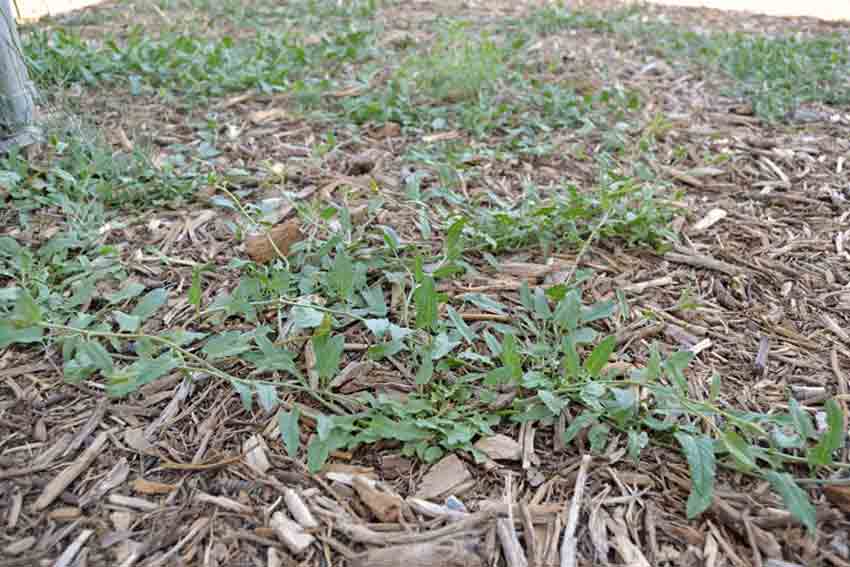
Invading Bindweed
The most common identification is when a gardener realizes there is a mat of green vines that are taking over a section of the garden or yard, or is climbing up the trellis or wall in the case of hedge bindweed. Early in the morning there will be hundreds of small, pretty flowers opened up that will attract a person’s attention.
Early warm weather wakes bindweed up and it grows until the frost or cold stops it in the fall. Extreme heat, drought, and cold will slow down or kill off the top growth, but the underground roots and shoots will go dormant, waiting for enough moisture or better weather to re-emerge. The root systems can spread up to 10 feet per growing season, or by the lateral roots and buds being broken up and re-distributed by tilling. Seed is often spread from irrigation water runoff, birds eating the seeds and depositing them elsewhere, on the feet of gardeners, dogs, and other animals and on the wheels of wheelbarrows, tillers or other machinery and vehicles.
Control Methods
When researching how to control bindweed, the most commonly recommended method is to spray it with a persistent herbicide like glyphosate (Roundup) or worse, but then turn around and caution that care must be used around vegetable or other food crops.
Please understand, we very strongly do not recommendthis approach, as is often creates more problems than it solves.
The second most common prevention recommendation is to make sure to avoid bringing in soil, seed, hay or animal feed that has the seeds, buds or pieces of the lateral roots in them. This is somewhat obvious, but too many times the first sign of having a problem is when the little flowers have bloomed and it is way too late for prevention.
The folly of using persistent, petrochemical herbicides to control most weeds – but especially bindweed – is apparent when looking at the multiple mechanisms it uses for reproduction – seeds, buds, lateral roots and the shoots they send up, as well as the vast amount of seeds that can stay dormant for several decades, just waiting for the right soil conditions. Sure, spraying will knock the above ground growth back, but the next season it will be back from all of the different angles it uses to survive, so more spraying is needed. Meanwhile, the spray is also knocking back the exact plants you want to grow and it isn’t beginning to touch the seed or root reservoirs in the soil!
Another common but misguided approach is to use a mixture of vinegar, Epsom salts, and dish detergent. This doesn’t work any better and may wind up killing more plants that just the weeds. Vinegar – whether household strength or the much stronger agricultural vinegar – is an acid and affects the above ground green growth. It will kill that off, but not touch the underground roots, seeds or shoots. It also changes the pH of the soil, potentially creating conditions for worse weeds to come in. Epsom salts are magnesium sulfate, supplying elemental magnesium for the soil microbes to work with and sulfur, which again lowers pH and is a nutrient building block. Dish detergent is a “spreader/sticker” which coats and covers the surface of the leaves, suffocating them. Unfortunately, it can also suffocate beneficial insects, earthworms and the leaves of nearby plants you want to keep.
It is initially easier and much simpler to just spray the weeds, but that quickly becomes a slippery slope as the weeds you are trying to control grow more abundant and you start to notice other invasive weeds appearing that weren’t there to begin with. If you want to get ahead of the weeds, you must understand how they grow, spread, reproduce and the soil conditions that allow them to flourish.
Compare spraying increasing amounts of herbicides multiple times each season to an initial learning curve, some soil improvements and watching as the unwanted weeds start to retreat year after year, while your garden or farm grows stronger, healthier and produces more food that tastes better. Which road do you want to go down?
In looking at methods of controlling bindweed, we need to step back just a bit to understand more of why this, or any other, weed establishes itself in the first place. Contrary to much of the commonly spread information today, weeds don’t just “happen”; they are in a certain place for a very specific reason – the conditions are “just right” for them to grow there.
Weeds are an indication of what is going on with the soil and its fertility, both right and wrong. They show the progression of the soil, whether thefertility and biological diversity and health are improving; or if it is in decline. Very much as a pond will go through several generations of different species of plants until it is filled in and becomes a meadow; or a grass pasture will gradually fill in with a progression of woody shrubs and eventually trees, weeds will have a progression of species that tell the story of improving or failing health of the soil where they grow.
This information is by no means new, untested or untried. It has simply been swept aside in the race toward industrial agriculture shortly after World War II using leftover nitrogen and phosphorus stockpiles from explosives manufacture. This chemical race also happened to home gardening, unfortunately. Dr. Carey Reams and Dr. William Albrecht were some of the last and greatest researchers into the relationship between healthy soils, healthy plants, and healthy people, which naturally extends to the study of weeds in relation to soil conditions. Much of their work is more than 50 years old at this point and is only becoming more proven as more research and testing is done in soil health. One of the best books that we always recommend to anyone wanting to start gaining a better understanding of how and why weeds work is Weeds – Control Without Poisons by Charles Walters, the founder of Acres USA magazine.
The appearance of weeds doesn’t always mean bad things are going on in the soil. For instance, moderate lambsquarter and pigweed are an indication of good soil structure and fertility is good, crops will thrive and insects will generally stay away. They can be managed with light tilling of the top two inches of the soil within one to two days after the weeds have sprouted.
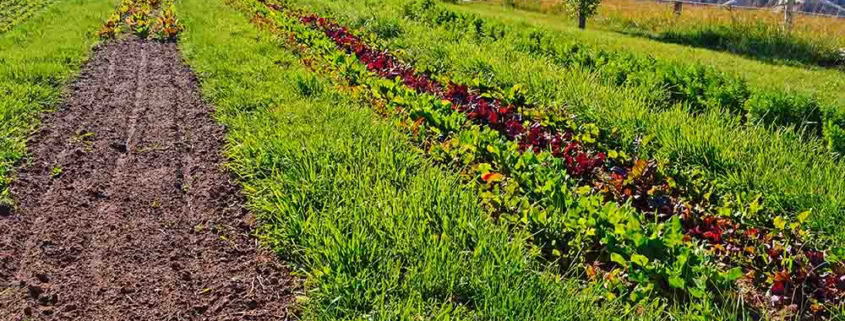
Two Adjacent Raised Garden Beds
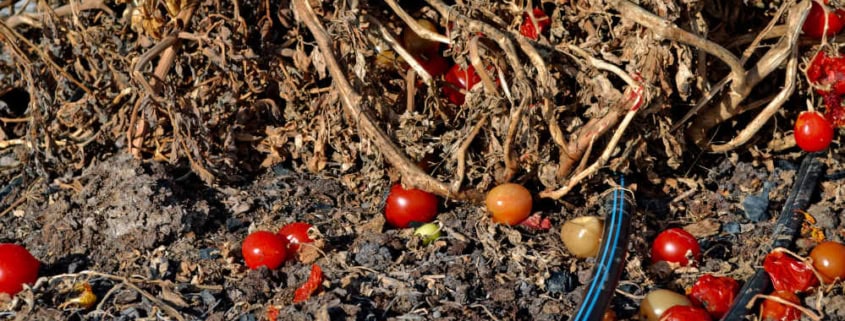
What bindweed says about the soil conditions when it appears is that the soil is out of balance, with pH issues and stuck or incomplete decomposition of organic material accompanied by excess heavy soil metals such as magnesium and potassium. There is usually an accumulation of dry and dead plant matter that can’t finish decomposing, creating the right conditions for bindweed to flourish. Most often, the soil is low in humus materials with low available calcium and phosphorus. pH can be either excessively low or high and the soil structure can be clay or sandy.
This is easily seen in the photo above. The near bed was treated with compost and a top dressing of wood chips last fall, while the bed in the background had flowers in it, was not cleaned out for the past couple of years and had little to no compost amended to it. The near bed has a few shoots appearing, but the background bed is over-run and won’t be able to be planted this year.

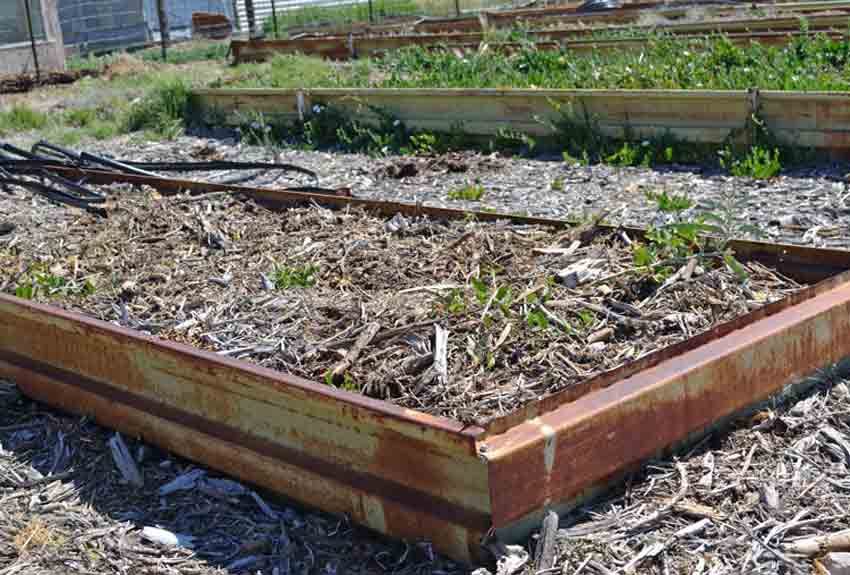
Bindweed Sneaking In
There are two different, proven methods of stopping and controlling bindweed without using herbicides.
The first method is using weed cloth to block any sunlight from reaching the bindweed plants, much like my article Stopping Bermuda Grass in the Garden.
This method can work if you take care to overlap the shade cloth, avoiding any gaps where the roots will come through. It normally takes about 4 – 5 years to make the roots go dormant, lose their stored energy and then finally rot.
The challenge in trying to shade bindweed out can be seen above, where the bindweed is sneaking in where there is a gap between the weed barrier cloth and the metal raised bed – possibly less than a 1/4 of an inch!
Bindweed Lateral Roots
When the weed barrier is pulled back, it is easy to see the lateral roots running along the bed to where the gap allowed them to put a shoot up and survive.

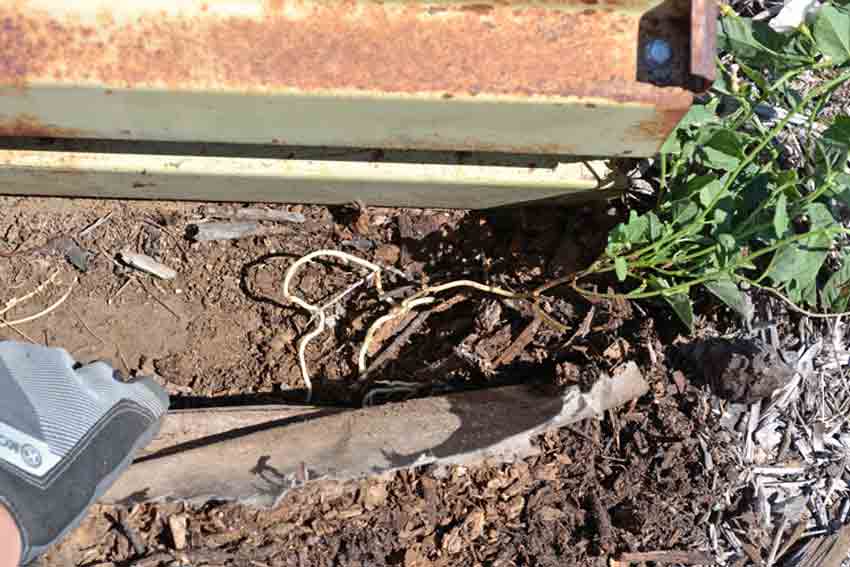
Bindweed Long Lateral Roots
Moving around to the long side of the raised bed – about in the middle of a 15-foot long bed – we found another shoot poking its head up and pulled the weed barrier fabric back.
This is what we found – a series of lateral roots that had followed the joint of weed barrier fabric and raised bed, poking shoots up wherever it could. These lateral roots went to the shoot in the above two photos.

Handfull of Lateral Roots
Here is what over 10 feet of lateral bindweed roots look like. What we’ve discovered is that when we installed a heavy and fairly non-porous weed barrier fabric several years ago and then put several inches of wood chips on top is that we were creating the perfect environment for bindweed to encroach underneath the weed fabric and pop up in our raised beds.
For most of our beds, this isn’t a serious issue as they are rich and well composted with a fertile and biologically active soil which seriously deters the growth mechanisms of bindweed, so we just see them popping up just inside the raised beds and nowhere else.
The second method involves improving the soil by adding missing or low nutrients, adjusting pH and adding well aged, rich compost to jump-start the decomposition process again.
This short-circuits the growth pattern of bindweed and will soon start to rot the roots and shoots. A complete soil analysis from a professional soil lab is the correct way to determine what nutrients are needed and how to adjust the pH of your soil. There are a number of very good ones, but the two that we know and are familiar with are Crop Services International and Texas Plant and Soil Lab. Either one is excellent and will help you determine what nutrients are needed and in what amounts.
Successfully controlling bindweed depends on several factors that are unique to each garden or farm. Your soil’s pH, mineral levels, clay or sandy based soil and whether you have wet or dry organic matter that is stuck in its decomposition will all determine what nutrients and approach to use. The complete soil analysis from a professional soil lab will provide you the information needed to make the plan to begin reversing the encroachment.
Bear in mind that no single weed species grows independently of all others, they will grow in groups and communities; much like companion plantings of flowers, veggies and herbs do. As you begin to learn more about what different weed species prefer and the conditions that they need for growth, you’ll start to see that groupings of particular weeds mean very specific things related to soil health and fertility. They will indicate exactly what is right or wrong with the soil and what is in excess or lacking. Then you can make the corrections and watch them leave, followed by others that are much less difficult to deal with and indicate a much more fertile soil.
This may seem a bit overwhelming at first, but when you take a step back and realize how much you’ve learned about gardening or farming since you first began, even if it’s only a short time – then you can see how much this knowledge will benefit both your soil and you with fewer weeds, pests and more abundant, healthier plants and veggies, herbs and flowers.
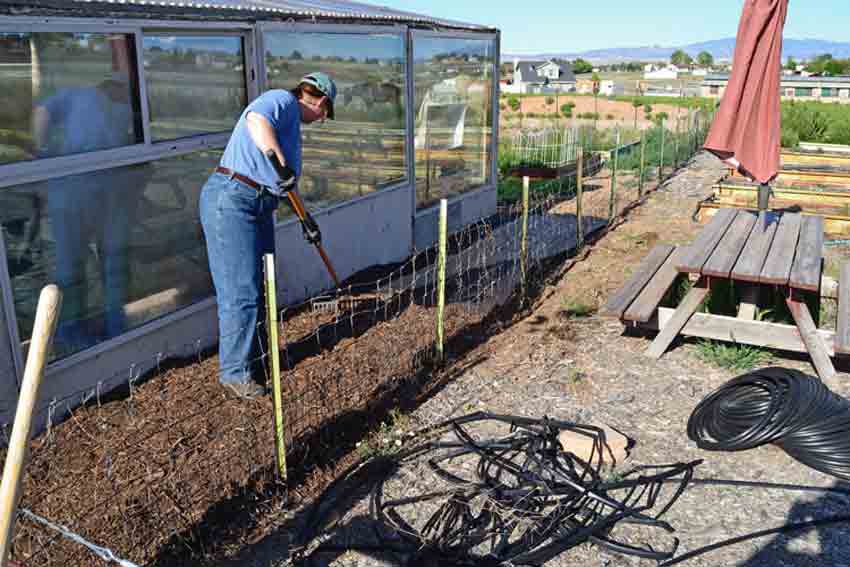
Bermuda grass: love it or hate it – most people fall into one of the two camps; there doesn’t seem to be much in-between. Personally, I think it’s a well-adapted grass for our harsh, dry Western climates. It loves heat, is remarkably wear resistant to foot traffic and is one of the most drought tolerant turf grasses around. It’s great for areas that need turf, for erosion control and for feeding to horses, but it’s an invasive alien weed in the garden. That’s where we have a problem.
We’ve dealt with a slow Bermuda grass invasion over the past few years as it spread from the walkway between our greenhouse and garden into the garden itself. At first it wasn’t such a pain because it colonized the wood chipped walkways and area where the picnic table is. Then it headed toward our smaller raised beds, completely taking over one and entangling the drip system where it entered the raised beds in 3 others.
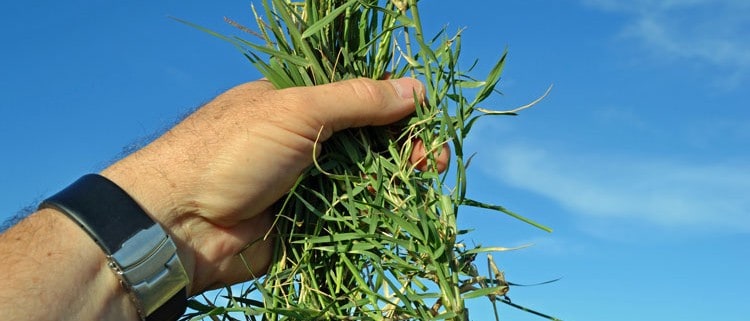
Bermuda Grass Stolons
We’ve tried a number of approaches to curbing it’s enthusiasm – burning the above ground grass and runners (properly known as stolons) both during and after the growing season, spraying a strong vinegar solution to the green grass phase and digging up the clumps and removing them. Nothing has really worked very well or for very long. Burning is highly satisfying, but did nothing about the rhizomes underground or the seed bank in the soil. After a season of targeted burning, the grass came back just as thick and lush the next spring. The vinegar sprays punched the Bermuda grass in the nose for a while, killing off or wilting the above ground growth but the rhizomes just sprouted up within a few weeks several inches away from where it was sprayed.

Bermuda Grass Seed Head
Persistent petrochemical herbicides such as Roundup are out of the question for a few reasons. One, we are working in our food producing garden and fully realize that whatever is put into the ground will wind up in the vegetables that are eaten. Two, we are a company that works hard to educate about the overuse and over-dependence on what has been called “rescue chemistry”, so it’s just a non-starter.
So what can be done? As is usual with us, we realized that understanding more about this grass than just how to kill it would probably lead us to answers of how to work with it better. After all, as gardeners we are forever working to get the plants we want to grow in a certain area, all the while trying to discourage other plants that we don’t want in the same areas!
It turns out that Bermuda grass isn’t originally from Bermuda; it’s from Africa and was introduced around the mid-1750s. It is thought to have hitched a ride in hay and introduced into the southern states initially. It spread from there and today it is most commonly found in the southern and southwestern United States. Bermuda grass was used almost exclusively as forage for animals for over a hundred years, sometimes becoming a lawn grass by default in places where other grasses could not survive the hot summers well. It wasn’t until the early 1900s that it became recognized as a valuable golf turf grass, starting a second life. Several resources list it growing below 3,000 feet in elevation; our garden in central Arizona is right around 5,000 feet so that doesn’t seem quite correct.

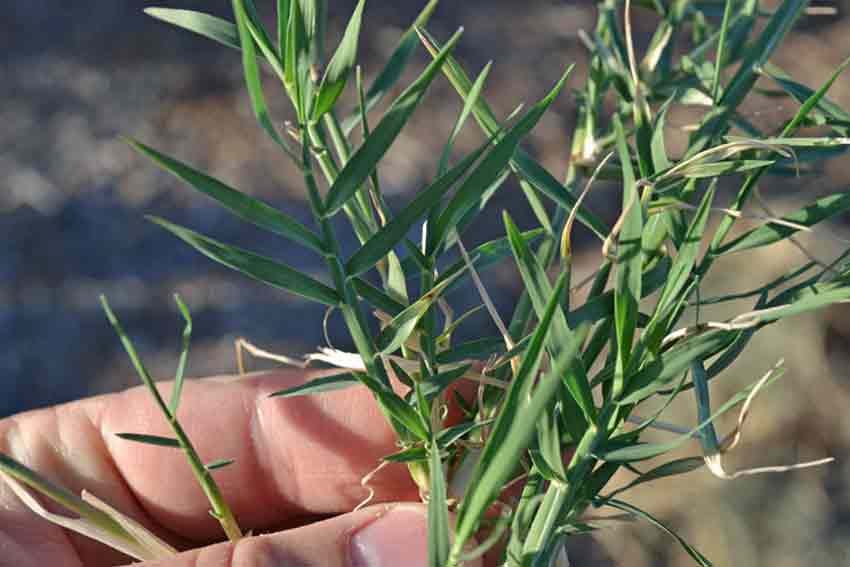
Bermuda Grass Rhizomes
Bermuda grass is sometimes confused with crab grass. Bermuda grass has a deeper root system and crab grass has no stolons or rhizomes to deal with.
In undisturbed soil, Bermuda grass will only drive its roots about 6 inches deep. However, they can go significantly deeper in sandy soil, deeply tilled fields or garden beds, or where the roots meet a solid barrier such as a sidewalk, concrete foundation or walls. This is why driving a solid edging into the soil deeper than about 8 inches has been shown to be effective in stopping the spread of a patch into a garden or surrounding area.
Unfortunately, controlling Bermuda grass with nutrient management or pH management just doesn’t work very well; unlike morning glory or bindweed or a number of other weed species.
The two approaches that have proven to work are drying/desiccating the top 6 inches of the soil to get both the above ground stolons and the underground rhizomes and roots, and excluding light. The one real weakness of Bermuda grass is that it simply won’t grow in the absence of light. Then again, most plants don’t!
There are some folks that have had success with digging or scraping the top layer of soil away, then replacing it with rich topsoil and compost that you are sure has no Bermuda grass seed, stolons or rhizomes. For every success story using this approach, we’ve heard of a dozen others that have seen a re-infestation after some period of time.
The problem with our garden situation is that we don’t have ready access to high quality topsoil that has no Bermuda grass in it. This is part of how we wound up with our current experiment – we brought in topsoil from a neighbor’s property to help fill in and got an unexpected bonus.
Using a thick clear sheet of plastic on top of the ground and excluding any moisture during the growing season has shown to work well, if the area can be isolated with no roots or stolons escaping the area being treated. This approach works especially well if you live in a sunny and warm to hot area during the summer, as a cool and damp summer will do little to stop the grass from growing. If there is escapement, the roots or stolons simply bring in moisture and nutrients and the grass suffers but does not die. Because of the grass intrusion into the garden and under the fence, we can’t use this option.
That leaves us with the shade option, so we are going to do it right. The first step is to take the wood chips out and scrape what we can down to the soil, removing what clumps of grass are possible. We burned the remaining grass, in order to reduce its energy reserves.
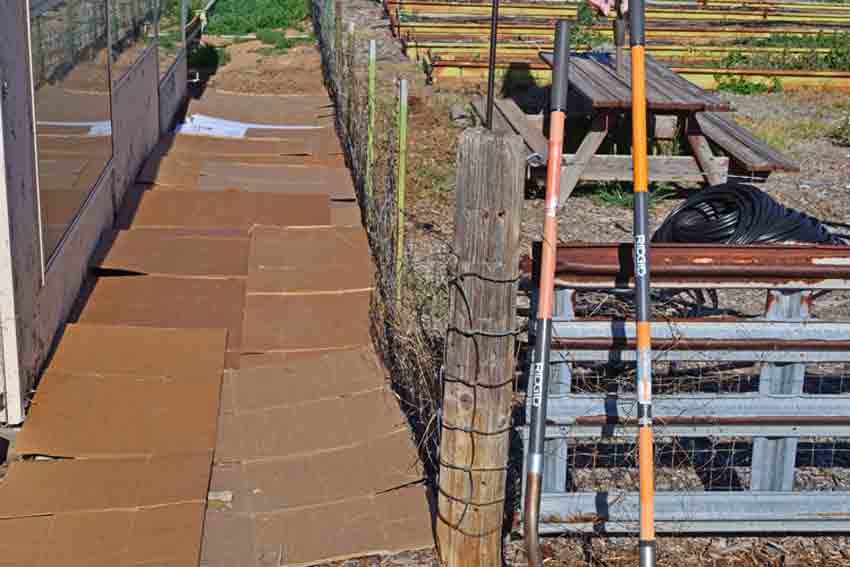
Double Layer of Cardboard
Then we installed a double layer of cardboard for two reasons – it helps to shade the ground and will decompose over time, increasing the chances of rotting the remaining Bermuda grass.

Weed Barrier Cloth
Over that we installed a thick and very dense weed barrier cloth from A.M. Leonard, a horticultural tool and supply company. You don’t need to be a business to order from them and their products are commercial quality. It is 20 mils thick, has a 98.7% opaqueness to light, won’t rot or mildew, will allow water to pass through and has a 5 year warranty, so should last for plenty of time for the Bermuda grass to rot. This photo is with the full, bright afternoon sun behind the cloth, to show just how much light is stopped. I actually had to lighten the photo up a bit!

Aurora Helping
Installation was easy – we simply rolled it out with our resident Dalmatian expert – Aurora – supervising…
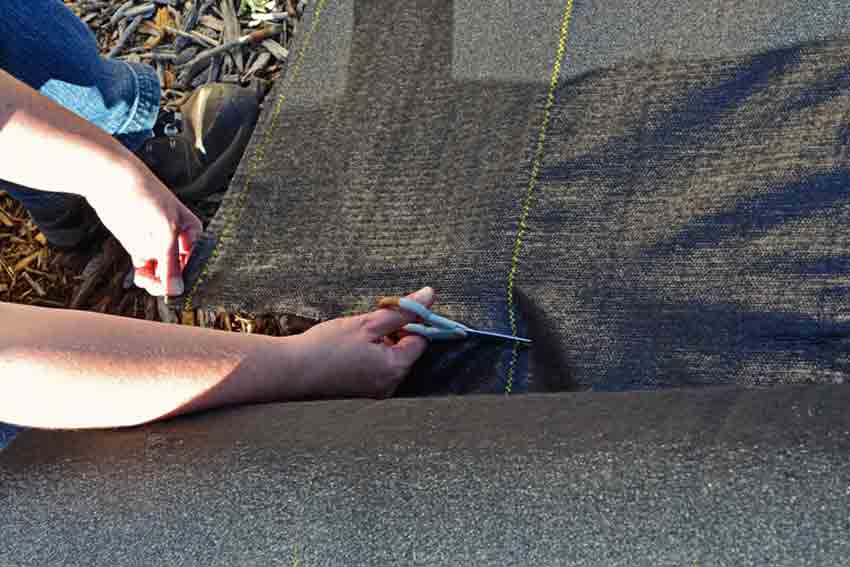
Cindy Trimming Weed Cloth
…then trimmed it to length with scissors.
Spreading Wood Chips
To finish things off we put 4 – 5 inches of wood chips on top of the weed barrier to further shade everything and discourage any other weeds from making their homes in the wood chips. With this approach, there should be no way that light will get to the grass or soil and as the cardboard rots it will start a layer of decomposition that will include the remaining grass seeds, stolons, rhizomes and roots. This very well might take a year or more with our moisture levels, but that is why we went to the lengths we did to ensure that light can’t get down to the grass and short circuit our project.

Weed Barrier Installation Finished
Here is the completed view, with the double layer of cardboard, weed barrier cloth and thick layer of wood chips installed.
We will post updates as they happen to this project. In the meantime, we would love to hear of your success or challenges with dealing with Bermuda grass in your own garden!
 © 2024 Terroir Seeds | Underwood Gardens
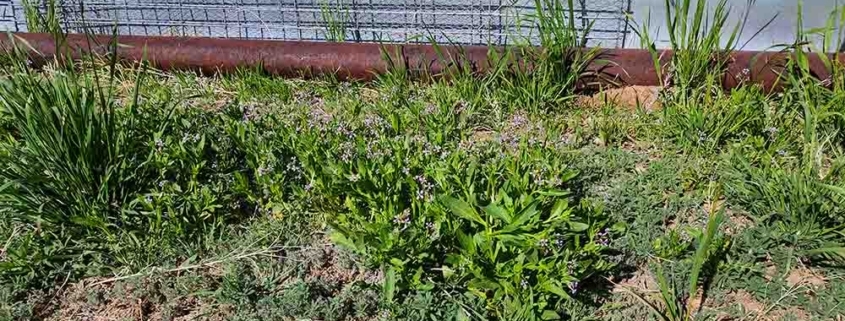 © 2024 Terroir Seeds | Underwood Gardens