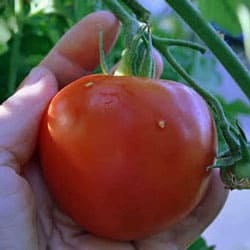
Picking Heirloom Tomatoes


Finding and picking perfectly ripe heirloom vegetables or fruit seems second nature to some, but those new to gardening can be confused and frustrated by the seemingly endless choices. One the one hand, you don’t want to pick too early and miss out on the scrumptious flavors, but you also don’t want to pick too late and not only miss the flavors, but lose the time and work of growing the vegetables in the first place. What’s a hard-working home gardener to do?

Do not use size (or color) alone to choose when to pick, as most of us are used to the size and color of the supermarket produce, which is not an honest or accurate measure to use for your veggies! Most home grown produce will be a bit smaller, more colorful and a bit less uniform in appearance than the supermarket equivalent. Heirloom vegetables grown at home will mature over a span of a few days to a couple of weeks, so you have time to let things get a bit riper if needed. No need to rush.

Use your sense of sight, touch, smell and taste to determine when to pick. Gently feel the tomato to see if it is soft and slightly yielding, or still just a bit firm. If it feels like it is ready to pick, gently pull the tomato just a bit. If it is truly ripe, it will almost fall off into your hand, if not it may need a day or two more. Give the melon vine the slightest pull to see if it slips from the melon. Smell the skin to see if it has that deliciously ripe tomato perfume, that heady melon scent or if it needs just a day or two more. Watch the colors change on the peppers, feel the skin and flesh change from firm and unyielding to slightly pliable to see when the flavor is best. Gently squeeze the okra, fondle the eggplant, watch the translucence of the pea pods fill with young luscious peas. Gardening is a full contact sport, and not just in the physical sense. It requires, engages and tunes all of your senses to learn when everything is at its absolute peak ripeness and therefore peak flavor and nutrition.

When in doubt, always take a taste test to see if your other senses are right, or they need a little education and fine tuning. Don’t be afraid to taste! Most of us have been educated on what to expect with vegetables from the supermarket, which is very misleading. Supermarket produce is specially selected to be picture perfect; everything else is discarded or used for other products. Every time you do a taste test, you become more in tune with the flavors and timing of your particular garden, and your particular vegetables that are growing there. This is called terroir, and your garden has its own special brand and flavor of terroir! With a little time, you will know exactly when everything will be at the peak of its flavor, and can plan some scrumptious meals around them. Once you have experienced the magic of a ripening garden, you will never forget the sights and smells.

It’s usually best to pick in the cool of the morning, as the evening’s growth is completed and flavor is at the day’s best. Cool evenings are a good time to pick as well. Make sure to plan ahead if you need chilled vegetables such as salad makings and pick ahead of time. Harvesting the day before will give plenty of time to get things chilled without losing any flavors that you’ve worked so hard to grow.

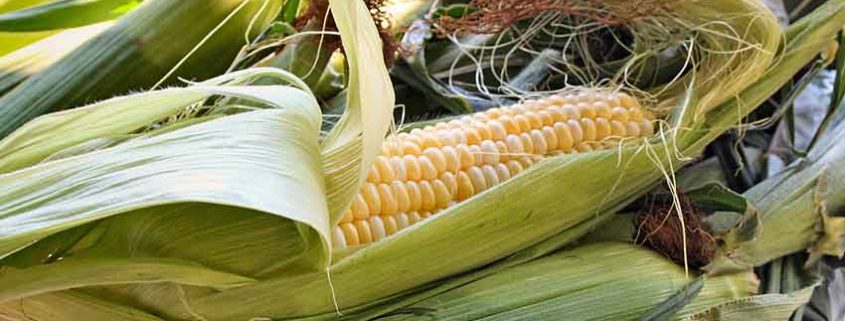
A close up of an ear of corn on the cob.


Sweet Corn Planting Tips

May is the traditional month to plant heirloom corn. A direct-sow crop, it must not be planted too early as it needs warm soil. Continuing with our historical heirloom history series, below is an excerpt on Sweet Corn from the 1884 “How The Farm Pays – The Experiences of Forty Years of Successful Farming and Gardening” by William Crozier and Peter Henderson.

Sweet Corn

“It may seem presumption in me to instruct the farmer how to grow corn; but as their methods of growing this special variety of corn for table use are probably not as well known as for the field varieties, I will here give them.

All the varieties of sweet corn may either be sown in rows four and one-half feet apart and about six or eight inches between seeds, or planted in hills at distances of three or four feet each way, according to the variety of corn or richness of the soil.

The smaller and earlier varieties as the Tom Thumb and Early Minnesota, may be planted in hills two feet apart each way. The taller variety of the richer the soil, the greater should be the distance apart. Such later varieties as Egyptian and Evergreen require to be planted at least three feet apart, or even more, on very rich soil.

We make our first plantings in this latitude about the middle of May, and continue successive plantings every two weeks until the last week in July. In more southern latitudes, or in warm, light soils at the north, planting is begun a month earlier and continued a month later.

I have repeatedly sold it in the New York markets, realizing as high as $200 per acre, and this, too, at the first wholesale price, the consumer paying about twice as much. An ordinary yield is about 11,000 ears to an acre. In such cases, however, it was either an early crop or a very late one, bringing two or three dollars per 100 ears, while the intervening crops, which came in competition with the full market, often sold as low as seventy-five cents per 100 ears.

The importance, then, will be seen, of striking the market at such seasons when the article will be scarce. The quantity of seed required per acre is from six to eight quarts.”

Modern Day Thoughts and Comparisons

It is very interesting how much attention was paid to the “richness” of the soil. Also, some great pointers to think about if you are trying to bring corn to the local market.

Here are some thought-provoking yield comparisons to our modern corn production. The average yield for commercial hybrid corn in 2010 was 152 bushels per acre. In 2010 the average price of corn was between $3.50- $4.00 per bushel. A bushel of corn in ears is 70lbs.

Higher production yields have not actually produced more income for the farmer in 128 years, due to several factors! Inflation is one of the biggest, but commodity pricing structures are a close second. 

Just for comparison, that $200/acre in 1884 would be worth about $4800/acre in 2010. This means that even with the increased yields of the hybrid corn, 152 bushels/acre at $4.00/bushel is only $608/acre, which is eight times less! Even if the income was $100/acre in 1884, that would be about $2400/acre in 2010- something that many farmers would jump at.

Plant some heirloom open-pollinated corn in your garden this year. OP corn may not have as high of production yield as the modern day super sweet hybrids but it sure does have a richness and depth of flavor that can’t be forgotten.

A Few Tips to be Successful with Corn

  • End wormy corn- We have heard about this tip from many folks, as an old time remedy to the corn worm. After the silks turn brown, apply 20 drops of mineral oil to the tips of each ear. Repeat every other day for three weeks. This not only smother s the larvae but also makes husking a simpler task.
  • There is a lot of folk lore about corn. Here are a few to ponder.
    “Put one fish head in each hill like the Indians did.”
    “Plant the seeds when the oak leaves are the size of a squirrel’s ear.”
    “Corn should be knee high by the Fourth of July.”
  • If you are just growing a small plot in might be better to plant in a block than in rows.
  • Corn has a number of four-legged enemies, raccoons, squirrels, rabbits and deer. Fencing maybe needed to protect young stalks depending on your area.
  • Remember there is more than just sweet corn, visit our heirloom corn department for all the choices available.

Here’s a few recipes to tempt your tastebuds!
Fresh Roasted Garden Salsa
Cajun Chicken Maque Choux
Heirloom Corn and Potato Chowder

Hortopita


Hortopita is a savory pie that is stuffed with horta, or edible wild greens such as dandelions, chard, kale, and lamb’s quarters- commonly called spring greens. Horta directly translates as “grass” in Greek, but refers to about 80 different greens growing all over the country. It’s delicious alone (sauteed with lemon and olive oil) but obviously much more savory when feta and filo pastry sheets are used. Hortopita is a cousin of Spanakopita–layers of crispy filo dough stuffed with cheesy, leafy spinach greens.

Here are two separate, distinct recipes for you to try. The first one comes directly from Greece, just outside of Athens and is a modern take on a traditional family recipe used for many years. The second one is from FarmPlate, a wonderful website that connects folks looking for great, locally produced food with those folks that make just such foods. They are “a revolutionary online community that connects farmers, fishermen, foragers, food artisans, restaurants, markets, distributors and foodies everywhere. Our searchable directory of 40,000+ business listings across the country, networking tools and reviews make it fun and easy to find and enjoy real foods near you.

These are large recipes, as they are usually made daily at the local bakery in large sheets, to be sectioned out for individual portions. Make a large batch, as it will be gone in a couple of days!

Traditional Greek Hortopita

  • 2-3 spring onions, chopped
  • 1/2 Cup extra virgin olive oil
  • 2 lb of various wild or spring greens, chopped (spinach, kale, arugula, sorrel, Swiss chard, fennel, leeks – only the white part – and any other spring green you like)
  • 1 package country style filo dough
  • 2-3 eggs whisked together
  • 4 oz feta cheese
  • Salt and ground pepper
  1. Preheat oven to 350 F.
  2. In a big pan heat olive oil and saute the onions till they are tender.
  3. Add the greens stirring continuously till they are wilted, about 4-6 minutes.
  4. Remove from the heat, add the egg, feta cheese and ground pepper. Careful with the salt since feta cheese is already salty!
  5. Evenly spread 1 Tbs olive oil in a baking pan, then set the filo dough and spread the mixture on it. Cover with the other filo, carefully close the edges and score the surface slightly (the steam from the cooking of the mixture needs to escape).
  6. Spread water and some olive oil on the surface and bake for 1-1/2 hour in the lower position of the oven till the filo takes on a golden color. Remove and let set up for about 15 minutes before slicing and serving.

Makes 3 to 4 servings

Hortopita from FarmPlate

  • 1/2 cup uncooked white rice
  • 4 tablespoons extra virgin olive oil
  • 4 small or 2 large leeks, rinsed well and thinly sliced
  • 2 tablespoons currants
  • 1 teaspoon ouzo, or 1 tablespoon balsamic vinegar or white wine
  • 2 tablespoons chopped fresh parsley
  • 1/4 teaspoon dried oregano
  • 1/4 teaspoon dried thyme
  • 1/4 teaspoon salt
  • Very generous grinding of black pepper
  • 3 pounds assorted tender greens, such as baby spinach, arugula, beet greens or Swiss chard, stemmed and washed
  • 1 teaspoon grated lemon zest
  • 3 tablespoons butter
  • 1 package filo dough, thawed
  • 8 ounces feta cheese
  • Pinch of grated nutmeg
  1. Preheat oven to 400 F.
  2. Cook rice by adding rice to small pot and covering with 1 cup water. Turn heat on high and bring water to gentle boil. Stir rice well, turn heat down to medium-low. When water level drops to top of rice, stir once more, cover with lid and reduce heat to very low. Rice will be done in 5-7 minutes.
  3. While the rice is cooking, heat 2 tablespoons of the olive oil in a large skillet over medium heat. Add the leeks and fennel, sauteing until they begin to soften, about 5 minutes.
  4. Stir in the currants then add the ouzo, vinegar or wine and cook for a few seconds to evaporate.
  5. Stir in the parsley, oregano, thyme, salt and a generous grinding of pepper. Transfer the leek/fennel mixture to a bowl and set aside.
  6. Return the skillet to the heat. Add two big handfuls of greens and cook, stirring, until they wilt. Transfer to a colander. Wilt the remaining greens in the same manner. Squeeze the excess liquid from the greens then coarsely chop. Sprinkle with the lemon zest and some pepper.
  7. Melt the butter and stir in the remaining 2 tablespoons olive oil. Lightly brush the inside of a 12-inch tart pan with a little of the oil/butter mixture.
  8. Unfold the filo dough and cover loosely with a kitchen towel to prevent it from drying out.
  9. Place 1 sheet of dough in the pan, pushing it into the corners. There will be about 3 inches of overhang. Brush the dough lightly with butter/oil. Add another filo sheet, placing it at a 45º angle to the first sheet. Brush that one as well. Continue stacking (at an angle) and brushing the sheets until you have used 8 sheets to line the pan.
  10. Spread the rice in the pie bottom. Top with the leek mixture followed by the greens. Crumble the feta and sprinkle oil on top. Season with black pepper and a grating of nutmeg.
  11. Top with 8 of the remaining filo sheets, stacking and brushing them as you did the bottom layer. Trim the overhang to 2 inches beyond the rim of the tart pan.
  12. Roll the edges inward, tucking them under. Brush the top with more butter/oil. Score the top into serving pieces using a very sharp knife.
  13. Bake for 15 minutes. Lower the heat to 350ºF and bake for 45 minutes longer. Let rest about 15 minutes before slicing and serving.

Makes 6 to 10 servings

Recipe Tip! The feta cheese is naturally salty, so be careful how much salt you add during preparation.