Are they called peppers or chiles, and why? I prefer to call them chiles and here’s my reasoning: In the Aztec’s Nahuatl native language, the word is “chilli”, which was changed to “chile” by the Spanish who were looking for a new source of black pepper and discovered these fiery little treasures. For me, chile is closer to the original name and meaning.
One of the mainstays of the garden, they are often started from seed or bought and planted right along with their travelling companions from the central Americas, the tomatoes. Humans have been eating chiles for at least 7,200 years, from archaeological evidence in Mexico and have grown them for around 6,100 years. For those that aren’t chile-heads, these sweet or hot little packets of history can be either boring or scary. Some gardeners will plant the same variety of green bell pepper year after year and not think too much of what else is on offer, while others are very concerned with the amount of “fire” some hot chiles pack. There is a lot of room to explore the world of chiles without being either bored or burned.
Chiles can be grown with great success in many varied garden climates across America. They are very adaptable to different conditions and have travelled widely, establishing themselves in many different locations and cuisines around the world. With a background understanding that they are a tropical plant originating in Central America and the following growing tips as a guide, you can have the tastiest, most colorful and most productive chiles or peppers from your garden this year. Here are some tips to help you along the way!
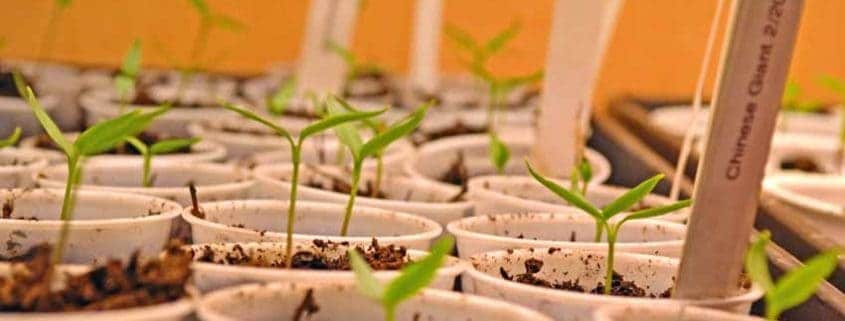
- Start seeds indoors at least 8 weeks before the last frost date. This can change year to year; they can be started a bit later in a hard winter and earlier during a mild one. A soil temperature of 75 – 85F will give the best germination. They are not nearly as fast to germinate as tomatoes, and will take from 14 – 21 days to germinate at the optimum temperature. Use heat mats under the seedling tray if needed. For a more in-depth look at what seeds need for germination, read Starting Seeds at Home – a Deeper Look.
- Peppers dislike transplanting or disturbance of their roots. Paper pots, yogurt cups or similar are a good start, having a large enough soil volume to give the root system enough time and space to develop well before going into a larger pot or into the garden. They can be started in seedling trays, but plant extra to account for those lost to transplant shock.
- Peppers really need warm soil to transplant into and warm weather for best growth and ripening. Full sun is preferred, but a light shade for part of the day should be all right.
- Make sure the weather is warm and all danger of frost has passed before transplanting into the garden. Daytime temps of 65F and night-time of 55F are minimums. If you find that you have to transplant under less than ideal situations, use what’s called “hot caps” or “cloches” at night to keep the termperature a few degrees warmer. These range from plastic milk jugs with the bottoms cut out to glass bells made for the purpose. Another alternative is to create a temporary row cover over the new transplants, taking it off in the morning and covering them at night. Use this until the night-time temperatures are warm enough for the young plants.
- Don’t worry about waiting an extra week or even two before setting the plants out, it will be worth it if you don’t lose half your peppers to a late-season frost!
- Peppers aren’t particularly picky about the type of soil, preferring a sandy loam of moderately high fertility. They will grow well in other types of soil, however.
- Critical factors are temperature and water, both factors need to be fairly steady. Don’t transplant starts from a warm growing condition into a cold soil, or let them dry out. They can tolerate high temperatures, but need a moist soil for best flavors and production.
- Days to maturity usually refers to the time from transplanting to harvest, similar to tomatoes.
- Magnesium is an important mineral, so add a dusting of Epsom salts to the hole when transplanting, working it into the soil around the plant.
- Transplant the peppers about 15 – 18 inches apart for best growth and to avoid crowding. This also makes it easier to see the ripe fruit.
- Separate sweet and hot varieties as far apart as practical, with neither upwind of the other if possible to avoid cross-pollination. If this is unavoidable, put the sweets upwind of the hots, unless you want really hot sweets!
- A 2 inch thick dressing of well-rotted compost around the base of the plant acts as both a mulch to keep the moisture levels more constant and act as a slow release fertilizer. For more on how to create great compost, read Compost- Nourishing Your Garden Soil.
- During the growing season, your peppers will benefit from feedings of a natural fertilizer, especially during the height of pepper production. You can make some of the best fertilizer yourself with our recipe for the Best Homemade Fish Emulsion.
- Green peppers will keep a bit longer than fully ripe yellow or red ones.
- Riper ones have more flavor and nutrients, are usually sweeter and have a more complex flavor. They also have much more Vitamin C. Hot varieties will have much more flavor with usually less apparent heat.
- Harvest when you think the fruit is ripe – either green, yellow or red. Try some of each color to see what you like the best. When picking fruit, don’t pull them off the plant, use a sharp knife or scissors to prevent damage to the plant, slowing growth and inviting pests and diseases.
- Companion plants are Basil, Carrot, Mint, Nasturtium, Spinach, Sweet corn and Tansy.
Use these tips for a great season of chiles or peppers, however you want to call them! Let us know how yours do this year, and if you have experiences or tips listed that would help others, please share them!


