Wheat


Today’s commercial wheat – a semi-dwarf, high-yield type – is causing many people to be sick. Gluten intolerance or celiac disease has skyrocketed since the 1970s and shows no sign of slowing down. A decade ago, gluten intolerance levels were at 1 in 2,500 worldwide. Today, it’s at 1 in 133! What has happened to the grain that has fed us for thousands of years is inedible for an increasing number of people? So what has happened? Why has bread, and by extension many grains, become bad for our health?

First, let’s look at the differences between historical wheat and today’s modern hybrid. Then we’ll look at how the wheat is made into breads and the differences in how we do that today vs. historically. We need this groundwork to establish how and why wheat is not the same grain it once was.

Bread is the “staff of life”, right? Well, it used to be. In fact, archaeologists have uncovered villages that housed the workers building the great Pyramids and found clay pots used to raise and bake ancient Egyptian sourdough bread. This bread was the majority of the diet, along with meat and milk, of the workers. These weren’t office or light duty jobs; these were brutally heavy jobs – moving huge stones over log rollers up dirt ramparts to place them into the pyramid. Bread, milk and meat kept them going for years.

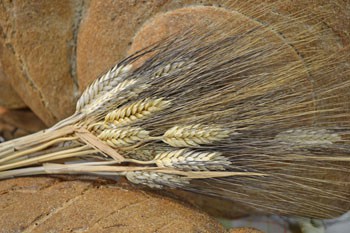
The grains that were used in baking the ancient sourdough are completely different than what we are eating today. Einkorn, spelt, emmer and dinkel are some of the ancient wheat cultivars that our ancestors ate. They are all “covered-wheat” grains, having thick husks around each kernel. The inedible husk must be removed by pounding or milling and then winnowing before the grains can be ground or eaten. Today’s modern wheat is considered to be a “naked-wheat” cultivar, with a much thinner husk that is easier to remove.

The move toward today’s modern wheat began with hybridizing for smaller or dwarf varieties of wheat. Shorter wheat means more of the plant’s energy is put into seed production, increasing yields. This was very successful, producing huge increases in production. Dwarf cultivars are also more resistant to “lodging” or falling over. Lodging occurs when the stalks are too long for the plant’s roots, the stalk falls over (lodges) and rots. Heavy applications of nitrogen fertilizer, common in commercial agriculture, only make the lodging problem worse. The hybrid dwarf varieties were much less susceptible to lodging, allowing excess nitrogen to be applied without losing too much of the wheat crop.

Happy with the increased production of the hybridized dwarf wheat, plant breeders began more hybridization experiments starting in the early 1960s. Extensive hybridization research, testing and experimentation went on, all with the objective of increasing the yields wheat produced. Repetitive back-crossing and crossing with foreign grass species were just two of several techniques used. What happened was a drastic increase in the production capability of the dwarf super-hybridized wheat. Unfortunately, the issue of digestibility was never examined. Another result of the hybridizations is that gluten levels increased in the new wheat, a good thing for making tall, fluffy breads that are appealing to consumers.

The experimentation didn’t stop there however. In 2003 BASF, the chemical company, introduced Clearfield wheat, which is tolerant to their proprietary herbicide Beyond, much like Roundup Ready Corn is tolerant of glyphosate. They proudly proclaim that the wheat is not the product of genetic engineering, but of “enhanced traditional plant breeding” methods. What, exactly, are these enhanced methods that allows a plant to resist a persistent herbicide?

The technique is called “chemical mutagenesis” and might be worse than GMO engineering. Using a highly toxic chemical – sodium azide – as well as gamma and x-ray radiation, the exposed wheat embryo mutates. After further experimentation, testing and development, Clearfield wheat emerges and is tolerant of the Beyond herbicide. Clearfield is now supplied in 20 varieties and nearly a million acres are planted with it in the US and Canada.

So what we are now eating is a super-hybridized, chemically and radiologically mutated wheat. It’s no wonder we are having issues with digestion and allergic reactions that are becoming more common and more severe. Not all of the wheat that is commercially available is from Clearfield wheat, but more and more is coming onto the market. The rest of the wheat is from the super-hybridized semi-dwarf varieties.

Now that we see the wheat we’ve been eating is different than what has fed us for a long time, let’s look at how bread is made today as compared to the past.

Traditionally bread was made with a slow rise sourdough method, using native yeast from the air to raise the dough. Sourdough is a partnership between specific yeast and bacteria that support each other and make bread rise and develops the unique flavors. In the Egyptian example, leftover dough from the previous batch was added into the current batch of water and whole wheat flour, mixed and kneaded well and set out to rise for a day in terra cotta pots shaped much like flower pots we are familiar with today. The next morning, the pots were put into the oven and baked into the bread which fed the pyramid workers. This pretty much describes how bread has been made for several thousands of years, all over the world.

Today’s bread is made with fast-rising yeast that has been cultured specially to raise bread dough faster and higher than any sourdough can. The wheat is milled to remove the outer layers of wheat bran and wheat germ, leaving only the starchy endosperm or white flour that we are all familiar with. Some of the nutrients that were removed with the bran and germ are added in the “enriching” process, where iron and synthetic B vitamins such as thiamin, riboflavin, niacin and folic acid are added back in. Other agents are added to the dough which keeps the bread fresh and pliable for a longer period of time. The bread dough is mixed and kneaded, then left to rise for an hour or two and baked.

The two major differences in these breads are the flour and the method of rising used. The flour in the sourdough bread is whole wheat, meaning the entire kernel of wheat is milled into flour. The white flour is stripped of most of its nutrients; with a few synthetic vitamins added back in after milling. The rising methods and times differ greatly, with the sourdough having time to break down some of the proteins and amino acids that are indigestible initially. The long ferment and rise of the sourdough, often more than 24 hours, allow the yeast and bacteria to make the resulting bread more nutritious and digestible for us.

So now what? Now that we know the commercial wheat and breads of today aren’t as healthy or nutritious for us as those our parents and grandparents ate, what are our choices? Some people are so affected by wheat that they have to avoid it altogether, while others find they feel better once they are off of it for 30 days or more, and then slowly re-introduce it back into their diets. Most find that avoiding modern wheat and sourcing ancient grains, preparing them in the older, slower methods keeps the digestive systems happy. Learning to make sourdough breads with long fermentation and rise times, along with soaking or sprouting grains will make these foods easier to digest and tastier as well.

One of the directions we have been working on is to provide the home gardener and small scale grower with grains that can be grown at home and prepared without milling equipment. The White Sonora Wheat is the grain we’ve started with, helping to re-introduce this heirloom and almost lost variety of wheat back to the Southwest, and the rest of the country. It has a papery husk that is easily hulled, has lower gluten content than today’s hybrid wheat and is well adapted to harsh climates. You can see other choices for the home grower in our Grains department.

In a story that is very much like the rise of industrial, commercial convenience foods we are seeing that the traditional grains and methods of making our daily bread is much more healthy, nutritious and tasty than the modern methods. To our surprise, many people are seeing that sourcing long fermented sourdoughs are easier to do and baking their own bread is not nearly as hard we we’ve been led to believe.

 

From New York to Africa, Why Food is Saving the World


Brian Halweil shares an important message about how food can and does change the world for the better. This short TED talk reminded me of my days in college and reading the same Paul Ehrlich title. Sometimes as individuals we can be overwhelmed with facts and figures, doom and gloom. In order to make positive changes in the world and home, we each need to take one step at a time. We hope this video inspires you to do just that!

Emergency Seed Plan


Survival seeds, emergency seeds or emergency seed banks – whatever term is used – have had a lot of attention and marketing focused on their purchase, storage and use in the recent past. The scenario usually goes something like this: buy this vacuum packed, nitrogen flushed can of emergency seeds for feeding your family in a disaster or crisis situation. The seeds are specially packaged for long life, and a single can will plant a 3/4 – 1 acre garden. These emergency seeds will be good for anywhere from 4 -5 years up to 20 – 30 years, depending on whose website you visit. One container of seeds can easily feed a family, more often a neighborhood. You can save the seeds from the harvest, ensuring a continual source of seed to grow more food for yourself. Sounds reasonable and encouraging, doesn’t it?

There are some faults with this direction of marketing and thought, though. Let’s look at a few of them to gain a somewhat different perspective on this issue. First is the quality of the emergency seeds themselves. If the seeds aren’t high quality and from an experienced, knowledgeable grower with a good germination potential and are pure and true to type, you are starting with a mixed bag and will get poor results. This rests on the seed supplier. If they are like most “Survival” supply companies they are a reseller, buying all of their inventory from wholesale companies, marking up the prices and shipping the products to you. They aren’t gardeners or growers and are not knowledgeable about agriculture or the seeds they are selling. It is worth asking some questions of them, such as where their seeds come from and how are the seeds sourced.

Another concern is how the seeds are packed. Seeds are living organisms and need certain conditions to remain alive. Vacuum packing and nitrogen flushing are very commonly used sales terms in describing why you should buy a particular brand of emergency seeds. These techniques sound great in helping to extend the shelf life of the seeds, but are really unnecessary for real-life emergency needs, as we will soon see.

The viability or lifespan of the seeds in storage is much more dependent on the temperatures and humidity levels than what gas the seeds are flushed with. Storage in high temperatures or high humidity conditions will drastically shorten the germination ability of the seeds – sometimes to just a few months – instead of the years that are advertised. Yes, the container is sealed but is not immune to outside temperatures. Besides, after the seeds are opened, how is the nitrogen flushing going to be replaced? It’s not, and it doesn’t really matter because the seeds realistically should be used in a relatively short time-frame and not stored for decades. You need the food that the seeds will grow, not just a container of seeds. Think about how humans have kept themselves alive for thousands of years, planting stored seeds from the previous couple of years, without the modern benefit of nitrogen flushing and vacuum storage, not to mention freezers or refrigerators.

Speaking of using the seeds in a relatively short time-frame, meaning planting and producing food from them, the seed stock should be rotated on a regular schedule just like the rest of your food stocks. Under normal household conditions, most seeds will be viable for 3 – 5 years. Some exceptions are the onion family – onions and leeks – as well as the hulless pumpkins. Their viability and germination really starts dropping off after the first year. They should be used regularly to grow food for the family and then replaced as the stock for a variety is used up.

Now we come to the most important point of emergency seeds in storage – their use. Unfortunately, many folks will look at the purchase of an emergency seeds source as a check to be made on a preparedness checklist. They will get their can of seeds in the mail, check the list off, and put the seeds in a safe place and move on to the next item on the list. This is analogous to that same person buying a firearm and ammunition, checking off the list and putting them in the closet. When needed, they realize that they have bought a rifle but the ammunition is for a shotgun, they’ve never tried to load the rifle and don’t know how to aim or shoot with it! Oversimplified, yes, but the point is the same. Seeds have incredible potential but their food value when sitting in the closet is pretty slim. They have to be used – planted and grown – to produce the food and realize the potential that they represent.

Gardening is a skill, much like being able to shoot accurately, clean and reload the firearm in a safe and efficient way. Other similar skill-sets are first aid, fire-starting or other bushcraft skills. These are perishable skills that must be practiced to be effective. Gardening is much more than simply scattering some seeds, watering them a bit, waiting a few days and then harvesting some food, as anyone who has practiced the art of gardening for more than a year will attest to! It takes time to make the mistakes, realize them as mistakes and learn from them. The time to start learning to grow some of your own food is today, not when the power goes out or the fuel shortages have stopped the trucks from delivering food to the local supermarket. It takes some time to learn the techniques of good gardening, and waiting until an emergency is in progress to start could be a very costly mistake in many ways.

Another mistaken assumption is being able to save seeds from the first year’s garden to continue a seed supply into the next year. This really ties into the skill of gardening in the above paragraph. Almost no-one that is inexperienced in gardening will be able to gain the skills in that first year needed to understand and maintain plant isolation, pollination and minimum population needs to ensure a viable and genetically robust supply of all of the seed varieties that they plant in the garden in that year.

First year gardeners will have their hands full learning the intimacies of their garden’s climate, soil nutrition and moisture needs along with how to keep the small and large veggie predators at bay, keep the young seedlings from freezing in a late frost or the grasshoppers or bugs from eating all of the leaves during the height of the summer. Seed production is an entirely different chapter to learn! That is why seed companies are around. Once a gardener has some experience in growing their food, then simple seed saving can be started with a much better understanding of what is needed without overwhelming them. They will then be much more successful than someone who is just starting out and trying to learn and be successful at everything in the first season.

A final thought on relying on emergency seeds as a food supply: what kind of food supply are your emergency seeds going to provide in the middle of the off season – meaning the winter in most of the country, or the middle of summer in the lower desert regions? Emergencies or disasters don’t always occur when the weather is nice and the garden can be worked. For this reason, a supply of emergency seeds needs to have a broader focus than most on the market. What can be planted that will grow quickly enough to provide nutritious fresh edibles for a family, no matter what time of year it is or what the growing conditions are?

Sprouts are an excellent example of what can be grown in any climate, at any time of year, with no soil, sunlight or space requirements. Four square inches on a countertop is all that they need. Many backpackers will continually sprout seeds for a fresh food supply when on long, multi-month treks for just this reason. A simple rinse once a day is all that they need to ensure a tasty, highly nutritious fresh food with no work.

For these and several other reasons, relying on a pre-packaged container of emergency seeds to supply the majority of your food in an emergency is probably not the best plan, especially if you are not an experienced gardener already. A seed supply can supplement an emergency food pantry with fresh greens and tasty vegetables, making the dehydrated or freeze-dried menus much more enjoyable. Let’s look at one approach to growing some of your own food based on an emergency timeline. We need to examine several assumptions that must be made before going on, as there is no possible way to anticipate every disaster or emergency scenario, or forecast in this article the range of home preparations that can and should be made. Most of these are easily prepared for well in advance.

The assumptions are these –

  • A reasonably well stocked refrigerator and freezer, with some dry goods on hand such as rice, lentils, beans, peas and dried fruit along with some canned foods which should be able to feed a family for a minimum of a week or better. Obviously, the well-stocked pantry will give more options and be able to provide food for a longer time. We are looking at how a reasonably stocked home can respond favorably to an emergency, not as a long-term “survival” event.
  • A modicum of gardening knowledge and experience, such as a second or third year gardener would have. A completely inexperienced person can make a go of this and experience success, but would have challenges recognizing issues early on and won’t be as capable of trouble-shooting and correcting them quickly enough to be effective.
  • A space to grow a garden, even on a small scale. Apartment folks can use a balcony with 5 gallon buckets or containers such as Earthboxes to grow a lot of food in a small space. There won’t be time to figure the growing space out or prepare the soil during an emergency, thus the reason to start gaining gardening experience now, even on a small scale. You won’t be able to run down to Lowe’s or Home Depot to get the 5 gallon buckets and garden soil when disaster hits!
  • A source of water, as without access to fresh water, all of the preparations will do you no good.

Starting on the day the power fails or the emergency occurs, let’s look at a timeline of what is possible, things to have in preparation and how everything can tie together to feed yourself in the short and medium term.

For the first week you should be able to eat out of your refrigerator and freezer. This is where the importance of a fairly well stocked fridge and freezer comes into play. Those that only have stale milk and coffee in the fridge won’t have the other resources to accomplish what we are talking about. The refrigerator will keep things cool for 2 – 3 days, depending on your location and temperatures outside. The freezer will become your fridge in 3 – 4 days as things thaw out but stay cool.

On the first day of the emergency, several things need to be done to start the sequence of growing that will help feed and sustain you for the next week to month or so.

  • Start sprouts in a jar. These will take 4 – 6 days to sprout and create tremendous amounts of nutrition that will keep you going in the short term. The amount of sprouts started will depend on how much you normally eat and the size of your family. You would be wise to start more than you think you will need, as additional work to get things set up in and around your home will require more energy. Extra food can be shared with friends and neighbors, strengthening those ties. It would be wise to do “succession sprouting”; meaning start a new jar of sprouts every day or every other day so that there is a continual harvest of fresh nutritious food available. The food from the refrigerator and freezer, combined with the sprouts should easily feed you and your family for the first week. This can be supplemented with some cooking of the dried foods or canned foods. Go easy on the canned and dried food stocks in the initial few days, as they are easiest to access but are finite and easy to exhaust in short order, making the situation worse.
  • Plant fast-growing, short-season crops that will give you food in around 15 – 30 days. These include radishes, carrots, beets, mustards, cress and such. Here’s a better breakdown –
  • Sprouts – 4 – 6 days for mature sprouts from organic alfalfa seed, organic red clover seed, organic mung beans and organic radish seed
  • Asian or Mustard greens – 21 days for baby, 45 days mature
  • Beets – 35 days for beet tops, 50 days mature
  • Broccoli Raab/Rapini or De Cicco – 40 – 45 days for first harvest, can harvest again and again
  • Carrots – 50 – 70 days depending on weather
  • Kale – 30 days for baby kale, 60 days mature
  • Lettuces – if seeds are started inside, lettuce can be ready in just over 30 days from transplanting.
  • Radishes – Some radishes are 25 – 35 days
  • Spinach – 30 days to baby, 45 days mature. Works best in cooler weather.
  • Swiss chard – 30 days baby, 55 days mature

As you can see from the list above, there will be a limited diet for the first three weeks to a month if you are not currently growing anything when the emergency occurs. This is why a well-stocked refrigerator, freezer and pantry are important, along with an on-going garden. Being able to use the fresh garden produce to supplement the dried, canned, freeze-dried and otherwise prepared foods will make meals much more interesting and tasty. Of course, if a garden is already in production, then everything changes, as the food supply isn’t nearly as threatened.

A supply of emergency seeds can be a critical positive factor in any disaster preparedness plan. It is perhaps best to look at any seed supply as part of a “Life Assurance Plan” where the basic needs of your family are supplied without needing to run out and buy something (or everything) when an emergency happens. A Seed Assurance Plan, as part of life assurance, means investing in seed, growing knowledge and experience instead of waiting for the disaster to strike and hoping that the seed will grow into enough food to feed you.

Hope is not a plan for providing for your family, especially in a disaster or emergency. You don’t hope to find a job, business, or career that will help feed, clothe, and house your family in daily life. You plan, get education and experience, and take risks and actions that move you in the direction you want and need to go. The exact same thing applies to your seed supply!

One thing that we do hope is that this article has given you food for thought in how a good supply of heirloom seeds, along with common sense forethought, can help get you through any unforeseen emergency or disaster. Obviously, this is an introduction to some concepts that aren’t being talked about nearly enough. This is a complex topic with many branches, offshoots and directions to go that really can’t be introduced here. The next steps are up to you, but aren’t difficult. Get started today and start small. Read more, get more education, become more informed and start your garden, even if it is just a couple of 5 gallon buckets on the patio or back deck. Find what interests you and pursue that angle or direction.

Spinach


SPINACH: The Prince of Vegetables

For many baby-boomers, the constant refrain of “Eat your spinach, it’s good for you!” and the olive green glop of canned vegetable that accompanied the words, led to life-long spinach avoidance. Well now is the time, if you haven’t already, to overcome your spinach phobia.  One nibble of a local farmer’s sweet and vibrant fresh spinach will do the trick.

The first spinach you see every spring is most likely from seeds that your farmer planted late last fall. The seeds germinate and barely start to put down roots before the frigid weather descends and they go into dormancy under the ice and snow. At the first hint of spring, however, they start growing like mad, and soon the leaves are huge, thick, juicy and sweet–unbelievably rich and meaty. You really have to taste it to believe it.

If great taste alone is not enough, remember that spinach is high in vitamins A and C, and in iron and folate. It is also a good source of fiber and magnesium, and is very low in calories. And if you’re still not convinced, wine fortified with spinach juice was the healing elixir traditionally given to injured French soldiers. And the Persians, who cultivated the leafy green from at least the 6th century, recognized spinach’s sophistication and called it “the prince of vegetables.”

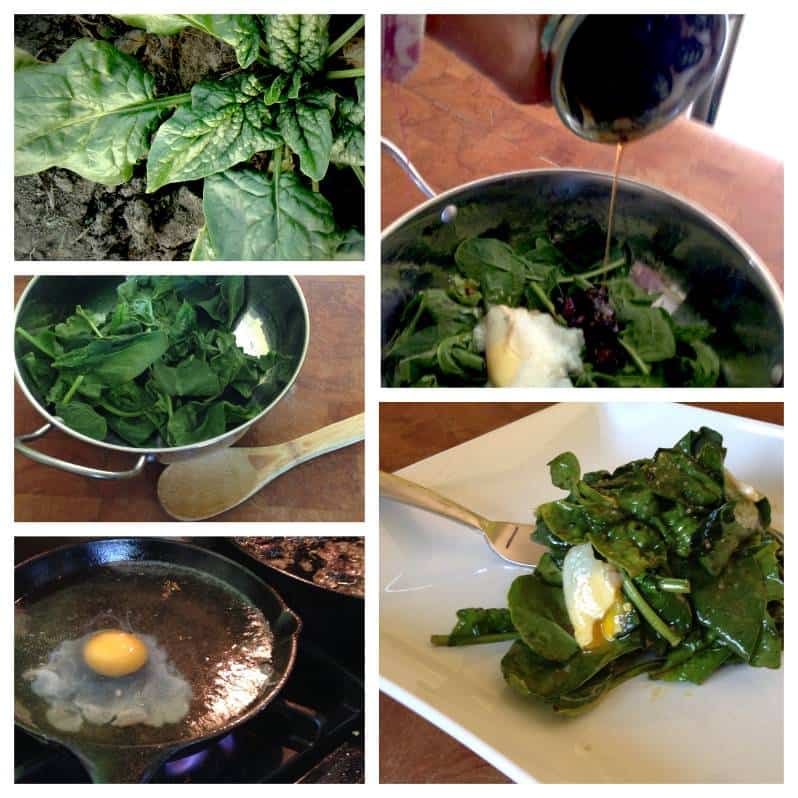
The best thing to do with any fresh vegetable is almost nothing. But I confess that I have become dangerously enamored of this Fresh Spinach Salade Lyonnaise.  It is quick and easy to make, yet fit for a king with the combination of meaty-leaved spinach, crisp bacon, barely cooked eggs, and warm, sharp Dijon vinaigrette. (If you want to go vegetarian or vegan, just leave out the bacon and egg, adding another few tablespoons of olive oil to the dressing.)  Keep this salad in mind when fall greens like frisee, escarole, and radicchio roll around because the hot dressing will soften and sweeten those sturdy leaves.

Spinach Salade Lyonnaise from Farm Fresh Now!

  • 4 cups torn spinach, or a mixture of spinach, lettuce, endive, and other greens
  • 2 tablespoons extra virgin olive oil
  • About 1/4 pound (or less) good bacon or ham, cut into 1/2-inch cubes
  • 2 to 4 tablespoons sherry or wine vinegar
  • 1 tablespoon Dijon mustard
  • Salt
  • 2 eggs
  • Black pepper
  1. Put greens in a large salad bowl. Put olive oil in a skillet over medium heat. When hot, add the bacon and cook slowly until crisp all over, about 10 minutes. Add vinegar and mustard to the skillet and bring just to a boil, stirring, then turn off heat.
  2. Meanwhile, bring a couple inches of salted water to a boil in a small pan, then lower heat to barely bubbling. One at a time, break eggs into a shallow bowl and slip them into the bubbling water. Poach the eggs for 2 minutes, until the white is set but the yolk is still runny. Remove each egg with a slotted spoon, and place onto the greens.
  3. Pour the bacon dressing over the greens (they’ll wilt a bit). Toss the salad, breaking the yolks of the poached eggs and distributing them evenly over the spinach. Season with salt and pepper to taste. Serve immediately, with croutons or toast if you like.

Serves 4 as a side dish, or 2 as a main course.

Secrets of a Seasonal Cook
Article © Terra Brockman
Photo © Cara Cummings

Farm Fresh Now! is a project of The Land Connection, an educational nonprofit that preserves farmland, trains new farmers, and connects people with great locally-grown foods.  This series is made possible with generous support from the Illinois Department of Agriculture.


Have you ever wondered what goes into the packets of heirloom seeds that you get in the mail? Those little paper envelopes have a lot of work, care, love and attention in them. We wanted to show you a little peek behind the scenes on how we pack our seeds here at Terroir Seeds.

Some people don’t know that we hand pack each and every one of our heirloom seeds packets, while others don’t understand why we don’t use a machine to pack them. To answer the second point first, the seed packing machines that are used in larger seed companies are prohibitively expensive, even when available used. They are fast, but require cleaning and recalibration to the new seed for each and every seed variety packed. In our company, this would mean we would spend about two thirds of our time cleaning and calibrating the machine and less than a third in packing seeds. It doesn’t make sense for us quite yet! And yes, we actually do hand pack each and every seed packet that we ship!

For quality control, we only work with one type of seed at a time. This avoids mix-ups, as all tomato or pepper seeds look the same! When a new batch of seed arrives for the season, we count the number of seeds that are supposed to be in each packet, then find the correct measure that will consistently give us the number we are looking for. This may mean we count the same seeds several times, to make sure we are putting the correct number in a packet. We try to err on the generous side. Sometimes that is the same measure as the year before, but not always. Differing weather conditions, nutrient availability, pest and disease pressures all play a part on the physical size of the seeds from year to year.

As you probably imagine, this part of our business is very important to our continued growth. It is a detail oriented, behind-the-scenes type of job that requires high levels of concentration. With our growth, keeping up with the seed packing is requiring more time and will soon be a full time job.

We hope you enjoy the video and learn a bit more about why we put so much effort and love into our seeds!