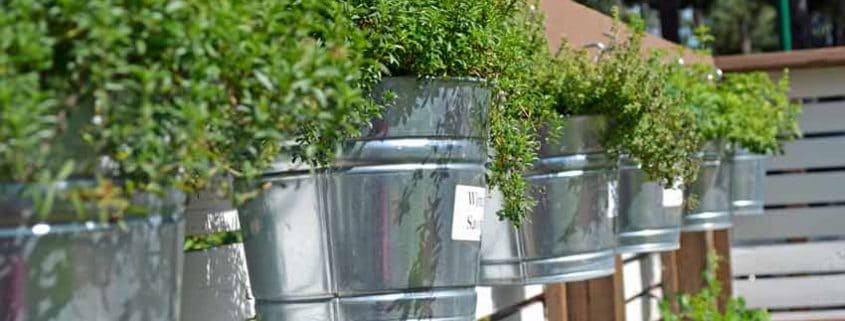
A row of metal buckets with plants growing in them.


Kitchen Garden in a Challenging Climate

Cindy and I recently visited the kitchen garden at the Forest Highlands Meadow Clubhouse. Forest Highlands was established in 1987, with the original raised bed concrete forms poured shortly afterward.

We don’t know how long they were garden beds. They were filled in and covered with sod for a children’s play area and family picnic grounds.

In 2015 the kitchen staff uncovered half of the original concrete terraced raised beds. They kept the upper part in sod, using it as a reception area for weddings or parties with 4 large raised beds.

This kitchen garden is just south of Flagstaff, AZ in a very short season climate. Some years they have less than 60 days of growing time, while others are just over 70 days.

This limits what they can grow. Creative use of existing advantages helped them be successful in their first year. The result has been a surprising amount of fresh vegetables and herbs for the kitchen.

They grow unique and unavailable varieties showing the chef’s talents with heirloom flavors.

Let’s look at some of the techniques used to create a successful kitchen garden in a challenging climate!

A garden with grass and plants in it.

Original Beds Revealed

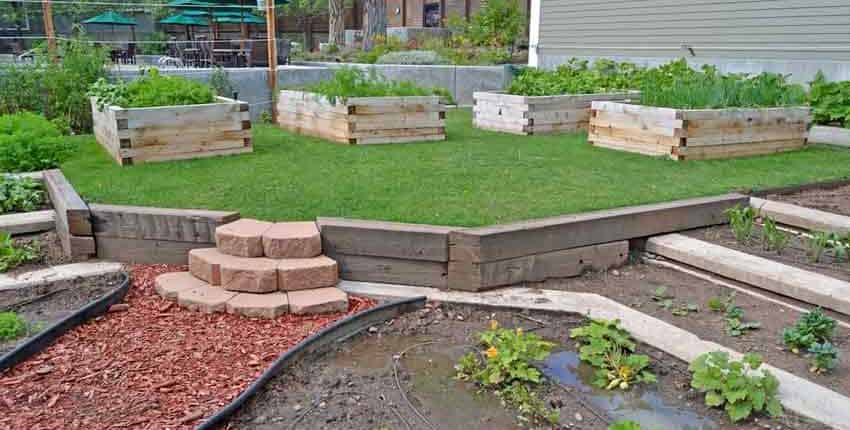
This uphill shot shows the concrete forms of the original stepped landscape garden beds giving way to the remains of the sod used for the children’s play area and picnic area. Four raised beds grow vegetables needing a deeper soil and host a reception area.

The raised bed soil is rich and fertile while the terraced beds need improvement. Rains left standing water in the beds on the lower right which made growing difficult this season. The staff is planting our cover crop mix to help. The mix will open up the moderate clay soil and improve drainage, soil structure and fertility.

A garden with many wooden raised beds in the middle of it.

New Raised Beds

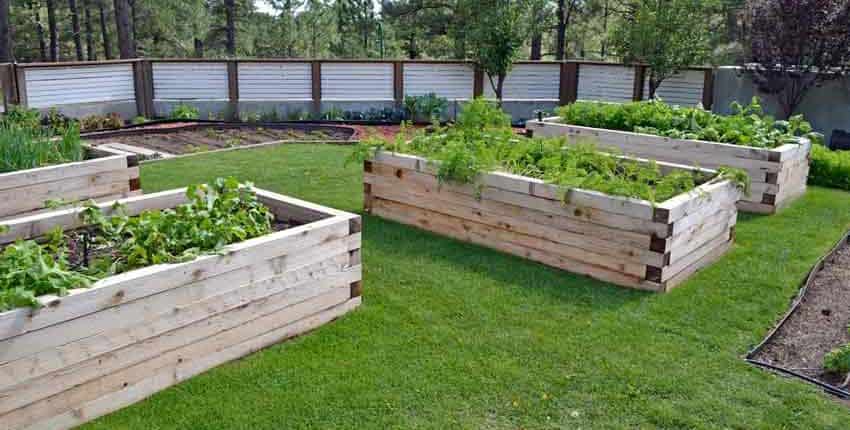
The terracing is harder to see from this angle, but the size of the raised beds is clearer. Each raised bed is about three feet deep, giving plenty of water drainage and depth for root crops. 

The semi-intensive planting has gone well with a successful harvest considering it is the first full year of growing there.

The concrete retaining wall topped with solid fencing is at the far end of the garden, providing wind protection as well as shelter from hungry critters ranging from rabbits to deer.

A wooden planter box with plants growing in it.

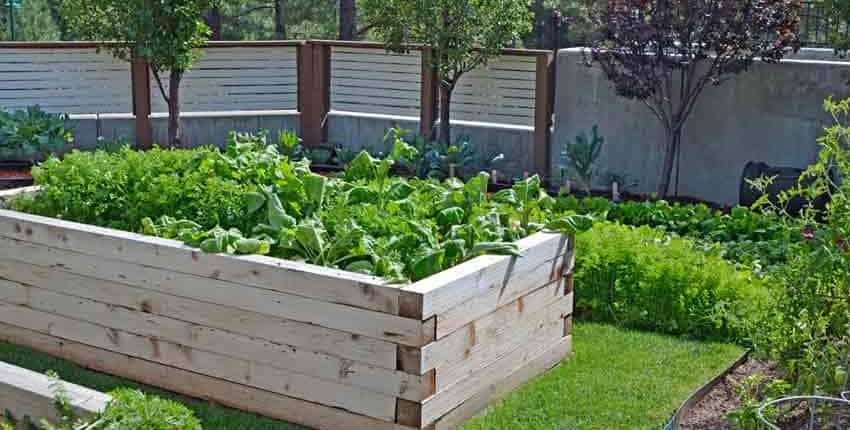
Carrots, beets and radishes are growing in this raised bed. After harvest the bed is mulched with straw and left dormant until early spring. The mulch protects the soil from temperature extremes, allowing earthworms to be more active. 

The raised beds are full of earthworm activity. If you create the proper environment the earthworms will appear!

A person in a garden with many plants

This left side view shows how different the soils are just 10 feet apart from the right side. The growth is lush and full, unlike the right side beds holding water with struggling plants. 

There may only be 2 – 3 weeks of growth for our Garden Cover Up Mix before the frosts kill them. This is enough time to establish a root system and mulch cover, starting improvement for the soil. 

Next season they will interplant cover crops among the root vegetables. The cover crops go in once the vegetables are a month old so they don’t compete with each other. This gives more time for better soil improvement. 

A woman kneeling down next to a garden hose.

South Facing Thermal Mass Wall

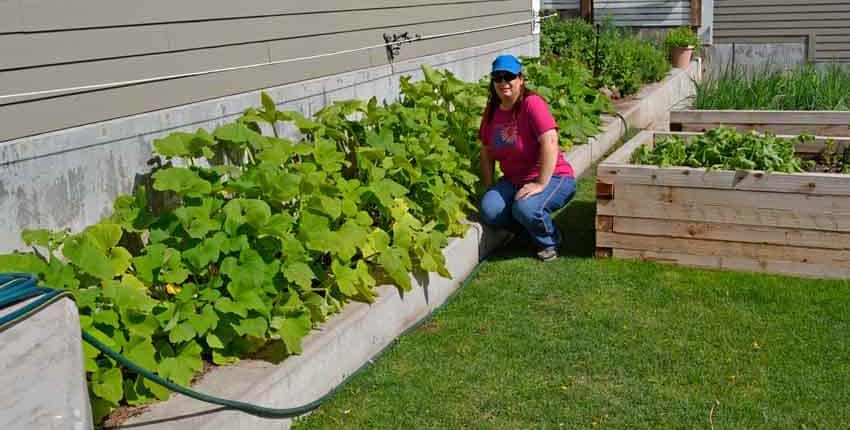
Cindy next to a long bed of pattypan squash. These summer squash are very cold sensitive and love warmth. This planting bed takes advantage of the concrete walls thermal mass, effectively moving this bed two or three zones south. It is unusual to see such vigorous and healthy growth in a colder climate.

This thermal mass technique has been used just outside Paris, France for over 300 years. Farmers grew extensive fruit tree and grape orchards in the cold climate of Paris.

Thick south-facing brick walls kept fruit trees and grape vines warm. Horticultural books showed why these orchards were so productive and grew such delicious fruits. 

There are still remnants of these horticultural walls still standing outside of Paris today. Many of the current residents do not know why the walls are there, or what function they served!

A close up of some plants in the grass

When we looked in the bed, sure enough there was a large pattypan squash ready for harvest! This is about 2 – 3 weeks prior to the first expected frost. 

A garden with many plants and bushes

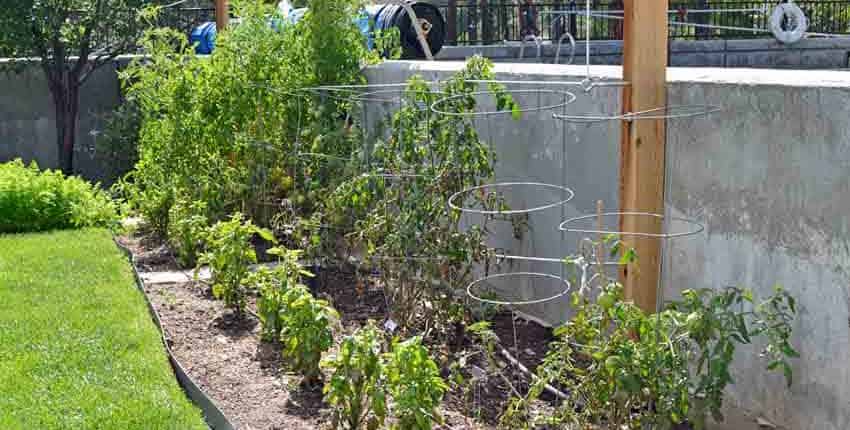
The same concept is used for the tomatoes and basil, for different reasons. 

This east facing retaining wall supports the pool and is not a traditional thermal wall. This growing spot is unique because the pool provides the moderating temperature. The pool has a lot of thermal mass, maintaining a steady temperature to the concrete. 

In the summer, the wall absorbs warmth during the morning and gives shade during the hot afternoons. The water temperature is cooler than the air, so the wall’s effect is shading and cooling.

During cooler weather, the pool temperature is warmer than the air, warming the bed. The sun warms the bed during the first part of the day. 

A fence with vines growing on it and plants in the background.

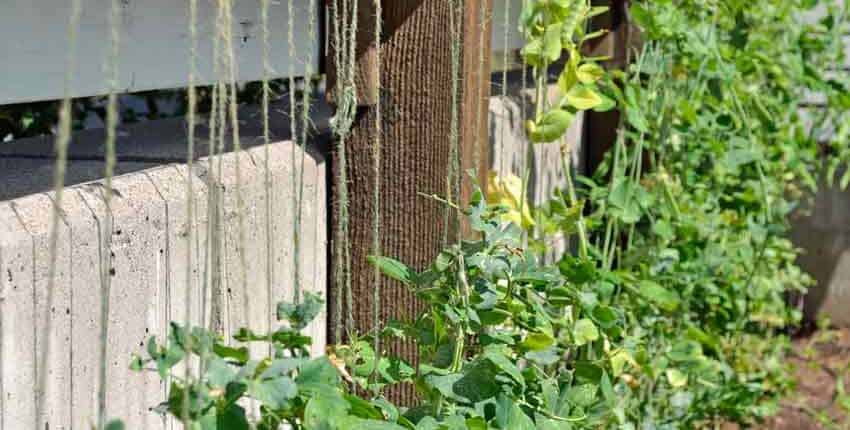
Up at the top of the herb garden section, the same technique is at work helping the snap peas have a good second season. They are climbing twine strings in front of the south-facing driveway retaining wall. The gardeners use this spot for an early planting of peas using the warmth as a jump-starter, transitioning to herbs later in the spring and back to peas in the fall. 

Pretty clever to coax three plantings out of a 60 day growing season! 

A garden with many plants and trees in it.

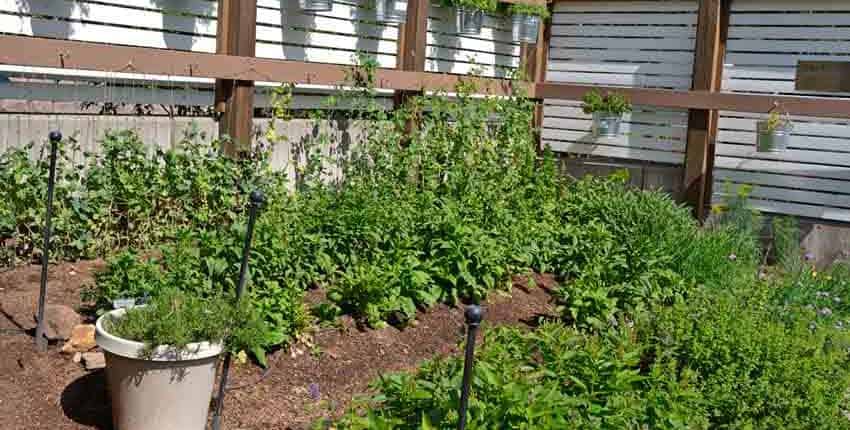
A different angle gives another look at the upper herb garden section. Notice the peas don’t extend past the warmth of the concrete retaining wall. 

Some of the herbs are in pots, while others grow as annuals in the beds. 

Notice the high fencing, which acts as walls for wind breaks and critter proofing. The garden is protected from chilling and drying winds and breezes, allowing more vigorous growth than if it were more exposed. 

The hanging buckets are at the top right, seen in more detail at the top photo of the article. Individual herbs grow in each bucket, giving more fresh herb variety to the kitchen.

Your Turn

Now you see how simple techniques are used in creating a successful kitchen garden, no matter the size.

Take a close look at your garden to see if some of these approaches would work for you, or with a smaller container garden close to the house!

A bee on a flower in the middle of green leaves.


Can cover crops improve garden soil in one month?

Cover crops – also called green manures – have improved soil for thousands of years. 3,000 years ago Chinese agriculture began planting horsebeans and sesame for soil improvement. Much later the Greeks and Romans sowed special crops to increase soil fertility.

The past 60 – 80 years has seen an incredible amount of knowledge emerge from small farmers experimenting with planting different cover crops and learning from what resulted. This knowledge was built on a foundation of several hundred years of European trial and error.

We now have access to detailed information about how to use cover crops for the maximum benefits in our gardens, pastures and fields.

Our Garden Cover Up Mix was developed from research into the specific benefits we wanted to bring to the home garden soil, as well as what species supported each other.

This photo essay is a look at what one month – 4 weeks – of growth provides in an average raised bed.

After sowing we began watering with our drip system, but the monsoon rains provided a good amount of water over the month. This helped the plant growth along, so your results may be a week or two behind these photos.

Week One

A close up of some plants growing in the dirt.

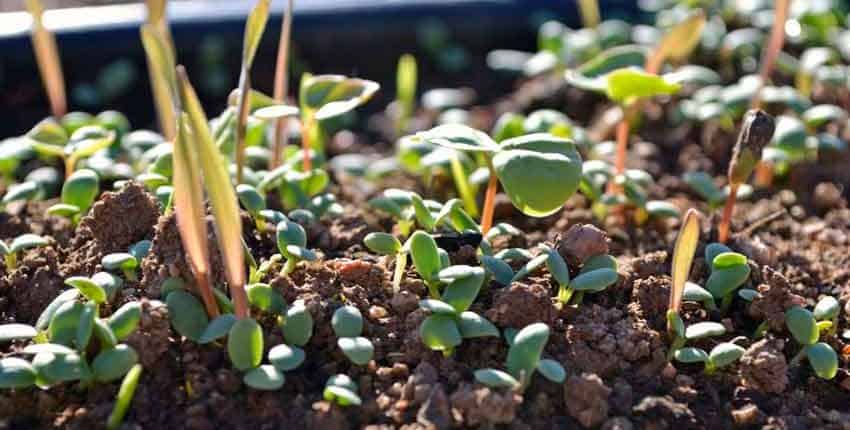
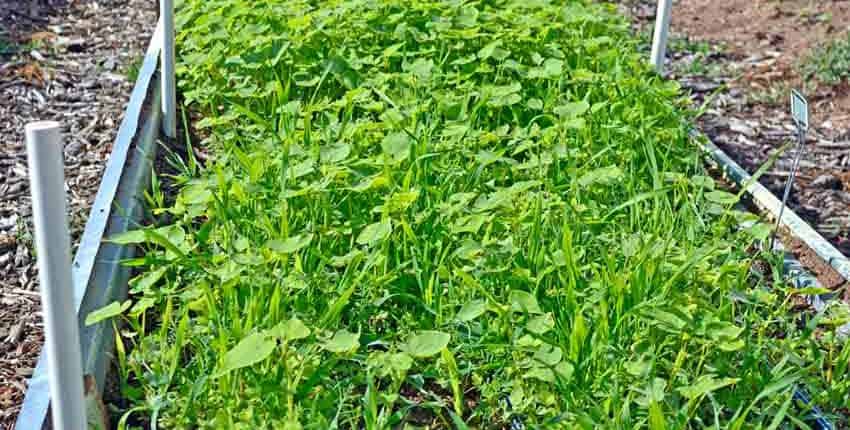
At one week, the mix has almost all sprouted and shown vigorous growth. The oats and rye are shooting up, looking like grass while the buckwheat spreads its leaves and the clover hugs the soil. The peas were just beginning to show up, as they took a few days longer to absorb moisture and begin germinating.

A close up of some plants growing in the dirt

We planted the different parts of the mix separately to get an idea of how they grew by themselves and with other species in support.

The rye and oats both shot up rapidly, germinating within 3 – 4 days and showing good soil coverage.

A close up of some green plants in the dirt

The crimson clover was also up fast, creating a fluffy green blanket over the soil with its tiny green leaves. Even with only an inch of growth it was easy to feel the temperature differences between the tops of the leaves and the soil temperature – it felt like 15°F difference!

A blue tray with some green plants in it

The buckwheat was a couple of days slower coming up than the oats or rye. Once the sprouts appeared they immediately opened their leaves and really started growing.

Week Three

A green plant is growing in the ground.

After three weeks the mix has almost completely covered the raised bed. The root system is about 3/4 of the top growth at this point, so the root density below the soil is almost as much as seen here. This is why cover crops are so beneficial to soil fertility.

A green plant is growing in the ground.

A closer look shows how much shade the soil has and how thick the mix is growing. This out-competes most weeds above the soil while the roots choke out weeds below.

The young seedlings have just finished emitting auxins, a natural root hormone that inhibits other seeds from growing.

This mechanism gives the cover crops a head start over any other weeds for the next 2 – 3 weeks. When weed seeds can’t germinate, they will often rot as the soil fertility improves.

Week Four

A green plant is growing in the ground.

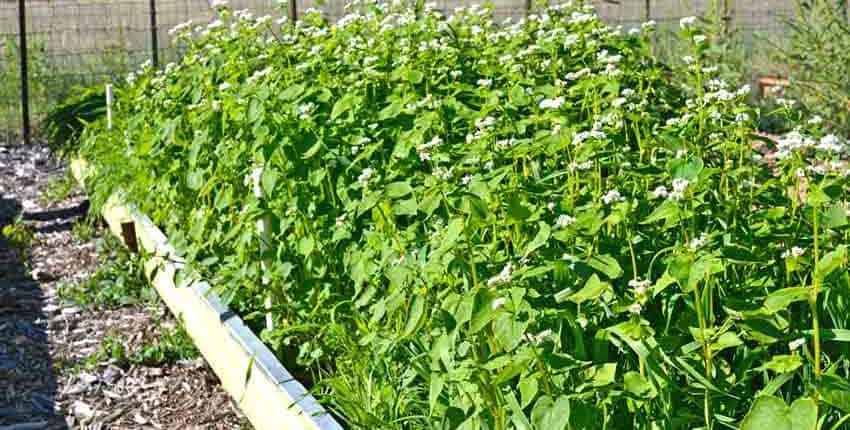
The growth accelerated going into the fourth week, as these photos show. The white PVC stake is about 14 inches tall. Last week the growth was about 3 – 4 inches, but this week it shot up above the top of the stake.

Besides putting on a lot of height, the mix also completely filled in the raised bed. Weeds have no space to grow and we could only find one or two after searching for them.

The soil is much cooler than the surface of the leaves. It is also moister, but that could be due to the amount of recent rains and not the cover crop. The buckwheat is starting to bloom and is attracting bees as seen in the top photo detail.

A green plant is growing in the ground.

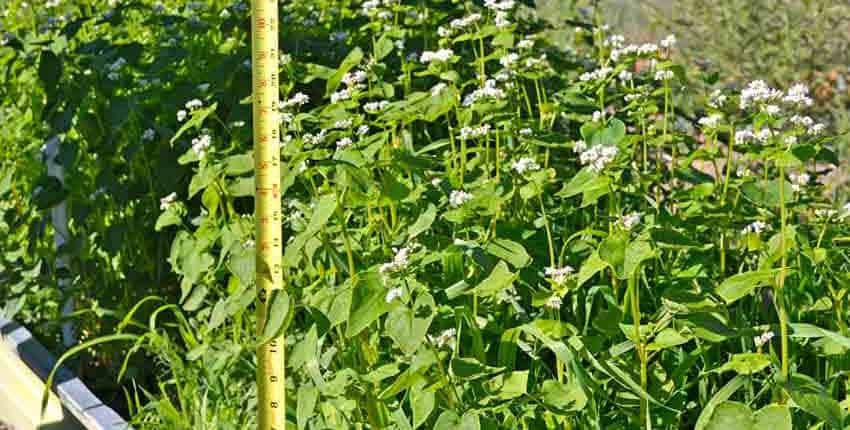
The buckwheat is the tallest of the mix at about 21 inches tall. The mix is extremely full and thick up to about 16 inches, completely choking out any weeds. The root system is still about 3/4 of the height of the plants, so there is an amazing amount of roots below ground! This shows why planting cover crops does so much to improve the physical structure of the soil.

As the roots die and decay they add organic matter to the soil, open up moisture and air pathways where the roots grew and increase the carbon content – all at the same time!

Pretty good for a few minutes spent planting the seeds and a months’ worth of growth!

A field of grass with some yellow poles

Both the rye and oats look like really lush grass. They completely cover the soil and top out at just over 15 inches at one month. We couldn’t find any weeds in this test plot.

A close up of some grass in the sun

Looking closer at the density of the rye planting, it is easy to see why weeds don’t stand a chance. There is no room for anything other than the rye with this dense seeding rate, which is the point.

Next Steps

If a killing frost happened tomorrow there is enough growth to create an excellent mulch while the root system will feed the soil and its microbial populations.

Our first frost is still several weeks off so the cover crops will keep growing both above and below the soil level. The flowers need watching to prevent setting seed and creating another crop next season. We will clip or mow the flower heads as they develop if there isn’t a frost soon enough.

If the rest of the mix can develop before mowing or a killing frost, it gives more nutrition and benefits to the garden bed.

Cover crops will increase the bio-available nutrition in your soil for next season, even if you use a well-aged compost. Both approaches have benefits but if used together support each other and create a better, more fertile soil sooner than if only one is used.

You don’t need a lot of time to grow a good cover crop and seriously improve your garden soil – a month will do! Even if you only have 2 – 3 weeks you will be better off with a shorter planting than none at all.

Go plant some cover crops. Your garden will reward you handsomely next season!


A close up of onions in the middle of a pile


Best Onions in Fall

Growing fall onions is sometimes confusing – should you choose the long day or day-neutral ones? When should you plant? Does the color of the onion matter? How to avoid growing non-bulbing onions again this year?

Most questions come down to, “What onions can be grown this fall?”

The short answer is the sweet onions will do best in almost all locations, but there is more to the answer!

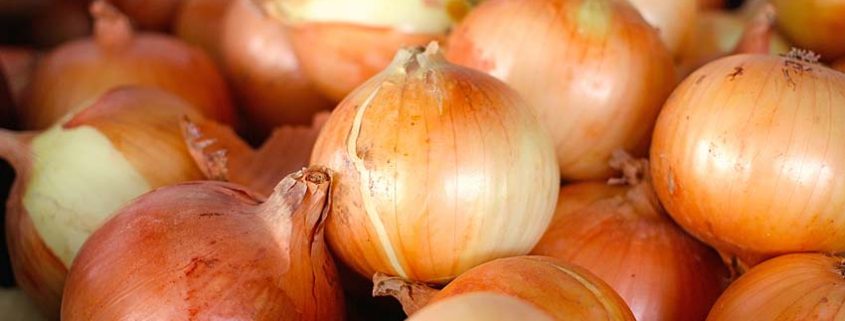
Most gardeners can successfully grow the sweet Candy onions for cooking.

Conditions for Fall Onions

There are three conditions fall-grown onions need – day-length, time to mature and temperature.

Day-length

A map of the united states with the name day-neutral zone.

Candy is a day-neutral onion, meaning it forms a bulb with 12 – 14 hours of daylight. The map above shows approximately where the Candy onion will grow. The southern limits are short day length and the northern are too cold too early for a sweet onion in the fall.

Our grower has had excellent results in almost all regions of the US. The exceptions are south Florida, south Texas and the extreme northern states bordering Canada. Even parts of Maine have been able to grow good sweet onions in the fall!

Time to Mature

Our sweet onion needs about 90 – 100 days to mature into good sized bulbs ready for harvesting. This is just over three months, so check your freeze dates to see if you’ve got enough time.

Light frosts aren’t a concern with onions as they continue growing until the first hard freeze.

If you aren’t sure of your medium frost dates, take a few minutes to read our article on understanding your frost dates. How to Plan for Fall and Winter Gardening will get you up to speed!

You are looking for the Fall 24°F date (the orange circle) from your local historical weather data.

This brings us to temperature…

Temperature

Onions are remarkably tolerant of frosts and even moderate freezing weather. They go dormant and then resume growth when favorable conditions return. Winter temperatures down to the early 20’s won’t damage onions if mulched and protected.

An old grower once told me some of the sweetest onions he ever grew were over-wintered ones.

He planted bulbs in the early fall, let them grow and mulched heavily 6 – 8 inches deep just before the first frosts. They went dormant in the winter and when spring came he removed the mulch. The onions resumed growing as spring warmed up. He had the earliest harvest of incredibly sweet, delicious onions.

He would never sell these, as they were too special! He shared them with family and close friends.

So – can you grow onions this fall?

You can have sweet onions this fall or early winter if –

  • You are not in the extreme southern or northern parts of the US &
  • have at least 100 days before your area expects to have a freeze of 24°F (or below).

OR

You can have sweet onions in early winter or early spring if –

  • You are not in the extreme southern or northern parts of the US &
  • don’t have 100 days before you expect to have a freeze &
  • don’t get below about 20°F winter low temperatures.

OR

You can have sweet onions for early spring harvest if –

  • You are not in the extreme southern or northern parts of the US &
  • don’t have 100 days before you expect to have a freeze &
  • do get below 20°F winter low temperatures
  • by growing under heavy mulch.


Knowing these 3 factors, you will be more successful growing your onions this fall.

As the famous radio host Paul Harvey used to say, “Now you know the rest of the story!”