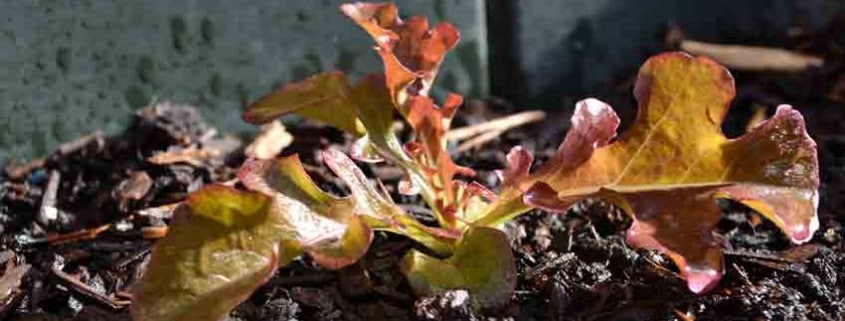
Spring Leaf Lettuce


Soil Elixir Jump-Starts Your Garden’s Soil

One of the most anticipated times of year for gardeners is Spring, with the attendant planting season. Everything is new and fresh, a chance to start over and improve on last year’s garden. A big subject for gardeners is what to do with the soil to prepare it for planting. If you have been reading our articles over the past several years, you know we advocate building the health and vitality of the soil in a natural, biologically safe manner. Soil becomes healthier, more productive, and disease, weed, and pest resistant. It results in an upward spiral where the garden gets better year after year.

Here is a unique recipe for a spring garden elixir that is easy to mix, completely non-toxic, and hugely beneficial for jump-starting your garden’s soil and getting it ready for planting. It comes courtesy of Crop Services International, which has over 35 years of experience helping growers accomplish their goals. They provide a Non-Toxic/Biological/Sustainable approach to growing food, from a full-scale commercial farm to the home gardener. We have read “The Non-Toxic Farming Handbook,” which they wrote to educate ourselves on improving our knowledge and approach.

This recipe is based on a 20′ x 50′ garden or 1000 sq. ft. Adjust for your garden size.

Before You Start

This recipe and applications assume an average garden soil that is basically good but could use some help.

It works in fertile soils by subtracting the lime or gypsum application, adding compost before spraying the elixir.

It helps very poor soils, but won’t give as much effect.

Preparing your garden beds for the elixir will require a couple of things.

First, evenly spread a 50 lb bag of high calcium lime (for acidic soils) or gypsum (for alkaline soils) across your beds. Your local garden center should have this. If using lime, it should be high calcium lime with as low magnesium as possible. 5% or less is great, up to 10% is acceptable, but nothing over 10%. The higher magnesium percentage releases excess nitrogen into your soil, greatly decreasing its fertility. It also overloads both the chemical and biological processes of your soil. Do not buy Dolomite lime, as it has too much magnesium.

Then, follow with 100 lbs of rich, aged compost, spread evenly across your beds, about 2 full-sized wheelbarrows. This can be purchased or from your own compost pile. Again, the best is made by you, and it is easy – “Compost – Nourishing Your Garden Soil” has all the details.

After doing both of these, make and apply the elixir.

Notes on Ingredients

  • When purchasing the fish fertilizer, if you can find one with kelp or seaweed, even better. If you want the absolute best fish emulsion possible, brew your own! Read our “Best Homemade Fish Emulsion” for the recipe and instructions.
  • Blackstrap molasses is best for its increased mineral content. Unsulphured is preferred but not absolutely necessary. One of the best sources of inexpensive molasses is a feed store that supplies horses, which can be bought by the gallon for much less than at a supermarket.
  • Do not buy diet cola, as the Aspartame/NutriSweet used as the sweetener acts as a chelating agent, meaning it ties up the minerals and nutrients in the soil, making them unavailable to the plants. (It also does the same thing in your body!) The cola has Phosphorus to add to the mix along with sugars.
  • The beer adds B vitamins – no, not vitamin Beer!
  • The Borax powder adds Boron, one of the most important elements in the biochemical sequence of plant growth.
  • Cranberry juice is full of vitamins and minerals, acts as an antibacterial agent, and has an acidic pH. Depending on how the juice is processed, it can also contain significant amino acids.
Spring Garden Soil Elixir

This recipe is based on a 20′ x 50′ garden or 1000 sq. ft. Adjust for your garden size.

Author: Stephen Scott
Ingredients
  • 20-24 oz liquid fish fertilizer Home-made is best
  • 1/2 cup molasses Black strap has more nutrients
  • 16 oz bottle of cola – NOT DIET!
  • 24 oz beer 2 - 12 oz cans, any beer works
  • 1/2 cup Borax powder
  • 1 qt cranberry juice – make sure to get 100% cranberry juice, not a dilution
Instructions
  1. Mix well with a stirrer and thin with enough water to enable mixture to be sprayed with a tank type or hose-end sprayer.
  2. Apply the mix evenly over lime or gypsum and compost base with sprayer. If needed, go back over with second application to use up all of the batch, just make sure to apply evenly.

  3. Broad-fork or lightly rototill garden soil. If using a rototiller, don’t go more than 2 inches deep at the maximum. Most of the biological growth happens at the 2-3 inch mark and the soil is turned over an inch or so beyond what the tines reach. Tilling deeper only destroys microbial life in the soil, setting you back in your efforts to create and build biologically active soil.

Recipe Notes

It must be noted that the sprayer cannot have been used to spray any chemical treatments like herbicides, pesticides, etc. as this will put those chemicals onto your soil, killing the microbial life in the soil and feeding the chemicals to the plants, where you wind up eating them!

Seed Planting Elixir

Once you have applied the elixir and broad-forked or lightly tilled the soil, prepare your garden planning and seedlings. We have another planting elixir to use just after planting the seeds and transplanting the seedlings into the garden that we’ll share with you: In a gallon milk jug, mix 1/2 cup of fish emulsion, 1 tsp sugar (preferably raw or brown), and 1/2 cup of cola. Fill the jug with water and shake well. Apply the mixture over the seeds and transplants. Each gallon will treat approximately a 50-foot row.

This is a great start towards sustainable, biological agriculture in your own garden. Remember, though, it is just a start, a good step in the right direction. To continue to make progress in knowledge and soil health, you need to find out where you are starting from. Do more reading, ask questions, and get a complete soil analysis, not just the widely offered NPK and pH soil tests. Spend the money to find out exactly where your garden soil is, and then you can make sound decisions on where you want and need to go. Then you won’t be guessing and shooting in the dark, trying to do what is right but not really knowing if you are making positive progress.

The More You Know – the Better You Grow

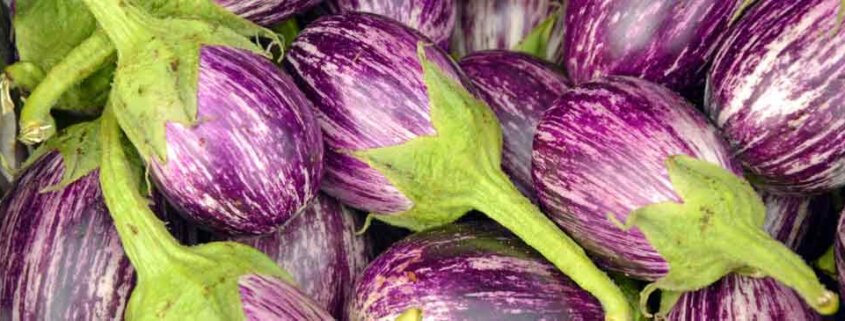
Eggplant gets its name from a small white Oriental variety that is rarely grown in the United States. We are used to seeing the large, shiny purple elongated globes, so the original name is somewhat of a mystery to most gardeners. It is known by other names around the world, including aubergine in Europe, brinjal in India, eggfruit, tomato-fruited eggplant, gilos, guinea squash, mad apple, and nasubi.

Fresh-picked, home-grown eggplant is mildly sweet and delicious, taking up other ingredients into itself when cooked. The all-too-familiar bitter, off-putting flavors come from fruits picked slightly unripe, trucked to a store that are almost a week old before appearing on the shelves. Grow your own and taste the differences!

History

A member of the Solanaceae or nightshade family, its cousins are tomatoes, peppers, and potatoes. Southeast Asia – likely India, China, Thailand, or Burma – is considered to be the center of origin where it still grows wild; a spiny, bitter, orange, pea-sized fruit that has been cultivated and refined for over 1,500 years.

The earliest uses seem to be medicinal as some of the earliest written Ayurvedic texts dating to around 100 BC describe the health benefits of using eggplant. The Chinese spent much time domesticating and breeding for desirable traits, as Wang Bao’s writing in 59 BC details the transplanting of seedlings at the Spring equinox. Later Chinese documentation shows the specific changes that growers brought to the fruit, from small, round, green fruit to the recognizable large, long-necked, purple-skinned fruits we know today.

Trade spread the seeds into Europe, where Spanish explorers brought them to the New World and by the early 1800s, both white and purple varieties were common in American gardens.

A plant growing in the dirt on a sunny day.
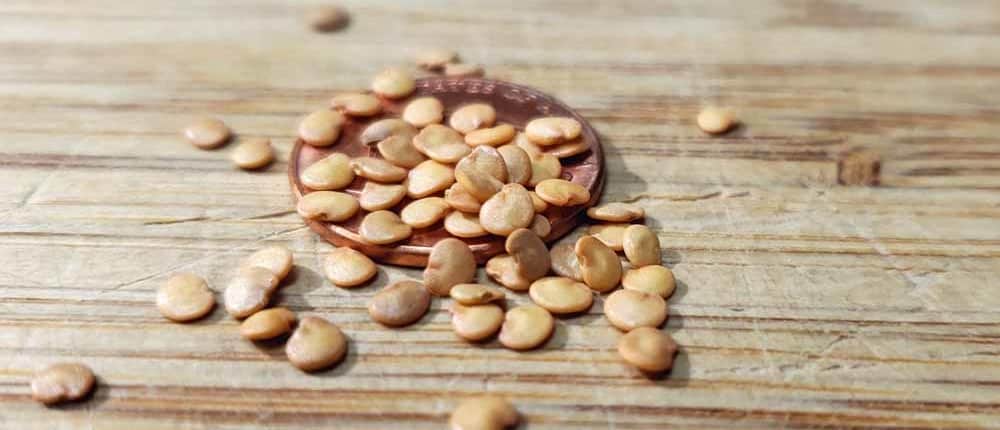
Eggplant Seeds

Site Needs

Eggplant is heat-loving, growing happiest in gardens with five months or more of warm to hot weather. Choose a sunny location where the sun can warm up the soil early. Raised beds and large black containers work wonders in colder climates to warm the soil sooner than in-ground gardens. Cool temperatures below 60°F reduce fruit production. In hot weather climates, afternoon shade can prevent leaf and fruit scalding, as fruit production decreases above 95°F.

Three to four plants will supply a steady stream of fresh delicately sweet fruit for a family, with extra for friends, neighbors, and co-workers.

Soil Needs

Like its tomato cousins, eggplant is a heavy feeder needing a rich, fertile soil to grow well and produce the best fruits. Adding well-aged compost into the bed the fall before planting provides nutrients all season. Fall cover crops improve the soil structure and fertility, as well as feeding the beneficial soil organisms doing the heavy work of transporting specific nutrients to the plant roots.

A plant growing in the dirt on a sunny day.
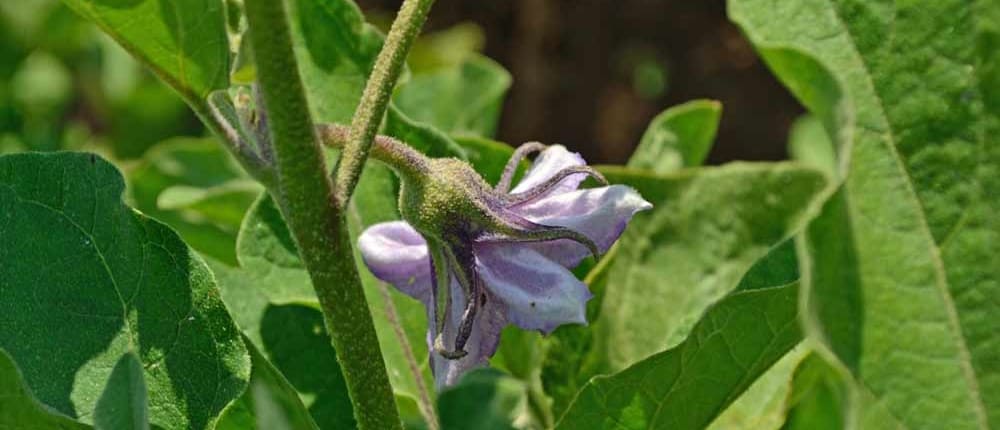
Eggplant Blossom

Planting

Soak the seeds overnight and plant in warm soil – ideally 80° to 85°F, but no less than 70°F – to greatly improve the germination rates. In warm soil, sprouts will appear in 7 to 12 days but can be delayed to three weeks or more in soil less than 70°F.

For almost all of North American gardeners, starting seeds indoors and transplanting them out after the soil warms up is the most successful method. Sow seeds indoors 6 to 8 weeks before your last expected frost date. Plant the seeds no deeper than twice their size in loose, moist soil then reduce the soil moisture to barely damp after the seedlings appear to reduce damping off and fungal issues. Transplant seedlings as needed into larger pots or containers to give the roots room to grow. Some gardeners will delay transplanting until a couple of weeks past last frost date to ensure bigger plants and earlier harvests, as well as avoiding early flea beetles.

Harden the young plants off by setting them outside on warmer days and bring them in the late afternoon,  helping them become more robust and ready for transplanting into the garden. Transplant after the soil is warming up and not dropping below 60°F at night. Measure the soil temperature first thing in the morning to see what the minimum is.

Give the plants enough room to grow with good air circulation – eggplant doesn’t thrive in an intensively planted setting. 2 to 3 feet between plants is a good distance, allowing the sun to reduce molds and mildew while ripening the fruits faster and more evenly. Adding a bit of well-aged compost into the transplant hole helps feed the plants.

A plant growing in the dirt on a sunny day.
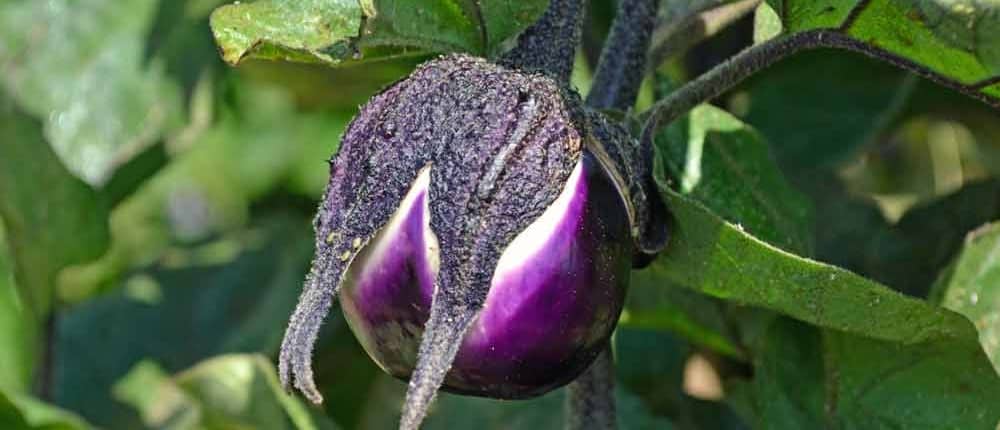
Young Eggplant

Growing

Eggplant has a shallow root system, so avoid cultivating too closely and pull or clip weeds carefully to not disturb their roots. Better yet, use a 2 to 3-inch layer of mulch for weed suppression that also insulates the roots and soil from excessive moisture loss while keeping them cool in hot weather.

Bigger yields come from starting the plants early and transplanting big, robust, healthy starts into warm soil in a sunny area. Keep them warm with moist roots and pest-free, otherwise, they can be set back and have a difficult time recovering. Producing lots of fruit requires lots of nutrition, so feeding a diluted liquid fish emulsion, milk & molasses snack, or other organic liquid fertilizer once a month will keep the plants in tip-top condition and health.

Companion Planting

Companion planting is an excellent weed and pest control technique. An early season crop of lettuce, French parsley, or spinach followed by herbs like French tarragon, thyme, or Mexican marigolds. Beans and peas provide needed nitrogen and shade in hotter climates. In cooler climates, make sure the beans or peas don’t shade out the sun-loving eggplant.

One word of warning on companion planting beans and Mexican marigold – they are antagonistic, so don’t plant both with eggplant, choose one or the other!

Other nearby companion plants to consider are beneficial insect flower mixes to bring in ladybugs, lacewings, and others to keep aphids under control.

A plant growing in the dirt on a sunny day.
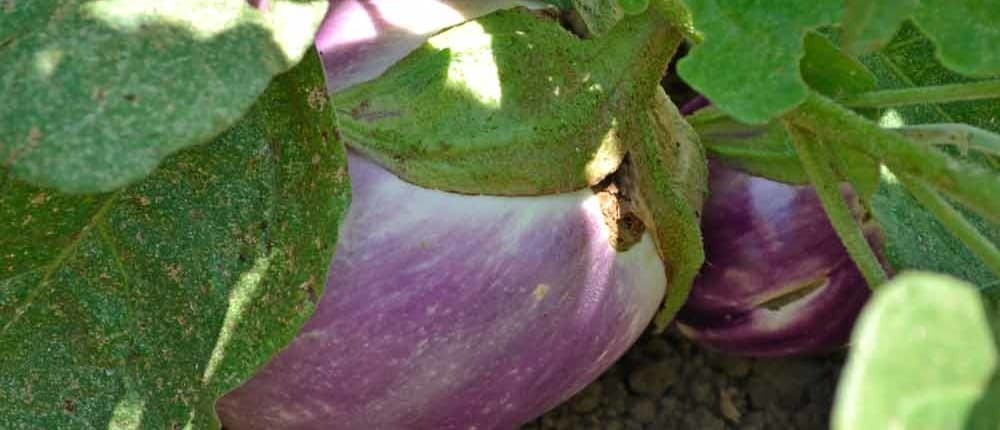
Mature Rosa Bianca Eggplant

Pests and Diseases

Colorado potato beetles can be a threat, but growing a companion crop of bush beans will help repel them. Inspect the undersides of leaves for the tell-tale yellow egg masses and pick them and any adult bugs off immediately.

Tomato worms can appear, so pick them off as you would on tomato plants. Knock aphids and red spiders off with a blast of water from the garden hose.

Flea beetles are the largest threat and can riddle young plants with tiny holes seemingly overnight. Small round holes in the leaves and tiny insects that jump like fleas are signs of flea beetles. In extreme infestations, the plants can lose their leaves and die. Young transplants are most susceptible and early detection is the key to preventing extensive damage.

From our personal experience, you can have very riddled leaves on your eggplant and still produce fruits. Do not give up hope, try to rid the plant of the beetles and give a little extra nutrition.

Trap crops of mustard planted near the area are helpful, as is interplanting with Daikon radishes to repel the flea beetles. If there is a sudden infestation, floating row covers and yellow sticky traps will help control the adult population.

A plant growing in the dirt on a sunny day.
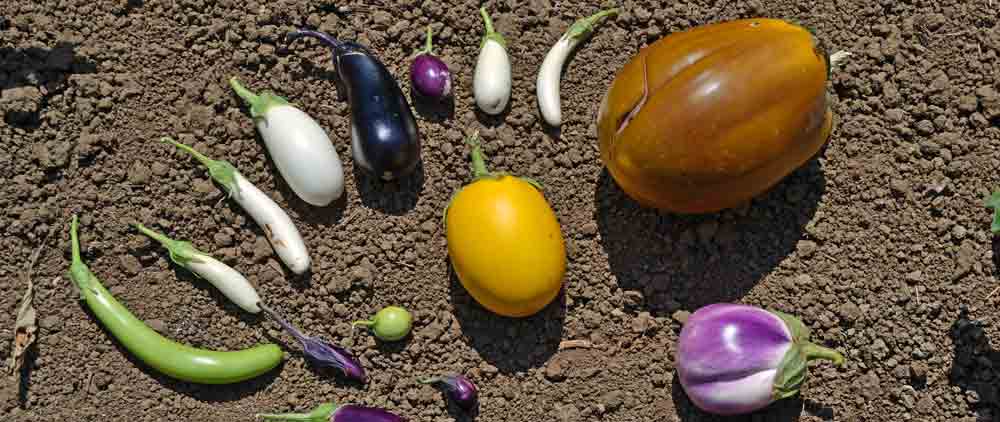
Eggplant Shapes

Harvest

Fully mature fruit has a shiny, smooth skin and firm texture. If the skin is dull, has any wrinkles, or is not firm to the touch – it is over-ripe or old and will be bitter.

When harvesting, cut the stems with a sharp knife or shears, don’t twist or pull them off as that damages both the fruit and plant. Handle carefully as they are delicate and bruise easily.

Harvest can start once the fruit is about one third mature size and still be tasty. This is a saving grace in the fall when frost threatens, just pick the young ones and have one last feast of baby eggplant!

Flavor is at its absolute peak just after harvest, but they can usually be stored a day or two in a cool place before starting to turn bitter.

Sicilian Eggplant and Tomato Sauce is an easy and simple but brilliantly delicious way to showcase your home-grown, fresh-picked garden bounty!