Roasted Pumpkin Puree
Pumpkin is an essential part of the fall season in my humble opinion, but it is much more than the trendy “Pumpkin Spice” everything that suddenly jumps into our lives in the cooler weather. Real, home-grown pumpkin has a rich sweetness that is just plain lacking in almost all of the commercially available pumpkin products today. Let’s take that one step further and slow-roast that incredible goodness of a pumpkin and now you’ve got something that resembles that canned pumpkin as much as a brand new truck does a 100 year old buckboard!
The type of pumpkin does matter, so think about it before you dive in. Don’t fret about not growing your own – buy one this year from your local Farmer’s Market, local grower or CSA share, and then plant your own patch next spring. The smaller pumpkins tend to be sweeter, especially the ones called “pie pumpkins” like our New England Sugar Pie pumpkin have been selected and refined for their rich sweetness along with their smaller, easy to handle size. Larger pumpkins will not be as sweet, but have their own flavors so don’t discount them. Plan on using 2 to 3 of the smaller pumpkins to put up a goodly supply of puree, or one of the larger ones. You will want to put up more than you think you will use, as once your family and friends taste some of the deliciousness, it will go much faster than you initially think! Keep in mind that the commercially grown “Jack-O-Lantern” pumpkins are hybrids, grown specifically for carving and usually have absolutely no flavor at all!
The process is extremely simple and doesn’t require your presence in the kitchen, so this is a great thing to do when you are home but have other projects. Set the timer to keep you on track and you’ll do fine.
Let’s get into it!
We are using the Connecticut Field Pumpkin for this, as we were shooting photos and had it available to roast. It has a mildly sweet flavor and is large enough to keep us in pumpkin puree for awhile. Aurora had to help, of course – inspecting and being part of the process!
The tools needed are pretty simple – a knife, cutting board, large spoon or spatula to scrape out the seeds and a colander if you want to keep the seeds for roasting and eating or saving and planting.
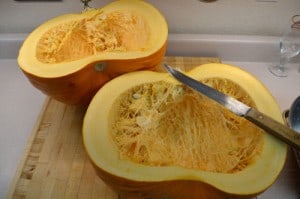
Cut the pumpkin open in half. This pumpkin weighed about 15 – 20 pounds, and you can see how thick the walls are, giving lots of pumpkin for cooking!
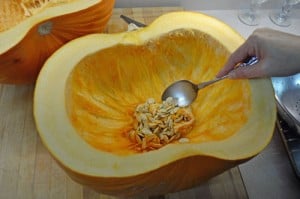
Use the large spoon or spatula to remove the seeds and as much of the pulpy connective tissue as possible.
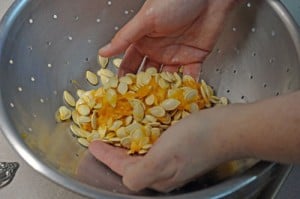
Use the colander with a warm water spray to clean the seeds and remove the connective tissue. Then they are ready for roasting or drying and saving to plant next year.
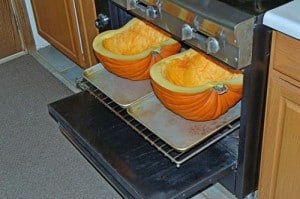
Ready for roasting! I wanted the slow roasted flavors that make the sugars caramelize a bit, so heated the oven to 300°F and roasted this one for about 2 hours, maybe a little more. I checked it every half hour or so with a toothpick – when it goes all the way in with very little resistance, the pumpkin is properly roasted.
If you need to roast it faster, you can – just use 350 – 400°F and peel the pumpkin, then cut it into 1 – 2 inch chunks or cubes. It will roast in about 30 – 45 minutes, you’ll need to check it every 15 minutes to make sure you don’t over-do it. It won’t have quite the slow-roasted flavors, but will be much better than the store-bought version nonetheless.
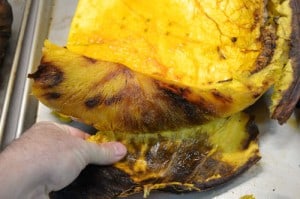
Next is peeling the pumpkin after it has cooled. You can see the darker spots, don’t worry, it isn’t burned – just well-roasted!
Cut the pumpkin into chunks after peeling. Cut them into manageable sizes for your food processor, blender or whatever you will use to puree it. Keep the juices from the roasting pan, as you’ll add them to the puree later on.
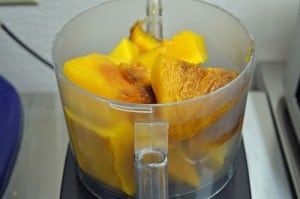
Into the food processor next! This shows the first batch and was a bit too full as it took a long time to work the pumpkin down and puree it. I added much less pumpkin to subsequent batches, and they processed a lot faster.
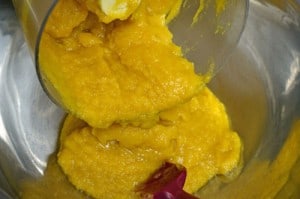
After pureeing, scoop it into a bowl large enough to hold all of the puree. You will need a bowl that is a bit larger than what holds the sliced chunks.
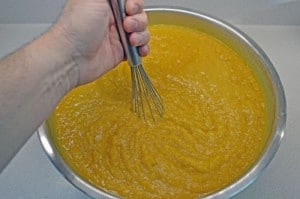
Remember the juices in the roasting pan? Add them to the puree and stir them in for added flavor.
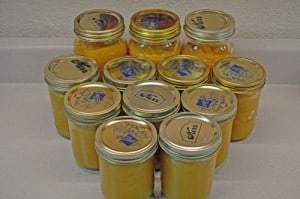
Here’s what we wound up with from one large pumpkin – 3 quarts and 9 pints of slow-roasted, pureed home-grown pumpkin! What is that worth at the store? We’ll use the quarts for soups and stews, with the pints going for pancakes, bread, muffins and cornbread.
We left about an inch of head room in the jars so we can freeze them without the jars breaking. Freezing is the preferred method, as canning is no longer recommended for pumpkin.
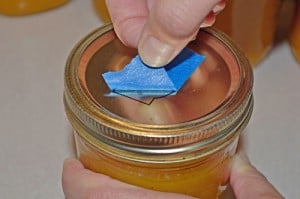
Here’s a bonus tip: Use painter’s tape for labels that will go into the freezer. We use name brand such as 3M, as the store brand doesn’t stay on as well. Using it as labels is very inexpensive as a roll will last for several months, sometimes almost a year. The tape stays on in the freezer, but comes off afterward with no sticky, gummy residue.






Thanks for the helpful information!
It is no longer recommended that pumpkin puree be canned. It freezes wonderfully though and is much simpler.
Thank you for that Kelly, I will amend the article!
Glad to help, hope you enjoy the puree!