
 © 2024 Terroir Seeds | Underwood Gardens
Discover the benefits of using quality compost in your garden. Improve soil health and promote thriving plants with nutrient-rich compost.
Tag Archive for: Compost
One of the biggest questions we are often asked is what to do about furry and/or feathered critters that want to snack on our gardens. There are a lot of approaches, and we realized that our customers have more experiences to share that can help more folks, so we put out the question of what has been successful in helping to deter critters from your garden?
We received some great replies that we’ve included here. We’ll start off with perhaps one of the most challenging garden conditions in the US – at the South rim of the Grand Canyon national park. Here elk and other wildlife are protected, and there is a short growing season to contend with.
Deb from AZ writes – “Since we are in Grand Canyon National Park, wildlife is our #1 challenge…we have to have an 8 ft. fence around our garden to keep the elk out. Rodents are also a huge problem here: gophers, mice, voles, and chipmunks/squirrels. I feel like we have become pretty skilled at working around them!
Here’s what we have learned to do:
- Move the compost far from the garden: our three-bin system had become a rodent motel and led to a population explosion. Once we got rid of that, things calmed down a bit.
- We also use the hardware cloth under some of the beds and it works great for the gophers. Low hardware cloth fences stop them from digging in paths and peeking over into the beds to nibble. This also stops the voles, who can’t really climb. For beans and squash and tomatoes, we use a little hardware cloth ring around each plant in the early season until they get big enough to be unpalatable.
- For climbers like squirrels and chipmunks, we use “deer netting” over the top of our low fences to prevent climbing in.
- To stop mice and voles from eating seeds and sprouts, we lay sheets of metal window screens on top of the soil after planting. Once they sprout, we switch to the low fences as mentioned above.
This sounds like a ton of work, (and it is), but once you make all of these structures it doesn’t take too long to install them, and it really saves your crops from being decimated. Even the smallest critters are creatures of habit, so if you take the time to observe what they are doing you can often work around them or plant more attractive plants in less trafficked areas.
Most importantly, we have learned to be a little more Zen about the whole thing, and now just expect there to be some losses from critters. We always keep enough extra seeds of short-season crops to re-plant areas that are compromised!”
Regina from NC says – “Last year I planted a garden in a different area and found the deer just loved my cabbage, broccoli green beans – all my first plantings were eaten to a nub. I consulted a local expert (94 year old gardener) and was told the following:
Plant a wide row of green edibles outside the perimeter of your garden and then put a border of yellow ribbon tape (the type used at a crime scene) and leave it a little loose so that it moves and twists in the breeze.
I planted oats and clover outside the garden area and put the yellow ribbon around the garden. The deer ate the stuff outside the garden area and left my garden alone.
The expert advice from the seasoned veteran worked like a charm.”
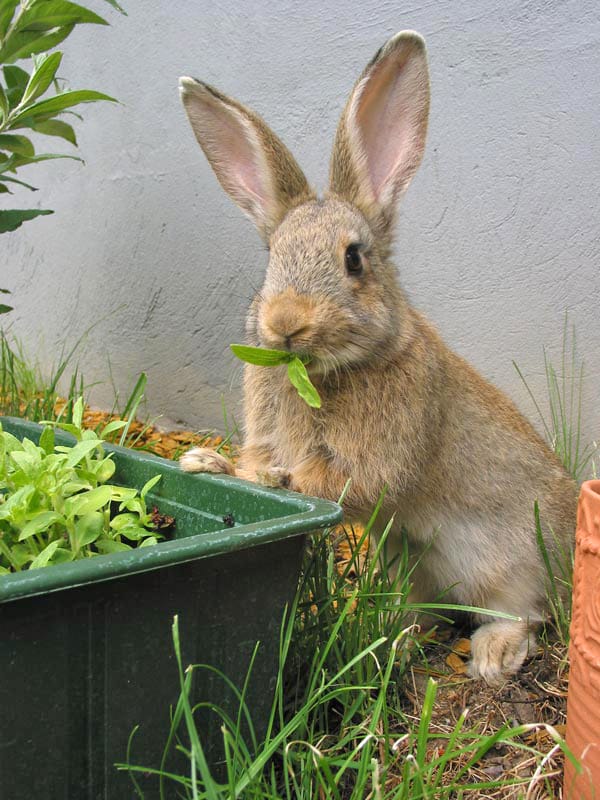
Jim in IL found – “No exaggeration…last spring I would see 50 rabbits running around within a 1/2-mile radius. They were everywhere! Many times I would see 5 or 6 running/playing together. This obviously is a bad thing when you have a veggie garden! I have 8 raised beds (5×20′) which I also cover with row covers. The rabbits would even crawl under the protective covers and nest under my plants. I had to do something fast!
This past fall I put up a 4′ chain-link fence around my garden (approx. 35’x85′) which was really only to serve as a frame for the 1″x1″ (24″ tall) vinyl coated wire mesh fence I installed inside the chain-link. I buried the mesh 6″ deep to hopefully prevent the vermin from digging under. This spring will be the true test for my efforts.
I’m not sure if the chipmunks can squeeze in the 1″ holes, but just in case, I have traps for them. Last season I nailed 35 of them. Aggravating to do all this work only to have the critters get in for a free meal!”
Diane shared – “I wanted to share that after years of the birds and lizards destroying much of our newly-planted raised bed gardens, my husband has built some screen covers over our raised beds. He used 2 inch x 2 inch redwood posts for a frame, and attached wildlife netting to the frames. These are slightly larger than each raised bed’s opening. He placed the screen-covered frames on top of the raised beds, and no more early garden destruction! Our early Spring garden is thriving!”
Mary Lou in IL has learned – “The best trick I have is to put aluminum foil around small plants that I don’t want the chipmunks to dig up. They hate the aluminum foil and won’t dig up my new transplants. It is actually funny to watch their reaction when they try to dig and get the foil instead of dirt.”
Linda in NE shared – “I have found Aztec Marigolds work really, really well at keeping the bunnies away from my strawberries. I usually leave them in the ground till spring, but for some reason I pulled them all at the end of last season and have noticed a huge increase in the bunny population in my yard throughout this past winter. Next year I’ll leave them in till spring.
To keep the neighbors cats away from my “bird garden” I scatter rue seeds amongst the beds. It keeps the cats away, but it makes it hard to get in there to cut flowers for bouquets.
For the never ending wasps I rub a bar of soap around all the areas where they like to hang out. When I see a nest forming I liberally rub the soap all around that area. And I try to destroy all of the nests I find after the first freeze. I know wasps serve a purpose, but if they want a place in my yard it’s going to have to be away from the house and shed.
Chrys in PA shares some wisdom – “My uncle taught me an effective way to keep the crows from “unplanting” your corn as soon as your back is turned. Poke a hole in the ground about 1/2 inch deeper than normal, drop in the corn and cover it with dirt. Then take your digging stick and poke a hole about 1/2 inch deep over the corn. Maybe the birds think that another bird already harvested the seed, but they usually leave it alone.”
Here’s some of the things we’ve learned in our own garden over time:
Gophers – In our area, there are colonies of gophers living in the vacant field next to our house and garden. They will mostly stay on their side of the fence, but occasionally come under and cause havoc to our garden. Our dogs love to dig up their tunnels, but so far haven’t been able to capture one.
When we were constructing our raised beds, we installed hardware cloth in the bottom of the beds before putting the soil in. The hardware cloth is stout enough that it deters the gophers from trying to dig through and has held up for 6 years now. The challenge is that they will still come up in the walkways under the wood chips where there is no barrier! We resort to gopher traps for this – the Gophinator is by far the best and most effective trap of several designs and approaches we’ve tried.
We don’t trap any gophers that don’t get into the garden. If they are on the other side of the fence we leave them alone.
Squirrels – We generally don’t have squirrel problems, but one summer had a rogue agent that was climbing the fence and dining on our garden. The solution was to borrow a live trap from a friend, capture the little bandit and release it into another area that was far from any houses. In this case, we were able to relocate it without harming it.
Do you feed wild birds? You may be bringing in unwanted visitors like squirrels, mice and possibly raccoons as they scavenge the seed dropped from the feeders. There are a couple of solutions to this challenge: stop feeding the birds – this removes the food source and will decrease the visitation of wildlife, or move the bird feeder to a spot that is the furthest possible distance from your garden and use a feeder design that minimizes the amount of seed dropped by hungry birds.
Javalina – These wild relatives of pigs have poor eyesight, but a very keen sense of smell. If you put fresh kitchen scraps onto your compost pile, you might be attracting these large and destructive critters. If you live in javalina country, don’t locate the compost bin or pile next to the garden, use leaves and manure with kitchen scraps aged for a couple of weeks in a bucket instead. This way it isn’t as appealing to them and won’t encourage repeat visits.
We are sharing an article that we’ve written for magazine publication and has been in the October 2013 issue of Acres USA as well as the Fall 2013 edition of Small Farmer’s Journal. Compost is one of the foundational cornerstones of any successful garden, but has been over-thought and made much too complex by people wanting to make it “faster” or sell you some piece of equipment or machinery to make it “better”. It really is simple to make and doesn’t take any equipment, only needing time to accomplish. After all, who turns and works the compost in nature?
This is about our experiences and what we’ve learned from about 15 years of composting. Enjoy!
What We’ve Learned from Compost
Having been gardening for 15 years and composting for almost as long, we quickly realized that with our climate and native soils, improving the soil’s health and quality were one of the most important things we could do to help our garden. We are located in North-central Arizona, which is a semi-arid high grassland environment. Historically there would be 18 – 20 inches of moisture per year, but we have been lucky to see 10 – 12 inches in a good year over the past 20 years. There is almost always a south-westerly breeze which pulls moisture from any unprotected ground. The soils are really varied in structure with many different types in close proximity to each other. It is not uncommon to have a good productive soil with a caliche or high sandy soil within 20 – 50 feet. Our garden is a good sandy loam, with decomposed granite about 30 feet to the east and a heavy clay caliche soil 20 feet to the west.
Good, aged compost has helped us build the health and fertility of our soil and overcome many of the challenges we face in our garden. It improves the soil structure, brings the micro nutrients and biological life to the soil, along with earthworms and larger soil dwellers. Mulching the compost helps to retain needed moisture and brings the soil moisture level from about 2 inches down to the surface of the soil/mulch interface. We use a combination of straw and wood chips for our mulch.
There is much we have learned that we have applied to our approach in creating great compost, along with observations and education we have sought out along the way. We are happy to share some of our experiences and knowledge about compost.
We don’t turn our compost, partly from being busy and not wanting to invest in machinery or equipment, also partly from research, reading and talking with those who have learned how to create some incredibly rich, earthy compost that looks like highly fertile soil. Most compost tumblers are too small for our needs and a tractor or turning equipment is an expensive purchase for the occasional use.
Our compost piles will age for at least a year before being added to the garden. We have learned that the slow aging is more beneficial to the decomposition process as well as not losing nearly as much nitrogen to off-gassing as happens with the hot and fast methods. Another benefit is the decomposition is much more thorough, destroying weed seeds, pathogens and any unwanted chemicals much better in a slower composting setup. In our climate, we need to water our compost occasionally to keep it going. This is easy to gauge, as the rich earthy smell goes away when the moisture level drops. We water about every 2 weeks on average during warmer weather.
(Cautionary note for those that use city water with chlorine in it: chlorinated water will kill the micro-organisms in the compost and soil that you are working to help! If you have chlorinated water, either fill buckets and let them sit overnight to off-gas the chlorine or buy a chlorine filter that attaches to the garden hose to remove it. Thanks to Marguerite from IL for pointing this out!)
In our research and education of how to make great compost, we consistently saw traditional, proven methods from different countries, climates and approaches that worked. Many of them were very similar, adjusted to adapt to the particular environments of where they were used. The French intensive method used 3 feet of fresh horse manure and straw to heat the cold frames over the winter in Paris, then were pulled out and added to the compost piles to finish decomposing. In the fall the aged compost was added back to the growing beds for the upcoming winter. The Russian dacha gardening tradition shows how continuous composting and mulching with wood chips will improve the soil, overcoming both heavy winters in the north and drought conditions in the south.
Another thing that we found is that European traditions and older American traditions applied compost thickly, about 3 – 4 inches at a minimum, while modern gardening applies it rather thinly – like expensive imported marmalade on toast – and then wonder why they don’t get the results they expect.
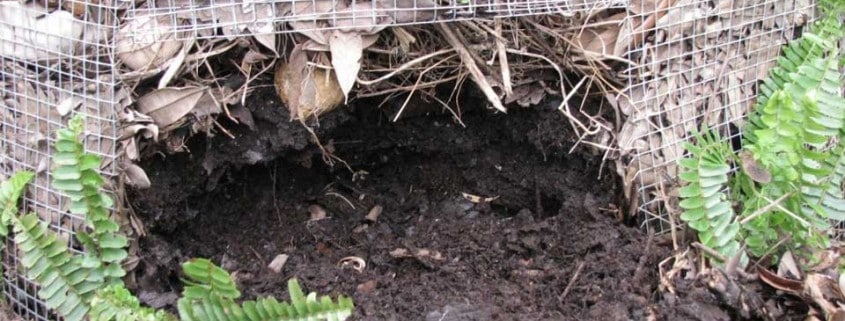
After the year of aging and decomposing, our compost looks and smells like rich dark soil. This is especially pleasing to see in comparison to our pale tan native soils! Once we apply it to the garden beds, we mulch it with several inches of straw, watered well to keep it in place. Recently we have begun experimenting with wood chips as mulch, with good results. The wood chips help retain and gain moisture better than the straw, with the added benefit of attracting earthworms faster. The wood chips act like a layer of permeable insulation, attracting the cooler and moist early morning air that sheds its water when it meets the warmer temperature of the soil. This moisture travels into the soil and is retained. It is surprising to see and feel how moist the soil is under 2 – 3 inches of wood chip mulch when there has been no rainfall or drip irrigation at all!
Our approach to making the best compost possible is to combine or “stack” techniques, similar to the bio-tech industry, but it is much more effective with no worries about future side-effects! We will walk you through the different techniques we use and why we use them.
We have used straw bales as the container for our compost system for years, but have recently started using shipping pallets to more effectively utilize the composting area. The pallets are almost 3 times as tall as the straw bales and will give more compost in the same footprint. Wood chips are put down first, about 3 – 4 inches thick. These help retain moisture at the bottom of the pile before it seeps into the soil, as well as helping to attract earthworms and adding nutrients as they break down. We will scatter wood chips throughout the pile as we add horse manure. The nitrogen of the manure helps in the breakdown of the lignin in the wood chips, creating richer and more fertile compost.
Our two horses provide the bulk of the manure, along with the occasional load of cow manure. We are careful to get our cow manure from non-feedlot sources to avoid any contamination from antibiotics, glyphosate or industrial chemicals. This has supplied enough finished compost for our 14 thirty foot long raised bed garden that is our home and trial garden for our heirloom seed business. We apply compost twice a year, mid fall and early spring.
Straw is used to mulch the top of the pile and provides aeration as more manure is added to the top. About 1 – 2 inches of straw is added across the top about every two feet of depth. This is continued as the pile grows in height. As the straw bales that make up other bins start to fall apart, they are added to the new piles.
Milk is diluted 50/50 and sprayed on the pile to help feed the microorganisms and jump starts the decomposition process. The amino acids, proteins, enzymes and natural sugars that make milk a food for humans and animals are the same ingredients in nurturing healthy communities of microbes, fungi and beneficials in compost and garden soil. Raw milk is the best, as it hasn’t been exposed to heat that alters the components in milk that provide a perfect food for the soil and plants, but any milk will work. Using milk on crops and soils is an ancient technique that has been lost to modern industrial agriculture.
Molasses adds readily available sugars to the compost that will skyrocket the microbial activity, with the addition of needed mineral content. We use one cup of molasses to a gallon of water and spray onto the pile once it is about 1 – 2 feet tall.
Coffee grounds are added routinely as the pile builds to help with moisture retention and buffer our alkaline soils. Traditionally, coffee grounds were seen as an acidic addition but recent research shows that coffee grounds act more as a buffer, moderating either an acidic or alkaline pH toward a more neutral one. In arid regions coffee grounds can be added up to 25% by volume of the pile. They are a good nitrogen source to help keep the decomposition going as well as being a natural earthworm attractant! Sourcing the coffee grounds comes from local coffee houses, restaurants, Starbucks, etc.
Hardwood lump charcoal or Bio-Char is added as the pile grows to help the compost in many ways. The most obvious benefit is to add carbon to the soil. Charcoal has a lifetime benefit of several hundred years, as shown by Brazilian university studies on the Amazonian “Terra Preta” sites in the rainforest. It must be hardwood lump charcoal and not briquettes, which are processed with chemical fire accelerators, sawdust and other industrial waste. We like to crush it to about the size of a grain of corn to increase its surface area and effectiveness.
Charcoal acts like a sponge for the first 6 months or so, absorbing minerals and nutrients from the surrounding soil or compost while it “charges” or “activates”. After that it becomes an active beneficial component of the soil, providing housing and food sources for the microbial communities. Mycorrhizal Fungi will colonize charcoal and help to monitor the surrounding soil health, moving nutrients around as needed by plants. It was previously thought that mycorrhizae would only colonize the roots of plants, but it has been found that they will also inhabit charcoal. This will help them live throughout a winter when little root life or activity is present. The charcoal is sourced in 40 pound bags from buying clubs such as Costco or Sam’s Club, and can be obtained in larger quantities directly from the manufacturer.
Trace minerals are added such as Azomite or Elemite to increase the available mineral and trace elements that are often low in today’s feed. This helps the decomposition of the pile, is absorbed in the charcoal and carries over to help feed the garden soil.
Once the compost pile is at the top of the bin, we cover it with a generous layer of straw and build a new bin. Then we pretty much ignore the active pile except for watering when it needs it. Every couple of months we check the pile to see how it is progressing, and see how much it has started to drop in height. Once the pile is finished it will have dropped about 1/4 to 1/3 of its original height.
This system has evolved over several years to the present one and has continually produced better and better compost. This approach may sound like a lot of work, but with the system set up there is very little additional work after cleaning the horse pens. We usually get a full wheelbarrow of fresh manure every other day, and we rotate the addition of minerals, charcoal and wood chips on top of the wheelbarrow load which is then dumped onto the pile, putting the additions underneath the load. Once we have about 2 feet above the last straw layer, we add a few inches of straw. The scent of the active pile is that of a handful of rich fertile earth, so we gauge when to water when we can’t “smell the earth” as we walk by. The additional time needed to add to the nutrients range from the time it takes to add a couple of shovelfuls of wood chips or a scoop of Elemite to the wheelbarrow, to a couple of minutes to crush a few handfuls of charcoal.
No matter what your scale, from backyard home gardener to small acreage, these concepts can be scaled up or down to suit your particular needs and animals. Look to your neighborhood or community for feedstock and supplies for the compost pile. Most horse owners will be happy to give away their excess manure, as most do not compost it and it becomes a waste management issue. Some farms will have excess straw or broken bales that are not useful for them but would be excellent feed for your compost pile.
Good composting – like much of good agriculture – takes a certain amount of patience and observation, letting Mother Nature work her miracles on her schedule. Think about how nature decomposes and composts leaf litter in the forest or grasses in the pasture, they aren’t “done” in 30 to 60 days! Once the cycle is established, you will always have some great compost becoming available for the next feeding of your garden soil.
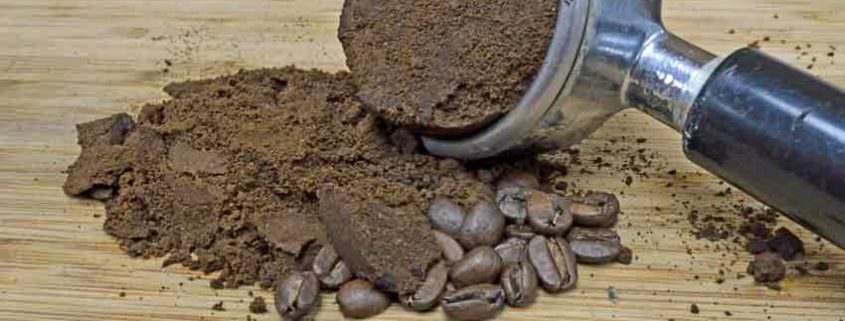
Fresh Coffee Grounds Are Great Source of Minerals and Nutrients
Looking to perk up your compost pile? Do you drink coffee? You might be holding the answer in your hands this very moment, or at least part of the answer. Coffee grounds have been used for many years by those “in the know” to boost the quality of their compost, making a superior soil amendment for free. The grounds are considered part of the “green” portion of the composting, speeding up the decomposition process while keeping temperatures high enough to kill off pathogens.
Coffee grounds provide energy in the form of nitrogen to the hard working bacteria doing all of the work in the compost. They also encourage beneficial microbe growth, contributing to a healthier soil. Another benefit is the minerals added to the compost such as phosphorus, potassium, magnesium and copper – all very necessary to the growing process. Earthworms absolutely love coffee grounds, preferring them to other food sources and turning them into highly prized vermicompost. For many years coffee grounds have been thought of as slightly acidic, but recent research shows that the grounds are usually pretty neutral in pH, but have a very high buffering capacity. This means that whether the soil is acidic or alkaline, the grounds will bring the pH back toward neutral, so they are good for any soil types. The moisture holding ability is very beneficial for loose soils, yet it acts to loosen heavy clay soils at the same time.
Some gardeners have worked the grounds directly into the soil, but it is best to add them to the compost pile and let decomposition release their nutrients first, then add the aged compost to the garden soil, working it into the top 2 – 3 inches in early spring and late fall. The grounds can make up to 25% by volume of the compost, and be used as a manure replacement for gardeners who don’t have ready access to those sources. Some city gardeners make their compost of leaves, cardboard and newspapers for the carbon side with coffee grounds and fresh grass clippings supplying the nitrogen to keep the pile going. It is best to let the compost decompose or age for at least 6 months, with a year time-frame yielding a higher quality amendment that looks very much like soil all by itself.
Compost Feeds and Improves Your Soil
Compost is one of the best mulches and soil amendments available. It is also one of the easiest ways to feed your garden soil and can (and should) be used instead of commercial chemical fertilizers. It can be easily improved or customized for your specific garden conditions, and best of all, compost is cheap. You can often make it without spending anything or very little.
Using compost improves soil structure, texture, and aeration and increases the soil’s water-holding capacity while improving its drainage. All you need are some feedstocks, moisture, and time.
Compost loosens clay soils and helps sandy soils retain water. Adding compost improves soil fertility and stimulates healthy root development in plants. The organic matter in compost provides food for the microorganisms that digest and break down the matter, keeping the soil healthy and balanced. Feeding of the microorganisms also makes foundational minerals readily available to the plants, such as nitrogen, potassium, phosphorus, boron, silicon, magnesium, and trace elements. Well-fed, properly produced compost applied to the garden soil can create a condition where few soil amendments will be needed.
We will examine several aspects of compost and techniques to build the nutrient value of the compost for the garden. One of the most useful aspects of compost is its adaptability, as it can be “customized” or enhanced with many additions that will increase its fertility and value to the garden. This is not meant as an introductory how-to compost article – see our article Compost – What We’ve Learned for that. You can use the techniques shown here to customize your compost for your garden’s needs.
For our discussion, we will assume a manure-based compost combined with leaves or straw for the close to ideal 25-30:1 ratio of carbon to nitrogen (C/N). Here are some examples of the C/N ratio for common compost feedstocks-

Compost Carbon/Nitrogen Ratios
One of the common techniques of the Genetic Engineering industry is called “Stacking,” or combining several traits into one variety to achieve multiple benefits. I’m unsure if it works, but the same thought pattern can be applied to our compost, with results that don’t need to be studied for a decade or two to determine if they are dangerous. We will be looking at and discussing several of these techniques, all of which can be “Stacked” or combined to achieve greater benefits. Some of these techniques are commonly used in the garden and will have similar effects in the compost pile.
Ingredients That Boost Compost

Azomite or Elemite trace minerals
Mineralization– If you’ve followed the previous soil-building blog posts, you understand the importance of adding minerals to your garden soil and its incredible benefits. For those who haven’t read it, read Mineral Restoration of Your Garden Soil for the first part and Mineral Restoration of Your Garden Soil Part II for the second. Adding a broad-based mineral supplement to your compost will kick-start the decomposition and feeding of the microorganisms and give them a powerful, healthy start. This will carry over when you apply the compost to your garden, as the remainder of the minerals and trace elements will benefit the garden soil, your plants, veggies, and ultimately – you.

MycoGrow soluble mycorrhizal fungi mix
Mycorrhizal Fungi– An ancient, microscopic group of fungi that develop symbiotic relationships with about 90% of crop species. They colonize in and around the roots and root hairs, sending hyphae– strands about 1/25 the diameter of a human hair- into the surrounding soil anywhere from 15 to 25 inches. This increases the nutrient “reach” of the plant from 10x to sometimes 100x! Mycorrhizae create enzymes to mobilize and release phosphorus, nitrogen, zinc, iron, calcium, magnesium, manganese, sulfur, and several other nutrients from the soil and transport them to the host plant’s roots. They also produce antibiotics and other defensive compounds that fight damaging root diseases by other fungi and bacteria.
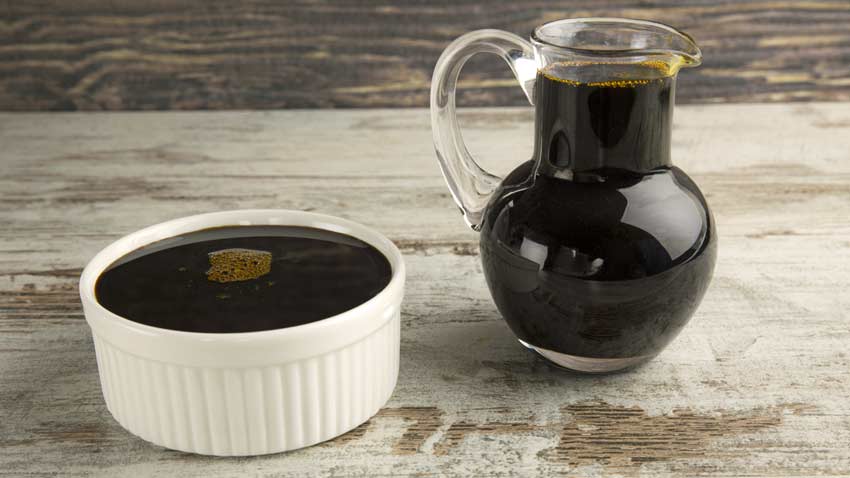
Jug of molasses
Molasses– From Wikipedia: Molasses is a viscous by-product of the processing of sugar cane or sugar beets into sugar. Sulfured molasses is made from young sugar cane. Sulfur dioxide, which acts as a preservative, is added during the sugar extraction. Unsulfured molasses is made from mature sugar cane, which does not require such treatment. There are three grades of molasses: mild or Barbados, also known as first molasses; dark or second molasses; and blackstrap. The third boiling of the sugar syrup makes blackstrap molasses. The majority of sucrose from the original juice has been crystallized and removed. The calorie content of blackstrap molasses is still mainly from the small remaining sugar content. However, unlike refined sugars, they contain trace amounts of vitamins and significant amounts of several minerals. Blackstrap molasses is a source of calcium, magnesium, potassium, and iron; one tablespoon provides up to 20% of the daily value of each of those nutrients.
Molasses is a very valuable addition to the compost pile, as well as to the garden itself. Unsulfured blackstrap is the preferred variety due to the mineral content, but any of the unsulfured ones will do fine. Beyond the minerals, there are benefits, such as the natural sugar content that will feed the microorganisms in the compost or soil of the garden. Use one cup to a gallon of water and spray onto the pile, or add to the drip system of the garden. The readily available sugar content will skyrocket the microbial activity. Blackstrap molasses is also commonly used in horticulture as a flower blooming and fruiting enhancer, particularly in organic hydroponics. Use the before-mentioned mixture in the drip system or spray alongside the roots of fruiting vegetables as they start to flower to increase their flowering and fruiting.
See Milk & Molasses – Magic for Your Garden for the whole story!

Pitcher of milk
Milk– Using milk in your compost and in your garden will probably come as a surprise to most. Upon closer inspection, however, it starts to make sense. The amino acids, proteins, enzymes, and natural sugars that make milk food for humans and animals are the same ingredients in nurturing healthy communities of microbes, fungi, and beneficials in your compost and garden soil. Raw milk is the best, as it hasn’t been exposed to heat that alters the components in milk that provide perfect food for the soil and plants. Using milk on crops and soils is another ancient technique lost to large-scale modern industrial agriculture.
Recently a Nebraska farmer completed a 10-year study on applying milk at different rates to his pastures and recorded the results with the help of the local Agricultural Extension agent, a university soil specialist and weed specialist. What they found was amazing- the grass production was drastically increased; the soil porosity or ability to absorb air and water doubled; microbe activity and populations increased; cows were healthier and produced more milk on treated pastures; the brix or sugar level in the pasture tripled, indicating more nutrients were stored in the grass than before. Grasshoppers abandoned the treated pastures- the sugars are a poison to soft-bodied insects as they do not have a pancreas to process the sugars. This also explains why insects leave healthy, high-brix level plants alone, as they contain more sugars than stressed and sickly ones.
The ratio can range from 100% milk to a 50/50 mixture with water, with no loss of benefits. Spray it on the compost and garden soil prior to planting and as needed when insects appear. Spray directly on the insects and around the areas they inhabit.
See Milk & Molasses – Magic for Your Garden for the whole story!
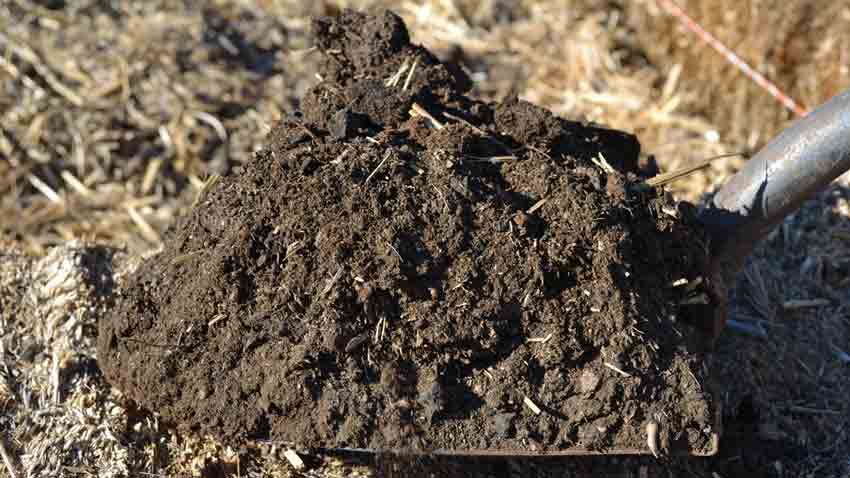
Well-aged compost
Manure– Earlier, I had said the assumption was a manure-based compost. Manure is usually available, even if you don’t have horses or cows. If you get to know farmers at the farmer’s market or growers that sell in your area, most have animals, which usually means excess manure. Most folks with animals are happy to have someone pick up their excess manure. The more different animals contributing to the compost pile will ensure a healthier and more diverse population of microbes and critters, meaning a better, healthier compost. Horses are not ruminants; their manure is just chopped grass and alfalfa. It decomposes well and provides a good compost. Sheep and cattle are ruminants, so their manure has been broken down further and has a lot of beneficial bacteria and microbes that will jump-start the compost. You get the best of both to your soil’s benefit!
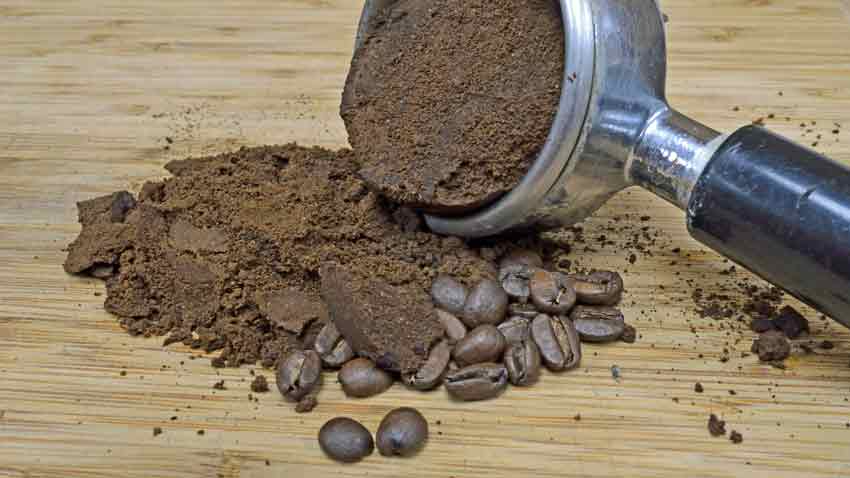
Coffee grounds
Coffee Grounds– Another unusual but highly beneficial and productive addition to your compost. The grounds of already brewed coffee are usually pH neutral yet have been shown to have a great buffering capability. Adding coffee grounds to acidic or basic soil will help minimize the acidic or basic effects and bring the pH back towards neutral, about 7.0. Grounds are a Nitrogen source for the 25:1 C/N ratio, so depending on what feedstock is being used, coffee grounds can be very valuable to keep the decomposition moving along. The upper limit on grounds is 25%, so a LOT of coffee grounds can be added if needed! Worms love coffee grounds, which act as a “worm attractant.”
So, now that you’re considering adding coffee grounds to your compost, where do you get them? Your office or work is a good start, as well as home. Starbucks has a corporate policy of working to reduce waste, so they usually have a covered bucket next to their stand in which they put the used grounds. The paper filters are compostable as well, as they are usually unbleached. Coffee shops, diners, restaurants, and donut shops are also great resources. If you feel funny asking for coffee grounds, you will probably be surprised when they respond enthusiastically when they understand what you’re trying to do.
See Coffee Grounds Build Compost and Soil Health to learn more!
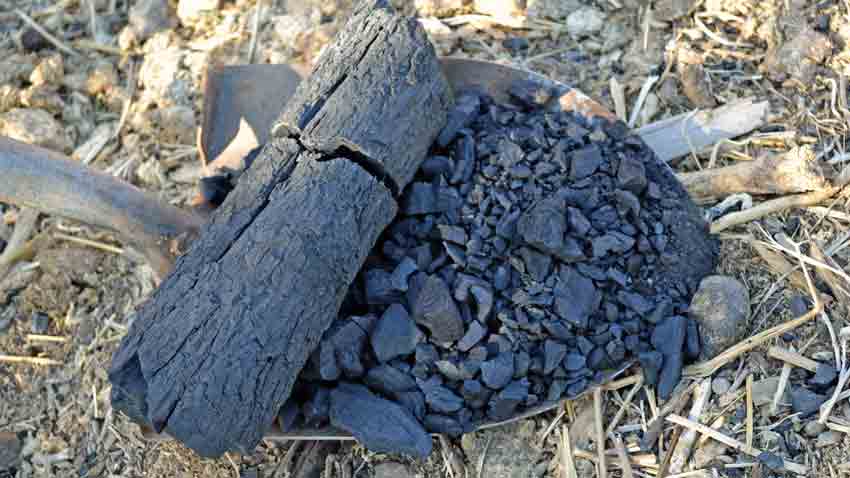
Shovelful of charcoal
Charcoal or BioChar– This is another of the soil-building articles that was previously written. Please read Terra Preta- Magic Soil of the Lost Amazon for Part One and Terra Preta Part II to get up to speed. Charcoal needs to be hardwood or lump, not briquettes, and should be crushed into smaller-sized chunks, about the size of corn seed. It needs time to “activate,” where it absorbs minerals and trace elements and provides a home for the microbes, beneficial bacteria, and fungi that make the compost so nourishing to the garden. The charcoal will last at least 100-300 years, so it isn’t something that will be depleted quickly. Adding it in small amounts to the compost and thus to the garden for several years will only increase your soil’s health, fertility, and productivity each year.
Where to Start
Work with what you have. You may not have a lot of nitrogen (green) or an abundance of carbon (brown) ingredients. Use what you have readily available. It’s not complicated, if you don’t have the “correct” ratio, just substitute some time and everything will be just fine. Use the above chart and this article to get the ratio close, and don’t sweat the small stuff. The gentle folks in India have been composting for 5,000 years without compost tumblers or fancy enclosures. Work with your local conditions- for instance, we must water our compost to keep it alive.
Now you can see what is meant by “Stacking” of these techniques! Compost is very valuable, but when combined with some or all of these techniques, things will start moving in a positive direction! The health and fertility benefits will increase exponentially, not only once but each time the compost is added to the garden soil, which should be twice a year- in the spring before planting and again in the fall. This creates an ever-increasing spiral of benefits for the garden, the plants, the fruits and vegetables, and you and your health.
This proves what Sir Albert Howard said to the House of Commons in England at the end of the 19th Century: “As goes the health of the soil, so goes the health of the nation.” He was laughed out of the House of Commons, but we realize now, 120 years later, that what he said is true. Improve the health of your soil, and your health will be improved from the produce from your garden.