A person touching the ground with their fingers.


When to Direct Sow

Direct sowing can be done almost any time of the year – in early to late spring for the summer garden, mid to late fall for the cool season garden, as well as succession planting a row after a crop has been harvested to grow something else delicious!

Direct sowing simply means planting the seeds directly into the garden soil, instead of starting them inside, nurturing and then transplanting into the garden once they are several weeks old and several inches tall.

If you are in doubt as to when your last frost date is, read Planning and Planting Your Spring Garden.

For more on cool season gardening, read How to Plan for Fall and Winter Gardening.

To discover how succession planting can help you grow more, read Succession Planting – Boosting Garden Production.

Some gardeners think they have no “luck” when it comes to direct sowing certain vegetables, while others are hesitant to try again after past challenges or outright failures. Inexperienced gardeners sometimes think their lack of experience dooms them to failure.

The root causes of most challenges, problems or outright failures can be traced to a shortage of good information, incomplete understanding of seed germination and a lack of patience.

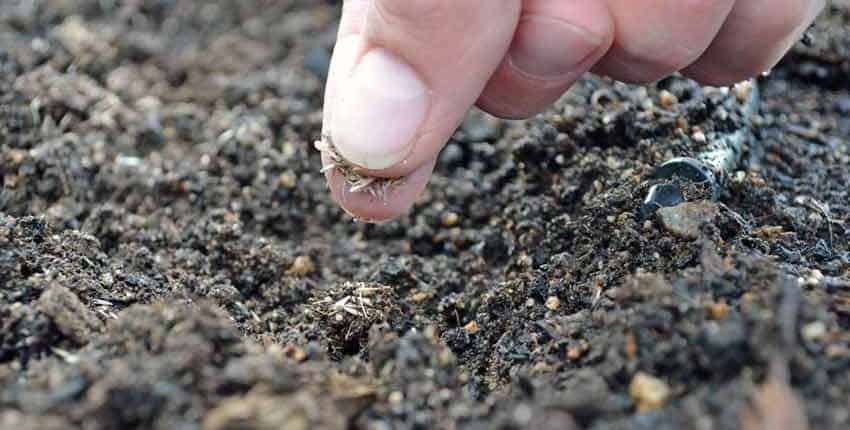
A person is touching the dirt with their finger.

Direct Sowing Lemongrass Seed

All of these can be overcome, and we’ll show you how!

At its most basic, direct sowing is simply inserting a seed into the garden soil so it can grow. There are factors which affect how successful the results are, but they are easily understood so you can set yourself up for success by using them.

There are three main parts to direct sowing – preparation, sowing and care.

1. Preparation

A pile of dirt on the ground in the sun.

Well Aged Compost

Amend the soil

Soil or bed preparation sets the stage for the seed and is usually done a couple of weeks to a month before direct sowing. This includes amending the soil with well-aged compost, minerals, fish emulsion, milk and molasses or anything else the soil needs.

“Amending” means to add the nutrients to the soil, then work them in with a garden fork or roto-tiller. If using a roto-tiller, make sure it is set to a shallow depth to avoid disrupting too many of the soil layers and the micro-organisms that live in those layers.

A comprehensive soil analysis can be extremely valuable here, as you’ll know exactly what the soil needs to be at its best. A simpler approach is to add the commonly used nutrients mentioned above and closely observe the plants to see if they are showing a lack of specific nutrients.

Weed the beds

After amending the soil, wait a few days for the first weeds to sprout, then remove them with a small hoe just below the surface of the soil. Weeds thrive in disturbed soil, so you won’t wait long!

When the weeds have just sprouted, they will have released a very potent plant hormonal signal – called auxins – into the soil, signaling all of the other weed seeds to remain dormant. The soil has a tremendous amount of weed seeds in it, just waiting for the right conditions to sprout, and the first weeds up send this signal to keep other weed species from competing with them. This hormone lasts from 4 – 6 weeks, giving you a head-start with little competition for the seeds you want to grow!

Weeds have the most serious effect on garden production during the first week to ten days after sprouting – this is why it is so important to spend more energy and time up front in weeding than it is later in the season.

After your seedlings have sprouted, they add their own particular auxins to the soil, inhibiting other seeds from germinating for another couple of weeks. After the garden crop is a foot tall, weeds have much less affect on their growth and can’t as easily out-compete for water and soil nutrition.

Yet another way is to use a flame weeder to kill the young weeds, while damaging the uppermost, soon to germinate weed seeds in wait. No hoe is used and this method is quite fast.

A pile of trash with blue ruler on top.

Row Marking Tools for Direct Sowing

Layout the bed

Some gardeners prefer to create furrows to sow their seeds in, while others use a garden row marker – two pegs with string attached – to lay out where they will direct sow their seeds.

There are several different approaches, and there is no one “right” way. If you are growing a smaller garden a row marker makes it easier to plant seeds closer together than creating rows. It’s also easier to do succession planting closer together with a row marker, as you plant the seeds along the line of the string without trying to open and then close a furrow and not disturb neighboring seeds or young plants.

2. Sowing the seeds

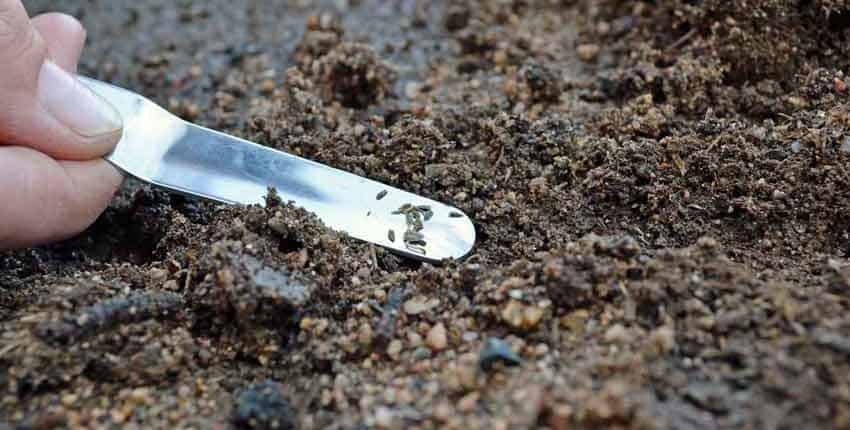
A close up of a spoon in the dirt

Direct Sowing Basil Seed with a Widger

Direct Sowing

Before direct sowing your seeds, consider how the vegetable will grow and be used. If you will be harvesting the entire crop for young greens, then plant fairly close together, as you want the most production possible. If the plant will be harvested regularly and allowed to mature, like leaf lettuce, spinach, kale or leafy broccoli, then give a little more space for the plant to mature without crowding.

Water the soil the day before planting to make sure it is properly moist to start the germination process.

Read the spacing recommendations on the back of the seed packets as a good starting point. If in doubt, plant two seeds at a time to ensure the best growth, as you can always thin once the seedlings are up. When thinning, never pull the seedlings out as this seriously disturbs the roots of the neighboring seedling – just snip off the unwanted seedling with a pair of small scissors.

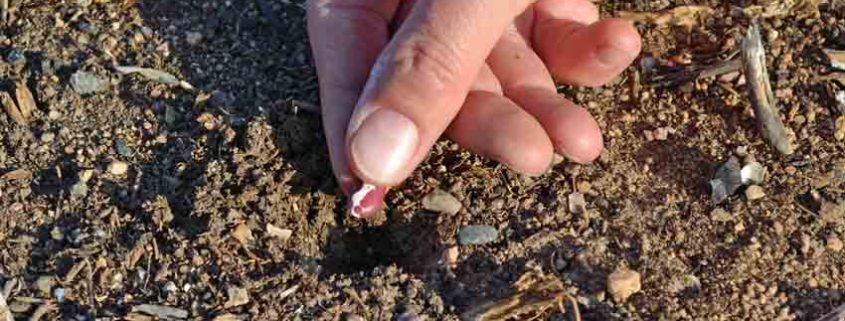
One of the more important things in planting any seeds is to be aware of the proper depth to sow them. An excellent rule of thumb is no more then 2 – 3 times their diameter.

Seed orientation is also an overlooked, but equally important thing to be aware of when sowing. The radicle – or part of the seed that was attached to and fed by the plant or fruit – should be planted pointing down, as this is where the root will emerge from. Corn, pumpkin and squash are easy to see – just plant the pointed end down. Smaller or more rounded seeds don’t matter as much, as there is equal distance all around.

After sowing, gently press the seeds into the soil for small seeds, or press the soil on top for larger seeds. This allows for better moisture transfer to the seeds as they start the germination process.

A person holding a pencil in their hand.

Direct Sowing Okra Seed

Water the seeds

After sowing, give the seeds a good drink. Make sure the soil is well moistened on the first watering, then wait about 24 – 48 hours to water again, depending on your climate. The most common mistake all gardeners of any experience do is to over-water the garden.

It’s simply a human trait to want to make sure the garden is watered!

Seeds need three things to germinate – moisture, temperature and light once they are up.

The soil moisture needs to be very damp initially, then slowly decreased after the seeds sprout until it is slightly moist. You won’t have much control over the temperature unless you can provide some weather protection such as a plastic row cover or black plastic on the soil a week before planting to warm it up. Light is needed once the seedlings are up, but the sun will take care of that!

3. Care after sowing

After sowing care is pretty simple, but needs to be well-attended during the first month after the seeds start sprouting. Care can be split into three areas – weeding, re-sowing and weather protection.

A wooden statue in the middle of some dirt.

Handmade Garden Row Marker

Weeding

Keeping your emerging seedlings free from weeds when they are young will give them a serious boost, as young weeds can effortlessly out-compete your vegetables for needed nutrients and water. This severely limits their future growth, strength and production.

Removing young weeds is very easy, especially if using a sharp, thin hoe to slice them just under the surface of the soil. If you’ve allowed the initial crop to sprout and then removed them, you should have less weed pressure to worry about, but still keep on top of them!

Make sure to distinguish between the weeds and what you planted. If in doubt, wait a few days to see the shape of the leaves and how it matches (or doesn’t) the seedlings where you planted.

Re-sowing

Due to the variabilities of weather outside, some of the seeds may not germinate, or do so very slowly. This may require some re-sowing in the thin spots to make up, but is easy and usually only needs doing once.

Keep a sharp eye on your young seedling crop, as they are absolutely tasty for wild critters – birds, mice and squirrels all love to munch on young, tender seedlings. If you see chewed or “disappeared” seedlings, look very closely to see if you can determine what ate them and take appropriate action – excluding them with netting or row cover or groundcloth, then re-sow.

Weather protection

You don’t have as much control the temperature and humidity of the garden, but you can moderate some of the temperature swings – all season long.

For cooler weather such as spring or later fall, row cover is a lightweight plastic sheeting which is easily spread over the seed bed, capturing some of the warmth from the sun and soil and raising the temperature for the seeds just a bit. As the seedlings grow, a small hoop house can be made from bent wire or 1/2 inch pvc pipe inserted into pvc elbows, creating a square hoop to support the row cover plastic.

Cooling in warmer weather can be done with shade cloth and the frames mentioned just above. Leave the ends open with shade cloth to allow for air circulation and so pollinators can get in.

A group of hot dogs on wax paper.


Why Test Your Seeds

Do you have some old packets of seed around, with doubts about the viability; or have you saved seed for a few years and wonder if they will still sprout?

Do you know if those seeds will grow?

Have you ever wished for a way to make sure?

We will show you how to know for certain whether that older packet of seed is still good, or how long you can keep those tomato seeds around before needing to pitch them.

There is a way, it is easy and simple to do. It’s called a seed germination test and you probably have all of the supplies needed in your kitchen.

Here’s How to Do It

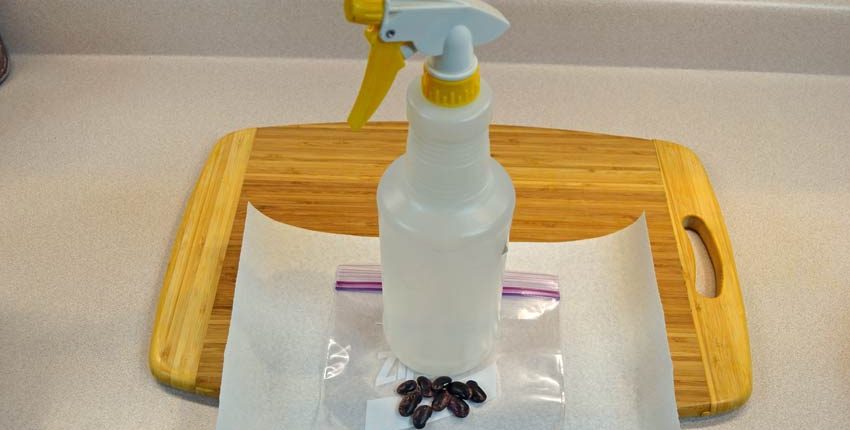
A spray bottle sitting on top of some food.

Germination Testing Supplies

You will need these 3 things, plus the seeds you want to test for germination –

  • Paper towel
  • Spray bottle of water
  • Ziploc type plastic bag
A close up of the wood grain on a table

Wetting the Paper Towel

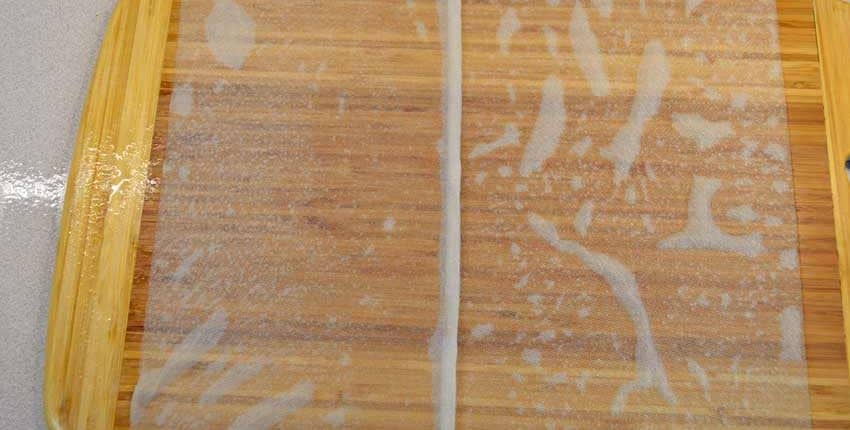
The first – and most important – step is to thoroughly wet the paper towel. This is the first and easiest step, but most mistakes are made right here, leading to poor germination. Smaller seeds don’t need as much water for germination, but larger seeds do. The extra moisture will create a humid environment in the plastic bag, helping the germination process.

The dry towel is on the left, with the properly wetted towel on the right side. You should be able to see through the towel to the surface underneath – then it’s wet enough. If it’s drippy when you pick it up, it’s wet enough. If you wet the towel like on the middle left side – damp but not wet – there’s not enough moisture for the seed to absorb and begin the germination process.

If you want to learn more about what happens during a seed’s germination, read Starting Seeds at Home – a Deeper Look!

A wooden floor with some white paper on it

Folding Paper Towel

Next, after the paper towel is thoroughly wet, fold it in half. You can see just how wet the towel is by the amount of water left on the board after folding it over.

A close up of the wood grain on the wall.

Unfolded Paper Towel

Open the towel back up, leaving a fold to mark the center of the towel.

A wooden floor with many small black ants on it.

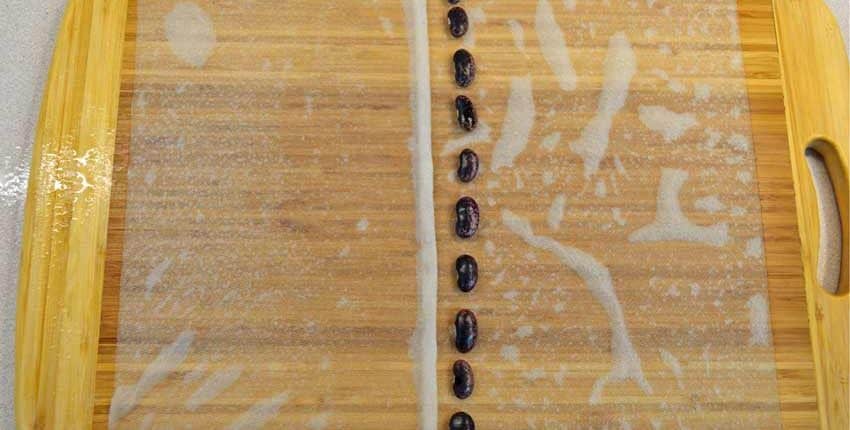
Seeds on Paper Towel

Third, place the seeds along the fold, leaving room for them to sprout so they don’t become tangled up.

If you are doing a germination test use enough seeds to make the math easier, such as 10, 20 or 25 seeds. When we are doing a germination test, we follow established testing guidelines, but  as a home gardener a smaller amount will verify if your seeds are viable and can sprout.

A close up of the wood floor with a blue strip

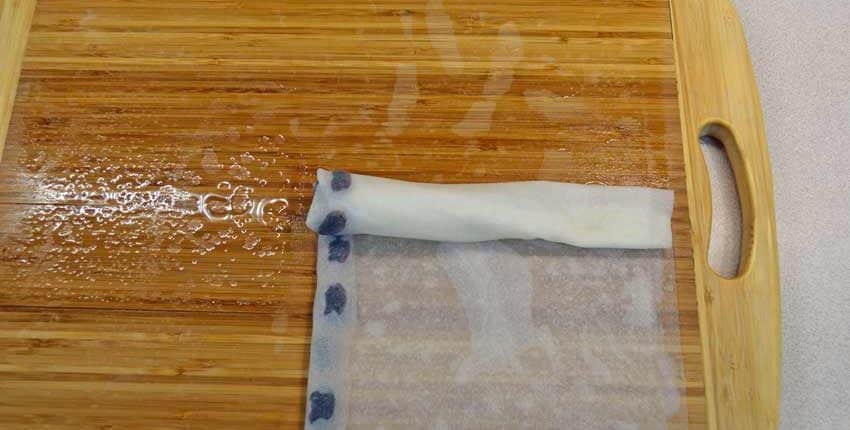
Folded Paper Towel

Re-fold the paper towel, enclosing the seeds.

A wooden floor with a blue cloth on it

Rolling Paper Towel

Roll the paper towel up….

A plastic bag with some kind of object in it

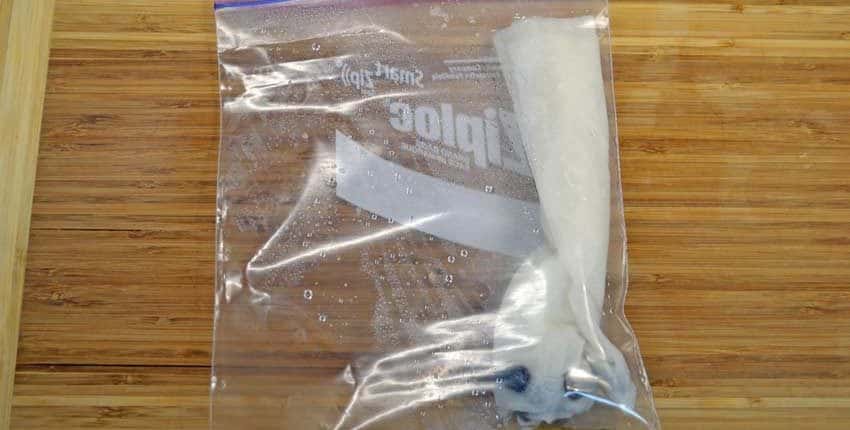
Paper Towel in Ziploc

…and place it inside the Ziploc bag. There should be a good amount of moisture in the bag to start the germination process, so if you don’t see moisture droplets inside after a few minutes, open the bag and give it a squirt of water.

Finally, place the bag in a consistently warm place – like the top of the refrigerator or in a warm window. Most vegetable seeds do not need light to germinate, so a darker place is fine to begin with.

Check every couple of days for moisture levels and the start of germination. If the moisture levels drop significantly – this is a good sign the seeds are absorbing the water and beginning to sprout. Add a spritz or squirt of water as needed, usually only once or twice a week.

Once the majority of seeds have sprouted, open the paper towel up,  count them and do the math to get a percentage. For instance, if you started with 10 seeds and 7 sprouted, you have roughly a 70% germination rate. If 20 out of 25 seeds sprouted, there is about an 80% germination rate.

Other Seed Germination Tests

A close up of some blue towels with gold and white writing

Germination Testing Results

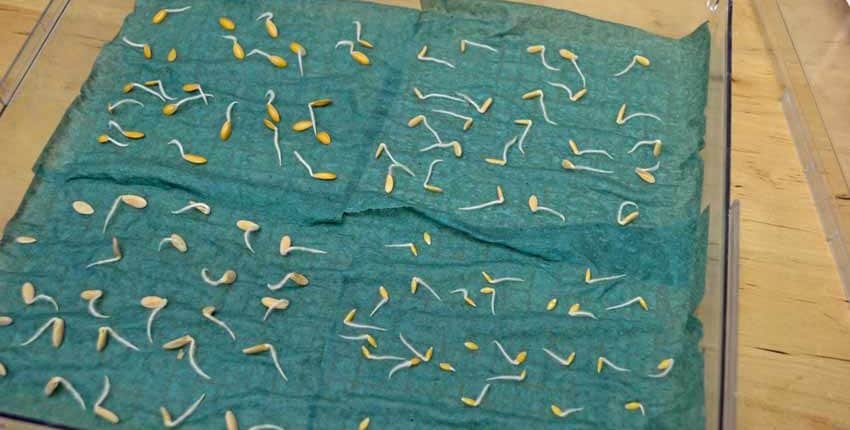
This is what one of the germination tests we do looks like – pretty good! These seeds are viable with a better than 90% germination rate.

A close up of some blue towels with gold and white writing

Multiple Seed Germination Testing Results

For smaller seeds, we will often divide the germination chamber into half or quarters to make the process more efficient. Some seedlings will mold faster than others, this is why you monitor the progress closely if you are pre-sprouting for transplanting.

A table with a white cloth and some black pins

Seed Germination Testing at Seed Savers Exchange

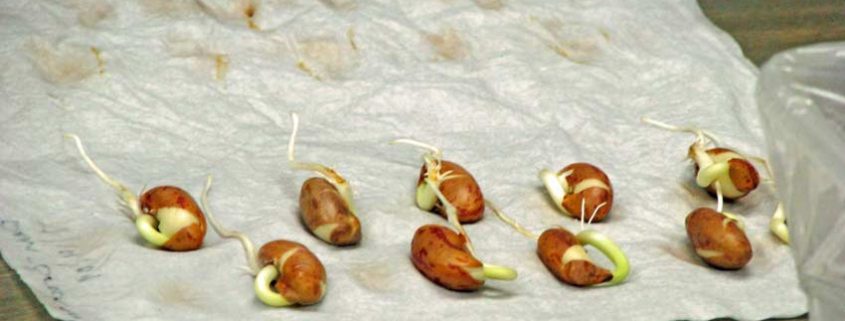
The “Paper Towel Method” is almost universally used. Here are the results from a germination test at Seed Saver’s Exchange. Note the labeling of variety of seed and date the test was started. If you are keeping track of your germination percentages, like we do, it is important to keep clear notes and details!

A person is cutting up some green beans.

Germination Results at Seed Savers Exchange

Please Note:  Depending on the type of seed you are testing, you may see very different results and they may take more time than the average vegetable seed.

For instance, herbs and flowers usually take much longer – sometimes weeks – to germinate, and can have lower germination rates. This is normal and not something to be concerned with.

Next Step:

Learn moreSeed to Seed Book is our go-to reference for all things seed related, including germination times, needs and regional recommendations.


A couple of glasses sitting in the grass.


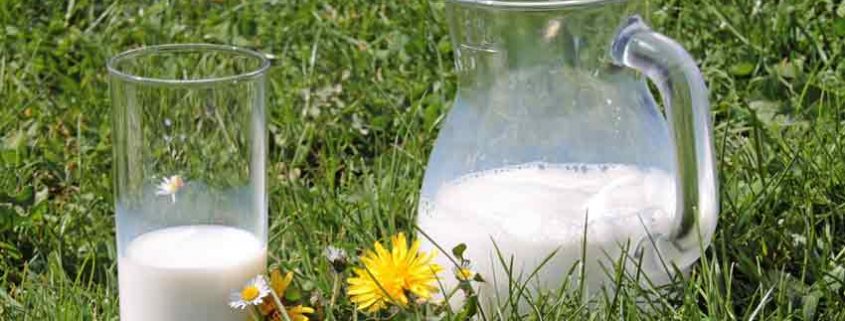
Do you know about the magic of milk and molasses in improving your garden? Yes, plain old milk of any kind – whole, 2%, raw, dried, skim, or nonfat – is a miracle in the garden for plants, soil, and compost. Molasses only boosts the benefits! Let’s see how and why they work.

Milk as Soil Food

Using milk on your compost and in your garden will probably come as a surprise to most.

Upon closer inspection, however, it starts to make sense. The amino acids, proteins, enzymes, and natural sugars that make milk a food for humans and animals are the same ingredients in nurturing healthy communities of microbes, fungi, and beneficial bacteria in your compost and garden soil.

Raw milk is the best, as it hasn’t been exposed to heat that alters the components in milk that provide the perfect food for the soil and plants, but any milk will provide nutrition and benefits. Using milk on crops and soils is another ancient technique that has been lost to large-scale modern industrial agriculture.

Milk is a research-proven fungicide and soft-bodied insecticide – insects have no pancreas to digest the milk sugars. Dr. Wagner Bettiol, a Brazilian research scientist, found that milk was effective in the treatment of powdery mildew on zucchini. His research was subsequently replicated by New Zealand melon growers who tested it against the leading commercially available chemical fungicide and found that milk out-performed everything else. Surprisingly, they also found that the milk worked as a foliar fertilizer, producing larger and tastier melons than the control group.

David Wetzel, a Nebraska farmer, completed a 10 year study on applying milk at different ratios to his pastures, and recorded the results with the help of a team made up of the local Agricultural Extension agent Terry Gompert , a university soil specialist, a weed specialist and an insect researcher.

What they found was amazing- the grass production was drastically increased; the soil porosity or ability to absorb air and water doubled; microbe activity and populations increased; cows were healthier and produced more milk on treated pastures; the brix or sugar level in the pasture tripled, indicating more nutrients were stored in the grass than before. Grasshoppers abandoned the treated pastures- the sugars are poison to destructive soft-bodied insects as they do not have a pancreas to process the sugars.

This also explains why damaging insects leave healthy, high-brix-level plants alone, as they contain more sugars than stressed and sickly ones. Read Milk Works As Fertilizer for the full article.

Home Gardener Recipe

For the home gardener, the ratio can range from 100% milk to a mixture of 20% milk to 80% water, with no loss of benefits.

Use as a spray on the compost and garden soil before planting and as needed when insects appear. Spray directly on the insects and around the areas they inhabit. When combined with molasses, it becomes a highly beneficial soil drench.

A proven solution is 20% milk – 1 cup of milk to 4 cups of water, or 2 cups of milk to 8 cups of water for larger gardens. Whatever amount you need, the 20% ratio has been proven to give the most effective results with the least amount of milk.

David Wetzel’s experiments found that 3 gallons of milk per acre benefits pasture grasses most, so the costs are minuscule compared to the benefits!

Molasses Feeds Micro-Organisms

A jar of coffee and a container on the table.

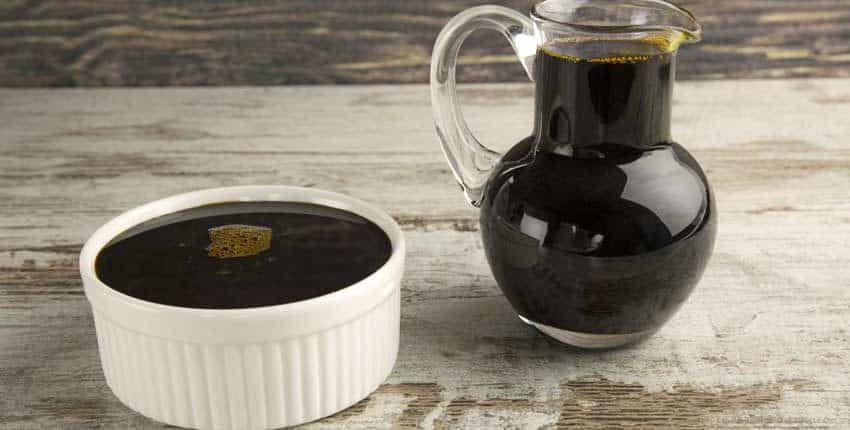
Molasses is a viscous by-product of the processing of sugar cane or sugar beets into sugar.

Sulfured molasses is made from young sugar cane. Sulfur dioxide, which acts as a preservative, is added during the sugar extraction process. Unsulfured molasses is made from mature sugar cane, which does not require such treatment.

There are three grades of molasses: mild or Barbados, also known as first molasses; dark or second molasses; and blackstrap. The third boiling of the sugar syrup makes blackstrap molasses. The majority of sucrose from the original juice has been crystallized and removed. The calorie content of blackstrap molasses is still mostly from the small remaining sugar content. However, unlike refined sugars, they contain trace amounts of vitamins and significant amounts of several minerals.

Blackstrap molasses is a source of calcium, magnesium, potassium, and iron; one tablespoon provides up to 20% of the USDA daily value of each nutrient. Not only do these nutrients do a body good, they are highly valuable in building up the soil!

Molasses is a very valuable addition to the compost pile, as well as to the garden itself. Unsulfured blackstrap is the preferred variety due to the mineral content, but any of the unsulfured ones will do fine. The benefits beyond the minerals are the natural sugar content that will feed the microorganisms in the compost or soil of the garden.

More Gardening Recipes

Use 1/4 to 1/2 cup of molasses to a gallon of water and spray onto the compost pile or garden, or add to the drip system for the garden. For soils that are poor, stressed, or need help, use 1 cup; for those that need a little “snack, “use 1/4 cup. The readily available sugar content will skyrocket the microbial activity.

Apply once or twice a month, but be careful not to overdo it – don’t train the microbes to expect you to feed them, only give them a boost when they need it!

Blackstrap molasses is also commonly used in horticulture as a flower blooming and fruiting enhancer, particularly in organic hydroponics. Use the before mentioned mixture in the drip system, or sprayed alongside the roots of fruiting vegetables as they start to flower to increase their flowering and fruiting.

Add 3 Tablespoons of molasses to the milk spray solution mentioned above and use to feed plants during the height of growing season. Hungry, high production plants such as tomatoes, peppers, eggplant, melons, and such will really benefit from the consistent feedings, giving you more production that is more flavorful.

Sweet Weed Control

A fringe benefit of spraying the milk and molasses mixture on the garden is biologically friendly weed population control. Many broadleaf weeds thrive on diets high in available nitrates and potassium diets, common with commercial fertilizers. Phosphorus is “tied up” or bound with calcium in the soil and needs biological activity to release it. The calcium in milk helps to compensate for what is unavailable in the soil, while the increased biological activity from both the milk and molasses releases unavailable phosphorus and creates soil conditions that are unfavorable to the germination of weed seeds.

Minimal Costs

The costs of applying the milk and molasses mixture are minimal, but when compared to any other fertilizer and insecticide regimen – even those that are organic in nature – milk and molasses have no comparison.

For instance, one acre has 43,560 square feet, and a gallon is 128 oz.

Doing the math, we find that 3 gallons per acre is 0.003 of an ounce per square foot!

Assuming a gallon of organic milk costs $8.00, that works out to 0.00055 dollars per square foot or 0.055 cents per square foot! Yes, that is right – when rounded up, it is six-tenths of a penny per square foot of garden.

So if you had a large garden – say 1,000 square feet – one application of the milk would cost a whopping $0.55 (55 cents), plus the expense of 2 – 3 tablespoons of molasses. What other biologically friendly soil fertility improvements would cost this amount?

Here’s the proof of the math:

1 acre = 43,560 square feet (ft²)

1 gallon = 128 ounces

128 oz/43,560 ft² = 0.002938 oz/ft²

3 gallons x $8 = $24

$24/43,560 ft² = $0.00055/ft² multiply this by 100 for cents = 0.055 cents/ft²

Who knew that something as simple as milk and molasses had such powerfully positive, far-reaching effects? Especially without any of the negative effects of petrochemical fertilizers?