Discover the incredible resilience and adaptability of the Wild Galapagos Tomato. Learn about its history and how it’s being used in innovative research.
Tag Archive for: Tomato Tips
Growing tomatoes is an enjoyable and rewarding experience that anyone can master. Whether you’re a seasoned gardener or just starting out, with the right knowledge and techniques, you can easily grow healthy and delicious tomatoes.
Heirloom tomatoes are available in a dizzying array of choices – colors, sizes, shapes, flavors and how they produce. Is a determinate variety best for your garden, or would an indeterminate be better for you? How to tell, and what do the terms mean, exactly?
While it may seem confusing, the terms are easy to remember and are pretty explanatory once you understand what they mean.
In a nutshell, the terms describe the growth and production habit of the plants. Determinate tend to be shorter and bushier, while indeterminate are taller and lankier. They also set or produce tomatoes completely differently!
What to choose and which type is best suited for your particular garden depends on a few things – how much space you have to devote to tomatoes, if you need or want to grow in pots or planters, how many tomatoes you can or want to handle at once and if you want most of your tomatoes in one harvest or prefer to get a few at a time.
Let’s look at the details.
 Determinate tomatoes are often called “bush” tomatoes, usually growing only about 3 to 4 feet high. These will grow to their full height, then start putting on tons of flowers – often covering the foliage with tiny bright yellow blossoms.
When they start setting blossoms at the very top of the plant, growth stops and all of the energy is put into producing lots of tomatoes at once. Usually the entire crop will ripen within one to two weeks, with the plant either dying or sometimes going dormant for a period before producing a second, smaller flush of flowers for a smaller follow-up crop. The second crop only happens in areas with a long growing season.
Because they are smaller and bushier plants, determinate tomatoes can be grown in containers, pots or buckets in small spaces where a taller tomato which needs staking won’t work. They don’t need pruning, as that only removes flowers and reduces production. Determinate tomatoes are great for gardeners who want or need a large harvest all at once or over a short time frame, such as for canning or making large batches of sauce or salsa. An added benefit is most determinate varieties are early producers. Some gardeners like determinate varieties as the early harvest allows them to get a good crop of tasty tomatoes and still enjoy a long summer vacation!
Some determinate tomatoes will benefit from staking or caging, but it isn’t as necessary as with indeterminate varieties. Those that need support don’t need much, just enough to keep them from toppling over if grown in a pot or container or from wind or rain.
Some of the determinate heirloom tomatoes we offer:
- Burbank Red Slicing
- Principe Borghese
- Oregon Spring
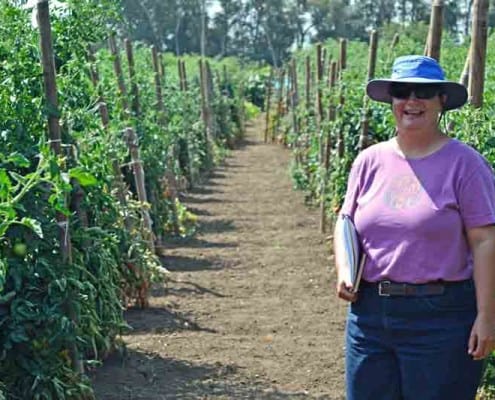 Indeterminate tomatoes are sometimes called “vining tomatoes”, as they will continue to grow throughout the season until frost kills them. These are what you’ve seen photos of showing tomato plants 10 or even 15 feet tall in a home garden. The greenhouse industry uses indeterminate tomatoes and will sometimes have tomato plants of 40 feet or more! The average height is about 6 to 8 feet for a home garden.
This type of tomato plant will grow some, set some flowers, produce fruit and continue to grow and repeat the process all season long. The amount of flowers and fruit set each time depends on the variety of tomato; some will only set a few flowers each time while others will easily put on 20 to 50 flowers for the smaller, cherry or currant size tomatoes. Indeterminate tomatoes really remind us these are tropical plants which are perennial in their native habitat. It isn’t unusual to find three year old tomato “trees” in Central America!
Indeterminate tomatoes are perfect for the home gardener who wants a smaller harvest several times during the season instead of one large batch at once. The amount of fresh tomatoes on your kitchen counter is easily controlled by how many plants are in the garden. Be warned, however, even indeterminate tomatoes can easily overwhelm the average home gardener’s kitchen with just a few too many plants in production!
Support for these tomatoes is essential for good harvests and to keep the plants healthy. Indeterminates can be allowed to sprawl – we have done it many times – but it becomes a lot of work to lift and move hundreds of pounds of vines to pick the tomatoes, and lots are lost to not being able to see them and they rot on the ground. Support systems like cages, staking, trellising and such will go a long way to keeping these monsters manageable. Heirloom tomatoes can easily have stems 1 ½ inches in diameter at ground level, so make sure the support structure is solid and able to hold a hundred pounds or more of tomato plant weight.
Pruning is optional, with some swearing by it while others don’t find it helps tomato output very much. Your climate has a lot to do with it, as those in humid climates will see benefits from pruning the bottom 10 – 12 inches to improve airflow and prevent the lowest fruit and leaves from touching the ground, inviting pests and disease into the fruit and plant. We have experimented with pruning and found for us in our climate early pruning prior to transplanting is beneficial, but we don’t see any improvement in production in pruning after transplanting and have actually seen a decrease in the size and amount of tomatoes on pruned plants.
One technique that helps end of season fruit ripen better is to prune late flowers that don’t have a chance of producing fruit before frost. This re-directs the plant’s energy into the ripening fruit and not into flowers that won’t bear anything.
Some of the indeterminate heirloom tomatoes we offer:
Many gardeners will grow both types, with an emphasis on one or the other depending on their needs. Some will do a few indeterminates for fresh slicing and salad tomatoes all season, with the majority of the plant being determinate for their well-known spaghetti sauce or signature salsa that is canned or frozen for the upcoming year. Others want to do smaller batches of different sauces or salsas or have a smaller kitchen and just can’t can a couple of hundred pounds of tomatoes at once.
Now you’ve seen how both types can be beneficial, you can choose what works best for your garden!
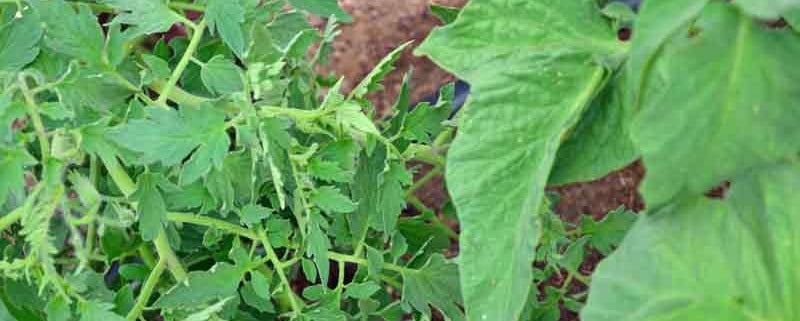
Heirloom tomato leaves have two main different and distinct types of leaves – potato leaf and regular leaf. Plants with regular tomato leaves are what we are all familiar with; multi-lobed, serrated and sometimes almost toothed branching off of the stem. Potato leaved plants have broader, smoother single leaves branching off of the stem, missing the multiple lobes and serrations.
Regular Leaf Tomatoes
These are by far the most common and well-known type of tomato leaves – they are what we think of when we think of “tomato plants”. The shape and color of the leaves can vary – from slightly serrated to extremely and from a light pale green to a deep dark green and almost a bluish leaf. The width and length of the leaf can vary a lot as well from small narrow leaves which almost always curl to long and wide leaves that droop.
Potato Leaf Tomatoes
As mentioned above, these leaves are almost always much bigger and smoother on the edges than regular leaves, with more heft. They look much more like potato leaves than tomato leaves, thus the name. Potato leaves tend to give more shade to a plant than regular leaves, due to the larger area that the leaves have and more shade from each leaf.
Examples of potato leaf tomatoes are:
- Stupice Tomato
- Japanese Black Trifele Tomato
There doesn’t seem to be much difference in growing the two different types of tomato leaves; one is not more productive, flavorful or pest and disease resistant than the other, or tolerant of heat or cold. They just have different leaves.
One thing of note is that as far as we can tell, all potato-leaved varieties are heirloom or older varieties. We haven’t been able to find a hybrid that is potato-leaved.
Have some fun in your garden this season and try one (or more) of these unusual but delicious heirloom tomatoes!
September in northern Arizona means a few things – the weather starts to cool off and the nights become very enjoyable, the garden seems to find another gear as the energy-sapping heat begins dropping off and we harvest some of the most amazing colors and flavors of vegetables.
We’ve taken some glamour shots of the garden’s bounty and wanted to share them with you, along with tips on how we’ve enjoyed preparing them in different dishes.
Remember as you look at these vegetables to not worry if you can’t plant and taste these this year or season; see what appeals to you and either buy them now or add them to your Wishlist. Seeds are good for more than one year, so buying them a few months before planting will not have any impact on their germination next season. Just store them in a cool and dry place, then you can plant and experience all of these colors and flavors for yourself, straight from your garden!
Click on the links in the descriptions to visit them in our online seed store!
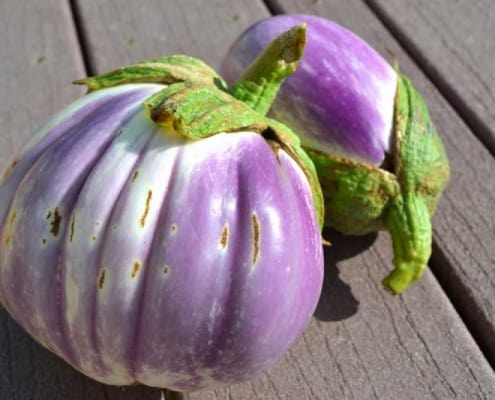
Fresh Rosa Bianca eggplant Рbeautiful, firm and tasty without any trace of bitterness. Eggplant can be quite delicious when grown in your own garden, harvested fresh and cooked soon after. We peeled and sliced this, slowly saut̩ed it in olive oil and added it into a fresh roasted tomato sauce. It easily stood with the intense roasted tomato flavors without getting lost or overwhelmed.
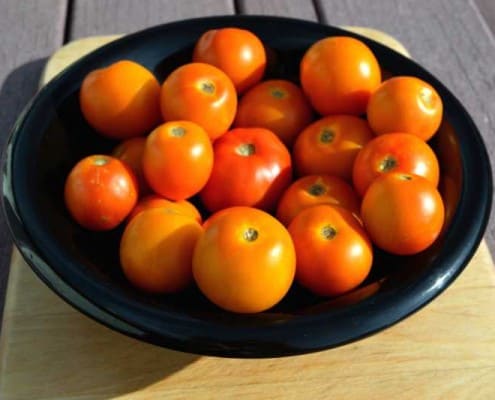
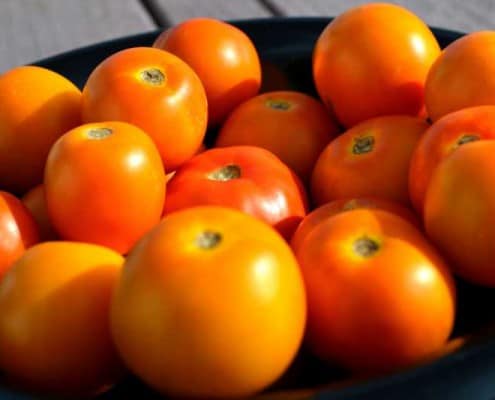
Flamme or Jaune Flamme Tomato – apricot size and color, French heirloom tomato that came on early and is still producing strong late into the season. Really a wonderfully delicious tomato with an immediate, intensely sweet flavor that is soon balanced by a smooth tartness and fruit overtones. The complex flavors last on the tongue, making a second and third bite inevitable.

Jubilee tomato – Absolutely delicious golden tomato with very little gel, lots of meat and long lasting flavor. Flavor is immediate with a balanced tart and sweet profile and very full. Many yellow tomatoes have a milder or blander taste, as if the flavors were diluted – not the Jubilee! Excellent fresh as a slicer and as a unique flavor in a fresh roasted pasta sauce – doesn’t get lost in rich red paste tomatoes and adds a brightness to the sauce.

Box Car Willie tomato – Most “old-fashioned” heirloom tomatoes have a strong to very strong acid content that contributes a tartness that sometimes becomes quite a bite. Not Box Car Willie – it has an immediate, forward flavor that starts off with a moderate tartness quickly followed by a mild sweetness, balancing the flavors out. Overall the impression is a slightly tart, yet mildly sweet smaller beefsteak tomato that is really enjoyable sliced fresh or juiced. When sliced it retained most of the juiciness inside the fruit and didn’t leak all over the cutting board.

Speckled Roman tomato – Meaty and moderately sweet with little juice or seed cavity, these are great on salads or as an appetizer dish where their unique and eye-catching colors can be shown off. Their flavors back up the show, making this all the more valuable in the garden. One of the all-purpose tomatoes that we turn to – it is excellent freshly sliced, in salsas and adds a fruit note to sauces or soups as well.
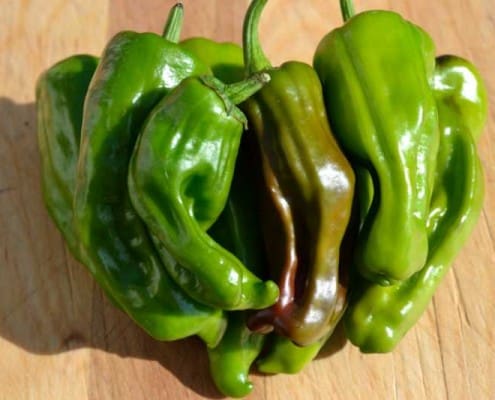
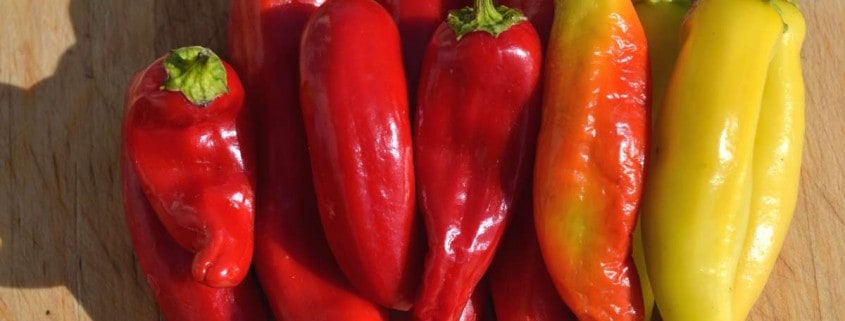
Pepperoncini Pepper – These are pretty common peppers, but the taste and flavors when grown at home are unlike anything you’ll find in the store. This probably explains why these continue to be a popular variety that continues to find new fans each year. Mild yet flavorful, these work well in many dishes that need a bit of pepper flavor without overbearing heat.
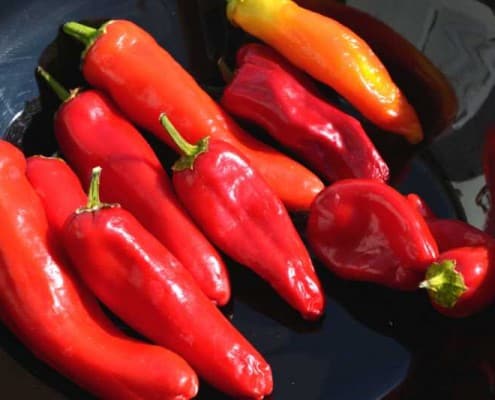
Hungarian Hot Wax Pepper – The wilder, spicier relative of the Sweet Wax pepper! Moderately warm without being overly hot with a tangy but slightly sweet flavor. Watered well, the heat is moderate but can be cranked up by restricting water. Excellent when de-seeded and dry-fried with garlic and onions on a hot cast iron pan, then added as a topping to a pizza.

Long revered in Oriental cultures as a symbol of mindfulness, calm and patience, the preying mantis is also a good sign in the garden as a pest patrol.
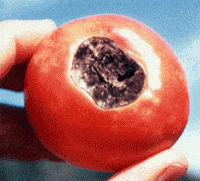
Blossom end rot affects mainly tomatoes and peppers, but can affect other fruiting crops such as eggplant, watermelon and summer squash. This is a perennial problem, meaning that as a gardener, you will deal with this yearly in your garden. There are two approaches to working with blossom end rot – prevention and reaction, or a primary and secondary solution. Unfortunately, most gardeners only realize they have a problem when the fruit are showing black spots on the end. This is the acute phase – once there are problems – and immediate action is needed to prevent further damage to fruit that is just beginning to set.
We will look at the underlying causes of blossom end rot, along with what happens and what can be done about it in the prevention as well as the acute phase.
As mentioned, blossom end rot will affect more than just tomatoes and peppers, but we will focus mainly on those as this is what most gardeners’ experience. Just tuck the other varieties into the back of your mind, and you’ll have a jump start if you see it strike them. In reality, the prevention will most likely have a beneficial effect for everything as you will be creating an environment that won’t support the cause of the problem!
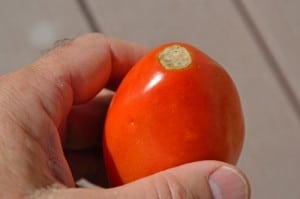
Blossom end rot is caused by a lack of enough available calcium in the fruit at the blossom end. What most often alerts us is a black spot or patch at the blossom end of the tomato or chile, opposite of the stem. This black spot is a secondary issue caused by a fungus attacking the weakened fruit. Contrary to what many think, we aren’t aiming for the eradication of the fungus and resulting black patch, but fixing and preventing the cause of the problem. Correcting the underlying issues that lead to the weakened fruit will automatically prevent the fungus from being able to attack.
Let’s start with the problem and work backwards, to better understand what is needed for both an acute fix and a preventative approach for blossom end rot. Calcium is a very important part of the growth process for plants and the proper development of high quality, tasty fruit as it contributes to healthy cell wall growth, insect resistance and helps to regulate many cell processes. Calcium is non-mobile in the plant once it is imported, meaning the plant can’t move it from one part of itself into the fruit, or from one part of the fruit to another. Thus, the tomato or chile plant needs a continuous supply of calcium as it grows, flowers and produce fruit all through the season.
Blossom end rot usually occurs early in the season with the first or second flush of fruit. It happens just when the plant is at maximum growth and is putting on the first fruit, with a second set of flowers on the way. It is in high gear and needs all of its nutrients available to be healthy, resist pests and disease, as well as grow lots of delicious tomatoes and peppers. The key to preventing blossom end rot is to supply a sufficient, steady amount of calcium to the plant so it can be transported into the fruit continuously. Problem solved!
Not so fast, just how can we make sure that the plant has a steady supply of calcium?
Here is where we branch off into the two approaches – the primary and the secondary. The primary, preventative approach is to have enough calcium in the soil that feeds the roots and is transported to the fruit throughout the growing season. That calcium in the soil must be ‘available’ meaning that the roots can actually absorb it and transport it where it is needed. Available means that it isn’t tied up by another mineral or a pH level that won’t ‘let go’ of it. There is more to the story than just adding a calcium amendment to the garden bed!
A very good example of this is where we live in central AZ, there is a decent amount of calcium in the soil that plates out on faucets and glassware as a calcium deposit. Conventional wisdom says not to worry about calcium because it is everywhere. That’s true, but the challenge we have is the pH of the soil is fairly alkaline at 8+ on the pH scale, so the calcium is ‘tied up’, or not available to the plants. This is proven by the weed populations we typically see that only grow in calcium deficient soils.
So what can be done? A comprehensive soil test is one of the best, first steps to take. This is much more than the simple NPK type of test done by university extension offices or the do-it-yourself test kits bought at the local garden center. A complete soil analysis is one that is collected and sent off to a recognized, professional lab that sends back a report on every mineral found along with recommendations on what direction to go and what nutrients to add in what form. They will usually cost from $25 to $75 range, depending on what analysis and information you need. There are several of these labs in the US; the two that we’ve worked with and are familiar with are Crop Services International and Texas Plant and Soil Lab. From this, you will have a very good indication of where to go next.
Fall is a great time to get your soil tested and amended in preparation for next spring’s season for a few reasons – the soil testing labs are generally not as busy, so results are quicker; and soil amendments will need some time to become integrated and available into the soil nutrients, so fall gives you the needed time, and it is easily incorporated into the traditional fall garden cleanup and prep.
Calcium is closely tied with magnesium, and this will be indicated on the soil analysis. More acidic soils, such as those generally found in the eastern states, will benefit from lime or calcium carbonate, while the more alkaline soils in the western states will need gypsum or calcium sulfate. Lime tends to raise the pH, while gypsum tends to lower it.
Water plays an often overlooked, but equally important, role in the blossom end rot saga. Inconsistent levels and rates of water will greatly vary the amount of calcium and other nutrients available to the plant, increasing the chance of diseases attacking the fruit like blossom end rot. This is one of the reasons we talk a lot about a drip system on a timer – it really helps even out the moisture levels in the soil and greatly reduces the stress on the entire garden, with the happy result of lowered amounts of nutrient and stress related problems. Of course, the weather can also play havoc with all of our carefully laid plans, as heavy and sudden rainfall can cause blossom end rot and splitting of tomatoes, along with a noticeable ‘wash-out’ of flavor and taste.
This is where the acute or secondary approach is needed. Calcium carbonate tablets, or anti-acid tablets (Tums or the equivalent) work great when a couple of them are inserted at the base of a tomato or chile plant, where they will dissolve and make the calcium available to the plant in just a few hours, saving this flush of fruit if done right after the rains, or the next set if done when blossom end rot is first noticed.
Another approach is to feed calcium directly to the roots through the drip system as a liquid fertilizer, usually with calcium chloride or calcium nitrate. This approach works very well in offsetting one of the most overlooked causes of blossom end rot – great weather. That’s right – excellent weather with moderate temperatures and lots of sunshine put the plants into overdrive, and their rapid growth can often simply outstrip the amount of available calcium in the soil, even if you have been proactive last fall. The calcium just cannot be taken up out of the soil fast enough, so feeding through the drip system can be a big bonus during these times. The secondary approach will always be needed, even if you’ve done your homework and amended the soil the previous fall.
Calcium isn’t absorbed very well by the leaves of a plant, especially older leaves. The roots are much better at absorption, plus they can transport the calcium faster than through a foliar approach. For these reasons, stay away from trying a foliar spray to supply calcium to your tomatoes.
Blossom end rot won’t ever quite go away, because of the reasons you’ve seen here. With some knowledge and practice, you can easily create a much better environment in the soil that supports the plants much more fully and then use the supplemental approach to keeping the calcium levels high enough to minimize blossom end rot and keep more of your hard work for your dining table instead of as scraps for the chickens or compost pile!
San Marzano tomatoes are world-famous with a long and storied history as the absolute best plum tomato for sauce and pizza. They are also excellent for canning, peeling and drying. Chefs worldwide prefer this variety to all others for making their signature sauces, and it is the only tomato that is acceptable for making true Neapolitan pizza. Many Americans are becoming fans and learning why this tomato created the peeled and sauce industry in Italy and across Europe.
San Marzano tomatoes are named for where they originate, the Campania region of southern Italy above the “toe” of the “boot”. Valle del Sarno is the valley where the recognized and protected variety is grown. The reason for this strict preference is the soil – a rich volcanic soil from Mount Vesuvius – that gives the tomato its distinct richness and depth of flavor. In fact, they are the only tomato that can be used for a true, recognized Neapolitan pizza! People who have tasted the native tomatoes grown in the volcanic soils claim that they can tell the difference between tomatoes grown there and those grown elsewhere, even if it is similar soils.
San Marzano tomatoes are thinner with a pointier end than Roma tomatoes, with a noticeably richer and mildly sweeter flavor. It has a thinner skin with fewer seeds and a meatier flesh than the Roma, with a higher pectin content that produces the thicker sauces it is famous for. This famous variety was developed from traditional breeding of three Italian tomatoes in the late 1800s; the King Umberto, Fiaschella and the Fiascona. Only the King Umberto tomato is still grown!
San Marzano tomatoes have been commercially popular since around 1875 when the first cannery was built to pack and ship these jewels across Italy and Europe. The popularity of the San Marzano declined during the 1970s as hybrids gained popularity for their thicker skins and tolerance of machine harvesting and marketability, but saw a resurgence in the late 1990s as people realized the flavor that had been lost with the original. Of 27 cultivars being grown in the Valle del Sarno area in the early 1990s, only 2 were selected as being the most representative of the traditional San Marzano. In 1996 the European Union granted Protected Designation of Origin status to the San Marzano tomato.
The San Marzano Redorta is one of the more popular cultivars of San Marzano due to its larger size and prolific production. The name creates some confusion, as this tomato comes from the Tuscany region, which is north of Campania where the tomato originated. It is supposedly named for a mountain – Pizzo Redorta – in the Lombardy region near the Italian Alps, which is much further north still. So, a larger version of the treasured San Marzano that is from Tuscany and not Campania, yet named for a mountain that is almost the length of Italy away? Stranger things have happened!
We do know that it is a great tasting and producing tomato with all of the traditional characteristics that have made the San Marzano tomatoes famous and have brought it back to being a heavyweight in the sauce tomato world. Whether you grow the traditional San Marzano or the Redorta, the flavors and production are sure to win you over.
Heirloom tomatoes vs standard supermarket “red slicing” tomatoes
One has created a following based solely on its incredible flavor, the other has long been the benchmark of mediocre, tasteless, pithy but brightly colored tomatoes. Available 365 days a year, it’s only offering to the salad or sandwich is a bit of bright red. Why do these universally yucky tomatoes exist, and why do the supermarkets continue to sell such an obviously inferior product?
Consumer demand is the main reason, as most commercial growers state that they are only paid on the weight, not the flavor, of their tomatoes. This traces back to the tomato breeders, as they are responding to the grower’s inputs of what they need – a plant that will yield as much as possible over as long of a time as possible. The fruits must withstand being harvested, packed, and stored in a warehouse where they are turned orange with ethylene gas, then shipped by truck several states away and continue to look good a minimum of 7 – 10 days later when displayed on the grocery store shelves. If the grower has no financial incentive to produce flavor, they won’t.
Here’s a new wrinkle to the story. The growers are not completely at fault, it turns out. Recent research published in the journal Science isolates a gene mutation that is responsible for the almost artificially bright red, at the cost of flavor. This gene mutation was accidentally discovered by commercial tomato breeders and then bred into the majority of tomatoes used in supplying the food chain, especially in the off-season. This is not a genetically modified organism (or GMO) as the gene mutation happened spontaneously, and not through mechanical gene manipulation.
This is truly a story of unintended consequences, as it clearly shows the unwanted results of focusing and breeding too closely on one desired characteristic while ignoring others. The color mutation also turns off the ripening sequence gene, which disables the tomatoes’ ability to manufacture sugar in the body of the fruit, explaining why the lack of flavor. Dr. Ann Powell, a lead author in the Science paper offered this solution to the flavor issue – heirloom tomatoes, as they do not have the genetic mutation!
Flavor Is the Price of Tomatoes’ Scarlet Hue, Geneticists Say
The yearly gardening season is just about on us and for many gardeners that means a heavy focus on tomatoes. Specifically, heirloom tomatoes, as their meteoric rise in popularity over the past few years would have many a pop and rock star green with jealous envy. The heirloom tomato seems to be almost everywhere these days, from high end cooking shows with their ultra-close-ups and glamor shots to many new cookbooks focusing on home-grown and locally sourced produce to Farmer’s markets, CSA’s and almost everyone’s home garden. Even die hard hybrid “Better Boy” and “Early Girl” gardeners that have planted nothing else for years are giving these wondrous beauties a shot.
With all of this attention being paid to the “Love Apple” as it was known in Colonial times, we wanted to give you a better chance of harvesting all of that potentially rich, complex, juicy tomatoey goodness that are only seedlings at this point.
Tomatoes are complex creatures, needing rich and well mineralized soil that is well drained and not over-watered. The simple, ruinous yet well intentioned act of giving tomatoes too much water most likely accounts for fully 75% of all of the problems with them; from soil borne fungi and other micro-organisms attacking the roots to fruit splitting, cracking and blossom end rot and ultimately the worst- flavor wash-out. Ideally, tomatoes like a lightly moist soil. The best way to judge when to water is by getting to know your plants and paying attention to the leaves. When the leaves just start to curl at the very edges or tips is when the plant is telling you it’s thirsty. Different varieties of tomatoes will have naturally curling leaves, thus the need to get to know your specific plants. Give them a drink, but don’t drown them. There has been multiple studies done that have clearly shown that tomatoes do much better with a little less water than a little more. Production, taste and disease resistance all increase when the plant is watered a full 25% less than what is commonly believed to be the “right” amount.
Now that we have the biggest issue out of the way, let’s look at some other techniques to get the best out of this year’s tomatoes! This is not an exhaustive, encyclopedic resource. There are many, many books available that are devoted entirely to the subject of fixing your tomatoes. What we want to do is give you some good, proven and easily used tools to help you get the best out of your tomatoes this year. Some of the most effective remedies are the simple and easily applied ones, as they are the ones that get used more often. So here we go!
-If you see brown or black soft spots appearing at the blossom end (opposite the stem) of the tomatoes, you have blossom end rot. This is caused by a lack of available calcium and can be easily corrected. Tuck a Tums or other antacid tablet or two into the base of the roots and give them a little water to soften. The antacids are calcium carbonate and will quickly provide needed calcium to the plant. It won’t cure the existing blossom end rot- nothing can- but will prevent the next set of blossoms from having then same problems.
-A 10 – 20% milk solution used as a foliar spray is highly effective against mildews and tomato mosaic virus. This remedy was discovered by Wagner Bettiol, an agronomist from Brazil found that weekly sprays of a milk solution was faster and more effective than synthetic chemical fungicides. The milk solution controlled the fungi just as well, with the added benefit that it acted as a foliar fertilizer and boosted the plant’s immune system and production. This spray also works for zucchini, cucumbers and other cucurbits including melons. It seems to work on roses also!
1 Cup milk
9 Cups water
Mix well and spray on offending mildews, blights and assorted unwanted fungi.
-The baking soda/mineral oil approach has been around a long time and is familiar to long-time gardeners, but it bears sharing. Cornell University has research showing the effectiveness of this approach. The baking soda deters fungus spores, and the oil coats the leaves, holding the baking soda in place longer.
1 Tbs Canola or mineral oil
1 Tsp baking soda
1 Gal water
Mix well and spray directly on the fungal blights.
– To stop nematodes from attacking the roots of your tomato, insert old 1 to 5 gallon nursery pots that have been cleaned, disinfected and had the bottoms cut out into the soil leaving 2-3 inches showing. Transplant your tomatoes into these guards. For heirloom tomatoes, the larger the pots the better, as the root system can be extensive.
-Another preventative measure for blight and other diseases, sprinkle a handful of this mix into the planting hole before you insert the transplant.
3 Cups well aged compost or potting soil
1/2 Cup powdered milk
1/2 Cup Epsom salts
1 Tbs baking soda
Mix well and sprinkle a handful into each planting hole.
-For soft-bodied insects, the milk spray described above is very effective, as well as a simple home-made insecticidal soap spray. You must use soap and not a detergent. They are different in how they work. Soap will kill the bugs, detergent will often kill the bugs and your plants! You’ve been warned. One of the absolute best soaps out there is Dr. Bronner’s. You can get it in a liquid form, it is certified organic and won’t harm your plants.
1 Tsp liquid soap
1 Qt water
Mix well and spray on the unwanted critters.
-When the plants are really working setting flowers and fruit, use the Spring Garden Soil Elixir recipe and omit the Borax and cranberry juice. Mix as usual and give a light spray to the roots as a side dressing to give the tomatoes a boost in nutrients to keep the health and flavor up.
These techniques and tips will set you on the path of better, tastier and longer producing tomatoes this season. If you have an especially effective remedy or recipe that you’ve used to help your tomatoes do well, please share it with us!

 © 2024 Terroir Seeds | Underwood Gardens.