Tag Archive for: Rosemary

We did a video in partnership with our local hospital about growing and cooking with herbs. Yavapai Regional Medical Center has created “Your Healthy Kitchen” recognizing and promoting the idea of eating and staying healthy makes a lot of sense.

We talk about some of the easier to grow fresh herbs that do well almost anywhere and in any size container, then use some of those same herbs in making a delicious tapenade or appetizer of olives, capers and herbs to finish the show.

Here’s what herbs and vegetables you could grow in your garden for this recipe – Dill, Parsley, Rosemary, Thyme & Onions

Argentine Beef Roast

Peceto Asado con Tallerines (Argentine Beef Roast with Fettuccine)

 Argentina is world-famous for the beef they raise on the open grassland plains of the Pampas. It isn’t surprising to see how creative they are with using beef in so many different ways, much like the Italians have finely crafted the myriad uses of pork in their cuisine.

To expand my cuisine beyond the beloved Mexican and Central American dishes that I’ve grown up with, I wanted to try something a little different but delicious. This beef roast is the first result of our experimentation, and it turned out as succulent and mouthwatering as the photos show. There was a breadth and depth to the flavors that was hard to describe – the roast was tender, juicy and had a number of flavor combinations that kept hitting the tongue, then the tomato sauce balanced the roast out beautifully.

We used a large roast to give us some for an easy, creative dinner or two during the week. Scroll past the recipe for more photos and commentary!

Here’s what could come out of your garden for this recipe – Tomato, Onion, Bell Pepper and Rosemary!
 

Peceto Asado con Tallarines (Argentine Beef Roast with Fettuccine)
Prep Time
30 mins
Cook Time
1 hr 15 mins
Total Time
1 hr 45 mins
 
This unusual but delicious Argentine roasted beef dish is served with "tuco" - a traditional tomato sauce over tallarines, similar to handmade fettuccine. The marinade and mesquite charcoal roasting gives it an unbelievable depth of flavor.
Servings: 8
Author: Maria Teresa Endara Aliaga Vierci
Ingredients
Roast
  • 1 Beef roast about 4 lbs
  • 1 Head of garlic peeled and crushed or diced
  • 1/3 Cup olive oil
  • 1 Tsp salt
  • 1 Tsp fresh ground black pepper
  • 2 Tbs fresh rosemary finely diced
  • 1/2 Cup red wine or water
  • 8 Cups cooked fettuccine linguine or spaghetti
  • Juice of 1 freshly squeezed lemon and orange
For the Tuco (Tomato sauce)
  • 1/3 Cup olive oil
  • 1 Medium onion chopped
  • 1 Bell pepper - yellow or red preferred chopped
  • 2 Large tomatoes chopped or 1 can of chopped tomato puree
  • 1 Cup well-seasoned beef broth
  • 2 Dried bay leaves
  • 2 Tsp Mexican oregano
  • Sea salt to taste
Instructions
Marinating the beef
  1. Trim any excess fat from the roast.
  2. In a mortar, mash the garlic into a paste, then lightly crush the rosemary leaves. Mix with the oil, salt and pepper forming a paste. Rub into the roast; cover with plastic wrap and refrigerate overnight.
  3. 2 - 3 hours before roasting, remove plastic wrap, place in bowl and pour lemon and orange juice over roast.
Roasting
  1. It is best to roast over mesquite charcoal for the absolute best flavor, but oven roasting will still be very tasty.
  2. Heat covered charcoal grill to around 325°F and roast over the coals for 10 - 15 minutes each side to sear and seal the juices in. After 30 minutes, place roast in a shallow roasting pan on a pizza stone to finish roasting over an indirect heat. Turn every 20 minutes until tender.
  3. If roasting in oven, start with roast in shallow pan and turn and bast every 20 minutes.
  4. Once roast is tender, remove from heat and let sit for 10 minutes then slice thinly across the grain.
Prepare the Tuco
  1. Heat the oil in a heavy bottomed skillet over medium heat.
  2. Saute the onions until soft, add the bell pepper and saute until just beginning to soften.
  3. Add the tomatoes and cook uncovered until they release their juices, stirring consistently as the juices evaporate a bit.
  4. Add the beef broth, bay leaves, Mexican oregano. Bring to a boil, then reduce heat to a simmer.
  5. Simmer for 10 - 15 minutes until slightly thickened and season to taste with salt.
  6. Set aside to serve with noodles.
Serving
  1. Arrange warm noodles on the plate, ladle a generous helping of tuco on the noodles and layer with 3 or more slices of roast on top.
  2. Garnish with a sprig of rosemary if desired.
Recipe Notes

This is a great way to cook a large portion of roast for a scrumptious Sunday dinner to have the basis of several outstanding meals during the week.

Argentine Beef Roast

Here is what dinner started with. The beef is locally grown, semi-grassfed from a neighbor. I call it semi-grassfed as we simply don’t have enough grass in central Arizona on smaller acreage to completely feed a large animal like a beef cow. We do know exactly how this beef was raised and the processor is local as well. This beef traveled less than 20 miles from hoof to plate!


Argentine Beef Roast

After just over an hour, this is the beauty that emerged from our Kamado, a Japanese charcoal smoker/cooker. The deep red is from the mesquite smoke, and the taste test that I cut off is apparent. Delicious!


Argentine Tuco Sauce

The tuco sauce close-up. It was a different experience making a non-Italian tomato sauce! It was rich, flavorful and a perfect counter to the intense flavors of the roasted beef.


Argentine Beef Roast

Just after plating, the first glamor shot!


Risotto alla Veronese

Risotto is a wonderful Italian dish made from rice. Some of the best Italian rice is harvested at the beginning of October around Verona, in the north-east of Italy. One of the most famous areas is Isola della Scala, just south of Verona. Isola della Scala is often called “Città del Riso” (city of rice) because it is surrounded by large rice fields.

It has been a center of rice production in the Veneto region since the 17th century. You can imagine the wealth and history of risotto dishes from this area! Once a year immediately after the rice harvest the Fiera del Riso (Festival of Rice) takes place during the months of September into October. This event features many culinary contests and historical exhibitions that inspire visitors. The rice festival is, of course, not only an event for education and watching but also for tasting – hundreds of thousands of different risotto recipes are served during the event. This past event was the 44th annual festival with just over 500,000 people visiting!

Here is a representative risotto recipe from the region. Many variations can be made from this simple basis; a vegetarian status is achieved by omitting the ham, the flavors of different cheeses will make the dish entirely different and a different selection of herbs will change the direction yet again. Start with the basis to get a feel for what flavors you like and branch out from there. Soon you will have a comfortable “feel” for how to make this, and start to make your own “family recipe”.

Risotto Alla Veronese

For the broth:

  • 2 Tbs of extra virgin olive oil
  • 2 celery stems, and a few leaves, coarsely chopped
  • 1 onion, coarsely chopped
  • 1/2 bunch Italian parsley, coarsely chopped
  • 2-3 new carrots (or baby carrots), coarsely chopped
  • 1 kohlrabi or Japanese turnip, sliced – it adds a nice touch of sweetness
  • 1 1/2 quarts of water
  • 10 peppercorns, cracked
  • 1 or 2 bunches of sculpit leaves
  • Coarse sea salt to taste
  1. Heat the olive oil in a pan and cook the celery, carrots, kohlrabi, onion, and parsley for 2-3 minutes before adding the water.
  2. Add the peppercorns, bring to a boil, cover and then simmer for about 15 minutes.
  3. Add the sculpit and simmer another 15 minutes.
  4. Turn off heat and let sit, but keep warm.

For the rice:

  • 1 onion or small bunch of green onions or 2 – 3 shallots
  • 1 – 2 cloves garlic, minced
  • 2 Tb olive oil or butter
  • 1 small whole sprig of fresh rosemary
  • 3 cups of risotto rice (Vialone nano)
  • 1/2 Cup Soave or other dry white wine
  • 6 cups vegetable broth from above
  • 1 /2 Lb Prosciutto or Parma ham, sliced into thin strips
  • 1 bunch of sculpit leaves, finely chopped
  • 2 handfuls of Grana Padano/Parmigiano Reggiano (or half/half with Pecorino Romano for a more intense flavor)
  • Knob of well chilled butter
  • Drizzle of olive oil and freshly ground black pepper
  • Coarse sea salt to taste
  • Fresh ground pepper to taste
  1. Heat the olive oil in heavy large pot over low heat. Add rosemary and sauté for 2 minutes, until fragrance is released. Remove rosemary and discard. Increase heat to medium, add the chopped onion, green onions or shallots along with minced garlic and sauté with a pinch of sea salt until just tender, about 4-5 minutes. Onion should just turn glossy.
  2. Add the rice and stir for about 2 minutes. When the rice starts to turn translucent in 5 – 10 minutes add the wine and stir, then put lid on pot until absorbed, about 1 minute.
  3. Stir in 1 cup of the warm broth and simmer until it is absorbed with the lid on, stirring frequently. Cook until the rice is almost tender, adding broth 1/2 – 1 cup at a time and stirring often, allowing each addition to be absorbed before adding the next, about 15 – 25 minutes.
  4. Add the finely chopped sculpit leaves, Prosciutto or Parma ham, stir well for one minute and turn off the heat.
  5. Stir in the Grana Padano/Parmigiano and the butter. Let the risotto rest for five minutes.
  6. Season with salt and fresh ground pepper.

Serves 6-8

Recipe Tip! This can easily be made vegetarian by simply omitting the ham at the end, or reserving a portion without the ham.

Roasted Heirloom Beets

Heirloom beets are one of the earlier crops to be planted, and one of the first to be enjoyed early in the Spring. Here’s a great recipe with an unusual preparation that really brings out the earthy goodness of fresh home-grown beets. The secret is slow roasting at about 300°F for almost an hour. I prefer to do this in our charcoal fired Kamado grill, a Japanese clay covered BBQ which holds the heat amazingly well and gives an incredible rich but lightly smoky flavor. The beets turn out heavenly, and I’m often asked what I did to make them so delicious. Oven roasted is a very good second choice, just make sure to roast them slow and long – it caramelizes the sugars in the beets, making them a surprise all of their own. 

The Dijon mustard plays a nice counterpoint to the richness of the beets. For some additional flavors, add some heirloom carrots or overwintered onions to the mix- roast along with the beets! Keep in mind that young beets – less than 2 inches in diameter- are sweet like carrots.

Dijon Roasted Heirloom Beets

  • 3 pounds beets, about 2 inches in diameter
  • 4 tablespoons olive oil
  • 1 teaspoon salt
  • ½ teaspoon black pepper
  • 1 tablespoon Dijon mustard
  • Juice of one orange
  • 1 teaspoon sugar
  • 1 tablespoon red wine vinegar
  • 1 tablespoon fresh minced rosemary
  1. Trim stem and root from beets. Place whole beets in roasting pan; add 1 tablespoon olive oil, salt and pepper. Toss to coat.
  2. Roast at 400° for 45 minutes or until beets are tender. Beets are tender when easily pierced with a fork or toothpick.
  3. While beets are roasting whisk mustard, orange juice, sugar, and vinegar in bowl. Whisk in remaining 3 tablespoons olive oil and rosemary. Set aside.
  4. When beets are cool enough to handle, rub to remove skins; cut into quarters. Add warm beets to bowl and toss with dressing. Let stand 30 minutes while beets absorb dressing.

Makes approximately eight servings.

Beef, Barley and Root Vegetable Soup

When Fall arrives, I look forward to thick and hearty soups. Even if the weather isn’t cold and blustery quite yet, a hot bowl of broth-based soup is somehow nourishing for both the body and soul. Serve with fresh cornbread, biscuits or home-baked whole wheat bread and butter, and you’ll understand how family traditions are started. For this soup, I used a beef broth that I’d made earlier this summer with bones from the butcher. We are fortunate to have a real, old-fashioned butcher in our town that understands when I ask for broth bones. Pan roasted with some root vegetables, then slowly simmered for a day and a half- this is a rich, silky broth that has a depth of flavor just not found outside of the home. Well worth the time to make in large batches and frozen until needed!

Using beef, barley and what root vegetables were on hand was the ancient beginning of this soup. You can use any root vegetable that you have, in any combination that you like, and a little or a lot of beef for flavor. Slow simmering for several hours will give the best, richest flavor. Plan on making extra, as this is very popular once people get a taste of it. Great to make on a weekend to have for lunches at the start of the week. This can be a thick or thinner soup, or stew depending on how much liquid you leave at the end of the cooking. Maintain the liquid level for more soup like consistency, or let the barley soak up the liquid for a stew. Feel free to add onion, green beans, peas, beets, celery or any vegetable that will add a hearty flavor to this soup.


Beef, Barley and Root Vegetable Soup

6-8 oz Beef, cubed- Roast is best for flavor in slow cooking

1 Qt Beef stock

1/2 Tsp Thyme

1/2Tsp Marjoram

1/2 Tsp Savory

1/2 Tsp Rosemary, fresh picked and chopped

1/2 Tsp Black pepper, best if freshly ground

2 Bay leaves

1/4 Tsp Salt (to taste)

4-6 cloves Garlic, diced

1/2 to 1 Lb Carrots, thickly sliced

1/4 Lb Potatoes, reds, purples or any waxy types

16 oz or 1 can crushed Tomatoes

1 1/2 Cups Barley

Add beef, broth and thyme, marjoram, savory, rosemary, black pepper, bay leaves and 1/2 of the salt to a heavy pot or stockpot and bring to a slow simmer. Once beef is tender- about 30-45 min for 8 oz- add garlic, carrots and potatoes and taste. Adjust salt if needed and add water to keep covered. Continue simmering for 1 hr or until carrots are tender. Add tomatoes and barley, check liquid level and add water if needed, simmer for 45 min to 1 hr until barley is tender but not soft or mushy. It will have a slight crunchy, toothy texture to it.

An alternative method is to brown the beef in 2-3 Tbs Olive oil or butter on medium heat until well browned and deglaze with 1/2 cup red wine. Lower the heat, then add the broth and spices and continue from that point. This will add a richness from the brown/deglazing, along with the wine. Experiment and you’ll soon learn which is your favorite method and ingredients!

The Carrot's Odyssey

Carrots are an ancient standard in the garden, one that is introduced to many of us as kids when we are first playing and learning in the garden. Short season, hardy, fast-growing and delicious just out of the ground, carrots are a hit with everyone, and one of the top sellers for every seed company.

What else to do with fresh carrots than slice them and add to the salad, especially an over abundance from an enthusiastic planting? There is always pickling and canning, but at the height of fresh garden produce, I don’t want to think of canning quite yet. Here are a couple of delicious ways to enjoy the sweetness of carrots combined with other flavors that go well with Spring and Summer dinners.

Pan Braised Carrots with Parsley and Rosemary

This unusual but satisfying side dish will be a hit with your dinner guests. Equally at home beside a burger, freshly grilled beef or Salmon steak or roast chicken. This can be done on a stove or outside on the barbeque in a cast iron pan. For extra panache, add grated Parmesan cheese just before serving. Fresh Fennel, sliced in 1 inch chunks can be added for an increased depth of flavor.

1 Cup Beef broth (can use mushroom base or vegetable base instead)

1 Lb Small carrots, sliced into 2 inch pieces

1 Tsp Honey

1 Tbsp Butter

2 Tbsp Fresh parsley, minced

2 Tsp Fresh rosemary, minced

Juice of 1 orange


In heavy saucepan bring broth and honey to a boil, reduce heat to a simmer. Add carrots, butter, rosemary and 1 Tbsp parsley. Cover and simmer for 5 minutes. Remove carrots to a warm covered plate, add orange juice and continue to simmer broth until reduced to about 2-3 Tbsp- should be about 15 minutes. Once reduced, add carrots and remaining parsley, toss to coat and serve immediately. If desired, add grated Parmesan or hard grating cheese to top just prior to serving.

Serves 4


Herb Marinated Carrots

These tangy, savory carrots are addictive! There is a train-wreck of flavors, from the sweet crunchiness of the carrots to the lemon juice, mustard and rosemary coming together into an unexpectedly delicious combination. Best if marinated overnight, but will work well with 6-8 hours in the refrigerator. Use as an appetizer or side dish. Will hold their own with almost any flavors.

1 Lb Full sized carrots, sliced or cut into matchsticks

2 1/2 Tbsp Lemon juice

1/2 Tsp Stone ground mustard

1/4 Cup Olive oil

2 Green onions, chopped

1 Tbsp Fresh parsley, chopped

1 Clove garlic, minced

1 Tbsp Fresh rosemary, finely chopped

Freshly ground Salt and Black Pepper, to taste


Blanch carrots in boiling water for 3-4 minutes or until just barely tender, then drain. Combine lemon juice, mustard, olive oil, onions, parsley, garlic and rosemary in a jar with tight fitting lid. Shake vigorously to mix well. Pour over warm carrots, season with salt and pepper and refrigerate a minimum of 6-8 hours or better yet, overnight.

Makes about 3 cups


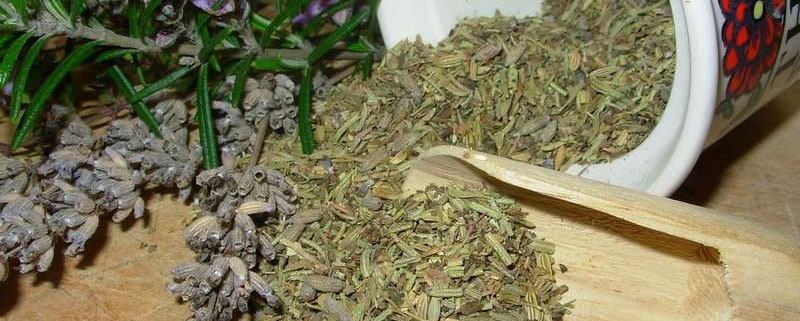
We are back from the Red Rock Lavender Festival, having met some wonderful people and loving the lavender scents for 4 days. While we were there, we picked up some Herbes de Provence and Herbes de Concho that are made at Red Rock Ranch. The high altitude, sparse soil and dry Mediterranean climate play a major part in the intensity of the scent and flavor of the lavender in their Herbes mix.

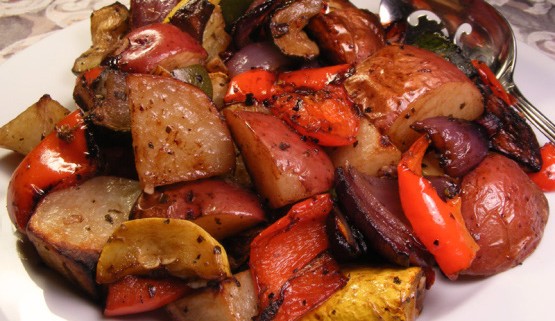
The amazing thing about Herbes de Provence is the adaptability of the mixture in so many culinary applications- from grilled, roasted or baked meats, to stews, soups and grilled or roasted vegetables, Herbes de Provence adds a depth of flavor and aroma that is unique and heady. Another interesting thing is the broad spectrum of ingredients that make up the Herbes mixture. The basic and classic mixture is equal parts dried Oregano, Thyme, Summer Savory and Lavender buds, mixed well. From this basis several other recipes have evolved, with both individual and regional preferences showing up. Many of the mixtures involve classical, foundation spices that are used in French and classical European cuisines. Some will argue that the essential ingredient is Lavender, while others will say that it’s exclusion does not lessen the mixture, and even enhances it in certain dishes. I’m not going to get into that argument, but will say that the Provence region is world famous for its Lavender, thus its inclusion into the Herbes de Provence.

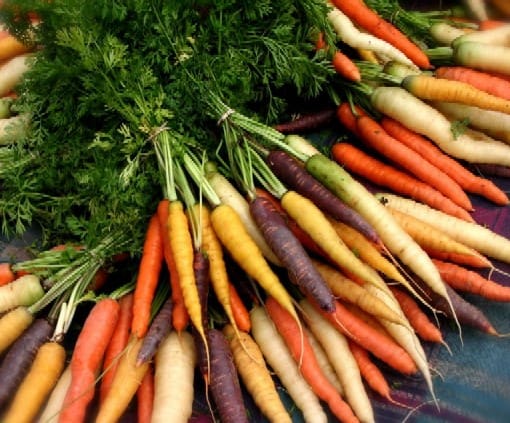
This is the time of year to start selecting, harvesting and drying your garden herbs for the coming year. Rosemary has starting blooming and is incredibly fragrant now, as is Sage, Oregano, Basil, Thyme and almost all of the culinary herbs.  Selecting the best leaves from the herbs and drying them in small batches starting now gives you plenty of time to accumulate the volume of dried herbs needed to not only have enough for general cooking, but will give you enough to make some mixtures that use foundational herbs without depleting your stocks. Starting now also gives you the time to do smaller batches, being more selective in quality instead of having to just pick what is available to do a large, rushed batch later in the Fall as the weather starts shutting the garden down. Ask me how I know… Plus it’s wonderful to improvise tonights dinner from the herbs and vegetables picked today from your garden!

The following recipes should be considered a starting point, not the definitive, final recipe. Use your tastes and flavor combination preferences as a guide, and adjust amount and types of herbs accordingly. How else do you think that so many variations on the theme evolved?

I will share several other recipes for the mixture below, as well as some ideas for using them. Dried herbs are important, as fresh herbs will lose their flavor in about 20 minutes of cooking.

Classic Herbes de Provence

Equal parts of the following dried herbs:

Oregano

Thyme

Summer Savory

Lavender buds

Mix well and store in an air tight container. Keeps for 3-6 months, depending on humidity and temperature.

Variations on Herbes de Provence

1 tsp thyme
1 tsp summer savory
1/2 tsp lavender buds
1/4 tsp rosemary
1/2 tsp oregano or basil (or both)
1/4 tsp sage

1 tsp marjoram
1 tsp basil
2 tsp thyme
1 tsp summer savory
1/2 tsp lavender buds
1 tsp rosemary
1/2 tsp fennel
1 tsp oregano


2 tsp thyme
1 tsp basil
1 tsp marjoram
1 tsp French tarragon
1 tsp rosemary
2 tsp summer savory
1 tsp fennel seeds
1 tsp lavender buds


1 tbs thyme
1 tbs chervil
1 tbs rosemary
1 tbs summer savory
1 tsp lavender buds
1 tsp tarragon
1 tsp marjoram
1/2 tsp oregano
1/2 tsp mint
2 powdered or chopped bay leaves


You can crush the mix prior to adding it to olive oil for a marinade or dressing. Add in crushed dried red chiles for a new taste dimension. Mix with homemade mayonnaise for a real taste treat.

Herbes de Provence/ Bleu Cheese Burgers

Mix lean hamburger meat with high quality Bleu cheese at a ratio of 3/4 meat to 1/4 cheese. Form into patties, dust liberally with Herbes de Provence mixture that has  been crushed with fresh ground black pepper and salt, let sit for 20 minutes and grill till done.  Make sure to make extras!

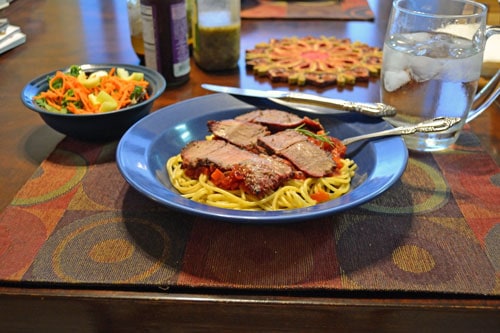
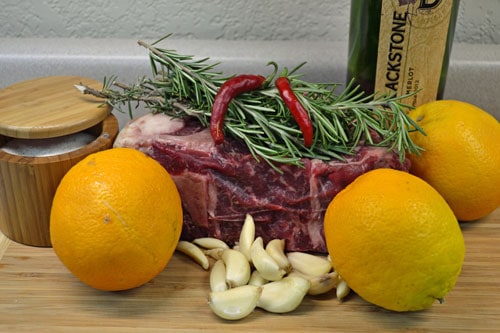
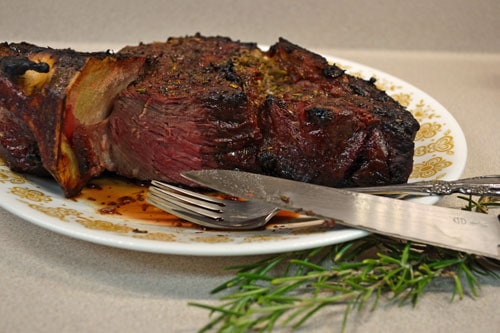
Marinated Herbes de Provence Steaks

The flavors will really be enhanced if you use grass fed beef.

1/2 cup extra virgin olive oil

1/4 cup Herbes de Provence

1 tsp fresh ground black pepper

1/2 tsp salt

Mix ingredients well, coat both sides of steaks, let sit covered for 30 minutes to 1 hour. Grill to taste. Optional- make 1/2 recipe extra to top steaks when served. Can add sprinkle of Gorgonzola cheese to top of hot steak as well.

Herbes de Provence Garlic Bread

1/4 cup Herbes de Provence

1/2 cup softened butter

3-6 large cloves freshly minced garlic

Fresh sourdough bread

Mix Herbes with butter and garlic. For more garlic flavor- use more cloves. Optional- roast the peeled garlic cloves prior to mincing for a richer, mellower flavor. Lightly spread butter on both sides of thickly sliced bread, bake in 400F oven for 3-5 minutes or until just turning golden brown.

Hopefully you can start to see the versatility of the magical Herbes de Provence. You are only limited by your tastes and creativity!

Today we have a new recipe that will work just about anywhere. I’ve used it when entertaining at home, at a friend’s house when cooking a shared dinner party and even when camping off road in our Land Rover! It lends itself to being cooked outside, which keeps the house cooler, and somehow increases the flavor…

It takes a bit of time, as this is a slow pan roast recipe, but is easy and you can do other prep or cooking while this is roasting. Total cooking time is around 30-45 minutes. Plan extra, as the flavor from the slow roasting is tremendous, and people will go back for more. That’s good, as this is real and healthy food! This is a perfect counterpart to barbecued chicken or burgers on a warm Spring evening. If you increase the vegetables and add warm fresh bread, this can be a light and healthy dinner in itself.

The eggplant must be fresh, as it can be bitter otherwise. Fresh means picked that day. If fresh is not available, leave it out. If you want an extra flavor, don’t peel the eggplant. This is the perfect showcase for fresh grown, heirloom ingredients, as the flavors will really shine. The ingredients are roasted in this order to bring out their flavors, as well as mingle them with the others. It is worth the time to do it in order!

Mediterranean Pan Roasted Vegetables

Serves 4-6

12 oz potatoes, cut into 1/2  inch cubes with skin on  (Red potatoes are preferred)

2 bell peppers- any color, cut into 1/2 inch squares

1 medium red onion, diced into 1/2 inch squares

1 small eggplant, peeled and cut into 1/2 squares (Only use fresh eggplant to avoid bitterness)

3 or 4 cloves garlic, sliced

4 Tbsp extra virgin olive oil

2 Tbsp balsamic vinegar

1/2 tsp dried basil

1/2 tsp dried oregano

1/2 tsp fresh chives

1 tsp fresh rosemary, finely chopped

Salt and freshly ground pepper to taste

A large cast iron pan is best, but a heavy bottomed pan that retains heat well will also work.

Heat pan on medium heat, until thoroughly warm. A pan that is not heated all the way through will cause food to stick. Whisk balsamic vinegar, 2 Tbsp olive oil, basil, oregano, chives and 1/2 tsp rosemary together and set aside.

Add 2 Tbsp olive oil to pan, coat pan well and add potatoes, coating with oil in pan. Roast for 10-15 minutes, turning occasionally until they start to soften. Add onion and bell peppers, along with half of the rosemary and roast for 10 minutes, turning as well. Add eggplant and garlic, roasting for 5 minutes. Drizzle herb/oil/vinegar mixture over vegetables, stir well to coat and continue roasting until potatoes are tender, about 10 minutes more. Serve hot or let cool and store in refrigerator for next day to let the flavors set up and mingle.

This is a great dinner for family or friends, and it doesn’t have to be Sunday. A whole roast chicken makes for an impressive tableside presentation followed by a delicious meal and the tender, tasty leftovers can be used for several other dishes, if there are any left!

For faster, more even roasting, cut the backbone out of the chicken with poultry shears or heavy duty kitchen shears. This allows the bird to lay flat in the roasting pan. Keep the backs in a freezer ziplock until you have several, then make chicken stock with the giblets, diced onions and celery, aromatic herbs such as savory, rosemary, thyme, salt and pepper and a bay leaf in a couple quarts of water. Bring to a boil, then simmer for a minimum of two hours, longer is better.

Pair this with some fresh homemade biscuits and you’ve got a proven winner! We found a great restaurant in the little town of Boulder, Utah called Hell’s Backbone Grill that makes the absolutely best biscuits that we’ve ever tasted! They are easy and quick to make and are positively addictive. We always make a double batch if we want any for the next couple of days. You can use the hot oven for both roasting the chicken and baking the biscuits.

Make sure to include plenty of vegetables, as they roast up well and balance out the rich roasted chicken flavors.

Herb and Vegetable Roasted Chicken

3-4 Lb chicken

1 lemon, halved

Fresh rosemary

Fresh thyme

8 cloves garlic, peeled and crushed

2 Tbsp butter, softened

Salt and fresh ground black pepper

4 small red onions, halved

8 small potatoes, halved

4-6 medium carrots

4 medium parsnips, peeled

Extra virgin olive oil

Heat oven to 450F. Rinse chicken, pat dry with paper towels. Place chicken in a large roasting pan or skillet. Cast iron is best.  Squeeze lemon juice to cover chicken then put lemon halves, rosemary, thyme and 4 cloves of garlic into cavity. Rub chicken with butter, sprinkle with salt and pepper. Arrange remaining vegetables around chicken and brush with olive oil, season lightly with salt and pepper.

When oven is hot, roast for 15-20 minutes, then bast chicken with pan juices. Reduce heat to 375F and continue to roast for about 45 minutes more, basting every 15-20 minutes until skin is crisp and golden. Remove from oven, cover with lid or foil for 10-15 minutes (while biscuits are cooking) and let rest before carving. When removing chicken, reheat oven to 450F. By the time you are ready to bake the biscuits, the oven will be at temperature.

Black Powder Buttermilk Biscuits

This is our all time favorite biscuit recipe! You must have two things to be successful here- a hot oven and cold dough. These are made and bake quickly, so get everything ready before you start.

3 Tbs cornmeal

2 1/2 Cups flour

1 1/2 Tsp salt

1/2 Tsp baking soda

1 Tsp baking powder

1/2 tsp course black pepper

1 Tsp sugar

1 stick (1/4 Lb) butter- cold- cut into 1/2″ chunks

1 Cup buttermilk or substitute 1 cup milk with 2 tsp lemon juice

Adjust rack to middle position of oven, lightly oil cookie sheet or use a nonstick spray. Sprinkle 2 Tbsp over surface.

It’s best to use a food processor for the next two steps, then lightly knead the dough by hand or in a stand mixer. It makes for better biscuits!

Add flour, salt, baking soda, baking powder, pepper and sugar in food processor bowl, pulse 5-7 times with cutting blade to mix. Next, add butter chunks and run until mixture resembles coarse crumbs. This can be done with 2 knives and some patience. Transfer to stand mixer bowl.

Using low speed, fold mixture in while slowly pouring buttermilk over top. Mix well until dough is sticky and moistened through, with no dry patches. Turn dough onto lightly floured worktop, using floured hands to prevent dough from sticking. Using knife or bench scraper, cut dough in half and stack one piece on top of the other. Flatten with rolling pin, but don’t over do it. Repeat cut, flatten and stack for 3 more times. Add small amounts of flour necessary to keep everything from sticking. Dough will be very moist- as it should be.

Transfer dough to cookie sheet. Roll to about 1 inch thick, then cut into squares about 2×2″. Sprinkle with remaining 1 Tbsp cornmeal. Bake until golden brown, about 12-15 minutes.

Serve with the roasted chicken and enjoy!