Tag Archive for: Planning & Planting

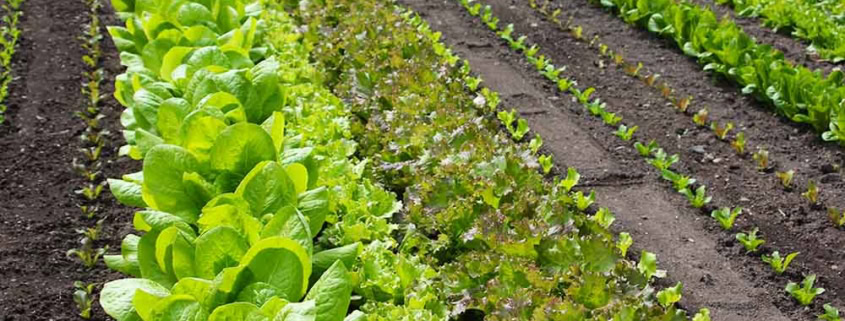
Succession planting or succession gardening is basically one crop following another crop in the same space to maximize the amount of food produced in that space. This approach should be looked at as a tool and used in planning what varieties to plant when in your garden so that you’ve got fresh veggies and herbs ready throughout a much longer season.

Succession planting is an approach or tool that is used alongside other techniques or approaches, such as intercropping or companion planting. Once you get the theory and technique dialed in for your garden, then overlapping succession planting with other techniques will further boost your garden’s productivity, as well as the health, taste, and nutrition of the vegetables for your dinner table.

Succession planting may sound complicated, but it simply means planting a little, often.

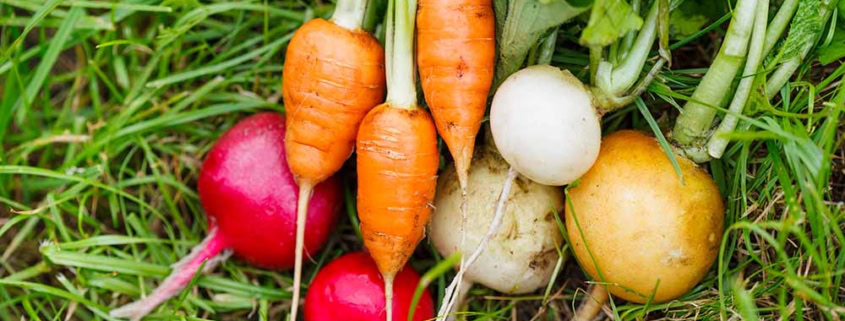
While it is tempting to plant a 10-foot garden bed full of carrots, when they all ripen within a week, you’ll have way too many carrots (or zucchini, cabbage, etc.) to eat at once, causing veggie burnout and all too often wasted food.

Sure, you can give it away, can, ferment, pickle, and do all sorts of things with an overabundance of a particular veggie, but the downside is that when it is all gone, you’ve got nothing left in that bed and have to start over. This is especially true with shorter seasons, and quicker producing vegetables like greens and root crops.

A great place to start learning about succession planting is in the early spring and fall garden, as a lot of the fast-growing greens are the perfect tool to learn with. If you make a mistake and plant too much or too little, you’ve not tied up precious garden space and soil for the next couple of months.

Another ideal place to experiment and learn about succession planting is in the heat of the summer when, most likely, your peas and radishes have all been picked, the cilantro is blooming, the lettuce has bolted, and the spinach is a tasty memory. If left alone, those newly-opened spaces in your garden beds are the ideal incubators for weeds, as their seeds can patiently sit dormant for years, just waiting for a spot of open, unused soil to appear so they can jump in and create havoc. 

So, fill those empty spaces with succession planting to jump-start some tasty fresh vegetables that will tickle your tastebuds.  You can easily plant a different fast-growing green or root in each space, creating a five-vegetable medley adding variety and a new spectrum of flavors to your salad or fresh grilled dinners in a couple of weeks.

Starting the Planning

Kale Succession PlantingFirst – start with planning for succession planting is to make a list of what veggies you actually like to eat. This sounds simplistic, but do you want to devote time, energy, and water in your limited garden space to something that you will wind up not eating? Doesn’t make sense, does it?

Our website descriptions always include how many days to maturity for that variety, so you can plan on how long it will take to grow. For instance, Bloomsdale Spinach is 39 days, so in about 5 weeks from planting the seed you should be harvesting the first of your fresh spinach.

Second – think about how much you will reasonably eat in a week or two. This helps determine how much to plant. If you love salads with lots of spinach and use it several times a week, then one or two plants will not be enough.

Third – consider how long each plant produces. Spinach, kale, Swiss chard, and many lettuces are “cut and come again”, meaning that you can harvest some of the leaves and the plant will continue growing, producing more leaves for next time. Head lettuce, cabbage, and root crops on the other hand are single-harvest vegetables. Once you’ve cut the cabbage head, it is finished. The root needs to be pulled out and something else replanted there.

Mapping the Garden

Swiss Chard Succession-PlanPutting all of the pieces together is much like assembling a jigsaw puzzle with your garden in the center. You can make it easier by drawing a simplified map of your garden with a spring, summer, and fall diagram for each bed you will use in succession planting. For instance, if you choose to practice succession gardening for spring, summer, and fall, you would have three beds drawn for each real bed in your garden – one for each season.

This is why we strongly recommend starting small and simple in learning succession planting. It is much easier and less overwhelming to start with one bed and practice for a year, learning what works well and what doesn’t than to convert all of the garden and lose track of what should be planted when and where.

The two photos above are from our small Grow Boxes that we have outside our back door. We have half of one box planted with Swiss chard and the other with kale, with the succession planting seeds just starting to peek out in the other half. This goes to show that you can do this with the smallest box or container!

A side benefit of starting small and learning is many people, even experienced gardeners, are taken by surprise at how much more food is being produced out of a garden bed than they have ever seen before.

Once you’ve determined how many beds you want to use in succession gardening and have the diagram for the seasons, you will want to map out what veggies get planted where and on what schedule. This is where using the days to maturity info comes in.

We’ve put together this chart to help you visualize and understand scheduling better. Shorter season, faster-growing crops will be planted more often; those needing a longer season will not be planted as often.


Examples of 7-day planting intervals –

Examples of 14-day planting intervals –

Examples of 21-day planting intervals –


Now that you have an idea of planting intervals, start plugging your favorite vegetables and greens into the garden bed diagram. It makes sense to mix some larger, longer-season crops like cabbage with early and fast-growing ones like lettuce or spinach. By the time the spinach and lettuce have been harvested a few times and is ready for pulling, the cabbage will be getting larger and need more space, but it won’t interfere with the other vegetables early on.

This technique is known as intercropping, and is complementary and beneficial to succession planting.

Cilantro Succession PlantinAnother good technique is to mix tall and short crops together that have similar maturity rates, such as spinach or arugula and a taller kale like Lacinato. Mixing deep and shallow-rooted crops is another way to maximize yield – like deep tap-rooted lettuce among shallow-rooted green onions.

As you make your diagram, list what is to be planted in the bed with the date to be sown or transplanted, along with the expected harvest date or date range. For example- that Bloomsdale spinach might be planted on September 1st and have a first expected harvest date of October 7th – or about 5 weeks later – with a harvest range of October 7th through October 15th for baby spinach or October 31st for full-size spinach. Your conditions may allow for an even longer harvest, or you might notice it getting slightly bitter and needing to be pulled and the next crop planted.

Mixing direct sowing of seeds intermixed with 2-week-old transplants of the same variety is another way of staggering the harvest and growth rates in a smaller area while greatly improving the amount of harvest. An example is to sparsely sow lettuce seed after transplanting 2-week-old lettuce seedlings of the same variety. By the time the seeds have sprouted and start to get some size on them, you’ll already be eating from the seedlings. The mature seedlings will be pulled first, making room for the younger lettuce grown from seed.

Eliot Coleman talks about how French market gardeners would sow a mix of radish and carrot seeds in the early spring, then immediately transplant 3 – 4 inch tall lettuce seedlings. The radishes are harvested first, making room for the carrots growing between the lettuces. The carrot tops grow above the young lettuce, giving them light to finish growing. The lettuce crop was harvested next and young cauliflower seedlings were transplanted in the spaces between the carrots. After the carrots were harvested the cauliflower had plenty of room to finish growing. This is how small-scale growers in and around Paris fed the city’s population for over 350 years!

Discover the secret to successful seed planting. Learn how the orientation of seeds can significantly impact their germination and growth.

Spring Wildflowers

Spring Flowers in the Fall?

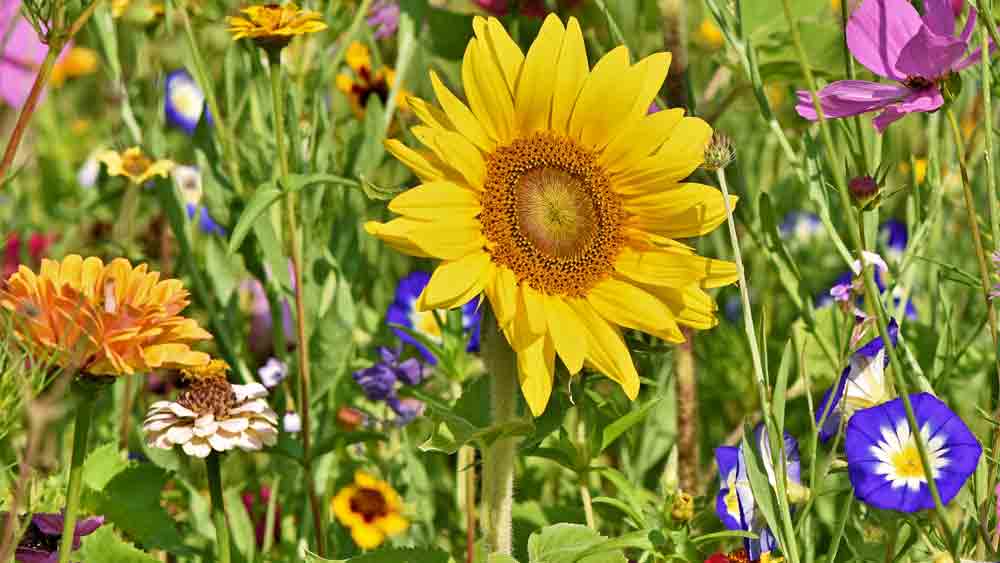
Did you know that fall is the best time to plant many wildflower and flower seeds for next spring? It’s true – if you want a beautiful patch of flowers for their scent, color or to attract pollinators, the best time to plant them is not next spring, but very soon – this fall.

Most wildflowers can (and should) be planted in the fall or early spring throughout many regions of the U.S. In the Southern and Western areas of the country the fall months of September through December are the most favorable time to plant wildflower seeds. In Northern and Northeastern regions seeds planted in the fall will remain dormant over the winter. Many varieties will quickly germinate in order to allow the seedling enough time to become established before going dormant for winter. Other varieties will just remain dormant within the soil until early spring. They will germinate and emerge in the spring when the conditions are favorable.

Spring Wildflowers

Follow Mother Nature

When you think about the life cycle of many flowers without man’s interference, they emerge in the spring, grow and flower summer to early fall, produce seeds which scatter to the winds and then the plant dies or goes dormant for the winter. The seeds remain in the cold winter ground yet to emerge once again in the spring. Almost all varieties of flowers, whether domesticated or wild, need periods of cold followed by a warming, such as freezing and thawing that naturally happens in the soil outside. This is called stratification, and keeps the seeds dormant for enough time to make it to the warm spring days to sprout.

Browse our Flower Department now and place your flower seed orders before the spring to benefit from the natural cycles. If you need specific information about what flowers would work in best in your area, email us your questions.

Otherwise, if you are new to flower gardening, one of our flower mixes is a great place to start.


Spring Wildflowers

Successful Seed Planting Tip

Do not plant your seeds too deeply, but try to broadcast them uniformly. Think about how the natural cycle works, with the seed heads drying out and shattering to release the seeds. They scatter onto the top of the soil and over time work their way into the proper position for germination.

This can sometimes be achieved by mixing your seeds into a light soil mix and then spreading with a rake. Try not to cover the flower seeds deeper than 1/16 of an inch. If you live in an area with heavy bird pressures, you might have to use a floating row cover or cover slightly deeper to prevent bird predation. Or do as we sometimes do here and as the Native Americans have done; plant one for the birds, one for God and one for the farmer!

2014 Heirloom Seeds Catalog

Perusing the newest crop of seed catalogs while engaging in some garden planning is a favorite pastime of gardeners everywhere during the cold, short days of winter. It is an excellent way to take your mind off of the often drab and dreary days that separate the last harvest from the first plantings. Seed catalogs can be much more than a pleasant distraction and fodder for summertime daydreams. They can help you with your upcoming garden planning by helping to visualize succession and companion plantings while arranging the palette of colors in the most attractive ways possible.

You can get started in one of two ways, with neither being right or wrong. Some prefer to sort through the catalogs first, circling what interests them and what standbys are always planted. Others will use different colors for vegetables, herbs and flowers to make organizing and planning a bit easier. The other approach is to put down an initial plan of the upcoming garden on note or graph paper, using zones or areas to show what types of plants go where. Others will use different colors for different plants to determine where everything will go. These initial plans are easily changed and updated as the planning process moves forward and the new garden starts taking shape. Once the plan is solidified, our Garden Journal is an excellent tool to help keep track of your progress this year. It is free as a download.

Remember to try something new each year, while keeping the foundation of what works going in your garden. This way you can experiment with new things and see what works and fits within the framework of what you already have established without risking losing too much if the new variety doesn’t make the grade.

If you want to try saving seeds – or you already do – make that part of your plan, where to plant those items for isolation to prevent possible cross-pollination and make the seed saving process as easy as possible. Pay attention to wind patterns and think about how you will isolate them, either through time, distance or exclusion. Time isolation just means planting those varieties you’ll save seed from either earlier or later than others of its type so that blooming and pollination don’t happen at the same time. Distance is easy – how far apart are you going to plant? How much space do you have? Can you use the front or back yard on the opposite side from the garden for planting? Exclusion is a physical barrier that keeps everything out including insects, meaning you might have to hand-pollinate that item.

While working on garden planning pay attention to the number of days to maturity for a variety and how that will work in your climate. Look at where you want to locate it when reading the size and height descriptions, especially if it needs shade or full sun. Succession and companion planting can make a small or medium sized garden produce like a small scale farm, producing enormous amounts of veggies from a deceptively small space. Think about how much you or your family likes particular veggies, and plan on doing some succession planting this year. Examples of varieties that take well to succession planting are beets, carrots, lettuce, spinach and radishes, but there are others as well. Just give your plants a bit more space to accommodate succession planting alongside companion plants.

When deciding on how many plants you’ll need, seed counts are in the variety headings and in each singular variety description, as well as on the website. We are working on getting planting instructions up on the website for each variety, but each packet will have detailed instructions on the back.

Look at the colors of your garden and plan a rainbow to grow the aesthetic and nutritional benefits of different colors. Plant a few red, yellow and orange tomatoes with yellow, purple and orange carrots as companions. Use red Chicory with green Kale and rainbow Swiss chard. Pole beans in different colors partner extremely well with corn.

Plant some of the vining plants like Red Malabar spinach along the garden fence where it won’t take up space, but give you lots of great tasting heat tolerant spinach substitutes for your summer salads. Melons and squash are happy planted in corners of the garden where they can sprawl along the fence or even over and out without being in the way. Another approach is planting them in containers outside the garden where they have all the room needed and are out of danger of being stepped on.

Look at the hot and long season varieties or cold and short season ones on the website for more ideas of what works well for your climate. Use these as a start and experiment to refine into a basis of what, exactly, really works in your garden. This will take time if you are just starting out, but you might be surprised at how much you have figured out if you’ve been growing a bit, even if you haven’t thought about it just this way! Read the descriptions carefully, as we’ve worked hard to try and get good information into them to help you.

Flowers are an often overlooked, but essential component of any serious vegetable and food garden. They don’t just belong in the realm of the flower or landscape gardener! Flowers attract pollinators (not just bees) that greatly improve production in the garden; are nursemaid plants for smaller, more tender ones; are core ingredients for some incredible teas and bring a delightful aroma that soothes and grounds you. Our flowers are notated by Annual, Perennial, Biennial which depends a lot on climate zones but will allow you to do some accurate planning for where they fit in best. Some of the best ways to get started using more flowers in and around your garden is with one of our mixes, especially created for drylands, humid climates or to spread some serious fragrance in your garden.

You should have some good ideas starting about your garden this year. Spending some time during the colder times in planning will help you to create a masterpiece that will grow some incredibly tasty treats to enjoy with your family and share with some lucky friends and neighbors.

Seed Planting

More Food than You Thought Possible From Your Current Garden

Succession planting is a very old concept that is re-gaining ground with home gardeners everywhere as they discover that there is much more production possible from their garden- no matter the size- than the typical spring planting ending with the fall harvest. Succession planting is the ancient practice of following one crop with another with no break in growing or production. It is one of the home gardener’s most important, yet overlooked, tools to create the maximum possible production in a given amount of time. Even tiny gardens can produce stunning amounts and qualities of fresh home grown vegetables using succession planting and related techniques.

The origins of succession planting are quite ancient indeed, with some horticultural historians finding evidence of Greek and Roman practices being documented. We will concentrate on the relatively more recent past with the systems perfected by the French that for over 300 years on 6-8% of the land that grew 80% of the foods that fed Paris. The French Intensive method, or French Garden System developed the forerunners of today’s Permaculture, Bio-intensive gardening, raised bed gardening, square foot gardening, intercropping and succession planting schools of thought in use today. We will be focusing mainly on succession planting for this article.

The foundational reason to start succession planting is simply to get more produce out of the garden. A great secondary reason is so that all of the carrots, lettuce or radishes are not ripe at one time, creating an overload with no more produce to come. Many beginning gardeners have experienced this dilemma!

The best way to get started with succession planting is much the same as with getting started with any endeavor, especially gardening. Start small, but start now. An ancient Chinese proverb says, “The best time to plant a tree was twenty years ago. The second best time is today.” This holds true for almost anything worthy of serious study and endeavor that has a large positive impact on one’s life. The art of succession planting can be much more extensive and complex than the initial planning of the garden itself. Or it can be as simple as continually planting a bed of carrots, a few feet every 3 to 4 weeks, over the growing season.

Catalog descriptions and seed packet instructions give you a head start with their instructions on planting, days to reach maturity, space required and cold or heat tolerance. Use this information to outline a succession plan that avoids confusion during the height of gardening season. Start by making a list of what you really like to eat and want to try growing in succession. The simplest method is to dedicate a bed or space to a specific variety, such as carrots. Then you plant a portion of that bed, wait 2 to 4 weeks and plant another portion, repeating throughout the season. Let’s take a 12 foot bed as an example. The first planting would be 3 feet, then 3 to 4 weeks later the second 3 feet would be planted, and so on until the bed is fully planted. This would take 4 plantings spanning 8 to 16 weeks. By the time the last section is planted the first section is being eaten, with the second section coming ripe. After the first section is eaten, it is replanted on the same schedule. This give a continual harvest of carrots until winter stops the growth. Fresh ripe, crunchy carrots all season long sound pretty good, don’t they?

Start in early spring with cool season crops such as lettuce, spinach, peas, broccoli, greens, carrots, radishes and beets. Plant every 2-4 weeks, depending on how much production you need, until the weather is too warm for the cool season crops. Then you can switch to planting warmer season crops with the same technique during late spring, summer and early fall. Good choices for warm season plantings are beets, cabbage, carrots, cucumbers, heat tolerant lettuces, warm season spinach substitutes, green onions, Swiss chard, kale and turnips. Once the temperatures cool off, go back to the cool season crops for fall and early winter production. It is interesting to note that several of the cool season varieties are also warm season as well. This should start to give you a glimpse of how to dramatically increase your garden’s production without any more space.

Another technique that ties in well with succession planting is interplanting. Interplanting is the practice of using two or more crops in the same garden bed that mature at different rates to eliminate possible space, water, nutrient and light competition. Examples of this are planting kale and lettuce together. The lettuce will be up and harvested just as the slower maturing kale is starting to spread out and produce. Planting lettuce in between tomato seedlings works well, as the lettuce will be gone by the time the tomatoes get big and need more space. Another example is interplanting varieties with complimentary growth habits such as lettuce and scallions or green onions. The lettuce has a deep taproot and spreads, while the scallions have a shallow root and narrow profile. The classic French gardening method is to broadcast radish and carrot seeds, then transplant lettuces a short time later. The radishes are harvested first and lettuce next, giving space to the carrots. After the lettuces are harvested, cauliflower starts are transplanted where the lettuces were, filling the holes and continuing production.

Some varieties such as spinach and carrots must always be direct sown into the garden, while other such as tomatoes and peppers do best when grown as seedlings then transplanted. Many of the faster growing items that make ideal candidates for succession planting grow equally well as seedlings or from seeds. A simple way to stagger or extend the harvest is to direct sow seeds and transplants at the same time for a variety. The transplants will produce in a shorter time, and then the direct sown seeds will come into production as the transplants are ending. This technique does require more work and planning, but once the schedule is determined it is fairly easy to start seeds in cups to have seedlings ready for transplanting.

Remove old crops as soon as they are finished producing, such as lettuce and spinach at the first signs of bolting. Letting them hang out in the bed costs time and space that can be used to grow more food. Being proactive will create lots of room and time to grow a second and even a third crop in many parts of the country. Once you get started and develop your own plan and style, you’ll be amazed at how much you can grow and will be constantly on the lookout for where you can tuck a few more plants!

Hopefully you now have a deeper appreciation of the wonders of succession planting and the basics of how it works. There are many good books entirely devoted to just this subject, as well as the broader picture of intensive gardening. The best way to start is to take a couple of the ideas presented here and try them on for size. See how they work for you, in your garden, with what you like to grow. Then take a couple more of the concepts and weave them into what works for you. Adapt these ideas and techniques to create your own success. The final step is to share what you’ve developed with others in your area or garden club, as the highest compliment you can pay to an idea is to pass it along.

Moscow Spring Garden

Now that the days are becoming slightly longer, the holidays are over and life is getting back to whatever consists of normal for you and your family, it’s time to dig into our garden seed catalog and start planning the eternally anticipated Spring garden.

After spending a little time reading – and realizing that you want to plant one of everything – the realization sinks in that this could be some work, and that’s before the real work of actually digging in the garden even begins!

What to plant, how to plant, when to plant, what will grow for me, should I start my heirloom tomatoes from seed or just buy starts, what do I need to do for my soil, and what exactly is succession planting are all questions that crop up and need answers.

All of a sudden, a garden seems pretty intimidating, definitely not for amateurs and something that might be best left to the experts. Well guess what? Everyone was an amateur at some point, starting out with not much knowledge and needing some help. It is easier to start your home garden today than in any other time in history, as there are mountains of information and education out there and it is all pretty easy to find. The Internet is full of good gardening advice in many areas.

What we will look at today are some points to consider about your home garden, we’ll do some initial planning and pass along some tools that will be very helpful in building your toolbox of gardening knowledge and problem solving. Let’s get started!

Now is the perfect time to start planning for what you want to do in your garden next year. Just get the planning started, then work on it as ideas bubble up from your subconscious. This way, you won’t be caught short when time becomes an issue in a couple of months.

To help you get the process rolling, we have the following points to consider, along with some tools to help get you there sooner.

1. Review last year’s garden. How did it do? Did you start enough seeds/seedlings to compensate for losses due to transplanting, weather, critters etc.? Were plants healthy and productive, or were there issues that need some researching, such as pests, insects, disease, weather conditions to plan for or try to mitigate?

We found that the rabbits and deer were a factor we didn’t even consider in planning how much of the White Eagle corn we planted as a test plot for growing our own heirloom seed corn. They took out almost a third of our crop! This is something that we will be planning for (in a couple of ways) in this year’s planting.

2. Plan early for varieties that might need a longer growing season, or take longer to germinate. This isn’t just a beginner’s mistake, many experienced gardeners get caught out on the timing for their garden. We’ll show you how to do the date planning later on in this article. Then it is just a matter of writing down the seed starting dates on a garden calender and sticking to the plan.

If you give yourself at least a week “cushion” on the timing, you won’t be stressed if you can’t get the seeds started or transplanted on the date you’ve chosen, whether due to busy schedules or the weather or some other unforeseen happening.

3. Try one new variety this year that you’ve never had out of your garden. It may be something that you don’t think you’ll like, or it may just be something that you’ve never had fresh just moments before from your own garden.

This was eggplant for me, and I now love it- from my own garden. This year it just might be turnips, as I’ve never had fresh turnips!

4. Make a garden plan. This can greatly help with spacing, intensive planting, succession planting and growing more food in your existing space. Also helps with small space/container growing.

Download and use our Garden Journal for more information and help.

Mother Earth News has a Vegetable Garden Planner that has several short videos showing how to get started. It is free for the first 30 days, and is $25 for a years subscription. There are other free garden planners if you do a search online.

5. Grow an herb this year. You won’t believe the exquisite flavor that one fresh heirloom herb can bring to your kitchen and meals. If you’ve grown herbs before, or are growing some now- try a new one.

To start, try something that is used extensively in cooking like Basil, Oregano or Thyme. All of these can be dried and used year round, with the added benefit of saving you money buying expensive dried herbs.

6. Plant some pollinator attractants. These can be herbs or flowers and will dramatically help your garden’s production. Just one or two varieties planted throughout the garden can make a huge difference.

7. Plan to save one variety of seed this year. Start with something easy and something that you are interested in. Read our Seed Saving articles to get started, or take a look at these books-  “Saving Vegetable Seeds” is a new book that has great illustrations and introductions, while “Seed to Seed” is the established reference for all things seed saving.

8. Plant enough to share with a neighbor/senior center home or food bank. Plant an extra row if possible, a couple of plants extra if space is small. The difference even one gardener can make in another’s life is extraordinary!

Plant a Row for the Hungry is a public service program of the Garden Writers Association and has donated over 14 million pounds of food since 1995 to feed hungry folks in our local neighborhoods and communities across the nation. This is without government assistance, oversight, subsidy or bureaucratic red tape — just people helping people. It was started in Anchorage, Alaska by Jeff Lowenfels to provide food for Bean’s Cafe, a local soup kitchen.

9. Get your kids or grand-kids involved. Have them help plan the garden and plant something just for them. Don’t have kids or grand-kids? Use the neighbors, friends, etc. Start them on growing food and learning where our food comes from and how it gets to the plate. You will be surprised at how interested kids are in the garden once they are there. Combine this with #7 above and help them learn the full cycle of the garden from planting a seed to harvesting a seed.

10. Cook a meal with those kids mentioned above. Plan a simple, easy to make meal. Have them help harvest, clean and prepare the meal.

11. Review our website. If you have questions or need help, please, email or call us. We’re here to help you be more successful in your garden. We make our living on the sale of heirloom seeds, tools, books, etc. but if we can help you be more successful in your garden, everyone wins.

Here’s how we see it: you have a better garden, more fresh veggies and more food. You give some to your neighbor, who notices your garden is much more productive, disease, insect and pest resistant and they ask how you do it. You share what you’ve learned and they have a better garden with more food. They then help create a better, more resilient local food system.

Yes, we may get a few more customers, but that isn’t the point or the focus. Another possibility is that you do plant a row to donate, and make the local food bank, soup kitchen or retirement home’s day with fresh, healthy and tasty food.

All right, then- now that you’ve got plenty of ideas of what to do with your garden this year, how do you get started?

Getting the timeline down is one of the hardest parts, as there is some real confusion on when to start seeds, when to till the soil, when to direct sow these seeds and transplant those to get some great food growing in your garden. There is no fail-proof method, as even experience can be tripped up by an early spring followed up by a sneaky late cold snap that kills your tender seedlings.

Here is a good tool to get some real world, historical weather data from the three closest weather stations to your zip code- the First and Last Frost Dates by Zip Code. Once you are there, add in your Zip code, click Go and this is similar to what you will see:

First and Last Frost Dates by Zip Code

First and Last Frost Dates by Zip Code

We are using our Zip code of Chino Valley, AZ for this example. Click on the photo to make it bigger.

There is a lot of useful information here, so let’s break it down a bit to make sense of all of this. The three weather stations are included for locations that might not be really close to any one of the stations, so you can make an educated guess on dates. We are closest to the Chino Valley weather station, so that is what we will use.

The first box says this-

  • Each winter, on average, your risk of frost is from October 5 through May 26.
  • Almost certainly, however, you will receive frost from October 22 through May 5.
  • You are almost guaranteed that you will not get frost from June 15 through September 17.
  • Your frost-free growing season is around 132 days.

This is good information to use in planning your garden and in choosing varieties to plant that will be able to grow in your garden, with your growing season. For instance- if your growing season is 60 days, like our friends in Flagstaff, AZ, then you want to be careful in choosing too many things that need 90 days to produce food, if you don’t have a greenhouse or shelter for protection. This information also gives you a good idea of first and last frost dates, but we can get more selective with the information below this top box.

The next three boxes are the historical data from the closest weather stations to your Zip code. The top line of each box is the chance- in percentage- of a frost happening. So 10% is a really low chance, while 90% is a high chance. The temperatures on the left side represent the different frosts- 32F is considered a light frost, 28F is a moderate frost and 24F is a killing or hard frost. For garden planning, look at the 32F line. I usually choose the 50% column to start, then work from there. In our example 50% chance of a 32F frost in Chino Valley in Spring is May 4. This corresponds with the traditional time to direct sow and transplant of May 7-10 locally. Direct sowing cool season crops can be done up to 4-6 weeks earlier in some locations.

To get the timeline correct on starting seedlings like tomatoes, peppers and eggplant- subtract at least 6-8 weeks to allow the seedlings time to grow and get strong enough for transplanting. The more time seedlings have, the bigger and stronger they will be. They will also take up more space, so allow for that as well. We try to give the tomatoes and peppers a minimum of 8 weeks before transplanting them, as we always seem to have some weird weather event that causes havoc with younger, more tender seedlings. We’ve found that the larger ones blow through a heavy wind or late frost without too much worry.

So here is how the math looks and works-

In our example May 4 is the earliest date to direct sow and transplant tender varieties. We want to subtract 8 weeks from that to determine our seed starting date for transplants such as tomatoes, peppers and eggplant. This takes us to March 9, give or take a week or so. This is where the beauty of planning comes in, as you can “fudge” the dates by a week or so on each end if needed and still be very successful. For example: you are swamped the week you are scheduled to plant seeds for transplants, and get them planted one week late. On the other end, you can very easily just wait one more week if needed (weather, hectic schedule) before transplanting the seedlings into the garden. Getting them started a little earlier and waiting a little longer will only give you bigger, stronger transplants.

This tool also works very well for planning your timeline for direct sowing those early season, cool weather crops that go in earlier than anything else. All of our seed packets have planting instructions on the back, and some will indicate that they can be planted a certain number weeks before the last frost.

One last tool to leave you with is your local Master Gardeners. Click on the link, select your state, then county to see where your local Master Gardeners are located. These are volunteers through the land grant universities in each state. They will have really good, accurate information on your local conditions, pest and disease pressures and general gardening information. They are good folks to get to know. Some are mainly flower gardeners, while others focus more on vegetables, so talk with a few of them.

The Master Gardener manual lists good planting timelines for local conditions for pretty much all of the garden crops, what kind of production can be expected for each crop and how many feet of garden to plant per person. You can also do a search for “Arizona planting guide” or “Arizona garden planting guide” substituting Arizona for your state. The search results will show something like “Arizona Master Gardener Manual”. You can then download or print this to have for your future reference. The local Master Gardener office can also make copies for you if you ask.

There you have it, a lot of information to help you get more out of your garden and some great tools to get the planning and timing under control. It can seem daunting at first, so start small and simple, get a good feel for how it works for you, then expand as needed. Make sure to use the Garden Journal to keep track of what worked well and what didn’t so you don’t get frustrated and repeat your mistakes. As always, we are here to help and advise you on growing a better, bigger garden!

Cool Season Vegetables

Fall and Winter Gardening- Plan in the Summer for Cool Season Harvests

Fall and Winter gardening starts in the heat of summer, when most gardeners want to wait before planning or planting anything.

Plan for a spectacular cool season garden delivering delicious, crispy vegetables when the weather is hot.

Plant as the weather starts cooling down, but with plenty of time before the first frost.

Fall and Winter gardening is somewhat counter-intuitive for many gardeners. The traditional “Plant in Spring, harvest in Fall” approach limits how much food can be grown.

Most home gardens in North America can grow vegetables for 3 seasons a year, or up to 8 or 9 months in your current garden. With a little more structure, growing year-round is possible and realistic.

Don’t believe me?

Eliot Coleman is perhaps the best known spokesman for year-round vegetable production. He has been successful in growing almost year round on his small acreage in Maine since the late 1970s. After discovering the best systems for his farm, he routinely out-produces farms 3 times larger.

If this is possible in Maine, a state not known for its long growing seasons, can it be possible in your garden?

Absolutely!

Plant Fall and Winter crops 8-10 weeks before the first frost. This gives the seedlings a head start before cool weather arrives.

Plan for Success

Dave’s Garden has a great first and last frost dates guide by ZIP code. Click the link, enter your ZIP code, click “Go” and you’ll see a chart that starts like this, but with your data:

Frost Dates Header

The detailed data shows 3 charts based on historical data from the weather stations near your ZIP code. Choose the one closest to you, even if it isn’t right in your neighborhood.

For this article, we are using our home data from Chino Valley, AZ.

Chino Valley Frost Dates

The red circle shows our first expected frost date, based on historical temperature data. This is the intersection of the Fall 32°F line and 50% column, meaning this is when we should expect a mild frost. 

32°F is a mild frost, with 28°F being a medium frost and 24°F a killing frost.

Our first expected frost is October 21, with the killing frost November 8. Find your first frost date exactly the same way – the 50% chance of a Fall 32° night. 

There is a lot of information packed into these dates, so here’s how to have a better garden using these details.

A successful Fall planting comes from knowing a few details and working to the ideal dates on a calendar. You need to know the expected first frost date and the number of days to maturity for what you want to grow. 

The following formula will give you the perfect time to plant –

Fall Direct Sowing Formula

Average days to maturity (harvest time frame) + 2 weeks for Fall weather factor = number of days to count backwards from first frost date for good garden production.

The average days to maturity can be found on the seed packet or the description page of our website. The Fall weather factor accounts for slower growth in cooler weather and shorter days.

Direct sowing example –  

  • our 50% chance of frost to 32°F is Oct 21
  • the Bull’s Blood Beet is a 55 day beet  
  • we add 2 weeks for the Fall weather factor

This adds up to 69 days – 55 days for the beet + 14 days Fall weather factor = 69 days, or 10 weeks. From Oct 21 we count backward 10 weeks which is the week of August 12.

Fall Transplanting Formula

For even more production, transplant leafy crops like kale, lettuce, cabbage, spinach and such. These seedlings only need to be three or four inches tall, unlike tomatoes and peppers in the spring garden.

Use the direct sowing formula, but add 10 – 14 days for growing the seeds to transplanting stage. For transplanting, the formula looks like this –  

Transplant stage (10 – 14 days) + average days to maturity (harvest time frame) + 2 weeks for Fall weather factor = number of days to count backwards from first frost date for good garden production.

Transplanting example – 

  • our 50% chance of frost to 32°F is Oct 21
  • the Spinach Beet-Greens is a 60 day Swiss chard  
  • we add 2 weeks for the Fall weather factor
  • add 10 – 14 days for transplant stage

This adds up to 84 days – 60 days for the Swiss chard + 10 days for transplant stage + 14 days Fall weather factor = 84 days, or 12 weeks. From Oct 21 we count backward 12 weeks which is the week of July 29.

Many fall crops do well when started inside then transplanted into the garden. You transplant the seedling as soon as it is three inches tall.

Plant them a little deeper than normal, so they don’t dry out as fast once transplanted in the garden. A thick layer of straw mulch will help get them off to a great start, helping to keep needed moisture. Remember, these are transplanted in the heat of the Summer so they need different protection than in the early Spring.

Here’s Why it Works

This approach gives us a couple of hedge factors, as the 32°F date is at 50% – meaning a medium chance of a lighter frost, which will usually give us a week or more past that.

We don’t count on it, but will use it if given the extra time. This is where the Garden Journal comes in handy, as you can record the frost dates for use in the coming years. Another hedge factor comes into play when planting fast-maturing varieties- this gives you an extra edge in time over slower maturing ones. For example – a smaller 40 day carrot vs a larger 60 day one. 

These examples assume the garden is finished when the frost hits. You can extend the season with row covers, low tunnels or other frost protection, sometimes several weeks!

What to Plant 

Now that you know when to plant, what should you plant?

The obvious answer is to start with what you like to eat and go from there. The list of what will do well in the Fall garden is pretty extensive- many familiar and some not so much.

Kale, beets, carrots, Swiss chard, leeks, spinach, lettuces and onions are pretty easy. Maché, radish, mustard greens, kohlrabi, parsley, radicchio, sorrel, turnips and cress are not so familiar to most gardeners, yet are both delicious and nutritious. 


How to Get Started Planting

How do you integrate this into your existing garden?

That’s the easy part!

Space opens up as you harvest, making room for the Fall and Winter planting. Start with rows of fast-growing vegetables such as lettuces, carrots, beets, radishes. Start small and go from there. See what works, what you like and adjust the size as needed.

You now have the tools to grow the tastiest vegetables and greens from your own Fall and Winter garden! Most varieties that do well for Fall gardening gain flavor as the weather turns cool. Many become sweeter while others gain richness in flavors. You will only find these flavors in your own home garden!

…and here’s some reasons why!

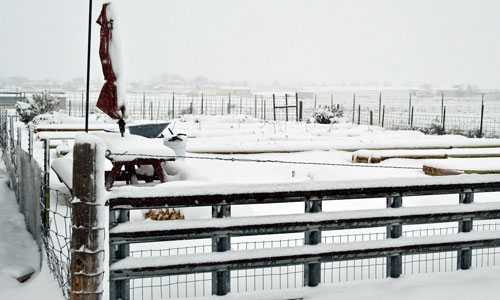
This was actually the second snow of this weekend, the first came in Friday night and was melted off by mid-morning Saturday. We got a second snowstorm Saturday afternoon that left the garden like this Sunday morning- April 10! Our normal direct sowing date is just under a month away- about May 7 or so.

By this afternoon the garden had returned to looking normal…


April's Frosty Weathervane

April’s Frosty Weathervane

I just couldn’t pass this up, much too charismatic! I love how the snow/frost has crystallized on the surface, making it look almost furry.


Fogbound snowy neighbor

Fogbound snowy neighbor

1920’s Sears and Roebuck Craftsman style house, across our back horse pen. Moved here a few years ago from just a couple miles down the road when the alfalfa farm was sold for development. Originally built by a Russian immigrant family. Dad spent 11 years making the bricks to build the house, by hand, each and every day. Tastefully refinished with a nice wrap around porch and the original oak hardwood floors brought back to life.

Never has sold, was finished just before the market blew up. I love the feeling this has.

Hope you enjoyed some beautiful sights this weekend!