Fresh Mint Taste All Year
Lime and mint are not usually thought of together (if at all) in combination with pickles, but they should be! The lime-mint flavors work together with the cucumbers to make something much more than the sum of their parts – bright, refreshing, and absolutely addictively delicious.
Even after a year in the freezer the mint tastes fresh-picked.
Similar to our much-beloved Cilantro Freezer Pickles, this is a very simple and fast recipe that doesn’t need canning or heat and will handle any amount of surplus cucumbers – from a few up to way too many!
Each recipe makes about 4 pints, so you can expand accordingly.
Another freezer pickle recipe that keeps the fresh-picked flavors long after the season is gone.
Quick, easy, and addictively delicious, the lime and mint work with the cucumber to create something amazing.
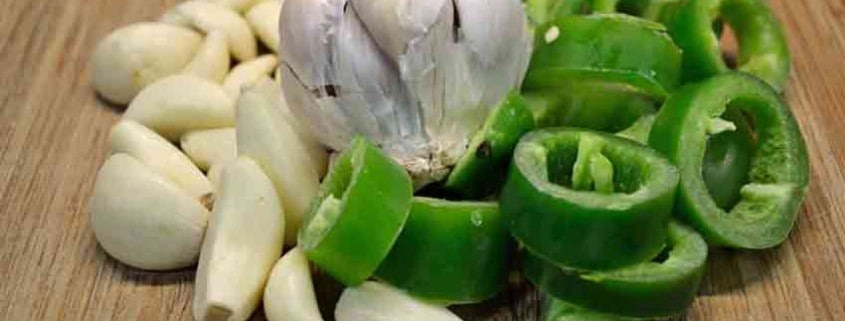
- 2 1/2 lbs pickling cucumbers thinly sliced
- 3 tbs pickling salt Kosher salt works and tastes great
- 1/2 cup mild onion thinly sliced
- 1 small sweet pepper chopped
- 1 lime zest grated
- 2 cloves garlic minced
- 1/4 cup fresh mint leaves minced
- 1 1/2 cups sugar organic cane sugar gives a more rounded flavor
- 1 1/2 cups white vinegar red wine or cider gives different flavors
-
Wash and thinly slice cucumbers – do not peel, then thinly slice onions.
Toss cucumbers and onions in a large bowl with salt, mixing well to evenly distribute the salt. Let stand at room temperature for 2 – 3 hours, then drain excess liquid but do not rinse.
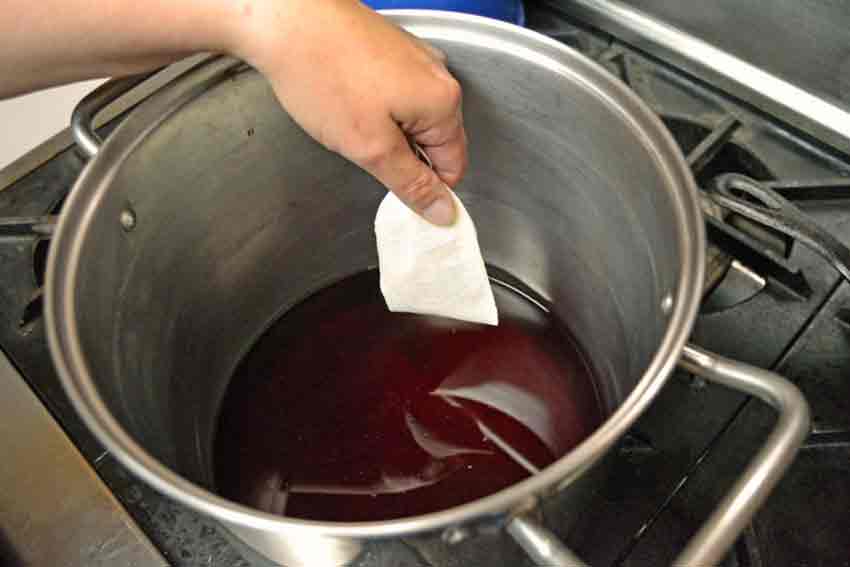
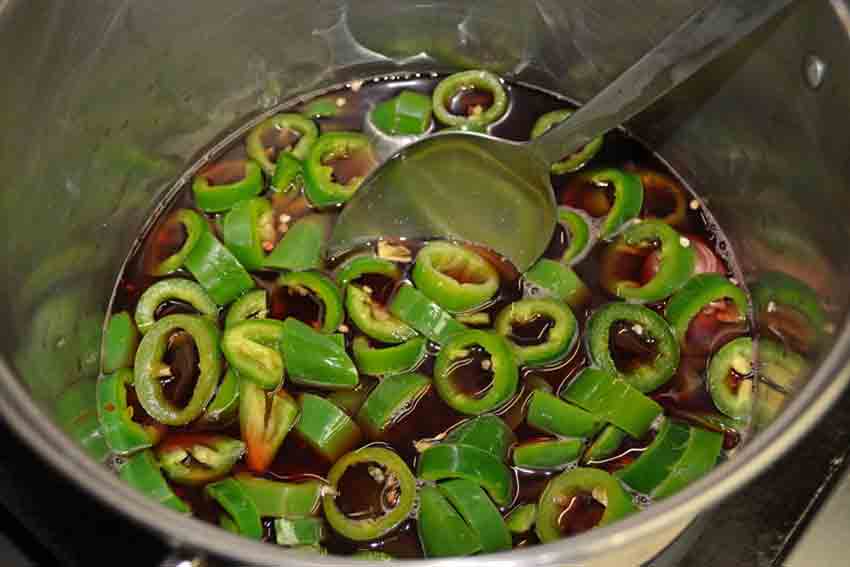
Combine remaining ingredients in a separate bowl, mix well and pour over vegetables, stirring well to mix. Refrigerate for 8 – 10 hours or overnight.
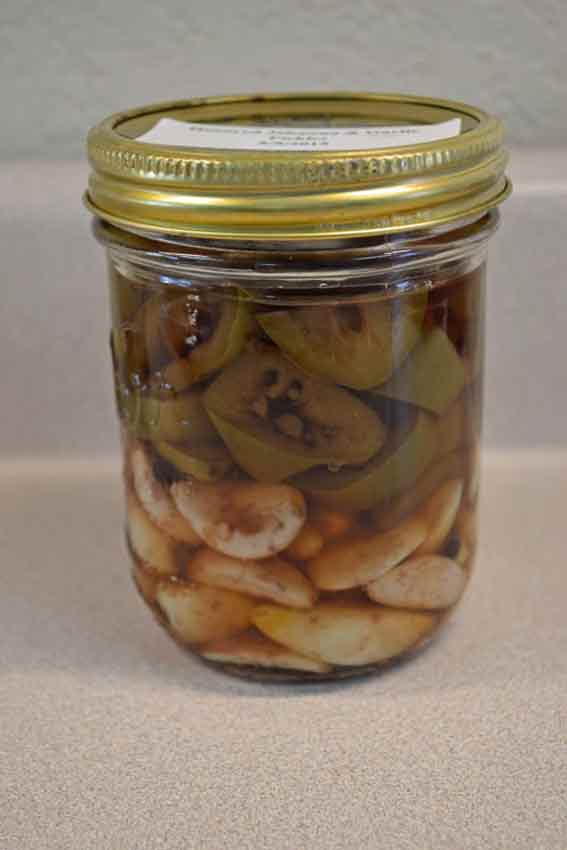
Pack the vegetables and brine in freezer-proof rigid containers and freeze. Make sure to leave about 1 inch of headspace to allow for expansion so the jars don’t break.
When packing the vegetables, make sure the brine completely covers them to prevent freezer burn and ensure the best flavors.
Freeze for a minimum of 2 weeks to allow the flavors to mature and mingle.
To serve, thaw overnight in the refrigerator and enjoy!
We use a Cuisinart or similar kitchen appliance to slice the vegetables – reducing our prep time to a few minutes.
Make the pickles according to the recipe, then experiment and use different ingredients to suit your tastes or the occasion. Try sweet onions, more pepper, lime, or mint for a more intense flavor. Different sugars have a different effect on the final flavor – try palm sugar, turbinado, or even a little brown sugar to the mix. Same with the vinegar – find which one you like best!
Making Lime-Mint Freezer Pickles
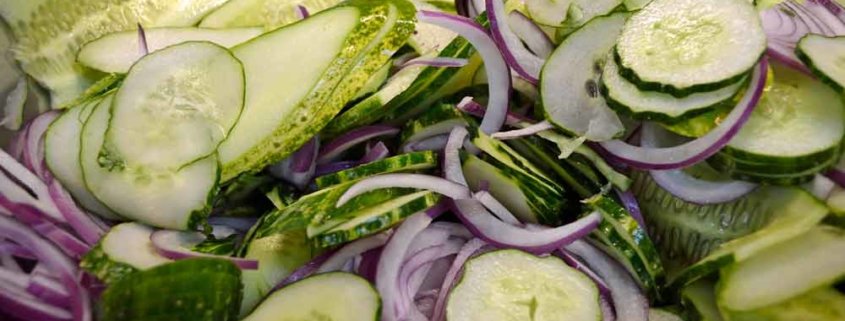
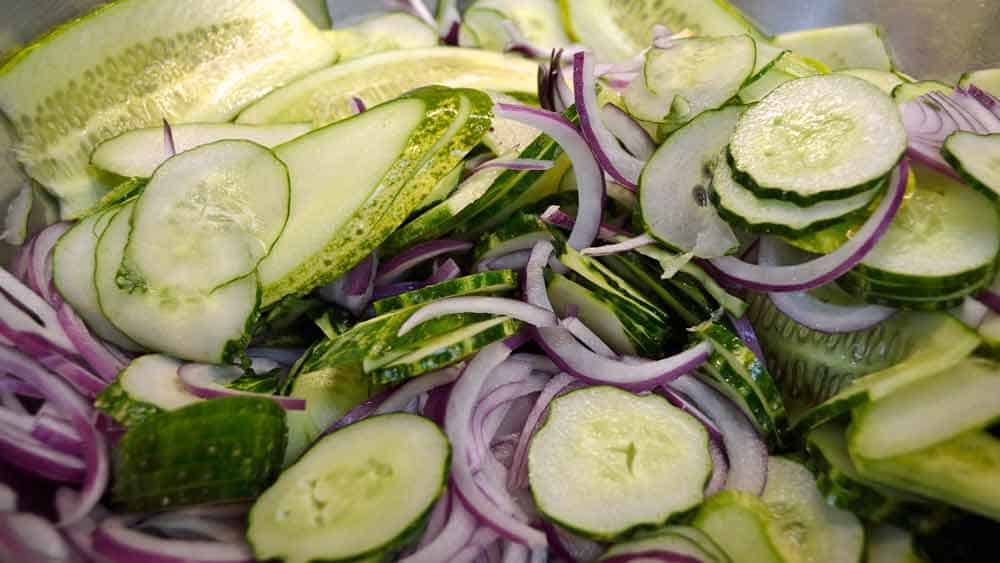
Start by slicing the vegetables…
…then salt them and let sit for a couple of hours. Don’t worry if you get busy and they sit all day – they’ll be just as tasty!
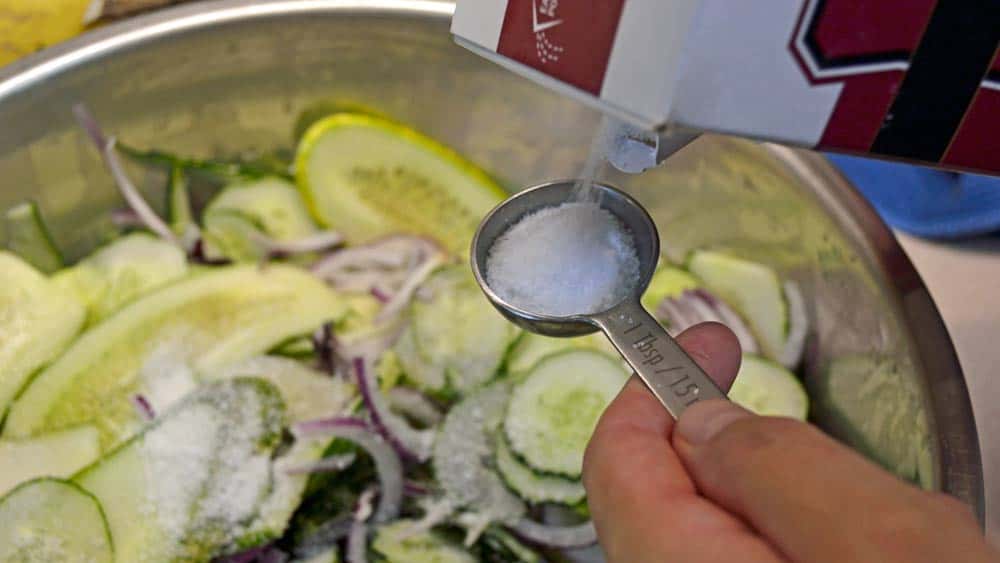
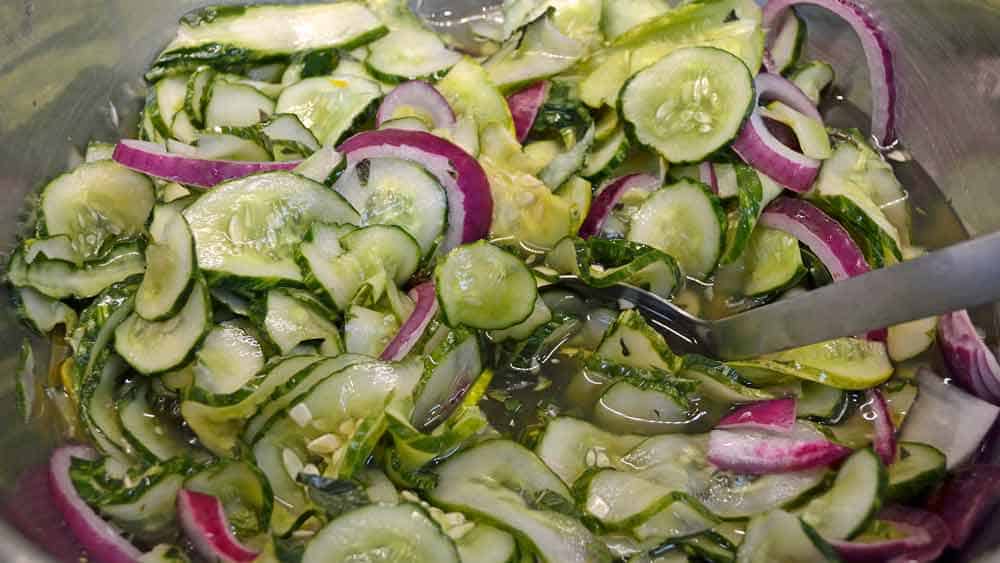
The salt draws out the natural juices, creating a brine to preserve the flavors.
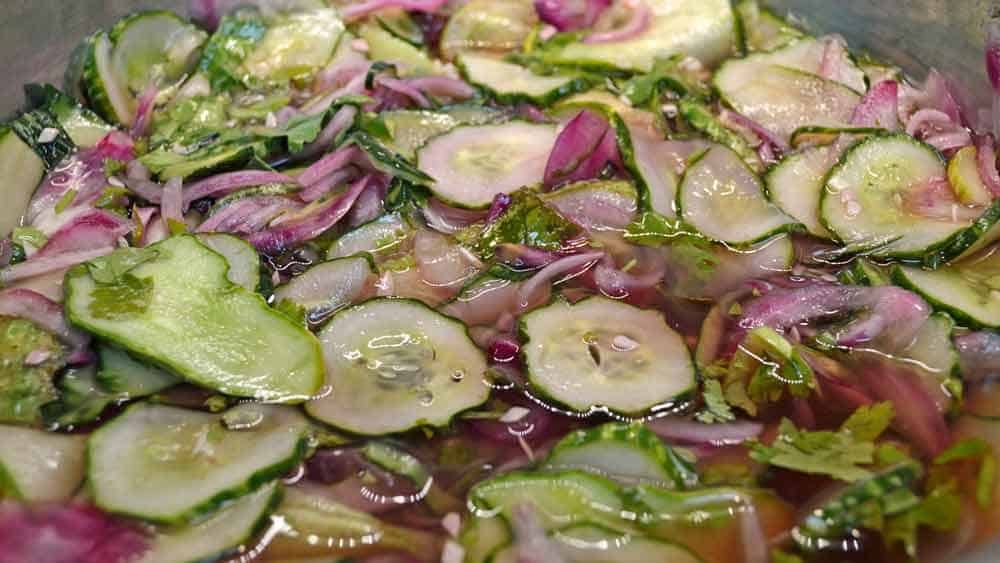
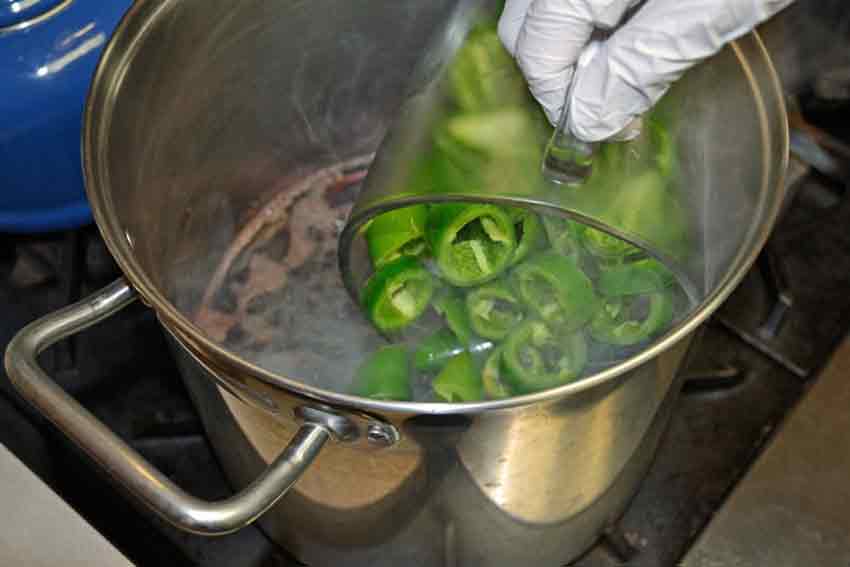
After sitting, drain off the brine but do not rinse.
Combine the sweet pepper slices and remaining ingredients into a separate bowl, mix well, then pour over the brined vegetables and refrigerate overnight.
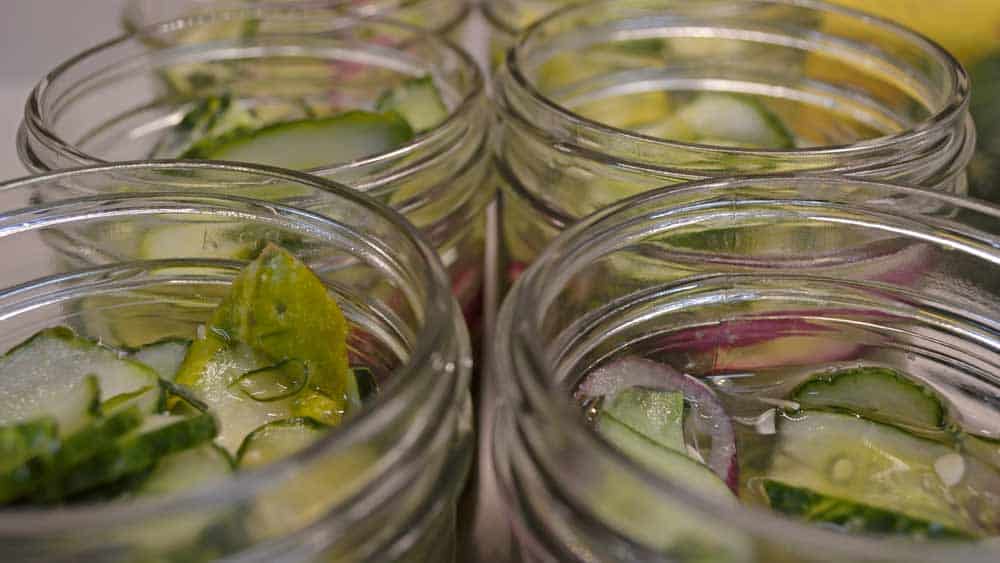
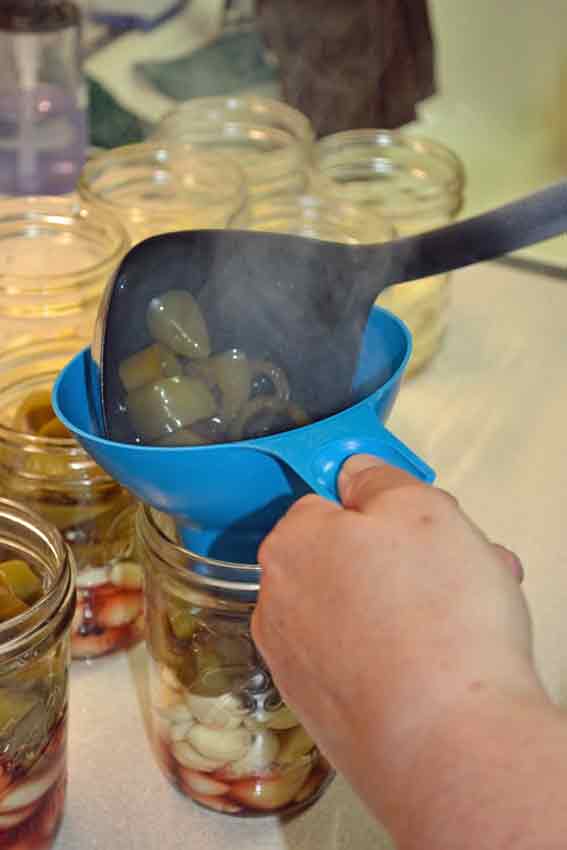
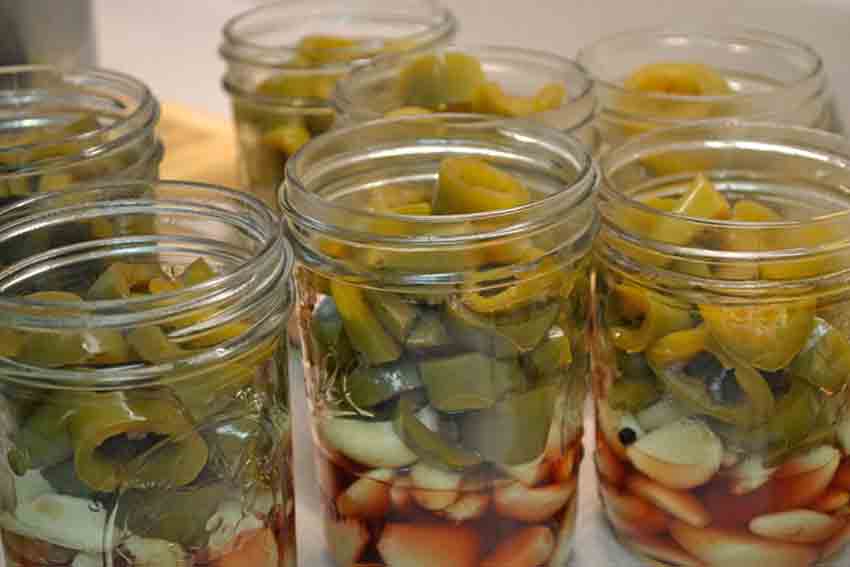
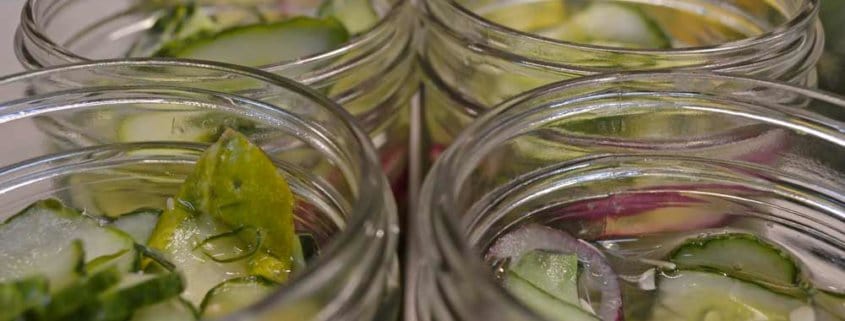
The next day, pack the vegetables into a freezer-proof container or bag. We like to use pint canning jars – just the perfect size for a family picnic or BBQ. If the gathering is larger, we take two.

When packing the jars or containers, just make sure to leave enough room for expansion so they don’t break or split the containers. Cover the vegetables with the pickling solution for the best flavor and to prevent freezer burn of exposed vegetables.
Freeze for at least 2 weeks for the flavors to mingle and mature before serving. Thaw in the refrigerator overnight and serve cold.


 2018 Terroir Seeds | Underwood Gardens