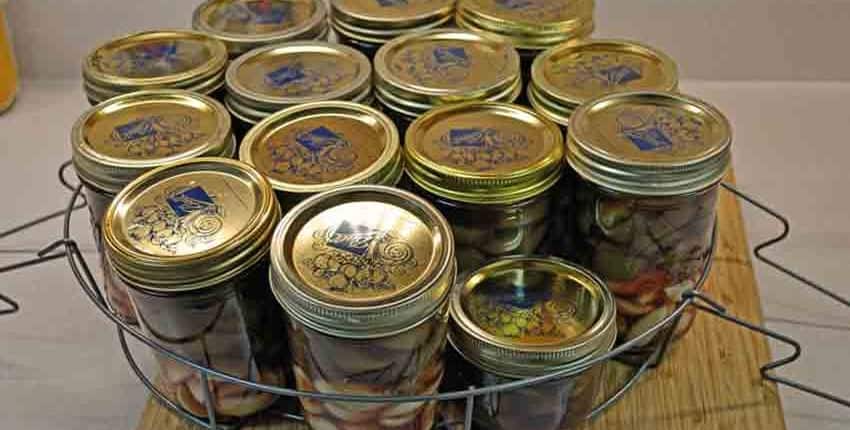
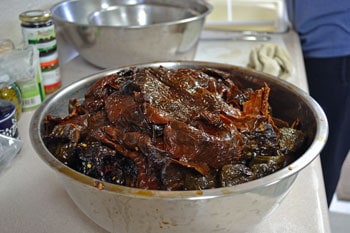
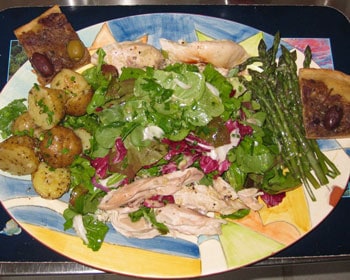
Discover a tasty recipe for Korean pickled garlic using fresh hardneck garlic. Sweet undertones and a tangy flavor await!
You’ve grown some incredible food from your home garden with heirloom seeds. Our heirloom recipes and cooking tips show easy ways to get the most flavor!
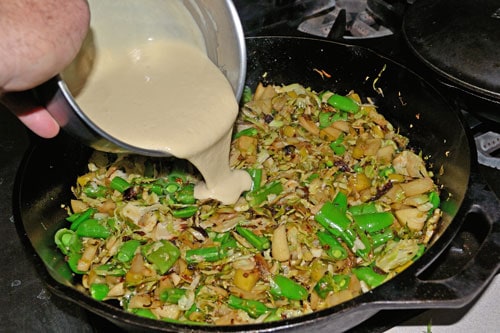
Elevate your coleslaw game with Chipotle-Cilantro Coleslaw. This recipe features roasted golden beets for a unique and delicious twist.
Moroccan Preserved Lemons
Lemons have captivated us for millennia with their bright yellow globes and sour juices, yet using the whole fruit is uncommon today. Preserved lemons boast their own virtues – its juice is tart and acidic with bright notes, while its fragrant oil lives in the peel, where the essence of the fruit is. Taken together, juice and peel offer a bright, aromatic, sweet-sour jolt of life and interest to any dish they touch.
Preserving whole lemons is a centuries-old tradition throughout India, North Africa, the Middle East, Turkey, and Iran where salt and extra lemon juice mellow the bitterness and create highly addictive sweet, salty, and sour flavors heavy with savory citrus aromas. Finely diced preserved lemons are ideal ingredients anywhere lemon juice is called for, and they are an excellent accompaniment to everything from grilled meat and fish to salads and marinades.
Once preserved, the lemons take on a completely different aspect, almost as if they were a different fruit with enhanced flavors.
Making Preserved Lemons
It’s much easier than you might think! We’ll share the recipe first, then walk you through the process in photos.
A unique way to keep the flavor and aroma of fresh lemons for up to a year, ready to bring a bright lemony note to any dish.
- 5 Organic lemons for preserving – scrubbed and dried to remove any wax
- 5 Organic lemons for fresh lemon juice
- 1/2 cup Kosher salt
Slice juicing lemons in half and juice well, discarding any seeds in juice.
Soften the preserving lemons by rolling them back and forth on a wooden cutting board. Quarter the lemons from the bottom down to within 1/4 inch of the top, open them up and sprinkle salt on the exposed pulp, then close back up.
Pack the salted lemon into a quart glass canning jar, pushing each lemon down with a wooden spoon. Sprinkle salt between each layer of lemon.
Top off with fresh-squeezed lemon juice, making sure that the lemons are covered but leaving an air space of about 1/4 to 1/2 inch before closing with lid.
Leave the lid slightly loose and place the jar in an overflow bowl to catch any lemon juice that seeps out during the preserving process.
Let the lemons ripen and preserve in a warm place for 30 days, turning the jar upside down once a day to distribute the salt and juice. Open the jar and add lemon juice if needed to keep lemons covered.
After 30 days, make sure lemons are covered with juice and store in the refrigerator for up to a year. The preserved lemons will be good for a year, and the leftover pickling juice will be good for another year.
Turn the jar upside down from time to time to redistribute the juice. Make sure that the lemons are covered by juice at all times.
If you notice a lemon has become exposed to air in the jar and has a white lacy substance clinging to it, this is a harmless byproduct of preserving and can be removed.
Pull out a lemon with a fork, slice off what is needed for your recipe and rinse under cold running water to reduce the saltiness. Return the unused portion to the jar.
The amount of salt you use is up to you, depending on your level of salty taste preference. The 1/2 cup listed in the ingredients is the minimum to keep the juice brined enough to preserve and protect the lemons, but you can add more if you like a saltier lemony flavor.
We have fallen in love with the beautifully bright hit of lemon scent and flavor these give with the minimum of salt, and we don’t rinse before use but adjust the amount of salt used in the recipe accordingly.
Adapted from Paula Wolfert’s The Food of Morocco
How to Make Preserved Lemons
Start by making the fresh-squeezed lemon juice. Slice 5 lemons in half and juice them, then remove any seeds but keep the pulp.
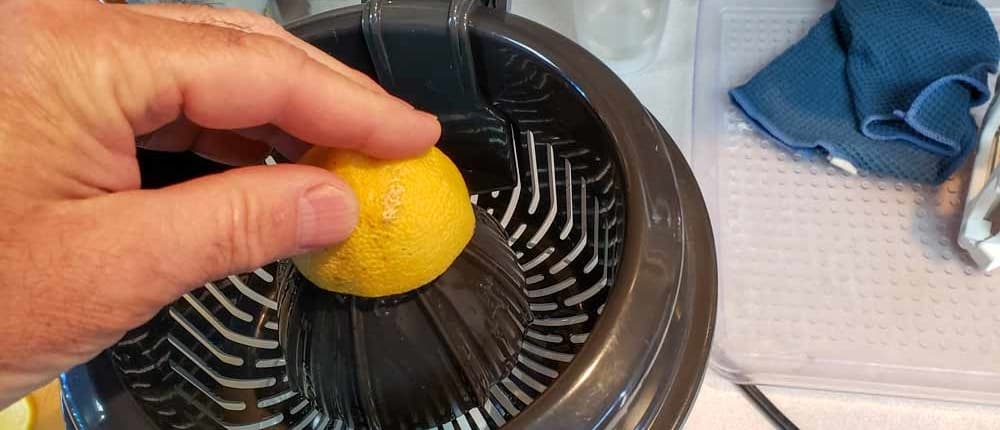
Get more juice out of the lemons by rolling them back and forth on a wooden cutting board with the palm of your hand for about 20-30 seconds each, then slice in half.

Juice the lemons, removing any seeds but keeping the pulp. Set juice aside to use later.
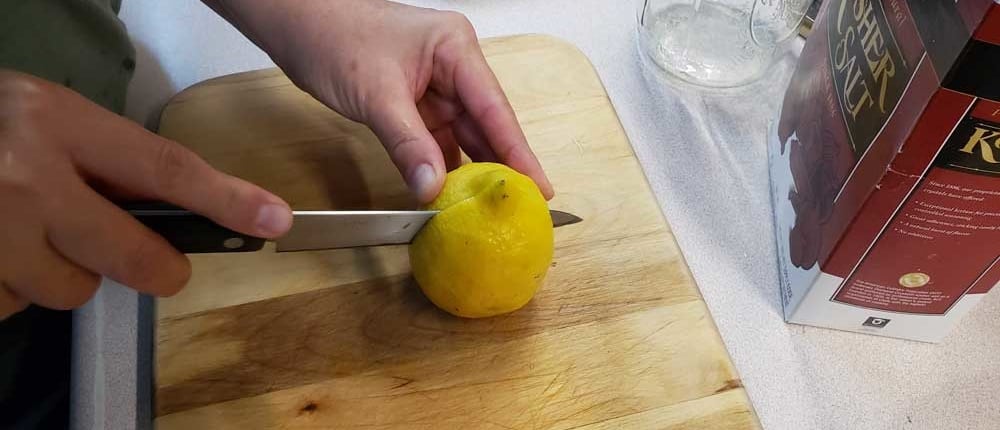
Next, prepare the lemons for preserving by slicing from the bottom end to about 1/2 to 1/4 inch from the top or stem end. Do this twice to quarter the fruit.
Open each lemon for salting. The amount of salt depends on your taste preference. We found that we like the flavors especially well when 1/2 cup of salt is used for the recipe. This allows the preserving action to take place but doesn’t impart any extra salt to the flavors. We find that we don’t usually need to rinse the lemons before using them.
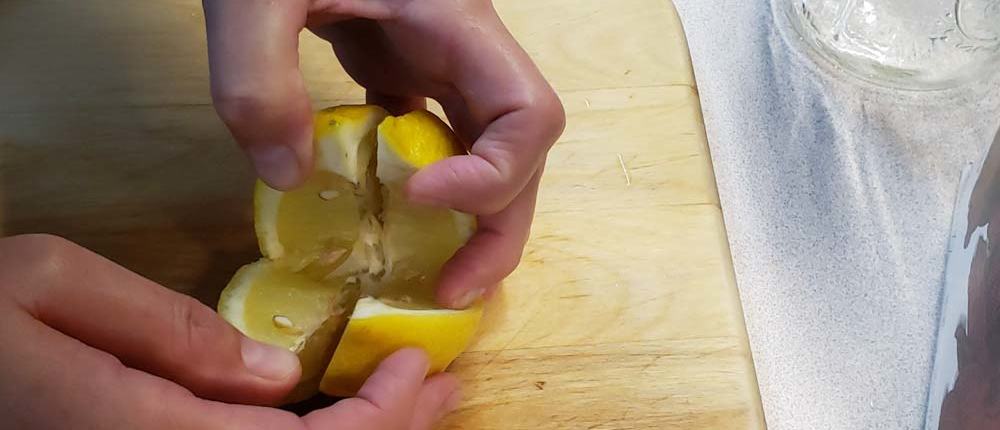
Lightly but evenly salt the interior of each lemon.
Pack the lemons into a quart glass canning jar, packing them down to make room for all 5 lemons. Add a light sprinkle of salt on top of each lemon in the jar.
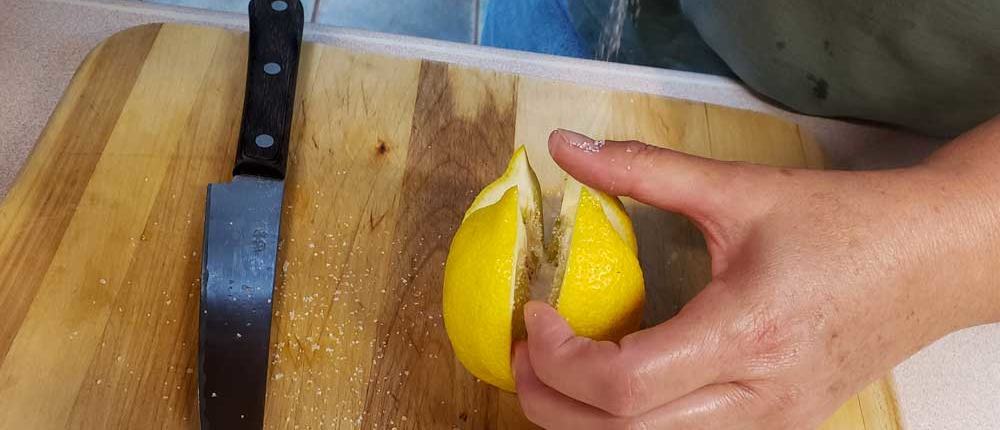
Four normal-sized lemons will almost fill the jar, so you’ll need to pack the fifth lemon pretty well.
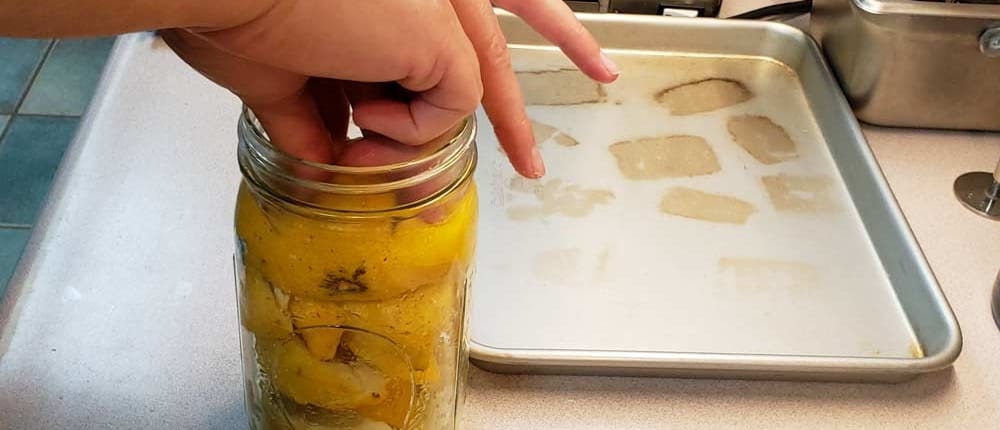
Using a combination of fingers and a wooden spoon, make sure the lemons have enough headspace for the juice to completely cover them.
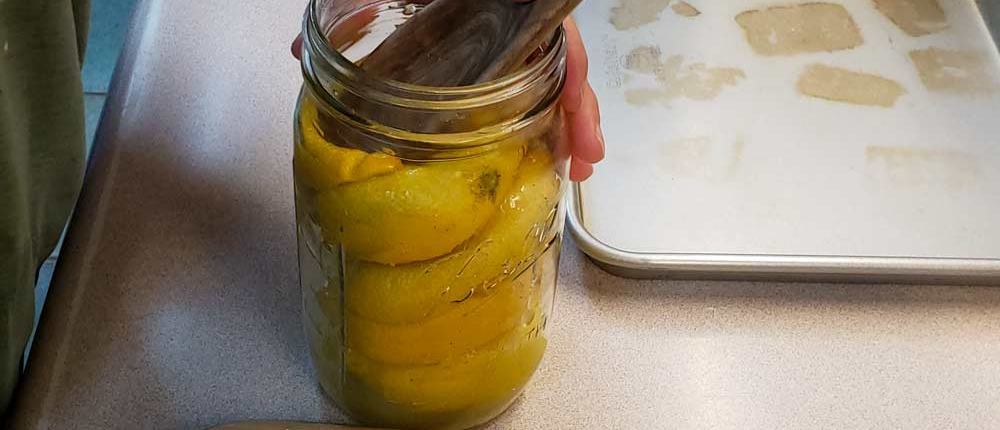
Add the fresh-squeezed lemon juice, making sure that the lemons are completely covered.
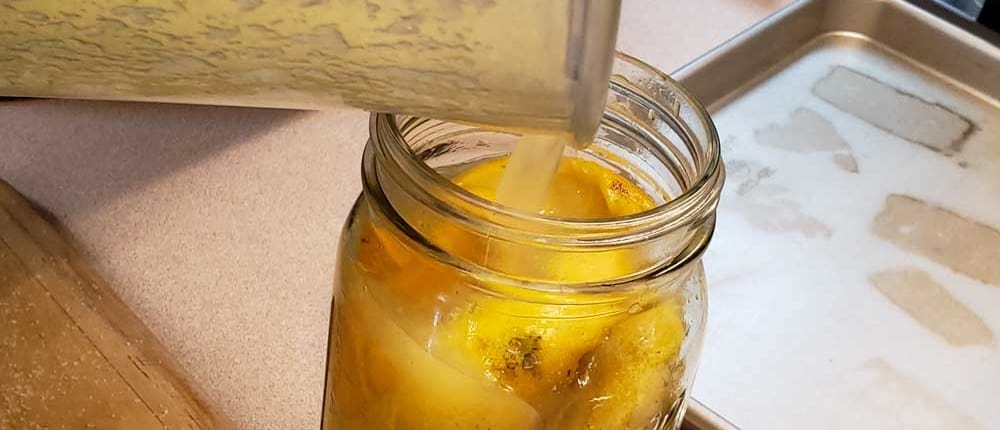
Fresh lemons are springy, so you’ll usually need to pack them back down with a wooden spoon after adding the lemon juice.
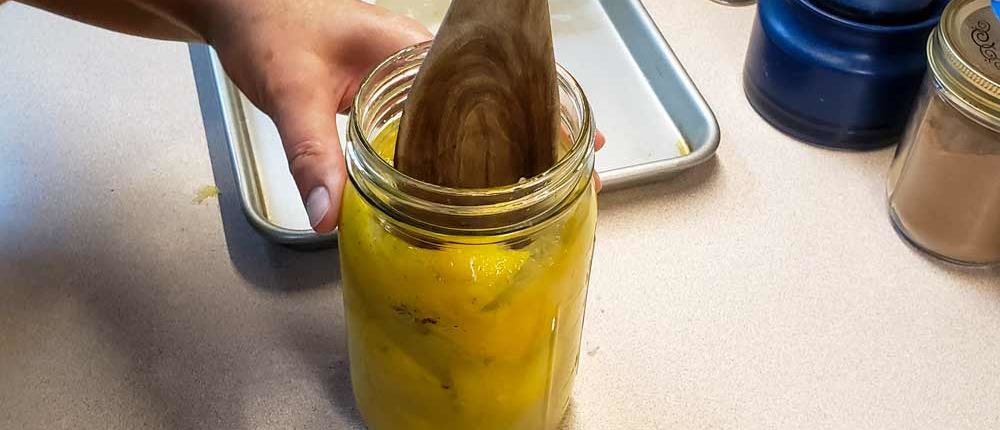
Make sure the lemons are covered by juice, tighten the ring and cap loosely to allow for any expansion during the preserving process. Put the jar in a bowl to catch any overflow.
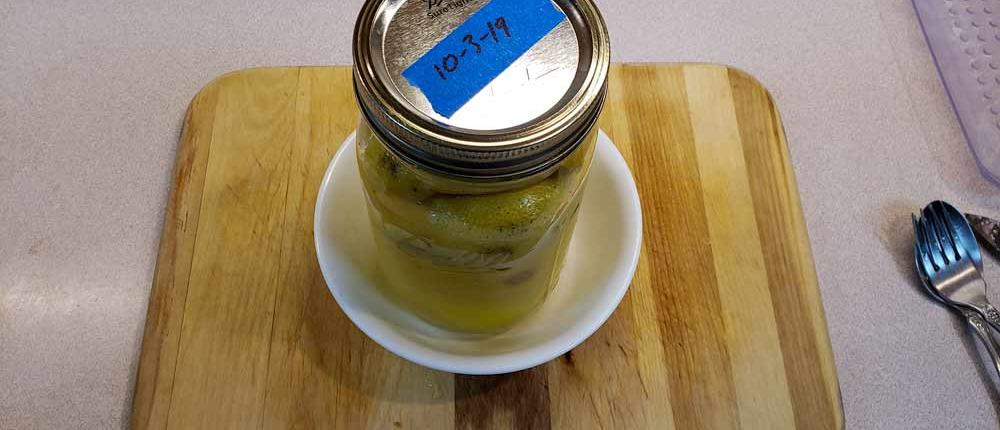
Now you wait! Invert the jar once daily to allow the juice and salt to trickle through the lemons, then set it back in the bowl.
After about a week, give the lemons a sniff test. You’ll notice the aroma starting to change from an overall sour lemon smell to overtones of sweet and almost fruity. It brings to mind the smell of a freshly opened Italian lemon soda – sweet, sour, and sparkling.

Let the jar sit out in a warm area for 30 days, then store in the refrigerator. The lemons will be good for up to a year, and the pickling juices will be good for another year. Once you taste them and start using them, they’ll be gone within a couple of months!
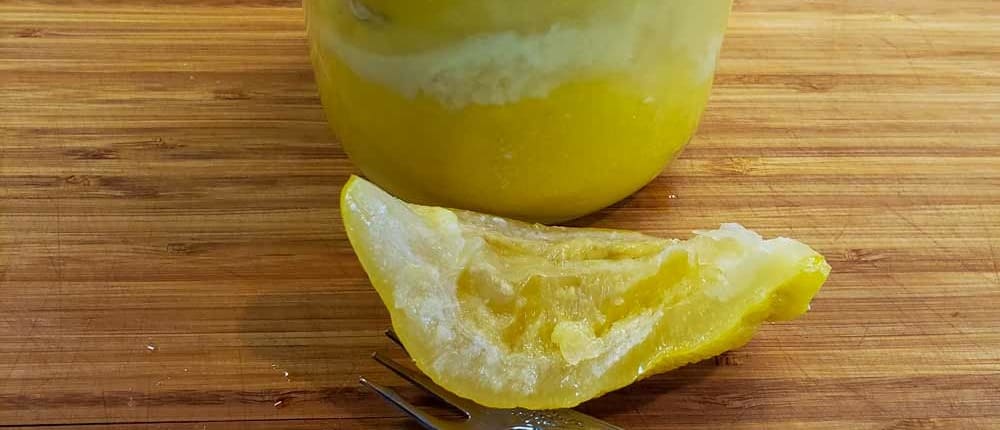
The rinds soften during the preserving process, allowing you to use the complete lemon – rind, pulp, and juice – in any recipe that calls for lemon zest or juice. We use a finely diced 1/4 inch slice of lemon when a recipe calls for a tablespoon of lemon juice. The preserved lemon adds a glorious citrus perfume with a very pleasing lemony punch that doesn’t disappear during cooking.
After we made our first batch and cooked our first lemon roasted chicken, we immediately made a second batch!
Fresh Mint Taste All Year
Lime and mint are not usually thought of together (if at all) in combination with pickles, but they should be! The lime-mint flavors work together with the cucumbers to make something much more than the sum of their parts – bright, refreshing, and absolutely addictively delicious.
Even after a year in the freezer the mint tastes fresh-picked.
Similar to our much-beloved Cilantro Freezer Pickles, this is a very simple and fast recipe that doesn’t need canning or heat and will handle any amount of surplus cucumbers – from a few up to way too many!
Each recipe makes about 4 pints, so you can expand accordingly.
Another freezer pickle recipe that keeps the fresh-picked flavors long after the season is gone.
Quick, easy, and addictively delicious, the lime and mint work with the cucumber to create something amazing.
- 2 1/2 lbs pickling cucumbers thinly sliced
- 3 tbs pickling salt Kosher salt works and tastes great
- 1/2 cup mild onion thinly sliced
- 1 small sweet pepper chopped
- 1 lime zest grated
- 2 cloves garlic minced
- 1/4 cup fresh mint leaves minced
- 1 1/2 cups sugar organic cane sugar gives a more rounded flavor
- 1 1/2 cups white vinegar red wine or cider gives different flavors
Wash and thinly slice cucumbers – do not peel, then thinly slice onions.
Toss cucumbers and onions in a large bowl with salt, mixing well to evenly distribute the salt. Let stand at room temperature for 2 – 3 hours, then drain excess liquid but do not rinse.
Combine remaining ingredients in a separate bowl, mix well and pour over vegetables, stirring well to mix. Refrigerate for 8 – 10 hours or overnight.
Pack the vegetables and brine in freezer-proof rigid containers and freeze. Make sure to leave about 1 inch of headspace to allow for expansion so the jars don’t break.
When packing the vegetables, make sure the brine completely covers them to prevent freezer burn and ensure the best flavors.
Freeze for a minimum of 2 weeks to allow the flavors to mature and mingle.
To serve, thaw overnight in the refrigerator and enjoy!
We use a Cuisinart or similar kitchen appliance to slice the vegetables – reducing our prep time to a few minutes.
Make the pickles according to the recipe, then experiment and use different ingredients to suit your tastes or the occasion. Try sweet onions, more pepper, lime, or mint for a more intense flavor. Different sugars have a different effect on the final flavor – try palm sugar, turbinado, or even a little brown sugar to the mix. Same with the vinegar – find which one you like best!
Making Lime-Mint Freezer Pickles
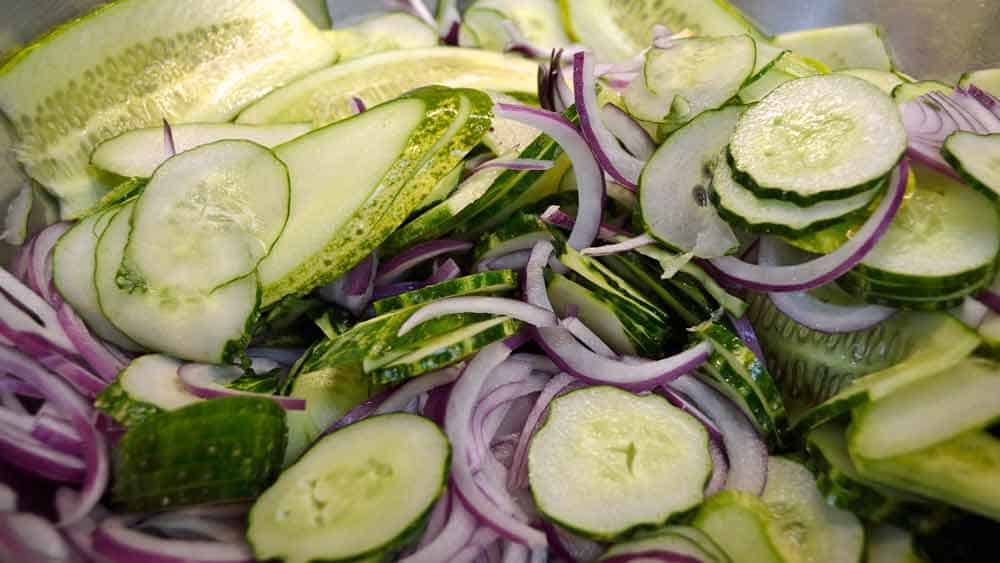
Start by slicing the vegetables…
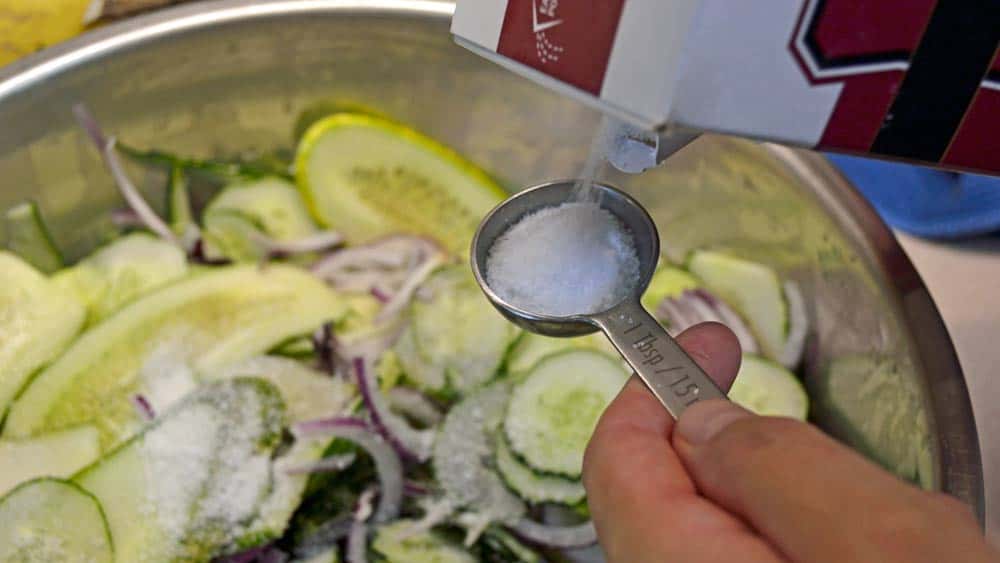
…then salt them and let sit for a couple of hours. Don’t worry if you get busy and they sit all day – they’ll be just as tasty!
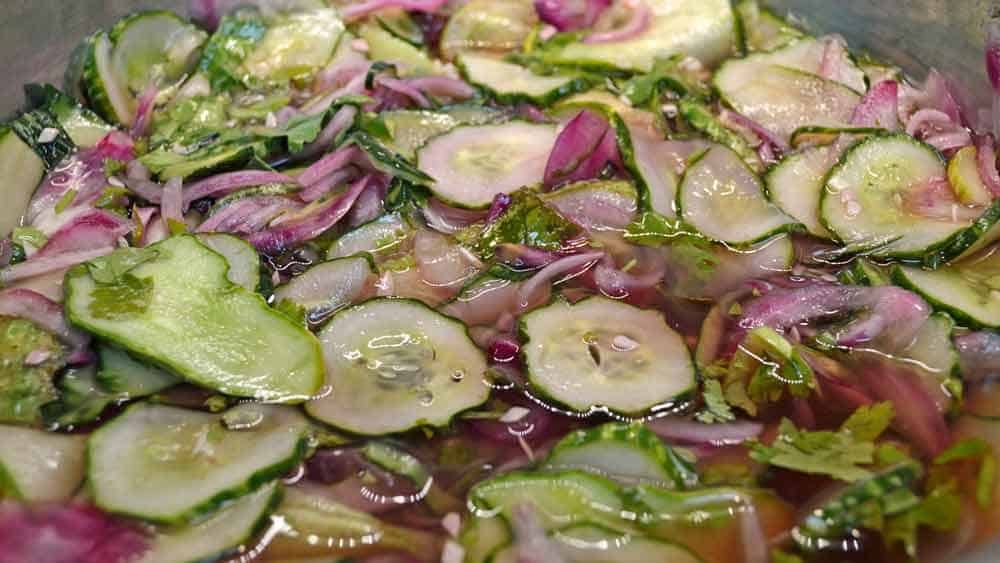
The salt draws out the natural juices, creating a brine to preserve the flavors.
After sitting, drain off the brine but do not rinse.
Combine the sweet pepper slices and remaining ingredients into a separate bowl, mix well, then pour over the brined vegetables and refrigerate overnight.
The next day, pack the vegetables into a freezer-proof container or bag. We like to use pint canning jars – just the perfect size for a family picnic or BBQ. If the gathering is larger, we take two.
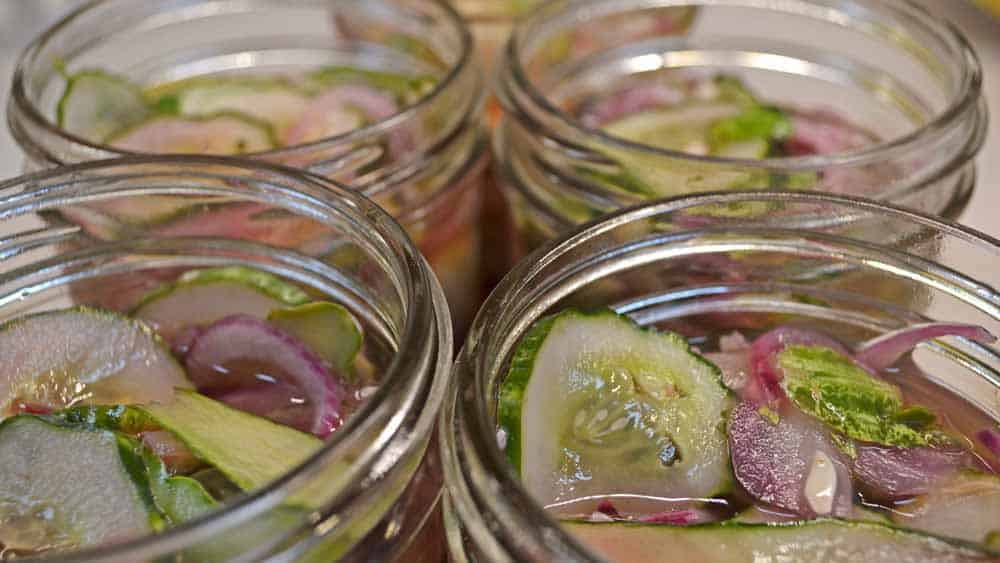
When packing the jars or containers, just make sure to leave enough room for expansion so they don’t break or split the containers. Cover the vegetables with the pickling solution for the best flavor and to prevent freezer burn of exposed vegetables.
Freeze for at least 2 weeks for the flavors to mingle and mature before serving. Thaw in the refrigerator overnight and serve cold.
Sun-Dried Tomatoes are Firecrackers of Flavor
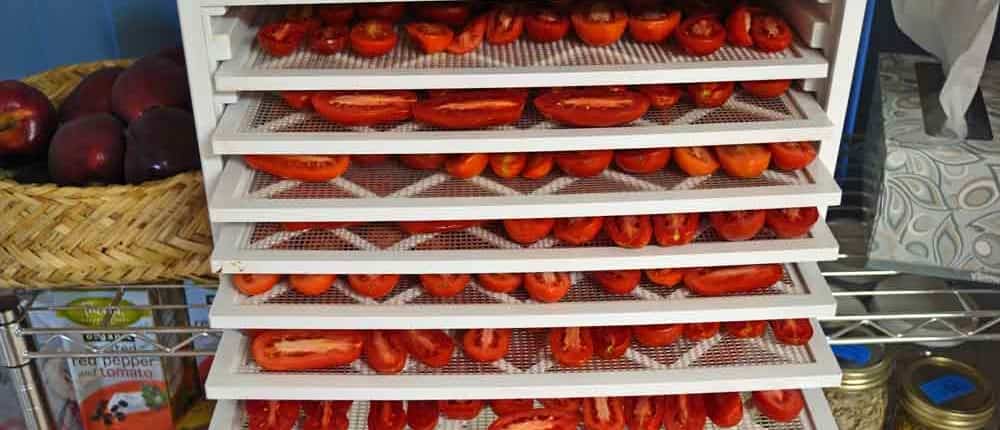
Sun-dried tomatoes are amazing. Just cracking open a jar perfumes the room with their unmistakably rich fragrance, making the dead of winter smell like the peak of late summer. They wake up many dishes with their explosion of intensely sweet and tart flavors. Preserving them uses the simplest techniques with only two ingredients, and they last an extremely long time without needing refrigeration. There is no easier way to capture and intensify their flavor and aroma.
You may not have experienced the full flavors if you’ve only tasted the store-bought offerings unless they were imported from Italy.
To understand the rise and fall of sun-dried tomatoes in America, read “What Ever Happened to Sun-Dried Tomatoes?”, then come back here.
Did you catch the part where commercial tomato growers jumped into the game once sun-dried tomatoes were popular? Using commodity tomatoes that were bred for uniform shape and tolerance to shipping (that’s actually one of the breeding characteristics!) simply ruined the market, due to their utter lack of flavor.
That’s not to say there isn’t a place for sun-dried tomatoes in your kitchen today – there is, and they are still just as delicious as you remember – maybe even more so if they come out of your garden!
If you’ve got a lot of tomatoes on the way, preserving them by sun drying or dehydrating and storing in olive oil allows you to put up 50 lbs. of tomatoes into a couple of jars with little work.
Let’s walk through just how easy and simple it really is!
Making Sun-Dried Tomatoes
The best tomatoes for sun drying are the best-tasting ones – grown in rich, fertile soil giving them the sweetest, most complex flavors. Paste tomatoes are traditionally used just for this reason – they have a sweeter taste that is intensified by the drying process, giving them their signature complex sweet/tart flavors.
Be careful, though – Italians use San Marzano tomatoes almost exclusively because they are sweet to begin with, unlike the Roma tomatoes used by the American tomato paste market, which are more acidic and take on bitter overtones once dried. The larger San Marzano Redorta tomato works very well also.
Remember – starting with the best quality means you’ll wind up with the best flavors!
Pick fully ripe, almost soft tomatoes then wash, de-stem and slice them, removing any bad spots. Fully ripe fruit have a richer, more fully developed flavor to start with.
Arrange them on a flat surface like a dehydrator sheet or a cookie sheet lined with parchment paper. They can be slightly touching but you want to keep good airflow between the tomato halves.
The original sun-dried tomatoes were just that – dried in the sun on rooftops then threaded on garlands or preserved in olive oil for the next season to add flavor to dishes when there were very few fresh vegetables available.
Most gardeners don’t have the space to spread out dozens of trays to sun-dry their tomatoes, so we improvise. A dehydrator works wonders, drying 30 lbs. or more of fresh tomatoes in a batch. We use an Excalibur that we’ve had for almost 20 years – set the temperature to 80-90°F, turn the fan on and check on the progress every few hours. The low temperature allows for a more even drying and doesn’t cook the fruit, leaving you with funky flavors. It’s a slow process so you don’t have to babysit. A full load usually takes overnight and we stop it when the tomatoes are leathery but still pliable and not crisp.
This is how much the tomato slices shrink in drying, and how 30 lbs. of fresh paste tomatoes can fit into a few jars.
Once they are dried to your liking, simply gather them up and determine what size and how many jars you need. They make exceptional, incredibly thoughtful gifts for the gourmand or serious cook in your life, so we decided to make up a few half-pint jars for gifts and half-gallons for our own use.
Pack them tightly into clean jars and add olive oil to fill, making sure to completely submerge the tomatoes, screw the lid on tight and you’re done! Use the best quality olive oil you can source – organic is preferable, as it becomes a component of the flavors you are working to preserve.
Fresh sun-dried tomatoes are beautiful and delicious in their own right, ready to enjoy in a myriad of dishes from bruschetta and simple fresh pasta dishes to brightening hummus and cream cheese spreads to showcasing their delightful flavors in simple scrambled eggs in the morning.
Sun-dried tomatoes keep a long time, much longer than you might expect. They go through a process similar to aging balsamic vinegar or wine, becoming richer, deeper, and more complex in their flavor profiles while gaining a surprising aromatic intensity. Being submerged in olive oil seals them off from the air and allows them to mature and age.
We discovered a hidden half-pint recently that was – let’s just say a few years old – in perfectly good shape and delicious. On opening the jar for the first time, the room was immediately filled with the intense, rich scent of aged tomatoes. It’s difficult to describe, but we were immediately hungry for something – anything – with those sun-dried tomatoes in it!
After tasting the aged sun-dried tomatoes, we will be putting up a jar or two strictly for aging each season from now on!
The Original Working Lunch
All over the world, working folks have eaten hand-held lunches of meat or vegetables wrapped in dough. Not sandwiches, but delicious and filling sealed, portable, savory pies – bringing energy for the afternoon work they faced.
Many of these international specialties have found a welcome home in this country, and this example comes from the 18th-century Russian Mennonite farms by way of south-central Kansas, where they emigrated to. Traditionally tucked into a basket or hamper and brought to the farmers at their mid-day lunch break, they are a hearty and delicious way to enjoy a good meal on the go today.
They are great fresh, but also keep in the refrigerator and freeze well. Let them thaw before reheating to get a taste of fresh, homemade goodness anytime!
Bierocks perfectly showcase fresh, home-grown cabbage as a foil for the richness of seasoned ground meat or other roasted, savory vegetables like mushrooms or beets. We used a freshly harvested head of Danish Ballhead cabbage that was sweet, tangy and crunchy!
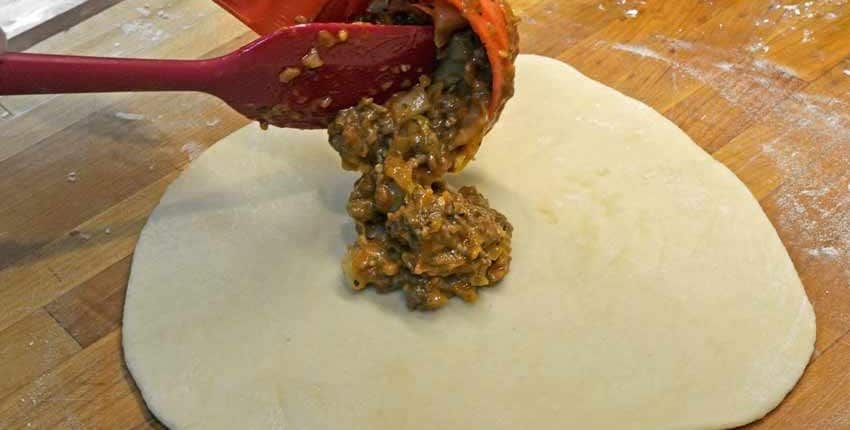
It starts with the dough, which has been mixed, kneaded and risen twice. These balls are rolled out…
…and filled with the savory filling. Equal parts ground beef mixed with cabbage is traditional, but any seasoned ground meat is just as tasty, or use portobello mushrooms sauteed in Worcestershire sauce for a meatless variation.
Seal the bierock by folding the edges together around the filling and pinch tightly to seal the dough together. To make a nicer, easier to handle pastry…
…fold the “tails” or ends underneath and seal them with a strong pinch.
Arrange them onto a baking sheet – we used parchment paper instead of oiling the pan. Let them rise for 20 – 25 minutes…
…then pop them into a hot oven for 15 – 20 minutes, or until golden or golden-brown on top.
They are ready to serve after sitting for a few minutes, or you can make them ahead of time for a party or trip. Bierocks re-heat well and make a satisfying field lunch when spending the day outdoors.
Here’s the recipe –
- 1 tsp active dry yeast
- 5 cups bread flour
- 1/2 cup sugar
- 1/2 tsp salt
- 1 1/2 cups milk - lukewarm
- 10 tbsp butter - melted
- 2 eggs - lightly beaten
- 3 tbsp oil - coconut or olive
- 1 yellow onion - peeled and finely chopped
- 1 lb ground beef
- 4 cups green cabbage - shredded
- 1/4 lb chedder cheese - grated
- 2 tbsp dijon mustard
- black pepper - freshly ground to taste
- For the dough:
Dissolve yeast in 2tbs warm water in a small bowl. Mix together flour, sugar, and 1/2 tsp salt in a large bowl. Add milk, 8 tbs butter and eggs to yeast, mix well then stir into flour. If the flour is too dry and crumbly, add water 1tbs at a time until a dough ball is formed. Turn dough out onto a lightly floured surface and knead until elastic - about 5 minutes. If using a stand mixer, use the dough hook to knead, then turn out and test elasticity by hand kneading. Put dough into an oiled bowl, turn it to coat with oil, cover with a cloth and set aside in a warm place to rise for about 30 minutes. Once the dough has doubled in size, punch down, cover and let rise for additional 30 minutes. While dough is rising, make the filling.
- For the filling:
Heat 2tbs oil in a large skillet over medium-low heat. Add onions and cook until soft and starting to brown - about 15 minutes. Increase heat to medium-high, add beef, and brown for 8 minutes. Stir in cabbage, cook for 10 minutes, then add cheese and mustard and season to taste with salt and pepper. Simmer for 5 minutes more, then set aside to cool.
- To assemble:
Preheat oven to 350°F. Return dough to a floured surface and divide into 12 equal balls. Roll out into 6" rounds and spoon about 1/3 cup of filling into the center, then fold edges together and pinch closed. Fold tips together and pinch to seal, then place seam side down on an oiled or parchment-lined baking sheet. Let rise for 20 minutes after all bierocks are made, then bake until tops are golden, about 15 - 20 minutes.
- Serve either hot out of the oven, warmed up or cold depending on your need.
Let us know how you like them, and what fillings you use in yours!
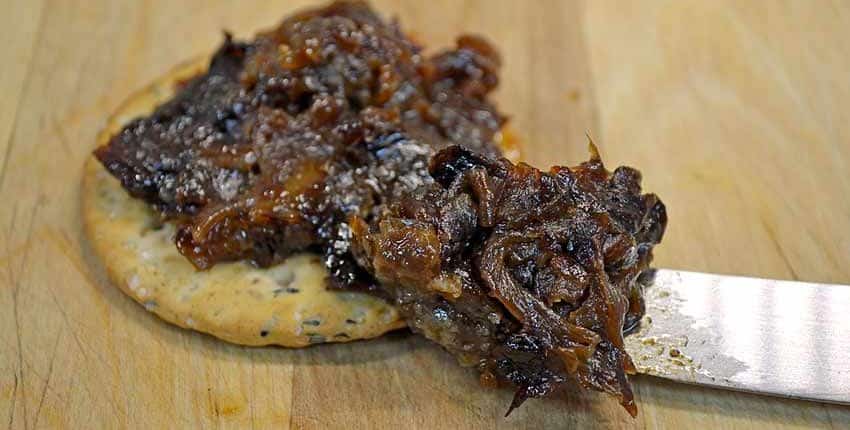
Slow cooked caramelized onions are great, but what if you took that further?
Like, a lot further. Say, six hours full of slow cooked, caramelized goodness.
You would wind up with what Chef Michael Solomonov makes at Zahav, his Israeli-inspired restaurant in Philadelphia.
The ingredients couldn’t be simpler –
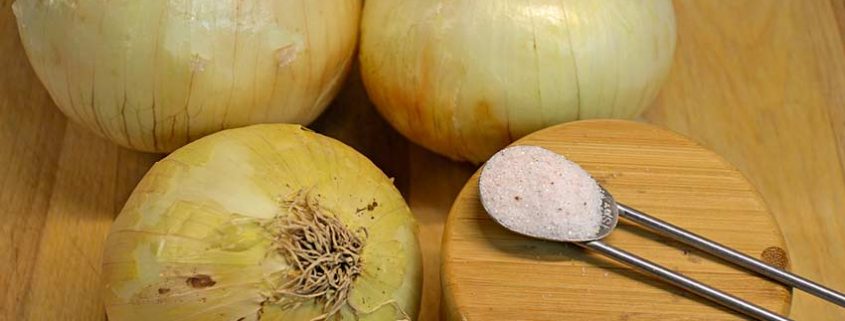
1â„2 cup olive oil6 lbs yellow or sweet onions (about 12 large), choppedKosher salt or sea salt to tastePlace the onions in a heavy heat-retaining pot. I’ve used cast iron for over 20 years and haven’t found anything better for this type of cooking!Pour the olive oil over the top of the chopped onions, then sprinkle the sea salt and stir well.
Chop the onions into smaller pieces. I love using sweet onions as they add a layer to the flavors, but any mild onion will work well.
Of course, growing your own onions will give you the absolute best flavors, but a close second is your local Farmer’s Market. Look for the large, fat, sweet onions for this recipe. Yellow or sweet onions give excellent flavors, but red or purple onions will do just as well with a different color and flavor.
Early fall is a great time for planting onions to over-winter and finish growing next spring – giving you an extra dose of rich flavor and sweetness.
Add the chopped onions to the pot, add the olive oil and salt, then give a good stir to coat the onions.
Put on the covered grill or oven set to 250°F.
The pot of onions has just been put on the Kamado, where I was pre-roasting a chicken for a clay pot dish with onions and Poblano chiles.
Note how full the pot is – within a half inch or so of the top. As we progress, you’ll see how much this drops!
Smoking means cooking! The smoke always means a delicious meal is on the way.
The beauty of slow cooking outside is the freedom it gives you. There is no need to stand around the grill, you can do projects, read or take a nap and check the progress every so often. I try not to lift the lid more than twice an hour, to not lose heat and smoke.
After a couple of hours the onions begin to caramelize. Give them a stir at this point, then about once an hour.
See how much the level has dropped?
The lid is left off so the moisture evaporates and the smoke can infuse the onions.
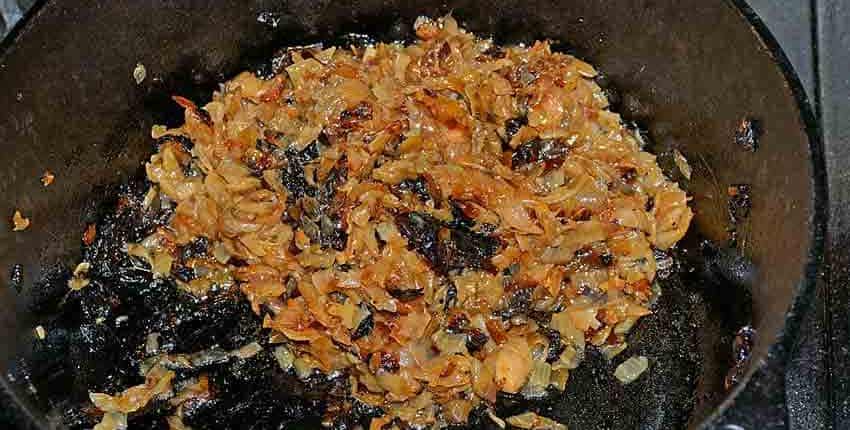
No, these aren’t burned – they are finished!
What started out as a full pot has cooked down to just a couple of cups. All of those flavors have condensed and intensified, mellowing with the gentle heat and smoke from the grill.
Remove from the pan, let cool and store in the refrigerator for up to a month. They won’t last past a few days, but they will keep up to a month!
Now that you’ve got some smoky caramelized onions, what do you do with them?
Almost anything you want!
They are delicious as appetizers straight on crackers, spread on the bun of a fresh-grilled hamburger or as a remoulade on a steak. Mix half-and-half with our 30 Second Mayonnaise for a sandwich spread that will amaze! Chef Michael serves them mixed with salads, slathered on roast chicken, spread on toast with ricotta cheese, or swirled in sauteed chopped collard greens as a rich side dish.
I like them straight, spread on crackers for that full blast hit of flavors and smokiness. Spread on burgers is sublime as well.
Give this a try and let me know how you like them and what you use them on!
Real, traditional mayonnaise has only five simple ingredients but is rarely made fresh, which is truly a shame. Discover how to make fresh delicious mayonnaise in 30 seconds with our recipe, and don’t worry about running out of the store-bought stuff ever again! Once you’ve tasted what real, fresh, homemade mayo is all about and explore the flavor variations, you’ll wonder why you didn’t ditch the jar sooner.
Fresh Food Warning
Unfortunately in today’s world of industrial, factory farmed foods, we must let you know that there is a risk of illness if using commercially produced eggs. That’s why we strongly recommend using fresh eggs from your own or a friend’s backyard chickens or ducks – you know exactly what conditions the eggs come from! Fresh farmer’s market eggs from a producer you know and trust is a good second choice, with certified organic eggs from a store being a third one.
What to do with all these eggs?
More often than not, if you, your neighbor or a friend have chickens or ducks in the backyard, sooner or later you’ll wind up with a surplus of eggs. There are lots of ways to use excess eggs, but we’ll show you one approach that will make your taste buds sit up and sing!
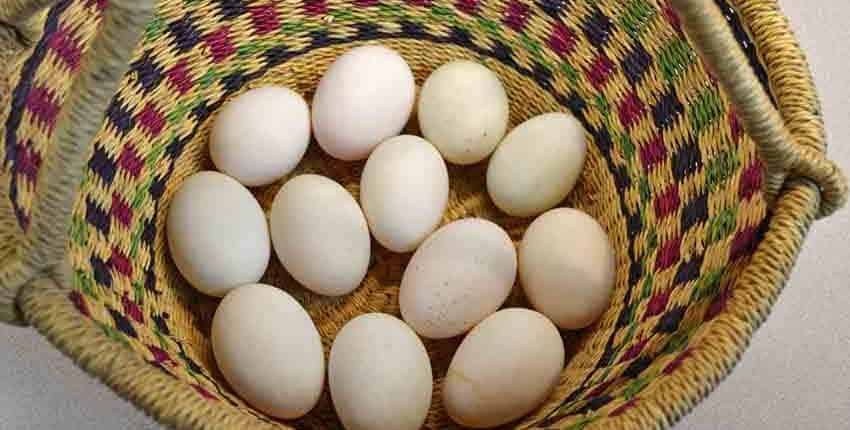
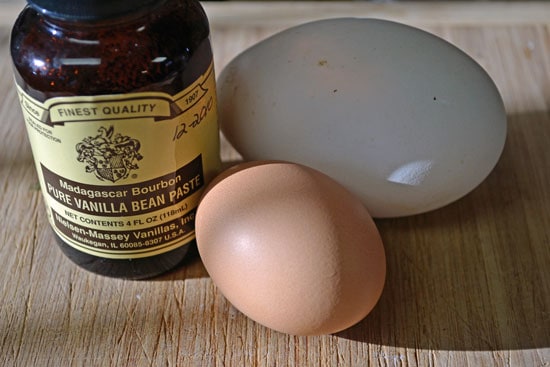
Here’s a peek into our egg basket after a normal spring morning of collecting duck eggs. We currently have Khaki Campbells and are expecting Welsh Halequins, both of which are excellent layers with great tasting eggs and no gamey flavors.
We’ll walk through the process after the recipe:
- 1 1/2 tsp red or white wine vinegar
- 1 tbsp Dijon mustard
- 1/2 tsp sea salt
- 1 egg - fresh is essential for flavor a second may be needed
- 1 1/2 cups high quality oil - avocado sunflower, canola, olive are all good
- Finely chopped herbs of your choice - optional
- Add ingredients into immersion blender cup in order listed.
- Lower immersion blender into bottom of cup.
- Puree for 3 seconds at bottom, then slowly bring to top while blending and emulsifying the oil - about 15 - 20 seconds.
- If mayonnaise is too thin, remove blender and add second egg. Repeat blending from bottom to top of cup.
- Once desired consistency is reached, add chopped herbs or spices and blend for 5 - 10 seconds.
- Store in a glass container and refrigerate for up to one month.
Making Mayonnaise the Easy Way
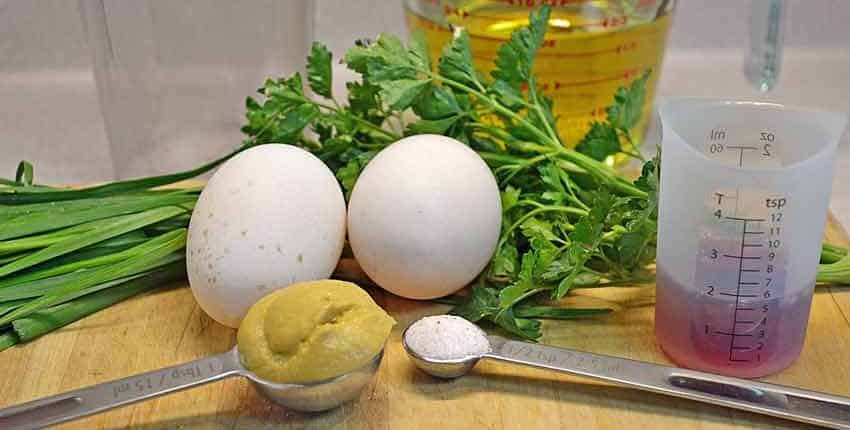
Start with gathering all of the ingredients – for the mayonnaise you’ll need eggs, a high quality oil, vinegar, salt and mustard. No emulsifiers, preservatives, thickening agents or ingredients you cannot easily pronounce. You can start with the very basic – and classic – version without herbs or spices and then expand your tastes as you like. Or, if you are a bit more adventurous and want more flavor than what comes out of a jar, then try some fresh herbs from your garden, or a dried herb mixture such as Herbes de Provence!
We chose to add garlic chives and parsley to our mayonnaise, simply because they were both growing vigorously in our container herb planters and were close at hand.
Red wine vinegar was our choice for the flavor, but white wine vinegar or apple cider vinegar are also great choices. Each will have a different flavor, so you can experiment and see what you like best! You might find you have a favorite mayonnaise for certain foods, and another recipe for others.
Dijon mustard is next, and the same advice applies. Test different mustards for their textures, flavors and aromas they contribute to the finished mayonnaise and decide what you like!
We use a Himalayan pink salt, but there are several different sea salts or RealSalt from Utah that would be good. A natural salt contributes a better flavor.
Next in is the duck egg, or chicken egg. Make sure to have a second one in reserve – we’ll show you why in just a minute! Different types of eggs will have different flavors, so if you have chickens you might try a duck egg mayonnaise, or vice versa.
Avocado oil is what we used in this recipe as it has a nice mellow flavor that supports but doesn’t dominate the mayonnaise. Again, do some testing and try different oils to see what you and your family like.
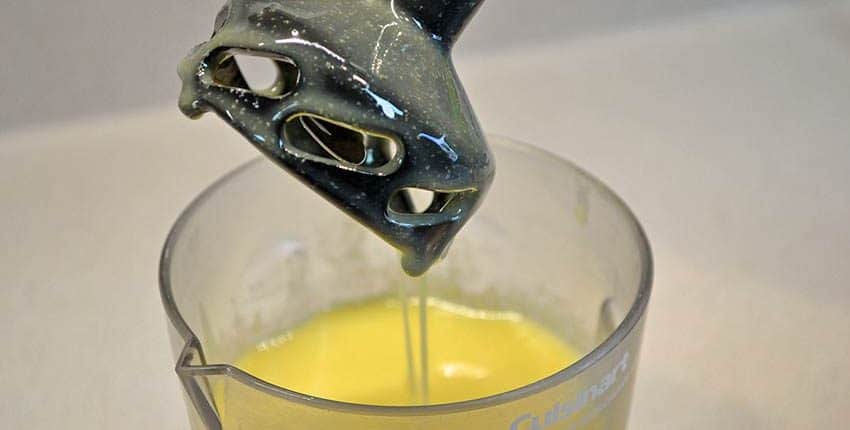
You’ll notice this is taking place in a simple Cuisinart immersion blender cup. This is the secret to the 30 seconds, as it does away with the dribbling oil into a blender or food processor. You simply add the ingredients…
…and insert the immersion blender all the way to the bottom of the cup before turning it on. Ours has two speeds, so I will start the process on low to puree the egg and solids at the bottom for 3 – 5 seconds, then switch to high as I slowly pull it upwards. You’ll see the emulsification process taking place as the blender works its way upwards.
If you get to the top of the cup and see the mayonnaise is too thin for your liking – don’t worry! Set the blender aside and add that second egg. It will go to the bottom, so repeat the blender at the bottom on low, switching to high as you pull it upwards. You’ll see the same process taking place, but the mayonnaise will be much thicker this time.
This is what the difference the second egg makes. This reminds me of the fresh made mayonnaise I used to enjoy in Belgium with fresh hot french fries, lightly salted and sprinkled with paprika. In much of Europe, french fries (called frites) are mostly eaten with fresh mayonnaise as a dipping sauce, or with mustard. Ketchup was unusual, and a sure sign that you are a foreigner!
I quickly came to realize the perfect marriage of flavors of the fresh mayonnaise and hot, slightly salty fries.
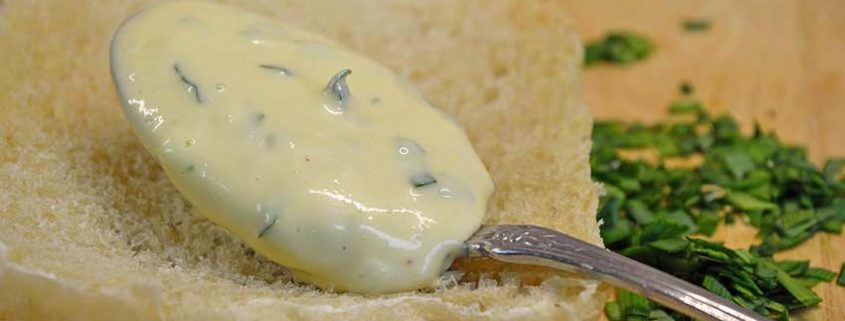
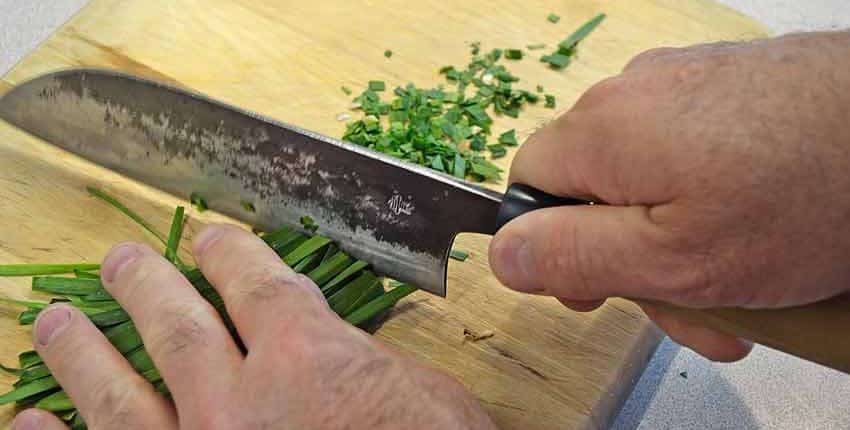
The garlic chives are fairly finely chopped, along with the parsley. I wanted a bit more of a chunky texture, but you can make it smoother with a more finely diced or minced herb mixture.
The herbs are added and the blender does its magic again!
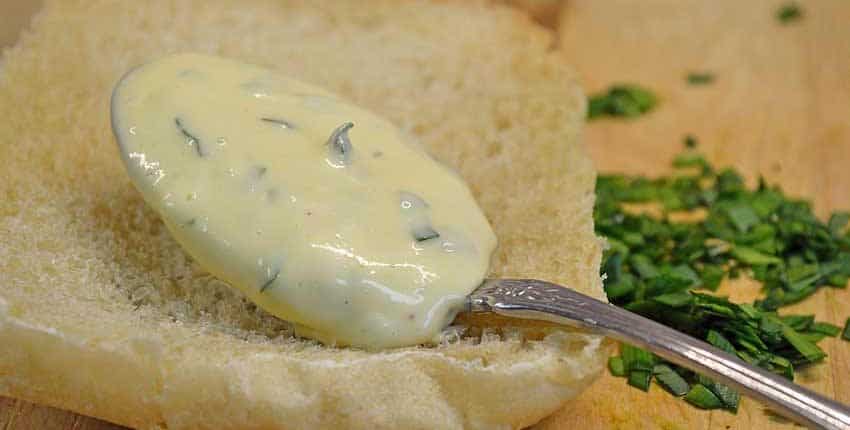
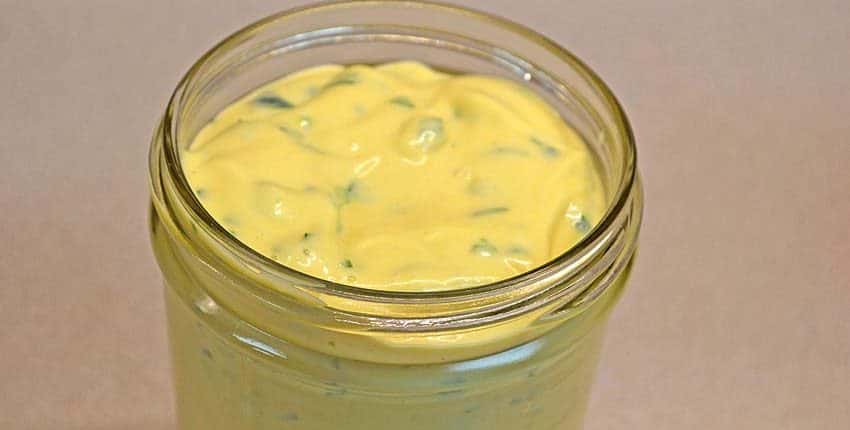
The result is a creamy, thick and luscious mayonnaise with an aroma and flavor that you will love! After a taste or two, you will understand the vast difference in flavors from this to the store-bought varieties.
To store, simply scoop into a glass jar. The recipe above will yield enough for a pint plus a little bit more for tasting. Store in the refrigerator for up to a month, but we’ve never had it last nearly that long!
As easy as it is to make, whip up a couple of different versions for sandwiches, or for french fries, or to add on top of a steak – try olive oil and rosemary for that one!
Once you make a couple of versions, let us know which one you like best and what you use it for in the comments below!
Spiced cauliflower soup is an easy and delicious dish – a warming winter’s dinner but is also a cool and creamy summer’s lunch entreé or appetizer. I had a smoked and roasted potato from roasting a chicken in the wood fired clay BBQ, so that added an extra dimension to the flavors.
The flavors are very engaging with more depth than would be anticipated from such simple ingredients. Use the coconut cream for a milder, richer and creamy soup, with the yogurt adding a tangy counterpoint.
Here’s what you could grow in your garden for this recipe –
- 1 large potato diced
- 1 medium cauliflower head chopped
- 1 medium onion chopped
- 1 tbsp oil
- 3 cloves garlic finely diced or crushed
- 1 tbsp grated fresh root ginger
- 2 tsp ground turmeric
- 1 tsp cumin seeds
- 1 tsp black mustard seeds
- 2 tsp ground coriander
- 4 cups vegetable stock
- 1 1/2 cups coconut cream or yogurt
- salt and freshly ground black pepper to taste
- fresh cilantro or parsley to garnish
- Add potato, onion and cauliflower to a large heavy bottomed pot or deep saucepan with the oil and 1/4 cup water. Heat until bubbling then cover and lower heat to simmer for about 10 minutes.
- Add the garlic, ginger and spices. Cook for 2 minutes, stirring occasionally, then add stock, salt and black pepper.
- Increase heat and bring to just before a boil, then lower heat and simmer for about 20 minutes.
- Stir in coconut cream or yogurt, taste and adjust salt and black pepper and serve with a generous pinch of freshly chopped cilantro or parsley.
Makes excellent and super easy leftovers for the following day's lunch. It is surprisingly satisfying on a cold winter night, but is light and cool on a summer's day.
This is extremely easy to make and doesn’t need you to watch or stir it the entire time, freeing you up for other things for most of the cooking time.
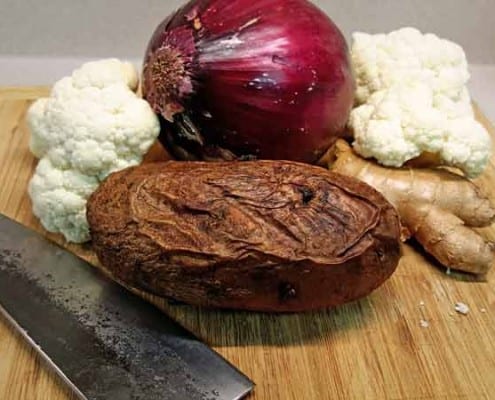
Starting with the main ingredients, I chopped them into appropriate sized pieces. I left the skin on the potato for the extra smoky flavor, but also because lots of nutrients are in the skin that I didn’t want to lose. Same thing with the ginger, I just thinly sliced it and then diced it finely so that it would cook down into the texture of the soup.
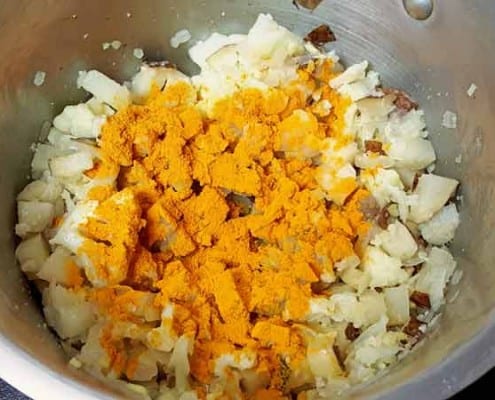
The cooked vegetables after adding the spices but just before adding the vegetable stock. Turmeric is highly beneficial to health, especially when activated by ground black pepper and teamed up with a healthy fat like coconut oil. Much more of the nutrients and benefits are delivered to the body this way, so this soup is the perfect, delicious delivery method!
Ready for enjoyment! The potato cooks down, thickening the consistency and the cauliflower almost completely cooks into the soup. If you want, transfer the finished soup to a blender for a quick spin to make it smoother before serving. The fresh chopped cilantro adds a bright, lively note!
Spaghetti squash is too often overlooked by the home gardener as too plain or common. This is unfortunate because it is a marvel for very tasty dinners which just happen to be quick and easy to prepare. In 30 minutes – from start to finish – you can have a hot and delicious fresh meal with a spaghetti squash and just a couple of other ingredients.
The flavor is very slightly sweet, more so than real pasta, making it an ideal base to pair a tomato or pesto sauce with. If you’ve made some sauce ahead of time, then you’ve got a fully home-made meal that will satisfy three to four people in a half hour from start to sit-down, with only about ten minutes of hands-on time. Another option is to use a quality store-bought sauce and dress it up with seasonings or balsamic vinegar and olive oil to make it a bit more special.
Here’s what you could grow in your garden for this recipe –
- 3 - 4 pound spaghetti squash whole
- 3 - 4 cloves roasted garlic optional
- Olive oil and balsamic vinegar to taste optional
- Freshly grated Parmesan Pecorino, Asiago or other hard grating cheese (optional)
- Salt and freshly ground black pepper to taste
- Place whole squash in a covered steamer basket.
- Cook for 25 minutes or until a knife easily cuts through flesh. Often the rind will pop right around the 25 minute mark.
- Remove steamer basket and rinse under running cold water until squash is just cool enough to handle, but not cold.
- Slice squash in half, remove seeds and smaller pulp in center cavity, and then remove rind.
- Shred flesh into long strands with fork or fingers.
- Add salt to taste to bring flavor of squash up.
- Serve hot with pasta or pesto sauce, add diced garlic cloves, olive oil and balsamic vinegar and/or grated cheese if desired.
Let’s take a look at just how easy this is!
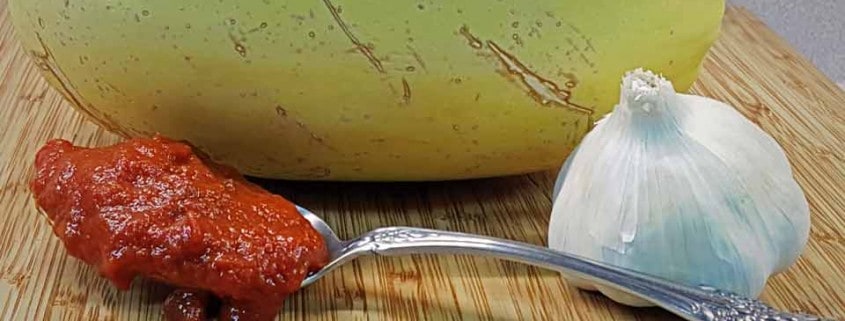
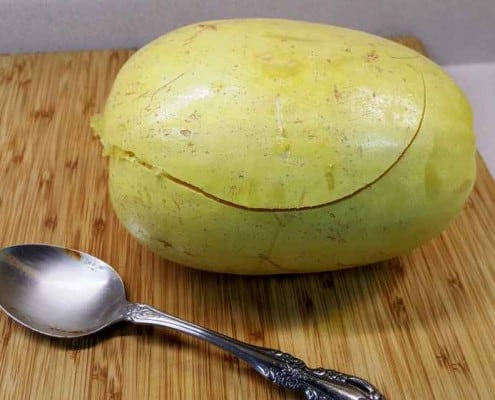
Starting off with Spaghetti Squash and friends…
It is steamed whole for about 25 minutes. The rind popped at about this time, letting me know it was close. The spaghetti squash was removed from the steamer basket and rinsed under cold running water so it could be handled.
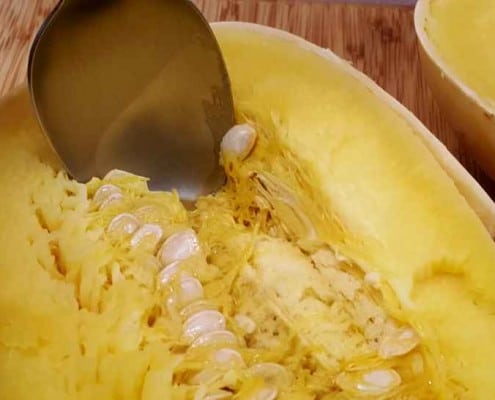
The seeds are removed with a spoon or scraper, then the shell or rind is removed.
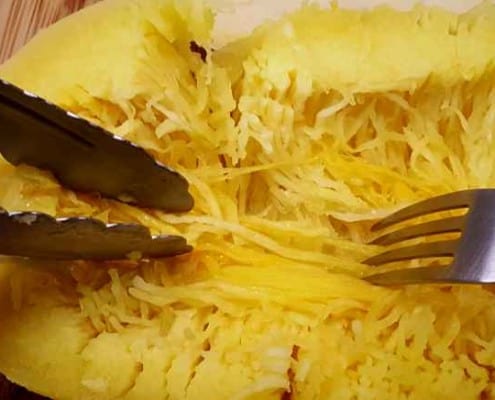
Using tongs, forks or your fingers, shred the squash into its namesake spaghetti strand appearance.
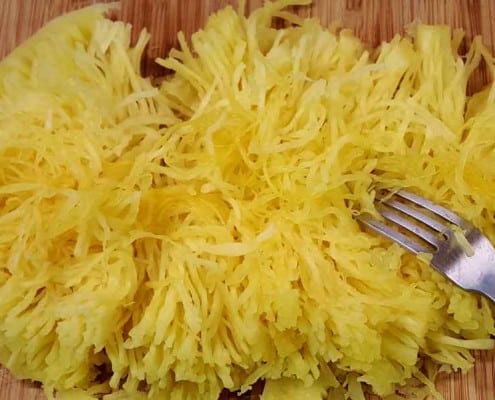
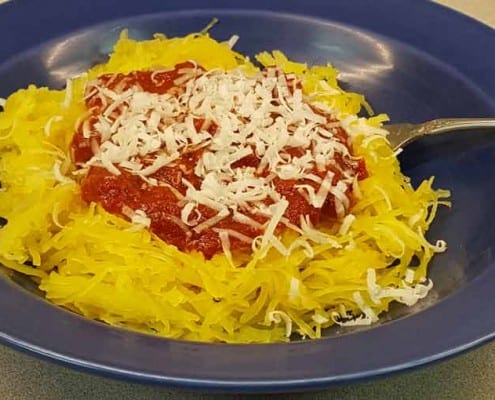
A couple of minutes later, this is what you’ll have! Ready for sauce.
A generous serving of home-made pasta sauce that was previously made, some grated Italian cheese and you’ve got an easy and delicious meal!
The next night we used a pesto sauce with Feta cheese and sun dried tomatoes and it was also exceptional.
This Sicilian eggplant and tomato sauce is wonderful and surprising with its richness and depth of flavors, both fresh and roasted. Easy and delicious!
Fresh, homemade basil pesto is one of the treasures of summer. There are many tasty treats that come out of our gardens during summertime, but pesto is one that is very easy and pretty quick to make. It freezes well and there is very little that evokes the flavor and fond memory of warm summer days than the taste of a batch of pesto on a cold winter’s day.
It might be because almost all of the other garden offerings are cooked in some way while preparing them for storage, while pesto is just frozen. It retains that true, fresh flavor better than many other vegetables that are frozen while fresh.
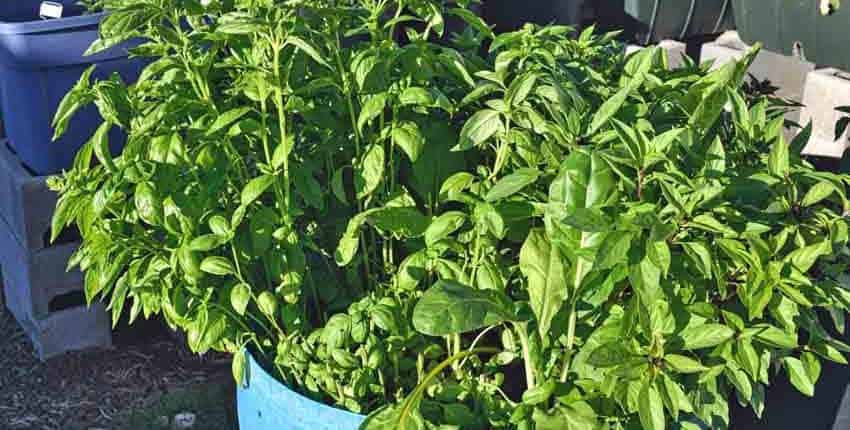
If you haven’t made your own fresh pesto from basil you’ve grown, you might be surprised at how easy it is to grow or how small of a space it takes to grow a good amount. This is an old horse water barrel that was “up-cycled” from a 55-gallon water drum that was cut in half. It is about two feet deep, and we filled it with a mixture of soil and aged compost.
We planted Thai basil in one half and Sweet basil in the other, so you can see how vigorously they grow. We’ve been enjoying fresh basil sprigs in our morning eggs – both the Sweet and Thai work wonderfully, giving their signature perfume and aroma to the breakfast. We also love the Genovese basil, considered the classic pesto basil – but it bears experimenting with different basil varieties and even mixtures of basils in a pesto recipe to see what flavors come out and find what you particularly love!
For this batch, we trimmed about half of the Sweet basil – about 1/4 of the circle- so there would be plenty left for another batch. Basil will grow back quickly, so don’t worry about trimming it short – we left about 3 inches above the soil.
This is our adaptation to the time-honored Pesto Genovese. It is made by pounding in a large mortar and pestle, but we find the flavors are very good when made with a food processor. It won’t be quite the same, and you owe it to yourself to make it the classic way at least once—even if only to see the difference in flavor.
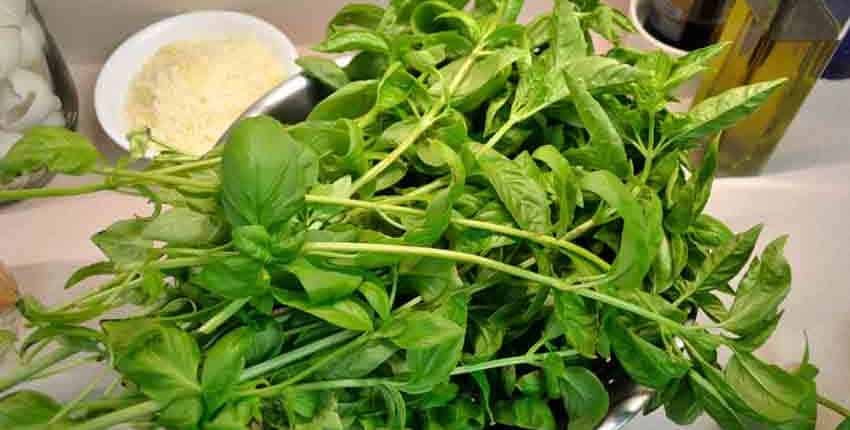
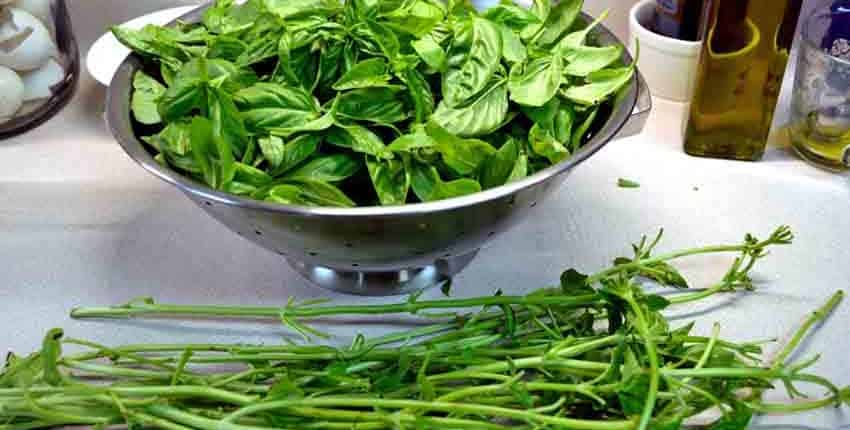
This is what that 1/4 of a circle planter of basil looks like! It overflows a large colander and is ready for the leaves to be picked.
If you are making fresh pesto for dinner, put the water on to boil just before you start picking the leaves. The water will be boiling when you’ve gotten the leaves off and washed and the cheese grated. With just a little preparation on the timing and ingredients, you can have the pesto done just about when the pasta is ready.
It took us about a half hour total to make this batch, including photos.
Harvesting the basil leaves is straightforward – pull them off the stem. You can change the overall flavor of the pesto by harvesting more of the younger leaves for a milder flavor or older and larger leaves for a deeper flavor. If you see young buds or flowers, adding a few of these will add a completely different flavor profile to the pesto. When making pesto to use as a remoulade to top a grilled steak with, using more of the buds will give it a sharper flavor to counter the rich, meaty steak.
You’ll have this in just a couple of minutes – a colander full of leaves and a pile of stalks. Rinse the leaves well and compost the stalks. If you’ve grown your own basil, you’ll probably notice that there is much less dirt than when bought at the store. This results when growing in a raised bed, especially using a drip system. The drip will not splash dirt up on the leaves, and a mulched raised bed will greatly reduce the rains from splashing dirt up as well. It makes a noticeable difference in how long it takes to rinse the leaves.
After rinsing the leaves, leave them to drain for a few minutes and grate the cheese. This is another chance to experiment with flavors, as the classic Parmigiano-Reggiano cheese is great, but a Pecorino is also delicious. Don’t be afraid to try different types of hard-grating cheeses to see what they bring to the recipe. Several hand-crafted American cheeses would be a tasty addition – not “authentic” but very delicious all the same!
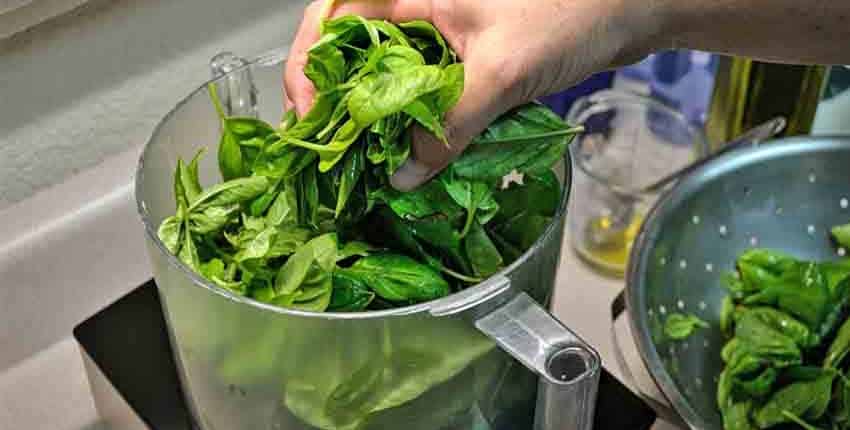
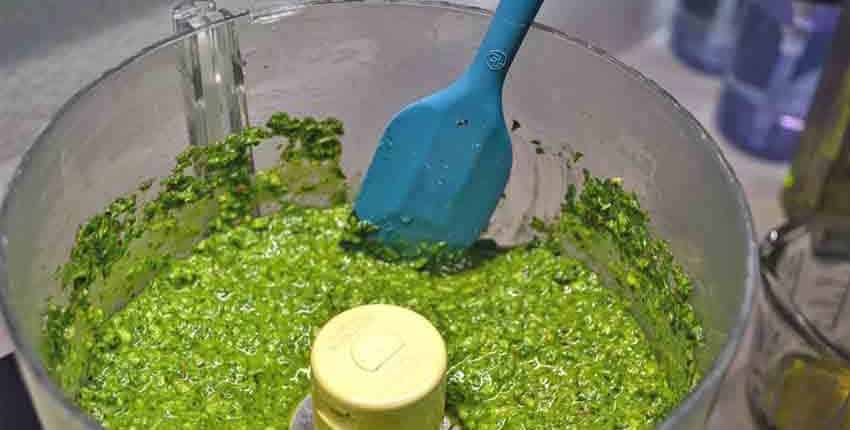
By this time, the basil leaves had drained, and it was time to add them to the food processor. All of the other ingredients, except the oil, were added as well. The water was at a boil, so we added the pasta to the water and then returned to the food processor.
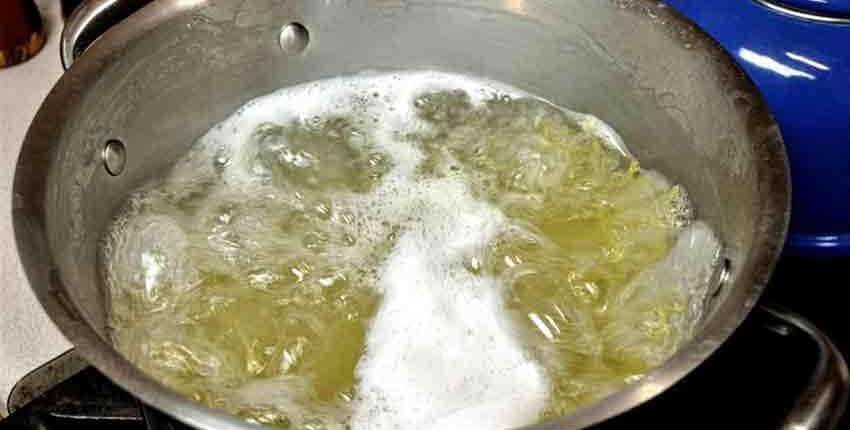
Does your pasta pot always seem to boil over, leaving a mess to clean up? We’ve found this Pot Minder to be a great little addition – it is a ceramic disc that almost stops the foaming that leads to boilovers. All you do is drop the disc in when you add the pasta, rice, or potatoes, and the boil-overs are decreased by at least 90%. I won’t say you’ll never have boil-overs again, but not very often, and they will be much smaller than before.
Here is the pot full of pasta at a full boil, with the small amount of foam being normal. The Pot Minder means one less thing to think about when you are in the middle of cooking dinner.
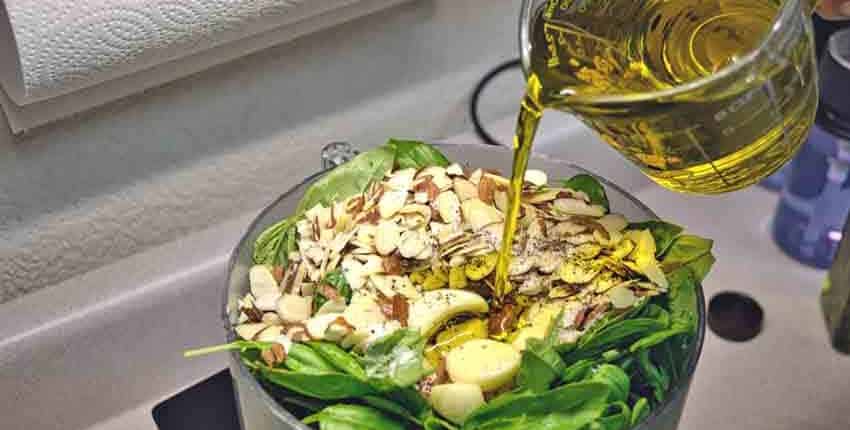
With the pasta starting to cook, the rest of the ingredients were added – garlic, nuts, and olive oil. We like to start with about 2/3 of the final amount of oil. That way, if more oil is needed, it is easy to add it, but if there is too much oil, it can’t be taken out!
The food processor is pulsed for several seconds at a time first to chop the ingredients and convert the mass of separate ingredients to the beginnings of a paste. After it has started to form a paste, use a flexible spatula to scrape the bowl and clean the sides, getting all of the good flavors into play.
After all of the ingredients have started to incorporate into a loose paste, add the grated cheese. We like adding it in two parts to make blending in and combining the flavors easier. Make sure to pulse the processor a few seconds several times until it begins to disappear into the paste and become thicker. Do this until all of the cheese has been added. Use the flexible scraper to clean the sides of the bowl.
Now it’s time to examine the pesto. You can leave it fairly chunky and coarse, like the above photo shows, or you can make it much finer by pulsing the food processor for 30 – 45 seconds several times more. It is all up to your preference, both in flavor and appearance. The flavors will change as the pesto is chopped finer by the processor blades. Make sure to taste the pesto several times to determine what you like.
Don’t worry if you make it too fine. The basil plant will re-grow quickly, and you’ll have a second chance soon! The fine pesto will likely still taste good, giving you a chance to refine your technique and put your signature on the dish.
Fresh basil is one of the few herbs that freeze fine with very little, if any, loss in flavor or aroma. We always try to make extra to freeze some for the winter – reminding us of the incredible flavors of summer. If you really want to freeze a lot, plant 10 basil plants, and you’ll feel like you’re farming basil!
You will be able to get at least two cuttings and very possibly three in one season. With our 10 plants, we were able to put up about 18 freezer jars of fresh pesto, and that doesn’t include eating at least six more. The freezer jars are just big enough for one meal, so there is no waste, and you don’t wind up with soggy pesto in the fridge a few days after thawing it out.
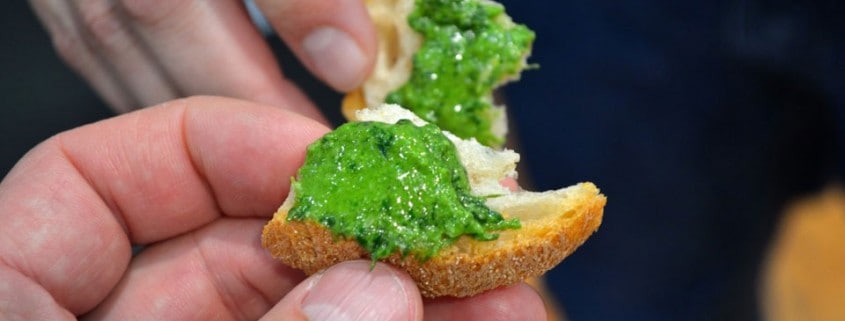
Here is the final product – a simple but delicious dinner just waiting to carry you away!
What do you think? Have you grown basil in a container like this, or do you grow it in a more traditional garden, or maybe inside? How else do you use fresh basil and pesto?
Here’s the full recipe –
- 3 cups fresh basil leaves
- 2 - 3 cloves garlic
- 1/2 cup Pine Nuts or other nuts
- Coarse Natural Sea Salt
- 2/3 cup Extra Virgin Olive Oil
- 1/2 cup freshly grated Parmigiano-Reggiano freshly grated Pecorino Romano or other aged, hard grating cheese
- Harvest the basil by trimming the stalks about three inches above the soil to allow the plant to regrow.
- Pull the leaves off, put them in a colander and rinse well. Allow to sit for a couple of minutes to drain well.
- Add the basil leaves, the the garlic, pine nuts and a pinch of sea salt. Add 1/2 cup of the olive oil. Pulse the processor quickly several times to chop the leaves and start the processing.
- After the bulk has started to drop in the bowl, pulse the blades for a longer time - about 30 seconds each until a rough consistency has formed. You might need to pulse the blades two or three times.
- Check the consistency of the pesto paste at this point. If it is a bit too dry, add half of the remaining olive oil and pulse a couple of times for about 15 - 20 seconds each time, then re-check the consistency. It is easy to add a bit more oil, but you can't take it out!
- Add the grated cheese when the pesto has a rough chopped consistency and pulse for 30 - 45 seconds, stopping each time to scrape the bowl down and examine the developing pesto. If the paste is a little too thick or dry for your liking or use, add a bit more oil and pulse, then check it again.
- The pesto is ready when it has a bright green, smooth consistency. When that is achieved, stop.
To avoid spoiling the pesto flavor by the food processor, take care to minimize the heat produced by the blade. Some suggest chilling the blade and bowl assembly in the freezer before starting and monitor the amount of time the pesto is being processed, but it doesn't take that long to make a batch, and we haven't tasted a noticeable difference with not freezing the blade and bowl.
Using cheese fresh from the refrigerator helps control any heat as well.
We did a video in partnership with our local hospital about growing and cooking with herbs. Yavapai Regional Medical Center has created “Your Healthy Kitchen” recognizing and promoting the idea of eating and staying healthy makes a lot of sense.
We talk about some of the easier to grow fresh herbs that do well almost anywhere and in any size container, then use some of those same herbs in making a delicious tapenade or appetizer of olives, capers and herbs to finish the show.
Here’s what herbs and vegetables you could grow in your garden for this recipe – Dill, Parsley, Rosemary, Thyme & Onions
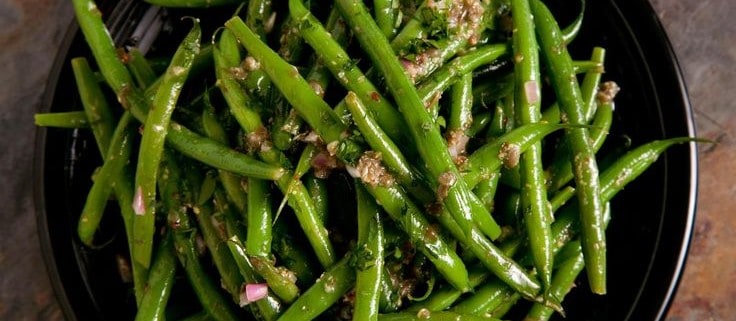
Whether you have a bounty of young green beans from your garden, or have gotten a great deal at the Farmer’s Market – here’s a quick and simply delicious way to make them into a very memorable side dish that will be talked about! The French name for the classic, tender green bean or filet bean is “haricots vert”. If you are looking for them at the market, look for young, slender and tender green beans that have just the faintest hint of the bean when you feel the shell.
Here’s what could come out of your garden for this recipe – Green Beans and Green Onions!
- 1 lb. young green beans also known as haricots verts, trimmed
- 3 tbsp. olive oil
- 1 tbsp. red wine vinegar
- 2 tsp. Dijon mustard
- 1 shallot or 3 small green onions minced
- Freshly ground black pepper
- Kosher or freshly ground salt
- Bring a large pot of salted water to a boil.
- Add the green beans and cook until bright green and crisp-tender, about 1 minute.
- Drain and transfer to a bowl of ice water for 1 minute.
- Drain the beans from the ice water and let sit in a colander while making the dressing.
- In a large bowl, whisk olive oil, vinegar, mustard and minced shallot.
- Transfer the drained green beans to a serving bowl, then pour the dressing over, toss to combine and season with salt and pepper to taste.
People often come back for second servings when they discover how delicious this unusual flavor combination is, so consider making extra!
Green beans can be a blessing in disguise – they are a welcome addition to the dinner table in the spring when they first arrive, but can soon wear out their welcome as their prolific nature is truly shown. Just how many ways can they be prepared without being the dreaded green vegetable on the plate?
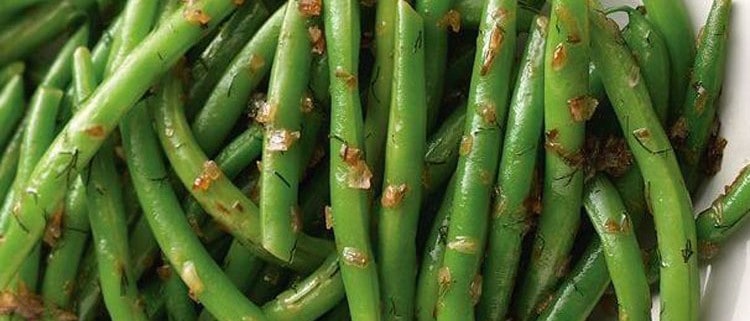
We love them this way; a very simple, easy and fast way to make them unique and delicious. They can easily balance a rich roasted chicken or grilled meats, but also add to a fish or seafood plate.
Consider this a base for exploring several different directions with the green beans – using toasted almonds, sauteed garlic and even taking the grated Parmesan approach and adding pasta for a light summer evening meal.
Here’s what could come out of your garden for this recipe – Green Beans and Green Onions!
- 1 lb fresh green beans
- 2 tbs butter
- 2 tbs olive oil
- 1 - 2 shallots or small bunch green onions, minced
- Freshly squeezed lemon juice
- Salt to taste
- Freshly ground Parmesan cheese
- Fresh lemon zest
- Bring a pot of well-salted water to boil. Add green beans and cook for 5 minutes, then drain and plunge into waiting pot of ice water to stop cooking. Drain when cold.
- Meanwhile, sauté shallots in butter and olive oil over medium heat until tender, about 5 minutes.
- Add beans to shallot mixture and continue to sauté until beans are warm and just tender, about 2 to 3 minutes.
- Sprinkle with lemon juice and season to taste with salt. Top with freshly ground Parmesan cheese if desired.
- Serve at once.
Blanching the green beans in boiling water keeps them from being over-cooked when sauteing them with the shallots.
Pickled jalapeños and garlic have been favorites of ours for a couple of decades. Long enough that we don’t remember exactly when we first started liking them, or where we came across them, but we just know we’ve enjoyed making them for a really long time! Our original recipe was on a well-worn scrap of newspaper clipping and made a lightly sweet Polish brine with garlic and we added the jalapeños after trying the plain garlic.
The Joy of Pickling recently made its way into our lives and we discovered this variation on the theme – using honey instead of sugar for the sweetness and adding an unusual spice mixture to kick things up a notch. We think this is fabulous!
If you are not a pickled garlic lover; or a pickled jalapeño aficionado this might take a little getting used to, but trust us it is delicious and well worth trying. The vast majority of people that we’ve sampled this to have loved it, even if they aren’t all that into chunks of garlic and hot peppers. The pickling mellows the heat and punch from the garlic and jalapeños, while the light sweetness brings some nice counter balance to the boldness. The spices bring traditional pickle background flavors into the mix, leaving most with a look of intrigue on their faces after tasting them.
We love these served on a multi-grain cracker, a whole clove and jalapeño ring side by side. Sometimes a thin slice of aged Irish cheddar cheese mixes things up.
Here’s what could come out of your garden for this recipe – Jalapeños, Coriander and Garlic!
- Whole black peppercorns
- 3 lbs fresh garlic cloves
- 5 lbs fresh jalapeños cut into rings and de-seeded - red, green or a mix of colors
- 3 quarts cider vinegar
- 1/2 cup honey
- 2 tbs pickling salt - kosher salt works well
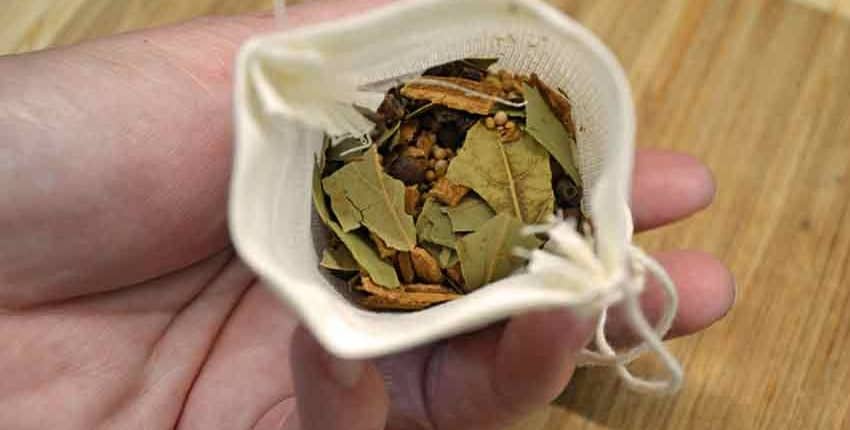
- 1/2 cup Mixed Pickling Spices
- 1 four inch cinnamon stick broken into small pieces
- 4 whole bay leaves torn into small pieces
- 1 tbs whole yellow mustard seeds
- 1 tbs whole allspice berries
- 2 tsp whole cloves
- 2 tsp whole coriander seeds
- Add 1/4 tsp whole black peppercorns to each pint jar.
- Add 1/2 to 3/4 cup garlic cloves to each jar, depending on how much garlic you want.
- Add enough water to water bath canning pot to submerse the pint jars and heat to a boil.
- Add the vinegar, honey and salt to a non-reactive saucepan or pot (stainless works well) and bring to a boil.
- Tie the Mixed Pickling Spices into a spice bag or square of cheesecloth. Add to the pot with the vinegar, honey and salt to steep.
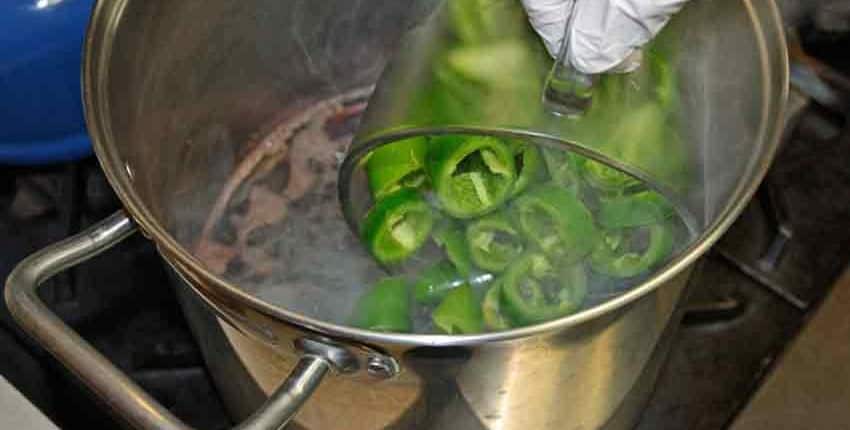
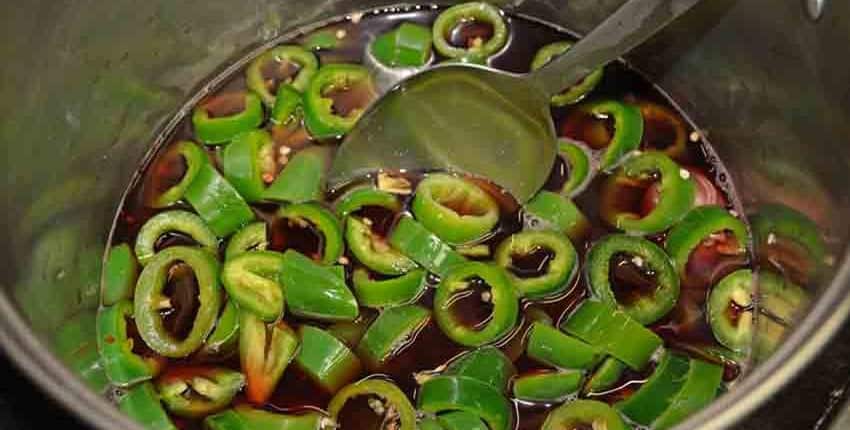
- Once the pickling solution and spices are at a boil, add the jalapeño rings and bring to a simmer. Reduce heat to keep at a simmer for 2 minutes.
- Remove spice bag and divide jalapeño rings evenly among pint jars.
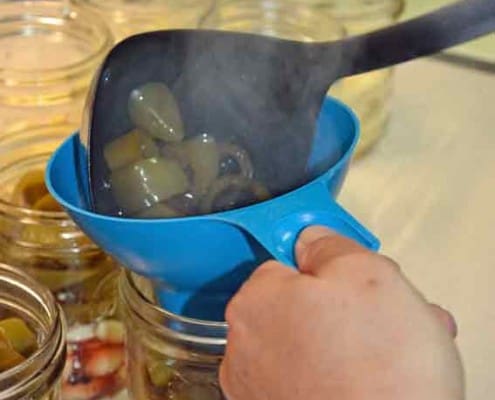
- Add hot pickling solution to each jar, leaving about 1/2 inch headspace. Close jars with two piece canning rings and new lids.
- Process the jars in the boiling hot water bath for 10 minutes, making sure there is space between each jar for hot water to circulate.
- After 10 minutes, remove and allow to cool down, listening for the "pop" of the canning lids sealing. Double check once cool to make sure all the lids sealed.
- Store the jars in a cool, dry and preferably dark place for 3 weeks for the pickling process to finish. After opening jars, store in refrigerator and use within 2 weeks of opening.
Once people taste these, they will go fast so don't hesitate to make a large batch!
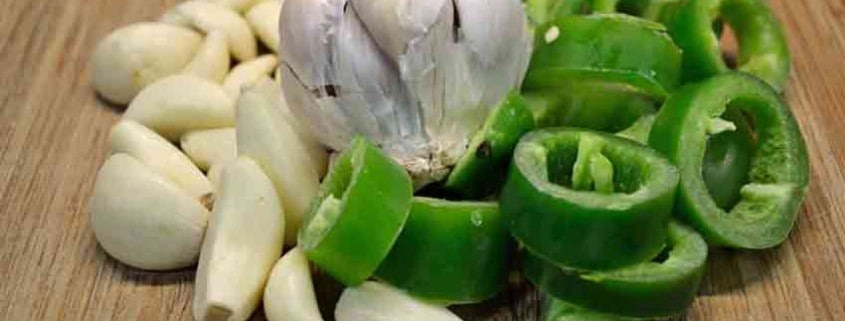
We start with fresh jalapeños and garlic cloves. If you don’t know how to peel lots of garlic very quickly and easily – just watch our short video “Peel Garlic in 10 Seconds“ and you’ll be set!
Next is to mix up the Mixed Pickling Spices for some great background flavors to round things out.
The whole spices are enclosed in a spice bag…
…and added to the pickling solution that is heating up to a boil.
Once the solution is at a boil, the jalapeños are added…
…and brought back to a simmer for a couple of minutes.
The hot peppers are poured over the waiting garlic in the pint jars.
The jars are waiting to be topped up with hot brine.
Ready for the hot water bath canning!
After canning, the jars need to pickle for about 3 – 4 weeks for the magic to happen, then it’s time to enjoy!
Making polenta takes a bit of time, care, attention and love but the results are delicious and will become highly valued by friends and family. It is a peasant dish, a close relative to cornmeal mush that has been refined and is no longer just a starvation staple of poor subsistence farmers. Polenta is featured in highbrow restaurants with exotic ingredients anchored to the cornmeal base. Done the traditional way, polenta takes work – about an hour straight of constant stirring – but there is another method that is simply delicious without all of the work. There is still some stirring and a good timer is needed, but you won’t be chained to the stove the entire time.
Northern Italy is where polenta is a staple, made from corn brought over from the New World and grown ever since the mid-1500s. As with many Italian dishes, there are many regional variances from a light Venetian recipe to the Lombardy buckwheat and corn tradition that is mixed with garlic and aged cheese.
Being invited to a home in Northern Italy and having polenta is an honor, a sign that you are not simply a guest but are considered as one of the family as polenta is home cooking and not for “company”. Part of it is the work involved to make it in the traditional way; the other is that until recently polenta was looked down upon as food for the poor and not to be served to honored guests. Now that those same Northern Italian areas have achieved wealth and status, polenta is eaten for enjoyment, to remember and as a comfort food.
I’ve been a fan of Marcella Hazan for years. It was in one of her earlier cookbooks that I learned the simple method of successfully making homemade noodles. It isn’t difficult, but I found out that I was rushing the process and not allowing the noodles to relax between rolling them out. After reading her process where she walks through the process and explains why things need to be done in a certain way and at a certain time, I made the most delicious fresh noodles and became a fan of her writing. I was never able to take one of her cooking classes, but her books have always had that way of explaining why things are done the way they are, helping me to be a better cook and capture the essence of those flavors.
Marcella has developed an easier method of making polenta that tastes like the traditional way. It still takes about an hour to make, but you can walk away from the stove for sections of time, going back to stir and monitor the process. You will see the cornmeal mixture turn silky and soft from coarse and grainy about half way through!
In the spirit of cooking with more locally sourced ingredients, we’ve changed this recipe from corn and buckwheat flour to yellow and blue cornmeal with homemade smoked chicken broth instead of just water. Growing your own corn just for polenta will make complete sense during the very first bite! The flavors cannot be compared to any cornmeal that is store-bought. They will be richer, bolder, earthy and sweet with a substantial feeling after tasting. Making extra takes no more work and will give you extras for the next few days to use as an appetizer, side dish, breakfast foundation or snack.
Here’s what you could grow in your garden for this recipe –
- 10 cups of liquid - 1 - 2 quarts of homemade chicken broth 4 - 8 cups supplemented by water to make the total
- 1 3/4 cups coarse ground yellow cornmeal
- 1 3/4 cups blue cornmeal - will usually be finer ground
- 2 yellow or white onions - diced
- 3 cloves garlic - diced
- 1 1/2 tablespoons salt - preferably sea salt or RealSalt
- 1 cup dry white wine
- 1 tablespoon extra virgin olive oil
- 1 cup aged Italian grating cheese
- Add the water and broth to a large heavy pot that has at least 3 - 4 inches of room above the liquid and bring to a boil over medium high heat.
- While water is heating, mix both colors of cornmeal in a bowl.
- When the liquid is boiling slowly, slowly add the cornmeal to the water while stirring with a wire whisk. It is important to add the cornmeal in a thin trickle to avoid clumping. You can add it a fistful at a time or use a 1/2 cup measuring cup, just make sure to add it slowly, being able to see the grains as they trickle in. This step may take several minutes, just be patient.
- Once all of the cornmeal has been added, stir well for a couple of minutes with a strong long-handled spoon. Add onions and garlic and stir in. After stirring well, cover with a tight-fitting lid and adjust heat to a low steady simmer.
- Set the timer for 10 minutes. After 10 minutes, uncover and stir for at least 1 minute, preferably 2. Make sure to mix the mixture well and from different directions.
- Add wine and olive oil at the 20 minute mark
- Repeat timer 3 times, stirring well for 1 - 2 minutes each time. You will feel the mixture firm up each time. If needed reduce the heat slightly.
- After 40 minutes you should see the mixture lose it's grainy, course texture and become silky, soft and creamy. If you are stirring at the time you will see it happen. It will also begin to pull away from the sides of the pot into a single mass.
- When it becomes soft and creamy, add cheese and stir vigorously for 1 minute, cover it, turn the heat off and let sit for 3 - 5 minutes to firm up.
- Serve hot with a rich roast, sausages, or roasted chicken.
- Allow extra to firm up either in the pot or scoop out onto a moistened board or counter top for use with other meals.
Polenta is extremely versatile - grilled, pan-fried, with eggs for breakfast or warmed and drizzled with olive oil and Balsamic vinegar for an appetizer.
Adapted from Marcella Cucina
Amazing flavors come from such simple ingredients! A closer look at the main ingredients.
This is how you should add the cornmeal – trickle it in slowly enough to see the individual grains of cornmeal.
The mixture will begin to get thicker at the end of adding the cornmeal, so you might have to change your grip on the whisk! I changed to the long spoon just after adding the rest of the cornmeal to make it easier to stir.
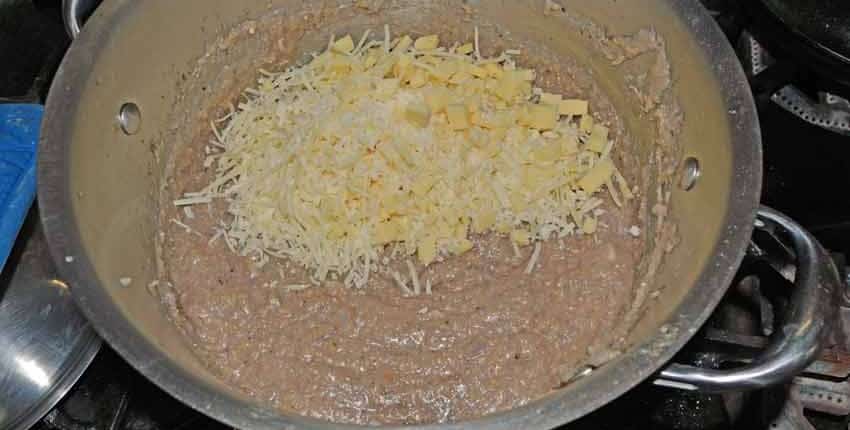
This was at about 40 – 45 minutes. I added the cheese and gave it a good stir for about a minute. You may or may not be able to see that it has turned silky and creamy at this point. I turned off the heat, covered it and let it sit for about 5 minutes after stirring the cheese in.
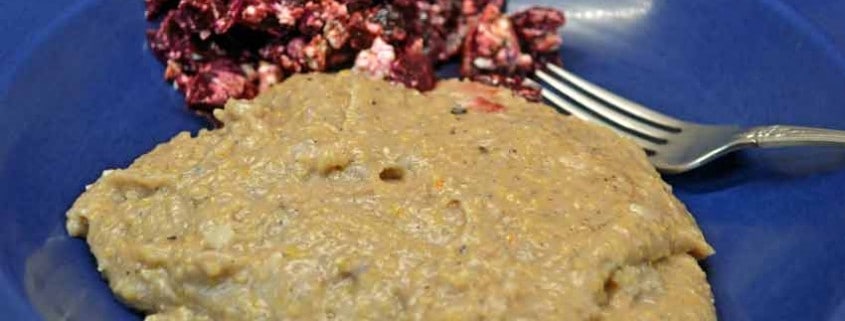
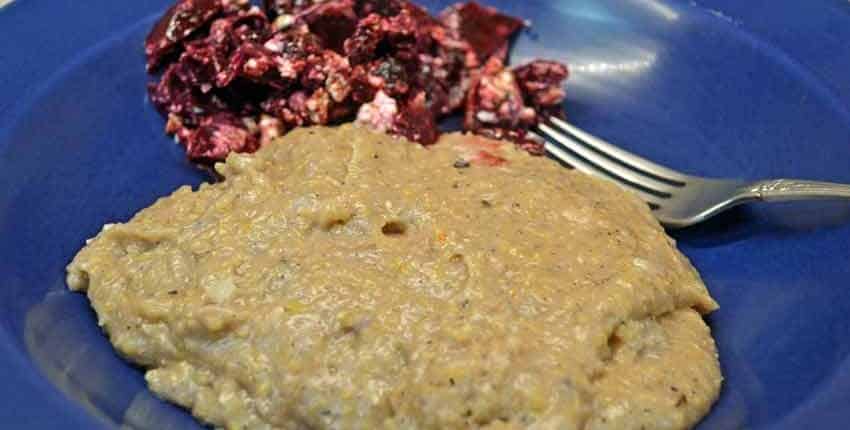
The finished result, accompanied by roasted beet and feta cheese salad dressed with olive oil and Balsamic vinegar.
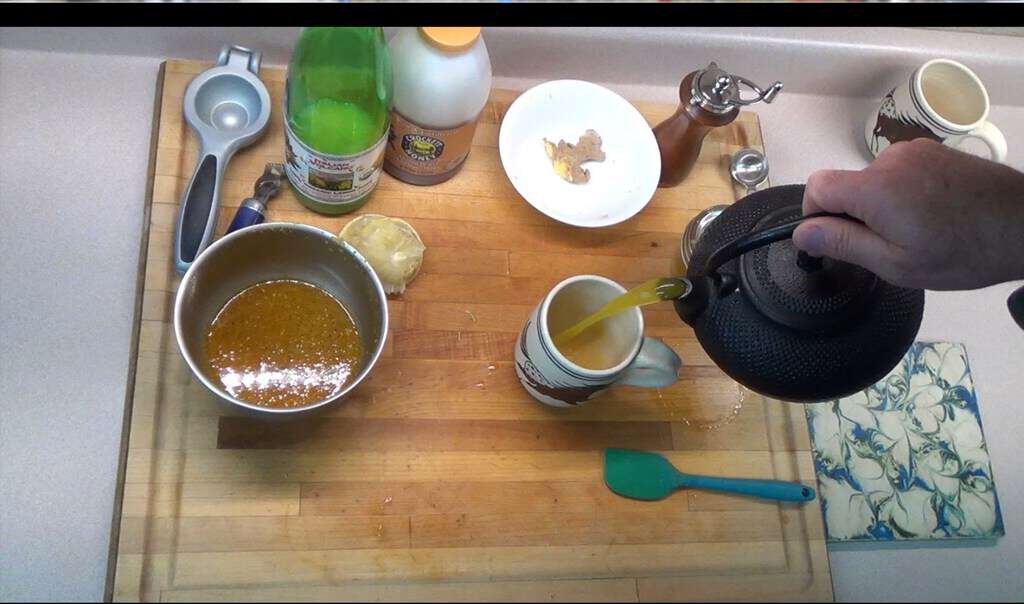
What happens when you combine the traditional honey and lemon juice sore throat or cold remedy with the powerful benefits of ginger and turmeric? You get an easy to make and highly effective cold killer! Stephen shows how to make it in just a few minutes:
This is the basis of a very flexible recipe. You can add chile powder for sinus issues and to boost the cold and flu fighting power or garlic for more benefits.
- 1/2 cup honey - preferably raw unfiltered and as local as possible
- 1/2 cup lemon juice - fresh squeezed is best
- Zest from one lemon
- 1 - 2 tablespoons fresh grated ginger
- 1 - 1 1/2 tablespoons ground turmeric
- Fresh ground black pepper
- Mix all ingredients together
- Heat enough water for a couple of cups of tea
- Add half of mixture to tea strainer, steep in hot water for 4 - 6 minutes
- Remove strainer with ginger pulp, or let steep for another 5 minutes then remove
Pumpkin is an essential part of the fall season in my humble opinion, but it is much more than the trendy “Pumpkin Spice” everything that suddenly jumps into our lives in the cooler weather. Real, home-grown pumpkin has a rich sweetness that is just plain lacking in almost all of the commercially available pumpkin products today. Let’s take that one step further and slow-roast that incredible goodness of a pumpkin and now you’ve got something that resembles that canned pumpkin as much as a brand new truck does a 100 year old buckboard!
The type of pumpkin does matter, so think about it before you dive in. Don’t fret about not growing your own – buy one this year from your local Farmer’s Market, local grower or CSA share, and then plant your own patch next spring. The smaller pumpkins tend to be sweeter, especially the ones called “pie pumpkins” like our New England Sugar Pie pumpkin have been selected and refined for their rich sweetness along with their smaller, easy to handle size. Larger pumpkins will not be as sweet, but have their own flavors so don’t discount them. Plan on using 2 to 3 of the smaller pumpkins to put up a goodly supply of puree, or one of the larger ones. You will want to put up more than you think you will use, as once your family and friends taste some of the deliciousness, it will go much faster than you initially think! Keep in mind that the commercially grown “Jack-O-Lantern” pumpkins are hybrids, grown specifically for carving and usually have absolutely no flavor at all!
The process is extremely simple and doesn’t require your presence in the kitchen, so this is a great thing to do when you are home but have other projects. Set the timer to keep you on track and you’ll do fine.
Let’s get into it!
We are using the Connecticut Field Pumpkin for this, as we were shooting photos and had it available to roast. It has a mildly sweet flavor and is large enough to keep us in pumpkin puree for awhile. Aurora had to help, of course – inspecting and being part of the process!
The tools needed are pretty simple – a knife, cutting board, large spoon or spatula to scrape out the seeds and a colander if you want to keep the seeds for roasting and eating or saving and planting.
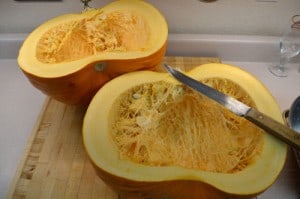
Cut the pumpkin open in half. This pumpkin weighed about 15 – 20 pounds, and you can see how thick the walls are, giving lots of pumpkin for cooking!
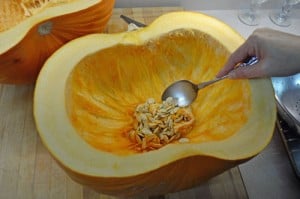
Use the large spoon or spatula to remove the seeds and as much of the pulpy connective tissue as possible.
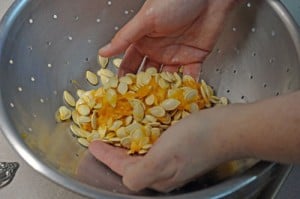
Use the colander with a warm water spray to clean the seeds and remove the connective tissue. Then they are ready for roasting or drying and saving to plant next year.
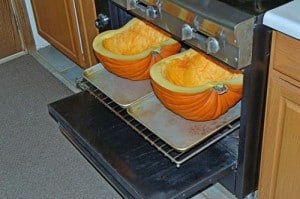
Ready for roasting! I wanted the slow roasted flavors that make the sugars caramelize a bit, so heated the oven to 300°F and roasted this one for about 2 hours, maybe a little more. I checked it every half hour or so with a toothpick – when it goes all the way in with very little resistance, the pumpkin is properly roasted.
If you need to roast it faster, you can – just use 350 – 400°F and peel the pumpkin, then cut it into 1 – 2 inch chunks or cubes. It will roast in about 30 – 45 minutes, you’ll need to check it every 15 minutes to make sure you don’t over-do it. It won’t have quite the slow-roasted flavors, but will be much better than the store-bought version nonetheless.
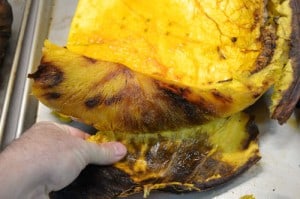
Next is peeling the pumpkin after it has cooled. You can see the darker spots, don’t worry, it isn’t burned – just well-roasted!
Cut the pumpkin into chunks after peeling. Cut them into manageable sizes for your food processor, blender or whatever you will use to puree it. Keep the juices from the roasting pan, as you’ll add them to the puree later on.
Into the food processor next! This shows the first batch and was a bit too full as it took a long time to work the pumpkin down and puree it. I added much less pumpkin to subsequent batches, and they processed a lot faster.
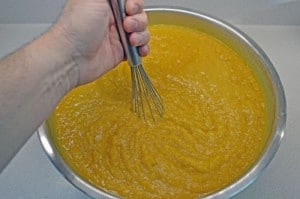
After pureeing, scoop it into a bowl large enough to hold all of the puree. You will need a bowl that is a bit larger than what holds the sliced chunks.
Remember the juices in the roasting pan? Add them to the puree and stir them in for added flavor.
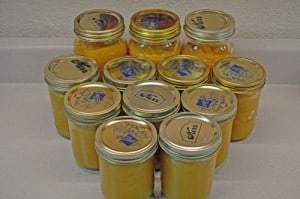
Here’s what we wound up with from one large pumpkin – 3 quarts and 9 pints of slow-roasted, pureed home-grown pumpkin! What is that worth at the store? We’ll use the quarts for soups and stews, with the pints going for pancakes, bread, muffins and cornbread.
We left about an inch of head room in the jars so we can freeze them without the jars breaking. Freezing is the preferred method, as canning is no longer recommended for pumpkin.
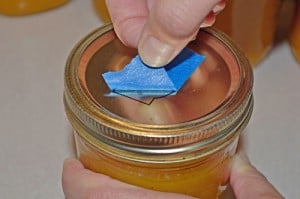
Here’s a bonus tip: Use painter’s tape for labels that will go into the freezer. We use name brand such as 3M, as the store brand doesn’t stay on as well. Using it as labels is very inexpensive as a roll will last for several months, sometimes almost a year. The tape stays on in the freezer, but comes off afterward with no sticky, gummy residue.
Brussels sprouts were not my friends when I was a kid. They always showed up unexpectedly, unannounced and taking up way too much space on the dinner plate with their hateful ultimatum – “No leaving the table until your plate is clean.” The worst part was the soggy, slightly slimy texture combined with the sulfurous, earthy, somewhat metallic taste from steaming.
Fast forward 30 odd years and after learning to cook, garden and eat healthy and tasty foods I’ve started to warm up to Brussels sprouts a bit more. I’m not having them twice a week or anything, but I’ve learned how to cook them a couple of ways that make them surprisingly tasty. This recipe is the first one that I tried where I really liked them, the other is Roasted Brussels Sprouts with Maple-Dijon Dressing which is completely unexpected but thoroughly delicious. That is a more sophisticated approach, this is rustic, simple and hugely satisfying. I’ve used this recipe to re-introduce others to an entirely different Brussels sprout than we all knew and hated as kids.
Take the time to properly roast the Brussels sprouts – in a cast-iron deep skillet is the absolute best way as the even heat caramelizes the sprouts, making them nutty, rich and very flavorful. Roasting opens up the flavors that are otherwise locked away and missed.
Here’s what you could grow in your garden for this recipe –
- 1 pound of Brussels sprouts halved
- 1 pound fresh sausage - Italian Polish or Sicilian, sliced
- 2 medium onions diced large
- 2 large bell peppers - preferably red or yellow diced
- 3 cloves garlic sliced thinly
- Olive oil
- Balsamic vinegar
- Sea salt and freshly ground pepper
- Heat cast iron skillet over low to medium heat, add halved Brussels sprouts, making sure they are all cut side down. Add enough olive oil to lightly coat the bottom of the pan. Check every few minutes by slightly lifting a sprout to check the progress of the caramelization, about 15 - 20 minutes. Add a drizzle of olive oil if sprouts start to stick to pan.
- Once the Brussels sprouts have started to caramelize, add the sausage and stir to cook - about 5 minutes.
- When the sausage is beginning to brown, add onions, bell pepper and garlic. Stir to cook evenly, about 5 minutes.
- Add a generous splash of balsamic vinegar and stir to coat vegetables. Add salt and ground pepper to taste.
- Serve hot.
A good caramelization will have some dark spots on the Brussels sprouts, but don't worry - it adds to the flavor!
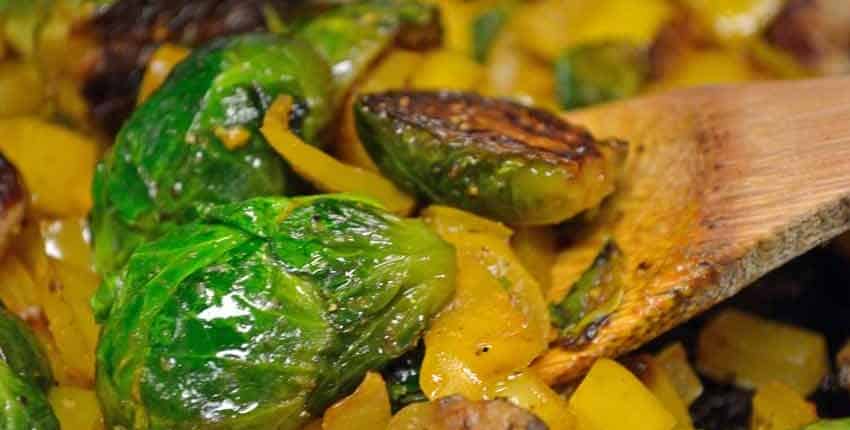
The hardest part of this dish is caramelizing the Brussels sprouts – which isn’t that difficult, just requiring a bit of patience. Allow time to let them slowly brown. Here’s what the caramelizing looks like… no they aren’t burned, but you don’t want to go much darker than this! The slow caramelizing adds an unexpected nuttiness and depth of flavor.
A closer view of what they look like when almost done. They will be slightly firm but not crunchy, yet a long way from limp and slimy!
On to the plate and ready for a feast!
The much-maligned Brussels sprouts can be made into dishes that will win over almost everyone. The key is to roast them, bringing out their sweetness by caramelizing and tenderizing them. Their rich, nutty flavor can then come out. This unusual recipe combines the roasting with a delicious twist – a Maple-Dijon dressing that really sets these humble brassicas apart!
Here’s what could come out of your garden for this recipe – Brussels Sprouts!
- 1/4 cup plain yogurt - strained Greek works very well
- 3 Tablespoons maple syrup
- 3 Tablespoons Dijon mustard
- 1/8 Teaspoon salt
- 1 pound Brussels sprouts about 4 cups
- 2 Granny Smith apples diced (about 1 1/2 cups)
- 1/4 to 1/3 cup dried cranberries
- 2 Tablespoons butter
- 1/2 Teaspoon salt
- Whisk together all ingredients in a small bowl and refrigerate for an hour to let flavors mingle.
- Use a food processor with a 2mm or 1/16 inch slicing blade to slice all the Brussels sprouts, set aside.
- Heat a large heavy (cast iron is preferable) skillet over low to medium heat and roast Brussels sprouts in butter with the salt until they soften and just start to caramelize, about 15 minutes. Stir often to prevent sticking.
- Increase heat to medium, add apples and dried cranberries. saute until apples are tender, about 5 - 10 minutes.
- When apples are tender and Brussels sprouts have caramelized, remove from heat and stir maple-Dijon dressing in.
- Serve immediately.
You can use other cool season veggies to add a different note to this dish. We had some left-over sugar snap peas that we added for a sweet crunch!
Adapted from Mary Janes Farm Oct-Nov 2014 issue
After we whipped the Maple-Dijon dressing together and put it into the refrigerator, we started on the slicing. In just a few seconds we went from these…
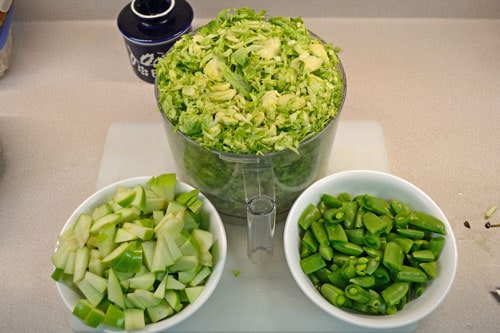
… to this – ready for the pan! Slicing the Brussels sprouts made them much easier and faster to roast.
From there it was short work to dice the apples and chop the sugar snow peas. We added them because they were handy and weren’t tagged for another recipe.
Once the Brussels sprouts had roasted for a few minutes and started to caramelize, the apples and peas were added.
A few minutes later, the dressing was added and stirred in.
Ready to serve! The combination of flavors – rich and nutty from the sprouts to the sweet and light of the apples and peas, to the sweet/savory of the maple and mustard – all worked really well together.
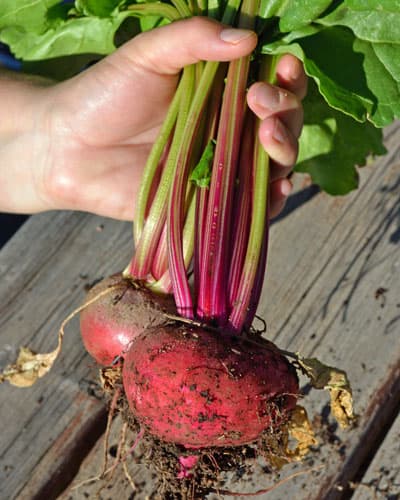
Ellen shares her research on the history of beets today. Did you know that beets weren’t always the deep red we are familiar with, but that characteristic was selected for and bred into them in the 1700’s? Lighter red existed much earlier than that, but not in the blood-red shades we know today.
Make sure to visit our Beet department and grow your own tasty varieties! Don’t forget to try both recipes at the end of today’s article.
Beet (Beta vulgaris)
The beet as we know it today is a handsome vegetable. It is rooted in the ground, transferring the earthy taste of good soil through its deep red root. The beet is an old vegetable, ascribed with aphrodesiac and blood strengthening qualities. Its wild ancestor, the sea beet (Beta vulgaris sp. Maratima) is not a sweet vegetable–it is a bunched mass of greens with a slender white-yellow root that grows almost on the tide line of the ocean.
The beet as we know it today has a larger, fleshier, and darker colored root than the seabeet. The seabeet grows wild along the Mediterranean coast, down the coast of the Corsican sea. The sea beet has the heart-shaped leaves, deep glossy green color, and bunching tendencies of garden beets. Today, we almost equivocally think of beetroot, as it is commonly called in Britian, New Zealand, and Australia, as blood-red. In fact, red pigmentation was selected and bred into the beet in the mid 18th century. While white colored beets are not common in the public marketplace, they are the leading beet grown for sugar production.
Another common cultivar of beta vulgaris is Swiss chard, whose name comes from a bastardization of the Sicula–the leafy green that Swiss chard is most likely descended from. Swiss chard is grown for its large leaves, which offer a near year-round source of leafy greens–with white, red, or rainbow colored ribs. Beet greens taste remarkably similar to chard and in fact the beet is the same as Swiss chard, but it has been bred to produce large edible roots, rather than put that energy into leaf production.
Anyone who has tasted a fresh beet can attest to its earthy, mineral taste. For those who find red beets to be too intense, the yellow or lighter fleshed cultivars offer a good substitute. More mellow tasting varieties include Golden Detroit and Chioggia beets. Chard’s buttery texture and almost ‘healthy’ taste is unbeatable, and I almost always feel better for eating it.
The sweetness of beets is well known. The vegetable has been associated in many cultures with love; it is said if a man and a woman eat from the same beet, they will fall in love. Aphrodisiac qualities were well-known in the beet in Ancient Greece and in Roman times. The red beet was hung on the walls of prostitution houses in 740 AD and again in the early 20th century. The beet is an old symbol of love and lust–and wealth. In Delphi, a beet was said to be worth its weight in silver, and was offered to Apollo to ensure wealth.
Today, the beet is well known and loved by gardeners and small growers. Its color and sweet taste are a welcome mix to the bitter greens and other green vegetables that are available in the spring months. Traditionally, there were three kinds of beets in cultivation. The sugar beet is used to produce sugar and was developed in Upper Silesia (now Poland) in the 1740’s. The majority of Europe’s sugar at the time was coming to the continent via the British colonies in the Caribbean. The sugar beet became better known when Napoleon Bonaparte announced an embargo with the British in 1813 and endorsed the growing and processing of sugar beets.
The process of extracting sugar from beets continues today in America and Europe, with Russia producing 1/6th of the world’s sugar beets. They are commercially grown all over the United States, concentrated in the Midwest and into Washington and Colorado States. Today, 20-30% of the world’s sugar comes from the sugar beet. As in Napoleons time, the United States sugar beet industry grew immensely after we enforced an embargo with Cuba, which was the major source of sugar for the United States.
The second type of beet is a forage beet, or manglewertzle, which simply means “root beet”. They are grown as livestock feed and are either left in the ground for sheep or other animals to uproot or grown, harvested, and fed out during the winter months. These varieties of beet have quickly lost popularity and are the most genetically threatened. One well-known Pennsylvania revival is Deacon Dan’s, which William Woys Weaver calls, “the field pumpkins of the beet world…some can weigh as much as 15 pounds but they need good, sandy soil to develop such large size.”
The most well known beets are those of the garden. They are typically red, although if you look closely, there are many shades of red, pink, even yellow to be found in garden beets today. They come in a variety of shapes, from perfectly spherical to flattened on the bottom half, to cylindrical. The garden beet is used for pickling, canning, eating fresh, roasted, and really, however you can think to enjoy them!
For some, the beet releases memories of vinegary pickles, or generic canned red vegetable, or the inevitable stained fingers one gets when preparing cooked beets. Beets food uses extend into food coloring, dyes, and even making tomato sauces more red. Nothing beats a fresh beet! Beets are served many ways, from shredded raw into a salad, roasted, or made into a soup. Borscht is a traditional soup from Ukraine–it is said there are as many recipes for borscht as there are villages throughout Eastern Europe. I enjoy this delightfully colored soup all year long, served chilled or hot. If borscht is not your thing, try the roasted beet salad with feta and cilantro.
Here’s what could come out of your garden for this recipe – Beets, Onion, Carrots, Cabbage and Dill!
Here’s what could come out of your garden for this recipe – Beets and Cilantro!Traditional BorschtBorscht is a traditional Eastern European soup that is served either hot or cold. There are many different variations, but this is a good starting point.Servings: 4Ingredients
- 2 large or 3 medium beets thoroughly washed
- 2 large or 3 medium potatoes sliced into bite-sized pieces
- 4 Tbsp of cooking oil
- 1 medium onion finely chopped
- 2 carrots grated
- 1/2 head of cabbage thinly chopped
- 1 can kidney beans with their juice
- 2 bay leaves
- 10 cups water and 6 cups broth to get 16 cups liquid total
- 5 Tbsp ketchup
- 4 Tbsp lemon juice
Instructions
Serve with a dollop of sour cream if serving hot. To serve chilled, simply make a day in advance and refrigerate. Take out about 15 minutes to a half hour before serving so the flavors will be noticeable.
Serves 4 as a meal, or 6 as an introductory courseRoasted Beet SaladThe richness of the roasted beets are offset and enhanced by the tang of the cheese and hint of apple cider vinegar.Servings: 4Ingredients
- 1-2 lbs beets red and yellow make a beautiful salad, but one or the other will do
- Feta or soft goat cheese
- Olive oil
- Apple cider vinegar
- Salt and pepper
- 1/2 bunch cilantro
Instructions
Serves 4 as a side salad.
Fermented chile paste is one of my favorite toppings or condiments: I use it on eggs, sandwiches, in soups, stews and of course stir-frys. Most of the chile pastes found in Asian markets will be fermented to some degree, with those made in America less so. Fermenting your own puts you in the driver’s seat, as you get to choose what flavors go into the process and how hot or mild the result is. After you’ve made a batch or two, you’ll reach for your ‘special sauce’ before anything else!
We’ve just made a different type of fermented chile paste and wanted to share the process with you. This is completely different than our other chile fermentation recipe – Fermented Pepper Sauce. This method is still a lacto-fermentation, but instead of depending on the natural lactobacillus bacteria on the chiles, it uses organic whole milk yogurt to jump-start the fermentation process. What we’ve found is that this method really adds to the complexity and roundness of the flavors while decreasing the heat considerably. This is so delicious that a small dollop goes well on top of real vanilla ice cream!
This is a very quick recipe – our fermented chile paste was finished in just about 4 – 5 days, instead of a couple of weeks to a month for the more traditional lacto-fermentation. We hardly saw any bubbling in the air pockets, with none on top. Because of the yogurt culture providing the fermentation engine, we didn’t need to cover the chile mixture with water and then strain it out later.
The chiles we used were heirloom Anaheim and Serrano chiles, with only about 10% being Serranos. I used the Anaheims for the mildness and well-rounded flavors, with the Serranos, providing a different flavor dimension and some good heat. I just cut the stems off of the Anaheims, but seeded, de-veined and de-stemmed the Serranos and the initial mixture was still pretty shockingly hot! The heat was an immediate, front-of-the-tongue heat which is typical for Serranos. The initial odor was unmistakably sharp fresh chiles and garlic, but after one day it smoothed out and had a very pleasant odor. After two days it started to smell very mellow with sauerkraut overtones and the chile/garlic combination fading. When it was finished the two odors were pretty well balanced, with the flavor being remarkably smooth, rich and long lasting. The heat had really mellowed, to a very moderate background that never intruded or was uncomfortable, only adding to the experience.
Note – to peel garlic painlessly, watch our short video Peel Garlic in 10 Seconds!
Here’s what could come out of your garden for this recipe – Chiles and Lemongrass!
- 1/4 cup organic whole milk yogurt you want as many live cultures as possible!
- 1 - 3 Tbsp natural salt such as Redmond RealSalt or Himalayan salt
- 2 - 3 cloves garlic or for more garlic flavor - use the whole head
- 2 - 3 quarts fresh chiles any type you prefer
- 1/2 gallon canning jar for the fermentation
- 1 quart jar for storage
- -OPTIONAL INGREDIENTS-
- 1 - 2 oz piece of ginger
- Fresh lemongrass stalks - chopped - use the bottom parts that are more tender
- 1 - 2 Tsp Organic sugar
- 1 - 2 Tbsp Thai or Vietnamese fish sauce
- Make sure the fermentation jar is extremely clean - wash with very hot soapy water and rinse very well.
- Wash, de-stem the chiles, removing seeds and veins if you want. Remove any bad spots. The seeds and veins contain the capsaicin, or heat. Milder chiles won't add much heat, but hotter ones will. I usually remove the seeds and stems from the really hot chiles for a better flavor that more people can enjoy.
- Peel garlic cloves.
- Add chiles, garlic and ginger or lemongrass pieces to food processor. Pulse until finely chopped into a paste. Use your judgement as to how fine of a paste to form. Stop and scrape the bowl down to make sure everything is chopped well. If the mixture gets thick and won't move in the bowl, add 1/4 cup water to make it looser.
- Add salt - if processor is full, add 3 Tbsp, if over half full, add 2 Tbsp and if half full, add 1 Tbsp.
- Add yogurt and pulse again to mix in.
- Transfer the paste to the 1/2 gallon jar for fermenting. Replace the screw lid loosely, to keep insects out but allow pressure build up to vent.
- Place the jar where you can observe it daily while it ferments, but not in the refrigerator yet.
- Daily, remove the lid, stir, smell and taste the mixture. You will see some bubbles and possibly some mold forming. White mold is good - do not be worried with white mold! Any other color is cause for concern - usually due to jar not being extremely clean or chiles not thoroughly washed. Stir any white mold into mixture.
- Store in refrigerator to slow down fermentation and enjoy!
When the flavors are to your liking, it is done. If left alone, the fermentation will continue for a month or more, so don't feel you have to wait on it.
Make sure that you have at least one full inch of headspace between the top of the chile paste and the lid, otherwise it can bubble over and make a mess.
We started with fully ripe heirloom Anaheim and Serrano chiles – the Anaheims for flavor with the Serranos providing a nice heat.
The next step was to remove the ‘heat’ from the Serrano chiles by removing the veins and seeds. These contain the capsaicin which is a yellow oil in the seeds and along the veins.
A butter knife worked well to slip into the chile and remove seeds and veins all at once. Note the disposable gloves to protect my hands now and eyes later!
After the chiles and garlic were chopped up in the food processor, the yogurt and salt were added, then pulsed to mix in well. Be careful when pushing the chile mixture down to keep your face away from the opening, as it can be quite pungent, depending on your chile selection!
After the yogurt and salt are added, the chile mixture is transferred to the fermenting jar. We started with the quart jar, but it was too full so we transferred to a half gallon to give it enough space.
After about 5 days, the fermented chile paste was ready to go. It started to mellow in the aroma after the 2nd day, and by the 4th it had a sauerkraut odor with undertones of chile – surprisingly delicious! We transferred the paste back into a quart jar to store in the refrigerator.
The final product glamour shot!
Peceto Asado con Tallerines (Argentine Beef Roast with Fettuccine)
Argentina is world-famous for the beef they raise on the open grassland plains of the Pampas. It isn’t surprising to see how creative they are with using beef in so many different ways, much like the Italians have finely crafted the myriad uses of pork in their cuisine.
To expand my cuisine beyond the beloved Mexican and Central American dishes that I’ve grown up with, I wanted to try something a little different but delicious. This beef roast is the first result of our experimentation, and it turned out as succulent and mouthwatering as the photos show. There was a breadth and depth to the flavors that was hard to describe – the roast was tender, juicy and had a number of flavor combinations that kept hitting the tongue, then the tomato sauce balanced the roast out beautifully.
We used a large roast to give us some for an easy, creative dinner or two during the week. Scroll past the recipe for more photos and commentary!
Here’s what could come out of your garden for this recipe – Tomato, Onion, Bell Pepper and Rosemary!
- 1 Beef roast about 4 lbs
- 1 Head of garlic peeled and crushed or diced
- 1/3 Cup olive oil
- 1 Tsp salt
- 1 Tsp fresh ground black pepper
- 2 Tbs fresh rosemary finely diced
- 1/2 Cup red wine or water
- 8 Cups cooked fettuccine linguine or spaghetti
- Juice of 1 freshly squeezed lemon and orange
- 1/3 Cup olive oil
- 1 Medium onion chopped
- 1 Bell pepper - yellow or red preferred chopped
- 2 Large tomatoes chopped or 1 can of chopped tomato puree
- 1 Cup well-seasoned beef broth
- 2 Dried bay leaves
- 2 Tsp Mexican oregano
- Sea salt to taste
- Trim any excess fat from the roast.
- In a mortar, mash the garlic into a paste, then lightly crush the rosemary leaves. Mix with the oil, salt and pepper forming a paste. Rub into the roast; cover with plastic wrap and refrigerate overnight.
- 2 - 3 hours before roasting, remove plastic wrap, place in bowl and pour lemon and orange juice over roast.
- It is best to roast over mesquite charcoal for the absolute best flavor, but oven roasting will still be very tasty.
- Heat covered charcoal grill to around 325°F and roast over the coals for 10 - 15 minutes each side to sear and seal the juices in. After 30 minutes, place roast in a shallow roasting pan on a pizza stone to finish roasting over an indirect heat. Turn every 20 minutes until tender.
- If roasting in oven, start with roast in shallow pan and turn and bast every 20 minutes.
- Once roast is tender, remove from heat and let sit for 10 minutes then slice thinly across the grain.
- Heat the oil in a heavy bottomed skillet over medium heat.
- Saute the onions until soft, add the bell pepper and saute until just beginning to soften.
- Add the tomatoes and cook uncovered until they release their juices, stirring consistently as the juices evaporate a bit.
- Add the beef broth, bay leaves, Mexican oregano. Bring to a boil, then reduce heat to a simmer.
- Simmer for 10 - 15 minutes until slightly thickened and season to taste with salt.
- Set aside to serve with noodles.
- Arrange warm noodles on the plate, ladle a generous helping of tuco on the noodles and layer with 3 or more slices of roast on top.
- Garnish with a sprig of rosemary if desired.
This is a great way to cook a large portion of roast for a scrumptious Sunday dinner to have the basis of several outstanding meals during the week.
Here is what dinner started with. The beef is locally grown, semi-grassfed from a neighbor. I call it semi-grassfed as we simply don’t have enough grass in central Arizona on smaller acreage to completely feed a large animal like a beef cow. We do know exactly how this beef was raised and the processor is local as well. This beef traveled less than 20 miles from hoof to plate!
After just over an hour, this is the beauty that emerged from our Kamado, a Japanese charcoal smoker/cooker. The deep red is from the mesquite smoke, and the taste test that I cut off is apparent. Delicious!
The tuco sauce close-up. It was a different experience making a non-Italian tomato sauce! It was rich, flavorful and a perfect counter to the intense flavors of the roasted beef.
Just after plating, the first glamor shot!
Sugar, Snap or Snow Peas
There is nothing quite as graceful as trellised pea plants in full swing. And nothing quite as tasty as a crunchy sugar snap pea eaten straight off the vine. And nothing that so captures the essence of spring as peas–all kinds of peas.
Peas love cool, wet weather, and so are often only in season for a few weeks, when you will find local farmers bringing in the irresistible sugar snap pea, the Chinese or snow pea, and the good old fashioned shell (or English) peas.
Snow Peas – Healthy and Cosmopolitan
Snow peas are long, thin, early flat pea pods, with teensy proto-peas inside. But you’re not after the peas in this case; it’s the tender pod itself you’ll love. Traditionally found in Chinese and other Asian cuisines, they now appear in all sorts of dishes from salads to pastas to stir-fries.
Some say the name snow pea comes from the slight whitish tint reflected from the pods in bright sunlight. Others say it’s because they are a cool weather crop–best in the early spring or late fall, when they just might be covered with light frost or even snow. But no matter the name, or where it comes from, snow peas are sweet and crisp and delicious– and an excellent source of fiber, iron, potassium, and vitamins A and C. Snow peas are also among the most venerable of vegetables, with evidence of their cultivation going back more than 12,000 years along the Thai-Burma border.
Sweet Sugar Snap Back Story
Way on the other end of the pea timeline, one of the newest pea cultivars is the sugar snap pea. Calvin Lamborn of Twin Falls, Idaho began crossing snow peas with shell peas in the 1960s. He was going after a pea that would have the edible, non-fibrous pod of the snow pea, plus the full-size interior peas of English peas. His hybrid was finally perfected in 1979, and has become a favorite of gardeners and market farmers ever since.
Both the pod and the peas are plump, succulent, and sweetly irresistible. The French call them mange-tout, which tells you what to do, “eat the whole thing,” preferably on the way home from market for maximum nutrition and enjoyment. As with all legumes, peas host beneficial bacteria in their root nodules, which make nitrogen in the air available as a fertilizer in the soil for themselves and whatever crop is planted there next. They are one of the true heroes of our fields and tables–so enjoy!
Here’s what could come out of your garden for this recipe – Peas and Parsley!
Quick Snow Peas with Lemon Herb Butter from Farm Fresh Now!
- 2 tablespoons butter at room temperature
- 1 teaspoon finely grated fresh lemon zest
- 2 teaspoons finely chopped herbs of your choice suggest half and half finely chopped tarragon and flat-leaf parsley
- 1/2 teaspoon salt
- 1/4 teaspoon black pepper
- 1 pound snow peas trimmed
- Stir together butter, zest, herbs, salt, and pepper.
- Cook peas in boiling salted water until crisp-tender, about 1 minute.
- Drain well.
- Transfer hot peas to a bowl, then add lemon herb butter and toss to coat.
Snow Peas and Sugar Snap Peas can be used interchangeably in just about any recipe.
Sugar Snaps are also great raw as part of a vegetable tray or a box lunch.
Serves four as a side dish.
The best way to enjoy healthy, seasonal produce is to buy it from your local community farmer.
To locate the farmers’ market or CSA nearest you, visit Local Harvest.
Farm Fresh Now! is a project of The Land Connection, an educational nonprofit that preserves
farmland, trains new farmers, and connects people with great locally-grown foods. This series is
made possible with generous support from the Illinois Department of Agriculture.
Sometimes the simplest things are the most elegant and satisfying. This almost-custard yogurt tart is one example. Strained yogurt, a little sugar, vanilla and some eggs are all there is to it, but the resulting marriage of the rich egg and yogurt flavors along with the sweetness of the sugar, all tied up in the aroma and taste of high quality vanilla is captivating.
Everyone expresses their approval with lots of “mmmm” sounds, not wanting to waste time or attention in talking. That’s when you know you’ve got something special!
Fresh eggs from your backyard chickens, ducks or geese will really make this memorable!
- 1 cup flour
- 1/4 cup sugar
- 1/4 tsp. kosher salt
- 8 tbsp. unsalted butter melted
- 3/4 tsp. vanilla extract
- 1 lb. labneh
- 1/4 cup sugar
- 1 tsp. vanilla extract
- 1/8 tsp. salt
- 3 eggs
- Heat oven to 350°.
- Whisk flour, sugar, and salt in a bowl. Stir in butter and vanilla until dough forms; press into bottom and up sides of a 9" Springform pan.
- Using a fork, prick dough all over.
- Line dough with parchment paper and fill with pie weights or dried beans; bake until pale golden, 13–15 minutes.
- Remove paper and weights and bake until golden brown, 8–10 minutes more; let cool.
- Lower oven to 300°.
- Whisk labneh, sugar, vanilla, salt, and eggs in a bowl until smooth; pour filling into crust.
- Bake until just set in the center, about 20 minutes.
- Let cool before serving.
Make sure to use the highest quality vanilla extract, as it really will make this dessert! We have used and have fallen in love with Nielsen-Massey pure vanilla bean paste from King Arthur Flour. It is absolutely scrumptious with a great aroma and delicate flavor that is wonderful.
If you are pressed for time, substitute a prepared pie crust. Then the time needed to make this is about 10 minutes of prep and the 20 minutes of baking.
Adapted from Saveur Magazine #163
The goose egg will fill my hand, while I can hold 3 or 4 of the chicken eggs!
Since I had the Kamado grill going, I just baked the tart on the grill with a heat diffuser underneath. The tart is almost ready here! It had just finished rising and had about 5 minutes to finish firming up.
After it sat for about 30 minutes, this is what greeted us:
And of course, the final glamor shot – ready to wow guests and birthday wife!
This smoked, yogurt marinated beef roast was served for Cindy’s birthday dinner, where I wanted to do something very tasty, a bit unusual and didn’t require hovering over the stove in the kitchen for a long time, as we were busy with catching up in the office after two successive weekends presenting at gardening shows.
We are fortunate to have some locally raised beef that is delicious in its own right, so that made a perfect base on which to build. I was perusing one of the newer issues of Saveur magazine and came across the dessert idea – a baked yogurt tart – and saw the recipe for grilled yogurt marinated lamb chops. This is our version, slow roasted and smoked over mesquite charcoal in a Kamado, or Japanese ceramic grill. I roasted this at about 300°F for just a bit over 2 hours, as grass-fed beef shouldn’t be cooked as long as conventionally raised beef roast.
The results were fabulous – the beef roast had a rich, smoky beef flavor that is missing in store bought beef, followed by the tangy, complex flavors of the marinade. Prepare this in the morning and roast it in the afternoon, planning about 2 – 3 hours for the roasting, depending on the size of your roast.
This is the perfect centerpiece for an impressive and delicious dinner that won’t take all of your day to prepare!
Scroll down after the recipe for photos showing the process.
Here’s what could come out of your garden for this recipe – Onion and Cumin, along with garlic you’ve grown!
- 1 large beef roast about 4 - 6 lbs
- 1 large red onion finely chopped
- Sea salt and freshly ground black pepper to taste
- 1 cup plain full-fat yogurt
- 2½ tsp. ground cumin
- 2 tsp. ground green cardamom
- 1/2 section star anise
- 1 tsp. ground caraway seeds
- 8 cloves garlic mashed into a paste
- Zest and juice of 1 lemon
- Grind cumin, green cardamom, caraway, star anise in a mortar and pestle. Add to mixing bowl with yogurt.
- Peel and crush garlic into a paste in mortar and pestle.
- Stir yogurt, freshly ground spices, garlic paste, zest and lemon juice in a bowl.
- Butterfly beef roast in a circular cut about 1 inch thick, lay open and spoon yogurt marinade over, leaving a small amount for the outside.
- Roll up and tie with butcher's twine, spoon remainder of marinade on outside.
- Cover with foil, marinade for 4 hours in refrigerator.
- Heat charcoal or covered gas grill to medium. 300°F is target temperature. Once temperature is stabilized, roast beef for 2 - 2 1/2 hours, turning once each hour.
- Roast until desired doneness, then remove and let sit on platter for 5 - 10 minutes. Slice and serve.
Grass-fed beef will be tough and chewy if cooked to the usual USDA temperatures most of us are used to. The USDA recommends the beef be cooked to 145 - 170°F, while 120 - 140°F is best for pastured or grass-fed beef. Shannon Hayes at www.grassfedcooking.com has taught me the most about bringing the rich and delicious flavors from these meats!
Adapted from Saveur Magazine #163
We assembled all of the ingredients to start.
A close-up view of the spices. I actually didn’t use all of them, but had gathered them when doing the brainstorming and adaptation of the original recipe.
I prefer to hand grind my spices when I have the time, the flavor is much better, more defined and richer than with a blender or mechanical spice grinder. The crushing and twisting motion really does make a difference. We also found this applies to the flavors of pesto!
There is green cardamom, star anise, caraway and cumin seeds in there.
During the grinding process, the most amazing aromas drift up. Cindy had come in and commented on how wonderful it smelled already, and I was only grinding the spices! I ground the cardamom pods whole to begin with, then pulled the shells out after crushing them a bit to release their flavors.
Next up was the garlic. I used the “Peel Garlic in 10 Seconds” trick, this time for the whole head. It still only took me maybe 15 seconds! The reason for grinding it instead of dicing or chopping it is to release the oils and flavors that only crushing or grinding will achieve.
After mixing the marinade and butterflying the roast into about an inch thick roll, I applied the marinade and wrapped it back up.
After liberally spooning the marinade on the inside and rolling it back up, I tied it with butcher’s twine, spooned the remainder of the marinade on the outside, put it into a bowl and then into the refrigerator for 4 – 5 hours to do it’s magic!
That afternoon I fired the Kamado up and once the temperature stabilized, the roast went on. I had spread the coals to the outside and put a small round cast iron griddle underneath to divert the heat to be more indirect. Once the internal temperature was 125°F in the center, it was ready to let rest and then slice. Beautiful and mouthwateringly aromatic!
It was hard to walk down wind of the smoker without popping the lid every time to check on it!
Once it had rested for 5 – 10 minutes, I sliced it and we dug in. Of the 4 – 6 pound roast, 3 of us ate only about 1/4 of it, so there will be a number of other tasty dishes that result from this one.
Here’s our adaptation of several classic Asian wilted spinach dishes, usually served either before or alongside the main meal. This is easy to make, downright delicious but with an unusual twist in the flavors that will make it memorable for your guests. Enjoy the flush of spinach, because it is a short-lived season!
Here’s what could come out of your garden for this recipe – Spinach, Chiles and Sesame seeds!
- 1 pound fresh spinach rinsed well, lightly steamed and cooled
- 1 1/2 tablespoons Asian sesame oil
- 1 1/2 tablespoons rice wine vinegar
- 1 1/2 tablespoons minced fresh ginger
- 1/2 teaspoon sugar preferably raw
- 1 teaspoon hot red pepper flakes
- freshly ground black pepper to taste
- 2 tablespoons sesame seeds toasted
- Make the dressing ahead of time by combining the sesame oil, rice vinegar, ginger, sugar, hot pepper flakes and freshly ground black pepper. Mix well with a wire whisk, taste and adjust seasonings to suit your preference. Set aside to allow flavors to mingle, at least a half hour.
- Toast the sesame seeds in a small heavy pan, like cast iron, over medium heat. Stir constantly until they release their aroma and start to slightly darken. Remove, pour into a cool bowl and stir until cooled down to stop toasting, about 1 - 2 minutes.
- To wilt the spinach, wash in a sink full of water thoroughly to remove any residual grit or dirt, shake once or twice and add to a deep, heavy saute pan that has been heating over medium heat and cover until just wilted, about 1 - 2 minutes. Remove the lid, turn the heat to high and let the water evaporate while stirring with tongs, about 30 seconds to 1 minute. Remove spinach using tongs to squeeze out any excess liquid and place into a large serving bowl. Refrigerate until cool.
- Once cool pour dressing over spinach and toss several times to mix flavors well, then sprinkle toasted sesame seeds over the top.
Can you peel garlic in 10 seconds? Not just one clove, but a handful or even a whole head? Can you do 5 or 10 in a row?
Sure you can, we show you how in our very short video! Extremely simple, works every time and completely eliminates the mess, fuss and frustration of peeling garlic.
A couple of tips- if the garlic isn’t quite as peeled as you need, simply shake it a little bit more. If it comes out looking a little crushed, just shake a little less next time. With just a couple of minutes of practice, you’ll be peeling garlic like a pro and will never hesitate to use fresh garlic in your cooking again.
Taste one of these little bright yellow jewels and you’ll immediately discover why they’ve gained a loyal following and a number of equally colorful names. They initially give a strong burst of citrus-like tang, quickly followed by a curious, tingly jolt of electricity sensation that spreads from your tongue to fill your whole mouth that ends in a numb feeling. This all repeats itself for about 15 minutes.
They have become very popular with restaurants that use the buds finely diced in fresh salads, with sliced chiles and lime as a condiment, lightly pickled or candied with desserts. Here is a unique, complex and attention-grabbing sorbet that will intrigue and delight your friends or a dinner party!
Here’s what could come out of your garden for this recipe – Chile and Szechuan Buttons!
- 3 fresh mangoes peeled, pits removed and sliced
- Finely grated zest and juice of 2 limes
- 1 cup of superfine sugar Use regular sugar if you can't find superfine - powdered sugar has cornstarch in it
- 1 small red chile finely chopped Remove seeds if you are sensitive to heat, or to try for the first time
- 9 small Szechuan buttons finely diced for the sorbet 3 diced for the salt coating and a few extra (quartered or halved) to use as a garnish in each dish
- Flaky sea salt
- In a food processor, blitz the mangoes, lime zest and juice and superfine sugar to a smooth puree.
- Pour into a freezer safe container, stir in the chopped chile and Szechuan buttons and put into freezer.
- After 1 hour, stir the mixture with a fork to loosen and fluff. Do this every hour until fully frozen. The aim is to create an icy, fluffy slush instead of a frozen block.
- Once frozen, wet the rim of a Martini glass or small dessert dish with lime then dip the rim into a mixture of sea salt and diced Szechuan buttons. Scoop a small portion into the glass or dish.
- Serve immediately with a garnish of halved or quartered Szchuan buttons and a ring or two of sliced chile.
The chile should add intrigue and a dimension of flavor, not stand on it's own heat. Start conservatively, then add as flavor is needed.
The overall flavor should be one of sweet, then fruity, then slightly sour, then the chile flavor (not heat) and "buzz" of the Szechuan buttons should arrive together, raising eyebrows!
Adapted from Homegrown Revolution
A Cucamelon is a tiny watermelon lookalike originally from Central America that is enjoying its spot in the limelight. Home gardeners are captivated by the look of these jewel-like melons and then often fall completely in love with their crisp, crunchy, cucumber-tinged-with-lime flavor.
After you’ve gotten your fill of fresh cucamelon in salads, salsas, appetizers in bowls of assorted olives, and as garnishes for high-brow Martinis, save some for the winter months with this delightful pickled cucamelon recipe!
Here’s what could come out of your garden for this recipe – Dill, Coriander and of course Cucamelon!
- 1 1/2 cups white vinegar - distilled malt or white wine
- 1 tsp salt
- 4 tbsp raw sugar
- 1 tbsp chopped fresh dill
- 1 tbsp chopped fresh mint
- 1 tsp coriander seeds
- 9 oz fresh cucamelons
- 1 fresh grape leaf or oak leaf
- Pour the vinegar into a bowl and add salt and sugar, then whisk until they have completely dissolved. Stir in the dill, mint and coriander seeds.
- Wash the cucamelons in water and pour into a sterilized jar. (Run the jars through the dishwasher and dry in a warm oven set to its lowest temperature.)
- Scrunch up the grape or oak leaf and place it on top of the cucamelons. The tannins in the leaf will slowly disperse outwards and help keep the fruit crisp.
- Pour the seasoned vinegar into the jar and seal tightly.
- Refrigerate for 2 weeks. The cucamelons will be pickled and ready to eat. Once opened, store in the refrigerator. They will keep up to 3 months, but most likely won't last nearly that long!
- Yields about 1 quart.
Pick enough cucamelons to make several jars of pickles, as you will go through one jar very quickly once people get a taste of them!
Makes a most impressive and unusual gift, especially once the weather is cold. Your recipient will remember this gift for a long time!
Adapted from Homegrown Revolution
Radicchio is a member of the chicory family – along with Endive and Escarole – and is part of the dandelion group. Chicories are thought to help with digestion of rich foods and are often served as sides to hearty winter fare in Europe.
Many folks are familiar with radicchio, endive and chicory as a fall and winter vegetable, but their cool season tolerance makes them ideal for early spring planting as well, either starting the seedlings inside and transplanting once soil temperatures are above 45 – 50°F, or just direct sowing when the soil is above 50°F. They can also be planted in the fall and overwintered in a cold frame or heavy row cover and harvested early next spring.
Here’s what could come out of your garden for this recipe – Thyme, Radicchio and Romano beans!
- 1/4 cup unsalted butter divided
- 2 small shallots finely diced
- 1 tbs. chopped fresh thyme
- 4 cups thinly sliced radicchio
- 1 1/2 cups arborio rice
- 1 1/2 cups cooked Italian beans like Romano
- 1 3/4 cups dry red wine
- 3 cups rich chicken stock - can substitute a roasted vegetable stock
- 1/2 cup Parmigiano Reggiano cheese plus more for topping
- Melt 2 tbs. butter in a sauce pot over medium-heat.
- Add shallots and sauté until soft, about 5 minutes.
- Add thyme and radicchio and sauté until radicchio wilts, add rice and toast until slightly browned. Add wine and simmer until liquid is almost evaporated.
- Add chicken stock slowly with a ladle and stir the rice occasionally. Continue adding stock and stirring until rice is almost al dente and starts to become creamy.
- Add beans and Parmigiano Reggiano cheese to pot and a little more stock if needed. The risotto should be a little soupy.
- Stir in the remaining butter and serve in shallow bowls with more Parmigiano Reggiano cheese.
A little sautéed diced pancetta is also delicious in this dish. Cook it and remove prior to adding the shallot. Top the finished dish with the pancetta and cheese.
Adapted from La Cucina Stagionale
Sour cream biscuits are a delicious use of extra sour cream, for a special occasion or just for the fun of it. Using extra sour cream or sour milk to make biscuits or pancakes is an old technique that dates back to farm house days when there would be extra milk or cream from milking the cow. Organic sour cream will give a noticeably richer flavor.
This recipe comes to us via “Chile, Corn and Croissants” by Joan Stromquist who traveled all across New Mexico visiting inns to compile the favorite recipes of the innkeepers and owners. She shares almost 400 dishes, from spicy Southwestern standards to old favorites. Casita Chamisa, run by Arnold Seargeant, is in Albuquerque and sits on an ancient Pueblo ruins dating from around 720 BC to the mid 1600s AD. This is an old recipe and has been updated for today’s cuisine.
- 3 Cups flour - White Sonora Wheat is excellent
- 1 Teaspoon raw sugar
- 1 Tablespoon baking powder
- 3/4 Teaspoon baking soda
- 1 Teaspoon natural salt - like RealSalt
- 1/2 Cup coconut oil warmed or vegetable oil
- 1 1/2 Cups sour cream
- Preheat oven to 450°
- In a large bowl add the flour, sugar, baking powder, baking soda and salt. Stir together well.
- Add the coconut oil and cut it in well with a pastry blender or stand mixer so that the mixture is crumbly.
- Add the sour cream and mix in so that everything is blended, but do not overwork.
- Place the dough on a lightly floured surface. Knead the dough about 10 times or just until smooth.
- Roll out the dough to about 1/2" thick.
- Cut out the biscuits with a 2 1/2" round biscuit cutter.
- Place the biscuits on an ungreased cookie sheet. Bake for 10 - 15 minutes, or until they are lightly browned. Check at 10 minutes for doneness.
These keep very well for a couple of days. It's doubtful that they will last longer than this!
You can also use Greek strained yogurt in place of the sour cream.
Adapted from Chile, Corn and Croissants

These are really easy and quick to make, taking about 10 – 15 minutes to mix, knead, roll and punch out.
I rolled the dough out to about 1/2″ thick…
Then punched out the biscuits.
The recipe made exactly 24 biscuits, after re-rolling the dough from the scraps left over after cutting the biscuits out. Ready to go into the oven.
Fresh baked biscuits, fresh from the oven! The description is very accurate, they are light and fluffy with a great flavor.
Roasted Butternut squash is the mainstay in many delicious cold season soups, with good reason. They are satisfying, slightly sweet and lend themselves to many savory seasonings without being overwhelmed. Here’s an unusual take on the classic with a slightly sweet twist thanks to maple syrup! It is very easy to make and works equally well as a cold weather soup served hot or a surprising spring soup served chilled.
Here’s what could come out of your garden for this recipe – carrots, onions, parsley and butternut squash!
- 2 medium butternut or other winter squash cut in half and seeded (about 4 cups)
- 1 cup chopped sweet onion
- 1 cup coarsely chopped carrot
- 1 teaspoon grated fresh ginger
- 4 1/2 cups homemade chicken stock can substitute ready-made broth
- 6 tablespoons maple syrup
- 1 teaspoon coarse salt
- Freshly ground black pepper
- 1/4 teaspoon freshly ground nutmeg
- 1/4 teaspoon freshly ground cinnamon Ceylon or Vietnamese is preferred for a warmer flavor
- 1/4 teaspoon freshly ground cardamom
- 1/4 cup heavy cream if desired optional
- 1 tablespoon fresh minced chives or parsley optional
- Roast squash, onion and carrot on a cookie sheet lined with foil in a 350F oven for 25 - 35 minutes or until fork tender. Scoop out squash from its shell.
- Working in batches, process roasted vegetables in a food processor, adding small amounts of stock and process until smooth. You can leave a few smaller chunks for a more rustic appearance.Transfer pureed mixture into heavy bottomed pot.
- Stir in maple syrup and remainder of seasonings. Simmer on low heat for 10 - 15 minutes, then taste for sweet balance.
- Swirl in a spoonful of cream and top with chives or parsley and serve hot with crusty bread.
The soup can be made up to serving, then refrigerated up to 3 days to allow flavors to mingle and reheated on stove top. It can also be frozen for up to 2 months.
Reheat soup on stove top before serving, then add cream and garnish.
Leeks are thought of (when they are thought of at all) as a base for winter soups and stews. But they deserve far more attention than a bit player in a winter’s tale. Although the leek is a member of the onion family, the flavor is more subtle and refined than the standard onion.
An Ancient Delicacy
Leeks have been around, and enjoyed, for a very long time. They were part of the diet of the workers who built the Egyptian pyramids, and the ancient Romans were particularly fond of them. In fact, the first century Roman Cookery of Apicius includes seventeen recipes for leeks. Among them are mouthwatering recipes such as leeks stewed with shell beans in white wine, leek sauce with pepper for braised meats, fish fillets with leeks and coriander, and leeks with truffles.
Leeks Around the World
The Roman tradition continues all over Europe and the Middle East, where nearly every shopper’s market basket contains a pound or more of leeks – slender ones in spring and summer, and nice big fat ones in fall and winter. Even the biggest, scariest leeks become tender and mild after a brief cooking, so don’t let big leeks – or the dirt often found in them – put you off.
They are excellent in sauces, vegetable dishes, soups, casseroles, and stir-fries. And they are naturally low in calories and an excellent source of Vitamin C, iron, and fiber.
Simple, Hearty and Delicious
- 1 pound potatoes
- 1 pound leeks
- 2 Tb butter
- 1 cup milk more or less, depending on dryness of potatoes
- Salt and freshly ground pepper
- Scrub the potatoes and boil in salted water until cooked through.
- While the potatoes are cooking, wash and slice the leeks into thin rounds. If the leeks are gritty, slice them longitudinally and rinse well before slicing.
- Melt the butter in a heavy pot. Toss in the leeks and season with salt and freshly ground pepper. Cover and cook on low heat until soft and tender.
- As soon as the potatoes are cooked, drain, peel, and mash.
- Bring the milk to the boiling point in a small pan. Beat the buttered leeks and their juices into the potatoes along with enough boiled milk to make a soft texture.
- Season with salt and freshly ground pepper.
- Serve immediately with a lump of butter melting in the center.
 The Land Connection Foundation
The best way to enjoy healthy, seasonal produce is to buy it from your local community farmer. To locate the farmers’ market or CSA nearest you, visit www.localharvest.org.
Farm Fresh Now! is a project of The Land Connection, an educational nonprofit that preserves farmland, trains new farmers, and connects people with great locally-grown foods. This series is made possible with generous support from the Illinois Department of Agriculture.
Italian Balsamic vinegar is pretty amazing, as even the “everyday” variety is highly tasty. Surprisingly, the traditional balsamic vinegar isn’t “true” vinegar in the classic sense of a fermented product that is removed from the fermentation after a specific period of time such as apple cider, wine or rice vinegar. Balsamic vinegar remains in the fermentation vessels for the entire time it is aging. It has been made in the Modena and Reggio Emilia regions since the Middle Ages, being mentioned as an established and highly regarded product in documents from 1046.
Traditional balsamic vinegar is produced by reducing pressed Trebbiano and Lambrusco grapes over low heat until the desired syrupy consistency is reached, called mosto cotto in Italian. This syrup, called a “must” is then aged for a minimum of 12 years in a series of seven barrels of successively smaller sizes. The barrels or casks are made of different woods such as chestnut, acacia, cherry, oak, mulberry, ash, and in the past, juniper. The results of this aging is a thick liquid that is a rich, glossy deep brown with complex flavors and aromas from the grapes and different woods that they’ve absorbed over time. The typical time for aging is 12, 18, 25, 50 and up to 100 years in those assorted wooden casks. No sampling is allowed until the aging is finished, and then a unique method of production is put into motion. A small amount of finished balsamic vinegar is drawn from the smallest and oldest cask, with each cask being topped off from the next largest and youngest cask. This happens once a year and is called “in perpetuum”. This is one of the reasons that certified traditionally produced balsamic vinegar can cost upwards of $150 – $400 for a 100ml bottle!
While we were at the Slow Food Terra Madre event in Turino, Italy last October, we were fortunate enough to be invited to sample several traditional balsamic vinegars produced in the Modena region, and certified as traditionally made. It seems that being tall, from Arizona and wearing my Australian Akubra hat gave us an open invitation with many of the food vendors that were eager to talk about the American West and share their culture!
This is what we were greeted with when he motioned us over to sample his treasures! There were some empty jam jars in front, followed by an apple and pear vinegar, made very similarly to how traditional balsamic vinegar is made, but not aged nearly as long – only 3 – 5 years. Very light, intensely fruity and delicious. We never knew that these kinds of vinegar existed.
Next he started sampling the aged balsamic vinegars. The 12 year bottle was the first one, much like what we are used to seeing in the United States in consistency, but darker and much more aromatic as he poured the small sample out onto our spoons. Even at almost arms length, we could immediately smell the complex aromas of wood cask aged balsamic. Our mouths were watering before ever tasting the first sample!
This is what the presentation or shipping box looks like for the 18 year old balsamic. You’ll notice the price – 47 Euros, which translates to about $63.00 in late 2013. That sounds expensive until you look online at what DOP certified balsamic vinegar produced in Modena sells for in the US. We didn’t taste this one, as there wasn’t an open bottle.
Next up was the 25 year old variety. Noticeably thicker in consistency, almost syrup-like. It moved slower out of the bottle and clung to the walls for longer. The aroma was much more complex and intense. The flavors really popped on the tongue with 4 or 5 flavors readily identified, then others showing up that surprised us. The flavors lasted for a long time, showing us how a tiny bit could be used for a powerful intrigue in dressings or sauces.
The presentation box for the 25 year balsamic, with pricing. 75 Euros is $100. It takes some dedication and patience to take a quarter of a century for a $100 bottle of vinegar!
We were then treated to a 50 year old balsamic vinegar. This was much thicker than the others, the gentleman had to shake the bottle a bit to get a few drops onto our spoons. It was different in that it didn’t have as much of an immediate aroma, but really lit off some fireworks of flavors in our mouths! As soon as it warmed up on our tongues, our sinuses were filled with multiple scents that continued to surprise us, coming from what was originally grape juice! The flavors didn’t just linger, they dominated our palates for a couple of minutes – to the point where we couldn’t smell anything other than this vinegar. After a couple of minutes lost in wonder at the craftsmanship and experience that created such a wonder, we took some swigs of water to prepare us for the Holy Grail of aged balsamic vinegars.
100 years of aging for this balsamic vinegar. He showed it to us, and I was very impressed that he would share such an expensive and precious delicacy with a complete stranger. I had read about these ancient balsamics, but had not expected to come across one or be invited to taste it. These highly aged balsamics are so valued that there are families that pass a bottle like this down from one generation to another.
All through this process, there were a number of people visiting his booth and a number of people were curious to see what we were sampling, but no one else joined us during the tasting. The proprietor explained in his limited English what we were tasting and the ages of the different samples. One of the impressive things that we experienced was the continuation of the flavors from the youngest to the oldest. There was a clear connection between all of them, with each successive taste getting stronger, more complex and more intriguing. It was like walking into a hall with a few doors, opening one to see hundreds more doors, then opening another to see thousands. That was what each taste was like!
The presentation box for the 100 year old balsamic is hand made of wood, with a satin lining to cushion the bottle. There was no price tag, but when we asked were told that it was “around 450 Euros” or $605 in 2013 dollars. It has been made this way since 1850 by the Malpighi family in Modena. They are truly connected with the land and the craft of making artisan balsamic vinegar.
It was an education and an honor to be invited to sample such flavors and aromas that take time and dedication to produce. It was another reminder of why food is truly important, why the quality matters and why care and dedication to craftsmanship remains a valuable part of our food pathways even in today’s ever-connected and busy world.
Pechugas in Salsa de Poblano Gratinadas
This Mexican poblano chicken dish from the Oaxacan region is another one of our family’s favorite dishes, partially because it is easy to make, is absolutely delicious and makes fantastic leftovers for lunch the next day or so. The flavors combine the mild richness of the roasted poblano chiles with the smooth creaminess of the cream and cheese in typical Oaxacan style. Add into this the smoky, roasted and seasoned chicken and you’ve got a memorable dish! We usually serve this on a bed of Mexican rice with a salad on the side. It never fails to impress our guests, with most asking for the recipe or for a second serving.
You can make this ahead of time, either in stages or in full to be served when it is convenient for your schedule. The sauce can be made up to 2 days ahead of time and the chicken can be roasted the day before, so all that is needed is to add the sauce to the chicken and pop it in the oven for 30 minutes or until everything is hot. This is best when roasted on the grill outside for that incomparable smoky flavor, but is very good when done entirely inside with the chicken browned in a heavy bottomed pot first.
Oaxacan Chicken in Poblano Sauce
Ingredients
1 lb. chicken parts cut up – can use breasts or thighs
3 – 5 large poblano chiles
1 large onion, diced
2 cloves garlic, diced
1 1/2 cup half and half
1/4 lb. grated Monterey Jack cheese
Freshly ground salt and pepper
Seasoning for the chicken
1 Tbs. ground cumin
2 Tsp. ground coriander
1 Tsp. garlic powder
1 Tbs. dried Mexican oregano, crushed
1 Tsp. freshly ground pepper
1 Tsp. sea salt
Mix the chicken seasonings well and then sprinkle onto chicken pieces, covering moderately. Grill on a medium heat for 5 – 7 minutes a side, to cook about 1/2 way or more. Remove from grill.
Grill onion and poblano peppers for 7 Р10 minutes or until starting to soften. Remove from grill and remove the stem, seeds and membranes from the peppers, then dice into medium sized pieces. Alternately, saut̩ in a heavy bottomed pot for 7 -10 minutes after cutting up peppers.
Puree pepper and onion mixture in a blender with half and half. The texture can be smooth or slightly chunky, depending on your preference. Pour poblano sauce into a heavy pot, and then add chicken pieces one at a time, coating them well with the sauce.
Either bake in preheated oven at 350F for 20 – 25 minutes or until sauce is bubbly, or simmer on stovetop. Once sauce is bubbling, turn off heat and add grated cheese. Let sit for 3 – 5 minutes to melt cheese, then serve hot.
Serves 4 – 6
We did a photo essay for you to see how easy it is!
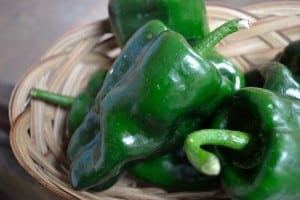 Starting with fresh Poblano peppers, we roasted them for a few minutes to soften them up, then removed the seeds, stems and membranes.
 Then we sauteed them for a few minutes to mingle their flavors.
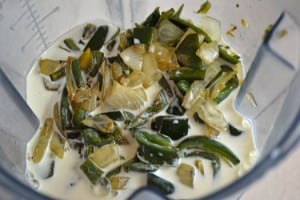 After they were ready, they went into the blender with some half and half and were pureed to a chunky texture. You can make it as smooth or chunky as you like.
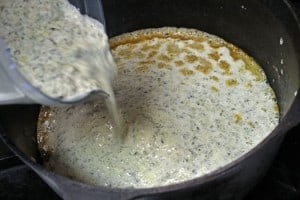 The poblano sauce was added back to the pot…
 Then the roasted chicken pieces were ready to be added.
 After adding the chicken pieces, the sauce was simmered for about 20 minutes until it was hot and bubbly, then the Monterey Jack cheese was added and melted with the heat off.
 Served on a bed of Mexican rice, it was both beautiful and delicious!
When we were looking for a classic sweet cornbread recipe to make in our Kamado, or ceramic charcoal-fired barbeque, we came across this one that is perfect for homegrown heirloom corn and White Sonora wheat and uses honey for the sweetener, instead of sugar.
This recipe comes from Alice Berner, who farms wheat in northern Montana without chemical fertilizers or pesticides. Alice developed this recipe using their local honey and the wheat that they farm. Even without white flour, this cornbread is light, moist and very flavorful with a sweetness that is warm and inviting. It is great with a roasted chicken like our Herb and Vegetable Roasted Chicken!
The Farmhouse Cookbook by Susan Herrmann Loomis supplies this recipe and is a treasure of simple, honest, delicious and yet surprisingly sophisticated recipes from farms all across America.
Recipe notes: We adapted this to our cast-iron cooking by preheating a round cast-iron deep frying pan in the oven before starting the recipe. Let the batter sit for a few minutes to thicken and mix a final time before pouring into the hot cast iron. You will get a wonderful crispy crust that just isn’t possible with standard baking pans.
Ingredients
- 1 1/2 cups yellow cornmeal (heirloom cornmeal is best)
- 2 cups whole-wheat flour (White Sonora wheat works very well here)
- 4 tsp. baking powder
- 1 1/4 tsp salt
- 4 large eggs
- 3/4 cup honey
- 1/4 cup mild oil, such as safflower
- 1 1/3 cup milk
Directions
- Preheat oven to 425F and oil a 9 x 13 inch baking pan.
- Combine the dry ingredients and mix well.
- In a small bowl, mix eggs, honey, oil and milk until thoroughly combined.
- If using a Kitchen Aid or similar mixer, slowly add the liquid ingredients to the dry and mix well. If mixing by hand, make a well in the center of the dry ingredients and gradually stir in the liquid, working quickly and gently.
- Pour batter into baking pan, or cast iron as per our recipe notes above and bake until the cornbread is golden and springs back when lightly touched, about 20 – 30 minutes. Check at the 15 minute mark to see how it is progressing. It will cook from the outside in, so watch the middle to see when it is finished baking.
Makes 8 – 10 servings.
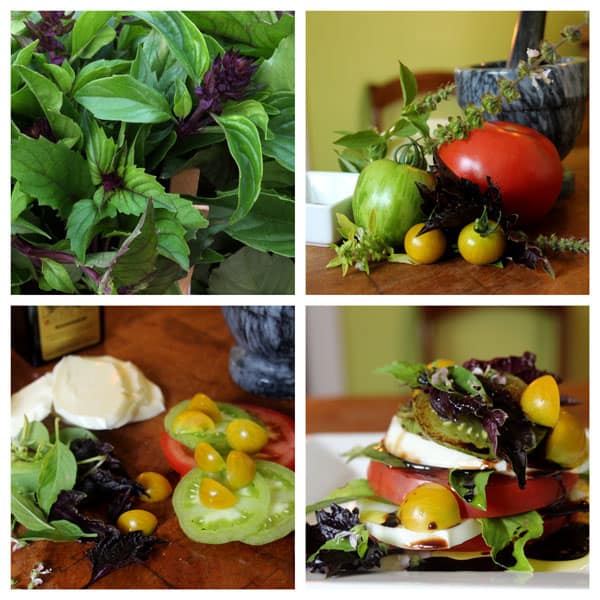 The intense aroma of fresh basil is one of the hallmarks of summer and a garden in the full swing of production. The Greek name for basil – βασιλικός – also translates as “royal”, showing the regard that it has had for a long time. It is also a symbol of love in Italy, where it is used generously in many dishes.
For the absolute best aroma and flavor, basil must be used fresh – the fresher the better. Luckily for us, it can be preserved through several different methods and brought out in the depths of winter to remind us of what summer was.
The easiest way is to freeze or dry the leaves. To freeze, just puree the leaves with a little water to a thick consistency and put into ice cube trays. When completely frozen, pop out into a gallon sized Zip-lock bag and store in the freezer until ready to use. They will brighten up soups, sauces and can be used to make a very tasty tapenade. Drying the leaves reduces the fresh aroma, but keeps most of the flavors for soups, stews and sauces. Make sure that they are dried to a brittle stage to avoid any moisture that can spoil the leaves in storage. Use sparingly when dried, as they rehydrate and can overpower milder sauces.
Yet another method to preserve those delicious summer-fresh flavors is to make pesto and freeze it, either in ice cube trays or in 6 – 8 ounce containers. It won’t have quite all of the punch of fresh pesto, but is mighty close when you are longing for the fresh flavors of summer! Read further for a traditional Pesto alla Genoves recipe, along with a video demonstration from Slow Food Terra Madre last October in Turin, Italy.
When you are absolutely overrun with basil, consider making herb-infused vinegar with basil, rosemary, thyme, marjoram or any combination for beautiful, thoughtful and highly tasty gifts. Just half fill a one gallon glass jar with air-dried herbs (leaves and stems, everything but the roots) and fill with almost boiling vinegar. High quality vinegar will give a better flavor; consider using apple cider or rice vinegar for great flavors. Cover loosely with a lid and let the herbs steep for at least one month or more. Taste occasionally to see when the flavors have developed to your taste, then strain the vinegar through cheesecloth and fill a decorative bottle.
Mention basil and immediately pesto comes to mind. Exactly when the combination of basil, cheese, garlic and pine nuts came to be is uncertain, but we do know that the Romans ate a paste of crushed cheese, garlic and herbs that was called moretum. The first recipe that we know of is from 1863 in La Cuciniera Genovese written by Giovanni Battista Ratto, so this delicacy has captivated us for quite some time!
Here is the classic Pesto alla Genovese followed by a video demonstration that we filmed at Slow Food Terra Madre in Turin, Italy in late October 2012.
Pesto alla Genovese – Classic Pesto
- 3 cups fresh basil leaves
- 2 cloves garlic
- 1/2 cup Pine Nuts
- Coarse Natural Sea Salt
- 2/3 cup Extra Virgin Olive Oil
- 1/4 cup freshly grated Parmigiano-Reggiano
- 1/4 cup of freshly grated Pecorino Romano
Directions:
With a pestle and mortar:
This is the time honored, traditional method that really does yield a superior flavor, if you have the mortar and pestle and the time.
- Wash the basil, pulling all the leaves off, and put them in a colander.
- Start the crushing process with the garlic, pine nuts and a pinch of sea salt.
- When a paste has formed, add the basil with another dash of sea salt. The rule of thumb is a clove of garlic per thirty leaves of basil, but you don’t have to count the leaves!
- Gently roll the pestle against the mortar walls, shredding the leaves.
- As soon as basil juice starts to form in the bottom of the mortar, it’s time to add the two grated cheeses to the mixture and continue to stir until a nice green paste is formed. After a few minutes a smooth, consistent paste will be formed and you will have the tastiest pesto!
With a food processor:
Purists will cry foul at this, but with care a food processor can give you very good results. It may take some experimenting to create a truly memorable pesto, but it is worth it.
- To avoid spoiling the pesto flavor by the food processor, take care to minimize the heat produced by the blade.
- Chill the blade and bowl assembly in the freezer before starting and monitor the amount of time the pesto is being processed.
- Using cheese fresh from the refrigerator helps control any heat as well.
- You’ll want to stop the processor three or four times to scrape the pesto from the sides with a spatula.
- You are looking for a bright green, smooth consistency. When that is achieved, stop.
Serves 4 – 6
To see how pesto is made in the traditional, handmade method, watch this video we shot at Slow Food Terra Madre last October.
The following best-practice rules and delicious recipe are courtesy of Farm Fresh Now!, a project of The Land Connection, an educational nonprofit that preserves farmland, trains new farmers, and connects people with great locally-grown foods. This series is made possible with generous support from the Illinois Department of Agriculture.
The best way to enjoy healthy, seasonal produce is to buy it from your local community farmer. To locate the farmers’ market or CSA nearest you, visit Local Harvest.
Basil Rules
Ahhh, basil! Even the word carries a whiff of its invigorating scent.
But it’s the aromatic leaves themselves that contain dozens of volatile essential oils. Their relative concentration is the difference between “regular” Genovese basil, Thai basil, Lemon basil, Holy Basil, Cinnamon Basil, African Basil and all the other basils you’ll find your local farmer growing.
There are a few rules to remember when buying and using basil.
Rule #1: Use only the freshest basil. The fresher it is, the better it is. The fragrance of basil is never as seductive as when it is first plucked from a live plant and eaten raw, as quickly as possible after plucking. This is why you should think about having a pot of basil of your own – on the kitchen window sill or in your back yard. The next best thing is to get basil from a local farmer at a Farmer’s Market or through a CSA.
Rule #2: Don’t cook basil – don’t even heat it up if you can help it. When adding basil to a pasta sauce or a pizza, do so only at the last minute, while tossing with the pasta or after the pizza has emerged from the oven. Basil pesto too, should always be used raw, never warmed up or cooked.
Rule #3: Stay away from knives. The cut edges of basil will blacken and the overall flavor will be diminished. Instead, simply use whole leaves or tear large leaves into small pieces with your hands before scattering them over a tomato salad, mashing them into a basil butter for corn on the cob, sprinkling on green bean salads, or roasted eggplant, zucchini, or peppers. For more summer fun, experiment with the many scented and colored basils that farmers are now bringing to market, including lemon, anise, Thai, cinnamon, and purple basils.
Rule #4: Use basil only in the summer. This relates back to Rule #1, bringing us full circle. Basil is the ultimate summer herb. Its rich perfume evokes warm sunny days and mouthwatering combinations with other summer vegetables – tomatoes, zucchini, peppers. Sure, you can get it year-round in the grocery store, but like tomatoes, basil tends to be insipid when grown in a greenhouse or flown in from California. Some things in life are definitely worth the wait. Basil is one of them.
Basil Caprese Salad
[dkprinterfriendlylinking file=”Basil_Caprese_Salad.html”]
Ingredients
- Several sprigs of basil (use a variety of types!)
- 4-6 tomatoes (use a variety of colors)
- 1 pound of fresh mozzarella, sliced
- 1 Tbsp balsamic glaze
- 1/2 cup extra-virgin olive oil
- Salt to taste
Instructions
- Slice the tomatoes and mozzarella into 1/4 in. slices
- Tear leaves off of the basil sprigs
- Alternate tomato, mozzarella, and basil leaves
- Top with olive oil, more basil leaves (and flowers if you have them), balsamic glaze, and sprinkle with salt
Seasonal Cook’s Notes:
Makes about 4 individual salads
Secrets of a Seasonal Cook
Article © Terra Brockman
Photo © Cara Cummings
With the garden in full production at this time of year, there is usually an over-abundance of fresh vegetables, especially tomatoes, basil and parsley. Of course, the first thought is a pasta sauce, but after the first few gallons have been made the magic fades a bit.
What else is there to create that is reasonably quick and stunningly delicious? With that we bring you a trio of antipasto recipes. These are perfect for light grazing through an evening with friends, or for just the two of you on the back deck watching a summer evening fade into twilight.
We will start with the simplest one first. It has been called a caponata spread, but is closer to a tapenade. This has been one of our go-to recipes for more than a decade, and came from a local wood-fired restaurant that has long since closed its doors. This is simple and quick to make and keeps well.
All of them are addictive, so double the amount you make for friends and you might have some left to enjoy the next day!
Zuma’s Caponata Spread
We will often use this as a base or starting point and substitute what is fresh at the moment. Adding green Spanish olives adds a nice flavor, as does adding one anchovy to move it more into the tapenade category. If we are pressed for time, we omit the onion and substitute 1/4 cup fresh garlic for the roasted.
- 1 cup olive oil
- 1/2 cup capers
- 1/2 cup black olives
- 1/2 cup fresh basil
- 1/2 cup fresh parsley
- 2 cups Roma tomatoes
- 1 large roasted onion
- 2 heads of roasted garlic
- Sea salt and freshly ground black pepper to taste
- Add all ingredients to food processor and pulse to a slightly chunky consistency.
- Store in refrigerator for at least 2 hours for flavors to blend. Serve with toasted bread or crackers.
Serves 4 – 6 as appetizers, 2 – 3 as antipasto
Classic Tapanade from Saveur Magazine
- 1 clove garlic
- 1 anchovy filet
- 1 tsp. chopped, rinsed, salt-packed capers
- 1/2 cup chopped, pitted olives
- 1 tbsp. chopped parsley
- 1/4 cup extra-virgin olive oil
- Juice from 1/4 of a lemon
- Crush garlic and anchovy filet with a mortar and pestle, then mix in capers, olives, and parsley.
- Stir in olive oil, add lemon juice, and combine well with a fork.
- Alternatively, add garlic and anchovy to food processor and pulse till blended, then add in capers, olives and parsley. Pulse to chop well while drizzling in olive oil, then add lemon juice and mix well.
Serves 4 – 6 as appetizers, 2 – 3 as antipasto
Sicilian Caponata
This is an adaptation of one of the oldest, most widely travelled recipes from the Mediterranean region, with several cultures contributing to the flavors and preparation. If you use fresh-from-the-garden eggplant you might not need to do the salting step, as this is used to remove bitterness.
- 2 eggplants (about 2 lbs.), cut into 1â„2″ cubes
- 3/4 cup extra-virgin olive oil
- 1 large yellow onion, coarsely chopped
- 1 anchovy filet, chopped
- 3 ripe medium tomatoes (about 1 lb.), cored, peeled, and coarsely chopped
- 2 ribs celery, thinly sliced
- 1â„4 cup red wine vinegar
- 2 tbsp. sugar
- 2 tbsp. tomato paste
- 2 tbsp. golden raisins
- 2 tbsp. pine nuts
- 2 tbsp. capers, rinsed
- 12 pitted green olives coarsely chopped
- 1 red bell pepper, roasted, peeled, cored, seeded, and thinly sliced
- 2 tbsp. coarsely chopped basil
- 2 tbsp. coarsely chopped flat-leaf parsley
- Sea salt and freshly ground black pepper to taste
- Put eggplant into a colander set over a large bowl; toss with 1 tbsp. salt. Top with a plate weighted down with several large cans; let drain for 1 hour. Rinse eggplant and pat dry with paper towels.
- Heat 2 tbsp. oil in a large skillet over medium-high heat. Add one-third of the eggplant and cook until golden brown, 7–8 minutes. Using a slotted spoon, transfer eggplant to a bowl. Repeat with oil and remaining eggplant.
- Reduce heat to medium-low and add remaining oil, onions, and anchovies; cook until soft, 14–15 minutes.
- Add tomatoes and celery and increase heat to medium; cook until tomatoes release their juices, 5–6 minutes.
- Add vinegar, sugar, and tomato paste; cook until thickened, 3–4 minutes.
- Add cooked eggplant, raisins, pine nuts, capers, olives, roasted peppers, and salt and pepper to taste. Cook until hot.
- Transfer to a plate; let cool slightly. Top with basil and parsley.
- Serve at room temperature.
Serves 4 – 6 as appetizers, 2 – 3 as antipasto
The book “The Culture of Vegetables and Flowers from Seeds and Roots” by Suttons and Sons printed in 1910 had this to say about the poppy-
“The recent developments of this flower have brought it into great and deserved popularity, and it may be safely affirmed that no other subject in our gardens affords a more imposing display of brilliant colouring during the blooming period. All the varieties are eminently adapted for enlivening shrubbery borders and the sides of carriage-drives. Large clumps of some of the bolder colours should be sown in spots that are visible from a distance, and they will present glowing masses of flowers.”
What a beautiful description for a flower that has been cultivated for a long time. Here are a few gardening tips for the poppy:
- When selecting the perfect spot, remember that they love bright sunlight for most of the day. If you live in a hot climate, pick a spot that will be at least partially shaded during the heat of the afternoon.
- A well-drained spot is needed, as the poppy’s roots will rot in waterlogged soil, especially during the winter months.
- Enjoy poppies where you plant them, they do not make good cut flowers.
- Wood chip mulch around the base will help reduce weeds as well as help keep needed moisture at the roots.
- Deadhead, or remove the individual flowers as the blooms fade and wilt. Removing the spent blooms encourages the plant to keep blooming throughout the summer.
- When the flowers have died down for the season, cut back the foliage to the ground. This will produce a second showing of attractive summer leaves.
Many people associate poppy seeds with the familiar and wonderful array of Eastern European baked goods, from poppy seed pie or the poppy seed filling in the Purim holiday classic Hamantaschen. The Czech Republic is one of Europe’s largest producers of poppy seeds. When you harvest your seed pods from your garden you can make your own savory dishes featuring the poppy seeds.
Here is a perennial favorite that is easy to make and tastes so much better made at home, Poppy Seed Dressing!
Poppy Seed Dressing
- 2 tbsp. Poppy seeds
- 1/2 cup raw sugar
- 1/3 cup white wine vinegar
- 2 tsp. dry mustard powder
- 2 tsp. kosher salt
- 1 tsp. freshly ground black pepper
- 1 small yellow onion, finely grated, juice reserved
- 3/4 cup sesame oil
- 1/4 cup olive oil
- Heat a 2-qt. saucepan over medium-high heat. Add poppy seeds, and cook, swirling pan constantly, until lightly toasted and fragrant, about 3 minutes.
- Add sugar, vinegar, mustard, salt, pepper, and onion with juice, and cook, stirring constantly, until sugar dissolves and mixture begins to simmer.
- Remove from heat and transfer to a blender.
- Add both oils, and blend until smooth; chill.
Makes about 2 cups
Chard will always be there for you. Like a reliable friend, it is one of the greatest, and often least appreciated, of all the gifts from your local farmer (or garden).
Chard’s long, thick stalks have wide, glossy green leaves that may be smooth or curly, depending on the variety. The stalk comes in many colors, from white to green to brilliant red, yellow, and pink. At many farmers markets you’ll see the flashy Ruby Red and Bright Lights varieties. They are glamorous and hard to resist, but the old-fashioned varieties with white stems and green leaves are even tastier.
Not only is chard giving, it’s forgiving too. It’s much more heat-resistant than spinach, grows well under most weather and soil conditions, and is disease resistant and bug resistant too. After harvesting, the inner leaves come back quickly, so you’ll see chard at farmers markets from early June clear through Thanksgiving. Because it’s always there, you might take it for granted, but, as with a good friend, you shouldn’t.
Chard is as close to perfect as a vegetable can get–a low-calorie, high-nutrition green with a mildly sweet, clean taste. It’s also a fast food. Tender young chard leaves can be eaten raw, adding a beet-like flavor to salads and sandwiches. Larger stalks and leaves can be blanched in boiling water, or sauteed up in a matter of minutes, quick and easy. Then toss the cooked chard into pasta with olive oil and garlic, add to omelets and frittatas, or use instead of spinach in your favorite recipe.
Chard stalks and leaves are delicious, and there is no reason to discard the stems as many American recipes instruct. French or Italian recipes, on the other hand, often tell you to use just the stems and reserve the leaves for another purpose. That “other purpose” was revealed by the great food writer Richard Olney who wrote in Simple French Food (1977) that “the green leafy parts . . . are usually fed to the rabbits and the ducks.” I’m sure they make a fine treat for rabbits and ducks, but I recommend the obvious – eat the stems, leaves, and all!
Swiss chard Italian Style from Farm Fresh Now!
- 2 pounds Swiss chard (2 or 3 bunches), rinsed and coarsely chopped
- 4 cloves garlic
- Sea salt and hot red pepper flakes
- 4 tablespoons olive oil, or 2 Tb butter and 2 Tb olive oil
- fresh ground pepper
- Place the chard in a large stockpot with plenty of water still clinging to it and set on medium-high heat. When it begins to sizzle, stir and cover. Reduce heat to medium and cook until chard is wilted but still has texture and the leaves have turned dark green, about 10 minutes.
- Remove from heat.
- Heat 2 tablespoons of oil in a skillet over medium-low heat. Add the garlic and cook until golden, about 5 minutes.
- Add the chard to the skillet after squeezing out some of the liquid. Cook, stirring, until the chard has wilted and the garlic is cooked, about 10 minutes. Season to taste with salt and pepper.
- Transfer to a warmed platter and drizzle with the remaining olive oil or dot with butter and serve.
Serves 4 as a main course.
The best way to enjoy healthy, seasonal produce is to buy it from your local farmer or grow it yourself. To locate the nearest farmers’ market or farm CSA near you, go to “Local Harvest” online.
Secrets of a Seasonal Cook
Article © Terra Brockman
Photo © Cara Cummings
Farm Fresh Now! is a project of The Land Connection, an educational nonprofit that preserves farmland, trains new farmers, and connects people with great locally-grown foods. This series is made possible with generous support from the Illinois Department of Agriculture.
For many baby-boomers, the constant refrain of “Eat your spinach, it’s good for you!” and the olive green glop of canned vegetable that accompanied the words, led to life-long spinach avoidance. Well now is the time, if you haven’t already, to overcome your spinach phobia. One nibble of a local farmer’s sweet and vibrant fresh spinach will do the trick.
The first spinach you see every spring is most likely from seeds that your farmer planted late last fall. The seeds germinate and barely start to put down roots before the frigid weather descends and they go into dormancy under the ice and snow. At the first hint of spring, however, they start growing like mad, and soon the leaves are huge, thick, juicy and sweet–unbelievably rich and meaty. You really have to taste it to believe it.
If great taste alone is not enough, remember that spinach is high in vitamins A and C, and in iron and folate. It is also a good source of fiber and magnesium, and is very low in calories. And if you’re still not convinced, wine fortified with spinach juice was the healing elixir traditionally given to injured French soldiers. And the Persians, who cultivated the leafy green from at least the 6th century, recognized spinach’s sophistication and called it “the prince of vegetables.”
The best thing to do with any fresh vegetable is almost nothing. But I confess that I have become dangerously enamored of this Fresh Spinach Salade Lyonnaise. It is quick and easy to make, yet fit for a king with the combination of meaty-leaved spinach, crisp bacon, barely cooked eggs, and warm, sharp Dijon vinaigrette. (If you want to go vegetarian or vegan, just leave out the bacon and egg, adding another few tablespoons of olive oil to the dressing.) Keep this salad in mind when fall greens like frisee, escarole, and radicchio roll around because the hot dressing will soften and sweeten those sturdy leaves.
Spinach Salade Lyonnaise from Farm Fresh Now!
- 4 cups torn spinach, or a mixture of spinach, lettuce, endive, and other greens
- 2 tablespoons extra virgin olive oil
- About 1/4 pound (or less) good bacon or ham, cut into 1/2-inch cubes
- 2 to 4 tablespoons sherry or wine vinegar
- 1 tablespoon Dijon mustard
- Salt
- 2 eggs
- Black pepper
- Put greens in a large salad bowl. Put olive oil in a skillet over medium heat. When hot, add the bacon and cook slowly until crisp all over, about 10 minutes. Add vinegar and mustard to the skillet and bring just to a boil, stirring, then turn off heat.
- Meanwhile, bring a couple inches of salted water to a boil in a small pan, then lower heat to barely bubbling. One at a time, break eggs into a shallow bowl and slip them into the bubbling water. Poach the eggs for 2 minutes, until the white is set but the yolk is still runny. Remove each egg with a slotted spoon, and place onto the greens.
- Pour the bacon dressing over the greens (they’ll wilt a bit). Toss the salad, breaking the yolks of the poached eggs and distributing them evenly over the spinach. Season with salt and pepper to taste. Serve immediately, with croutons or toast if you like.
Serves 4 as a side dish, or 2 as a main course.
Secrets of a Seasonal Cook
Article © Terra Brockman
Photo © Cara Cummings
Farm Fresh Now! is a project of The Land Connection, an educational nonprofit that preserves farmland, trains new farmers, and connects people with great locally-grown foods. This series is made possible with generous support from the Illinois Department of Agriculture.
Preserving that overly abundant harvest has been one of the major challenges that gardening and agriculture has always had. In today’s world we are much more familiar with the processes of canning, drying and freezing as acceptable methods of preserving our garden’s harvest for the winter season and longer. These methods have their own set of challenges, though. Canning requires time, experience and knowledge to be successful. Freezing is pretty simple, but has its own set of needs to ensure the garden bounty isn’t lost to freezer burn or premature thawing. Drying is also simple, but benefits from modern drying equipment that can be expensive as an initial purchase.
What if there was another way, a method of preserving the harvest that is not only simple, non-intensive for both labor and equipment and was proven safe? One that is location and temperature independent, doesn’t care if you forget the exact timing and still produces an absolutely delicious product? There is! That method is fermentation. It has been proven safe over several thousand years, with at least that many different approaches and many more recipes. Almost every culture across history has contributed something to the art of fermentation.
Fermenting vegetables is an extremely simple, effective and tasty way to start experimenting and gaining knowledge, taste and experience. In addition to being easy and quick it is also highly nutritious and beneficial to your health.
Some folks are hesitant or outright afraid of trying fermentation for fear of accidentally growing the “wrong” bacteria and sickening or even killing themselves or their families. This is completely understandable in today’s world of anti-microbial soaps, detergents and wipes.
At least in the world of raw vegetables, this fear is unfounded. “As far as I know, there has never been a documented case of food-borne illness from fermented vegetables. Risky is not a word I would use to describe vegetable fermentation. It is one of the oldest and safest technologies we have.” This is from Fred Breidt, a USDA microbiologist specializing in vegetable fermentation.
In fact, fermenting commercially available vegetables will kill any pathogens that we’ve seen in the news as contributing to food-borne illnesses, as they simply cannot survive in the lactic acid environments of fermentation!
This is going to be a slightly different recipe format than we usually do. We will give you a foundational approach to fermenting any vegetables, and then give a basic recipe for a sweet and hot fermented pepper sauce or paste. The beauty of these recipes is that they are entirely scalable. Do you have an extra quart of hot chiles, a handful of sweet peppers and some garlic or onion? Great, we can work with that! Or do you have a couple of 5 gallon buckets of hot chiles and 3 more of sweet peppers, more onions than you know what to do with and you’re worried about them all going bad? No worries, we can work with that as well – all from the same recipe! The flavors from each recipe will be different, but equally delicious and nutritious.
There is a new book on fermentation on the market, and it is most excellent. The Art of Fermentation by Sandor Katz is his newest exploration of this ancient form of preserving foods. His tagline on the book reads, “An in-depth exploration of essential concepts and processes from around the world.” The basic concepts of fermenting come right out of his book, and they are easy!
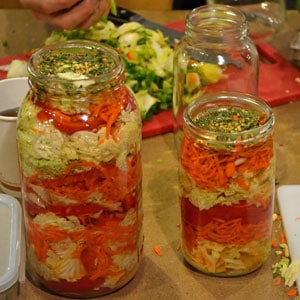
Vegetable Fermentation Made Easy
- Chop or grate vegetables.
- Lightly salt the chopped veggies (add more as necessary for taste) and pound or squeeze until moist; alternatively, soak the veggies in a brine solution for a few hours.
- Pack the vegetables into a jar or other vessel, tightly, so that they are forced below the liquid. Add water, if necessary.
- Wait, taste frequently, and enjoy!
It doesn’t matter if you have one or a dozen veggies, the above recipe works. Add spices, herbs or edible flowers and experiment. You will be surprised at just how tasty almost everything comes out.
Now that we have the basics down, let’s look at how to handle that bumper crop of hot chiles and sweet peppers. These, along with tomatoes, are one of the most expensive vegetables to buy in the store, but taste so much better out of your garden. It is an absolute crying shame to let any of these go to waste!
Let’s look first at a hot fermented chile sauce, much like Sri Ra Cha or “Rooster Sauce” as it’s called after the rooster on the bottle. The only ingredient ratio to keep in mind is the chile to garlic. Don’t go crazy on the garlic, as it gains pungency as it ferments and can throw off the overall flavor.
A note on the salt – use anything but Iodized salt, as this will cloud the color of the brine and can leave a metallic aftertaste.
Homemade Fermented Sri Ra Cha Sauce
- 1 Lb Ripe red chiles – Jalapeno, Serrano, Cayenne, Beaver Dam, or Concho
- 2 Cloves garlic, peeled
- 2 Tsp Real Salt, kosher salt or pickling salt
- 2 Tbs Palm sugar or 1 Tbs light brown sugar
- 1/4 Cup Apple cider vinegar
- Optional: 1/4 Cup fish sauce in place of vinegar. Use Vietnamese for a stronger flavor or Thai for a milder one.
- Optional: Tapioca starch for thickening
- Remove the stems from the chiles, leaving the green “cap” where the stem meets the chile. It adds a unique flavor during fermentation.
- Chop the chiles and garlic lightly, using a food processor if needed until mixture is largely chunky. Do not process too much, just minimally.
- Add chile mixture to a half-gallon Mason jar or other non-metal container. Sprinkle salt in while packing chiles. Pack down with a wooden spoon or spatula. Add just enough water to submerge mixture and cover with a dish towel secured by the ring.
- Ferment for a month, more or less as taste dictates. Taste about every week to see when it is “done” for your tastes. You will see how the flavor changes with time. Keep chile mixture submerged and remove any mold that forms on top by lifting it out with a spoon, fork or spatula.
- When the fermentation is finished, liquefy in a blender or food processor. Strain out the seeds and pulp with a cheese-making cloth and let hang for a few hours or squeeze to get all the liquid out. Discard the pulp and seeds. Heat the liquid on low heat, adding the sugar and vinegar or fish sauce and stirring them in.
- Once the sugar, vinegar or fish sauce are melted in you can lower the heat and reduce the sauce to the consistency you like or use a little tapioca starch to thicken it, much like using corn starch. Tapioca will add just a touch of sweetness, won’t be bitter and is GMO free. Let cool and bottle.
- Store in the refrigerator.
Will keep for 6 months or more, but you’ll eat it long before then!
Recipe notes: Wait until the chiles are fully ripe and red, as they will have the most complex flavor profile and yield the tastiest sauce.
Use the general ratio listed to scale up or down to suit your particular needs at the time.
Now let’s look at a larger batch with more ingredients and a completely different flavor.
Sweet and Spicy Fermented Pepper Sauce
- 3 Lbs Ripe red chiles, much the same as above
- 1 Lb Ripe sweet bell peppers – Jupiter, Melrose, or Lipstick
- 1/2 Lb Onion
- 2 heads of garlic, cloves separated and peeled
- 1 1/2 Cups Palm sugar or 1 cup brown sugar
- 3 – 5 Tbs Real Salt, kosher salt or pickling salt
- 1/4 Cup apple cider vinegar or fish sauce for additional flavor
- The procedure is much the same as for the above recipe. Chop the chiles, sweet peppers, garlic and onion.
- Submerse in a suitable container, pack down with a wooden spoon and cover with water. If using a large, open container it may help to use a plate on the top weighted down with one or two heavy-duty freezer Zip-lock bags filled with a brine solution of 3 Tbs salt to 1/2 gallon water. This way if the bags do spring a leak, you don’t dilute the brine of the fermentation. This also allows the bubbles to get past the plate and bags without building up pressure.
- Ferment for a month, tasting weekly.
- Liquefy in a blender, strain out the pulp and seeds.
- Heat on low and add sugar and vinegar or fish sauce.
- Thicken if desired.
- Enjoy!
Now you have the basic foundation of how to make some incredibly delicious chile or sweet fermented pepper sauce. You can go from mild to shockingly hot and experiment with different spices and amounts of complementary vegetables to add their flavors. You will quickly become something of a hero to your family and friends once they taste your unique sauces!
As you improve the health and fertility of your soil, you should start seeing some impressive vegetable harvests. This can be a blessing as well as a curse though. Many people know the old but highly accurate joke about the neighbor that leaves a bag of zucchini on the doorstep, rings the doorbell and runs. This is all well and good, but what to do with 100 pounds of fresh plum tomatoes? Or 150 lbs., 200 lbs. or more? The old doorbell trick will only go so far, so let’s look at a delicious alternative! Tomato conserve is a perfect choice.
Drying and canning are always options, very good ones that should be used. There is another ancient method of preserving the bountiful harvest to capture the fresh flavors for the cold winter and gray early spring months when there wasn’t much of anything fresh available. Fermenting fresh vegetables opens up so many flavors and paths to storing this summer’s bounty for the coming winter. We will look at one such method that not only ferments the over-abundance of tomatoes, but concentrates their flavors as a bonus.
A word about fermenting before we begin is in order, so that you don’t come home one day and throw out the entire project due to a misconception or lack of understanding of how the process works. This particular process uses a wild fermentation, meaning the combination of wild airborne yeasts and the naturally occurring bacteria that is on the tomatoes. This wild fermentation is spontaneous; you don’t do anything to help it along. The acid in the tomatoes provide the perfect environment to support lactic acid fermentation. There will be a surface mold which is white and completely normal. Indeed, the white surface mold is needed to protect the tomatoes from rotting. You should not see any colored mold or offensive “rotting” odors.
This process has been used for several hundred years in Italy; probably the first time was shortly after the tomato made its way from America to Italy in the early 1500s. It is still being used today, all across Italy, as small scale home growers put up their harvests to have the flavor of summer to remember during the coming winter.
The beauty of this method is that it is very scalable, able to handle 20 lbs. in one batch and 100 lbs. or more the next one.
Start with all of the tomatoes washed, stems and any bad spots removed. Get a container that is larger than the amount of tomatoes, so that when all of the tomatoes are crushed there are several inches of space to the top of the container. If necessary, use more than one container.
Crush all of the tomatoes and add them to the container. Stir well and cover with a towel, dishcloth or such to keep insects out while allowing air circulation.
The fermentation happens within a few hours and bubbles will appear, with the solids coming to the top and a white mold forming on them. Remember, white mold is good! Stir twice a day, mixing in the mold. (Note, we did not stir the tomatoes, just let them sit for 5 days and everything turned out fine!)
The fermentation will take from 4 to 5 days, depending on temperature and then stop. Remove the solids from the top and strain the mixture through a strainer. One of the best ways to do this is by using a hand cranked device that separates the skins and seeds from the pulp, called a Squeezo or Roma food strainer. The Squeezo is all metal and more expensive but will last several lifetimes!
After straining, keep the pulp and compost the seeds and skins. (As a side note, it you are wanting to save the seeds from those wonderful tomatoes, just transfer them into another bucket for a second ferment for a couple of days, scoop off the mold on top and strain out the seeds. Rinse thoroughly and dry on paper towels with the seeds spread out.)
The pulp will still have a lot of moisture that needs to be removed. Do this by further straining the pulp in a fine mesh bag or cheese making bag over the sink or a catch bowl. Tie the bag closed, let it hang and drip liquid for a day. It may become covered with a layer of white mold again, just “shave” it off after it finishes the drip process.
The pulp will be noticeably drier and reduced in volume. If the consistency is thick enough for you, stop here. If not, put the bag between two boards or plates with a weight on top to compress it and further drain moisture out for another day or two.
When it is the consistency that you want, traditionally that of firm dough, remove any mold on the bag, open it up and peel it off of the now-firm pulp.
The Italians add 25 percent salt to the tomato pulp, but most Americans find this to be way too salty. 10 percent is a good starting point, as it is much easier to add salt than to remove it! Mix the salt in well and let sit. After a few hours knead the mixture just like dough to develop the texture and store it in a jar. It does not need to be refrigerated and will last for several months. In Italy it is usually stored in waxed paper. If you do choose to store it in the refrigerator, it should last for a year.
The end result will be a preserve that is about 8 – 10 percent of the amount of tomatoes you started with. The flavors will be highly concentrated, so a very small amount will add a tremendous amount of flavor to your dishes, from soups, stews and sauces to omelets, dressings and marinades.
This is an incredibly versatile chile sauce with loads of flavor and just a touch of heat. It is my adaptation of the incomparable Mole Coloradito Oaxaqueno from Susanna Trilling in her “Seasons of My Heart” cookbook that we’ve featured before. (Mole is pronounced “Mole-lay”!)
This makes a sauce that is 95% of her Mole, but I prefer to make a very large batch as it is a project to do and doubling of the recipe doesn’t take much more time to make. Then you have this cache of amazing flavor that spices up any dish with no extra time but lets all of the flavor and work shine through. It is a wonderful basis for enchiladas, nachos, stews, soups, sloppy Joe’s, burritos or even spooned over eggs in the morning. I like to add about half tomato sauce by volume to make a great sauce that is smooth and mellow with the taste of the chiles but none of the bite.
Colorado means “red” in Spanish, usually referring to a deep brick type of red, so coloradito is “little red”. We’ll give you the recipe first, then walk you though the preparation in photos so you can see the stages and progression. These chiles can easily be grown in your garden for most of North America, or at a well-stocked Mexican grocer. For the Mexican chocolate, Ibarra is a well-known brand that is available almost everywhere. If you really want to take the flavor to the next level, look at Taza Chocolate. It is stone ground in the traditional Mexican village tradition and has a flavor that is absolutely to die for, not to mention being fair trade and traceable to the source. You can see all about how your batch was made by entering the batch number into their website!
Homemade Chile Coloradito Sauce
- 18 Ancho chiles
- 21 Guajillo chiles
- 25 Pasilla Bajio/Chilaca chiles
- 10 Concho chiles
- 1 Chipotle chile en adobo
- 5 Black peppercorns, whole
- 2 Cloves, whole
- 1 Star anise, whole
- 1 Allspice, whole
- 1 Piece Mexican cinnamon, about 1 inch long
- 1/2 Tsp Cumin, whole
- 1/4 Tsp Coriander, whole
- 1 Head garlic, cloves separated
- 1 Medium onion
- 1 Lb ripe tomatoes, quartered
- 1/2 Tsp Mexican oregano, dried (Can substitute Marjoram if needed)
- 1 Plantain, ripe
- 1 Tbs raisins
- 5 Almonds, whole and unpeeled
- 1/2 Cup sesame seeds
- 2 Bars Mexican chocolate – 6 oz total
- 3 Tbs Coconut oil or sunflower oil
- 1 1/2 Qt homemade chicken stock
- Salt to taste
There are 3 steps to this recipe: processing the chiles, processing the spices and processing the tomatoes, onions, plantains and seasonings.
Some cooks will stem and seed the chiles while still dry, toasting the pieces. Others will toast the chiles whole, then soak them to soften the skins and remove the stems and seeds.
- Bring 2 quarts of water to a boil. Meanwhile, heat a dry comal, griddle or a cast-iron frying pan over low heat and toast the chiles on both sides for about 5 minutes. Toast the Anchos a bit slower and on a lower heat because of their thicker skins. Toasting them blisters and loosens the skins and gives off a rich chile aroma. It may be best to toast them in smaller batches so the pan or comal is not crowded. You need room to move and turn the chiles in the pan.
- Remove the chiles, place them in a large bowl with the hot water. Cover or weight the bowl with a plate to keep the chiles submerged. Soak for about 20 minutes to fully soften the dried skins. If chiles have been stemmed and seeded, puree in a blender using as little of the chile water as possible to make a thick paste, usually about a cup. If chiles have not been stemmed and seeded, do this first, then puree in blender. It is best to do this in small batches to not overload and overheat the blender, as the chile puree is quite thick. Depending on your blender, you may have a smooth paste at this point, or you may have some small pieces of skin. If skin pieces are present, pass the puree through a food mill or sieve to remove the skin pieces. Set aside.
- After processing the chiles, heat the dry comal, griddle or cast-iron frying pan over medium heat and toast the peppercorns, cloves, allspice, cinnamon stick, cumin and coriander until they release their aroma. Stir the spices constantly to prevent burning and to monitor the toasting process. Set the spices aside.
- Grill the garlic and onion on the dry frying pan, turning often until they become translucent. They may stick a bit, but keep turning. Puree the spices, onion and garlic with 1/2 cup of the chicken stock. Set aside.
- Heat the cast-iron frying pan to medium and cook the tomatoes and oregano with no oil until the condense, usually about 10 – 15 minutes. They will give off their juices, then start to condense as the juices evaporate. Once condensed, set aside.
- Heat 2 Tbs of the oil over a medium heat in a cast-iron frypan and fry the plantain until brown, about 10 – 12 minutes. Remove from the pan, add raisins and fry until plump, about 3 minutes. Remove and set aside with plantain. Fry the almonds until light brown, about 4 minutes. If needed add a little additional oil, but the amount should decrease with each ingredient until the almonds are almost being dry-fried.
- Puree the plantain, raisins and almonds in a blender with 1 1/2 cups chicken stock until smooth.
- Heat frying pan over low heat, add 1 Tsp of oil and gently fry the sesame seeds until just turning brown, about 6 – 8 minutes, stirring constantly. Remove, cool and grind in a spice grinder or food processor.
- In a heavy stockpot, at least 6 quart capacity, heat 1 Tsp of oil until almost smoking on medium-high heat. Add chile puree and cook, stirring constantly. It will splatter, but keep stirring until heated through. Once heated, lower heat to medium-low and cook for about 20 minutes, stirring frequently. When chile puree starts to thicken add tomato mixture, lower heat to low and cook another 15 minutes, stirring to keep from sticking or burning. Then add onion and spice mixture and stir well. Add pureed plantain and sesame mixture and stir well. Cook a further 10 minutes, stirring constantly to keep from sticking.
- If you are making a larger batch and freezing some, add 2 cups of chicken stock, stir in well then add the chocolate and stir constantly. Once the chocolate has dissolved, add the salt, stir in well. Reduce heat to a slow simmer and let cook for 10 – 15 minutes, stirring frequently to avoid sticking. It will be a thick sauce, ready for freezing in jars. Let cool, then ladle into mason jars leaving an inch gap at the top. Will keep in the freezer for up to a year.
- If you are making the batch to use fresh, add 5 cups of chicken stock to thin the sauce, then add the chocolate, stirring constantly. Once the chocolate has dissolved, add the salt. Lower the heat to a slow simmer and let it cook down for at least 30 minutes, stirring occasionally. It should coat the back of a spoon, but not be much thicker when done.
Makes about 8 servings.
Recipe Tip! It doesn’t take much longer to make double the recipe and freeze for an easy, delicious dish later!
This may sound complicated or a lot of work, so we will walk you through the process and show you what each step looks like. It is a good day’s worth of work, but it can be broken up into a couple of days if you don’t have the time to make it all in one day. Once you taste the results, you will immediately see why it is worth the effort to make a large batch!
In the first photo, we are toasting two of the different chiles and dry frying the onion and garlic in another pan. We have learned to save a lot of time by combining a couple of steps at once. The Ancho chiles are in the back with the Pasilla Bajio or Chilacas in front.
These are the chiles after toasting, soaking and being stemmed and seeded. Most of the work happens right here, to get to this stage. After this everything is roasting and toasting, then using a blender to puree everything into a sauce. To give a sense of scale, this bowl is over 18 inches across!
Into the blender with the chiles! We have a Vita-Mix blender that is a real blessing with big projects like this. It stands up to the thick sauce without overheating, but we still need to process all of the chiles in batches. We usually fill the blender about 1/3 full with chiles and add just enough soaking water to make a thick paste. Please notice the gloves, I use them when working with chiles for extended periods of time to keep me from itching my eyes with a chile-infused finger!
It is easy to see why the name of “colorado” is applied to this sauce – look at that beautiful rich brick red color! My mouth was watering for most of the time after we pureed the chiles as the kitchen was filled with their aroma.
There is not too much volume lost from the soaking stage to the pureed stage. This is the same bowl after we’ve finished pureeing all of the chiles.
Next up is toasting and grinding the spices and seasonings. We used a smaller cast-iron pan to toast the spices and release their aromas.
A molcajete is what we use simply because we have one. It is great for grinding spices and really working them to release their flavors and aromas. A food processor or blender can do much the same with less effort.
A few minutes later, here is what the ground spices look like, ready to be mixed into the chile mixture. At this point we’ve also pureed the onion and garlic and mixed it into the chile sauce.
Now it’s time to mix it all together! This photo helps to show the scale of everything, as the whisk is almost a foot long and I’ve got my hand completely wrapped around it to work all of the purees and spices together.
After everything is mixed together and cooked at a slow simmer, we put it up in jars to freeze for later. We use pints, as this gives a generous amount of sauce without being too much after a couple of days. We leave about an inch or little more of space at the top to allow for expansion in the freezer.
All done except the clean-up! This particular batch made 17 pints of scrumptious chile sauce, with just a bit left over for the next morning’s eggs. This will give us almost a year’s worth of chile sauce.
A close-up of the color and texture of the finished product. Well worth the work!
Risotto is a wonderful Italian dish made from rice. Some of the best Italian rice is harvested at the beginning of October around Verona, in the north-east of Italy. One of the most famous areas is Isola della Scala, just south of Verona. Isola della Scala is often called “Città del Riso” (city of rice) because it is surrounded by large rice fields.
It has been a center of rice production in the Veneto region since the 17th century. You can imagine the wealth and history of risotto dishes from this area! Once a year immediately after the rice harvest the Fiera del Riso (Festival of Rice) takes place during the months of September into October. This event features many culinary contests and historical exhibitions that inspire visitors. The rice festival is, of course, not only an event for education and watching but also for tasting – hundreds of thousands of different risotto recipes are served during the event. This past event was the 44th annual festival with just over 500,000 people visiting!
Here is a representative risotto recipe from the region. Many variations can be made from this simple basis; a vegetarian status is achieved by omitting the ham, the flavors of different cheeses will make the dish entirely different and a different selection of herbs will change the direction yet again. Start with the basis to get a feel for what flavors you like and branch out from there. Soon you will have a comfortable “feel” for how to make this, and start to make your own “family recipe”.
Risotto Alla Veronese
For the broth:
- 2 Tbs of extra virgin olive oil
- 2 celery stems, and a few leaves, coarsely chopped
- 1 onion, coarsely chopped
- 1/2 bunch Italian parsley, coarsely chopped
- 2-3 new carrots (or baby carrots), coarsely chopped
- 1 kohlrabi or Japanese turnip, sliced – it adds a nice touch of sweetness
- 1 1/2 quarts of water
- 10 peppercorns, cracked
- 1 or 2 bunches of sculpit leaves
- Coarse sea salt to taste
- Heat the olive oil in a pan and cook the celery, carrots, kohlrabi, onion, and parsley for 2-3 minutes before adding the water.
- Add the peppercorns, bring to a boil, cover and then simmer for about 15 minutes.
- Add the sculpit and simmer another 15 minutes.
- Turn off heat and let sit, but keep warm.
For the rice:
- 1 onion or small bunch of green onions or 2 – 3 shallots
- 1 – 2 cloves garlic, minced
- 2 Tb olive oil or butter
- 1 small whole sprig of fresh rosemary
- 3 cups of risotto rice (Vialone nano)
- 1/2 Cup Soave or other dry white wine
- 6 cups vegetable broth from above
- 1 /2 Lb Prosciutto or Parma ham, sliced into thin strips
- 1 bunch of sculpit leaves, finely chopped
- 2 handfuls of Grana Padano/Parmigiano Reggiano (or half/half with Pecorino Romano for a more intense flavor)
- Knob of well chilled butter
- Drizzle of olive oil and freshly ground black pepper
- Coarse sea salt to taste
- Fresh ground pepper to taste
- Heat the olive oil in heavy large pot over low heat. Add rosemary and sauté for 2 minutes, until fragrance is released. Remove rosemary and discard. Increase heat to medium, add the chopped onion, green onions or shallots along with minced garlic and sauté with a pinch of sea salt until just tender, about 4-5 minutes. Onion should just turn glossy.
- Add the rice and stir for about 2 minutes. When the rice starts to turn translucent in 5 – 10 minutes add the wine and stir, then put lid on pot until absorbed, about 1 minute.
- Stir in 1 cup of the warm broth and simmer until it is absorbed with the lid on, stirring frequently. Cook until the rice is almost tender, adding broth 1/2 – 1 cup at a time and stirring often, allowing each addition to be absorbed before adding the next, about 15 – 25 minutes.
- Add the finely chopped sculpit leaves, Prosciutto or Parma ham, stir well for one minute and turn off the heat.
- Stir in the Grana Padano/Parmigiano and the butter. Let the risotto rest for five minutes.
- Season with salt and fresh ground pepper.
Serves 6-8
Recipe Tip! This can easily be made vegetarian by simply omitting the ham at the end, or reserving a portion without the ham.
Asparagus adds a creamy foundation to the rich, flavorful and slightly spicy tomato pesto sauce in this unusual side dish. It is easy to make and adds taste and presence next to a hearty frittata or fresh spring dinner.
To cut the amount of time needed, make the pesto ahead of time. The flavor and heat can be adjusted by adding more chipotle and garlic to the pesto sauce. Make extra, as this is a hit once people taste the mixing of flavors!
Asparagus with Tomato Pesto Dressing
- 1 Lb fresh asparagus
- 1 Qt water
- 1 Tbs salt
- 1/4 Lb Sun-dried tomatoes (not marinated)
- 1 Chipotle pepper
- 1 – 2 cloves garlic
- 1/2 – 1 Cup Olive oil
- Cut woody ends from asparagus. Bring water to a boil with salt.
- When water is boiling, take some to cover tomatoes and Chipotle pepper in an inch of boiling water; set aside and let soak until soft, about 10 – 20 minutes.
- While tomatoes and pepper soak, add asparagus to pot and boil for 2 minutes to blanch.
- Drain and plunge into cold water to stop cooking, then drain.
- Drain tomatoes and pepper, put into food processor with 1/2 cup olive oil and garlic. Puree until well minced. Blend in additional oil to achieve desired consistency.
- Arrange asparagus spears on plate; pour pesto over top. Serve warm or cold.
Recipe Tip! If using pliable sun-dried tomatoes and Chipotle pepper in adobo sauce, only soak in boiling water for 2 – 5 minutes.
Makes 4 servings
This pumpkin-orange cheesecake is a centerpiece dessert with multiple layers of rich flavors that roll across your tongue, surprising you with each new taste. Rich and complex, this cheesecake is to be savored and enjoyed with friends and family. The orange is the first surprise, coming in soon after the pumpkin announces itself. Then the caramel, toasted nuts and salt crystals come into play, creating an entirely new experience than most have had with cheesecake.
There are several variations that can easily be done here, depending on your skill level and time. First, making the caramel sauce in advance is important because the flavors you will have with home-made caramel sauce are much richer and fuller than the preservative laden sauce from a store. Second, using local pumpkin will give another flavor dimension that is impossible with store bought canned pumpkin. Third, the choice of salt is important. I really prefer FalkSalt, a handmade sea salt from Cyprus by a Swedish company that is dried into pyramid shaped crystals. They have an incredible visual appearance, great flavor and a satisfying crunch that just really completes the whole experience. My personal favorite is the Chipotle, as the slight hint of spiciness combined with the saltiness really complements all of the different sweet flavors. You should be able to find FalkSalt at a well-stocked grocery or specialty food store near you.
Both Thanksgiving and Christmas are top-shelf culinary times, and this cheesecake will set itself apart at either one. It will disappear almost as fast as the compliments roll in! We have adapted this recipe from one we tried and loved last Thanksgiving from Sunset magazine. Give it a try and enjoy!
Pumpkin-Orange Cheesecake
CRUST
- 1 package (9 oz.) chocolate Graham crackers
- 1/2 cup melted unsalted butter
FILLING
- 3 packages (8 oz. each) cream cheese, at room temperature
- 3/4 cup granulated raw sugar
- 1/2 cup packed light brown sugar
- 1 Tbs flour
- 4 large eggs, at room temperature
- 1 cup pumpkin puree
- 1/4 cup heavy cream
- 1/4 cup sour cream or plain whole milk yougurt
- 1/4 cup maple syrup
- Zest of 2 medium oranges
- 2 Tsp pumpkin pie spice (1 part freshly grated nutmeg, 1 part ground allspice, 2 parts dried ground ginger, 4 parts ground cinnamon and 1 part ground cloves)
TOPPING
- 6 Tbs caramel topping (see note)
- 1/8 Tsp sea salt such as RealSalt
- 1/2 cup coarsely chopped toasted pecans
- Flaked salt crystals like FalkSalt
Note: Caramel topping can be store-bought or made youself in advance. Home-made caramel is much more tasty and doesn’t take too much time.
Flaked salt crystals make a great garnish to the edge and add a depth of flavor. I prefer FalkSalt, the Chipotle flavor adds a spicy note to the sweetness!
- Make crust: Preheat oven to 350°. Whirl crackers in a food processor until finely ground. Whirl in butter just until incorporated. Pour crumbs into a 9-in. springform pan and press over bottom and about 1 in. up inside of pan. Bake 7 minutes, then let cool on a rack. Reduce oven heat to 300°.
- Make filling: In a large bowl, with a mixer on medium speed, mix in cream cheese, sugars, and flour until smooth. Beat in eggs on low speed 1 at a time. Add remaining filling ingredients and beat until just blended. Wrap bottom of springform pan with foil, pressing it up the outside.
- Set springform pan in a roasting pan and pour filling into crust. Pour enough boiling water into roasting pan to come about halfway up side of springform pan. Bake until cheesecake barely jiggles in the center when gently shaken, about 1 1/4 hours. Let cheesecake cool on a rack 1 hour, then chill until cold, at least 5 hours.
- Whisk caramel topping and table salt in a bowl and spoon over cheesecake. Arrange pecans around rim and sprinkle flaked salt over pecans.
Recipe Tip! For a crack-free cheesecake, mix the filling just until it’s smooth and blended–no more. (Too much air in the mixture will make it deflate, and then crack, in the oven.)
Makes about 16 small servings
Fresh, seasonal salads are an excellent starter for great meals and showcases for creativity, and here we have the famous red radicchio from Treviso partnering nicely with pine nuts and alici, the smallest, most delicate members of the sardine family.
Radicchio di Treviso Salad
- 2 1/4 Lbs Radicchio di Treviso
- 1/2 to 3/4 unpacked cup, shredded tender root portions of radicchio plants (can substitute celery root)
- 3 Tbs olive oil
- 8 – 10 Alici, chopped fine (see note)
- 1-2 Tsp Balsamic vinegar
- 1/2 cup pine nuts
- Freshly ground sea salt and black pepper to taste
Note: Alici are the smallest and most delicate of the sardine family. They are traditionally pickled fresh with a mild onion, then chopped fine and used in antipasto dishes. As a substitute, use half the amount of sardines in salt that have been rinsed and soaked a couple of times to remove the overly strong salt flavor.
- Clean, wash and shred the radicchio root.
- Wash the radicchio, shake out the moisture, and shred the leaves to uniform size.
- Combine the ingredients in a bowl, mix thoroughly and serve.
Recipe Tip! This traditional antipasto goes extremely well with a moderate white wine.
Makes 3 to 4 servings

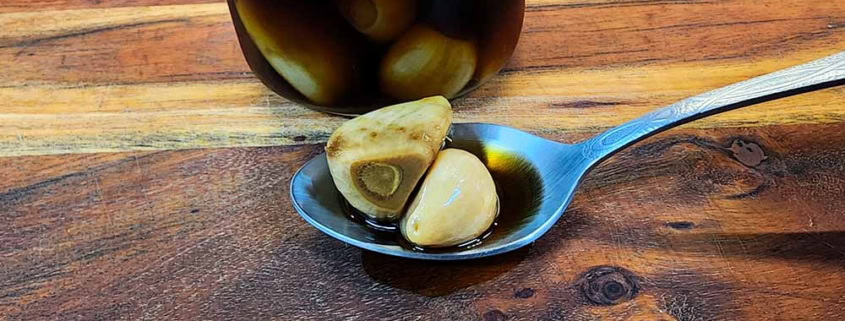 © 2024 Terroir Seeds | Underwood Gardens
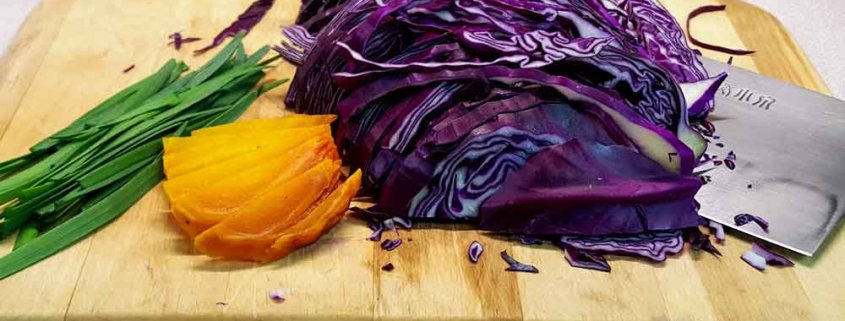 © 2024 Terroir Seeds | Underwood Gardens
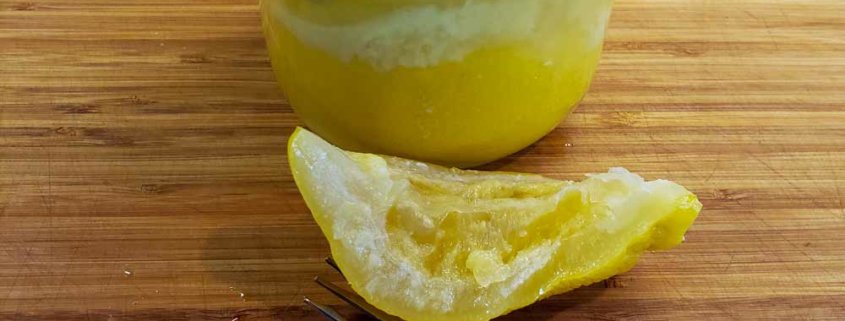 2019 Terroir Seeds | Underwood Gardens
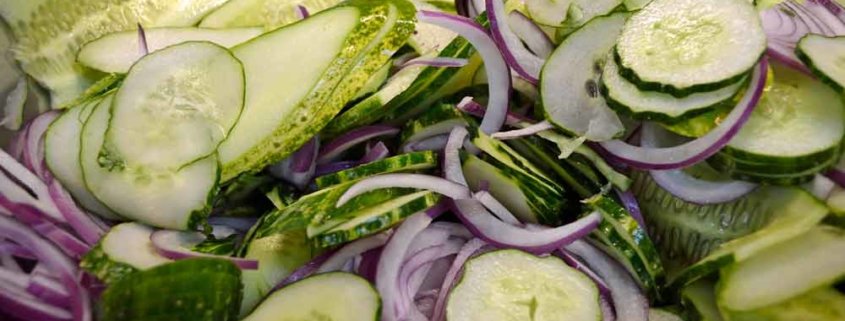
 2018 Terroir Seeds | Underwood Gardens
