You’ve grown some incredible food from your home garden with heirloom seeds. Our heirloom recipes and cooking tips show easy ways to get the most flavor!

Slow Food International’s premier worldwide event – Terra Madre and Salone del Gusto – happens every two years in Turin, Italy. Terra Madre is educational workshops, culinary tastings, speeches and panel discussions with 130 countries represented this year. Salone del Gusto is a world’s fair of food, with 4 huge halls devoted entirely to food of all kinds from around the world. We were fortunate enough to be chosen as US delegates, along with about 230 other people. We had been somewhat prepared by others that had attended before so the scale didn’t overwhelm us. The quality and diversity of what was presented, both edible and educational, was astounding. At some points in the day, there were over 15 different workshops, panel discussions, regional tasting events and special culinary projects showcasing a specific regional treasure all happening at the same time! This was in addition to the Salone which occupied more than double the space of both buildings of the Las Vegas convention center. One of our delegates responded to the question of what it was like with “Tasty and tiring.”

It will take several other articles and videos to give a more rounded overview of the event, as it is really several events all rolled up into one. We were chosen as International Congress delegates, which was a completely separate event that is held only once every four years and is attended by those chosen for their work in advancing the core tenants of Slow Food – “Good, clean and fair.” To say we were honored to be among the likes of Alice Waters, Vandana Shiva, Carlo Petrini and 650 others is a monumental understatement. On two separate occasions we felt we were in hallowed company. The first was the opening ceremony for the 230 Slow Food USA delegates where Carlo had some remarks that were amazing. I walked up to the front of the room just before the opening ceremony started to get a photo and stood there for a minute looking at everyone getting settled and chatting with their new neighbors. It was both humbling and inspiring to be in the same room with so many talented, dedicated, passionate and brilliant people who are all working at the same goal from so many different angles – good food that is real and honors all who are involved with it. The second time was in the gorgeous theatre that housed the opening ceremony for the International Congress. This theatre was in the renovated Fiat factory that has its own test track on the roof, a huge building in itself. The theatre was red velvet and oak, with all 650 delegates sprinkled throughout. It was the same feelings as with the USA delegates, but on a larger scale; especially when we heard several of the speeches of what other countries were working on or had accomplished.

With that teaser, we present for your enjoyment “A World of Taste – Slow Food Terra Madre/ Salone del Gusto 2012.” This is a short overview of photos and some short video we took while attending the event. This is only a small sampling, so stay tuned for more to come!

I grew up eating this green chile stew, or as we simply called it – green chile. Mention green chile in most places in the Southwest, and people will understand that you are talking about a bowl of stew, made with green chiles, herbs, sesonings and usually pork. We would make a huge batch of it in the fall, roasting, peeling, seeding and chopping upwards of 50 pounds of the Hatch New Mexican green chiles on the first day. The next day we would make the recipe in huge kettles on the stove to serve at Thanksgiving, Christmas and celebrations at the end of the year. What we didn’t eat immediately we would freeze for the coming year. Thanksgiving just wasn’t really complete without a bowl of green chile on the table, to be ladled over the turkey, mashed potatoes or in a bowl on the side to be savored all by itself. Christmas was much the same. That green chile was something to be looked forward to each time we took it out of the freezer for that night’s dinner.

We learned the foundation of this recipe from an old family friend from a small town in the state of Chihuahua in Northern Mexico. She grew up poor, so her family grew and raised almost all of their own food, including chiles that were used in almost all of their cooking. The flour and oil is used to make a roux, or thickening sauce that gives the dish a nutty flavor as a backdrop for the chiles and meat to take center stage. It takes a bit of time to make, so make a lot to freeze for later. It doesn’t take any extra time to make more, especially if you aren’t roasting, peeling, seeding and chopping the chiles yourself. You can order them directly from companies such as Biad Chile Company and get them delivered to your door, or go to your local farmer’s market where there will probably be a propane powered chile roaster spinning away, creating fresh roasted chiles right before your eyes.

This recipe will give you highly tasty, mild green chile. You can spice it up with hotter green chiles, or with some varieties of hot red chiles as you like. Green chile is ubiquitous in the Southwest, every family has their own take or twist on the basics, so no two are alike. In Santa Fe, you can go from one restaurant to another directly across the street and the tastes will be noticeably different, but delicious.

Here’s where the story takes a little jag. Last year we raised Navajo Churro sheep for the first time. After we got them back in little white packages, we tried them in this recipe, as we had run out of pork. It turned out to be one the best tasting green chiles that I had ever eaten. The Churro has just the right flavoring that pairs beautifully with the chiles to make an outstanding dish. Home or locally raised pork is also excellent, as it has much more flavor than commercially raised supermarket pork.

Serve with a garnish of chopped cilantro and a swirl of sour cream if you want to dress it up a bit. Warm tortillas are a great accompaniment. Give it a try and let us know what you think!

Old Time Green Chile Stew

  • 1/2 cup flour
  • 1/2 cup oil – olive, coconut or vegetable
  • 2 – 3 medium onions, chopped
  • 4 – 6 cups water
  • 2 – 3 lbs Navajo churro lamb or home raised pork cut into bite sized pieces
  • 5 lbs Hatch mild green chiles, roasted, peeled and diced
  • 2 heads of garlic, peeled and sliced
  • 1 Tbs fresh ground black pepper
  • 2 Tsp salt
  • 1 Tbs whole cumin seed, roasted and freshly ground
  • 1 Tsp whole coriander seed, roasted and freshly ground
  • 1 Tbs Mexican oregano, lightly toasted and freshly ground
  • 1 Lb fresh tomatoes or 1 16 oz can of chopped tomatoes (optional)
  • 2 – 3 medium potatoes, diced (optional)
  1. Before starting, have onions, lamb/pork, green chiles and 2 cups water prepared and ready at hand.
  2. In a heavy stock pot, preferably cast iron, heat oil over medium heat. When oil is warm, add flour and brown to make a roux. Stir constantly with a spatula, reaching all parts of the bottom of the pan to keep flour from burning. The mixture will bubble and foam as it starts to brown, then settle into a smooth consistency. The color will change from white to an old copper penny color and the odor will go from flour and oil to a roasted aroma. Be careful not to burn the flour, as you will need to start over. If in doubt, stop browning at a slightly lighter color.
  3. To stop the browning process, add the onions and 2 cups water. It will hiss and steam as you add them, stir mixture well to cool roux and brown the onions. When onions have started to brown, add lamb/pork and brown.
  4. Add chiles and remainder of water, stirring well. While chiles start to simmer, roast cumin and coriander in small skillet over medium heat until they release their toasted aroma and add Mexican oregano at end to lightly toast. Grind them in mortar and pestle or food processer.
  5. Add herb mixture to chiles, along with garlic, salt and black pepper.
  6. Stir mixture well, reduce heat to a low simmer and check on every half hour or so until meat is tender and flavor has mingled well.
  7. If desired, tomatoes and potatoes can be added at start of simmering for a different flavor profile.

Makes plenty for a large dinner and enough to freeze 6 – 8 quarts.

Recipe Tip! This is a very mild “heat” with great flavor, but can be modified by using hotter chiles to suit your spice tolerance.

Herbed Dried Tomatoes

Here’s a recipe that will take a little preparation, but you will be thanking me for it later! Make a lot more of these dried tomatoes than you think that you will ever need, as once folks catch on to just how incredibly tasty these little jewels are, you will run out. You might want to hide some just for yourself!

These make beautifully presented, incredibly thoughtful gifts for the chef or serious home cook in your life. You cannot buy the flavor of these herbed tomatoes, anywhere, at any price. These will take a bit of time, but doesn’t require much hands-on time to make.

First, the tomatoes. Only heirloom tomatoes can really be considered, as the flavor is what you are after. The beauty of this process is that almost any tomato can be used, as the drying intensifies the flavors already present. Obviously, a paste tomato will give you a more substantial result. Good ones to look for are the plum and pear sizes with meaty walls, few seeds and a ton of flavor. If you don’t have these already growing in your garden, plan to plant some next year and look at your local farmer’s market. You will need a lot of fresh tomatoes, as they lose a lot of weight during drying. Plan on about 3 times the fresh volume as what you will get dried.

Drying them is the easy part. Wash them, slice and place on cookie sheets to dry. The oven is a great choice, as most gas fired ovens with a pilot light stay at around 90F or so. A consistently warm, sunny location is also good. If drying outside, cover with cheesecloth to prevent flies from snacking on your treats. Let them dry to a leather-like stage, then collect and start the marinating.

There are several different directions you can go with the herbs. A traditional approach is to use basil, oregano and garlic. A French approach would include lavender buds, Herbes de Provence with garlic. The strong punch of Mexican oregano accompanied by some smoked Jalapeno chiles, cumin and marjoram would be out of this world as well. Be creative, look at some herb combinations you enjoy and do some experimenting. The results will most likely be quite tasty!

We will start with the most basic recipe and then give you some alternatives to try. Use as you would sun-dried tomatoes – in soups, sauces, stews, bruschetta, pizza, spreads, salads or anywhere else the flavors would work well.

Herb Marinated Dried Tomatoes

  • 1 1/2 Cups dried tomatoes
  • 1 Tbs fresh basil leaves, chopped
  • 2 Tsp fresh oregano, chopped
  • 1/4 Tsp pickling salt
  • 2 Large garlic cloves, thinly sliced
  • 6 Tbs red wine vinegar
  • 2 Tbs Extra virgin olive oil
  1. If tomatoes are crispy dry, put into 2 cups boiling water for 5 minutes to soften, then drain. If tomatoes are leather dry and still slightly pliable, you don’t need to soften them.
  2. Add herbs, salt and vinegar to bowl and mix or toss well. You want to have all of the herbs well mixed before adding the tomatoes.
  3. Pack tomatoes and herb mixture into a 12 ounce to 1 pint jar, being sure to coat the tomatoes well with the herb mixture. Leave a small space at top of jar. Add olive oil to top and cap jar.
  4. Store in a cool, dry, dark place. Once opened and for longer storage, keep in refrigerator.

Use these following recipes as the herb ingredients for the basic recipe above.

Herbes de Provence Marinated Dried Tomatoes

  • 2 – 3 Tbs Herbes de Provence
  • 3 Large cloves garlic, thinly sliced
  • 1 Tsp freshly ground black pepper

Mexican Herbed Marinated Dried Tomatoes

  • 1 Tbs Mexican oregano, dried
  • 1 Tsp Sweet marjoram, dried
  • 1 Tsp Chipotle chile, finely chopped
  • 1 Tbs Whole cumin seed, toasted and ground
  • 1 Tsp Whole coriander seed, toasted and ground
  • 3 – 4 Large garlic cloves, thinly sliced

Italian Herbed Marinated Dried Tomatoes

  • 2 Tsp Fresh Greek oregano
  • 1 Tsp Sweet marjoram
  • 1 Tsp Summer Savory
  • 1 Tbs Fresh Marseilles basil, chopped
  • 2 Large garlic cloves, thinly sliced

Recipe Tip! Pickling salt is -simply put- fine, pure granulated salt. Grocery stores label it “canning and pickling salt”, health food stores call it “sea salt”. It is not table salt, which contains iodine and several other stabilizers and anti-caking agents that can ruin your pickles appearance.

Nasturtium Pods

Nasturtium pods, also called seeds or buds, are hot like peppers when they are mature, green and plump. They also make an incredible pickled condiment that is considered better than capers in many sauces and salads. I’m looking forward to using them in an old favorite capanata spread recipe that relies on capers for its distinctive flavor. Nasturtium pods will initially release a sulphurous odor when brined, but the resulting flavor is outstanding. Heirloom Nasturtiums are very prolific and fairly hardy.

Here is a family recipe that has its roots in Eliza Smith’s 1727 cookbook, The Compleat Housewife. It comes to us from the excellent book The Joy of Pickling by Linda Ziedrich.

Pickling salt is -simply put- fine, pure granulated salt. Grocery stores label it “canning and pickling salt”, health food stores call it “sea salt”. It is not table salt, which contains iodine and several other stabilizers and anti-caking agents that can ruin your pickles appearance.

Pickled Nasturtium Pods

  • 4 1/2 Tbs pickling salt
  • 3 Cups water
  • 1 Pint fresh, green and plump nasturtium pods
  • 4 Whole cloves
  • 1 Pinch unground mace
  • 1/4 Nutmeg kernel
  • 1 Slice of horseradish, about 1 1/4 inches diameter and 3/8 inch thick, cut into thin strips
  • 1 Shallot or large green onion
  • 1 Cup white wine vinegar
  1. Dissolve 1 1/2 Tbs salt in 1 cup water, and then pour brine over nasturtium pods. Let stand at room temperature for 24 hours.
  2. Drain, make fresh brine as above and repeat. Repeat again for a third time. This initial process will take 3 days, each day needing about 5 minutes of your time.
  3. On the fourth day, drain the pods and put them in a jar with cloves, mace, nutmeg, horseradish and shallot.
  4. Cover well with vinegar, cover jar tightly and let stand at room temperature for at least a week.
  5. After opening jar, store in refrigerator.

Give these a try and let us know what you think, or if you already use them in some special recipes, please share them with us!

Hortopita

Hortopita is a savory pie that is stuffed with horta, or edible wild greens such as dandelions, chard, kale, and lamb’s quarters- commonly called spring greens. Horta directly translates as “grass” in Greek, but refers to about 80 different greens growing all over the country. It’s delicious alone (sauteed with lemon and olive oil) but obviously much more savory when feta and filo pastry sheets are used. Hortopita is a cousin of Spanakopita—layers of crispy filo dough stuffed with cheesy, leafy spinach greens.

Here are two separate, distinct recipes for you to try. The first one comes directly from Greece, just outside of Athens and is a modern take on a traditional family recipe used for many years. The second one is from FarmPlate, a wonderful website that connects folks looking for great, locally produced food with those folks that make just such foods. They are “a revolutionary online community that connects farmers, fishermen, foragers, food artisans, restaurants, markets, distributors and foodies everywhere. Our searchable directory of 40,000+ business listings across the country, networking tools and reviews make it fun and easy to find and enjoy real foods near you.

These are large recipes, as they are usually made daily at the local bakery in large sheets, to be sectioned out for individual portions. Make a large batch, as it will be gone in a couple of days!

Traditional Greek Hortopita

  • 2-3 spring onions, chopped
  • 1/2 Cup extra virgin olive oil
  • 2 lb of various wild or spring greens, chopped (spinach, kale, arugula, sorrel, Swiss chard, fennel, leeks – only the white part – and any other spring green you like)
  • 1 package country style filo dough
  • 2-3 eggs whisked together
  • 4 oz feta cheese
  • Salt and ground pepper
  1. Preheat oven to 350 F.
  2. In a big pan heat olive oil and saute the onions till they are tender.
  3. Add the greens stirring continuously till they are wilted, about 4-6 minutes.
  4. Remove from the heat, add the egg, feta cheese and ground pepper. Careful with the salt since feta cheese is already salty!
  5. Evenly spread 1 Tbs olive oil in a baking pan, then set the filo dough and spread the mixture on it. Cover with the other filo, carefully close the edges and score the surface slightly (the steam from the cooking of the mixture needs to escape).
  6. Spread water and some olive oil on the surface and bake for 1-1/2 hour in the lower position of the oven till the filo takes on a golden color. Remove and let set up for about 15 minutes before slicing and serving.

Makes 3 to 4 servings

Hortopita from FarmPlate

  • 1/2 cup uncooked white rice
  • 4 tablespoons extra virgin olive oil
  • 4 small or 2 large leeks, rinsed well and thinly sliced
  • 2 tablespoons currants
  • 1 teaspoon ouzo, or 1 tablespoon balsamic vinegar or white wine
  • 2 tablespoons chopped fresh parsley
  • 1/4 teaspoon dried oregano
  • 1/4 teaspoon dried thyme
  • 1/4 teaspoon salt
  • Very generous grinding of black pepper
  • 3 pounds assorted tender greens, such as baby spinach, arugula, beet greens or Swiss chard, stemmed and washed
  • 1 teaspoon grated lemon zest
  • 3 tablespoons butter
  • 1 package filo dough, thawed
  • 8 ounces feta cheese
  • Pinch of grated nutmeg
  1. Preheat oven to 400 F.
  2. Cook rice by adding rice to small pot and covering with 1 cup water. Turn heat on high and bring water to gentle boil. Stir rice well, turn heat down to medium-low. When water level drops to top of rice, stir once more, cover with lid and reduce heat to very low. Rice will be done in 5-7 minutes.
  3. While the rice is cooking, heat 2 tablespoons of the olive oil in a large skillet over medium heat. Add the leeks and fennel, sauteing until they begin to soften, about 5 minutes.
  4. Stir in the currants then add the ouzo, vinegar or wine and cook for a few seconds to evaporate.
  5. Stir in the parsley, oregano, thyme, salt and a generous grinding of pepper. Transfer the leek/fennel mixture to a bowl and set aside.
  6. Return the skillet to the heat. Add two big handfuls of greens and cook, stirring, until they wilt. Transfer to a colander. Wilt the remaining greens in the same manner. Squeeze the excess liquid from the greens then coarsely chop. Sprinkle with the lemon zest and some pepper.
  7. Melt the butter and stir in the remaining 2 tablespoons olive oil. Lightly brush the inside of a 12-inch tart pan with a little of the oil/butter mixture.
  8. Unfold the filo dough and cover loosely with a kitchen towel to prevent it from drying out.
  9. Place 1 sheet of dough in the pan, pushing it into the corners. There will be about 3 inches of overhang. Brush the dough lightly with butter/oil. Add another filo sheet, placing it at a 45º angle to the first sheet. Brush that one as well. Continue stacking (at an angle) and brushing the sheets until you have used 8 sheets to line the pan.
  10. Spread the rice in the pie bottom. Top with the leek mixture followed by the greens. Crumble the feta and sprinkle oil on top. Season with black pepper and a grating of nutmeg.
  11. Top with 8 of the remaining filo sheets, stacking and brushing them as you did the bottom layer. Trim the overhang to 2 inches beyond the rim of the tart pan.
  12. Roll the edges inward, tucking them under. Brush the top with more butter/oil. Score the top into serving pieces using a very sharp knife.
  13. Bake for 15 minutes. Lower the heat to 350ºF and bake for 45 minutes longer. Let rest about 15 minutes before slicing and serving.

Makes 6 to 10 servings

Recipe Tip! The feta cheese is naturally salty, so be careful how much salt you add during preparation.

Wheat and Lentil Soup

Catania is an old city on the south-east coast of Sicily, fronting the Ionian Sea. During the Renaissance, Catania was Sicily’s most important cultural, artistic, and political hub due in part to its major seaport. In 1434 the first university in Sicily was founded and today it is one of the main economic centers of the island and an important hub of technology and industry.

Cantine del Cugno Mezzano, located on the Via Museo Biscari is one of the chic restaurants in the old downtown that are reviving the ancient farm cuisines and elevating them to fine dining status. What is notable is that the flavors need no “freshening” or “elevating”, only the surroundings and atmosphere is needed to create the fine dining experience. The old recipes and locally sourced farm-grown ingredients are what make the flavors so memorable. The chef drives out to the surrounding countryside every weekend and goes from farm to farm on a well-established routine buying the foundations for the next week’s dishes.

This is a substantial and deeply satisfying, yet not heavy winter soup that has sustained farm families and farmhands for many generations. It is eaten during the cooler weather in Sicily on the farms, but is in demand year round in the restaurants. Get the best quality sausage possible, as it is the foundation of the flavors here. The smoked sweet and bittersweet paprika will add an intriguing depth of flavor to the soup, with the oregano backing them up. Another option to broaden the flavor profile is to use a home made beef stock instead of the water in the lentils, or split it in half. This freezes well to provide a delicious backup when time is short or plans change during the week.

Add some thick slices of fresh artisan peasant bread with butter and a good beer for a taste of what our ancestors ate after a long workday in the fields!

Zuppa Di Grano e Lenticchie

  • 1 Cup Wheat berries
  • 1 Cup Lentils
  • 6 Cups water
  • 3 Oz Italian sausage, diced
  • 2 Tbs extra-virgin olive oil
  • 1 medium onion, diced
  • 1 stalk celery, diced
  • 2 medium carrots, sliced thickly
  • 5 Oz Swiss chard or Kale leaves, stems removed, rinsed and coarsly chopped
  • Sea salt and freshly ground pepper to taste
  • Optional seasonings- 1/8 Tsp each of smoked sweet and bittersweet paprika, 1/2 Tsp oregano
  • Dollop of sour cream
  1. In a small heavy bottomed pot cover the wheat berries with plenty of water and bring to a boil over medium-high heat. Once boiling, remove from heat, cover and let sit for 1 hour. Drain and reserve the cooking water.
  2. Using a cast-iron pot or flame proof clay pot, add lentils and cover with 6 cups of water and bring to a boil over medium-high heat. Once boiling, reduce heat so that the lentils are just above a simmer until they just start to turn tender, about 15-20 minutes.
  3. While lentils are simmering, heat the oil in a heavy skillet over medium heat. Add the sausage and onion and sautee for 5-7 minutes, until the onion just turns golden. Lower the heat, add the celery and carrots and cook until the carrots are just tender, about 10 minutes. Add the Swiss chard or Kale, stir in and cook until dark green and just wilted, about 3-5 minutes.
  4. Add wheat berries and sausage and vegetable mixture and stir well. Season with salt, pepper and optional seasonings if using. Add enough wheat berry cooking water to cover slightly and bring back to a boil, immediately reduce heat to a bare simmer and heat soup through, about 3-5 minutes.
  5. Add small dollop of sour cream if desired

Makes 6 servings

French sorrel is known as “lemonade leaf” and has been prized for its nutritional and culinary qualities for centuries. In many climates it will nativize.

Roasted Heirloom Beets

Heirloom beets are one of the earlier crops to be planted, and one of the first to be enjoyed early in the Spring. Here’s a great recipe with an unusual preparation that really brings out the earthy goodness of fresh home-grown beets. The secret is slow roasting at about 300°F for almost an hour. I prefer to do this in our charcoal fired Kamado grill, a Japanese clay covered BBQ which holds the heat amazingly well and gives an incredible rich but lightly smoky flavor. The beets turn out heavenly, and I’m often asked what I did to make them so delicious. Oven roasted is a very good second choice, just make sure to roast them slow and long – it caramelizes the sugars in the beets, making them a surprise all of their own. 

The Dijon mustard plays a nice counterpoint to the richness of the beets. For some additional flavors, add some heirloom carrots or overwintered onions to the mix- roast along with the beets! Keep in mind that young beets – less than 2 inches in diameter- are sweet like carrots.

Dijon Roasted Heirloom Beets

  • 3 pounds beets, about 2 inches in diameter
  • 4 tablespoons olive oil
  • 1 teaspoon salt
  • ½ teaspoon black pepper
  • 1 tablespoon Dijon mustard
  • Juice of one orange
  • 1 teaspoon sugar
  • 1 tablespoon red wine vinegar
  • 1 tablespoon fresh minced rosemary
  1. Trim stem and root from beets. Place whole beets in roasting pan; add 1 tablespoon olive oil, salt and pepper. Toss to coat.
  2. Roast at 400° for 45 minutes or until beets are tender. Beets are tender when easily pierced with a fork or toothpick.
  3. While beets are roasting whisk mustard, orange juice, sugar, and vinegar in bowl. Whisk in remaining 3 tablespoons olive oil and rosemary. Set aside.
  4. When beets are cool enough to handle, rub to remove skins; cut into quarters. Add warm beets to bowl and toss with dressing. Let stand 30 minutes while beets absorb dressing.

Makes approximately eight servings.

"Seasons of My Heart" Cookbook

Oaxan Sopa de Tomate con Albóndigas

One of my favorite Mexican cookbooks is titled Seasons of My Heart, by Susana Trilling.  Susana was a chef and owner of a restaurant in New York City and also owned a very successful catering business.  She left all of this to pursue her ethnic roots in Mexico around Oaxaca, sharing the food, culture and traditions of the cooking of the region.  She wrote this cookbook to showcase the native foods that are not well known outside the region.  Seasons of My Hearthas become hard to find but is well worth pursuing once you do find it.

Today I’m going to share a recipe called Albóndigas, or meatball soup.  Many people are familiar with Albóndigas as a clear broth with a couple of meatballs in it as an appetizer or first course.  This particular soup is more rural in nature, with the broth enriched by the onions and tomato puree.  Many people are are amazed to find that this is “Mexican food”, as it doesn’t have the characteristic emphasis on chiles and heat that most Americans are accustomed to seeing in Mexican food.  This is one of those perfect hearty winter soups that has an abundance of rich and savory flavors.  Make extra, as this soup keeps exceptionally well and will prove to be very popular.

Oaxan Sopa de Tomate con Albóndigas

For the meatballs:

  • 1 1/4 pounds ground sirloin
  • 1 teaspoon freshly ground black pepper
  • 1/2 teaspoon salt
  • 1/4 cup sunflower or vegetable oil
  • 1 teaspoon mild chile powder
  • 1 teaspoon ground cumin

For the soup:

  • 4 cups beef stock
  • 1 1/2 medium white onions, finely chopped
  • One large leek, halved lengthwise and thinly sliced
  • 1 tablespoon finely chopped garlic
  • 1 1/2 teaspoons ground black pepper
  • 3 bay leaves
  • 5 cups thick tomato puree
  • 1 1/2 teaspoons salt
  • 1 tablespoon finely chopped fresh parsley
  • 1 tablespoon finely chopped garlic chives
  1. In a medium bowl, mix the ground beef with the pepper, salt, cumin and chili powder.
  2. Shape the mixture into tiny meatballs about the size of black cherries.
  3. In a heavy 4 quart stockpot, heat the oil over medium to high heat and brown the meat balls on all sides, for about 2 minutes, in small batches without crowding them.
  4. Remove from the pan and set aside.
  5. If there is extra oil in the stock pot, remove it, leaving about 2 tablespoons.
  6. Fry the onions and leek until they’re soft over medium heat, 4 to 6 minutes.
  7. Add the garlic and season with the pepper and bay leaves.
  8. And the beef broth, tomato puree, and meatballs.
  9. Lower the heat to a slow simmer, cover, and cook for 1 1/2 hours.
  10. Add the salt, parsley and chives and cook 5 to 10 minutes longer.
  11. Serve with garlic toast.

During the winter months, or cold weather, this is the type of soup that is very easy to make when you’re cooking out of your freezer with ingredients that you have prepared beforehand.  Making beef broth or beef stock is somewhat time consuming, but does not require constant attention and can be made in large batches, saving time later on.  Likewise, making tomato puree from extra tomatoes when your garden is in the height of production gives you a rich, fresh tomato taste in the dead of winter.

Please give this soup a try, and let us know what you think!

I’ve often wondered why the Armenian Cucumber was always the preferred choice of cucumber for my grandmother. She said it was the best tasting cucumber and that it was “burpless” which was important to her. I know sometimes folks are very sensitive to eating raw cucumber because of that burping issue.

What causes the burping? Some foods are more prone to producing gas, such as onions, celery, and cucumbers. Foods high in fiber have more of the “gas” forming characteristics which can cause that burping issue. But back to the Armenian Cucumber, which is really a melon (Cucumis melo var. flexuosus) is why we don’t burp. There is a funny group of melons that botanically are melons but are much similar in characteristic to the cucumber (Cucumis sativus). 

I wanted to know more about this Armenian Cucumber, so I referred again to Fearing Burr’s Field and Garden Vegetables of America to read up on the Snake or Serpent Cucumber (AKA Armenian Cucumber).

Though generally considered as a species of cucumber, this plant should properly be classed with melons. In its manner of growth, foliage, flowering, and in the odor and taste of the ripened fruit, it strongly resembles the muskmelon. The fruit is slender and flexuous; frequently measuring more than three feet in length; and is often gracefully coiled or folded in a serpent-like form. The fruit is sometimes pickled in the manner of the Common Cucumber, but is seldom served at table sliced in its crude state. It is generally cultivated on account of its serpent-like form, rather than for its value as an esculent (edible). Well-grown specimens are quite attractive; and, as curious vegetable productions, contribute to the interest and variety of horticultural exhibitions.

Interesting that in 1865 not much was mentioned about the “burpless” quality that the Armenian Cucumber is known for today. I would have to say it is much tastier than just an ornamental for the local county fair!

Give this recipe a try with your Armenian Cucumbers!

Peasant Salad

  • 2 tomatoes cut in wedges
  • 2 cucumbers, sliced
  • 1 small red onion, sliced
  • ½ c olive oil
  • ½ c red wine vinegar
  • 1 Tbsp lemon juice
  • Dried oregano, to taste
  • Salt and ground black pepper, to taste
  • ½ c Kalamata olives, chopped
  • ½ c crumbled feta cheese or chopped anchovy fillets (optional)
  1. Combine tomatoes, cucumbers and onions in bowl.
  2. Whisk olive oil with vinegar, lemon juice, oregano, salt and pepper. Add to vegetables; toss to coat. Top with olives.
  3. If desired, add feta or anchovies.

Makes 4 servings

Recipe Tip! Redmond Salt is the best tasting salt to use with fresh garden vegetables. A sprinkle on a fresh cut tomato or on a hard-boiled egg is heaven.

Beef, Barley and Root Vegetable Soup

When Fall arrives, I look forward to thick and hearty soups. Even if the weather isn’t cold and blustery quite yet, a hot bowl of broth-based soup is somehow nourishing for both the body and soul. Serve with fresh cornbread, biscuits or home-baked whole wheat bread and butter, and you’ll understand how family traditions are started. For this soup, I used a beef broth that I’d made earlier this summer with bones from the butcher. We are fortunate to have a real, old-fashioned butcher in our town that understands when I ask for broth bones. Pan roasted with some root vegetables, then slowly simmered for a day and a half- this is a rich, silky broth that has a depth of flavor just not found outside of the home. Well worth the time to make in large batches and frozen until needed!

Using beef, barley and what root vegetables were on hand was the ancient beginning of this soup. You can use any root vegetable that you have, in any combination that you like, and a little or a lot of beef for flavor. Slow simmering for several hours will give the best, richest flavor. Plan on making extra, as this is very popular once people get a taste of it. Great to make on a weekend to have for lunches at the start of the week. This can be a thick or thinner soup, or stew depending on how much liquid you leave at the end of the cooking. Maintain the liquid level for more soup like consistency, or let the barley soak up the liquid for a stew. Feel free to add onion, green beans, peas, beets, celery or any vegetable that will add a hearty flavor to this soup.


Beef, Barley and Root Vegetable Soup

6-8 oz Beef, cubed- Roast is best for flavor in slow cooking

1 Qt Beef stock

1/2 Tsp Thyme

1/2Tsp Marjoram

1/2 Tsp Savory

1/2 Tsp Rosemary, fresh picked and chopped

1/2 Tsp Black pepper, best if freshly ground

2 Bay leaves

1/4 Tsp Salt (to taste)

4-6 cloves Garlic, diced

1/2 to 1 Lb Carrots, thickly sliced

1/4 Lb Potatoes, reds, purples or any waxy types

16 oz or 1 can crushed Tomatoes

1 1/2 Cups Barley

Add beef, broth and thyme, marjoram, savory, rosemary, black pepper, bay leaves and 1/2 of the salt to a heavy pot or stockpot and bring to a slow simmer. Once beef is tender- about 30-45 min for 8 oz- add garlic, carrots and potatoes and taste. Adjust salt if needed and add water to keep covered. Continue simmering for 1 hr or until carrots are tender. Add tomatoes and barley, check liquid level and add water if needed, simmer for 45 min to 1 hr until barley is tender but not soft or mushy. It will have a slight crunchy, toothy texture to it.

An alternative method is to brown the beef in 2-3 Tbs Olive oil or butter on medium heat until well browned and deglaze with 1/2 cup red wine. Lower the heat, then add the broth and spices and continue from that point. This will add a richness from the brown/deglazing, along with the wine. Experiment and you’ll soon learn which is your favorite method and ingredients!

The Carrot's Odyssey

Carrots are an ancient standard in the garden, one that is introduced to many of us as kids when we are first playing and learning in the garden. Short season, hardy, fast-growing and delicious just out of the ground, carrots are a hit with everyone, and one of the top sellers for every seed company.

What else to do with fresh carrots than slice them and add to the salad, especially an over abundance from an enthusiastic planting? There is always pickling and canning, but at the height of fresh garden produce, I don’t want to think of canning quite yet. Here are a couple of delicious ways to enjoy the sweetness of carrots combined with other flavors that go well with Spring and Summer dinners.

Pan Braised Carrots with Parsley and Rosemary

This unusual but satisfying side dish will be a hit with your dinner guests. Equally at home beside a burger, freshly grilled beef or Salmon steak or roast chicken. This can be done on a stove or outside on the barbeque in a cast iron pan. For extra panache, add grated Parmesan cheese just before serving. Fresh Fennel, sliced in 1 inch chunks can be added for an increased depth of flavor.

1 Cup Beef broth (can use mushroom base or vegetable base instead)

1 Lb Small carrots, sliced into 2 inch pieces

1 Tsp Honey

1 Tbsp Butter

2 Tbsp Fresh parsley, minced

2 Tsp Fresh rosemary, minced

Juice of 1 orange


In heavy saucepan bring broth and honey to a boil, reduce heat to a simmer. Add carrots, butter, rosemary and 1 Tbsp parsley. Cover and simmer for 5 minutes. Remove carrots to a warm covered plate, add orange juice and continue to simmer broth until reduced to about 2-3 Tbsp- should be about 15 minutes. Once reduced, add carrots and remaining parsley, toss to coat and serve immediately. If desired, add grated Parmesan or hard grating cheese to top just prior to serving.

Serves 4


Herb Marinated Carrots

These tangy, savory carrots are addictive! There is a train-wreck of flavors, from the sweet crunchiness of the carrots to the lemon juice, mustard and rosemary coming together into an unexpectedly delicious combination. Best if marinated overnight, but will work well with 6-8 hours in the refrigerator. Use as an appetizer or side dish. Will hold their own with almost any flavors.

1 Lb Full sized carrots, sliced or cut into matchsticks

2 1/2 Tbsp Lemon juice

1/2 Tsp Stone ground mustard

1/4 Cup Olive oil

2 Green onions, chopped

1 Tbsp Fresh parsley, chopped

1 Clove garlic, minced

1 Tbsp Fresh rosemary, finely chopped

Freshly ground Salt and Black Pepper, to taste


Blanch carrots in boiling water for 3-4 minutes or until just barely tender, then drain. Combine lemon juice, mustard, olive oil, onions, parsley, garlic and rosemary in a jar with tight fitting lid. Shake vigorously to mix well. Pour over warm carrots, season with salt and pepper and refrigerate a minimum of 6-8 hours or better yet, overnight.

Makes about 3 cups


Sculpit or Stridolo is a treasured Italian green herb that is almost completely unknown here in America, which is a shame, gastronomically speaking. Its’ flavors have been compared to a blend of Chicory, Arugula and Tarragon, but milder and with its’ own unique flavor. A fast-growing annual, it is traditionally found on the edge of fields, forests and mountain pastures and is harvested in Spring before the first blooms appear. The leaves are the part used in cooking, most famously flavoring risotto, along with pasta, soups, salads and main courses including meat.

It really reminds me of Ramps- or more properly- Rampions in the East where there are huge multi-acre patches growing in forests and alongside old, established agricultural fields. They have a cult-like following, and are now becoming so popular that some of the native patches are being over harvested, causing a decline in recovery and a decreasing size of the patches.

Back to Sculpit, though. They are extremely popular in the Emilia-Romagna region in Northern Italy, with Bologna as its’ capital. So popular, in fact, that they have their own festival at the end of April in the little mountain village of Galeata, in the Southeast of Emilia-Romagna.

Here is a classic Italian Sculpit recipe with Tagliatelle noodle pasta- as always, the fresher the ingredients, the better the flavors!


Tagliatelle with Sculpit

Tagliatelle agli Stridoli

2 Mild Italian sausages, sliced  1/8″ thick

2 slices of pancetta

4 ripe tomatoes- Italian Plum such as Principe Borghese or the San Marzano tomatoes.

5 oz Sculpit, coarsely chopped

7 oz Tagliatelle pasta

Extra virgin olive oil

Freshly ground salt and pepper, to taste


Heat pasta water in a large pot on high heat with salt added to water. Once the water just starts boiling, start cooking. Start the pasta cooking right after adding the pancetta to the pan.

Cook the sausages in a heavy pan on medium heat with a little oil for 3-5 minutes, then add the diced pancetta. Cook until light golden, then add fresh tomatoes and sculpit, reduce heat slightly to a simmer.

Cook the pasta in boiling salted water, drain it, and place the pasta in the pan with the sauce, frying it for a few seconds. Sprinkle with olive oil, salt and pepper and serve immediately with fresh bread. Optionally, add a very light sprinkle of grated hard Italian cheese- don’t drown out the fresh flavors with the cheese, though.


One of the sure signs that Spring is near is the arrival of tender, young Asparagus.

Now I realize that some folks aren’t all that excited about this unusual vegetable, but it is something like Eggplant, or even Brussels Sprouts. Store-bought, it is not that appealing and is often rightly described as insipid. A lot of us grew up with mushy, steamed-to-death stalks of slightly slimy green yuck.

I thought much the same until encountering the young green stalks growing alongside the irrigation ditches as a pre-teen. Sliced off just below ground level to encourage next year’s growth, taken straight home, washed and lightly sauteed in butter before being drenched in eggs with fresh home grown tomato, basil and oregano in a classic frittata, I fell in love with that incredibly fresh, lingering taste of Spring. So much so, in fact, that I have been hesitant to buy asparagus from the store, preferring to get it from the Farmer’s Market or other fresh sources.

I have found that the sautee method keeps the crisp texture while concentrating the fresh taste, while steaming or boiling creates the mushy texture and drains the flavor out.

Here is a different approach to the presentation, that has a medley of fresh flavors that will make it memorable in a positive way!

Sauteed Asparagus with Prosciutto and Pine Nuts

  • 1/4 cup butter
  • 3 oz thinly sliced prosciutto, chopped
  • 2 cloves garlic, minced
  • 1/2 cup pine nuts
  • 1/3 cup fresh lemon juice
  • 2 lbs fresh asparagus, trimmed to bite size
  • salt and pepper to taste

Melt butter in a heavy skillet over medium heat. Stirring constantly, sautee the garlic and pine nuts in the melted butter until the garlic is fragrant and the nuts just begin to turn brown, about 2 minutes. Stir in the lemon juice.

Add the asparagus and prosciutto to the mixture and toss to mix evenly. Continue to sautee until asparagus is bright green, tender and still just slightly crisp, about 3-5 minutes. Season with salt and pepper; serve hot.

Serves 6 as a side dish.


How Local Food Keeps a Small, Remote Restaurant Growing

Hell’s Backbone Grill- Boulder, UT. Located in south-central Utah in one of the last remaining remote places in the lower 48 states, Hell’s Backbone takes it’s name from a narrow wooden bridge over Box Death Hollow that allowed auto traffic for the first time in 1933.  In a town of 180, more or less, that received it’s first electricity in 1947, and stopped getting it’s mail by mule in 1942, having a flourishing restaurant is an achievement in itself. The challenges are considerable- the closest bank and grocery store are 45 minutes south in Escalante, which is another fairly remote, small town. Planning becomes critical, cooperation and community building is not just a good idea, but is the only way to stay in business.

Despite these challenges, Hell’s Backbone Grill and The Boulder Mountain Lodge, where the Grill is located have had lots of great press from far and wide. Success hasn’t gone to their head, as they are down to earth folks. They partner with local ranchers and community members for food supplies, as well as growing a huge garden to feed the restaurant. All of the food is grown and raised with care, love and tremendous respect, whether by the restaurant or by the community. This comes through in the flavors, which are indescribably delicious. There is a deep, rich fullness to the food that is readily apparent.

Here is a recipe for Blue Corn Flapjacks from their cookbook- “With A Measure Of Grace”. The Prickly Pear syrup is our own homemade syrup.


Blue Corn Flapjacks

3 Cups flour

1 Cup sugar

1 Tbs baking powder

1 Tsp salt

1 Cup blue cornmeal

4 Eggs

3 Cups milk

1/2 Cup oil

1 Tsp Vanilla extract

Oil for griddle


In a large mixing bowl combine flour, sugar, baking powder, salt and cornmeal.

In another bowl lightly beat eggs with milk, oil, and vanilla extract.

Add wet to dry and combine well.

Preheat griddle to medium-hot. A cast iron griddle works best. A drop of water will dance over the griddle when it’s ready. Add 2 Tbs oil to griddle, spread with folded paper towel. Keep towel to grease griddle for next batch of cakes.

Pour from a pitcher or use a ladle to make standard round cakes, or get wacky and make a portrait pancake for each breakfast companion. Turn cake when adges are set and small bubbles form and pop on the surface.

The batter will keep in the fridge for two days.

These are substantial flapjacks, very satisfying and filling. Enjoy them!

When a friend mentioned the Loofah gourd, I thought of a scrubby for the shower. When he mentioned eating the Loofah, I had to stop and really think for a minute. This is probably the same situation for most of us, as this Asian vegetable is not very well known here for cuisine. We tend to grow them or know them as bath or scrubbing sponges, the result of growing a long green gourd, then drying, peeling, seeding and pounding it to make it soft enough to use as a sponge. Virtually unknown in American kitchens, this very same gourd is harvested young across Asia when it is a tender and adaptable vegetable. It has a porous texture and cucumber-like flavor that lends itself well in dishes that use a sauce base or where it can soak up the other flavors of the dish. Very popular in China, it is steamed, boiled or stir-fried with various ingredients such as garlic, onions or dried- sometimes salted- prawns. In spicy dishes, it is used as a cooling ingredient.

There are two physically different kinds of Loofah. One has ridges on it that must be peeled to remove the sharp ridges before cooking. The second type, which is more common in the US, is round and when small looks like a zucchini. It only needs to be washed and sliced for cooking, though some recipes will call for it to be peeled. Terroir Seeds carries a round Loofah that can be eaten and used as a sponge.

Here are a couple of stir-fried Loofah recipes to get you used to the idea of the Loofah as a food.

Chao Sigua (Stir-Fried Loofah)

This is an extremely simple side dish that is deceptively delicious.

2 Tbsp Peanut oil

4 Cloves garlic, thinly sliced lengthwise

1 Lb. Young Loofah gourd, cut 1/4 inch diagonally, then in 1/4 inch julienned

1 Tbsp Water

1/4 Tsp sugar

Sea salt and freshly ground pepper to taste

Heat large wok or cast iron skillet over high heat, then add oil once wok is hot. Keep heat on high- this cooks in under a minute. Immediately add garlic, stir quickly 10-20 seconds. Add Loofah and water, give a good stir then add salt and pepper, stir again then add sugar. Stir for 30-60 seconds and serve immediately. Do not overcook, more than 60 seconds. The high heat will cook with very little oil and create a very delicious taste.

Stir-Fried Loofah and Chicken

This is another unusual, but delicious Chinese dish that will amaze your guests. Make sure everything is sliced, at hand and ready to be added to the wok, as once the cooking starts you will only have time to add ingredients and stir, as the whole process will take only about 5-7 minutes.  I prefer to use a cast iron wok, as it retains the heat better and makes the fast cooking of the Chinese stir-fry much easier. I start cooking the dish when the rice is just finishing up, and both are usually ready about the same time.

1/2 Lb skinless boneless chicken breast, cut across grain into 1/8-inch-thick slices

1  Tsp Sesame oil

2 Tbs Oyster sauce

1 Tbs Soy sauce

1 Tsp Sugar

1/2 Cup Chicken stock or  chicken broth

1/2 Lb Young loofah  (about 12 inches long). Slice diagonally into 1/4 inch slices, then cut in half.  You may peel this if you want, but not needed.

1/8 to 1/4 Cup Peanut oil

3 Small fresh shiitake mushrooms, stems discarded and caps sliced 1/8 inch thick

1 Tsp Chinese fermented black bean sauce

5 Small (2-inch) fresh red chiles such as Thai, seeded and cut into fine julienne (2 Tsp)

2 Tsp Garlic, finely chopped

2 Tsp Fresh Ginger, finely chopped

2 Tsp cornstarch mixed with 2 tablespoons water

Stir chicken, soy sauce,  sugar and 1/2 Tsp Sesame oil in a bowl, set aside for 10 minutes. This acts as a quick marinade. If you want, add 1/2 of the chiles to the mix.

Stir Oyster sauce, corn starch, and chicken broth/stock in another bowl, set aside.

Heat dry wok or cast iron skillet on medium-high to high heat. It needs to be just almost smoking before you add the oil. Once you add the oil, you will immediately start cooking and not slow down to get the best flavor and texture. When wok is hot, add Peanut oil, swirl wok to coat sides and immediately add chicken, stirring constantly. Cook for 1-1 1/2 minutes, until no longer pink, but just barely.

Remove chicken with slotted spoon to a bowl and set aside. Increase heat to high, add remainder of oil if needed, swirl wok to coat sides and add mushrooms, cook until lightly browned and tender, stirring constantly. This should be 1-2 minutes.  Add black bean sauce, chiles, garlic, and ginger and stir-fry until fragrant, about 30 seconds.

Add loofah and stir to coat, then add Oyster sauce mix and bring to a boil, stirring well. It should boil and start to thicken and turn translucent in 30-45 seconds. Lower heat to low at this point, let Oyster sauce with the cornstarch finish thickening to your liking and serve immediately over sticky rice. Drizzle remaining 1/2 Tsp Sesame oil over dish just before serving.

'roasting the Pumpkins

There are many ways to use the remains of the Thanksgiving turkey. Of course, having a delicious herb-roasted and smoked turkey will leave fewer leftovers, but there are bound to be some no matter what. One of my favorites from childhood is Scrapple, but that is the subject of another post and recipe.

It has been colder here, so soups have been on the menu. Roasted bone and carcass broth based soups are always very satisfying and nutritious this time of the year.  I wanted to share a different take on the re purposing of the noble Thanksgiving turkey in the role of a rich, hearty and extremely satisfying soup. This recipe uses pumpkin, as there is usually some left from making the pies, but any hard shell winter squash will work beautifully. The best flavor will be from a pie pumpkin, not a carving or field pumpkin. Taking advantage of the abundance of vegetables used at the Thanksgiving feast, this soup can be as rich and complex or as simple and straightforward as you wish. You can also make a couple of soups, as once the roasting of the carcass is done there are endless routes one could go with this soup. Roasting the turkey carcass after it has been cooked intensifies its flavors and prepares it for creating the rich stock, which is the base for partnering with the creamy smoothness of the roasted pumpkin.

Thanksgiving Turkey and Pumpkin Soup

For the Stock-

1 Turkey carcass- whole with some meat and skin left on it, or with wings

2 Onions–  quartered

3-5 Medium carrots

5-6 Lbs. Pumpkin, sliced open and seeds removed

1 Bouquet Garni- 2 Dried Bay leaves, 1 small bunch Flat Leaf Parsley, (preferably fresh, dried is ok),  2 sprigs fresh Thyme (dried is ok)

1- 6 Oz. can of tomato paste


Roast the carcass on a large roasting pan or heavy baking sheet at 450F for 1  hour. It should be medium brown. Add the quartered onions, carrots, potatoes and pumpkin and roast for 1/2 hour. Other root vegetables can be roasted as well for different flavor dimensions. The vegetables should be soft, slightly darkened and well roasted, while the carcass should be nicely browned and almost falling apart.  Browning the carcass and vegetables in the oven before simmering them in a pot gives the stock a more pronounced flavor and deeper color. Scoop out pumpkin, use 1 Lb now, reserve the rest. Place everything in a large heavy stock pot. Deglaze the roasting pan by adding 2-3 cups of water to the pan on the stove, bring to a simmer and scrape the browned bits loose with a wooden spoon. A cup of red wine with the water to deglaze will add an incredible depth to the flavor. These bits are very concentrated in flavor, called the “stock foundation” by the French. Add to stock pot, along with Bouquet Garni and tomato paste, which adds color and depth of flavor. Cover carcass completely with water- about 10-12 Qts and slowly simmer very gently for a minimum of 10-12 hours. During the first few hours, fat and proteins will rise to the top. For a clear stock- skim the top, but it is not absolutely necessary, as the fats will collect at the top when cooled, and the proteins will remain in the stock.

Once the stock has simmered, allow to cool. Skim fat from top and strain out bones and Bouquet Garni. Mash up remains of vegetables. Bone the turkey, leaving the soft cartilage and bits of meat. You should have a very thick stock, with no whole vegetables showing.

For the Soup-

Remainder of roasted pumpkin

1-2 Lbs leftover Turkey, shredded

6-8 Cups Turkey stock

4 Tbs Butter, preferably unsalted

2 Medium Onions, chopped

4-6 Garlic cloves, minced

2-3 Medium potatoes, cut into medium cubes

15 Fresh Sage leaves, coarsely chopped

Freshly ground Salt and Black Pepper

Fresh cream if desired

In heavy stock pot, preferably cast iron, melt butter over low heat and slowly cook onions for 15 minutes, then add garlic for 5 minutes. Add remainder of roasted pumpkin and bring to a simmer. For a smoother soup, puree pumpkin, onion and garlic mixture now. Return to pot, add potatoes, Turkey and stock. Slow simmer for 30 minutes. Potatoes should be tender. Add ground Salt and Pepper and chopped sage leaves, reserving some for a garnish. Finish simmering for 10 minutes to blend flavors. Add splash of cream to each bowl and  serve hot with fresh bread.

This is always a hit, so I make extra. Enjoy and let us know how yours turns out!

Here is another great recipe that takes advantage of the abundance of fresh vegetables out there now. This is an easy, foundational salsa recipe that is extremely tasty just as it is, but also lends itself very well to experimentation with whatever fresh vegetables you have available. Everything is roasted to bring out the fullness of the flavors, and to help them mingle better. I’ve been able to do an acceptable substitute in the winter with fresh frozen chiles from our garden, and canned Italian plum tomatoes!

This is one of those salsas that just grabs you by the taste buds and gets your attention. No matter if it is mild or hot, you keep coming back for “one more bite”, because it just tastes so good. When having guests over, a batch rarely lasts through the evening, when it’s at the height of its warm, rich goodness. Best cooked outside, this lends itself beautifully to doing fresh quesadillas, queso fundido, burgers or all three in succession on the grill, along with plenty of cold beer and good friends. Watching the late summer sun going down after a hot day and enjoying the salsa along with other great food is one of the memories that will be brought up many times.

I like using several kinds of chiles, some mild, medium and hot to bring more depth of flavor to my salsas. I will start picking the mild ones,  fewer of the medium, and less still of the hotter ones. This builds a base of flavor first, then heat. Don’t worry if it looks like you’re making tomato soup when you start roasting the tomatoes, everything will turn out just fine…

Roasted Fresh Garden Salsa

2 Lbs fresh tomatoes-diced.  Plum tomatoes are best, but use what is fresh- a couple of different kinds will give more depth of flavor! Dicing will help remove some of the excess juice.

3-4 Ripe red bell peppers– diced

10-15 Various Chiles to taste for heat- de-seeded, de-veined and diced

3-4 Ears fresh sweet or roasting corn– cut from the cob. About 1-2 Cups

5-6 Cloves garlic- sliced in 1/8 inch slices

1-2 Cups cooked Black beans (optional)

1 Tsp whole Cumin

1/2 Tsp whole Coriander

1/4 Cup Extra Virgin Olive Oil

1 Tsp salt

1/2 Tsp fresh ground black pepper

Splash of Balsamic Vinegar

You’ll need a couple of large, heavy, shallow pans for roasting- preferable cast iron, as it retains the heat well and is easy to keep at the best temperature for roasting vegetables. The grill or outdoor stove is the best place to do the cooking, as the heat stays outside, and you get to enjoy the late afternoon! A couple of large bowls to hold the roasted vegetables and a large food processor or blender will be needed after everything is roasted.

Heat the pans to a medium heat, add the tomatoes to one pan, the bell peppers and corn  to another, and if you have a third pan- the Chiles to that one. Let them roast until their skins start to turn dark. The skins should be a little black in spots and starting to loosen from the fruit. This can take up to a half hour depending on the heat of your grill or stovetop. Stir and turn with a wooden spatula occasionally. You will see some sticking, especially with the tomatoes- this is ok. When the Chile skins are starting to turn dark, add the garlic to that pan. Remove the veggies when they are fully roasted and have dark skins with a few black spots on them. The corn should have a dark yellow color to it. Put them all together into a large bowl and cover.

Toast the cumin and coriander in a small heavy pan over medium heat for 2-5 minutes, until they release their aromas. You will see the seeds start to darken and release their aromas- move the pan off of the heat for a second or two, then return to the heat. Continue this until the rich toasted aroma tells you they’re ready. Grind in a mortar and pestle or spice grinder to a coarse ground consistency.

Add the vegetables to the food processor in batches if needed and process with a chopping blade until a chunky consistency is reached. Do not over process to a smooth or fine consistency- you will lose flavor. Repeat until all the vegetables are processed, and return to a large serving bowl. Add ground spices, Olive Oil, salt and ground black pepper. Add splash of Balsamic Vinegar and mix well. Taste and adjust salt and pepper if needed.

Serve warm with chips, or in and on top of fresh hot quesedillas or accompanying queso fundido with chips.

Chicken Maque Choux is one of the most wonderful, rich and flavorful chicken dishes there is. This has been one of our favorites for years, and is absolutely best cooked at the end of summer, when the corn is rich and ripe with plenty of other fresh vegetables available to round out the chicken and sausage. Fresh vegetables are essential for the complementary flavors, but you can do this with frozen and canned ingredients in the winter. This is one of the reasons to freeze and can your own produce, to be able to capture the taste of late summer in the middle of winter…

“Maque choux” is a Cajun word meaning a dish smothered with fresh corn and tomatoes. This is a stew dish in consistency and needs some liquid in the bottom of the bowls. Provide soup spoons and plenty of fresh bread, as the liquid in the bowls is delicious!

This is the traditional recipe, using the entire chicken, but one can use breasts or thighs if needed. We use Olive oil to cook in, and cast iron as it holds the heat better and adds more flavor, I believe. This is one recipe where the freshest ingredients will really shine. Fresh, local chicken will make this a dish that everyone will remember.

The sausage is optional, as it does add to the richness of the dish. For a lighter dish, use just the chicken. Who cooks Cajun in a lighter way though? Seriously, though, the chicken by itself is very memorable!

Chicken and Sausage Maque Choux

1/4 Cup Vegetable oil or Olive Oil

2 Small fryers, cut up (Can cut into bite sized pieces if desired)

1/2 Pound hot Cajun or Italian sausage links, cut into 1/2-inch slices (Optional)

4 Cups fresh corn cut off the cob, with cob liquid reserved (substitute 16 Oz frozen sweet corn if needed)

2 Tbs fresh heavy cream

3 Cups chopped onion

1 Cup chopped green pepper

2 large Beefsteak tomatoes, coarsely chopped (substitute Italian canned plum tomatoes if needed)

1/4 Tsp dried Thyme

1/4 Tsp dried Basil (or 1/4 cup chopped fresh basil)

1 Tbs finely minced fresh Parsley

2 fresh Thyme sprigs

1/2 Tsp cayenne, or to taste

3 Tsp salt

1 Tsp freshly ground Black Pepper

2-3 Tbs milk, if needed

Heat oil in a heavy 8-10 Qt pot or kettle over medium heat. Season chicken with salt and pepper and brown in hot oil, turning often to brown evenly. When chicken is just starting to brown, add sausage if using, turning often. Reduce heat to low once sausage has started to cook and chicken is almost browned. Add onion and cook for about 15-20 minutes. Add corn, corn liquid and cream, mixing thoroughly.  Add green pepper, tomatoes, herbs, salt and pepper. Lower heat until mixture is just barely simmering, cook for 30-45 minutes. Check progress about every 15 minutes. Chicken and sausage should be very tender, chicken will be almost falling off bones. If dish is too soupy, uncover pot for last 15 minutes. If it is becoming a little too dry, add milk as needed.

Serve hot with fresh bread in soup or gumbo bowls. Make a full recipe, as everyone will go back for more, and it gets better the next day.

We are back from the Red Rock Lavender Festival, having met some wonderful people and loving the lavender scents for 4 days. While we were there, we picked up some Herbes de Provence and Herbes de Concho that are made at Red Rock Ranch. The high altitude, sparse soil and dry Mediterranean climate play a major part in the intensity of the scent and flavor of the lavender in their Herbes mix.

The amazing thing about Herbes de Provence is the adaptability of the mixture in so many culinary applications- from grilled, roasted or baked meats, to stews, soups and grilled or roasted vegetables, Herbes de Provence adds a depth of flavor and aroma that is unique and heady. Another interesting thing is the broad spectrum of ingredients that make up the Herbes mixture. The basic and classic mixture is equal parts dried Oregano, Thyme, Summer Savory and Lavender buds, mixed well. From this basis several other recipes have evolved, with both individual and regional preferences showing up. Many of the mixtures involve classical, foundation spices that are used in French and classical European cuisines. Some will argue that the essential ingredient is Lavender, while others will say that it’s exclusion does not lessen the mixture, and even enhances it in certain dishes. I’m not going to get into that argument, but will say that the Provence region is world famous for its Lavender, thus its inclusion into the Herbes de Provence.

This is the time of year to start selecting, harvesting and drying your garden herbs for the coming year. Rosemary has starting blooming and is incredibly fragrant now, as is Sage, Oregano, Basil, Thyme and almost all of the culinary herbs.  Selecting the best leaves from the herbs and drying them in small batches starting now gives you plenty of time to accumulate the volume of dried herbs needed to not only have enough for general cooking, but will give you enough to make some mixtures that use foundational herbs without depleting your stocks. Starting now also gives you the time to do smaller batches, being more selective in quality instead of having to just pick what is available to do a large, rushed batch later in the Fall as the weather starts shutting the garden down. Ask me how I know… Plus it’s wonderful to improvise tonights dinner from the herbs and vegetables picked today from your garden!

The following recipes should be considered a starting point, not the definitive, final recipe. Use your tastes and flavor combination preferences as a guide, and adjust amount and types of herbs accordingly. How else do you think that so many variations on the theme evolved?

I will share several other recipes for the mixture below, as well as some ideas for using them. Dried herbs are important, as fresh herbs will lose their flavor in about 20 minutes of cooking.

Classic Herbes de Provence

Equal parts of the following dried herbs:

Oregano

Thyme

Summer Savory

Lavender buds

Mix well and store in an air tight container. Keeps for 3-6 months, depending on humidity and temperature.

Variations on Herbes de Provence

1 tsp thyme
1 tsp summer savory
1/2 tsp lavender buds
1/4 tsp rosemary
1/2 tsp oregano or basil (or both)
1/4 tsp sage

1 tsp marjoram
1 tsp basil
2 tsp thyme
1 tsp summer savory
1/2 tsp lavender buds
1 tsp rosemary
1/2 tsp fennel
1 tsp oregano


2 tsp thyme
1 tsp basil
1 tsp marjoram
1 tsp French tarragon
1 tsp rosemary
2 tsp summer savory
1 tsp fennel seeds
1 tsp lavender buds


1 tbs thyme
1 tbs chervil
1 tbs rosemary
1 tbs summer savory
1 tsp lavender buds
1 tsp tarragon
1 tsp marjoram
1/2 tsp oregano
1/2 tsp mint
2 powdered or chopped bay leaves


You can crush the mix prior to adding it to olive oil for a marinade or dressing. Add in crushed dried red chiles for a new taste dimension. Mix with homemade mayonnaise for a real taste treat.

Herbes de Provence/ Bleu Cheese Burgers

Mix lean hamburger meat with high quality Bleu cheese at a ratio of 3/4 meat to 1/4 cheese. Form into patties, dust liberally with Herbes de Provence mixture that has  been crushed with fresh ground black pepper and salt, let sit for 20 minutes and grill till done.  Make sure to make extras!

Marinated Herbes de Provence Steaks

The flavors will really be enhanced if you use grass fed beef.

1/2 cup extra virgin olive oil

1/4 cup Herbes de Provence

1 tsp fresh ground black pepper

1/2 tsp salt

Mix ingredients well, coat both sides of steaks, let sit covered for 30 minutes to 1 hour. Grill to taste. Optional- make 1/2 recipe extra to top steaks when served. Can add sprinkle of Gorgonzola cheese to top of hot steak as well.

Herbes de Provence Garlic Bread

1/4 cup Herbes de Provence

1/2 cup softened butter

3-6 large cloves freshly minced garlic

Fresh sourdough bread

Mix Herbes with butter and garlic. For more garlic flavor- use more cloves. Optional- roast the peeled garlic cloves prior to mincing for a richer, mellower flavor. Lightly spread butter on both sides of thickly sliced bread, bake in 400F oven for 3-5 minutes or until just turning golden brown.

Hopefully you can start to see the versatility of the magical Herbes de Provence. You are only limited by your tastes and creativity!

Today we have a new recipe that will work just about anywhere. I’ve used it when entertaining at home, at a friend’s house when cooking a shared dinner party and even when camping off road in our Land Rover! It lends itself to being cooked outside, which keeps the house cooler, and somehow increases the flavor…

It takes a bit of time, as this is a slow pan roast recipe, but is easy and you can do other prep or cooking while this is roasting. Total cooking time is around 30-45 minutes. Plan extra, as the flavor from the slow roasting is tremendous, and people will go back for more. That’s good, as this is real and healthy food! This is a perfect counterpart to barbecued chicken or burgers on a warm Spring evening. If you increase the vegetables and add warm fresh bread, this can be a light and healthy dinner in itself.

The eggplant must be fresh, as it can be bitter otherwise. Fresh means picked that day. If fresh is not available, leave it out. If you want an extra flavor, don’t peel the eggplant. This is the perfect showcase for fresh grown, heirloom ingredients, as the flavors will really shine. The ingredients are roasted in this order to bring out their flavors, as well as mingle them with the others. It is worth the time to do it in order!

Mediterranean Pan Roasted Vegetables

Serves 4-6

12 oz potatoes, cut into 1/2  inch cubes with skin on  (Red potatoes are preferred)

2 bell peppers- any color, cut into 1/2 inch squares

1 medium red onion, diced into 1/2 inch squares

1 small eggplant, peeled and cut into 1/2 squares (Only use fresh eggplant to avoid bitterness)

3 or 4 cloves garlic, sliced

4 Tbsp extra virgin olive oil

2 Tbsp balsamic vinegar

1/2 tsp dried basil

1/2 tsp dried oregano

1/2 tsp fresh chives

1 tsp fresh rosemary, finely chopped

Salt and freshly ground pepper to taste

A large cast iron pan is best, but a heavy bottomed pan that retains heat well will also work.

Heat pan on medium heat, until thoroughly warm. A pan that is not heated all the way through will cause food to stick. Whisk balsamic vinegar, 2 Tbsp olive oil, basil, oregano, chives and 1/2 tsp rosemary together and set aside.

Add 2 Tbsp olive oil to pan, coat pan well and add potatoes, coating with oil in pan. Roast for 10-15 minutes, turning occasionally until they start to soften. Add onion and bell peppers, along with half of the rosemary and roast for 10 minutes, turning as well. Add eggplant and garlic, roasting for 5 minutes. Drizzle herb/oil/vinegar mixture over vegetables, stir well to coat and continue roasting until potatoes are tender, about 10 minutes more. Serve hot or let cool and store in refrigerator for next day to let the flavors set up and mingle.

The Carrot's Odyssey

Today’s recipe is a wonderfully different yet tasty way to prepare Heirloom Carrots, but will work equally well with other, similar vegetables, such as celery, bell peppers, beets, radishes or other root crops. The preparation is quick, and done the day before makes a special lunch or dinner even more so. Other herbs will work well, such as fresh oregano, basil or thyme. Get creative and try a couple of root crops, or several!

Heirloom Carrots

Marinated Carrots

1 Lb carrots- best fresh from your garden or farmer’s market

2 1/2 Tbsp Lemon juice

1/2 Tsp Dijon mustard or stone ground mustard

1/4 Cup Extra Virgin Olive Oil

1 to 2 green onions, chopped

1 Tbsp Fresh Parsley, chopped

1 Clove garlic, crushed

Fresh ground salt and black pepper, to taste

Bring a medium pot of water to a boil.

In the meantime, scrub and slice carrots into uniform slices. Matchsticks work well if using for garnish or presentation.

Blanch carrots in boiling water for about 2-3 minutes, or until just barely tender, but slightly crunchy.

Combine lemon juice, mustard, olive oil, onions, parsley and garlic in tight fitting jar with lid. Shake well to mix.

Pour marinade over carrots in sealable dish, season with salt and pepper. Refrigerate at least 8 hours or better yet, overnight.

Serve by themselves as a side dish, as a garnish or presentation.

Makes about 3 cups.

Here are a couple of recipes that use fresh herbs- that you should soon have growing in your garden!

The first is the classic Basil Pesto. Make extra, freeze in small amounts for use later. We just finished using the last batch in a dinner that tasted like the height of summer. The second is a basic, classic tomato based pasta sauce that is not only easy to make, but lends itself to endless variations using what is fresh and on hand at the time.

You can easily have a fresh, incredibly tasty dinner on the table in 30 minutes with either of these recipes!

Basil Pesto Sauce

2 Cups fresh basil leaves, washed

3 cloves fresh garlic, mild flavored

2 Tbsp pine nuts or walnuts

1/2 Cup extra virgin olive oil

Salt to taste

1/2 Cup fresh grated aged Parmesan or Pecorino cheese

Makes about 1 cup.

Place all ingredients except grated cheese in food processor and puree until smooth, usually about 1-2 minutes. Add in grated cheese, pulse till mixed well.

Add to soups for a bright and fresh flavor, use as a sandwich spread or add to hot freshly cooked pasta for heavenly pesto pasta.

As basil production increases, make large batches to freeze into small single serving containers for use in the winter when you want a taste of summer. Most people think of pine nuts as the only nut to use, but experiment with other nuts including almonds and sunflower seeds for different flavor combinations. Use different basils as well, for the different flavors that they will bring.

Fresh Tomato Basil Sauce

1 Medium red onion, minced

1/2 Cup dry white wine

Pinch crushed red pepper flakes

3 Medium fresh tomatoes, peeled and chopped

1 Tbsp olive oil

1 Tbsp Balsamic vinegar

1 Tsp sugar

1/2 Tsp salt

1 Tbsp tomato paste

1 Cup fresh basil, chopped

Slow cook onion in wine over low heat in heavy bottomed sauce pan for 10-15 minutes, until liquid is reduced to a few tablespoons.

Add pepper flakes, tomatoes, olive oil, sugar, salt, Balsamic vinegar, and tomato paste. Simmer for 15-20 minutes, stirring occasionally until sauce is thickened.

Add basil, then remove from heat. Let sit for a couple of minutes to infuse basil flavor into sauce, then serve over fresh hot pasta.

Makes about 3 cups. Can be easily frozen for a quick, healthy and tasty dinner.

You can easily add fresh carrot thinly sliced, fresh oregano, different types of basil, fresh fennel sliced thinly, or whatever sounds good at the time. Experiment with different flavor combinations, use what is fresh and available at the time for new and great tastes.

A fast growing herb, oregano serves many purposes beyond the kitchen counter

Related to mint (but nowhere near as sweet), oregano is a popular herb found throughout Italian, Greek, and Mexican cuisines. Whereas Greek oregano is very strong and slightly bitter with a clove-like afterbite, Mexican oregano is almost all bitter, and can be almost tongue numbing. Oregano is great with anything involving tomatoes, and goes very well with savory dishes like eggs and roasted meats.

How to Grow:
Because it loves warm climate and direct sunlight, you want to plant your oregano only when you are sure the last frost has passed. It only takes a week-and-a-half to germinate, with the leaves ready for harvest after six. Since compost and manure have a tendency to adversely affect the final flavor of the leaves, it is best to plant the seeds (or transplants) fifteen inches apart in loose, moist soil and cover with mulch to combat weeds. Because it is drought tolerant, as long as you water it periodically, the plant will take care of itself.

Non-Culinary Uses:
Oregano can be used as a border for many gardens and walkways. It is a perennial and will
grow back each year. Many people enjoy its aromatic fragrance. Due to its high levels of an antiseptic called carvacrol (also responsible for its ‘pizza-like’ flavor), oregano acts as a bacterial inhibitor and an effective first-aid treatment for insect, spider, and even snake bites.

Culinary Uses:
Oregano is often used in many soups and pasta sauces. However, oregano is most widely recognized as the “special herb” which turns bland pizza sauce into real pizza sauce. You can make your own pizza sauce following the simple recipe below.

Ingredients Needed:
1 32 oz can of plain crushed tomatoes
1 8 oz. can of tomato paste
½ teaspoon of dried crushed oregano (Either True Greek or Sweet Marjoram will work well).
2 Tablespoons extra virgin olive oil
2 cloves minced garlic
¼ cup water

In a medium saucepan, heat the olive oil over medium heat.
Add the garlic and simmer over low heat for 2 minutes.
Add in the rest of the ingredients and mix well.
Simmer over low heat for 20 to 30 minutes.

Author Credits: Elizabeth Trementozzi Krause publishes her own Italian cooking website,
www.simpleitaliancooking.com where she features more Italian recipes. She enjoys spending her time cooking and drinking espresso with friends and family. She and her husband love eating pizza with a dish of pasta on the side along with a nice green salad. She offers a newsletter each week featuring new recipes and tips.

This is a great dinner for family or friends, and it doesn’t have to be Sunday. A whole roast chicken makes for an impressive tableside presentation followed by a delicious meal and the tender, tasty leftovers can be used for several other dishes, if there are any left!

For faster, more even roasting, cut the backbone out of the chicken with poultry shears or heavy duty kitchen shears. This allows the bird to lay flat in the roasting pan. Keep the backs in a freezer ziplock until you have several, then make chicken stock with the giblets, diced onions and celery, aromatic herbs such as savory, rosemary, thyme, salt and pepper and a bay leaf in a couple quarts of water. Bring to a boil, then simmer for a minimum of two hours, longer is better.

Pair this with some fresh homemade biscuits and you’ve got a proven winner! We found a great restaurant in the little town of Boulder, Utah called Hell’s Backbone Grill that makes the absolutely best biscuits that we’ve ever tasted! They are easy and quick to make and are positively addictive. We always make a double batch if we want any for the next couple of days. You can use the hot oven for both roasting the chicken and baking the biscuits.

Make sure to include plenty of vegetables, as they roast up well and balance out the rich roasted chicken flavors.

Herb and Vegetable Roasted Chicken

3-4 Lb chicken

1 lemon, halved

Fresh rosemary

Fresh thyme

8 cloves garlic, peeled and crushed

2 Tbsp butter, softened

Salt and fresh ground black pepper

4 small red onions, halved

8 small potatoes, halved

4-6 medium carrots

4 medium parsnips, peeled

Extra virgin olive oil

Heat oven to 450F. Rinse chicken, pat dry with paper towels. Place chicken in a large roasting pan or skillet. Cast iron is best.  Squeeze lemon juice to cover chicken then put lemon halves, rosemary, thyme and 4 cloves of garlic into cavity. Rub chicken with butter, sprinkle with salt and pepper. Arrange remaining vegetables around chicken and brush with olive oil, season lightly with salt and pepper.

When oven is hot, roast for 15-20 minutes, then bast chicken with pan juices. Reduce heat to 375F and continue to roast for about 45 minutes more, basting every 15-20 minutes until skin is crisp and golden. Remove from oven, cover with lid or foil for 10-15 minutes (while biscuits are cooking) and let rest before carving. When removing chicken, reheat oven to 450F. By the time you are ready to bake the biscuits, the oven will be at temperature.

Black Powder Buttermilk Biscuits

This is our all time favorite biscuit recipe! You must have two things to be successful here- a hot oven and cold dough. These are made and bake quickly, so get everything ready before you start.

3 Tbs cornmeal

2 1/2 Cups flour

1 1/2 Tsp salt

1/2 Tsp baking soda

1 Tsp baking powder

1/2 tsp course black pepper

1 Tsp sugar

1 stick (1/4 Lb) butter- cold- cut into 1/2″ chunks

1 Cup buttermilk or substitute 1 cup milk with 2 tsp lemon juice

Adjust rack to middle position of oven, lightly oil cookie sheet or use a nonstick spray. Sprinkle 2 Tbsp over surface.

It’s best to use a food processor for the next two steps, then lightly knead the dough by hand or in a stand mixer. It makes for better biscuits!

Add flour, salt, baking soda, baking powder, pepper and sugar in food processor bowl, pulse 5-7 times with cutting blade to mix. Next, add butter chunks and run until mixture resembles coarse crumbs. This can be done with 2 knives and some patience. Transfer to stand mixer bowl.

Using low speed, fold mixture in while slowly pouring buttermilk over top. Mix well until dough is sticky and moistened through, with no dry patches. Turn dough onto lightly floured worktop, using floured hands to prevent dough from sticking. Using knife or bench scraper, cut dough in half and stack one piece on top of the other. Flatten with rolling pin, but don’t over do it. Repeat cut, flatten and stack for 3 more times. Add small amounts of flour necessary to keep everything from sticking. Dough will be very moist- as it should be.

Transfer dough to cookie sheet. Roll to about 1 inch thick, then cut into squares about 2×2″. Sprinkle with remaining 1 Tbsp cornmeal. Bake until golden brown, about 12-15 minutes.

Serve with the roasted chicken and enjoy!

This is a wonderful winter chowder, warming and hearty to chase away the cold winter blues. It uses readily available winter ingredients- potatoes, onions, garlic and carrots, along with some frozen corn. Homegrown frozen sweet corn will be the best, but a good quality frozen sweet corn will work.

I use this as a starting base for experimentation and new directions. This is perfectly delicious, however, just as it is! Lobster, crab or shrimp makes this an excellent seafood chowder. Fresh sausage gives a completely new flavor, especially if it is spicy or smoked. Smoked pork works magic as well. Use your imagination and unique, local ingredients to shape this into a new regional specialty in your area!

Corn and Potato Chowder

Sea Salt, to taste

1 Stalk celery, chopped coarsley

1 Medium carrot, chopped coarsley

1 Sprig fresh parsley, can use dried

1 Bay leaf

5 Black peppercorns

1/4 Lb. salt pork, or smoked pork

3 Medium yellow onions, peeled and diced

3 Cloves garlic, peeled and minced

1 1/2 Lbs. unpeeled red potatoes, cut into 1/2″ cubes.

4 Cups corn kernels- (about 6 ears worth)

3 Cups half and half

Cayenne pepper

Freshly ground black pepper

1 Tbsp.  Chicken base- Better Than Bouillon is a great brand

10 Cups water

In a  large, heavy stockpot (preferably cast iron) heat the water and mix chicken base. Once simmering, add celery, carrots, parsley, bay leaf and peppercorns. Cover and simmer over low heat for 1 1/2 hours, then increase heat to medium until stock is reduced to about 6 cups, about 10-15 minutes. If using seafood, cook in stock base now, only til just tender and remove for later.

Cook salt pork or sausage in separate heavy pan over medium low heat until crisp, about 20 minutes. Remove, drain and slice. Add to stockpot. In same pan, saute onions and garlic until soft and browned.

Add to stockpot along with potatoes and corn. Simmer on medium heat until potatoes are tender, about 10 minutes. Stir in half and half, cayenne and return to simmer. If using seafood, add now and heat through, about 5 minutes. Season to taste with salt and pepper. Ladle into bowls and serve hot.

Please let us know how you like it, and what adaptations you make!

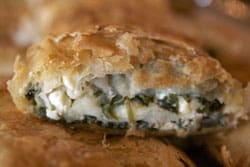
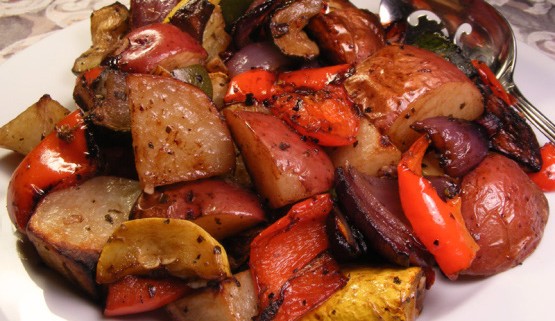
It has been cold here, much colder than in the past several years, so I’ve been making some great cold weather dinners. Onion soup is one of the classic cold weather dishes- rich and hearty in flavor and aroma. We bought a cazuela at The Spanish Table in Sante Fe this past September, and I love cooking with it. You can use it over a direct, but low, flame on the stove-top. This saves the time of soaking the clay pot, loading it with the ingredients, putting it into a cold oven and then turning it on. The warm up time of the oven greatly increases the cooking time, as the clay pot needs to come up to temperature slowly to avoid cracking. Not so with the new cazuela! It is glazed and has been high fired, so is ready for action. I’ve done several pots of slow cooked beans that are heavenly, as well as some other soups and stews. Today is about the onion soups, though…

For several years now I have faithfully cooked the French Onion Soup recipe from the Le Cordon Bleu Home Collection cookbook, and as you would expect, the results are fabulous. It does take some time and preparation, but the results are wonderful. If you have any desire to learn even a small part of the French traditional cooking, and the techniques and reasons behind the techniques- get this cookbook!

This time, I didn’t have quite all of the ingredients or the time or maybe the inclination to spend over an hour at the stove. So I started looking for a good but tasty alternative to the hallowed French Onion Soup.

And found it in a Southwestern recipe from the Roaring Fork restaurant in Scottsdale, AZ. The premise of the restaurant is “Upscale Campfire Cooking”. In Scottsdale.

The thing that I like is that most of the cooking is done in cast iron. Wonderful stuff, lasts forever and if seasoned correctly can cook anything. I tried it, with some modifications that I’ll share, along with the original recipe so you can make both and see for yourself which you like best. Both are great, with different flavors and different approaches.

Here goes-

French Onion Soup from Le Cordon Bleu Home Collection cookbook.

3 Tbs unsalted butter

1 small red onion, thinly sliced- Rossa de Milano is perfect here

3 white onions, thinly sliced

1 clove garlic, finely chopped

3 Tbs all purpose flour

3/4 cup white wine

6 cups brown stock- (I used Better Than Bouillon– beef flavor.)

1 bouquet garni- (Leek outer wrapper, bay leaf, sprig of thyme, celery leaves, few stems of fresh parsley tied together)

1 Tbs Sherry

12 thick slices French baguette

1 1/2 cups finely grated Gruyere cheese

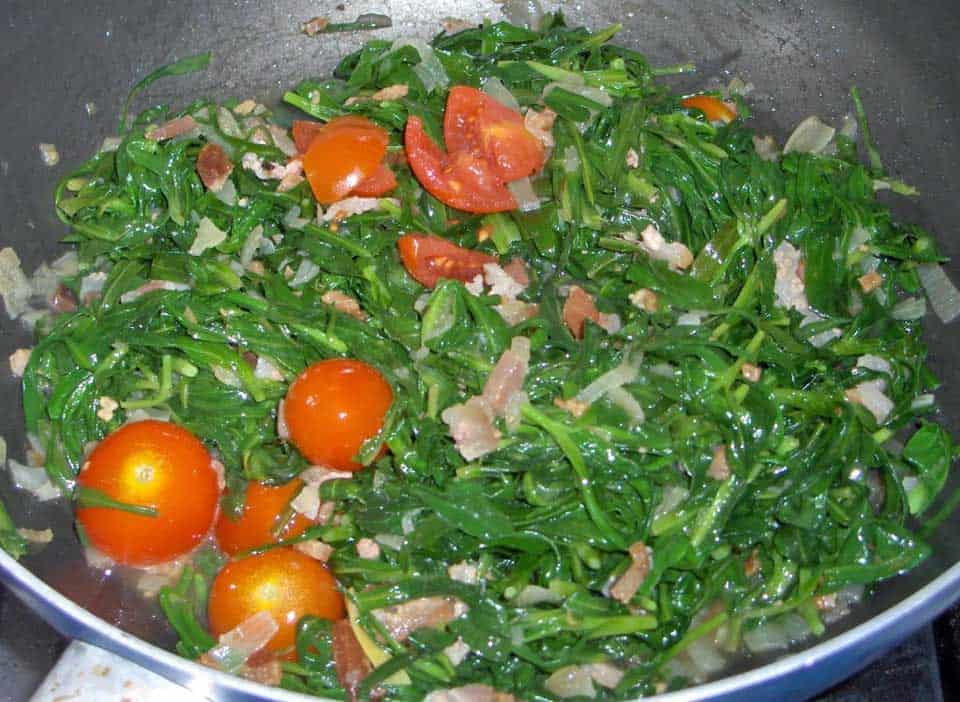
Melt the butter in a large heavy bottomed saucepan over medium heat. Add the onions and cook for about 20 minutes, stirring often, until caramelized and dark golden brown. This is the most important step, as the color of the onions at this stage will determine the color and the ultimate flavor of the final soup!

Stir in the garlic and flour and cook, stirring constantly for 1-2 minutes.

Add the white wine and stir the mixture until the flour has blended in smoothly. Bring to a boil slowly, stirring constantly. Whisk or briskly stir in the stock, add the bouquet garni and season to taste with salt and freshly ground black pepper. simmer gently for 30 minutes, then skim the surface of any excess fat if necessary. Add the sherry to the soup and adjust seasonings to taste.

To make the croutes, toast the French baguette slices until dry and golden on both sides.

Ladle the soup into warm flame proof bowls and float a few croutes on top. Sprinkle the top of each bowl with Gruyere cheese, place under preheated broiler until cheese melts and turns golden brown. Serve immediately.

Serves 6 as a first course. Double ingredients for main course.

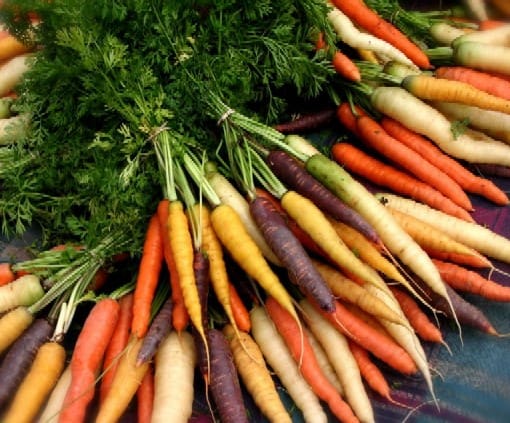
The first thing I would say is to use heirloom, locally grown onions and garlic, as the flavor will be exponentially better- fresher, deeper and with more dimension than onions and garlic that have been grown and shipped halfway across the country, having sat for who knows how long before you bought them. Don’t believe me? Please try it both ways, and let me know!

You will be sold on the first bite of the local soup…

If you haven’t ever tasted truly hand made from scratch French Onion Soup, you are in for a taste treat. It is heavenly on a cold winter’s evening with some fresh made bread and butter on the side, with a glass of wine.

Very satisfying.

Worth the time to make it.

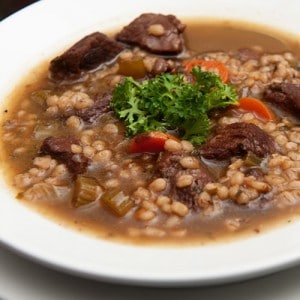
Shiner Bock Onion Soup from The Roaring Fork restaurant, Scottsdale AZ

3/4 cup chopped bacon- smoked is better, imparts a depth to the overall flavor

6 cups finely sliced yellow onions- Walla Walla or Sweet Spanish Utah are great

1 Tsp minced garlic- a robust flavor will stand up to the chiles and beer

1 Tbs finely chopped serrano chile- optional. I used 1 chopped Chipotle en Adobo chile; great flavor and smokieness

3 Tbs butter

1/4 cup flour

1 12 oz bottle of Shiner Bock or light microbrew ale

4 cups veal or chicken stock- again I use Better Than Boullion- chicken flavor

Salt and fresh ground black pepper to taste

Pinch of cayenne pepper

Cook the bacon until crisp in medium hot cast iron pot or heavy deep saucepan. Reduce heat to medium low, add onions, stir well and cover. Cook for 10-12 minutes then add garlic, chile and butter. Stir until onions begin to caramelize, about 10 minutes.

Add flour, stir to thicken and do not allow to stick to bottom of pan/pot. Once flour has blended in, add beer and stir to completely mix in. Increase heat, slowly bring to a boil and add stock. Return to a boil, then reduce heat to low and simmer the soup for 5-10 minutes.

Season to taste with salt and pepper, simmering until the beer has smoothed out and incorporated with other flavors- about 10-15 minutes. Soup should just be starting to thicken. Add pinch of cayenne, stir in well.

Ladle into warm soup bowls and serve immediately.

The flavor of this is completely different, but incredibly delicious. It is easier to make and do something else in the kitchen, as you are not over the pot for most of the time. I used a Chipotle en adobo chile, chopped fine and added some extra adobo for the smoky flavor and it was a great addition. A smoked bacon adds a lot of flavor as well. I doubled the garlic, as it roasts in the onion mixture and mellows its flavor.

Again, a locally grown garlic and onion will make all the difference in the world with both of these soups.

I’m hesitant to experiment too much with the French Onion Soup, as it is an established classic, and also the flavor is so definite and distinct that to start to change it might result in something less than where we started. The Shiner Bock Onion Soup I will most definitely experiment with, as the flavor is wonderful, but almost begs to be taken in a new direction, as the flavor is bold and new.

I could see adding some purple or fingerling potatoes to the mix at the point where the stock is added and brought back to a boil. The texture of the purple potatoes will thicken the soup, as they will cook into it quickly, while the flavor will add a completely new dimension. Fingerlings won’t cook into the soup nearly as much, but will add a nutty creaminess that I think would be amazing. The combination of bacon, onions and really flavorful potatoes would make this pretty much a one dish winter meal with some fresh hearty sourdough bread, butter and a dark beer.

So there you have it, a trans continental journey with the simple ingredients of onions. The flavors are almost as distant from each other, yet perfectly wonderful in each separate way.

Please try these and let me know what you think!

Connecticut Field Pumpkin

Here’s 3 great heirloom pumpkin recipes that we have used and enjoyed. Too often people think of pumpkin in a strictly Halloween or pumpkin pie way, when there are so many other unique and wonderfully tasty ways to enjoy it. Pumpkin is not only a fall or winter vegetable, but can be frozen or stored in a cold cellar environment for several months, in addition to the traditional canning. Please try these, enjoy and tell us what you think!

Here’s what could come out of your garden for this recipe –  Pumpkin, Leeks and Thyme!

Pumpkin Soup with Chipotle Chile
This Southwestern recipe is a favorite of mine, as it is so unexpected yet delicious that everyone comes back for more. Vary the amount of chipotle, as a little gives a seductive smoky flavor and a little more adds some heat. Pie pumpkins will give a sweeter taste, but any heirloom pumpkin will give a rich, deep flavor once it is roasted. Any firm winter squash, such as acorn or butternut can also be used in addition or substitution for the pumpkin. You won’t believe how wonderful the flavor of fresh roasted pumpkin is! Do not use canned pumpkin, it will give the soup a canned flavor. Freeze extra soup in small quantities.
Servings: 10
Ingredients
  • 3 Lbs pumpkin
  • 3 Tbs unsalted butter
  • 3 Leeks white parts only-finely sliced
  • 2 large shallots minced
  • 5 scallions finely sliced
  • 1-2 garlic cloves minced
  • 2 Tbs fresh ginger minced
  • 1 Tbs pureed chipotle en adobo
  • 8 cups rich chicken stock- can use 4 cups stock and 4 of water for lighter flavor
  • 3 Tbs fresh thyme leaves or 1 Tbs dried
  • 1-2 cups heavy cream to taste
  • Salt and fresh ground pepper to taste
Instructions
  1. Cut pumpkin in half, scrape out and save seeds, peel and cut into 1 inch cubes on heavy cookie sheet or roasting pan. Roast in oven at 400F for 20-30 minutes. If skin is very tough, add 1/4 cup of water to pan while roasting.
  2. Saute leeks, shallots and scallions in butter in a large heavy pot for 10 minutes.
  3. Add garlic, ginger and chipotle en adobo, cook for 2 more minutes.
  4. Stir in the pumpkin, stock and thyme.
  5. Slow simmer for 45 minutes, until pumpkin is very soft.
  6. Puree in small batches in blender or food processor and return to pot.
  7. Add cream, taste for seasoning and add salt/pepper as needed.

Here’s what could come out of your garden for this recipe – Pumpkin, Onions, Chile, Cumin, Chives!

Warm Pumpkin Salsa
This is served on top of a flan or baked custard dessert, but can be used with many dishes as a counterpoint or accompaniment. Sweet, yet savory and a little spicy, this is another unusual use of pumpkin that wows friends and family. Everyone raves about this warm salsa, the time of year it is served and comes back for more. I even think it's pretty good over some real vanilla bean ice cream! Make a trial batch to see how the flavor evolves, then make extra when preparing for friends and family. It will go quickly!
Servings: 4
Ingredients
  • 2/3 cup small diced fresh pumpkin
  • 1/3 cup small diced tart apple- Granny Smith etc.
  • 2 medium red onions diced small
  • 1 1/3 Tbs coconut or olive oil
  • 1/3 cup Marsala wine
  • 1/4 Tsp fresh ground nutmeg
  • 1/4 Tsp ground red chile
  • 1/4 Tsp fresh ground cumin
  • 1/4 cup orange juice
  • 2-3 Tbs brown sugar
  • 1 Tbs apple cider vinegar
  • 2 Tsp minced red jalapeno chile- can use green jalapeno
  • 1 Tbs chopped chives
  • 2 Tbs roasted/salted pumpkin seeds
  • Salt and pepper to taste
Instructions
  1. Saute the pumpkin, apple and onion in canola oil in a heavy pan over medium heat until onion is slightly browned.
  2. Deglaze the pan with Marsala wine.
  3. Add spices, orange juice and brown sugar, cook over low heat until most of liquid has evaporated.
  4. Add apple cider vinegar, reduce slightly.
  5. Remove from heat, add jalapenos, chives and pumpkin seeds.
  6. Taste for seasoning, add salt and pepper as needed.

Here’s what could come out of your garden for this recipe – Pumpkin, Onions and Sage!

Pumpkin Soup with Sage
Simple yet rich in flavor, savory, hearty and deeply satisfying this pumpkin soup will do justice as an introduction to the Christmas meal. With the addition of meat such as turkey or ham, preferably smoked, this becomes a one dish main course that teams wonderfully with hot homemade biscuits.
Servings: 6
Ingredients
  • 1 small pumpkin- about 5 lbs.
  • 4 Tsp extra virgin olive oil
  • 6 Tbs unsalted butter
  • 2 medium yellow onions finely chopped
  • 2 cloves garlic minced
  • 4-6 cups chicken stock
  • Salt and freshly ground pepper
  • 18 fresh sage leaves and 1 cup vegetable oil for frying
  • 9 shallots halved lengthwise
Instructions
  1. Quarter, seed and peel pumpkin, rub with olive oil and roast on baking sheet in 350F oven for 30 minutes, or until soft. Allow to cool.
  2. In a heavy stock pot, melt 4 Tbs butter, then brown onions and garlic over medium heat for about 15 minutes, or until onions are soft.
  3. Add pumpkin to mixture, continue cooking for 5 minutes. Add chicken stock and slow simmer for 30 minutes.
  4. Puree soup in food processor or blender until just smooth.
  5. Return to pot, thinning with water if too thick. Keep soup warm on lowest flame and heat diffuser if needed.
  6. Heat vegetable oil and fry sage leaves until just crisp and drain on paper towels.
  7. Add to soup and keep warm.
  8. Drain oil, melt remaining 2 Tbs butter over medium heat and cook shallots until soft and golden, about 15 minutes.
Recipe Notes

To serve, ladle soup into individual bowls and distribute 3 sage leaves and 3 shallot halves into each bowl.

Freezer Pickles – Easy, Simple, yet Delicious

This is a recipe that Cindy has used for several years and is always devoured at picnics. A lot of people ask for the recipe because the flavor is so outstanding! By freezing instead of boiling the brine a lot of unique flavors come out, as well as the fresh cilantro. It is very easy to do in small or large batches. We have used cucumbers and German Beer radishes, but just about any hard skinned vegetable can be used.

Cilantro Freezer Pickles
Prep Time
15 mins
 

Quick, easy, and absolutely delicious - these pickles will be the hit of your picnic, potluck, or dinner party! Freezing instead of boiling brings out flavors lost to the heat, as well as being the only way we've found of keeping the fresh summer cilantro flavor into the winter. 

Course: Appetizer
Keyword: freezer pickles
Servings: 4 Pints
Ingredients
  • 2 lbs. cucumbers thinly sliced
  • 2 cups sweet onions thinly sliced
  • 3 tbs pickling salt Kosher salt works and tastes great
  • 1 whole red bell pepper chopped
  • 1 tsp ground cumin freshly ground has better flavor
  • 1/4 cup fresh cilantro chopped - homegrown tastes best
  • 1 1/2 cups sugar
  • 1 1/2 cups cider vinegar
Instructions
  1. Wash and thinly slice cucumbers - do not peel, then thinly slice onions. There should be about 7 cups.

  2. Toss cucumbers and onions in a large bowl with salt, mixing well to evenly distribute the salt. Let stand at room temperature for 2 - 3 hours, then drain excess liquid but do not rinse.

  3. Combine remaining ingredients in a separate bowl, mix well and pour over vegetables, stirring well to mix. Refrigerate for 8 - 10 hours or overnight. 

  4. Pack the vegetables and brine in freezer-proof rigid containers and freeze. We like to use pint jars - they are the perfect size for a picnic or family BBQ. Make sure to leave about 1 inch of headspace to allow for expansion so the jars don't break. 

    When packing the vegetables, make sure the brine completely covers them to prevent freezer burn and ensure the best flavors. 

  5. Freeze for a minimum of 2 weeks to allow the flavors to mature and mingle. 

    To serve, thaw overnight in the refrigerator and enjoy! 

    Be prepared to make an immediate, larger second batch!

Recipe Notes

Use a Cuisinart or other kitchen appliance to slice the vegetables and reduce your prep time to a few minutes! 

We've successfully used this recipe with large radishes, cucumbers of all kinds, and yellow beets. Almost any sturdy vegetable - root or otherwise - will pickle beautifully with this recipe. 

Making Cilantro Freezer Pickles

Thinly slice your vegetables – we use a Cuisinart or other type of kitchen slicing appliance – making this a 2-minute process! The photos are of two different recipes we did – one with white onions and the other with red ones.

Sliced Cilantro Freezer Pickles

Sliced Cilantro Freezer Pickles


Once your vegetables are sliced, brine them by adding salt to the vegetables and stirring them thoroughly to mix the salt in well. Let sit for a couple of hours – the exact time isn’t important, so don’t worry if it’s 3 hours, they will taste great! Strain out excess moisture from the vegetables, but don’t rinse – you need the salt for flavor and the pickling process.

Next, start the pickling process by mixing the herbs, sugar, and vinegar in a separate bowl, then pour over the brined vegetables. This starts the pickling process.

Pickling Cilantro Freezer Pickles

Pickling Cilantro Freezer Pickles


After refrigerating them overnight, pack your newly-pickled vegetables into jars or freezer-proof containers. We use pint-sized Mason jars, which are just enough for a family picnic or supper or a BBQ. If there is a larger crowd, we’ll take two.

Packed Cilantro Freezer Pickles

Packed Cilantro Freezer Pickles


Leave enough room for the pickles to expand without breaking the jars – about 1 inch, and make sure to cover the vegetables with brine for the best flavor and to prevent freezer burn.

Let the flavors mature and mingle for at least 2 weeks before serving. Thaw in the refrigerator overnight and serve cold.

Rosa Bianca Eggplant

I’ve never liked eggplant. The taste was bitter but past that, remarkably bland with a similar texture. Not that exciting.

So I decided to grow some this year.  This is something I recommend against to my customers- “Grow what you like to eat”  is what I advise.

My reasons for growing something that I don’t like are simple;  I also don’t like supermarket tomatoes, yet  love the ones that I grow.  I wanted to try one eggplant to see if it was different than what I had tasted before. It’s the supermarket vs. homegrown argument on a different level.  Supermarket tomatoes are merely tasteless, whereas eggplant is unpleasant to me.

The first eggplant of the season was ready yesterday. A medium gorgeously purple beauty, surprisingly light in weight. I pulled the cookbooks out to see what made sense to try that would showcase the flavor of the eggplant and didn’t require the oven on for an hour, or at all. Marcella Hazan came to the rescue once again. She is an incredible chef and writer of the lesser known Italian cooking that most of us have never experienced. You  get the recipe, and the reasons for the actions taken in the cooking and why to not shortcut the steps. Flavors are described in detail and reasons behind the techniques are given, something I’ve rarely seen. The stories behind each recipe are compelling as well, something I love from the heirloom seeds.

The recipe I tried is Eggplant Sauce with Bell Pepper, Tomato and Basil. I’ll give it to you at the end. The freshly sliced eggplant was not bitter, but had a slightly sweet flavor that compounded the smell of the fresh eggplant. I salted it according to the directions, which made it sweeter. I chose this recipe as it used more fresh ingredients from our garden. I’ve got some wonderfulGenovese Basil that has an incredible aroma and holds up in cooking. I don’t have the bell peppers or tomatoes yet, so will try it again when another eggplant is ripe.

The overall character is complex and slightly spicy with many individual flavors that come through, yet is in harmony as no single flavor overpowers another. Italian flavor at it’s finest! The flavors are not overbearing, as most common American Italian cooking has become, but are lively and pleasing. This is a lighter dish, perfect for summer cooking, and can be done outside on a grill if one is experienced at outdoor cooking, not just barbecuing. This is a dish I would prep ahead of time to do trail side at the end of a long day exploring the backcountry of Arizona or the Southwest. It’s not hard, but attention and patience are needed to bring the flavors out! The small investment of time is well worth it.

Here’s the recipe:

1 1/2 lbs eggplant

Salt

1 ripe bell pepper (yellow is best, but make sure it’s ripe)

3 Tbs extra virgin olive oil

3 garlic cloves sliced very thin

1/8 Tsp crushed red pepper or to taste

2 Tbs Italian flat leaf parsley- whole leaves, not chopped

1/3 Cup thinly sliced onion

1 Cup ripe fresh tomatoes, peeled and chopped. Canned Italian tomatoes will work.

1/3 Cup dry white wine

6 small basil leaves or 4 large ones, torn not cut into small pieces

6 green olives in brine, quartered

1 1/2 Tbs capers

1 Lb box dry pasta, penne is good choice

Slice eggplant in half. If seeds are dark, or if there a lot of seeds, scoop seeds out. Cut eggplant into 1 inch squares, put into colander rinse in cold water. Salt and let set for 45 minutes. This brings out the bitter liquid if there is any. Rinse again afterwards.

Split bell pepper in half, scoop out seeds and pith, then peel skin with swivel peeler. This removes the bitterness in the skin once cooked. Cut into thin strips.

Warm 3 Tbs olive oil in 10 inch skillet, then add garlic and chili pepper. Increase heat to medium, no more. Stir often just until garlic scent rises, no more.

Add whole parsley leaves. Careful, they will pop and sputter for a couple of seconds. Stir a couple of times, add onion and turn heat to low. Cook slowly until onion is soft. This increases the flavor by cooking slowly, and the garlic flavor is not entirely lost.

Add pepper strips, some salt and cook until pepper starts to be tender. Stir occasionally. You should have some liquid starting to build in the bottom of the pan.

Add eggplant, tomatoes, wine, basil, olives and capers. Stir several times to mix well. Slowly simmer with lid on for 40 minutes, watching liquid level. It should slowly decrease, and have almost no liquid at the end. Add a small amount if it looks dry. Stir occasionally during the simmer. Crack lid if too much liquid is remaining about 15 minutes before the end, or when you put the pasta water on.

Time cooking the pasta so its done just before the sauce, about 7-10 minutes. Toss pasta with sauce,  adding 1 more Tbs olive oil and serve hot. Cheese is really not needed, but you can add a small amount of pecorino if you want. Don’t drown the delicate sauce in cheese!

Enjoy and let me know what you think! Please leave a comment!

 Restaurant-Style Zuppa Toscana

Based on a popular restaurant starter soup.

INGREDIENTS

  • 1 (16 ounce) package smoked sausage
  • 2 potatoes, cut into 1/4-inch slices
  • 3/4 cup chopped onion
  • 6 slices bacon
  • 1 1/2 teaspoons minced garlic
  • 2 cups kale – washed, dried, and shredded
  • 2 tablespoons chicken soup base
  • 1 quart water
  • 1/3 cup heavy whipping cream

DIRECTIONS

  1. Preheat oven to 300 degrees F (150 degrees C).
  2. Place sausage links onto a sheet pan and bake for 25 minutes, or until
    done. Cut links in half lengthwise, then cut at an angle into 1/2-inch
    slices.
  3. Place onions and bacon slices in a large saucepan and cook over medium
    heat until onions are almost clear. Remove bacon and crumble. Set
    aside. Note- You can saute the kale at this step for extra richness in its flavor!
  4. Add garlic to the onions and cook an additional 1 minute. Add chicken
    soup base, water, and potatoes, simmer 15 minutes. Note- This is where I prefer to add my kale! Russian kale will take the simmer without losing its texture and flavor.
  5. Add crumbled bacon, sausage, kale, and cream. Simmer 4 minutes and serve.

Stir-Fried Kale and Broccoli Florets

Good for an unusual side dish. Can be used for a light fall lunch or dinner starter.

INGREDIENTS

  • 1/8 cup extra virgin olive oil
  • 7 cloves garlic, sliced
  • 1 chile pepper, chopped (optional)
  • 1 head fresh broccoli, chopped
  • 1 bunch kale, stems removed and chopped
  • 1/4 cup sun-dried tomatoes, cut in thin strips
  • juice of 2 limes
  • salt

DIRECTIONS

  1. Heat olive oil in a large wok or skillet over high heat. Stir in garlic and chile pepper; cook for 2 minutes, stirring frequently. Stir in broccoli; cook 1 minute. Add kale, and cook 2 minutes, stirring frequently. Stir in sun-dried tomatoes. Pour in lime juice, and season with salt to taste. Toss well.

Pork Tenderloin with Steamed Kale

Amazing showcase of pork and kale. For extra flavor, marinate the tenderloin for a couple of hours, up to overnight.

INGREDIENTS

  • 2 limes, juiced
  • 1 cup olive oil
  • 2 teaspoons dried cilantro
  • 1 teaspoon cracked peppercorns
  • 1 teaspoon garlic salt
  • 1 (1 1/2 pound) pork tenderloin
  • 1 pound kale, stems removed and leaves coarsely chopped

DIRECTIONS

  1. Preheat oven to 350 degrees F (175 degrees C). In a small bowl , whisk olive oil with lime juice. Season with cilantro, garlic salt, and peppercorns. 
  2. Brush the pork tenderloin with three tablespoons of the lime dressing. Wrap in aluminum foil, and place on in a large baking dish. Roast in preheated oven for 30 to 45 minutes, or until a meat thermometer reads 170 degrees.  Note- can be slow grilled on indirect heat on a BBQ if the weather is too hot or you want a smoky flavor!
  3. While the tenderloin is cooking, place kale in a steamer. Cook for 20 minutes, or until tender. You can saute the kale now for a more intense flavor.
  4. Slice the pork tenderloin into 1 1/2 inch thick slices. Serve on top of the kale. Whisk the remaining dressing, and drizzle over pork and kale. Make sure to serve the kale under and on the side of the pork, don’t just use it as a garnish! It adds a depth of flavor to the pork.

There is some starters for what to do with kale. There are a lot of great bean/sausage/kale recipes that will keep you warm this fall and winter. Please let me know what you think,  and share your experiences.

Happy eating!