Papalo Leaf


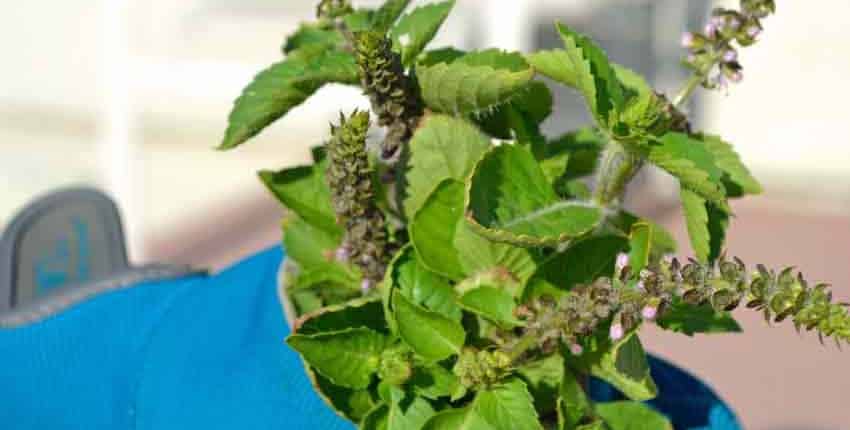
Papalo is a fabulous, but still relatively unknown, ancient Mexican herb you should be growing. A heat-loving alternative to cilantro, its flavors are both bolder and more complex. It has been described by some as somewhere between arugula, cilantro and rue; others say it tastes like a mixture of nasturtium flowers, lime, and cilantro. Younger leaves are milder flavored, gaining pungency and complexity as they mature.

Papalo (PAH-pa-low) is known by many names; Quilquiña, Yerba Porosa, Killi, Papaloquelite and broadleaf in English. It is a member of the informal quelites (key-LEE-tays), the semi-wild greens rich in vitamins and nutrients that grow among the fields in central and South America. These green edible plants grow without having to plant them. They sprout with the first rains or field irrigation, often providing a second or third harvest, costing no additional work but giving food and nutrition.

Other quelites include lamb’s quarters, amaranth, quinoa, purslane, epazote and Mache or corn salad.

Papalo pre-dates the introduction of cilantro to Mexico by several thousand years, which is a very interesting story all by itself. South America is thought to be the ancestral home of papalo.

Cilantro is also known as Chinese parsley and was brought to Mexico in the 1500s by Chinese workers in the Spanish silver mines of southern Mexico and South America. Spain had a huge trade industry with China, exchanging silver from America for china, porcelain and various drugs – opium and hashish among them. They also imported many Chinese workers for the silver mines, as European diseases had decimated the native population which had no immunity. The Chinese workers brought along foods, herbs and spices which were familiar to them, so cilantro came to the Americas.

Papalo is sometimes called “summer cilantro†due to its heat loving character and not bolting and setting seed until the late summer or early fall.

A plant growing in the dirt on a sunny day.

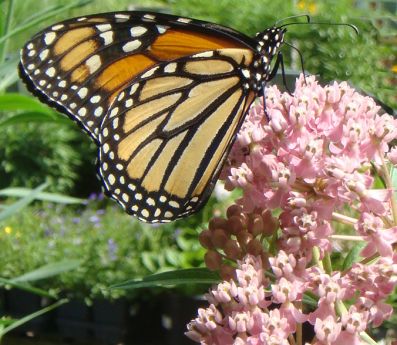
The name Papalo originates with the Nahuatl word for butterfly, and Papaloquelite is said to mean butterfly leaf. The flowers provide nectar to feeding butterflies, while also attracting bees and other pollinators to the garden with their pollen.

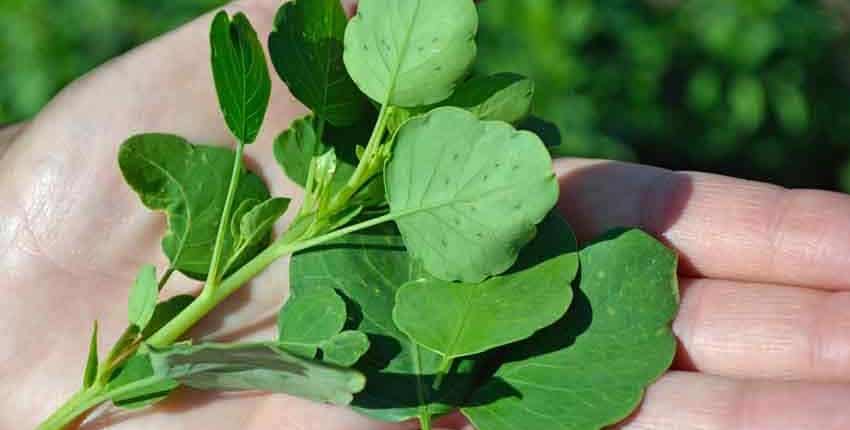
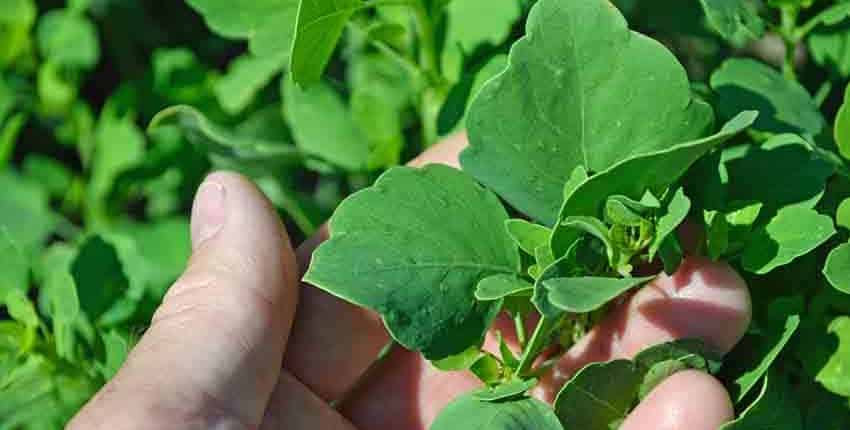
Part of the aroma and flavor is seen above with the oil glands which look like spots on the underside of the leaves. Those glands produce a fragrance which repels insects from eating its leaves.

There are two different leaf shapes grown – a broadleaf and a more narrow leaf, often called poreleaf. We have found the broadleaf variety to be more palatable, quite a bit more pungent than cilantro but quite tasty. When beginning to use papalo, start with 1/4 to 1/3 as much as the normal amount of cilantro. The flavor is much stronger and lasts longer, so a little goes a long way until you’ve gotten used to it. We grow and offer only the broadleaf variety.

When we hear about people complaining of papalo tasting of soap, detergent or having a rank or funky odor, usually they have encountered the poreleaf or narrow leafed variety. It is quite a bit more pungent than the broadleaf type, so usually comes as quite a shock to our palates.

A plant growing in the dirt on a sunny day.

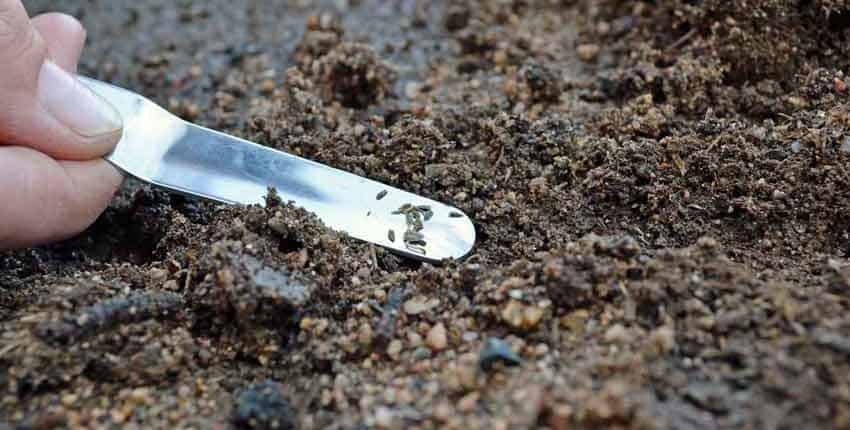
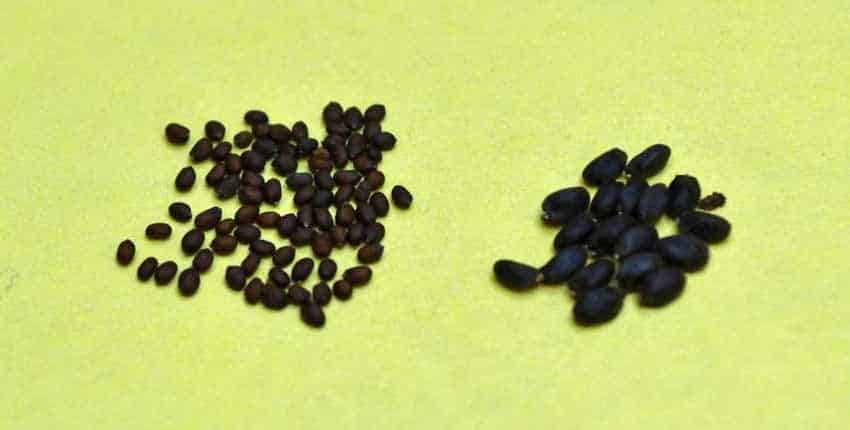
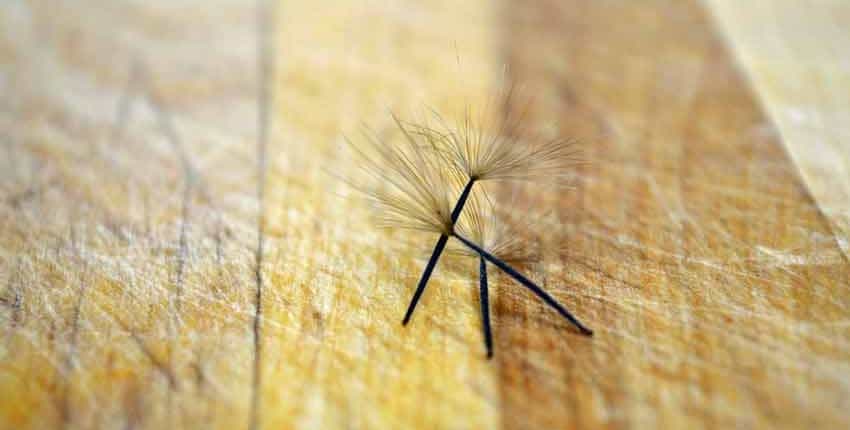
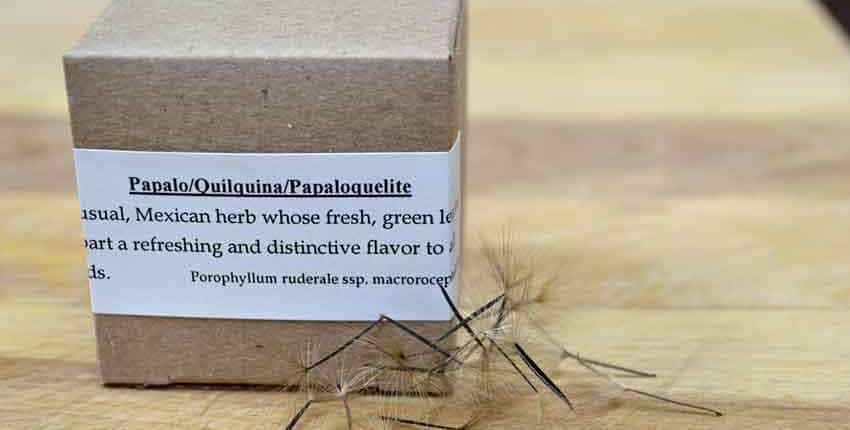
Papalo seeds look much like dandelion seeds, with the stalk and “umbrella†to help carry them on the wind to their new home. Having the umbrella attached is very important to good seed germination, which we will show you in just a bit.

A plant growing in the dirt on a sunny day.

The harvested seed comes from our grower in a big clear plastic trash bag, as it just isn’t possible to harvest and clean the seeds without breaking the umbrellas off. The seeds are almost weightless, so a big bagful that you can hide behind weighs less than a pound.

Cindy has a handful of seed heads, showing how they clump together after maturing. As the seed matures, the sheath or covering that protects the young seeds peels back, exposing these clusters to the wind, which will carry them away as they dry.

A plant growing in the dirt on a sunny day.

A closer look at the clump of seeds. We haven’t found a better way to separate them without damaging them, so we usually pack them much like this – by the ever so gentle pinch! There are probably 30+ seeds in this photo.

A plant growing in the dirt on a sunny day.

Papalo is often described as having “very low and variable†germination. This is true if the seed is packed in a standard seed packet, which breaks off the umbrella from the stem. From experimenting, we have found germination will drop to around 10% if the seed is broken, but will be as high as 90% or better if the seed is intact.

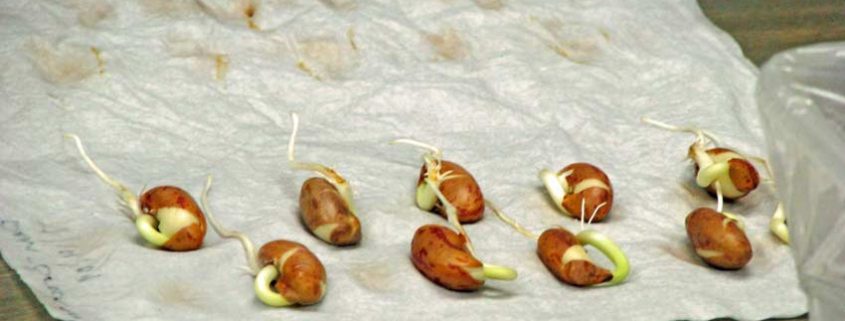
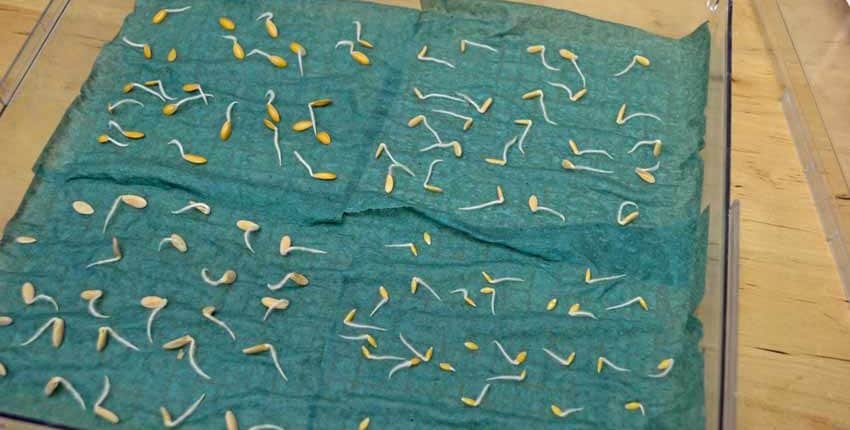
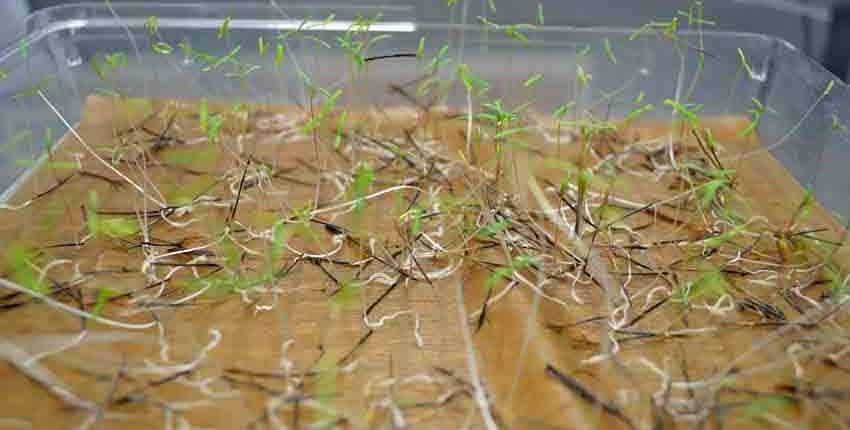
This photo of papalo in our germination tray shows the proof. Using seed germination paper to keep the seed damp, there was 100% germination in less than 72 hours. In fact, the seedlings hit the lid of the germination chamber, trying to get to the light.

A plant growing in the dirt on a sunny day.

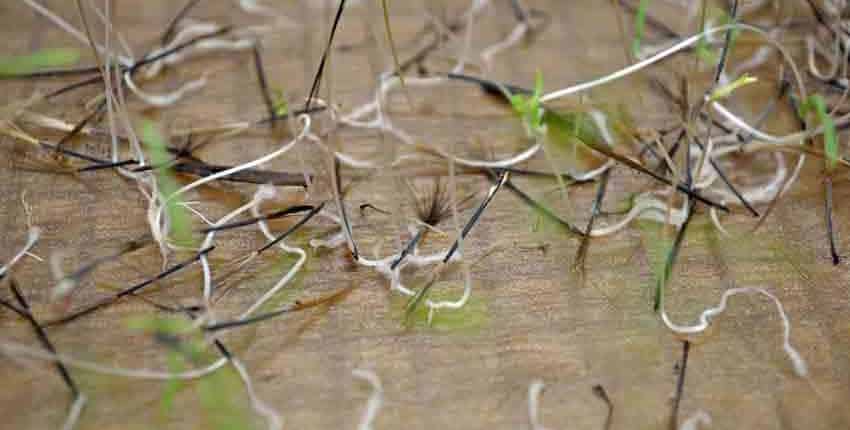
A close-up shows how the stem emerges from the bottom of the stalk, immediately turning vertical in growth, searching for light.

A plant growing in the dirt on a sunny day.

Seen in Cindy’s hand it is easier to identify the parts of the seed and where the seedling emerges from, as well as how tall they can grow in a short time.

A plant growing in the dirt on a sunny day.

From our germination experiments, we have developed this simple but highly effective packing box. It keeps the seeds intact for planting as well as protecting them from being broken during shipping.

A plant growing in the dirt on a sunny day.

Young seedlings don’t have the oil glands developed yet, so they are milder in flavor and aroma than when they begin to mature. This planting is a bit thick, but it is sometimes difficult to separate the seeds without damage. In this case, just plant them thick and don’t worry about it. If desired, you can clip the unwanted or unneeded seedlings to thin them. Make sure not to pull them out, as this really disturbs the roots of the adjacent plants and seriously disrupts their growth.

A plant growing in the dirt on a sunny day.

Even in a very harsh spring with sustained high temperatures and punishing winds, the young papalo grows strongly. The weather effects can be seen in the drying of the leaf margins, as well as the scruffy and dry leaf appearance. The holes are not from a bug chewing on the leaves, but from the oil vaporizing from the porous oil glands. The lighter colored spots on the leaves are additional oil glands.

A plant growing in the dirt on a sunny day.

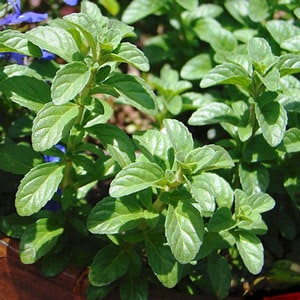
A fully mature papalo leaf in good growing conditions looks like this – a moderately deep, rich green with oil glands distributed across each leaf. The leaves have a medium thickness to them with a fairly substantial feel. They don’t feel delicate like some vegetable leaves, but aren’t thick and succulent either.

Touching them will release some of the aromatic oils, so you should be able to immediately experience their singularly unique aroma, even from an arm’s length away. This is the same with organically grown or home-grown cilantro – the aroma will be much more pronounced.

A plant growing in the dirt on a sunny day.

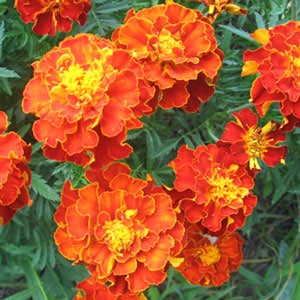
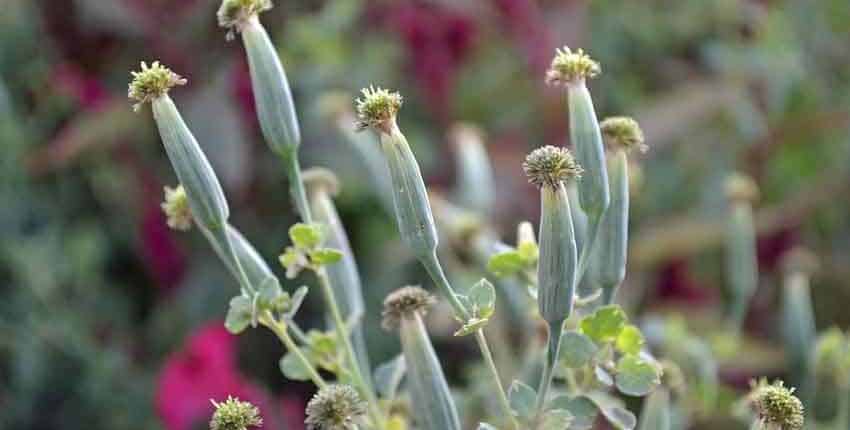
The seed heads start out looking much like marigold flower heads. After flowering they will set seed and begin the cycle anew. When harvesting seeds to save, make sure to clip the seed head after it has fully matured and begun to dry, but before it is completely dry. Otherwise, you will go out to the garden to collect seed to find it has all blown away!

In October 1999, when Alice Waters, renowned chef of Chez Panisse in Berkeley, California, first tasted one variety of papaloquelite, she was ecstatic, demanding to know why she had never experienced it before. She purchased every seed packet available from the Underwood Gardens booth at the Taste of the Midwest Festival, an annual event sponsored by the American Institute of Wine and Food.

When we met Alice at Slow Food Terra Madre in Turin, Italy in 2012, we mentioned this past connection. She immediately remembered the event and her eyes lit up with discussing the aromatic flavors and how she introduced it to her restaurant patrons.

It’s always used raw and added at the last minute, giving its signature, unique piquant flavor to dishes. It’s used in fish dishes, salsas and guacamole. There is a memorable guacamole that uses cucumbers and papalo for added depth of flavor that we can’t get enough of. We also really like it in scrambled eggs, fresh salsas and finely diced in a strong flavored salad of spinach, arugula, mustard greens and kale. Devilled eggs take on an entirely new dimension with a couple of leaves finely diced and mixed into the filling. People always try and guess what the mystery seasoning is, and always mistake it for something else.

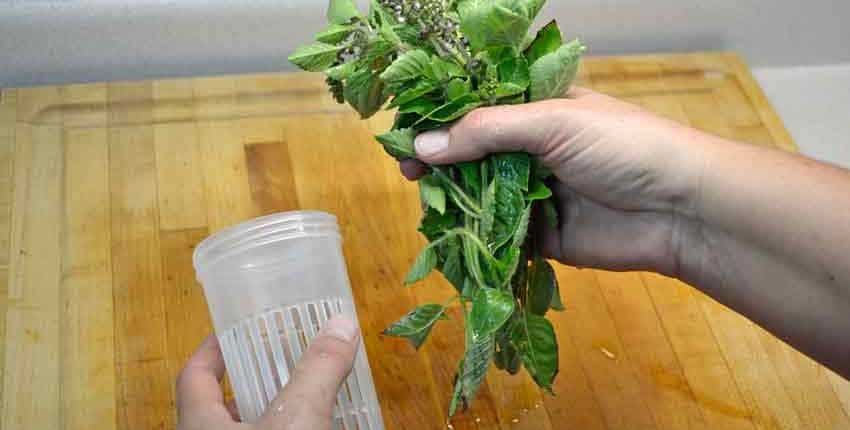
In restaurants in the state of Puebla in Mexico, it’s common to find a sprig of papalo in a glass jar of water on the table, next to the salt, pepper and salsas — ready to be added raw to soups, tacos, tortas or beans. The diners will take off a leaf or two and tear it up finely before sprinkling it over their meal.

Papalo is very easy to grow with a history reaching back thousands of years, so give it a try in your herb garden this season!

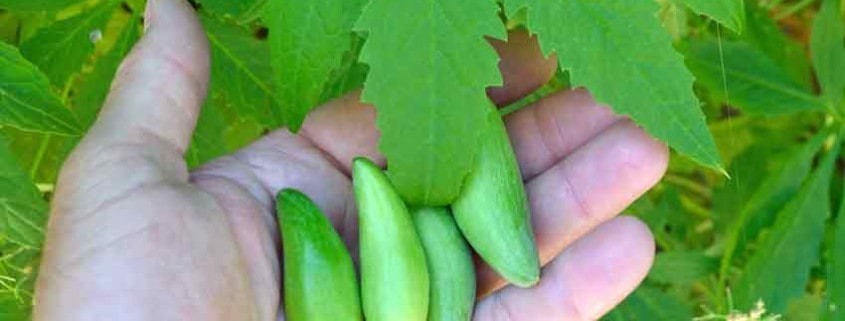
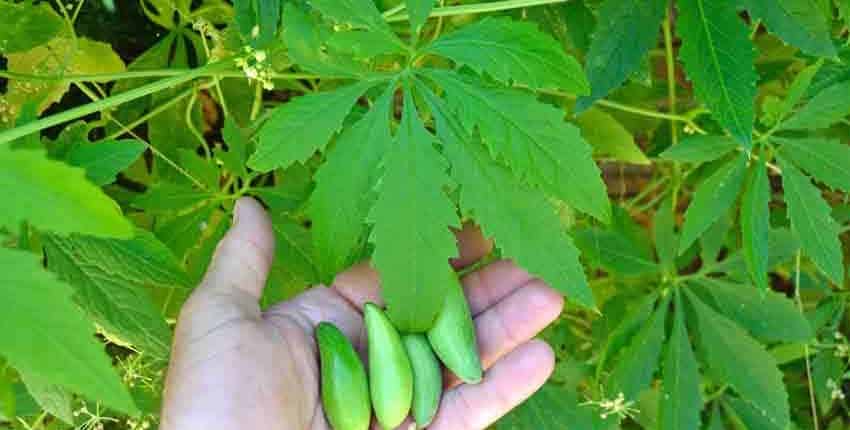
Handfull of Achocha


Achocha or Caihua (pronounced kai-wa) is an unusual and relatively unknown member of the cucurbit or cucumber family with a difference. Although they share family roots with cucumbers, squash, pumpkin, zucchini and melons, they are almost completely immune to many of the diseases and pests that attack the other cucurbits – squash bugs, vine borers, cucumber worms and powdery mildew along with other fungal issues.

Achocha are hugely prolific both in leafy shade growth and fruit, making them a dual purpose plant for gardeners looking for a green shade or windbreak which gives a good supply of tasty food.

Originally domesticated in the Andes Mountains, the seeds travelled by trade from modern day Columbia in the north to Bolivia in the south. This ancient crop has been featured on pre-historic pottery and art and is discussed in the book “Lost Crops of the Incas†by the National Research Council. Today, they are widely grown all across Central and South America, as well as in many other parts of the world. For example, achocha is very popular in northern India, Nepal and Bhutan.

A plant growing in the dirt on a sunny day.

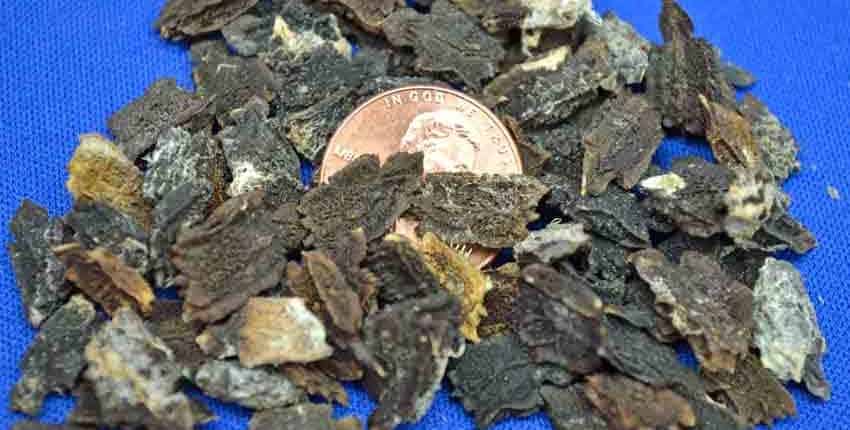
The seeds are very intriguing, looking much like flecks of bark or burnt chunks of a rough plant material. The color ranges from a medium brown to an almost black. Each mature fruit will have several seeds in it.

A plant growing in the dirt on a sunny day.

A close-up of the seeds shows how very different they appear from almost all other vegetables, and certainly other cucurbit family seeds.

A plant growing in the dirt on a sunny day.

Another look at the achocha seed. The majority of them have the little tail or protrusion seen here.

A plant growing in the dirt on a sunny day.

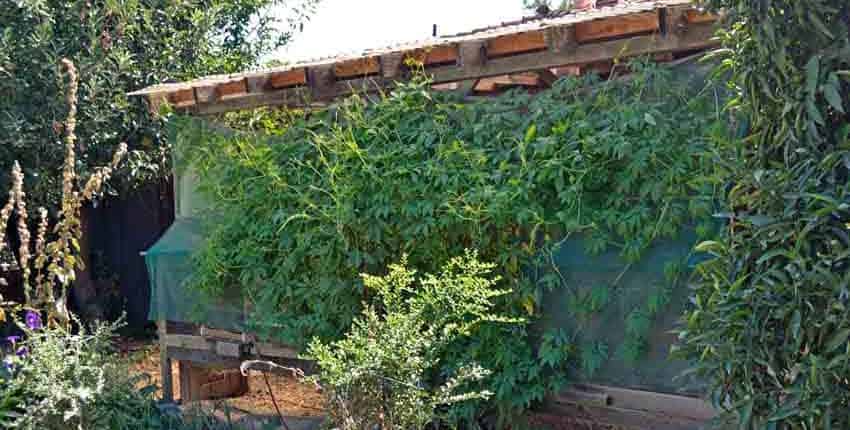
Achocha puts on vigorous vine growth with lots of leaves which provide a good shade for other crops. In areas with a long hot season, establishing them early will give better growth as they slow down during the hottest times. Giving them a bit of afternoon shade and protection helps them along, as they are seen growing up through a patch of Butter Daisies and climbing up a trellis.

This is a western facing wall, and they had a bit of a challenge in becoming well established with the afternoon heat. They had morning shade, but were exposed to full sun and heat during the hottest part of the day until almost sundown.

A plant growing in the dirt on a sunny day.

On the opposite side of the wide walkway, they are seen much more established and prolific. This is the east facing wall that is shaded from early afternoon, giving the plants enough protection from high heat and constant sun exposure to really take off.

This was the most productive planting, giving handfuls of fruit each harvest.

A plant growing in the dirt on a sunny day.

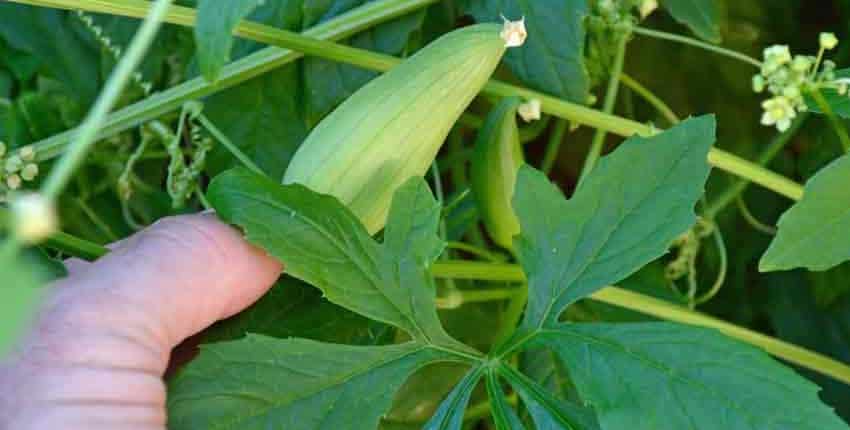
Cindy is holding a young fruit with the blossom cap still attached. At this stage the bark-like seeds are still fairly soft and immature. The fruit will not have completely hollowed out yet, but it is very edible and mild in flavor with a soft texture.

Once the plants begin setting fruit, they should be harvested regularly to encourage continued production. As they begin to produce, you will have handfuls of the fruit to work with!

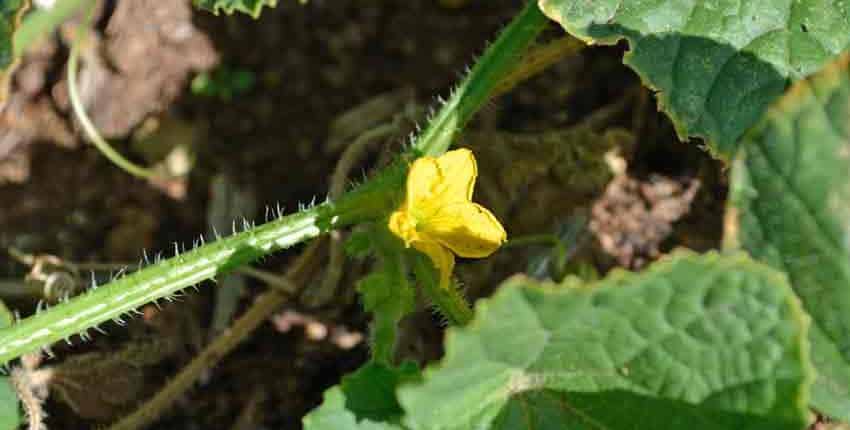
The tiny, off-white flowers can be seen in the background. It is best to plant at least two plants so they can pollinate each other. The flowers will attract a number of smaller insects to help with pollination, among them the beneficial serphid fly which feasts on aphids, thrips and other soft bodied destructive insect pests.

A plant growing in the dirt on a sunny day.

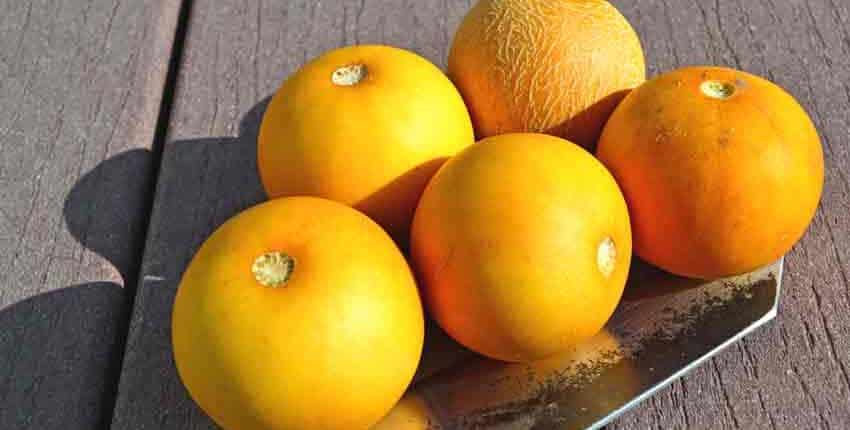
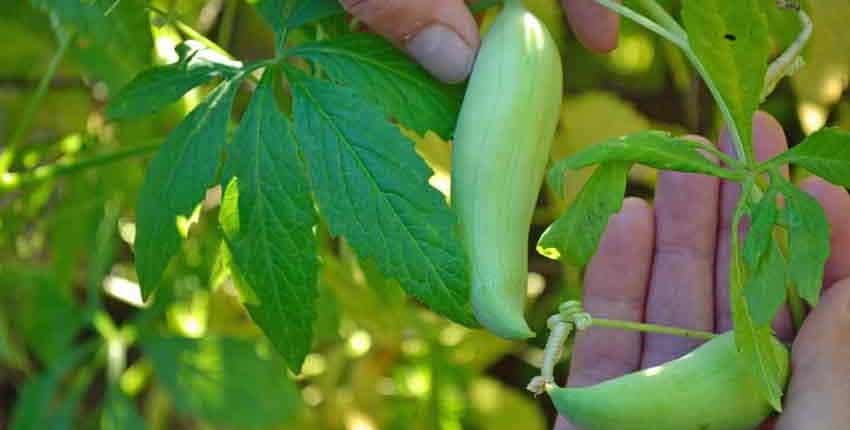
Another view of the size, shape and color of the achocha fruits, along with the foliage. There are a few different varieties of achocha – some with soft spines and a fatter fruit. Ours are more slender and smooth skinned with no soft spines.

A plant growing in the dirt on a sunny day.

The foliage will sometime raise eyebrows and cause questions, as its long toothy leaves somewhat resemble another controversial plant. There is no relation, but it is a conversation starter!

One handful of fruit leads to discovering another, then another as well…

A plant growing in the dirt on a sunny day.

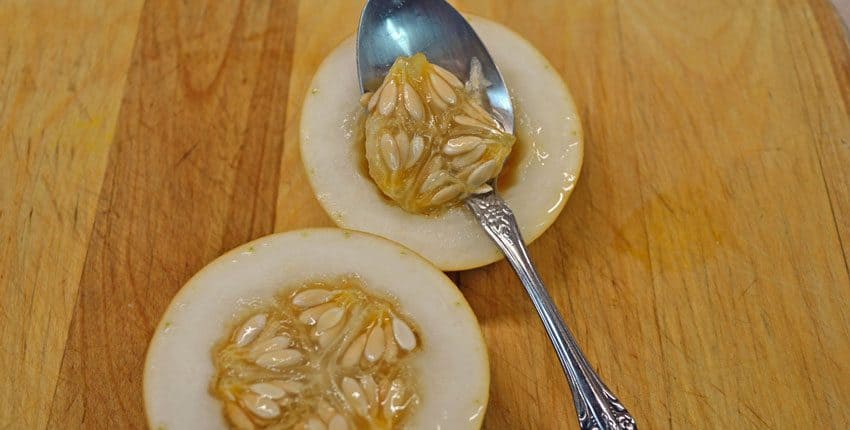
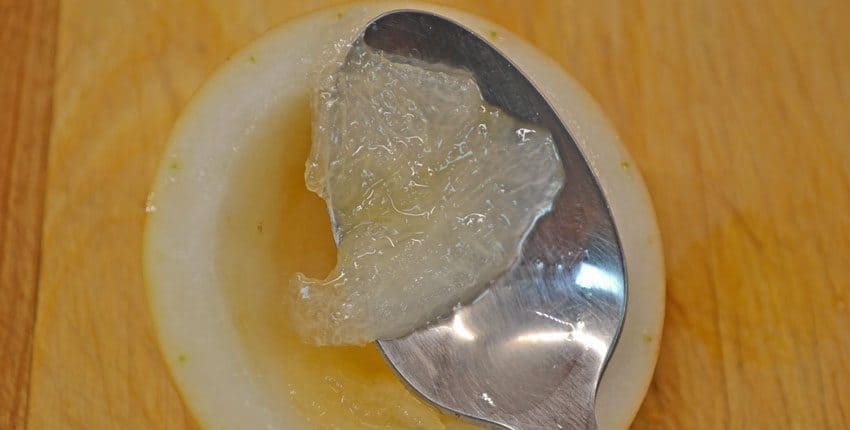
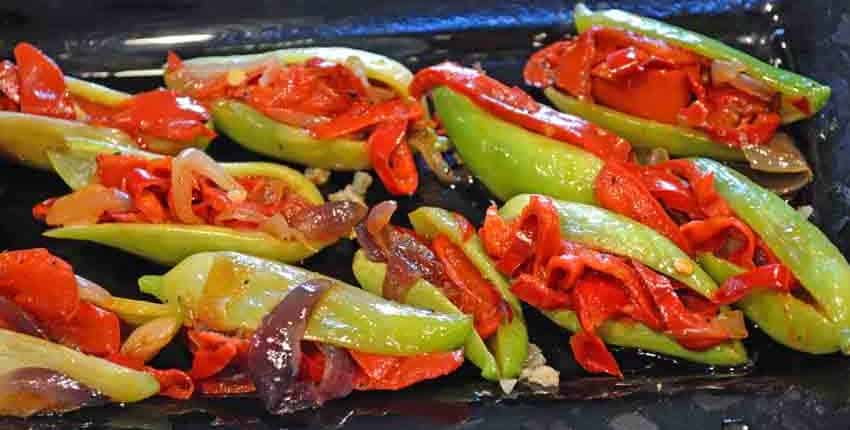
You’ll see why they have earned the name of “stuffing cucumber†when you slice them open and scoop out the seeds. There are enough recipes using them to fill a thick cookbook, but an easy and delicious starting point is to simply stuff them with sautéed sweet peppers and onions after slicing them open and just warming them up on the griddle.

Very colorful, unique and eye-catching along with being delicious, they will be the center point of the table.

In Central and South America the fruits are eaten either raw or cooked after removal of the seeds. They are also prepared as stuffed peppers; stuffed with meat, fish or cheese and then baked or fresh.

Kids often love to pick and eat them in the garden, and they make an excellent addition to salads. The tender shoots, tendrils and young vines are edible and eaten raw or very lightly cooked.

Growing Bed Moved


A growing bed can be made from many materials, but when you factor in the ability to make a growing bed from recycled components, then the opportunities become almost limitless. It makes sense in so many ways to make your raised beds from an already-used materials. You will often save a significant amount of money while contributing less to the growing landfills. In addition, you reduce the amount of raw resources used to make new building materials. Often you will find your options are much broader when looking at recycled stock, as the solution can more easily present itself when your mind is more open and relaxed, without a fixed design idea.

This is exactly what led to our finding and choosing this particular metal from our local salvage yard. We know we needed a structurally sound, ecologically friendly and long lasting substance for our raised beds in our garden. The pricing on new lumber which could be in contact with soil for long periods of time was not realistic for the amount of beds we needed to make. One by one, every other reasonably available construction material and method fell out as being much too costly, much too labor intensive or not suitable for our climate.

All of this led us to our local salvage yard. When we let the person know what we were looking to do, he immediately pointed us in the direction of some large-scale roofing they had recently recovered. After looking at a couple of different options, we came across these 3 foot wide and 20 foot long sections of really heavy galvanized steel with most of their avocado green paint still attached. They were heavy enough that it was hard to turn one section over to look at the other side.

When we turned a smaller section over and saw how well it dove-tailed into the long section, we knew we had a custom-made solution to our raised beds. All at a price that was pennies on the dollar of other solutions we had looked at, with a much longer lifespan as a bonus.

We have now used these as raised beds in our garden for almost a decade, with no problems. We recently moved the two smaller beds in our greenhouse and discovered photos of when we made the beds initially and wanted to share the process with you.

Please use this as a guiding hand, suggesting what can be done; don’t go out and expect to find this exact material waiting for you. If you go with an open mind, you just might be surprised at just how well what you find works in your particular garden!

A plant growing in the dirt on a sunny day.

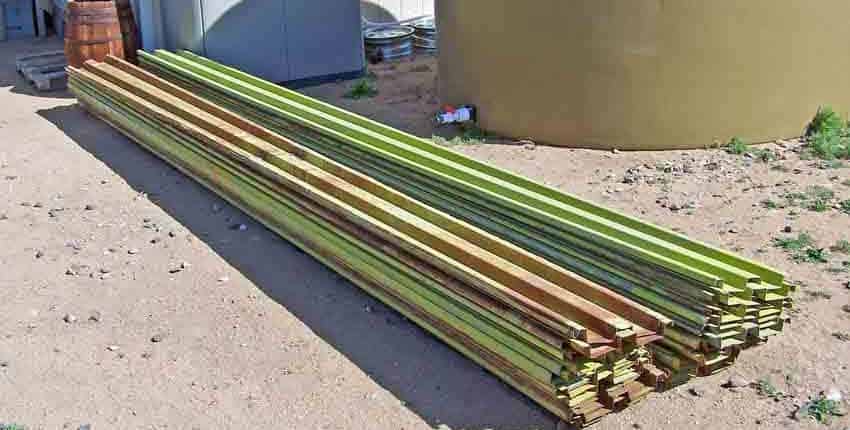
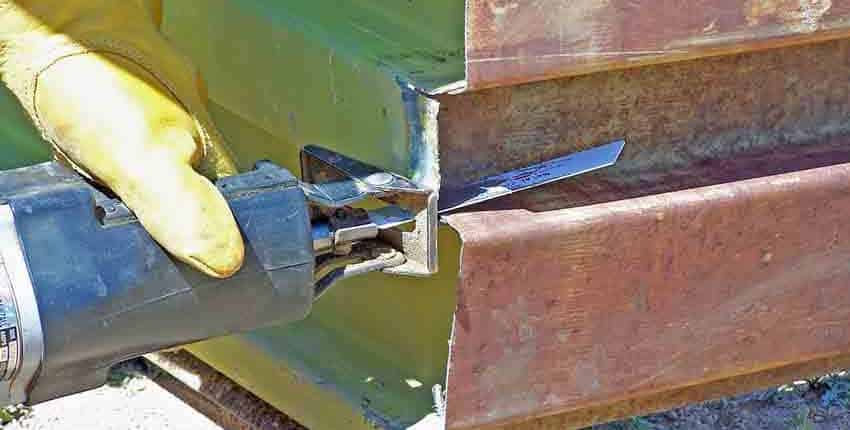
The project started out with our finding some really heavy duty galvanized steel corrugated roofing at our local salvage yard. We then rented an electric nibbler tool to split them lengthwise, as they were too wide or deep to use by themselves.

This is the pile after getting it home, splitting it on the flatbed trailer and then unloading them. A full day’s work!

A plant growing in the dirt on a sunny day.

The unusually large corrugations worked perfectly for us, as we flipped the ends over so they would mate with the sides, creating interlocking tabs. The material is heavy enough for us to just screw together, without needing extra supporting material.

A plant growing in the dirt on a sunny day.

The outside view shows the middle tab already cut, bent over and screwed together. These are strong enough to stand on the top of the sides, once the box is constructed!

A plant growing in the dirt on a sunny day.

Using a Sawzall – an electric reciprocating saw – the tabs are cut. There are top and bottom screws in addition to the middle ones.

A plant growing in the dirt on a sunny day.

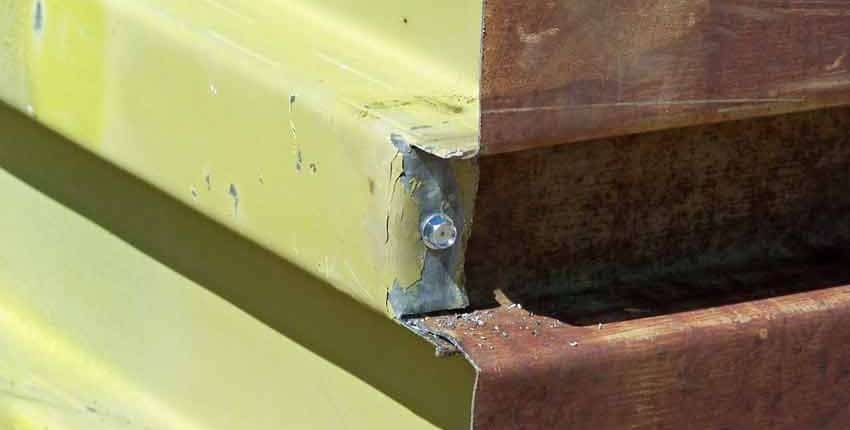
After cutting, they are bent over into the channel to be screwed together, making a very strong joint or connection.

A plant growing in the dirt on a sunny day.

A close-up look at the finished middle tab. We used self-tapping screws to eliminate the need to drill a starter hole.

A plant growing in the dirt on a sunny day.

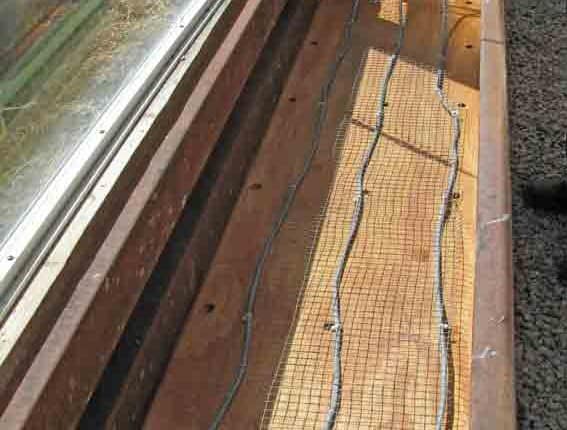
Another feature of the unique corrugations is the channel in the bottom of the side panels which perfectly fits a ¾ inch sheet of marine grade plywood that had been previously waterproofed and drainage holes drilled. After installing the plywood and securing it into the channels, we added a heat cable and hardware cloth on top to protect it from damage from gardening tools. The heating cable is desigened and made specifically for this use and is waterproof with an internal thermostat which shuts off at 70°F. 

You can see the channels in the steel in the second and third photos from the top.

A plant growing in the dirt on a sunny day.

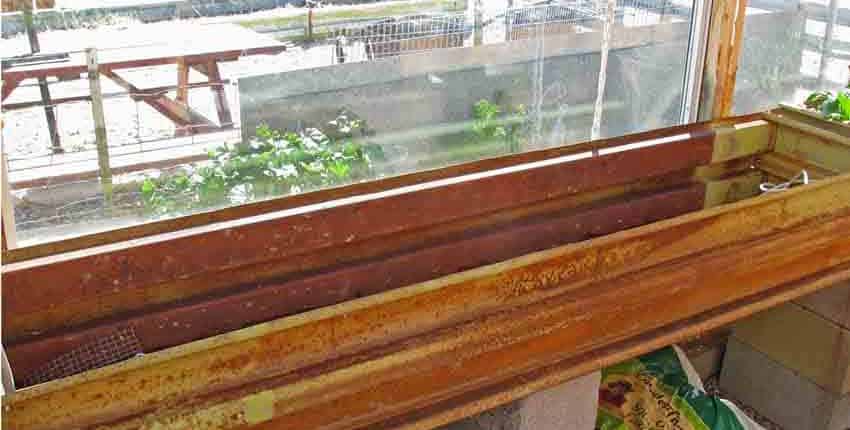
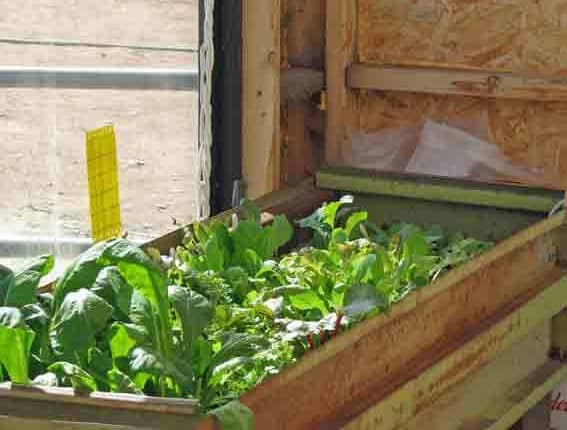
For the first few years, we used the bottom heated growing bed in our greenhouse. We made two of them and grew cool season salad greens during the fall, through the winter and into the following spring in the unheated greenhouse.

We used overstock cinder blocks from the local block maker to support the beds.

A plant growing in the dirt on a sunny day.

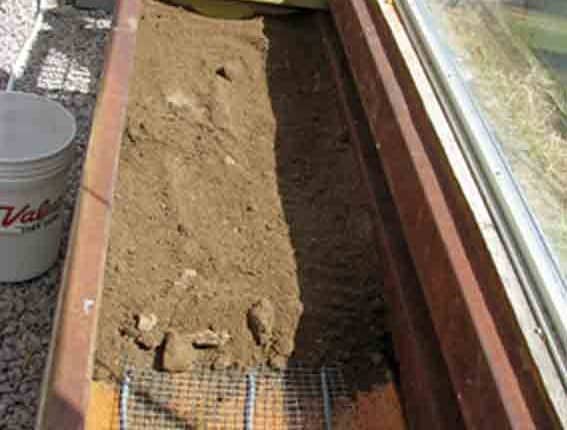
After installing the beds on the cinder blocks, we put in a bottom layer of sand about two inches deep. The sand keeps the heating cable out of contact with decomposing soil and provides a better heat transfer to the soil on top when the moisture seeps down.

A plant growing in the dirt on a sunny day.

Both growing beds were very successful in growing lots of greens throughout the winter. We often found we couldn’t keep up with all of the greens from just one bed!

A plant growing in the dirt on a sunny day.

The greenhouse is being updated and changed a bit to a grow room, with a solid roof as it gets way too hot in the spring and summer to grow anything, so the growing beds needed to be moved to be more useful and functional.

We experimented with a very simple container garden just off of our back deck last year – with great success. It was very close and convenient for fresh herbs and often used fresh greens – just a step out the back door! The containers were all recycled plastic – from old horse water tubs to industrial food shipping barrels cut in half. They were simply put on top of a base of cinder blocks three high for less bending and ease of gardening. Everything was arranged in a “U†shape, with access to standing on all sides.

They worked very well, so we expanded the container gardening space with adding the two growing beds on each long side of the “Uâ€.

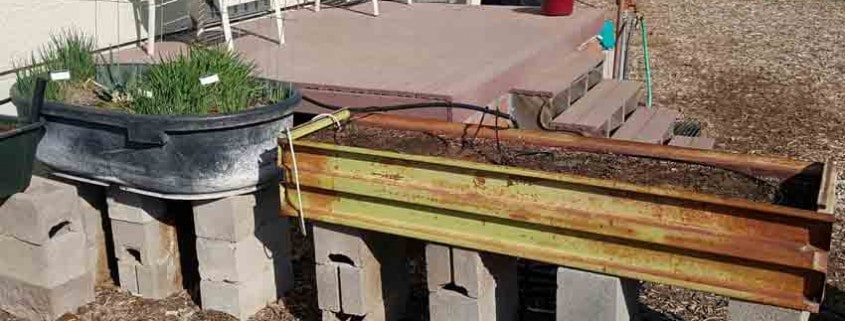
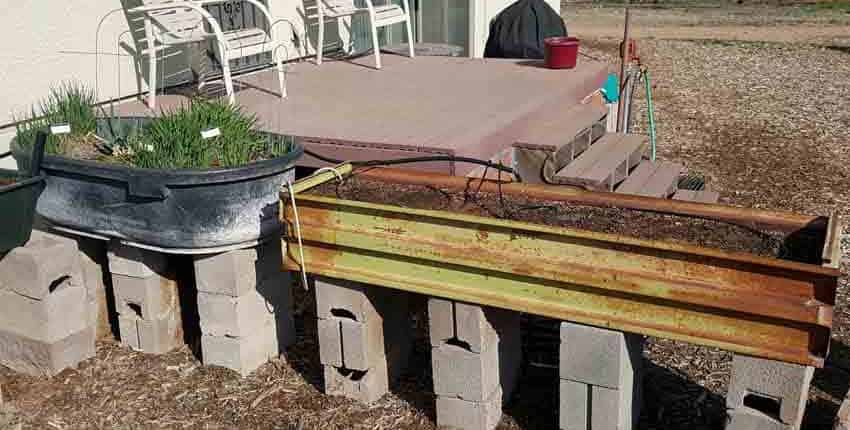
The slightly shorter growing bed is next to an old 100 gallon horse water tub, containing garlic chives and I’itoi onions, both acting as perennials in our climate. This photo is from the very beginning of March, after a cold and wet winter that turned warm in early spring.

A plant growing in the dirt on a sunny day.

Here’s a look at the updated container garden, just after moving the second growing bed. The two large plastic containers in the foreground were what we used last season and were moved to make room for the larger growing bed.

Cucumber Seedling Germination


Seed germination is affected by several factors – moisture, temperature, light, soil or seed starting media, time, observation and last but not least patience. We have covered most of these elements in “Starting Seeds at Home – a Deeper Lookâ€, “Seed Starting Media for the Home Gardener†and “Are Seed Starting Mixes Worth Your Money?† What we haven’t covered are time, observation and patience.

Recently we wrote an article on seed starting mixes, linked above, and did a small experiment to see how they compared to each other in germination of a single seed of the same variety in the same conditions. What we learned is interesting, but also taught us some things we want to share with you.

Two of the seed starting mixes had very good seed germination in about the same amount of time, while one did not. At the same time, a different variety of seed was planted in an adjoining tray with the same temperatures and very similar moisture and the seed germination was very good and consistent, yet was the same seed starting media that did poorly in the single seed test.

This is where time, observation and patience enter into our story.

Seeds need the exact right conditions to germinate. If one or two of the conditions are right, but another is not, the seed will simply remain dormant or in worst case start to decompose. It is only when every condition is right the seed germination occurs.

We gardeners make the mistake of thinking only we can provide those perfect conditions with our heated pads and thermostats, moisture probes, soil thermometers and lights. We forget the seeds left in the garden, untended and unmonitored which germinate in their own time, when the conditions are just right. The same goes for the seeds in the forest, in the ditch by the side of the road or anywhere we aren’t planting them.

A plant growing in the dirt on a sunny day.

This is the initial test – three sets of seed starting mixes with two cups of each mix. We planted the Crystal Apple cucumber as the test seed, since cucumbers have a good strong seed germination and we know the germination percentage as we had just finished doing seed germination tests on the new seed stock.

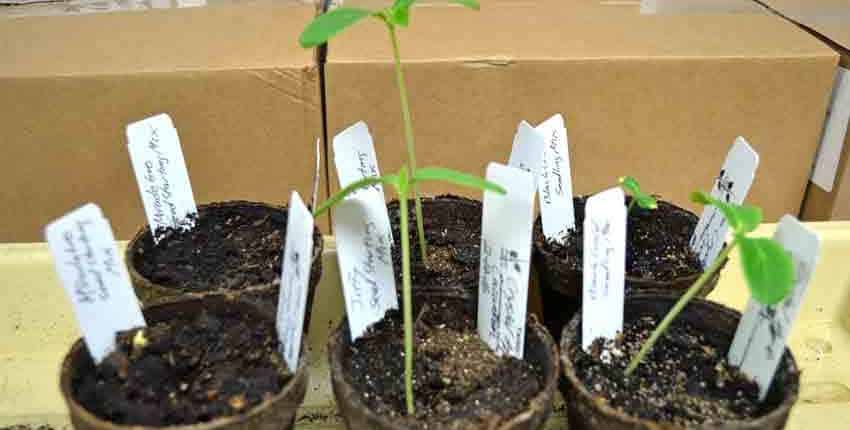
After 14 days, this is what the test looks like. The six seed starting cups have been in the same tray with the same heat from a heat mat underneath and with the same amount of water, as they were watered from the bottom by adding water to the tray.

The Jiffy mix has the tallest seedling, followed by the Black Gold and the Miracle-Gro cups only having one seed just starting to peek itself out.

A plant growing in the dirt on a sunny day.

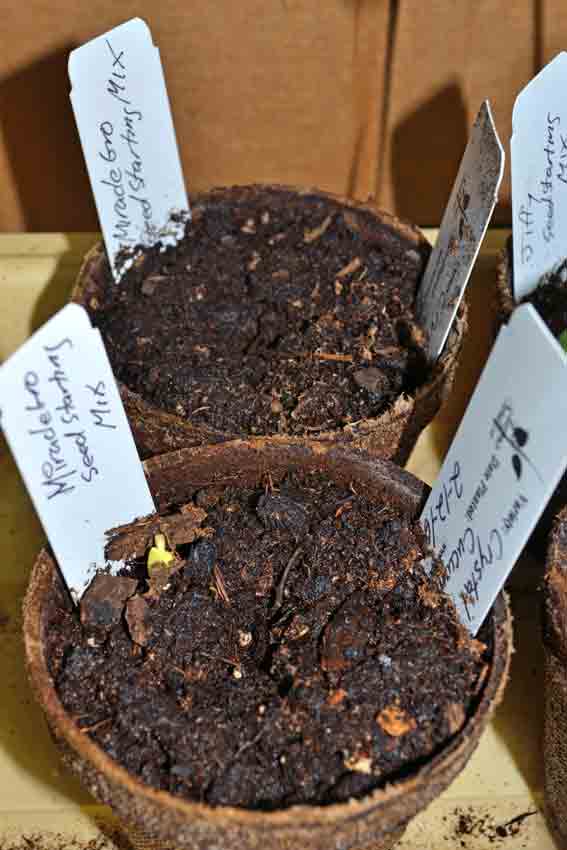
A closer look at the Miracle-Gro cups with the tiny little yellow spot being the seedling just starting to peek out. There is no indication of seed germination from the other cup.

There is also no sign of mold or fungus that might be inhibiting the seed germination, either. 

A plant growing in the dirt on a sunny day.

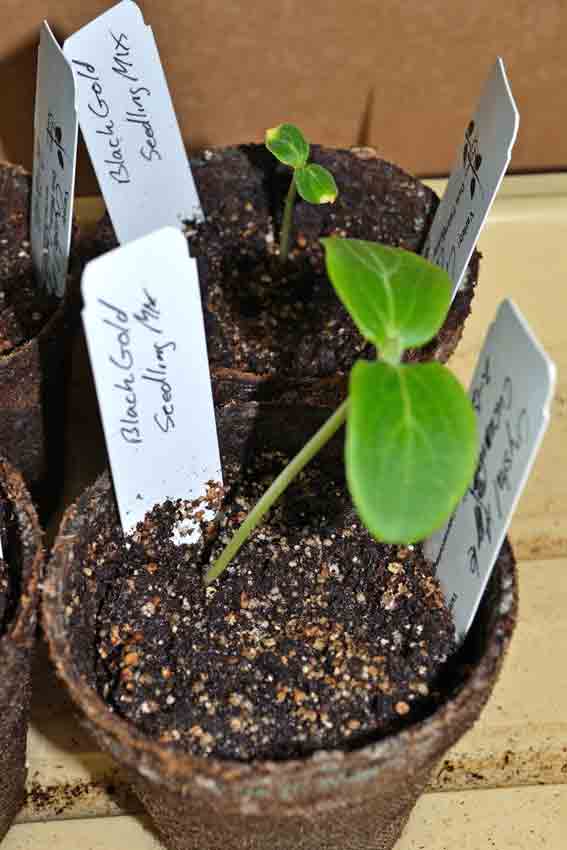
The Black Gold cups have really good seed germination in one cup, with a much delayed seedling in the other. Both look strong and healthy, with the two yellow spots on the smaller seedling in the background from where the seed was holding on after sprouting and emergence.

The soil looks good in this set as well, no mold or fungal issues.

A plant growing in the dirt on a sunny day.

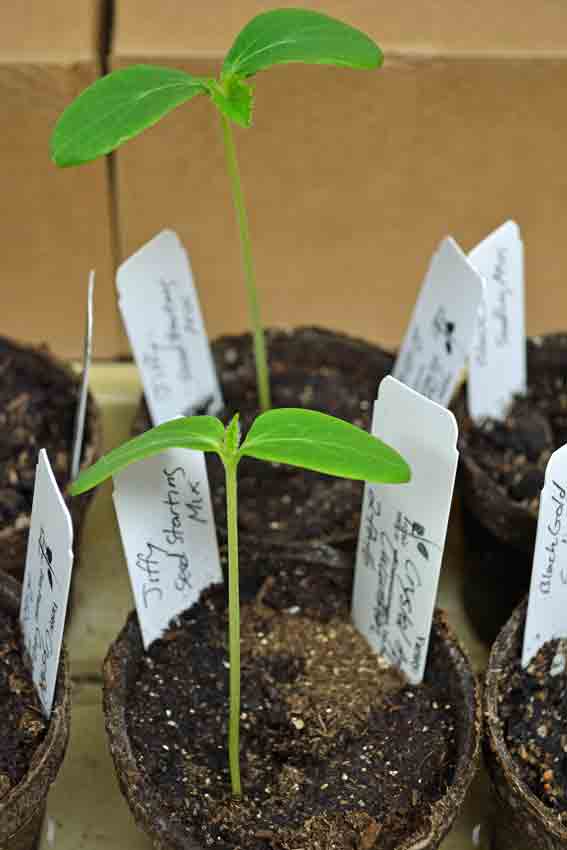
The Jiffy seed starting mix was the clear winner in this test, with both seedlings coming up within a day of each other and both growing strong and at about the same rate. Both have started putting on their first true leaf with the one in the background being just a little bigger.

What we found really interesting was Jiffy was the hardest seed starting mix to work with, being very water repellent, very light and fluffy. It was difficult to get into the cups without spilling it and Cindy had to really water it and work the water in for the first couple of times to get the media moist before planting the seed. The water would pool up and run over the lip of the cup, without any getting into the media. She had to dump the excess water out, add a little bit and carefully mix it in with a small tool to get the media to start to absorb the water. It took a few times of this to get the initial wetting done and after that there were no more problems.  

This soil looks really good as well with no mold or fungal issues.

A plant growing in the dirt on a sunny day.

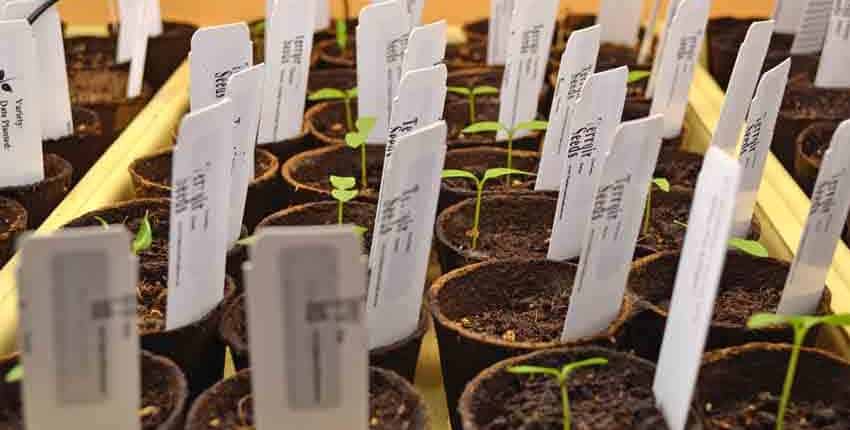
The seedling tray next to the six pot test tray looks like this – it’s a test planting of another new Oaxacan chile we hope to bring to market and this is the grow-out test planting. All of these seeds are planted in Miracle-Gro and as you can see, they are doing well. The seed germination has been good and at an even rate, with almost all of the cups having a seedling at almost exactly the same stage.

If we hadn’t observed the difference in seed germination rates between the two flats, we could easily conclude the Miracle-Gro is a poor choice for starting seeds in. However, the chile seedling tray disproves that.

Cindy had almost given up on seeing any seed germination from the Miracle-Gro in the cucumber seed test, but then three days later the first seedling peeked out.

This is the lesson of patience; so many times we’ve gotten calls or emails from semi-panicked or frustrated gardeners saying their (our) seed hasn’t come up yet. Most of the time, the needed seed germination period hasn’t elapsed yet, so we ask them to wait until the normal germination time has passed, then let us know. Almost without fail, we hear back in a couple of days the seeds have sprouted.

Please realize, just because we had these results with our very small and informal test doesn’t mean you will get the same results. Seed starting mixes and potting soils are formulated differently in different regions across the country, and those ingredients often change from one supplier to the next, depending on the time of year and availability. It is well worth doing a similar test of your own to see what works best for you in your location. Buy a few different bags of seed starting mix and potting soil to see if you have different seed germination rates, then you’ll have a better understanding on how this part affects sprouting. 

Now you’ve seen our experiments and experiences, what are yours? Have you had a similar situation turn out completely different than you expected it to?

Kellog's Potting Soil OMRI


Potting soils come in all shapes and sizes, with most touting some form of “Organic & Natural†on the bag – but are they really certified organic? Do those potting soils really work as advertised and contain healthy, wholesome ingredients to help your precious seedlings get that critical head start they need?

To answer these questions and more, we bought a few bags of potting soils from our local sources, brought them home and opened them up to take a close look at what is there. We looked at the bag and labeling, seeing what is being sold and why, what wording and marketing is being used and if they stood up to closer scrutiny. One of those potting soils we have used for a few years, so we let you know of our past experiences.

Please note – this article is in no way meant to be a comprehensive, exhaustive laboratory research and review of all potting soils available to the average home gardener. There’s just no way for us to do that, as many are only regionally available and the ingredients change from region to region in the bigger brands.

As with our seed starting mixes article, we suspect there are a few companies producing potting soils for different markets with unique branding and bagging for each channel. We saw this with one product – one bag design and color set for the big box stores and another one for the smaller independent garden centers. This only underscores the need to read the labels, know what the descriptions, ingredients and marketing-speak mean and be able to decide for yourself if that particular bag will work for you and is worth the cost.

As with our seed starting mixes analysis, we found confusing and sometimes misleading labeling.

What are potting soils and do I need to use one?

Potting soils are traditionally what seedlings are transplanted into from the seed starting mixes. The seed is germinated in the seed starting mix, then when it is 3 – 4 inches tall and starting to put on its second or third set of true leaves, it is transplanted into a potting soil. Potting soils have nutrients which are missing in the seed starting mixes, continuing the growth of the seedling by feeding and supporting the root structure it is starting to develop.

What goes into potting soils varies widely, from a basic seed starting mix with some aged compost added for plant nutrition to full custom blends with compost, soil and nutrients coming from different ingredients – all to supposedly help the seedling grow stronger and faster.

Not everyone needs potting soils, as some have the space and materials availability to create an excellent rich, aged compost to use as the starting point of mixing their own special blend, while others just don’t have the time, space or materials available to do that.

Let’s take a look!

A plant growing in the dirt on a sunny day.

The first of the potting soils we found was the Kellogg Amend Organic Plus at Lowe’s and it’s available at Home Depot as well, so it should be available in most big box stores in the western US. We were interested to see what was in the bag and do some testing, as we’ve had several of our customers email us in alarm after transplanting into the Amend potting soils and within a few hours the seedlings were almost all dead or severely wilted. We found a commonality with most of them using the Kellogg Amend potting soils, but haven’t heard anything negative in the past couple of years.

As we mentioned in our seed starting mix article, we are not impressed with the words “Organic†or “Natural†on bags of soil, so seeing “Organic Plus†prominently splashed across the bag was an alert for us. It is branded as a garden soil for flowers and vegetables.

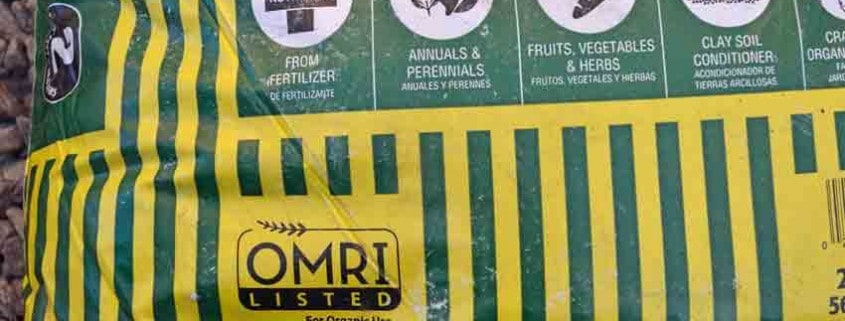
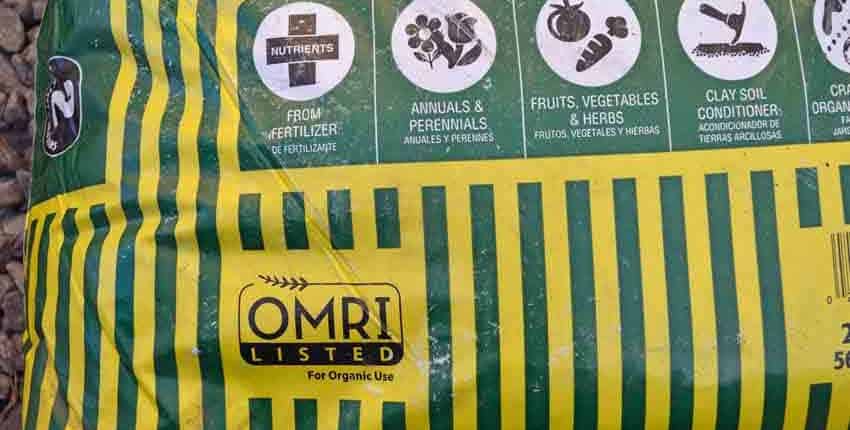
One label that did catch our eye and add to the intrigue was the OMRI listing on the bottom left of the bag. This indicates the contents are certified for organic food production, and are the equivalent of a “Certified Organic†label on food.

The OMRI label piqued our curiosity because our previous research as to why the Amend potting soils were killing seedlings led us to the fact that Kellogg had been using bio-solids, or treated municipal sewage, and possibly industrial runoff or wastewater. This easily explained why the seedlings died when transplanted into the potting soil. 

So the question was – is this the same potting/garden soil, and if so, how is it OMRI listed?

In doing some reading, it appears Kellogg has used bio-solids or treated municipal sewage as a major ingredient in its composting program for a number of years. It seems that their OMRI listed products do not have any bio-solids as an ingredient in their products, but you can’t tell from the label.

In looking at the OMRI listing for Kellogg Amend garden soil, we found it is listed but with restrictions. OMRI lists it in the category of “Fertilizers, Blended with micronutrients†with the restriction being –

May be used only in cases where soil or plant nutrient deficiency for the synthetic micronutrients being applied is documented by soil or tissue testing.

Kellogg’s Amend product page has this to say about their OMRI listing –

Proven Organic

All of our products are listed by the Organic Materials Review Institute (OMRI), the leading non-profit, internationally recognized third party accredited by the USDA’s National Organic Program (NOP). That means every ingredient and every process that goes into making our products has been verified 100% compliant as organic, all the way to the original source. Look for the OMRI logo on the bag, ensuring every product is proven organic.

All in all, it is OMRI listed – even with the discrepancies between Kellogg’s product information and the OMRI listing itself with the restrictions.
A plant growing in the dirt on a sunny day.

The OMRI listing is displayed in the lower left part of the bag, underneath the info box of what it is supposedly derived from and what it is good to use it for.
A plant growing in the dirt on a sunny day.

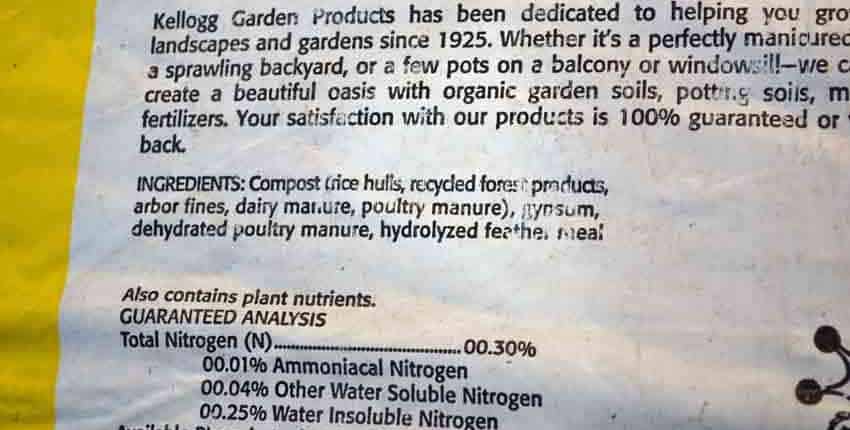
The ingredients list compost as the primary ingredient with what makes up the compost. Recycled forest products are typically a blend of finely ground wood from leftovers of the timber industry. Arbor fines are finely ground tree trimmings. Hydrolyzed feather meal is crushed and boiled poultry feathers, used as a source of nitrogen.  

Dairy and poultry manure sound fine, until the source is looked at a little closer. What is the source of the dairy and the poultry manure? There is reasonable concern as to what is contained in the manure of animals from confined feeding operations – there are antibiotics and hormones used in the day to day operations which are passed through in their manure. Another concern is the possible presence of industrial herbicides and pesticides used in conventional grain production, which can easily be passed into the manure.

These are things to think about, especially if you want to grow as organically as possible.

One of our biggest initial concerns after getting it home and looking up both the Kellogg’s product listing page and the OMRI listing showing the restriction is there is no mention anywhere of the “synthetic micronutrients” from the OMRI listing on the bag or Kellogg’s website.

What are those synthetic micronutrients, and what is their source?
A plant growing in the dirt on a sunny day.

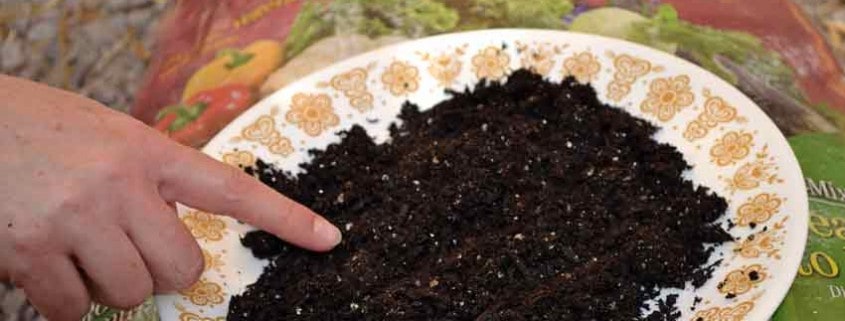
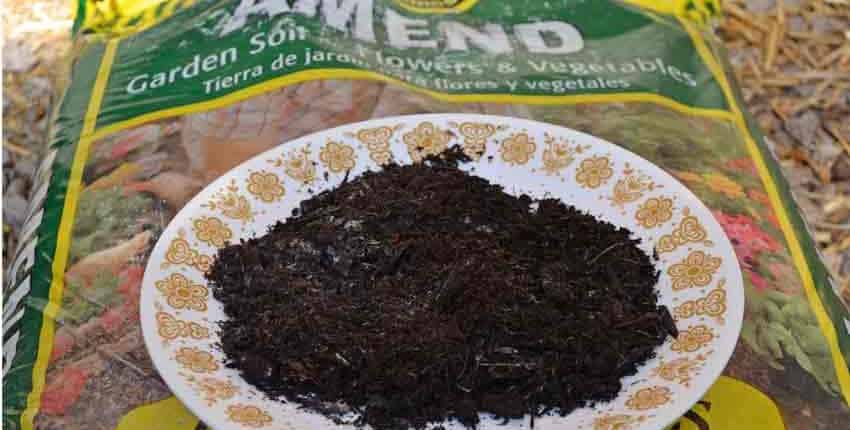
On opening the bag we noticed it was moist and had some white mold spots on the woody material in the mix. This is not a bad thing, molds and fungi work to break down wood into more available nutrients. Woody material helps to boost microbial activity to do just this.

The bag had a rich, woody aroma but did not smell of raw or partially decomposed manure. It was a dark, rich brown verging into almost black.

A handful of the soil felt light and porous with a slightly damp feeling to it. There was a trace of dark residue left on the fingers after rolling a handful through the fingers and getting a feeling for it.

A plant growing in the dirt on a sunny day.

On closer inspection, it is easy to see the woody residue of various sizes. Even though it is advertised as a soil, it was fairly light in texture without the more solid structure needed for long term growing of plants.

The white mold can be seen in the top right of the photo.
A plant growing in the dirt on a sunny day.

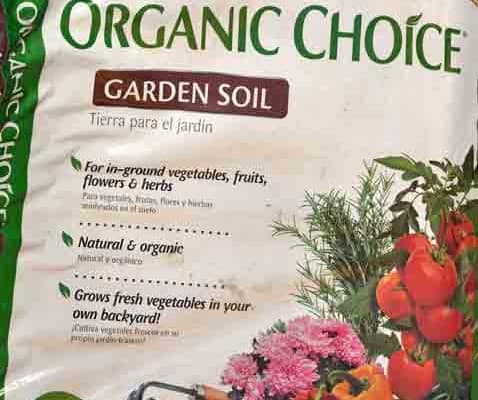
The next bag we opened was Miracle-Gro Organic Choice. We also picked this up at Lowe’s and have seen an impressive selection of Miracle-Gro products at Home Depot as well, so any big box store will have this line. We’ve also seen this brand at every garden center, hardware store garden aisle and landscaping supply store we’ve visited. It’s hard not to find them.

Again, the word “Organic†is used as a marketing tool in the word choice for the name. This is advertised for use with in-ground vegetables, fruits, flowers and herbs. It has the “Natural & Organic†term next, above a statement that it will grow fresh vegetables in your backyard.

So far, pretty standard stuff and not really any different than the next pile of bags at the big box store.

Our concern with this Miracle-Gro product is much the same as we mentioned in our Seed Starting Mix article -their blend of plant food emphasizes vegetative growth and strong flowering, without the nutrients for fruit or food production. We have seen numerous gardeners with tomato plants growing lush, dark green leaves and covered in flowers but not producing a single tomato, or very few.
A plant growing in the dirt on a sunny day.

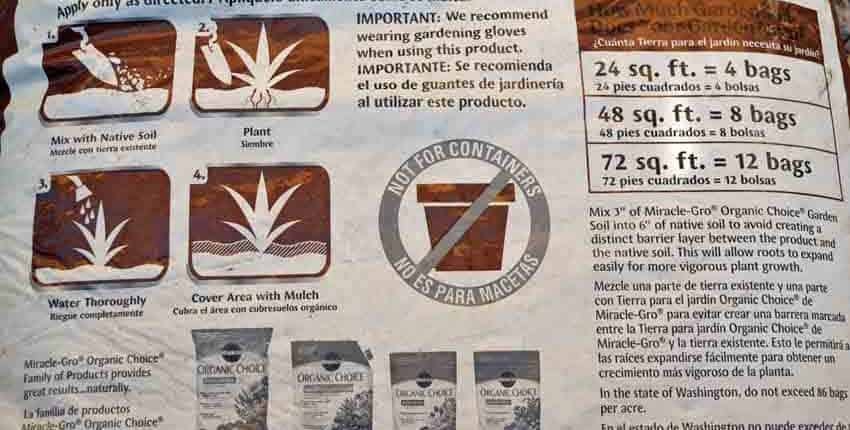
Looking at the back of the bag, we were surprised to see this product was not recommended for container gardening. It is also interesting to see the warning to wear gloves when using Organic Choice.

It’s labeled as “garden soil†on the front, but on the back the instructions say to mix 3†of Organic Choice with 6†of native soil, mix well to avoid a stratified layer, then plant. These instructions combined with the not for containers seems to indicate this is not a full potting soil and more of a soil amendment or fertilizer.

A plant growing in the dirt on a sunny day.

The ingredients listing says it is formulated with organic materials but doesn’t specify if “organic†means organic as in containing carbon, or organic as in certified organic.

It has much the same ingredients – forest products, compost, composted manure and pasteurized poultry litter. In addition it lists peat humus and sphagnum peat moss which are more commonly associated with seed starting mixes than potting soils.

The ingredients do vary regionally, which they do specify.

We searched the OMRI listing to see if this, or any, Miracle-Gro product was listed and found this is OMRI listed, along with several other products. This is somewhat surprising, as most other manufacturers proudly display the OMRI listing label. Another interesting detail is this has no restrictions, unlike Kellogg’s Amend. It is listed under fertilizer and soil amendments, which makes more sense of the instructions to mix with native soil.

A plant growing in the dirt on a sunny day.

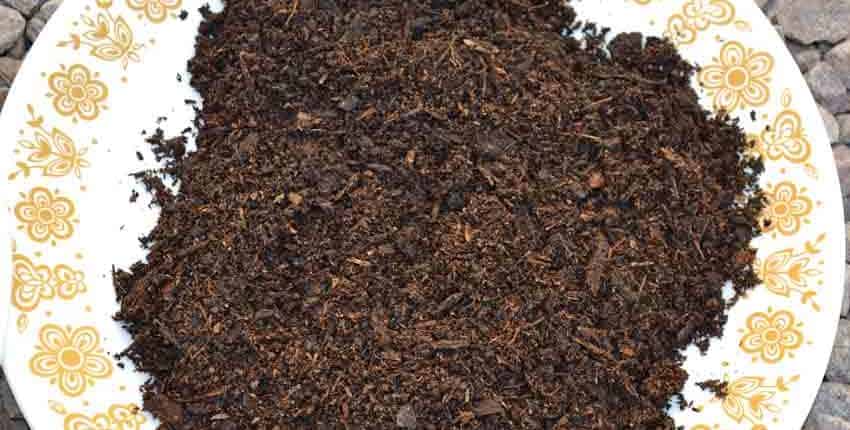
On opening the bag we noticed it was moist with a dark brown, rich earth color. There was woody material present, but seemed a bit more integrated and had an earthy, soil based aroma. There was no indication of partially composted manure or off odors.

It didn’t have any mold indication and a handful of the soil had more of a substance to the texture, while still being light and fluffy. There were smaller or finer components to the mixture.  There was less of a dark residue on the fingers after handling a handful for inspection.
A plant growing in the dirt on a sunny day.

Closer inspection shows the more even distribution of size, along with the dark brown or earthy color. This seemed to be closer to a replacement soil but with enough lightness to allow good root development.

A plant growing in the dirt on a sunny day.

Square Foot Potting Soil

The next bag was Garden Time Square Foot Garden Soil from Gro-Well Brands. They are local to us, being based in Tempe, AZ. This was bought at Lowe’s and we’ve seen it at Home Depot also, and have seen garden forum threads where it is possible to special order it online in different quantities. We also saw it at our local True Value Hardware store in the garden aisle, with a different design bag – so it is probably also available in independent garden centers as well.

We have used this particular mix for a few years now with good results. We primarily use it as a seed starting mix and transplanting medium, but have experimented with it as a complete soil – like the bag’s labeling says – and have been pleased with the results.

Having said that, it isn’t perfect either and makes many of the same claims as the other brands. The “Natural & Organic†label is prominent on the bag, even though this is not OMRI listed. Some of the other claims are “Proven Formula for Optimum Growth†and “Great for Vegetablesâ€. It does say “ready to use†and doesn’t need mixing with native soils, something that might be helpful for a container gardener with a small patio or apartment balcony.

A plant growing in the dirt on a sunny day.

Square Foot Potting Soil Ingredients

The ingredients are compost, peat moss, coconut coir, vermiculite, bloodmeal, bone meal, kelp meal, cottonseed meal, alfalfa meal and worm castings. The peat moss, coir and vermiculite are classic seed starting mix ingredients, with the compost, different meals and worm castings adding nutrients to the soil for the plants growth and health. We use this as both a seed starting mix and potting soil or transplant soil because of the nutrients, which are lacking in straight seed starting mixes.

The same concern we voiced above at the vagueness of what is in the compost is valid here as well. In reading around a bit, I haven’t come across Gro-Well Brands using bio-solids in their compost, which is good news. On the other hand, that doesn’t mean the compost is organically sourced and not feedlot manure, but it’s a step in the right direction.

The more extensive list of ingredients give this some substance in nutrition so it can be used as a transplanting medium, a potting soil or as a complete standalone soil.

As another plus, we’ve not experienced seedlings dying when transplanted into this mix, nor have our customers said anything.
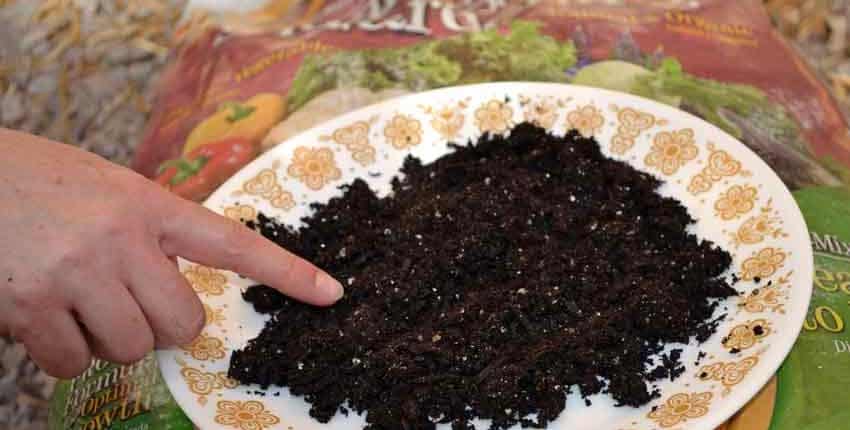
A plant growing in the dirt on a sunny day.

On opening the bag, the soil is slightly moist with a very dark, almost black color. It had almost no odor and felt light in weight but with some substance. This makes sense with the compost being 30 – 40% and much of the rest made up of lighter weight seed starting ingredients that have no odor of their own. The shiny vermiculite specks are easy to see and the texture is fairly even without lots of larger, identifiable chunks of wood.

A handful of the soil showed more of the smaller size particles making up the mix with an even and light feel to it. There was a trace of black residue on the fingers after a handful for inspection.

A plant growing in the dirt on a sunny day.

Square Foot Potting Soil

 A closer inspection shows the darker color, with the specks of vermiculite showing through.
A plant growing in the dirt on a sunny day.

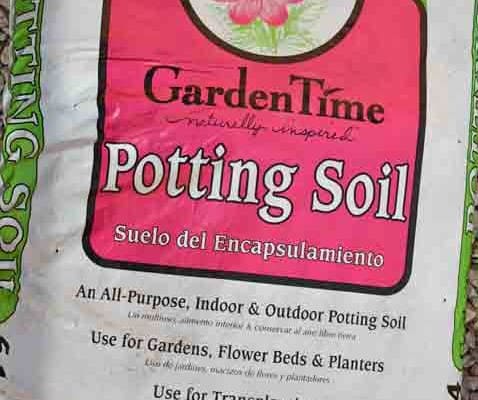
Garden Time Potting Soil

The last bag was also from Gro-Well Brands – Garden Time Potting Soil. This was also bought from Lowe’s, and is available in big box stores. It may be regionally available in independent garden centers with a different bag.

The same technique of word use – “Natural & Organic†was in play, but the other trigger words were missing. This is advertised as an all-purpose potting soil for indoor and outdoor use in containers and garden beds, as well as for transplanting.

Like the Square Foot Gardening soil, this is not OMRI listed.
A plant growing in the dirt on a sunny day.

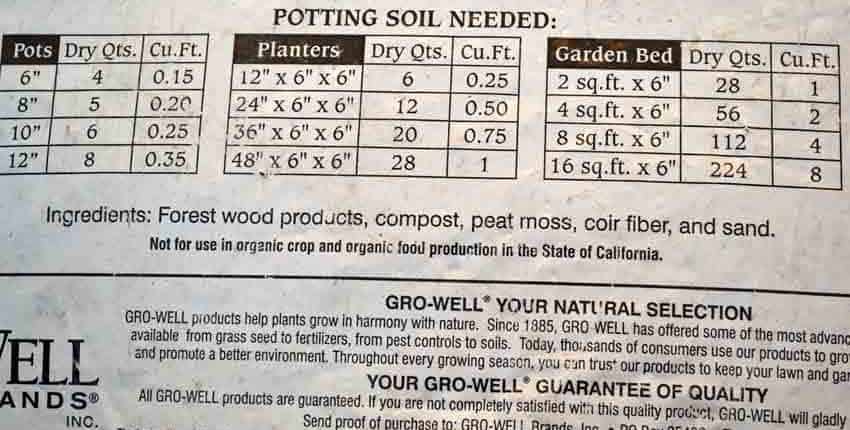
Garden Time Potting Soil Ingredients

The ingredients are different, with fewer of the seed starting ingredients and less of the nutrient amendments. It does have peat moss and coconut coir fiber, common in seed starting mixes, but is without the perlite and such.

The standard forest wood products are there, as well as the compost listing again. What we found interesting is the addition of sand as the last ingredient.
A plant growing in the dirt on a sunny day.

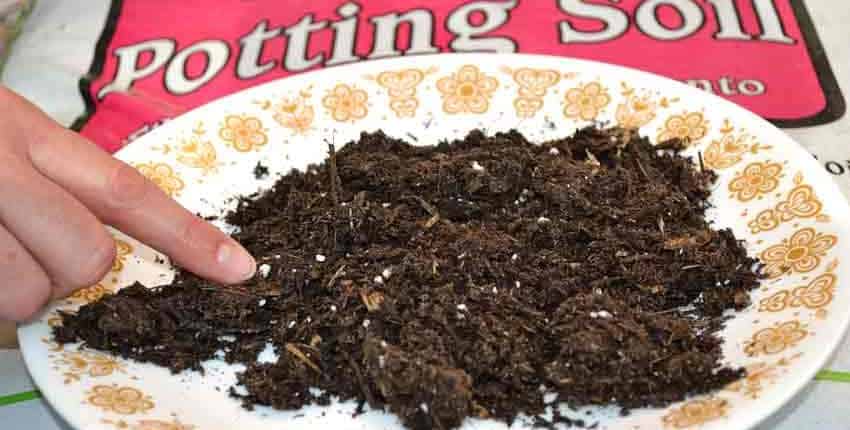
Garden Time Potting Soil Closeup

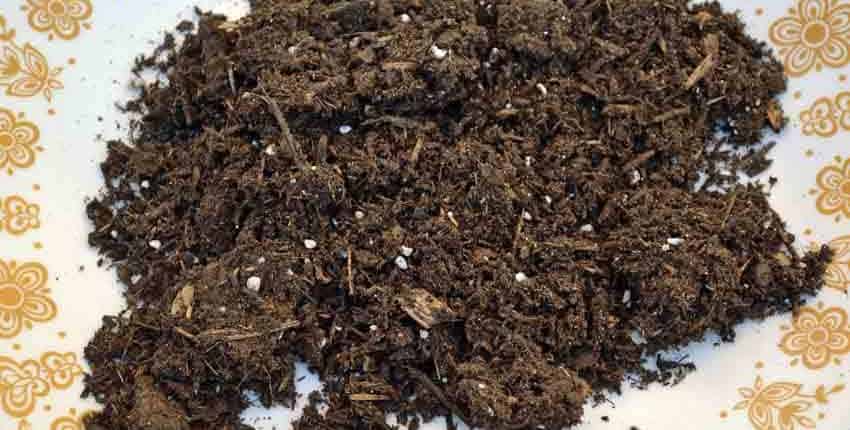
When opening the bag we noticed this mix had a more woody aroma and was less earthy. It was also the driest of the mixes, leaving almost no residue on the hand after sifting through a handful of mix. It wasn’t dry, just much less moist than the other mixes. It had more substance and weight to the mix, probably as a result of the sand. This mix looked, smelled and felt the woodiest of the ones we inspected. It had no odor of compost or manure at all, only slightly of decomposed wood.

One thing we immediately noticed with a handful of soil is the white specks in the mix. In looking closely at them, they look much like perlite even though there is none listed on the ingredients. This could be an older bag with a new mix formulation, or a mistake in adding perlite to this mix. The perlite isn’t a negative, but the fact it isn’t listed in the ingredients makes us wonder a bit.

Even with this, the mix looks like it would be good as an amendment to loosen up native soils. The overly woody composition would be beneficial as it decomposed more, but might not add much to this season’s growth. 
A plant growing in the dirt on a sunny day.

Garden Time Potting Soil Closeup

A closer look shows the woody texture and color with the white specks of what looks to be perlite throughout.

A plant growing in the dirt on a sunny day.

Potting Soil Cost Chart

In looking at the related costs, a couple of things stand out. The two best-looking soil mixes are also the most expensive – Miracle-Gro and the Square Foot Gardening Soil. They are also the smallest size bags. When adding in the positive benefits of an OMRI listing, the Miracle-Gro becomes the initial winner – something that surprised us.

In making a recommendation, an OMRI listing helps to assure a home gardener that the materials and ingredients used are of better quality and higher nutrient content than a non-listed mix. With that said, we would not recommend avoiding mixes which aren’t listed if you can be sure the ingredients meet reasonable standards. For example, compost from a neighborhood friend’s horses won’t be able to be OMRI listed, but would probably be excellent compost if the horses are fed well and wholesomely. The same would go for a grass-fed farmer in your area, who doesn’t feed growth hormones or regular antibiotics.

From this list, our two choices are the Miracle-Gro Organic Choice Garden Soil and the Square Foot Gardening Soil, with the others being a distant second choice if the first two weren’t available. This is conditional upon our testing some seedlings in each of these to see if they can actually support healthy seedling growth, but that will be another article!

For you, the best choice depends on what is available in your area, the amount of potting soil needed and what you can afford. Some gardeners, like ourselves, much prefer to make our own compost with multiple amendments to create a complex and wonderfully fertile soil amendment, while others simply don’t have the space or availability of materials. Some better options include creating a composting system as part of a community garden, or partnering with a friend or neighbor who has the space and is willing to boost their garden’s fertility. You might offer to do the work in setting up and maintaining the compost in return for some of the finished product for your garden.

Now you’ve got an overview of what to look for and be aware of when shopping for potting mixes, what are your thoughts and experiences? Do you have a dependable “go-to†potting mix you’ve used and loved for years? Or, do you have a tried and true recipe for mixing up your own potting soil that has never let you down? Please share!
Square Foot Potting Soil Closeup


Seed starting mixes can be confusing – there are so many at different price points; who’s to know what’s good and what’s junk? Is the extra expense worth it, or is the cheapest mix just as good?

We looked at a few examples on the market to see what is available from a range of prices and suppliers. Starting with the big box stores and going to a local hardware store with a good gardening selection and then to a garden center, we chose a representative sample to give you a good starting point in choosing what to use for your seed starting.

This is in no way meant to be an exhaustive or comprehensive review of all available seed starting mixes. From what we can tell, there are many different brands and types of seed starting mixes. We suspect that a few companies are producing many of the re-bagged or re-branded mixes, much like there are exactly two car battery manufacturers in the US, selling dozens of brands of batteries through different outlets. Our goal is to provide you with an educated overview of some middle of the road seed starting mixes so you will be better informed when confronted with the “Great Wall” of seed starting mixes at your local garden center. 

Along the way, we found seed starting mixes are seemingly designed to be confusing – especially when they are stacked next to each other in the garden section of the big box store or in the garden center. None of them were the same size, so easily comparing costs while in the store was difficult, requiring converting different prices to the same volume. We chose a quart size as the standard for the seed starting mixes, as most home gardeners will be using smaller amounts than market growers.

Another interesting thing we found was the labeling on each bag and the claims made. Some had the word “Organic†prominently displayed or used as part of the name, with no verification that the contents were, in fact, organic. “Natural†was also strongly used, with no substantiation.

In addition to the seed starting mixes, we have included a potting mix we’ve started seeds in for several years and have recommended to our customers. This is included as a reference point, as gardeners in some areas won’t be able to use a potting soil to start seeds due to high humidity and the associated fungi and mold challenges. Others, like us, will be able to use it to their advantage.

What are seed starting mixes and do I need one?

Seed starting mixes are not soil, they are blended to create a good environment to get the seed germinated and into the seedling stage, where it is transplanted into a potting soil or garden soil. For a closer look at the components that typically make up seed starting mixes, read Seed Starting Media for the Home Gardener.

Not everyone needs seed starting mixes, some gardeners do very well starting their seeds in potting soil or a rich garden soil. This often saves the work and stress of transplanting, but if you need a sterile soil because of mold or fungi pressures, then seed starting mixes will really help. Other gardeners just trust a sterile seed starting mix and have had good results for their garden.

Let’s take a look!

For all of the photos, click to enlarge them for more detail. 

A plant growing in the dirt on a sunny day.

Jiffy Seed Starting Mix

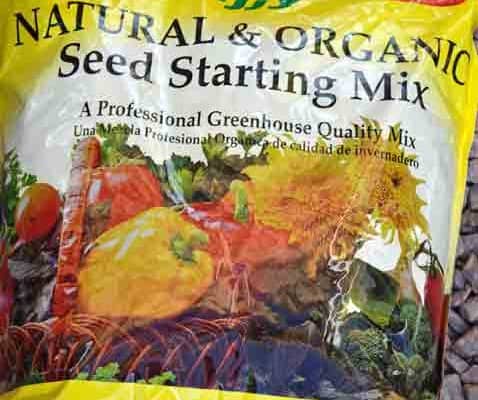
First up is Jiffy “Natural & Organic†Seed Starting Mix. We bought this at our local True Value garden center, so it should be available at independent garden centers and possibly the big box stores. There are several interesting things about this seed starting mix. First off, there is no ingredients listed, either on the bag or on Jiffy’s website. Second, this is an OMRI listed product, meaning it is approved through the Organic Materials Review Institute (OMRI)

OMRI is an international nonprofit organization which certifies which input (fertilizer, herbicide, pesticide, etc.) products are allowed for use in certified organic agriculture. OMRI Listed® products are allowed for use in certified organic operations under the USDA National Organic Program. This is a big deal, there is no way to buy or sneak a product in and most companies will prominently display the OMRI listing on their bags, as you’ll see below.

Jiffy doesn’t mention it, or list the ingredients. With the OMRI listing, we feel pretty comfortable in using this, but would like to see what makes up the seed starting mix.

Here is what the bag looks like. On first read the “Natural & Organic” label is somewhat misleading, especially with no mention of the OMRI listing. The bag has 12 quarts for $6.99, so not a bad price, especially for a smaller home gardener who will use less than one bag to start their tomato, pepper and eggplant seeds. 

A plant growing in the dirt on a sunny day.

Jiffy Seed Starting Mix Closeup

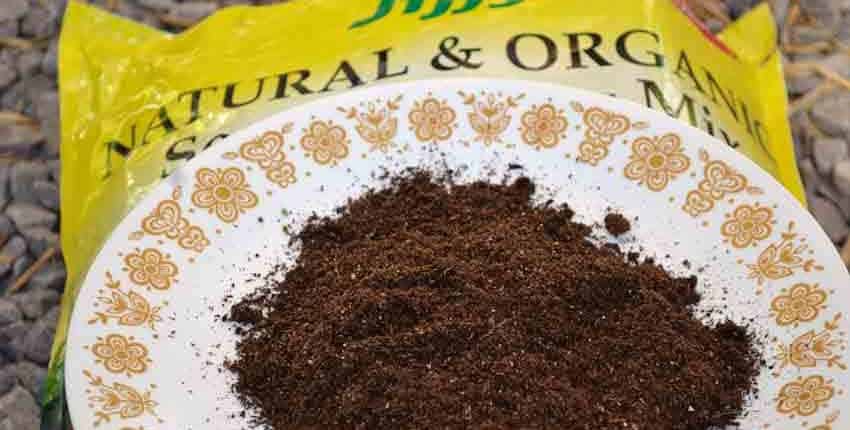
An initial look at the soil shows what looks to be some coconut coir, possibly some peat moss, perlite and maybe some compost, but it’s hard to be sure. It had a good, rich soil aroma and was finely textured with no large lumps or woody chunks in it.

A plant growing in the dirt on a sunny day.

Jiffy Seed Starting Mix

Here’s a closer inspection. 

Overall, we were pleased at what we saw, with the caveat of wishing to know what the ingredients were making up the mix. On the plus side, OMRI listing is very good – indicating it is accepted for certified organic agriculture.


A plant growing in the dirt on a sunny day.

Miracle Gro Seed Starting Mix

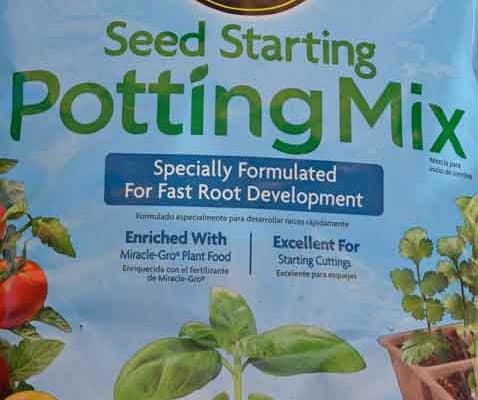
Miracle Gro Seed Starting Potting Mix was next up. The labeling seems to be trying to straddle the seed starting mix/ potting soil applications without specifying if it is suitable for both. The bag says it is enriched with Miracle Gro, which is no surprise, and the mix is excellent for starting cuttings. The bag has 8 quarts and is $4.77 at Lowe’s or Home Depot, which is enough for a small gardener to start seeds with. This mix is not OMRI listed. Here is Miracle Gro’s online listing. 

Our concern with Miracle Gro is their blend of plant food emphasizes vegetative growth and strong flowering, without the nutrients for fruit or food production. We have had numerous customers call or email asking why their tomato plants had such lush, dark green leaves and were covered in flowers but not producing a single tomato, or very few. When we asked if they were using Miracle Gro, they seemed shocked that we could know what they were using!


A plant growing in the dirt on a sunny day.

Miracle Gro Seed Starting Mix Ingredients

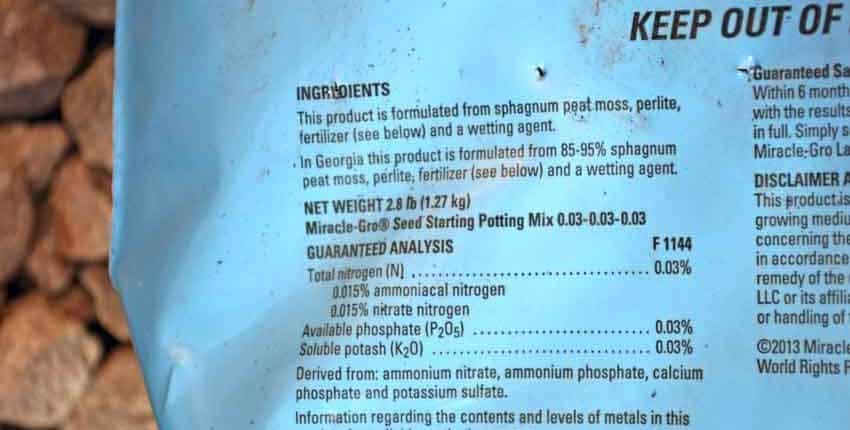
The ingredients are listed – peat moss, perlite, Miracle Gro fertilizer and a wetting agent. Not terrible, but not the greatest either. If you’ve read Starting Seeds at Home – a Deeper Look, you remember that during germination, seeds have no need for fertilizers as they carry everything they need to sprout and establish a seedling inside the seed coat. The fertilizer might be beneficial during the seedling phase, but more soil nutrients are definitely needed to sustain a healthy plant, so this is not a seed to garden transplant mix. The wetting agent will be beneficial in the germination stage, but could contribute to mold and fungal issues for the seedling if the gardener isn’t aware and careful in not over watering and inadvertently saturating the soil, which the wetting agents will make worse.

There is valid concerns raised about the harvesting of sphagnum peat moss from Canada as being sustainable or not. It takes peat moss bogs several hundred to a thousand years to mature, depending on the conditions, so it is hard to “sustainably†manage them.

A plant growing in the dirt on a sunny day.

Miracle Gro Seed Starting Mix Closuep

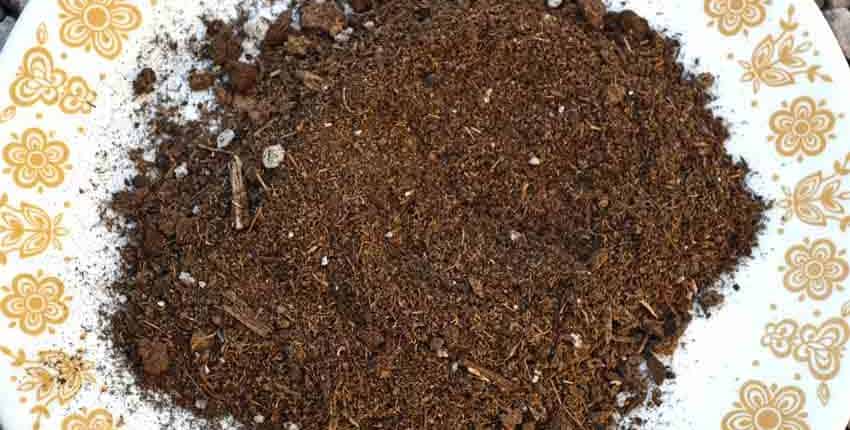
Looking at the soil it was fine and fairly light with some perlite easily seen among the peat moss. It looks a bit chunky, but the feel wasn’t. It did seem to have a few larger chunks of material, but that shouldn’t matter in starting seeds.

A plant growing in the dirt on a sunny day.

Miracle Gro Seed Starting Mix

Not a bad seed starting mix, and we would take this over several store brands we’ve seen.

A plant growing in the dirt on a sunny day.

Black Gold Seed Starting Mix

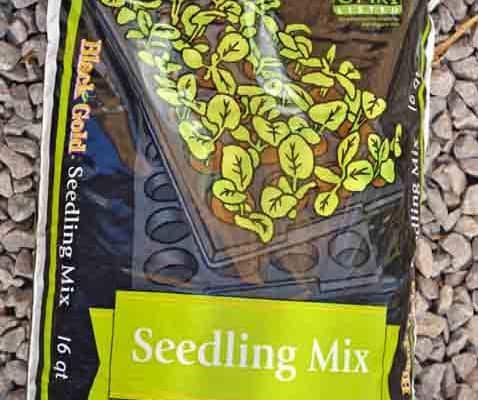
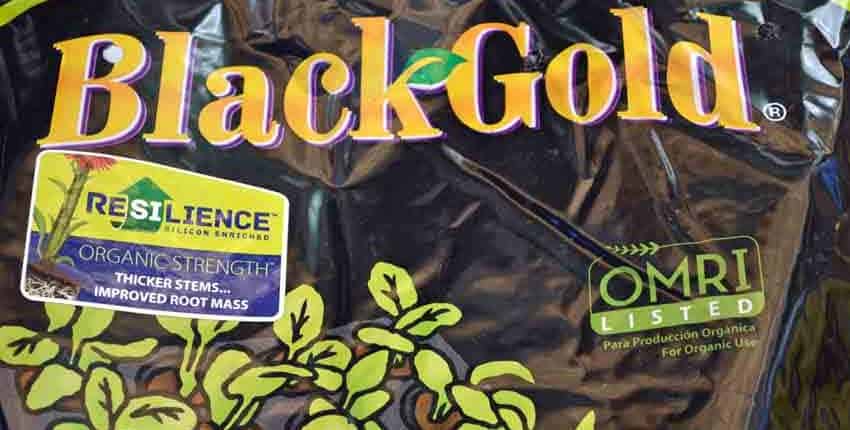
Black Gold Seedling Mix is another of the seed starting mixes listed by OMRI, and it says so on the top right side of the bag. Black Gold is a well known supplier for hydroponic growers and would be considered one of the premium or super-premium seed starting mixes.

We sourced this from True Value, so it should be available from an independent garden center but probably not from the big box stores. The bag has 16 quarts for $6.99, so is a good value with enough to start seedlings for a very large garden or for sharing between a couple of neighbors or a community garden. Black Gold’s online listing. 

A plant growing in the dirt on a sunny day.

Black Gold Seed Starting Mix OMRI Listing

In addition to the OMRI listing, the label shows this seed starting mix to be enriched with silicon for thicker stems and improved root mass. While it is true that silica and silicon are important components to strong cell, stem and root growth, there is no mention of the silica in the ingredients. This might be a marketing approach, or it could be something worthwhile, but the bag doesn’t expand on the benefits.

A plant growing in the dirt on a sunny day.

Black Gold Seed Starting Mix Ingredients

Black Gold’s ingredients are pretty standard for seed starting mixes; peat moss, perlite, dolomite lime and Yucca extract as the organic wetting agent. Dolomite lime is calcium magnesium carbonate and increases the pH of soil, but also aids in organic decomposition. It is high in magnesium and calcium, which could be good for acidic soils but could be trouble for alkaline soils like we have in the West. The amount of dolomite lime is probably small and wouldn’t cause much of an effect in the amounts used in seed starting mixes, but might not be the best use as a garden or container amendment.

It is good to see what is used as the wetting agent – Yucca extract.

A plant growing in the dirt on a sunny day.

Black Gold Seed Starting Mix Closeup

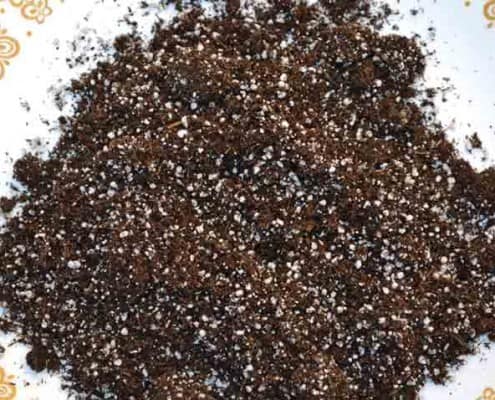
The appearance confirms what we would expect to see from the ingredients – lots of white perlite specks on a very dark peat moss background. It is light and fluffy, allowing good root penetration and establishment.

A plant growing in the dirt on a sunny day.

Black Gold Seed Starting Mix

Because this is OMRI listed, we would choose it over a non-OMRI listed seed starting mix.

A plant growing in the dirt on a sunny day.

Square Foot Potting Soil

The final comparison is included even though it is labeled as a potting soil and isn’t one of the seed starting mixes. Garden Time’s Square Foot Gardening Potting Soil is about as close as you can come to a complete garden soil in a bag, and we’ve used it for a number of years to start seeds, transplant seedlings into and have been quite happy with the results.

The “Natural & Organic†label is prominent on the bag, even though this is not OMRI listed. Some of the other claims are “Proven Formula for Optimum Growth†and “Great for Vegetablesâ€.

We sourced this from Lowe’s and have bought it at Home Depot in years past. We also saw it with a different bag in True Value. The company name is Garden Time and is a part of Gro-Well brands in Tempe, AZ. The bag is 1.3 cubic feet, which translates to 38.9 quarts for $8.98, making it by far the most cost effective seed starting medium. Garden Time’s Square Foot Gardening online listing. 

A plant growing in the dirt on a sunny day.

Square Foot Potting Soil Ingredients

The ingredients are compost, peat moss, coconut coir, vermiculite, bloodmeal, bone meal, kelp meal, cottonseed meal, alfalfa meal and worm castings. The peat moss, coir and vermiculite are classic seed starting mix ingredients, with the compost, different meals and worm castings adding nutrients to the soil for the plants growth and health. We use this as both a seed starting mix and potting soil or transplant soil because of the nutrients, which are lacking in straight seed starting mixes.

A plant growing in the dirt on a sunny day.

Square Foot Potting Soil Closeup

Looking at the mix it’s easy to see the vermiculite granules, which are gold colored specks instead of the white of perlite. It has a lot darker look due to the compost and additional nutrients.

Vermiculite is mica expanded by intense heat and is used much like perlite to retain water, decrease soil compaction and improve water retention.

A plant growing in the dirt on a sunny day.

Square Foot Potting Soil

Here’s the closeup look. 


A plant growing in the dirt on a sunny day.

Seed Starting Mix Cost Chart


The breakdown of the costs per quart tell a story – they are in the ballpark of each other, with the exception of our rogue potting soil thrown in. Most of them have similar ingredients, with a few different additions.

If we had to buy a dedicated seed starting mix and couldn’t use the potting soil we do, our choice would be one that lists the ingredients and is OMRI listed. Having said that, any of the seed starting mixes with the primary ingredients of coconut coir (our preference) or peat moss with perlite or vermiculite would make a satisfactory seed starting mix.

What you choose will depend largely on the availability for you, how much you need and the cost.

As part of the test, we are starting seeds in all four mixes and have documented our results in Seed Germination Observations. Our Potting Soils article gives you some details on what to look for in good soils to transplant your young, tender seedlings into. 

Chile de Agua For Sale


History

The Chile de Agua is a little known heirloom chile from Oaxaca, Mexico, grown in a small valley for at least three centuries and is slowly becoming better known and more popular in the US. It is one of the chile varieties grown in the ancient Milpa system of community gardening with companion planting using corn, beans, squash, amaranth, sunflowers and chile to feed and sustain the people in the community.

It is very much a local chile, until recently only grown in the valley of Oaxaca (wa-HA-ca) just north of the city of Oaxaca, Mexico. It is not grown commercially, so the production is relatively small and rarely makes it out of the surrounding area, explaining why so few people have gotten to know this remarkable chile.

Even though it isn’t well known outside of the area, the chile de agua holds a special place among other well-known chiles like the chile de arbol, serrano and jalapeño. Traditionally grown in semi-arid lands, it was planted when the seasonal rains began by transplanting seedlings into cone shaped beds made of adobe-like wet mud filled with leaf-cutter ant manure, then capped with more mud. The cap retained enough moisture in the soil for a few months if the weather didn’t cooperate, giving the village of Hidalgo Jaltepec fame for their yearly harvest of the chile de agua and their growing skills.

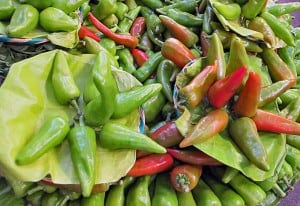
Chile de Agua roughly translates as “water chile†or “irrigated chile†and is grown almost year round now, selling for a large price premium in the open air markets of Oaxaca. They are sold in groups of six to twelve, fanned out in a circle on a small flat tray or large plate lined with a large green leaf. It isn’t uncommon to see the chile de agua selling for twice the price or more of any other chile at the market, selling out very quickly.

Characteristics

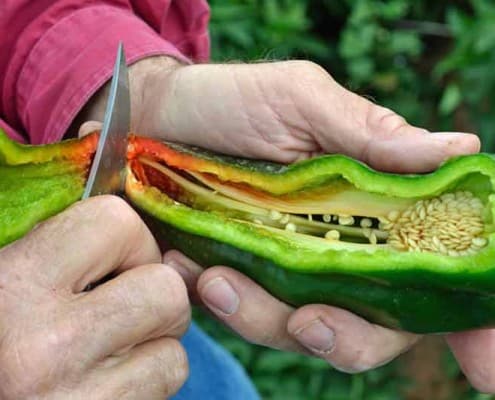
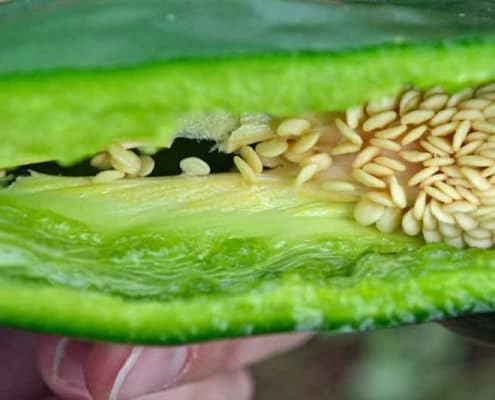
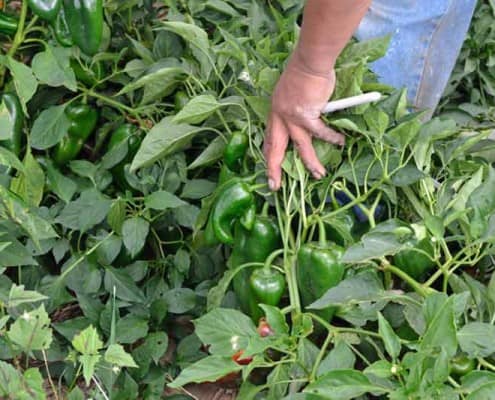
A plant growing in the dirt on a sunny day.They have a triangular, conical shape about 4 inches long and 1 to 1 1/2 inches wide at the shoulders, tapering to a pointed tip. The skin is shiny, smooth and slightly wavy with a moderately thick flesh. Almost all of the heat is located in the ribs which contain the seeds. The heat is moderated by sweet, almost herbal and slightly sour flavors overlaying the spiciness and giving the characteristic complex flavors. The chiles grow erect or pointing upwards and can be prolific in the right conditions. They have about the same heat as a jalapeño but with much more flavor, most often used fully ripe which is a medium-light green up to orange to moderate red in color.

The plants are bushy and mostly low growing, around 2 to 2 1/2 feet tall. The flowers are the usual white color, with a field of ripening chile de aguas a very colorful sight with the enormous numbers of chiles turning from a light spring green into yellows and oranges, finally finishing in a deep orange-reddish. They don’t all ripen at once, as the plant continues to set more flowers as the early season progresses, so the colors come in a palette of hues.

There has been some debate as to what is the “correct†form of the chile de agua, as there are some nurseries and seed companies selling seedlings and seeds with photos showing the chiles hanging down, or pendant. The physical form looks to be correct, but after researching the markets of Oaxaca and reading descriptions in current and historical literature, as well as chefs descriptions we concluded that the erect form is what has been known in Oaxaca for centuries and is the correct one.

Uses

A plant growing in the dirt on a sunny day.The fresh chiles are often fire-roasted, peeled and stuffed with a shredded meat and cheese filling; or cut into strips, sautéed with onions and epazote, then topped with fresh cheese and wrapped in warm tortillas. They are also commonly used freshly roasted in sauces, as well as being fully vine ripened and dried for a remarkably full-flavored powder, but less and less now as they are more valuable sold fresh in the market. Guajillo chiles have almost completely replaced the chile de agua as the main source of local dried chile powder, as they are more productive and less expensive in the market.

The Seed’s Journey

A search by a famous Chicago chef who specializes in authentic Oaxacan cuisine first introduced us to this unique chile. He needed the chile de agua for a special dish and couldn’t find the correct plants or seeds anywhere. One of our mentors who specializes on all things chile involved us in the search, as he thought we might be interested in finding an unknown but delicious chile to add to our offerings.

Through much searching and tapping into different networks, we came across a photographer working on a book about the restoration of the ancient milpa system just north of Oaxaca. This system has included the chile de agua for at least 300 years, as shown by Spanish documents, and most likely much longer.

The photographer obtained seeds from the local farmers, after email introductions and several explanations of why we were searching for this particular regional chile. There were initial concerns about our ethics and motives as farmers in the region had experienced theft of their seed sovereignty when corn they had grown and nurtured for centuries was obtained under false pretenses and later patented. After we explained our reasons for introducing the chile to American gardeners and restaurants, we were welcomed.

Evaluation and Grow-Out

A plant growing in the dirt on a sunny day.Once seed from Oaxaca was in hand, we sourced seed from four other sources as comparisons in our grow-out trials. A grow-out is an evaluation of a potential new variety to see if it is true to its description and type, as well as if it meets quality standards for growth, vigor, production and flavor before it will be included into our growers rotation for seed production. Sometimes the initial evaluation takes a few years to really determine if the potential variety has the quality and characteristics needed.

After evaluating all four seed sources we found that only the original seed from Oaxaca met all of the standards, so it was rotated into the seed production schedule of one of our most experienced growers. Two years had been spent on the evaluations and another two years were needed to produce enough seed to be able to offer it to our market. The first year, all of the seed from the best plants were saved and replanted with the seed from the second year’s crop being offered for sale after seed from the best plants were held back as our foundation seedstock.

The entire process took four years to complete – from obtaining the different seeds for evaluation to having enough seed to offer for sale. This amount of time to introduce a new seed variety isn’t unusual in our line of work, as the last thing we want to do is race off to market with a brand new seed that we don’t have any experience with or knowledge of.

The true value of our work is shown in the comments of gardeners who rave about the flavors, production and gratefulness in being able to grow a variety which has sustained and nurtured a culture across several centuries. In choosing to grow these ancient and sometimes rare seeds over the more common and easily obtained modern varieties, gardeners continue a tradition started long ago and experience a direct connection to the flavors that could easily have been lost to history.

The beautiful thing for home gardeners today is the ability to easily choose and grow a number of heirloom vegetable varieties with amazing stories, beautiful colors, bountiful production and delicious flavors! Each time someone chooses to grow one of these heirlooms, they keep a particular piece of history alive in a real, tangible way.

Maybe you, too, will choose to grow a delicious bit of history in your garden this year!

This article was first published in Mother Earth News Organic Gardening Blog on January 14, 2016! 

Indoor Herbs


Growing herbs indoors is one of the easiest ways to capture the flavors of summertime any time of year, but especially during the middle of the winter. Many of the culinary herbs used in cooking will happily grow on a windowsill or space next to a south facing window, bringing color, aroma and freshness to an often-dreary winter. With just a snip or two, you’ll have fresh aromatic flavors for your dishes.

Herbs have been helping us for thousands of years; from medicinal and cultural uses, to dyeing fabric, repelling insects, seasoning foods, making teas and scenting rooms while providing colorful decorations. We can put many of these same qualities to use in a small indoor herb garden.

They make excellent container plants, needing little attention past good light, healthy soil and minimal water. In getting started, it is best to plant one herb per pot to give them enough space without crowding. Smaller pots can be as small as four inches across, with six to eight inches being more ideal for longer lived plants.

There are very few things that indoor herbs need to thrive:

Good light

For the best growth and flavor, herbs need as much natural light as possible. Ideally, place them in or near a south facing window so they can get direct sunlight. If that isn’t possible, a south east or south west window with good strong indirect light should work. You’ll know if they need a bit more light as the plants will be smaller and a bit pale. If needed, a broad spectrum or “daylight†portable fluorescent light can be used.

Good drainage

Most common herbs used in the kitchen are Mediterranean in origin, so they won’t tolerate their roots being in standing water. Clay pots will drain quickly; but they are also porous and may dry out the soil in some climates, while glazed pottery or plastic pots will prevent this. A plate, saucer or other catch basin is important to prevent the water drainage from leaking out and damaging a counter top or windowsill.

Good soil

High quality potting soil can usually provide herbs with the nutrition needed throughout a winter growing season, but you might want to re-pot them with fresh soil in the summer or fall if you plan on keeping the herbs going longer.

Getting started couldn’t be easier! To begin, choose herbs for fresh ingredients or seasonings for what you like to cook. You might start with only two or three herbs or be adventurous and choose five or six. Remember, it is easier to start small and increase the number of herbs once you’ve got the hang of growing them inside.

If you are having a hard time choosing, it’s hard to go wrong with basil, oregano, thyme or sage. All of these are hardy and easy to grow, tolerating less than ideal conditions and a little occasional neglect. If you’ve not experienced fresh herbs, you’ll be surprised at how just a tiny bit of fresh herb will liven up an everyday, otherwise boring dish!

Let’s look at a few herbs in more detail which are ideally suited to an indoor kitchen environment!

Basil

A plant growing in the dirt on a sunny day.Few herbs are as easy to grow indoors or have as much to give to a kitchen’s atmosphere, aroma and flavors as the humble basil plant. Prolific, delicious and aromatic, a medium sized basil plant can brighten up a kitchen all by itself.

Start from seed and pick or clip leaves as needed for dishes, but don’t forget to use the flowers and seeds as seasonings when they appear. The flowers have a much more intense scent and flavor than the leaves, making them ideal for garnishes, soups and stews when added in the last few minutes of cooking. The seeds can be dried, saved and ground like black pepper giving a citrusy basil note to dishes.

There are several different varieties of basil to choose from – sweet and luscious Genovese, the traditional Italian pesto basil; bright citrusy lemon or lime basil; the very aptly named clove basil or the intense Thai basil.

Oregano

A plant growing in the dirt on a sunny day.This herb is hardy enough to be found in many European cottage gardens, almost completely ignored in cultivation and sometimes having grown in the same patch for a couple of decades.

Always sweetly aromatic and flavorful, one whiff or taste of fresh oregano will immediately make you wonder why you put up with the bland dried commercial stuff for so long.

Easy to start from seed, may take a bit of time to get established but will live for several seasons or longer with minimal needs. There are several varieties, but we’ve found the flavor and scent of the True Greek oregano strain to be the best – sweet and flavorful with a good pungency that doesn’t fall over into bitterness.

Thyme

A plant growing in the dirt on a sunny day.Another ancient herb, thyme is tough enough to be used as a ground cover that can be walked on and mowed! Thyme goes with almost all foods – meats, poultry, fish, stuffing, stews, vegetable dishes, cheese, eggs and rice. Just a little bit brightens up the food without taking over the flavor stage.

Thyme fits in really well in a kitchen setting because it is a naturally small plant and is very hardy and undemanding. Starting from seed is as easy as lightly pressing a few seeds into the damp soil and keeping it well watered until the seedlings appear. After that, keep the soil barely moist and enjoy!


Sage

A plant growing in the dirt on a sunny day.One of the classic foundational herbs in Thanksgiving stuffing, sage can do so much more for other dishes. It was values so highly by the Chinese that they would trade four pounds of Chinese tea for one pound of French sage, to be used for tea.

Sage is a small fragrant perennial shrub, making it well suited to the kitchen garden and windowsill. It is more commonly used dried today, but once again, the first whiff and taste of fresh sage will leave you cold on the common dried offerings.

Traditionally used to balance and moderate the fats and heavy flavors of rich, meaty foods, sage also works wonders in adding strength and depth to the sometimes bland flavors of a winter vegetarian dish.

Toasted or pan-fried sage leaves are an appetizer all of themselves, topping aged cheese slices or crushed on roasted winter squash soup.

Garlic Chives

A plant growing in the dirt on a sunny day.These mildly garlic-flavored chives are perennial and grow happily in all but the coldest climates, making them a perfect fit for the kitchen. Looking much like a stand of grass, just one or two stalks will give a lighter dish interest and a few will liven up soups or stews in winter.

To keep the chives producing, snip the stems down at the base.


If you can’t decide on which herbs to start with, or want some for the kitchen and a larger selection for the outdoor herb garden, our Kitchen Herb Collection could help. Containing eight herbs – most of which will do well in the kitchen – along with a short 32 page guide to get you started, this will give you plenty of seed to start indoors and have a great herb garden in the spring.

Heirloom Tomato


Heirloom tomatoes are available in a dizzying array of choices – colors, sizes, shapes, flavors and how they produce. Is a determinate variety best for your garden, or would an indeterminate be better for you? How to tell, and what do the terms mean, exactly?

While it may seem confusing, the terms are easy to remember and are pretty explanatory once you understand what they mean.

In a nutshell, the terms describe the growth and production habit of the plants. Determinate tend to be shorter and bushier, while indeterminate are taller and lankier. They also set or produce tomatoes completely differently!

What to choose and which type is best suited for your particular garden depends on a few things – how much space you have to devote to tomatoes, if you need or want to grow in pots or planters, how many tomatoes you can or want to handle at once and if you want most of your tomatoes in one harvest or prefer to get a few at a time.

Let’s look at the details.

A plant growing in the dirt on a sunny day.Determinate tomatoes are often called “bush†tomatoes, usually growing only about 3 to 4 feet high. These will grow to their full height, then start putting on tons of flowers – often covering the foliage with tiny bright yellow blossoms.

When they start setting blossoms at the very top of the plant, growth stops and all of the energy is put into producing lots of tomatoes at once. Usually the entire crop will ripen within one to two weeks, with the plant either dying or sometimes going dormant for a period before producing a second, smaller flush of flowers for a smaller follow-up crop. The second crop only happens in areas with a long growing season.

Because they are smaller and bushier plants, determinate tomatoes can be grown in containers, pots or buckets in small spaces where a taller tomato which needs staking won’t work. They don’t need pruning, as that only removes flowers and reduces production. Determinate tomatoes are great for gardeners who want or need a large harvest all at once or over a short time frame, such as for canning or making large batches of sauce or salsa. An added benefit is most determinate varieties are early producers. Some gardeners like determinate varieties as the early harvest allows them to get a good crop of tasty tomatoes and still enjoy a long summer vacation!

Some determinate tomatoes will benefit from staking or caging, but it isn’t as necessary as with indeterminate varieties. Those that need support don’t need much, just enough to keep them from toppling over if grown in a pot or container or from wind or rain.

Some of the determinate heirloom tomatoes we offer:

A plant growing in the dirt on a sunny day.Indeterminate tomatoes are sometimes called “vining tomatoesâ€, as they will continue to grow throughout the season until frost kills them. These are what you’ve seen photos of showing tomato plants 10 or even 15 feet tall in a home garden. The greenhouse industry uses indeterminate tomatoes and will sometimes have tomato plants of 40 feet or more! The average height is about 6 to 8 feet for a home garden.

This type of tomato plant will grow some, set some flowers, produce fruit and continue to grow and repeat the process all season long. The amount of flowers and fruit set each time depends on the variety of tomato; some will only set a few flowers each time while others will easily put on 20 to 50 flowers for the smaller, cherry or currant size tomatoes. Indeterminate tomatoes really remind us these are tropical plants which are perennial in their native habitat. It isn’t unusual to find three year old tomato “trees†in Central America!

Indeterminate tomatoes are perfect for the home gardener who wants a smaller harvest several times during the season instead of one large batch at once. The amount of fresh tomatoes on your kitchen counter is easily controlled by how many plants are in the garden. Be warned, however, even indeterminate tomatoes can easily overwhelm the average home gardener’s kitchen with just a few too many plants in production!

Support for these tomatoes is essential for good harvests and to keep the plants healthy. Indeterminates can be allowed to sprawl – we have done it many times – but it becomes a lot of work to lift and move hundreds of pounds of vines to pick the tomatoes, and lots are lost to not being able to see them and they rot on the ground. Support systems like cages, staking, trellising and such will go a long way to keeping these monsters manageable. Heirloom tomatoes can easily have stems 1 ½ inches in diameter at ground level, so make sure the support structure is solid and able to hold a hundred pounds or more of tomato plant weight.

Pruning is optional, with some swearing by it while others don’t find it helps tomato output very much. Your climate has a lot to do with it, as those in humid climates will see benefits from pruning the bottom 10 – 12 inches to improve airflow and prevent the lowest fruit and leaves from touching the ground, inviting pests and disease into the fruit and plant. We have experimented with pruning and found for us in our climate early pruning prior to transplanting is beneficial, but we don’t see any improvement in production in pruning after transplanting and have actually seen a decrease in the size and amount of tomatoes on pruned plants.

One technique that helps end of season fruit ripen better is to prune late flowers that don’t have a chance of producing fruit before frost. This re-directs the plant’s energy into the ripening fruit and not into flowers that won’t bear anything.

Some of the indeterminate heirloom tomatoes we offer:

Many gardeners will grow both types, with an emphasis on one or the other depending on their needs. Some will do a few indeterminates for fresh slicing and salad tomatoes all season, with the majority of the plant being determinate for their well-known spaghetti sauce or signature salsa that is canned or frozen for the upcoming year. Others want to do smaller batches of different sauces or salsas or have a smaller kitchen and just can’t can a couple of hundred pounds of tomatoes at once.

Now you’ve seen how both types can be beneficial, you can choose what works best for your garden!

Potato Leaf and-Regular Leaf Tomato


Heirloom tomato leaves have two main different and distinct types of leaves – potato leaf and regular leaf. Plants with regular tomato leaves are what we are all familiar with; multi-lobed, serrated and sometimes almost toothed branching off of the stem. Potato leaved plants have broader, smoother single leaves branching off of the stem, missing the multiple lobes and serrations.


Regular Leaf Tomatoes

A plant growing in the dirt on a sunny day.

These are by far the most common and well-known type of tomato leaves – they are what we think of when we think of “tomato plantsâ€. The shape and color of the leaves can vary – from slightly serrated to extremely and from a light pale green to a deep dark green and almost a bluish leaf. The width and length of the leaf can vary a lot as well from small narrow leaves which almost always curl to long and wide leaves that droop.


Potato Leaf Tomatoes

A plant growing in the dirt on a sunny day.

As mentioned above, these leaves are almost always much bigger and smoother on the edges than regular leaves, with more heft. They look much more like potato leaves than tomato leaves, thus the name. Potato leaves tend to give more shade to a plant than regular leaves, due to the larger area that the leaves have and more shade from each leaf.

Examples of potato leaf tomatoes are:

There doesn’t seem to be much difference in growing the two different types of tomato leaves; one is not more productive, flavorful or pest and disease resistant than the other, or tolerant of heat or cold. They just have different leaves.

One thing of note is that as far as we can tell, all potato-leaved varieties are heirloom or older varieties. We haven’t been able to find a hybrid that is potato-leaved.

Have some fun in your garden this season and try one (or more) of these unusual but delicious heirloom tomatoes!


September in northern Arizona means a few things – the weather starts to cool off and the nights become very enjoyable, the garden seems to find another gear as the energy-sapping heat begins dropping off and we harvest some of the most amazing colors and flavors of vegetables.

We’ve taken some glamour shots of the garden’s bounty and wanted to share them with you, along with tips on how we’ve enjoyed preparing them in different dishes.

Remember as you look at these vegetables to not worry if you can’t plant and taste these this year or season; see what appeals to you and either buy them now or add them to your Wishlist. Seeds are good for more than one year, so buying them a few months before planting will not have any impact on their germination next season. Just store them in a cool and dry place, then you can plant and experience all of these colors and flavors for yourself, straight from your garden!

Click on the links in the descriptions to visit them in our online seed store!

A plant growing in the dirt on a sunny day.

Fresh Rosa Bianca eggplant – beautiful, firm and tasty without any trace of bitterness. Eggplant can be quite delicious when grown in your own garden, harvested fresh and cooked soon after. We peeled and sliced this, slowly sautéed it in olive oil and added it into a fresh roasted tomato sauce. It easily stood with the intense roasted tomato flavors without getting lost or overwhelmed.


A plant growing in the dirt on a sunny day.

Flamme or Jaune Flamme Tomato – apricot size and color, French heirloom tomato that came on early and is still producing strong late into the season. Really a wonderfully delicious tomato with an immediate, intensely sweet flavor that is soon balanced by a smooth tartness and fruit overtones. The complex flavors last on the tongue, making a second and third bite inevitable.


A plant growing in the dirt on a sunny day.

A different angle on the Flamme tomatoes.


A plant growing in the dirt on a sunny day.

Jubilee tomato – Absolutely delicious golden tomato with very little gel, lots of meat and long lasting flavor. Flavor is immediate with a balanced tart and sweet profile and very full. Many yellow tomatoes have a milder or blander taste, as if the flavors were diluted – not the Jubilee! Excellent fresh as a slicer and as a unique flavor in a fresh roasted pasta sauce – doesn’t get lost in rich red paste tomatoes and adds a brightness to the sauce.


A plant growing in the dirt on a sunny day.

Box Car Willie tomato – Most “old-fashioned†heirloom tomatoes have a strong to very strong acid content that contributes a tartness that sometimes becomes quite a bite. Not Box Car Willie – it has an immediate, forward flavor that starts off with a moderate tartness quickly followed by a mild sweetness, balancing the flavors out. Overall the impression is a slightly tart, yet mildly sweet smaller beefsteak tomato that is really enjoyable sliced fresh or juiced. When sliced it retained most of the juiciness inside the fruit and didn’t leak all over the cutting board.


A plant growing in the dirt on a sunny day.

Box Car Willie Tomatos sliced open.


A plant growing in the dirt on a sunny day.

Speckled Roman tomato – Meaty and moderately sweet with little juice or seed cavity, these are great on salads or as an appetizer dish where their unique and eye-catching colors can be shown off. Their flavors back up the show, making this all the more valuable in the garden. One of the all-purpose tomatoes that we turn to – it is excellent freshly sliced, in salsas and adds a fruit note to sauces or soups as well.


A plant growing in the dirt on a sunny day.

Another view of the Speckled Roman, showing the interior.


A plant growing in the dirt on a sunny day.

Pepperoncini Pepper – These are pretty common peppers, but the taste and flavors when grown at home are unlike anything you’ll find in the store. This probably explains why these continue to be a popular variety that continues to find new fans each year. Mild yet flavorful, these work well in many dishes that need a bit of pepper flavor without overbearing heat.


A plant growing in the dirt on a sunny day.

Hungarian Hot Wax Pepper – The wilder, spicier relative of the Sweet Wax pepper! Moderately warm without being overly hot with a tangy but slightly sweet flavor. Watered well, the heat is moderate but can be cranked up by restricting water. Excellent when de-seeded and dry-fried with garlic and onions on a hot cast iron pan, then added as a topping to a pizza.

A plant growing in the dirt on a sunny day.

Long revered in Oriental cultures as a symbol of mindfulness, calm and patience, the preying mantis is also a good sign in the garden as a pest patrol.


Heirloom Chile Inspection


One of the wonderful things that we get to do in this business is visit seed growers. Most of the time the visit is to inspect the crops or harvest for that season, looking for potential challenges or quality issues that must be addressed. Open pollinated seed wants to “drift” or change and adapt to current conditions, and it is our job to keep true to the characteristics that made it so worthwhile to be passed down from generation to generation.

Other times we get to visit a grower or breeder to see what they are working on, which becomes a highly educational day in the fields for us. This is just such an occasion.

We were invited to south-eastern Arizona to spend the day with a world-class chile breeder. He currently supplies most of the chile seeds for the Hatch chile growers in New Mexico, and has been breeding and refining chiles for about 30 years. As an example, he obtained seeds for the “Sandia” chile from growers in the Albuquerque area almost 20 years ago and has doubled the production of that chile, while retaining it’s remarkable flavor and compact, bushy plant characteristics that have lots of leaf shade to prevent the young chiles from becoming sun scalded. He combines traditional plant breeding with extensive selection and very close observation, only choosing to keep the very best plants for seed.

We first met him at a Master Gardener conference where he presented a talk about the genetics of the breeding he was doing, explaining how much more complex a chile plant is than a tomato, with the resulting complexities in breeding and selecting to get certain characteristics to come through reliably. He has studied the DNA of the chile plant extensively, and has collaborated with university research projects working to identify and map the chile genome to better understand how and why it grows and reacts the way it does.

A plant growing in the dirt on a sunny day.

When we first pulled up to the growing field, we weren’t exactly sure what to expect. From our conversations with him, we knew he was growing several dozen chile varieties on a few hundred acres, but we didn’t know how. Chiles will readily cross pollinate, creating a mess for growers and especially breeders. As we parked, a tractor was already pulling a flatbed trailer out of the field loaded with freshly harvested chiles.

For all of the photos, click to see them full sized.

A plant growing in the dirt on a sunny day.

Looking out across the fields, you can see fluorescent flags in the middle distance. It is easier to see if you click on the photo for the full size. These are the primary plants that show all of the desirable characteristics or traits that the breeder is looking for, so they are tagged and will be allowed to fully ripen, then the seeds will be collected to be replanted next year. All of the surrounding chiles will be harvested for use as fresh green chiles. 

A plant growing in the dirt on a sunny day.

This is where it all starts, with a single flower. One flower, successfully pollinated, will give you one chile with seeds. These particular chiles have a good amount of seeds, but there are some that we have grown for us that only produce a few seeds per chile pod, so they are much more labor intensive and more expensive to grow.

Chile flowers are classified as “perfect”, meaning that each flower has both male and female organs. The anther or male portion produces the pollen and is seen extending out from the flower in the above photo. The stigma is the female organ and it is beneath the flower petals and underneath the anthers.

Flowers begin appearing when the chile plant starts branching and the process of flowering is called “dichotomous”, meaning that the plant produces one flower, then two, then four, eight, sixteen and so on. There will be many, many more flowers than fruit, and a larger percentage of the early flowers produce fruit than those later in the season.

Chiles are surprisingly temperature sensitive, as they produce the most fruit when nighttime temperatures are between 65° and 80°F, almost stopping by 85°F and the pollen aborts when daytime temperatures are above 95°F. This is why home gardeners will shade their chile or pepper plants in the summer in hot locations. To read more about this, see Grow Better Peppers with Shade.

A plant growing in the dirt on a sunny day.

Gardeners with some experience often ask how we isolate the different varieties of tomatoes, peppers or any of the different cultivars we offer so they do not cross-pollinate. There are three main methods of isolation – time, distance and physical isolation. Our growers use all three of these techniques to grow more plants for seed, which increases production.

Swaths of corn are used at this location for isolation. It is planted earlier than the chiles in rows that are about 15 feet deep and seeded fairly thickly. The result is tall barriers that inhibits the travel of pollen from one plot of chiles to another and has proven itself to be highly effective through both field trials and laboratory testing.

When the corn has matured it is harvested and the stalks are removed, making it much easier to access the chile plots. By that time the chiles have flowered and produced the first couple of flushes of fruit which the seed will be saved from. Later pollination of fruit is picked and used as fresh chiles, with the seed not being saved.

A plant growing in the dirt on a sunny day.

We had camped in small secluded campground the night before, with a strong weather warning for the next couple of days due to a tropical storm working its way inland from the Pacific.

This is how we started our day, with clouds getting stronger and the wind picking up until the mountains to the west were getting drenched. The rains then turned toward us and we were forced out of the fields just after noon.

A plant growing in the dirt on a sunny day.

Keeping track of all of the individual plots is done both by hand and with modern technology. A hand drawn map is used in the field to verify and make notes, with the information being transferred to a computer file later.

There is a team that works to keep the quality high – the breeder and farm owner, a field foreman and two highly experienced plant identification specialists that spend lots of hours each day in the field with the foreman, looking at and evaluating each individual chile plant for the characteristics that are desired. Those plants are then identified, tagged and tracked throughout the season.

If a plant continues to perform to standards, the chiles will be harvested and the seeds saved for next season. If even one trait or characteristic is found to be below standards, the markers are removed and the fruit is harvested as fresh chile to be eaten and the seeds are not saved.

A plant growing in the dirt on a sunny day.

The field inspections of chiles was a highlight of our day! This chile is just starting to ripen past the green stage. There are sometimes 15 different characteristics that are desired and evaluated in a single chile – many not having to do with heat or taste.

If you click into the larger photo, you will see the thickness of the flesh better. This shows how fertile the soil is, as poor or unsuitable soil will not grow thick flesh and the skin will be slightly to noticeably bitter. The breeder has shown me photos of chiles that have a flesh 3/8 of an inch thick! This is extremely good soil for growing chiles.

This particular chile only grows two ribs down the center of the fruit where the seeds are attached to. They know to cut the chile open from the side to see into the chile for evaluation.

A plant growing in the dirt on a sunny day.

One thing we learned is that the capsaicin or heat is located along the ribs of the chile. Mild to moderate chiles will have the majority of the heat here. This is primarily true for most chiles, though some of the hotter varieties will contain additional capsaicin in the flesh.

Once again, clicking into the larger photo will show the yellow capsaicin better. It is located on the bottom rib and is a very light yellow color. It was very educational to taste the chile flesh, which was very flavorful and mild and then touch the rib with the capsaicin and taste it. The heat was immediate and surprising for such a mild chile and lasted for several minutes on the tongue. This is why many recipes will say to remove the ribs, as it strips out the majority of the heat!

A plant growing in the dirt on a sunny day.

The capsaicin can be easily seen on the top rib as a light yellow line that follows the flesh, with the tip of the knife pointing to a heavy spot. This chile has a good amount of capsaicin on both ribs and would give an unsuspecting person quite the surprise!

His focus with chiles is on the milder varieties, such as those grown in and around Hatch, NM.

A plant growing in the dirt on a sunny day.

We talked about different characteristics being selected for in the plots and here is a representation of some of them. At first glance, these four chiles seem to be all the same – large, green and fairly flat. In fact, these are all different cultivars; bred, selected and grown for different markets.

The top one is grown for fresh chile sales at Mexican markets – this is what traditional Mexican households are looking for in size and flavor for specific dishes with fresh green chile. It is too long for canning, as the chile will fold over in the can – making it undesirable for whole canned chile use.

The second from the top is grown for the canning companies – it has a “crown” where the stem is, making it easier to de-stem by machine. In fact, the term is called “de-stemability” when looking at the characteristics.

They will pick a chile, grab the stem and snap it off of the top. If it comes off whole without taking any of the chile with it, that is good. If part of the stem remains, or some of the chile is removed – that is not acceptable.

The third chile is preferred for fresh stuffing use as it is flat and wide and is perfect for Chile Rellenos.

The bottom one is perfect for fresh roasting, as it is rounder so that it will tumble in the flame roaster and is longer and wider than the canning chile. The stem is a bit smaller and tighter than the canning chile as well, which is desirable for roasting as you don’t want to lose the stems in the roaster.


A plant growing in the dirt on a sunny day.

It is easier to see some of the physical differences in this shot.

A plant growing in the dirt on a sunny day.

For the breeder, flavor is most important followed closely by productivity. We must have tasted a hundred chiles during our time in the field and left with both of our arms full of chiles that had been picked and tested for de-stemability or other physical traits and were then waste. We loved it!

A plant growing in the dirt on a sunny day.

Another look at the production capability of a chile plant. They select for smaller, more compact plants with larger chiles and lots of leaf cover to shade and protect the chiles from sun scald and hotter temperatures. More leaf cover also keeps the soil cooler which keeps the flowers cooler, maintaining a better pollination and fruit production environment.

It quickly became apparent that there were many other traits that had been identified and were selected for beyond just flavor and size or appearance of the chiles that contributed greatly to the overall quality and flavor of the chiles. Lower plants that had thicker stems so that the chiles didn’t break the stems from the high production and large sizes were part of it. More leaf cover with larger leaves was another. Tolerance and resistance to disease, sun-scald and other challenges were more traits actively encouraged.

A plant growing in the dirt on a sunny day.

Remember how we talked about isolation in a previous photo? Here’s another example of isolation that is being used to actively improve the chiles in the field. These are isolation cages or tunnels, put over the chile plants after they are sown to exclude any insects or pollen drift from other chile plants. This prevents cross-pollination and only allows the chiles inside the cage to do the pollination. These cages were just slightly taller than the chile plants and some were hundreds of feet long – as long as the row of chile plants.

A plant growing in the dirt on a sunny day.

Here’s another look, showing two different types of isolation in one photo. The remains of the corn row isolation between plots is next to one of the isolation tunnels, with the field manager and breeder as we saw them most of the day – heads down looking at chiles with their hands full of chiles. The yellow flags are tags of specific plants that have been identified as having the traits or characteristics they wanted.

A plant growing in the dirt on a sunny day.

The isolation tunnels don’t prevent sun or water from entering, only insects and stray pollen.

A plant growing in the dirt on a sunny day.

After we were chased out of the fields by the rains, we got a tour of the processing facility where the truckloads of ripe red chiles were cleaned, de-seeded and dried. The dried chile pods are sold to a company that makes chile paste and sauces, while the seeds are sold to the New Mexico chile canning companies and grown around Hatch, NM and surrounding areas.

We were treated to seeing how much seed is involved in an operation like this – lots and lots! The warehouse is climate controlled for temperature and humidity and is stacked full of chile seeds. Most will be sold to the commercial growers of fresh green chiles, but there is a deep store of multiple years worth of breeding stock seed. There are backups upon backups going several years back, all labelled and coded with details so that they can be easily reached if needed, or if there is a crop failure due to weather or insects.

This level of backup and redundancy is absolutely necessary as a breeder, as there is nowhere else to turn if a crop fails or things don’t turn out well. We felt very privileged to see and spend some time in the seed warehouse! 


Succession planting or succession gardening is basically one crop following another crop in the same space to maximize the amount of food produced in that space. This approach should be looked at as a tool and used in planning what varieties to plant when in your garden so that you’ve got fresh veggies and herbs ready throughout a much longer season.

Succession planting is an approach or tool that is used alongside other techniques or approaches, such as intercropping or companion planting. Once you get the theory and technique dialed in for your garden, then overlapping succession planting with other techniques will further boost your garden’s productivity, as well as the health, taste, and nutrition of the vegetables for your dinner table.

Succession planting may sound complicated, but it simply means planting a little, often.

While it is tempting to plant a 10-foot garden bed full of carrots, when they all ripen within a week, you’ll have way too many carrots (or zucchini, cabbage, etc.) to eat at once, causing veggie burnout and all too often wasted food.

Sure, you can give it away, can, ferment, pickle, and do all sorts of things with an overabundance of a particular veggie, but the downside is that when it is all gone, you’ve got nothing left in that bed and have to start over. This is especially true with shorter seasons, and quicker producing vegetables like greens and root crops.

A great place to start learning about succession planting is in the early spring and fall garden, as a lot of the fast-growing greens are the perfect tool to learn with. If you make a mistake and plant too much or too little, you’ve not tied up precious garden space and soil for the next couple of months.

Another ideal place to experiment and learn about succession planting is in the heat of the summer when, most likely, your peas and radishes have all been picked, the cilantro is blooming, the lettuce has bolted, and the spinach is a tasty memory. If left alone, those newly-opened spaces in your garden beds are the ideal incubators for weeds, as their seeds can patiently sit dormant for years, just waiting for a spot of open, unused soil to appear so they can jump in and create havoc. 

So, fill those empty spaces with succession planting to jump-start some tasty fresh vegetables that will tickle your tastebuds.  You can easily plant a different fast-growing green or root in each space, creating a five-vegetable medley adding variety and a new spectrum of flavors to your salad or fresh grilled dinners in a couple of weeks.

Starting the Planning

A plant growing in the dirt on a sunny day.First – start with planning for succession planting is to make a list of what veggies you actually like to eat. This sounds simplistic, but do you want to devote time, energy, and water in your limited garden space to something that you will wind up not eating? Doesn’t make sense, does it?

Our website descriptions always include how many days to maturity for that variety, so you can plan on how long it will take to grow. For instance, Bloomsdale Spinach is 39 days, so in about 5 weeks from planting the seed you should be harvesting the first of your fresh spinach.

Second – think about how much you will reasonably eat in a week or two. This helps determine how much to plant. If you love salads with lots of spinach and use it several times a week, then one or two plants will not be enough.

Third – consider how long each plant produces. Spinach, kale, Swiss chard, and many lettuces are “cut and come againâ€, meaning that you can harvest some of the leaves and the plant will continue growing, producing more leaves for next time. Head lettuce, cabbage, and root crops on the other hand are single-harvest vegetables. Once you’ve cut the cabbage head, it is finished. The root needs to be pulled out and something else replanted there.

Mapping the Garden

A plant growing in the dirt on a sunny day.Putting all of the pieces together is much like assembling a jigsaw puzzle with your garden in the center. You can make it easier by drawing a simplified map of your garden with a spring, summer, and fall diagram for each bed you will use in succession planting. For instance, if you choose to practice succession gardening for spring, summer, and fall, you would have three beds drawn for each real bed in your garden – one for each season.

This is why we strongly recommend starting small and simple in learning succession planting. It is much easier and less overwhelming to start with one bed and practice for a year, learning what works well and what doesn’t than to convert all of the garden and lose track of what should be planted when and where.

The two photos above are from our small Grow Boxes that we have outside our back door. We have half of one box planted with Swiss chard and the other with kale, with the succession planting seeds just starting to peek out in the other half. This goes to show that you can do this with the smallest box or container!

A side benefit of starting small and learning is many people, even experienced gardeners, are taken by surprise at how much more food is being produced out of a garden bed than they have ever seen before.

Once you’ve determined how many beds you want to use in succession gardening and have the diagram for the seasons, you will want to map out what veggies get planted where and on what schedule. This is where using the days to maturity info comes in.

We’ve put together this chart to help you visualize and understand scheduling better. Shorter season, faster-growing crops will be planted more often; those needing a longer season will not be planted as often.


Examples of 7-day planting intervals –

Examples of 14-day planting intervals –

Examples of 21-day planting intervals –


Now that you have an idea of planting intervals, start plugging your favorite vegetables and greens into the garden bed diagram. It makes sense to mix some larger, longer-season crops like cabbage with early and fast-growing ones like lettuce or spinach. By the time the spinach and lettuce have been harvested a few times and is ready for pulling, the cabbage will be getting larger and need more space, but it won’t interfere with the other vegetables early on.

This technique is known as intercropping, and is complementary and beneficial to succession planting.

A plant growing in the dirt on a sunny day.Another good technique is to mix tall and short crops together that have similar maturity rates, such as spinach or arugula and a taller kale like Lacinato. Mixing deep and shallow-rooted crops is another way to maximize yield – like deep tap-rooted lettuce among shallow-rooted green onions.

As you make your diagram, list what is to be planted in the bed with the date to be sown or transplanted, along with the expected harvest date or date range. For example- that Bloomsdale spinach might be planted on September 1st and have a first expected harvest date of October 7th – or about 5 weeks later – with a harvest range of October 7th through October 15th for baby spinach or October 31st for full-size spinach. Your conditions may allow for an even longer harvest, or you might notice it getting slightly bitter and needing to be pulled and the next crop planted.

Mixing direct sowing of seeds intermixed with 2-week-old transplants of the same variety is another way of staggering the harvest and growth rates in a smaller area while greatly improving the amount of harvest. An example is to sparsely sow lettuce seed after transplanting 2-week-old lettuce seedlings of the same variety. By the time the seeds have sprouted and start to get some size on them, you’ll already be eating from the seedlings. The mature seedlings will be pulled first, making room for the younger lettuce grown from seed.

Eliot Coleman talks about how French market gardeners would sow a mix of radish and carrot seeds in the early spring, then immediately transplant 3 – 4 inch tall lettuce seedlings. The radishes are harvested first, making room for the carrots growing between the lettuces. The carrot tops grow above the young lettuce, giving them light to finish growing. The lettuce crop was harvested next and young cauliflower seedlings were transplanted in the spaces between the carrots. After the carrots were harvested the cauliflower had plenty of room to finish growing. This is how small-scale growers in and around Paris fed the city’s population for over 350 years!


Bindweed History

Field bindweed, also called perennial morning glory, has the scientific name of Convolvulus arvensis and is widely considered to be one of the most invasive and destructive weeds in cropland and gardens. It was first found in Virginia as early as 1739 and is thought to have originally brought to Kansas and the Midwest from the lower Volga region in Russia, hitching a ride in the oats and wheat brought by immigrants starting new lives. It and its close cousin hedge bindweed (Convolvulus sepium) are both perennials, reproducing from both seeds and shallow creeping roots which make control and eradication much more difficult than if it was an annual.

Bindweed has been so pervasive that in 1937 Kansas wrote official legislation outlawing field bindweed – among a number of other persistent weeds – requiring farmers to use every effort to remove them from their fields and state agencies to do the same with public lands. Several Midwestern states followed suit and adopted this legal approach, approving and vigorously promoting an “eradication through poisoning†approach. As you might assume, all of these laws and efforts were unsuccessful. Perhaps the legislators forgot, if they ever knew, that Mother Nature rarely obeys mankind’s laws.

Bindweed competes very aggressively with adjacent crop plants for water, nutrients, and light, reducing crop yield and quality as well as interfering with harvesting by intertwining with crop plants and clogging up farm equipment – thus giving its name of “bind-weedâ€. In farming, bindweed infestations can reduce grain crop yields by 20 – 50% and row or vegetable crops by 50 – 80%, with similar reductions in the home garden. This is not a weed to be taken lightly!

Identification and Growth

A plant growing in the dirt on a sunny day.

Bindweed Wrapped Around Morning Glory

It is pretty easy to identify field bindweed and its several cousins. If you’ve ever grown morning glory, then you are already familiar with what bindweed looks like because they are in the same family – Morning Glory. Bindweed has narrower leaves and smaller flowers than Morning Glory, as can be seen in the photo of bindweed vine wrapped around morning glory, and the photo at the top of the article. It is a low growing, drought tolerant with medium green narrow arrowhead-shaped leaves on vigorous vining slender stems. The flowers are funnel-shaped with colors from white to pink. The flowers produce small round capsules with 1 – 4 seeds in each, which can survive in the soil for up to 50 years due to their exceptionally hard and durable seed coats. There is a long central taproot on each plant that can drill down as far as 20 feet or more for moisture that develops numerous lateral roots, mostly in the top 2 feet of soil. Field bindweed reproduces from seed and from buds that form along the lateral roots, sending shoots up to the surface which then become entirely new independent plants. Lateral roots can spread about 10 feet per season, sending up new shoots along the way.

A plant growing in the dirt on a sunny day.

Invading Bindweed

The most common identification is when a gardener realizes there is a mat of green vines that are taking over a section of the garden or yard, or is climbing up the trellis or wall in the case of hedge bindweed. Early in the morning there will be hundreds of small, pretty flowers opened up that will attract a person’s attention.

Early warm weather wakes bindweed up and it grows until the frost or cold stops it in the fall. Extreme heat, drought, and cold will slow down or kill off the top growth, but the underground roots and shoots will go dormant, waiting for enough moisture or better weather to re-emerge. The root systems can spread up to 10 feet per growing season, or by the lateral roots and buds being broken up and re-distributed by tilling. Seed is often spread from irrigation water runoff, birds eating the seeds and depositing them elsewhere, on the feet of gardeners, dogs, and other animals and on the wheels of wheelbarrows, tillers or other machinery and vehicles.

Control Methods

When researching how to control bindweed, the most commonly recommended method is to spray it with a persistent herbicide like glyphosate (Roundup) or worse, but then turn around and caution that care must be used around vegetable or other food crops.

Please understand, we very strongly do not recommend this approach, as is often creates more problems than it solves.

The second most common prevention recommendation is to make sure to avoid bringing in soil, seed, hay or animal feed that has the seeds, buds or pieces of the lateral roots in them. This is somewhat obvious, but too many times the first sign of having a problem is when the little flowers have bloomed and it is way too late for prevention.

The folly of using persistent, petrochemical herbicides to control most weeds – but especially bindweed – is apparent when looking at the multiple mechanisms it uses for reproduction – seeds, buds, lateral roots and the shoots they send up, as well as the vast amount of seeds that can stay dormant for several decades, just waiting for the right soil conditions. Sure, spraying will knock the above ground growth back, but the next season it will be back from all of the different angles it uses to survive, so more spraying is needed. Meanwhile, the spray is also knocking back the exact plants you want to grow and it isn’t beginning to touch the seed or root reservoirs in the soil!

Another common but misguided approach is to use a mixture of vinegar, Epsom salts, and dish detergent. This doesn’t work any better and may wind up killing more plants that just the weeds. Vinegar – whether household strength or the much stronger agricultural vinegar – is an acid and affects the above ground green growth. It will kill that off, but not touch the underground roots, seeds or shoots. It also changes the pH of the soil, potentially creating conditions for worse weeds to come in. Epsom salts are magnesium sulfate, supplying elemental magnesium for the soil microbes to work with and sulfur, which again lowers pH and is a nutrient building block. Dish detergent is a “spreader/sticker†which coats and covers the surface of the leaves, suffocating them. Unfortunately, it can also suffocate beneficial insects, earthworms and the leaves of nearby plants you want to keep.

It is initially easier and much simpler to just spray the weeds, but that quickly becomes a slippery slope as the weeds you are trying to control grow more abundant and you start to notice other invasive weeds appearing that weren’t there to begin with. If you want to get ahead of the weeds, you must understand how they grow, spread, reproduce and the soil conditions that allow them to flourish.

Compare spraying increasing amounts of herbicides multiple times each season to an initial learning curve, some soil improvements and watching as the unwanted weeds start to retreat year after year, while your garden or farm grows stronger, healthier and produces more food that tastes better. Which road do you want to go down?

In looking at methods of controlling bindweed, we need to step back just a bit to understand more of why this, or any other, weed establishes itself in the first place. Contrary to much of the commonly spread information today, weeds don’t just “happenâ€; they are in a certain place for a very specific reason – the conditions are “just right†for them to grow there.

Weeds are an indication of what is going on with the soil and its fertility, both right and wrong. They show the progression of the soil, whether the fertility and biological diversity and health are improving; or if it is in decline. Very much as a pond will go through several generations of different species of plants until it is filled in and becomes a meadow; or a grass pasture will gradually fill in with a progression of woody shrubs and eventually trees, weeds will have a progression of species that tell the story of improving or failing health of the soil where they grow.

This information is by no means new, untested or untried. It has simply been swept aside in the race toward industrial agriculture shortly after World War II using leftover nitrogen and phosphorus stockpiles from explosives manufacture. This chemical race also happened to home gardening, unfortunately. Dr. Carey Reams and Dr. William Albrecht were some of the last and greatest researchers into the relationship between healthy soils, healthy plants, and healthy people, which naturally extends to the study of weeds in relation to soil conditions. Much of their work is more than 50 years old at this point and is only becoming more proven as more research and testing is done in soil health. One of the best books that we always recommend to anyone wanting to start gaining a better understanding of how and why weeds work is Weeds – Control Without Poisons by Charles Walters, the founder of Acres USA magazine.

The appearance of weeds doesn’t always mean bad things are going on in the soil. For instance, moderate lambsquarter and pigweed are an indication of good soil structure and fertility is good, crops will thrive and insects will generally stay away. They can be managed with light tilling of the top two inches of the soil within one to two days after the weeds have sprouted.

A plant growing in the dirt on a sunny day.

Two Adjacent Raised Garden Beds

What bindweed says about the soil conditions when it appears is that the soil is out of balance, with pH issues and stuck or incomplete decomposition of organic material accompanied by excess heavy soil metals such as magnesium and potassium. There is usually an accumulation of dry and dead plant matter that can’t finish decomposing, creating the right conditions for bindweed to flourish. Most often, the soil is low in humus materials with low available calcium and phosphorus. pH can be either excessively low or high and the soil structure can be clay or sandy.

This is easily seen in the photo above. The near bed was treated with compost and a top dressing of wood chips last fall, while the bed in the background had flowers in it, was not cleaned out for the past couple of years and had little to no compost amended to it. The near bed has a few shoots appearing, but the background bed is over-run and won’t be able to be planted this year.

A plant growing in the dirt on a sunny day.

Bindweed Sneaking In

There are two different, proven methods of stopping and controlling bindweed without using herbicides.

The first method is using weed cloth to block any sunlight from reaching the bindweed plants, much like my article Stopping Bermuda Grass in the Garden.

This method can work if you take care to overlap the shade cloth, avoiding any gaps where the roots will come through. It normally takes about 4 – 5 years to make the roots go dormant, lose their stored energy and then finally rot.

The challenge in trying to shade bindweed out can be seen above, where the bindweed is sneaking in where there is a gap between the weed barrier cloth and the metal raised bed – possibly less than a 1/4 of an inch!

A plant growing in the dirt on a sunny day.

Bindweed Lateral Roots

When the weed barrier is pulled back, it is easy to see the lateral roots running along the bed to where the gap allowed them to put a shoot up and survive.

A plant growing in the dirt on a sunny day.

Bindweed Long Lateral Roots

Moving around to the long side of the raised bed – about in the middle of a 15-foot long bed – we found another shoot poking its head up and pulled the weed barrier fabric back.

This is what we found – a series of lateral roots that had followed the joint of weed barrier fabric and raised bed, poking shoots up wherever it could. These lateral roots went to the shoot in the above two photos.

A plant growing in the dirt on a sunny day.

Handfull of Lateral Roots

Here is what over 10 feet of lateral bindweed roots look like. What we’ve discovered is that when we installed a heavy and fairly non-porous weed barrier fabric several years ago and then put several inches of wood chips on top is that we were creating the perfect environment for bindweed to encroach underneath the weed fabric and pop up in our raised beds.

For most of our beds, this isn’t a serious issue as they are rich and well composted with a fertile and biologically active soil which seriously deters the growth mechanisms of bindweed, so we just see them popping up just inside the raised beds and nowhere else.

The second method involves improving the soil by adding missing or low nutrients, adjusting pH and adding well aged, rich compost to jump-start the decomposition process again.

This short-circuits the growth pattern of bindweed and will soon start to rot the roots and shoots. A complete soil analysis from a professional soil lab is the correct way to determine what nutrients are needed and how to adjust the pH of your soil. There are a number of very good ones, but the two that we know and are familiar with are Crop Services International and Texas Plant and Soil Lab. Either one is excellent and will help you determine what nutrients are needed and in what amounts.

Successfully controlling bindweed depends on several factors that are unique to each garden or farm. Your soil’s pH, mineral levels, clay or sandy based soil and whether you have wet or dry organic matter that is stuck in its decomposition will all determine what nutrients and approach to use. The complete soil analysis from a professional soil lab will provide you the information needed to make the plan to begin reversing the encroachment.

Bear in mind that no single weed species grows independently of all others, they will grow in groups and communities; much like companion plantings of flowers, veggies and herbs do. As you begin to learn more about what different weed species prefer and the conditions that they need for growth, you’ll start to see that groupings of particular weeds mean very specific things related to soil health and fertility. They will indicate exactly what is right or wrong with the soil and what is in excess or lacking. Then you can make the corrections and watch them leave, followed by others that are much less difficult to deal with and indicate a much more fertile soil.

This may seem a bit overwhelming at first, but when you take a step back and realize how much you’ve learned about gardening or farming since you first began, even if it’s only a short time – then you can see how much this knowledge will benefit both your soil and you with fewer weeds, pests and more abundant, healthier plants and veggies, herbs and flowers.


Bermuda grass: love it or hate it – most people fall into one of the two camps; there doesn’t seem to be much in-between. Personally, I think it’s a well-adapted grass for our harsh, dry Western climates. It loves heat, is remarkably wear resistant to foot traffic and is one of the most drought tolerant turf grasses around. It’s great for areas that need turf, for erosion control and for feeding to horses, but it’s an invasive alien weed in the garden. That’s where we have a problem.

We’ve dealt with a slow Bermuda grass invasion over the past few years as it spread from the walkway between our greenhouse and garden into the garden itself. At first it wasn’t such a pain because it colonized the wood chipped walkways and area where the picnic table is. Then it headed toward our smaller raised beds, completely taking over one and entangling the drip system where it entered the raised beds in 3 others.

A plant growing in the dirt on a sunny day.

Bermuda Grass Stolons

We’ve tried a number of approaches to curbing it’s enthusiasm – burning the above ground grass and runners (properly known as stolons) both during and after the growing season, spraying a strong vinegar solution to the green grass phase and digging up the clumps and removing them. Nothing has really worked very well or for very long. Burning is highly satisfying, but did nothing about the rhizomes underground or the seed bank in the soil. After a season of targeted burning, the grass came back just as thick and lush the next spring. The vinegar sprays punched the Bermuda grass in the nose for a while, killing off or wilting the above ground growth but the rhizomes just sprouted up within a few weeks several inches away from where it was sprayed.

A plant growing in the dirt on a sunny day.

Bermuda Grass Seed Head

Persistent petrochemical herbicides such as Roundup are out of the question for a few reasons. One, we are working in our food producing garden and fully realize that whatever is put into the ground will wind up in the vegetables that are eaten. Two, we are a company that works hard to educate about the overuse and over-dependence on what has been called “rescue chemistryâ€, so it’s just a non-starter.

So what can be done? As is usual with us, we realized that understanding more about this grass than just how to kill it would probably lead us to answers of how to work with it better. After all, as gardeners we are forever working to get the plants we want to grow in a certain area, all the while trying to discourage other plants that we don’t want in the same areas!

It turns out that Bermuda grass isn’t originally from Bermuda; it’s from Africa and was introduced around the mid-1750s. It is thought to have hitched a ride in hay and introduced into the southern states initially. It spread from there and today it is most commonly found in the southern and southwestern United States. Bermuda grass was used almost exclusively as forage for animals for over a hundred years, sometimes becoming a lawn grass by default in places where other grasses could not survive the hot summers well. It wasn’t until the early 1900s that it became recognized as a valuable golf turf grass, starting a second life. Several resources list it growing below 3,000 feet in elevation; our garden in central Arizona is right around 5,000 feet so that doesn’t seem quite correct.

A plant growing in the dirt on a sunny day.

Bermuda Grass Rhizomes

Bermuda grass is sometimes confused with crab grass. Bermuda grass has a deeper root system and crab grass has no stolons or rhizomes to deal with.

In undisturbed soil, Bermuda grass will only drive its roots about 6 inches deep. However, they can go significantly deeper in sandy soil, deeply tilled fields or garden beds, or where the roots meet a solid barrier such as a sidewalk, concrete foundation or walls. This is why driving a solid edging into the soil deeper than about 8 inches has been shown to be effective in stopping the spread of a patch into a garden or surrounding area.

Unfortunately, controlling Bermuda grass with nutrient management or pH management just doesn’t work very well; unlike morning glory or bindweed or a number of other weed species.

The two approaches that have proven to work are drying/desiccating the top 6 inches of the soil to get both the above ground stolons and the underground rhizomes and roots, and excluding light. The one real weakness of Bermuda grass is that it simply won’t grow in the absence of light. Then again, most plants don’t!

There are some folks that have had success with digging or scraping the top layer of soil away, then replacing it with rich topsoil and compost that you are sure has no Bermuda grass seed, stolons or rhizomes. For every success story using this approach, we’ve heard of a dozen others that have seen a re-infestation after some period of time.

The problem with our garden situation is that we don’t have ready access to high quality topsoil that has no Bermuda grass in it. This is part of how we wound up with our current experiment – we brought in topsoil from a neighbor’s property to help fill in and got an unexpected bonus.

Using a thick clear sheet of plastic on top of the ground and excluding any moisture during the growing season has shown to work well, if the area can be isolated with no roots or stolons escaping the area being treated. This approach works especially well if you live in a sunny and warm to hot area during the summer, as a cool and damp summer will do little to stop the grass from growing. If there is escapement, the roots or stolons simply bring in moisture and nutrients and the grass suffers but does not die. Because of the grass intrusion into the garden and under the fence, we can’t use this option.

That leaves us with the shade option, so we are going to do it right. The first step is to take the wood chips out and scrape what we can down to the soil, removing what clumps of grass are possible. We burned the remaining grass, in order to reduce its energy reserves.

A plant growing in the dirt on a sunny day.

Double Layer of Cardboard

Then we installed a double layer of cardboard for two reasons – it helps to shade the ground and will decompose over time, increasing the chances of rotting the remaining Bermuda grass.

A plant growing in the dirt on a sunny day.

Weed Barrier Cloth

Over that we installed a thick and very dense weed barrier cloth from A.M. Leonard, a horticultural tool and supply company. You don’t need to be a business to order from them and their products are commercial quality. It is 20 mils thick, has a 98.7% opaqueness to light, won’t rot or mildew, will allow water to pass through and has a 5 year warranty, so should last for plenty of time for the Bermuda grass to rot. This photo is with the full, bright afternoon sun behind the cloth, to show just how much light is stopped. I actually had to lighten the photo up a bit!

A plant growing in the dirt on a sunny day.

Aurora Helping

Installation was easy – we simply rolled it out with our resident Dalmatian expert – Aurora – supervising…

A plant growing in the dirt on a sunny day.

Cindy Trimming Weed Cloth

…then trimmed it to length with scissors.

A plant growing in the dirt on a sunny day.

Spreading Wood Chips

To finish things off we put 4 – 5 inches of wood chips on top of the weed barrier to further shade everything and discourage any other weeds from making their homes in the wood chips. With this approach, there should be no way that light will get to the grass or soil and as the cardboard rots it will start a layer of decomposition that will include the remaining grass seeds, stolons, rhizomes and roots. This very well might take a year or more with our moisture levels, but that is why we went to the lengths we did to ensure that light can’t get down to the grass and short circuit our project.

A plant growing in the dirt on a sunny day.

Weed Barrier Installation Finished

Here is the completed view, with the double layer of cardboard, weed barrier cloth and thick layer of wood chips installed.

We will post updates as they happen to this project. In the meantime, we would love to hear of your success or challenges with dealing with Bermuda grass in your own garden!


Heirloom Seed Corn


Heirloom Corn – More than just Sweet Corn

Heirloom corn is gaining in popularity as more people taste the vast differences and depths in flavors compared to commercially grown hybrid sweet corn. Comments like “It tastes more like corn than any store-bought corn I’ve ever had†and “The flavor lasts much longer and is much stronger than what I’m used to,†are common when people first taste roasted heirloom corn.

What many don’t realize is there is much more to discover in heirloom corn than just the sweet, fresh eating varieties. After all, corn has been the foundation of nutrition in Mexico and Central America, as well a surprising amount of North America.

William Woys Weaver does a marvelous job of introducing and explaining the different types of heirloom corn in his extensive book Heirloom Vegetable Gardening, the result of over 30 years of growing, tasting and cooking with heirloom vegetables.

Heirloom corn this way!

Explore the different types of heirloom corn in this article.


Types of Corn

The Indians appear to have categorized their corns by intended use: for flour, for hominy and porridge, for popping, and so forth. Each corn had its adjunct ceremonies and festive recipes. We have inherited some of these corns from native peoples, and we have selectively borrowed some of their dialect names (such as flint) for types of corn, but we use them in much different ways. The profundity of the changes that occurred as the cultivation of corn shifted from the Indian to the white man is acutely evident in Porter A. Browne’s Essay on Indian Corn (1837), which cataloged thirty-five of the most commonly raised varieties at the time. Very few were pure Indian sorts, and only a couple are known today; the rest are probably extinct.

Browne organized his corns by color. Among the yellows he listed King Phillip Corn, which is still available. Under white corn, he mentioned Smith’s Early White and Mandan, in this case a sweet corn, not the Mandan corn familiar to seed savers today. His list of red corns was the largest, including Guinea Corn, William Cobbett’s Corn, Dutton Flint, and a curious Mexican corn “found in a mummy.†Perhaps the Mexican corn released in the 1860s by Massachusetts seedsman James J. H. Gregory attempted by virtue of its provocative name to cash in on a similar implied ancient authenticity, like the Anasazi bean of today.

Horticulturists divide corn differently than did either the Indians or the early corn specialists like Browne. All of the cultivated varieties belong to the same species and therefore readily cross with one another. In fact, corn is one of the easiest of all garden vegetables to cross, since it relies on windblown pollen for fertilization, and even the slightest puff of air can carry pollen a great distance. This promiscuity results in many varieties that fall between the five or six recognized types generally accepted by horticulturists. Of the garden varieties, these include popcorn (var. praecox), dent corn (var. indentata), flint corn (var. indurate), soft (flour) corn, and sweet corn (var. rugosa). If this discussion is shifted to Mexico, everything is turned topsy-turvy by the huge number of corns that evolved there. Their complicated pedigrees were analyzed in Paul Mangelsdorf’s Corn (1974), one of the breakthrough studies on the origins of this plant.

Popcorn is one of the oldest and hardiest of all the types and can be grown where many other corns do not thrive. It can be planted earlier in the spring than other varieties, but of course it will cross easily with any type of corn planted near it. Since popcorn pops best when the kernels are over a year old, this is a corn that must be allowed to ripen on the stalk, then properly dried indoors before storing in containers free of insects and moisture. Freezing it immediately before it is popped will increase the rate of popping. I have included two old varieties in my selection that not only pop beautifully but have a flavor not found in modern commercial varieties.

Dent corns are characterized by a dent or crease in the kernel, hence the Indian name “she-corn.†This type of corn is starchy and is generally used for roasting, corn bread, and hominy. It is a type best acclimated to the South and Southwest, where it seems to have developed the greatest number of varieties. Flint corns are the northern counterpart to this type. The kernels contain a high percentage of opaline, a mineral that gives the corn it’s gritty or “flinty†texture when ground. Flint corns are normally used for grits and hominy, as are many field corns.

Flour corns or soft corns are characterized by a kernel that is mostly starch when ripe, and therefore lends itself to grinding for flour. All North American Indians involved in agriculture maintained flour corns of one kind or another. Even though they are believed to have had a tropical origin, corns with this genetic feature were among the first to be dispersed by the Indians to all parts of our continent. The Tuscarora corn on my list is one of the classic Eastern corns of this type.

The Indians of North America distinguished between two types of sweet corn, the “green†or unripe corn of most corn types when they are in the so-called “milky†stage, and a corn with heavily wrinkled kernels that is naturally sweet by genotype. The sweet corn of white culture is this latter type. Historically, true sweet corn was a latecomer, reaching what is now the United States in the 1300s. It originated in Peru, where it is still used to make chicha, a fermented drink made in pre-Columbian times. Sweet corn derives its sweetness from a recessive gene, a mutation that has made it defective in converting sugar to starch. This characteristic was utilized by Native Americans for storing slow-ripening late-season varieties as “fresh†corn during part of the winter or for caramelizing the corn while in the husk over hot coals. This slow drying process resulted in a sweet-tasting dry corn that could be eaten as a snack or used in stews and vegetable mixtures.

According to anthropologist Helen Rountree (1990, 52), the Powhatans of Virginia made a corn-and-bean dish called pausarowmena that served as a staple dish during the winter. In the late summer, “green†corn or a variety of sweet corn was harvested and roasted in the husk over hot coals until dry and slightly caramelized, very much in taste and texture like the present-day dry sweet corn of the Pennsylvania Dutch. This dry sweet corn was stored in middens and reconstituted as needed with water. It was stewed with two types of beans, a large pole variety and a small bush bean. This combination of dried sweet corn and two distinct types of beans constituted the real “succotash†of the Powhatans and related peoples in the Middle Atlantic region.

Planting Corn

All open-pollinated heirloom corn must be planted differently from hybrids. For best results, plant the seed in blocks or squares 5 to 6 rows wide. John Brown, a farmer who lived on Lake Winnepesaukee in New Hampshire and who developed the variety known as King Philip Corn, noted in The Report of the Commissioner of Patents (1856, 175–76) that farmers in his region were still planting corn “the old way†in rows 4 feet apart in hills 3 feet from one another, four to six plants per hill. This method works well for heirloom varieties and will ensure good pollination with room between the hills for squash. Pole beans may be planted among the clumps of corn and allowed to climb up the stalks.

Among the Indians in the East, corn seed was generally treated in an herbal tea before it was planted. F. W. Waugh described some of these decoctions in Iroquois Foods and Food Preparation (1916, 18–20). After soaking in the tea, the corn was left wet in a basket so that it would sprout a little before planting. This treatment was thought to protect the corn, and may in fact have produced an odor to camouflage it from birds and insects. It had the additional benefit of separating viable seed from weak ones and avoiding seed that might otherwise rot in the ground.


From this, we hope you’ve gained a deeper appreciation for the extensive uses and different types of heirloom corn and are inspired to give one or two different types a try this season! Visit our online store to see some storied varieties of corn.

With watermelons, both size and flavor matter. Heirloom watermelons grown at home will give the absolute best flavor and taste, regardless of size.


A Look At The Foundation Of Terroir Seeds

Terroir Seeds’ foundation is in soil, as most of you know. That is one of the main reasons for our choice of name for our seed company. Through personal experience and learning from those who have much more experience, we have seen time and time again that those who take care of their soil have better health and productivity, along with more pest and disease resistance than those who don’t.

In organizing some old magazines, Cindy ran across an article we wrote for Range Magazine way back in the spring of 1996 after attending a Public Rangelands Grazing Conference at Arizona State University. This was the start of our learning curve, when we were seeing wildly different philosophies about how to best conserve and improve our arid Western soils. The standard approach was exclusion and rest, thinking that the cows were the enemy- while the up and coming thought pattern was managed, short-term intensive grazing followed by appropriate rest for the grasses to recover.

Allan Savory was introducing Holistic Resource Management to the US at this time. There was a wide range of responses, both from private individuals and public officials. Most of the government officials were skeptical, while many so-called “grazing experts†were outright condemning the ideas even while acknowledging that they had no knowledge or experience in how HRM worked, only that “it couldn’tâ€.

Almost 20 years later, HRM is now known as Holistic Management (HM) and has quietly proven itself across the world in many different climates and ecosystems to simply work. We have seen it work in our part of central Arizona and have used some of its philosophies and approaches to help improve and maintain the health of garden soil.

We wanted to share one of the foundations of Terroir Seeds with this article we wrote almost two decades ago!

A plant growing in the dirt on a sunny day.

“The Way I See It”

Unequal Representation

By Stephen & Cindy Scott

Minutes after the opening of the 1996 Public Rangelands Grazing Workshop at Arizona State University last winter we heard Steve Johnson say that it’s not possible for cattle to improve the land. Johnson, presented as “a noted author/lecturer,†claims in his biography that “adding domestic livestock to our public rangelands exacts a price from a living fragile landscape.â€

Johnson, the workshop’s keynote speaker, helped set the tone and used several labels, including “welfare ranchers†having a “farce lifestyle.†Ranchers, he said, are “laying siege to the public lands†and going for “total control of the western lands.â€

The workshop’s stated focus was to educate people on participating in Forest Service or BLM public rangelands grazing activity. There were no ranching interests represented on the panel of speakers and the main topic, with a few notable exceptions, was the removal of all cattle from public lands. Emotionally charged, most presentations were confrontational and throughout the day, ranch- and cowboy-bashing was openly accepted.

Ranchers were portrayed as evil, welfare dependent, and lazy. Comments from presenters included cowboys are “always in the coffee shops†and “only see cattle twice a year.†A majority of the speakers seemed to applaud a newly accepted racism in the West. Unrealistic expectations were advanced during the workshop, such as the removal of all cattle from the western rangelands. What to do with the cattle was never addressed.

Dr. John Brock from ASU presented most of the alternatives – rotational grazing, deferment and rest. He discussed historical impacts of cattle, along with man’s impacts on arid desert ecology – i.e., Phoenix. Dr. David Brown, presenting a rare and balanced view of the benefits and problems of grazing –showed a personal 33-year perspective of grazing lands that had improved.

Holistic Resource Management and Allan Savory were both misquoted and twisted into new meanings. HRM was made to look foolish, even by those who admitted they knew little or nothing of the concepts. Many other authors were quoted out of context and used to support anti-grazing.

Of the 125 attendees, 30 were top environmental/grazing activists. Only one rancher was known to be present and he remained silent. It was apparent that ranchers need to attend these workshops to prevent misrepresentation by the ignorance of others. If they don’t, no resolutions will ever be found.

For too long now “word wars†and “range wars†have dominated the West. It is time to stop blaming others – generations, cultures, lifestyles and educations. Common ground and solutions must be found through communication, not by fund-raising confrontation. To assure positive changes, all viewpoints must be represented at the forums and workshops. We need to learn the facts, so that we can properly manage our lands, both public and private.

Stephen and Cindy Scott are environmental studies students who did not appreciate the imbalance of the 1996 Public Rangelands Grazing Workshop at Arizona State University.

From the Summer 1996 issue of Range Magazine, page 39


Aquaponics Process


Growing a surprising amount of food at home with aquaponics can be very simple, but there are a few basic things to know before getting started. We want to introduce you to the techniques of seed starting and how to keep the growth cycle continuing so that you get the most out of your system.

You can grow most vegetables that you enjoy eating in your aquaponics system. Vegetables that grow the best and easiest are those that grow above ground, such as herbs, greens, tomatoes, peppers, eggplant, cucumber and squash as examples. Please realize that this is not an entire listing, as there are over 300 different types of vegetables that have been grown in aquaponics systems over the past 20 years!

The major foods that are not suitable for aquaponics systems are corn, wheat, soy and rice. Root crops can be a challenge, however a lot of people have grown delicious carrots, beets and radishes after gaining some experience, but they are not recommended for a beginning aquaponics grower. It is best to gain some experience on the easier vegetables, then work into the more challenging ones.

Getting Started

So where to start? Once you have the system assembled, you need to get the system to start “cycling” or converting the raw nutrients from the fish into a form that is available to the plants you’ll be growing. Don’t worry, this isn’t difficult! It might be a bit different than what you are used to, but is easy to understand and monitor. The cycling process will happen automatically in almost all cases, and the testing needed to monitor the process is minimal, only taking a couple of minutes of time.

Cycling begins when the fish start adding ammonia to the aquaponics system through their waste. Ammonia is made of nitrogen and hydrogen (the chemical formula is NH3) and is not easily used by plants. Untreated ammonia is toxic to fish unless it is either diluted to a non-toxic level or converted into a different form of nitrogen.

The presence of ammonia attracts two naturally occurring bacteria in the air that will populate the surfaces of your system. The first bacteria, nitrosomonas, convert the ammonia into nitrites (the second curve in the chart below). This is the first step in the aquaponics cycling process. The presence of nitrites attracts the second naturally occurring bacteria, called nitrospira (the third curve in the graph below). These bacteria convert the nitrites into nitrates, which are generally harmless to the fish and excellent food for your plants. You can see the progression of nutrients in the water, from ammonia to nitrites to nitrates in the chart below, as well as the time frame needed. Click on the photo to enlarge it.

A plant growing in the dirt on a sunny day.

Aquaponic Ammonia Cycling Levels

 Using a readily available aquaponics water sampling kit, once you detect nitrates in your water and the ammonia and nitrite concentrations have both dropped, your system will be fully cycled and aquaponics will have officially begun! This is the best time to transplant your seedlings, as the nutrients needed by the plants will be fully available to feed them while they filter and clean the water for the fish. This mutually beneficial relationship is what makes aquaponics unique.

Now you are ready to start your seeds! One caution before we begin – don’t plant all of the available space in your system at once. You will need a graduation of plants to absorb the nutrients and filter the water for the fish. If all of your veggies are ready for harvest at once you will nutrient load the water when the veggies are removed, causing stress on the fish as the new plantings begin to establish their roots. You want a mixture of veggies and maturity levels in your planting. Some fast growing, some medium and some slow. You will only plant a few of the slower growing ones such as herbs, tomatoes, peppers and eggplant, with more of the dark leafy greens like kale and Swiss chard, with more of the faster growing lettuces. Using succession planting, or planting a few of a fast-growing green every 2 – 3 weeks, allows for them to mature and be harvested while newer ones are growing and coming in behind.

What Your Seeds Need for Germination

Seeds have everything they need to continue their species built right into them. All of the accumulated adaptations, the wide range of environmental and seasonal conditions that they have encountered and grown through are encoded into their genetic material, their DNA. Everything they need to remain dormant, and then sprout when the time is right is built right inside their shells.

Within that hard seed coat is enough food energy to help them break dormancy and carry them into their first several days as seedlings. All the enzymes they need to convert the stored energy into food is there as well; they have all of the fats, carbohydrates, protein, enzymes and hormones needed to get the seed off to a great start. As home gardeners, our job is to provide those proper conditions to ensure maximum germination into strong and healthy seedlings.

What does a seed need for germination? Moisture and temperature are the two most important aspects for vigorous seed germination, followed by a few other factors. Let’s take a closer look!

Moisture must be at a constant level for the seed and young seedling as they have no moisture reserves in themselves like a mature plant does. A mature plant can go without moisture for a short period of time, sometimes up to several hours, but a seedling will die if it loses its critical moisture level even for a few minutes. The seed needs enough moisture to soften and split the seed coat during germination; but not too much as to prevent oxygen from reaching the seed, as respiration increases dramatically. Water initially starts the process by softening and splitting the seed coat, then activates nutrients, enzymes and hormones to convert stored foods into energy. Finally it serves as a means of transporting nutrients to all parts of the newly emerging plant. When starting seeds in a tray, watering from the bottom is the best method of keeping the moisture levels more consistent. Misting can help correct smaller areas that aren’t quite moist enough. Many seedling trays will have a bottom tray to help water the soil or grow cubes.

The soil or grow cube temperature where the seed is must be correct to initiate the germination process. The key is the temperature at the seed, not the surrounding air. A room that has an air temperature of 70F may have a seed temperature of 60F or less, as the moisture acts as an evaporative cooling medium, reducing the seed temperature below what is needed. At too low a temperature the seed remains dormant, often for an extended amount of time. Not only the ideal temperature is needed, but for the correct amount of time. This prevents the seed in the wild from germinating too early and being killed by the next frost or cold front that moves in. If the temperature swings too much from the daytime high to the nighttime low, the seed will not germinate, or do so very slowly. A constant temperature for a week to 10 days will have almost all vegetable seeds up and going well.

The relationship between temperature and light changes as seeds germinate. Seeds need a high moisture and warm environment to germinate. Both moisture and temperature levels need to be pretty constant to get good germination. If the temperature is high during the day and cooler at night, the germination will be delayed. Ideally, tomatoes and peppers need 85F seed temperature to sprout. Most cool season vegetables we eat today need a seed temperature above 70F for best germination, with varieties like carrots and cauliflower needing 80F. For more specific temperature needs, refer to our Seed Germination guidelines.

Seed Starting Techniques

Now that we’ve covered some basics of seed germination, let’s look at specific ways to start the seeds for your aquaponics system. There are 3 main ways of starting seeds – broadcasting them, using a support system like paper towels or cotton balls, and seed starting media for those varieties that do best being transplanted after they are a little bigger. Here’s how each of them work:

Broadcasting the seeds is just like it sounds, taking a small quantity of seeds in hand and sprinkling them around the grow bed. This technique is obviously used with a clay or gravel bed, as it has the nooks and crannies that will support seed growth. This technique works well for lettuce and other leafy greens, as well as herbs and would probably work for other small seeds that are typically planted in the early spring and are adapted to being very wet. You can choose to randomly scatter the seeds across the entire grow bed, or just in certain areas like along one side or in a corner. Be aware that the broadcasting approach can have lower overall germination rates than the other approaches, as the seed is likely completely covered in water for a significant part of the time.

Support systems like paper towels or cotton balls work well with slightly larger seeds that germinate quickly such as beans, peas, melons, and cucumbers. This method can also be used to start the smaller seeds mentioned above – experiment and see what works best for you. Some people like to broadcast some seeds, while others prefer to plant individual seeds or seedlings in specific spots in their systems.

Planting these larger seeds directly into the bed sometimes doesn’t work as well, as they don’t reliably germinate there and are longer lived plants with more food production, so it pays to focus a bit more on where they will be located in the growing bed. They will usually germinate and grow very quickly given some support, they don’t need the added work and material of the grow media. One approach is to wad up a small piece of paper towel or part of a cotton ball and place it in the grow media where it will be moistened by the flow of water. Another is to fold a paper towel in half to crease it, unfold it, then place the seeds about 1 – 2 inches apart just above the fold. Refold it, moisten it and place it in a plastic Zip-lock bag. Check the moisture level and germination daily. You should see moisture droplets on the wall of the bag when you pull the towel out to check germination. When you see a 1 inch or longer root, trim the seedling out of the paper towel and place the root into the grow media where it will get a good flow of water.

Seed starting media is best used for seeds that are sometimes harder to germinate in an aquaponics environment (like spinach or chard) or need a little more time and care (tomatoes, peppers and eggplant) before going into the grow bed. There are different types of seed starting media, such as rock-wool or a peat based “sponge” material. Rock-wool is the most common, is inexpensive, sterile and is the easiest to find. It can be broken into smaller chunks for smaller systems or to use less material. The media is pH balanced by wetting in water that has been adjusted to between 5.8 and 7.0, then the seed is inserted into the media and kept moist, much like above. Make sure to use some sort of marker to keep track of what it is you’ve planted! After the seedlings reach about 1 1/2 inches tall, they are transplanted into the grow bed, rock wool and all.

When transplanting the seedlings and planting the seeds for the first time, it is best to add liquid seaweed for some nutrients to get them established. As the growing progresses, adding a small amount at regular intervals will help keep the trace elements and micro-nutrients in balance, producing better vegetables.

After the initial excitement of getting the system cycling and converting nutrients, then planting the initial selection of vegetables and herbs that you want to grow, don’t stop! Now is when you can harvest the first of your home-grown veggies and start the succession planting process to make up for their removal. As you harvest the lettuce or Swiss chard, watch for openings that will be good for another variety. This way you can have a continual harvest year-round of the tastiest, freshest and most nutritious food possible.

Like anything truly worth having in life, a garden requires some work. It is a continual project, an experiment. Always evolving, growing and expanding. The results will amaze and humble you, as the vibrant, rich colors show themselves. Then the aromas and flavors arrive, stunning with the depth and intensity of the garden show. The deep-seated sense of accomplishment resulting from a job well done lasts, urging you back to the work of succession planting new varieties. Each new year is familiar, yet entirely new.

Rabbit in Garden


Approaches to keeping furry and feathered critters out of the garden

One of the biggest questions we are often asked is what to do about furry and/or feathered critters that want to snack on our gardens. There are a lot of approaches, and we realized that our customers have more experiences to share that can help more folks, so we put out the question of what has been successful in helping to deter critters from your garden?

We received some great replies that we’ve included here. We’ll start off with perhaps one of the most challenging garden conditions in the US – at the South rim of the Grand Canyon national park. Here elk and other wildlife are protected, and there is a short growing season to contend with.

Deb from AZ writes – “Since we are in Grand Canyon National Park, wildlife is our #1 challenge…we have to have an 8 ft. fence around our garden to keep the elk out. Rodents are also a huge problem here: gophers, mice, voles, and chipmunks/squirrels. I feel like we have become pretty skilled at working around them!

Here’s what we have learned to do:

  1. Move the compost far from the garden: our three-bin system had become a rodent motel and led to a population explosion. Once we got rid of that, things calmed down a bit.
  2. We also use the hardware cloth under some of the beds and it works great for the gophers. Low hardware cloth fences stop them from digging in paths and peeking over into the beds to nibble. This also stops the voles, who can’t really climb. For beans and squash and tomatoes, we use a little hardware cloth ring around each plant in the early season until they get big enough to be unpalatable.
  3. For climbers like squirrels and chipmunks, we use “deer netting” over the top of our low fences to prevent climbing in.
  4. To stop mice and voles from eating seeds and sprouts, we lay sheets of metal window screens on top of the soil after planting. Once they sprout, we switch to the low fences as mentioned above.

This sounds like a ton of work, (and it is), but once you make all of these structures it doesn’t take too long to install them, and it really saves your crops from being decimated. Even the smallest critters are creatures of habit, so if you take the time to observe what they are doing you can often work around them or plant more attractive plants in less trafficked areas.

Most importantly, we have learned to be a little more Zen about the whole thing, and now just expect there to be some losses from critters. We always keep enough extra seeds of short-season crops to re-plant areas that are compromised!”


Regina from NC says – “Last year I planted a garden in a different area and found the deer just loved my cabbage, broccoli green beans – all my first plantings were eaten to a nub. I consulted a local expert (94 year old gardener) and was told the following:

Plant a wide row of green edibles outside the perimeter of your garden and then put a border of yellow ribbon tape (the type used at a crime scene) and leave it a little loose so that it moves and twists in the breeze.

I planted oats and clover outside the garden area and put the yellow ribbon around the garden. The deer ate the stuff outside the garden area and left my garden alone.

The expert advice from the seasoned veteran worked like a charm.”


Jim in IL found – “No exaggeration…last spring I would see 50 rabbits running around within a 1/2-mile radius. They were everywhere! Many times I would see 5 or 6 running/playing together. This obviously is a bad thing when you have a veggie garden! I have 8 raised beds (5×20′) which I also cover with row covers. The rabbits would even crawl under the protective covers and nest under my plants. I had to do something fast!
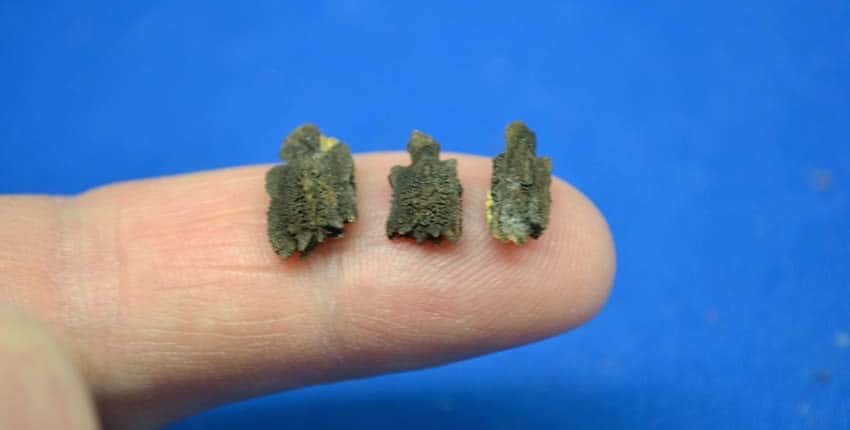
This past fall I put up a 4′ chain-link fence around my garden (approx. 35’x85′) which was really only to serve as a frame for the 1″x1″ (24″ tall) vinyl coated wire mesh fence I installed inside the chain-link. I buried the mesh 6″ deep to hopefully prevent the vermin from digging under. This spring will be the true test for my efforts.

I’m not sure if the chipmunks can squeeze in the 1″ holes, but just in case, I have traps for them. Last season I nailed 35 of them. Aggravating to do all this work only to have the critters get in for a free meal!”


Diane shared – “I wanted to share that after years of the birds and lizards destroying much of our newly-planted raised bed gardens, my husband has built some screen covers over our raised beds. He used 2 inch x 2 inch redwood posts for a frame, and attached wildlife netting to the frames. These are slightly larger than each raised bed’s opening. He placed the screen-covered frames on top of the raised beds, and no more early garden destruction! Our early Spring garden is thriving!”


Mary Lou in IL has learned – “The best trick I have is to put aluminum foil around small plants that I don’t want the chipmunks to dig up. They hate the aluminum foil and won’t dig up my new transplants. It is actually funny to watch their reaction when they try to dig and get the foil instead of dirt.”


Linda in NE shared – “I have found Aztec Marigolds work really, really well at keeping the bunnies away from my strawberries. I usually leave them in the ground till spring, but for some reason I pulled them all at the end of last season and have noticed a huge increase in the bunny population in my yard throughout this past winter. Next year I’ll leave them in till spring.

To keep the neighbors cats away from my “bird garden” I scatter rue seeds amongst the beds. It keeps the cats away, but it makes it hard to get in there to cut flowers for bouquets.

For the never ending wasps I rub a bar of soap around all the areas where they like to hang out. When I see a nest forming I liberally rub the soap all around that area. And I try to destroy all of the nests I find after the first freeze. I know wasps serve a purpose, but if they want a place in my yard it’s going to have to be away from the house and shed.


Chrys in PA shares some wisdom – “My uncle taught me an effective way to keep the crows from “unplanting” your corn as soon as your back is turned. Poke a hole in the ground about 1/2 inch deeper than normal, drop in the corn and cover it with dirt. Then take your digging stick and poke a hole about 1/2 inch deep over the corn. Maybe the birds think that another bird already harvested the seed, but they usually leave it alone.”


Here’s some of the things we’ve learned in our own garden over time:

Gophers – In our area, there are colonies of gophers living in the vacant field next to our house and garden. They will mostly stay on their side of the fence, but occasionally come under and cause havoc to our garden. Our dogs love to dig up their tunnels, but so far haven’t been able to capture one.

When we were constructing our raised beds, we installed hardware cloth in the bottom of the beds before putting the soil in. The hardware cloth is stout enough that it deters the gophers from trying to dig through and has held up for 6 years now. The challenge is that they will still come up in the walkways under the wood chips where there is no barrier! We resort to gopher traps for this – the Gophinator is by far the best and most effective trap of several designs and approaches we’ve tried.

We don’t trap any gophers that don’t get into the garden. If they are on the other side of the fence we leave them alone.

Squirrels – We generally don’t have squirrel problems, but one summer had a rogue agent that was climbing the fence and dining on our garden. The solution was to borrow a live trap from a friend, capture the little bandit and release it into another area that was far from any houses. In this case, we were able to relocate it without harming it.

Do you feed wild birds? You may be bringing in unwanted visitors like squirrels, mice and possibly raccoons as they scavenge the seed dropped from the feeders. There are a couple of solutions to this challenge: stop feeding the birds – this removes the food source and will decrease the visitation of wildlife, or move the bird feeder to a spot that is the furthest possible distance from your garden and use a feeder design that minimizes the amount of seed dropped by hungry birds.

Javalina – These wild relatives of pigs have poor eyesight, but a very keen sense of smell. If you put fresh kitchen scraps onto your compost pile, you might be attracting these large and destructive critters. If you live in javalina country, don’t locate the compost bin or pile next to the garden, use leaves and manure with kitchen scraps aged for a couple of weeks in a bucket instead. This way it isn’t as appealing to them and won’t encourage repeat visits.

A close up of green leaves with black spots


Fungus gnats are more of a nuisance than a real problem to most young plants and seedlings, but they can cause some issues if their population gets high enough. As you start your seedlings for this year’s garden, you will probably notice these tiny white flying insects that seem to infest some of the seedling trays. Sometimes they are everywhere, other times only on certain plants or sections of the seedling flats.

Fungus gnats are tiny mosquito-like insects (actually flies) that are small enough to be able to enter your home or greenhouse through the tiniest openings, but more often they ride in as eggs in soil that has been outside or in damp potting soil that has been exposed to the air for some time. If their population gets high enough, their larvae will cause damage to seedlings as they feed on the young, tender roots.

Fungus gnat life-cycle

A plant growing in the dirt on a sunny day.The eggs are laid in tiny cracks in the soil surface, hatching within 6 days into larvae that feed on seedling roots, algae and fungi in the soil. After about 2 weeks of feeding, they pupate and a week later they emerge as adults, starting the cycle all over again. The emerging adults will be mostly females and they can lay between 100 – 300 eggs, so the population can increase rapidly. By the time you see the gnats flying around the seedlings, they’ve been active for at least a couple of weeks. The adults do not feed or bite, their only purpose is to reproduce in their 7 – 10 day lifespan.

There are a couple of approaches that we’ve found to be effective. Closely monitor the amount of water or moisture that is in the flats or cups where the seedlings are. Fungus gnats are highly attracted to moist and over-moist growing media, so they are almost always concentrated where there is a bit more moisture. Over-watering is one of the most common mistakes of all gardeners, new and experienced. This is understandable, as the seeds need a moist and warm environment to soften the seed coat and start the germination process, but afterwards they don’t need nearly as much water. This is where the over-watering condition sets in. It doesn’t take very much excess moisture at all to attract the gnats.

A close up of a fly on the ground

Treatment options

To detect and trap fungus gnat larvae, simply insert a small slice of potato just under the surface of the soil. The larvae will migrate to the potato and start feeding on it within a few days. After 3 – 5 days, remove the potato slice and look on the bottom side for clear to very pale white larvae feeding on the potato. This will tell you whether you’ve got the fungus gnats as larvae and how concentrated the population is. If you’ve got a large population of larvae, put a number of potato slices into the soil to attract more larvae, then remove, inspect and throw the slices away after about a week.

Yellow sticky traps are very effective means of monitoring and capturing the adult gnats. They will show up as black specks on the bright yellow background. This may be all you need to do, but if they persist there are a couple of biological friendly sprays that we’ve had success with. The first is from Safer products, is called “3-in-1″ and is effective on insects, mites and fungi. We have found that one or two applications are effective. The other is Safer brand “Yard and Garden†spray with plant-derived pyrethrins that are highly effective on insects. Both products are OMRI listed as accepted for organic growers.

Overall, realize that fungus gnats are more of a nuisance than real problem, but serve as an effective notice that your seedling soil is a bit too moist. Decrease the soil moisture slightly, monitor and trap the larvae and adults and you’ll most likely not have any noticeable damage to your seedlings.

Seedling Damping Off


Damping-off is a soil borne disease that can attack almost all young vegetable seedlings. Home gardeners often first notice that something is wrong when the very young seedlings have a constriction around the base of the stem, some of the seedlings have fallen over or there are small flying gnats around the base of the seedlings. Damping off is caused by soil fungi and the right conditions to help them flourish.

If not taken care of, losses can be severe and results in the majority of a flat of carefully planted seedlings dying in 24 to 48 hours. Damping-off can happen before seedlings emerge from the soil. With this type of damping-off, fungi infect seeds as they germinate. As the infection progresses, seeds rot and do not germinate, leading many home gardeners to think that the seed quality is poor. Another result of seedling infected damping-off is poor or weaker seedlings that become apparent days or weeks later.

Even if some of the seedlings survive damping off and are transplanted, they are often stunted and have a twisted, constricted or off-color stem – called ‘wire-stem’ – and have health and production issues.

Not everyone experiences damping off, yet other gardeners in the same area fight with it yearly. Some gardeners buy seed starting mix every year, otherwise they suffer large seedling losses; while others (including ourselves) have mixed our own soil for years and have had very little problems. Just because your neighbor or gardening club friend has trouble with damping off, it doesn’t automatically mean you will also. We’ve created this article as a tool to help you troubleshoot and control how and why damping off happens.

Causes of Damping off

The most common cause of damping off is from soil borne fungi from three groups – Pythium, Rhizoctonia, and Fusarium.

Pythium thrives in cool, over-wet and poorly-drained soils and is often the result of over-watering and not maintaining a warm enough soil temperature for the seeds to germinate. Its symptoms are a damp, odorless rot in the root, causing it to be slimy. It may run up the lower portion of the stem and cause it to be black and slimy. Pythium can survive in soil for several years.

Rhizoctonia is present in all natural soils, coming to life when a soil is over-wet and hot. This is the most common occurrence of damping off, as the seedling will have the classic constriction on the stem right around where it touches the soil.

Fusarium thrives in acidic soils that are poorly fertilized and can remain inactive for long periods of time – years. Fusarium infects the seeds, causing many of them to fail to germinate and creating the ‘wire-stem’ appearance in those that do survive.

There are also seed-borne bacterial and fungal pathogens that can decimate seedlings. These are most often seen in seeds obtained from seed swaps or gardening clubs with poor sanitation and handling techniques in processing and packing seeds. If not recognized and corrected, seed borne pathogens will continue to infect future generations of seed that is saved and distributed.

Controlling Damping Off

A plant growing in the dirt on a sunny day.

Damping off may not be able to be prevented, but there are several easy and highly effective methods to control the outbreaks which will greatly lessen the severity of your seedling losses.

For seeds, the easiest method to control seed borne diseases is to source your seeds from a reputable, knowledgeable and experienced seed company or person. Don’t be afraid to ask questions and listen to the answers. An experienced company, grower or garden club member will be able to easily tell you what measures they take, for what varieties and why. If you are sourcing seeds from a local grower or garden club member, it will be very easy to ask around and determine their reputation.

For soil, the easiest and most proven method is simply starting with fresh, sterilized seed starting mix from established and trusted sources. There are a number of bagged seed starting mixes in gardening centers and big box stores, and often some reputable local sources. Simply buying a fresh bag, bringing it home and dumping it into your old faithful seeding tub is not the answer – you might have just infected the fresh soil! First you absolutely must thoroughly clean and sanitize all of your seed starting tools, otherwise you’ve only infected new material and brought the problem into a new season.

After cleaning and removing all of the soil residue, wash with warm soapy water, rinse well then soak in a weak bleach solution – 2 Tablespoons of bleach in a gallon of water and keep the surface wet for 5 minutes. Soaking hand tools such as trowels, hand hoes and such in a small bucket is the easiest, while spraying the potting bench and sink or mixing container works well. Spray as needed to keep the surfaces wet, then let air dry. After sanitizing, you are ready to open the bag of fresh seed starting mix and let the magic of another season of gardening begin!

A good seed starting mix will not only be sterile, but drain well and ideally have a little nutrition for the young seedlings so they won’t need transplanting right after they sprout. You can mix your own or buy a bagged mix from your local garden center or big box store. If you are interested in mixing your own, Seed Starting Media for the Home Gardener will show you what the different ingredients are and what they do.

Practical Tips

There are a couple of tools a home gardener has in their day to day gardening to minimize the chance of damaging fungi getting a toehold in the seed beds.

The easiest, most overlooked and most important is to avoid over-watering. If you notice, two of the three damping off fungi thrive in damp, over-wet conditions. This one mistake is responsible for most of the gardening woes today, both in the seed starting trays and the garden itself. It is best to bottom water seedlings using a standard seed starting tray and wicking seed starting pots. Paper pots have excellent wicking capacity, are easy to make and give the gardener control of how long the pot will last by how many wraps of paper are used to make the pot. Let the water sit for no longer than 20 – 30 minutes, then drain to avoid an over-wet situation. Water 2 or 3 times a day if needed to keep the soil moist during sprouting.

Over-seeding or overcrowding of seedlings creates a favorable environment for destructive fungi to flourish, so give the seedlings room to grow. If needed, thin the weakest seedlings in a starting pot or seedling tray with snips, not by pulling them out. Pulling the seedlings out disturbs and damages adjacent roots and causes more problems down the road. Planting fewer seeds in a pot or seed tray cell will lessen the amount of thinning greatly.

Air movement can significantly reduce the activity of the fungi, as a fan moving air helps to slightly dry the surface of the soil/seedling interface, making it harder for the fungi to get established. This works best in combination with carefully monitoring the soil moisture.

Daily observation is another easy to do, yet often overlooked tool. Catching the fungi in action early gives you a better chance to take corrective action and save more seedlings from an early death. Get in the habit of spending a few minutes just looking at the seedling trays, looking at all of the minute details and getting very familiar with what “normal†looks like. Then compare that each successive day to see if something looks out of place or not right.

Treatment of Damping Off

Now that you’ve got the knowledge and tools to minimize the chance of damping off happening, let’s look at some treatment options if and when it does show its ugly head.

Chamomile is one of the oldest treatments and is one of the gentlest to try first. It is high in sulfur and is a mild fungicide. Make a strong tea with 3 tea bags steeped for at least 20 minutes, then mist on the seedlings once cool.

Cinnamon is a potent natural fungicide that should only be used once. Lightly sprinkle infected soil with finely ground fresh cinnamon if the chamomile doesn’t work in the first day.

Canadian gardening guru Doug Green has found that homemade garlic spray is also very effective against damping off, as garlic is a potent anti-fungal. To make, crush or blend several garlic cloves into a quart of water, then simmer over low heat until the garlic is softened and the essential oils are released. Cool and strain, then spray on the seedlings, making sure to get the stems. If using as a soil drench, straining isn’t as needed.

Now that you’ve got the knowledge to be pro-active in controlling damping off, as well as some tips and tools to treat it when it shows up, you should have a great start to a prolific garden this year!


Cucamelons can act as a perennial if you are lucky enough to live in a climate where they can produce tubers, or radish-like roots. The first year they will produce as normal by starting to fruit around July until the first frost stops them. As they start to slow down, search around in the soil by gently exposing some of their roots to see if they have produced tubers. They will be a white to off white color and look something like radishes. If you see them, you can store them in a protected area over the winter and replant them next spring for extra early and larger harvests of cucamelons!

To store them, gently lift them out of the soil and stored in very slightly moist compost or potting soil in a cool but frost-free area. Next spring, wake them up by transplanting into pots early to mid-April in moist compost or potting soil and place them in a well-lit, sunny room. Plant in the garden into warm soil after the last frost date. These second year plants will take off sooner, producing flowers and fruit much earlier, giving you a longer season and greatly increased harvest.

If you live in an area that doesn’t get much frost, then you can overwinter the roots in place by insulating with 6 – 8 inches of straw mulch and lightly moistening it. They will be able to survive temperatures down to freezing with this approach. To ensure that the roots are less likely to rot in the cool moist soil, make sure that there is plenty of sand in the soil to allow the excess moisture to drain away.

If desired, the roots can be gently uncovered and transplanted much like above after overwintering in place to increase your yearly harvest.

Heirloom Lettuce


Grow Lettuce Longer Into the Warm Season

When lettuce is mentioned, many think of the standard iceberg lettuce found in supermarkets and restaurant salads. That is changing with the growth in popularity of the different types of lettuces from Romaine to head and leaf-type lettuces, mainly due to the flavors and colors that they offer from deep red to almost white and noticeably sweet to tangy and slightly bitter. Iceberg lettuce, originally bred as a hybrid, is now offered as an open pollinated variety and has been around long enough to be considered by some as an “heirloomâ€!

We have come to expect lettuce year-round, mainly due to being educated by the supermarkets as to what our vegetables should look like, taste like and when they should be available. Many are surprised to find that lettuce is a cool season crop and will bolt or go to seed readily during late spring and summer months. It is best planted early in spring and then again in late summer or early fall when the temperatures start to cool off.

A plant growing in the dirt on a sunny day.

Saint Anne’s Slow Bolting Lettuce

Ideal Conditions for Lettuce Seed Germination

Lettuce seeds won’t sprout when soil temperatures are above 80°F but they will start to germinate as low as 40°F, making it ideal for early and late season planting. A plant hormone is produced under warm conditions that stop the germination process, called “thermo-inhibitionâ€. This is a carryover from wild lettuce that originated in the Mediterranean Middle East, where summers are hot with little moisture. If the lettuce seeds were to sprout under these conditions, they would soon die out and the species would go extinct.

Thanks to traditional plant breeding and selection of heat tolerant characteristics over a number of years, there are several varieties of lettuce that are more heat tolerant and are open-pollinated – meaning you can save seeds from year to year. Some examples are Saint Anne’s Slow Bolting, Summertime, Black Seeded Simpson and Jericho. Just because these are heat tolerant doesn’t mean that they will grow through the summer, only that they won’t bolt or turn bitter quite as quickly.

Thanks to ongoing research on lettuce traits, there are some techniques to extend the sprouting for lettuce seeds into the warmer months that home gardeners can use. The optimum soil temperature for most lettuce seeds is 68°F, with some varieties sprouting in the 40 – 75°F range. The temperature of the soil must be taken, not just the air temperature which can be several degrees different.

A plant growing in the dirt on a sunny day.

Jericho Lettuce

Sprouting Lettuce Seed in Warm Weather

In warmer temperatures, imbibing or soaking the seeds in water for at least 16 hours before planting in a well-lit area will increase the germination percentages greatly. Red light has been found to be the best color, but many home gardeners won’t have access to a non-heating red light and sunlight or full-spectrum light was found to be almost as good. Soaking the seeds in the dark in warmer conditions decreased their germination rates. Another technique that has shown to be successful is to soak the seeds in cool water in a well-lit area for 16 – 24 hours. This approach has increased the germination rate up to 97% when planted in warmer conditions. Soaking for less than 16 hours has little to no positive effect on germination. For a closer look at what happens when a seed goes through germination, read our article “Starting Seeds at Home – a Deeper Lookâ€.

Other successful methods of extending the season for lettuce in the garden include laying a thick mulch of straw or wood chips on the ground of at least 1 1/2 to 2 inches. This insulates the soil from becoming too hot and drying out too fast and helps to preserve moisture in the soil. Shading the lettuce plants can give enough of a temperature drop to keep them from bolting, sometimes up to 3 – 5 weeks. Shade can be from a shade cloth on a row cover or hoop type structure or companion planting of tall wide leafed plants such as some types of pumpkin.

The traditional rule of thumb of “plant early and plant often†for lettuce can also be said as “plant late and plant oftenâ€, but some of the more heat tolerant varieties, along with soaking in the light and providing some mulch and shade can greatly extend your lettuce season in the garden this year.

Acres Article Soil to Seed


Family Company Fosters Seed Freedom

Want to learn more about what makes Terroir Seeds different? We are excited to be featured in the January 2015 issue of Acres USA magazine, the voice of eco-agriculture for over 40 years. This will give you great insight into what makes Terroir Seeds so unique in today’s seed world.

These varieties are featured in the article –  Zapotec Tomato,  Chile de Agua, Kentucky Wonder Pole Bean, and Rosemary.

Click the photo to read the article!
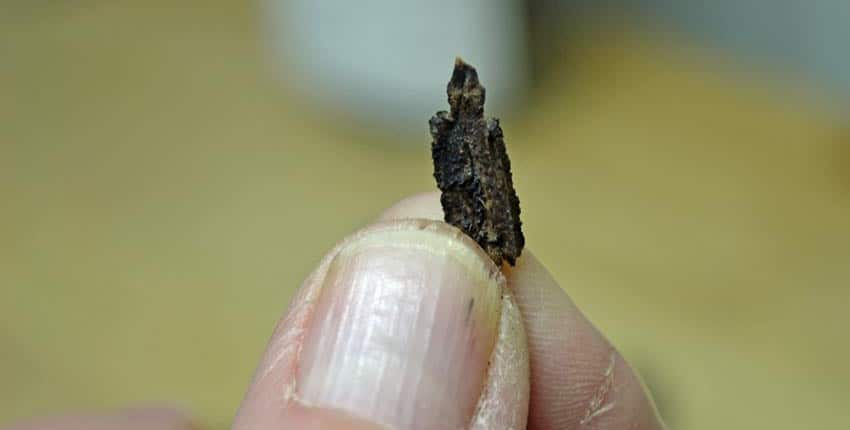
 

A plant growing in the dirt on a sunny day.

Acres USA Soil to Seed Article

Vandana-Shiva with Cindy and Stephen


Food is something that many of us in the US, quite literally, take for granted. We have reached the point where we simply don’t think about it much anymore. This has become both a blessing and a curse.

For most of us, food is always available, never in short supply and the choices can be staggering. Do we want Asian, Italian, Mexican or American tonight? Easy enough. For some, we can drill down much deeper to regional cuisines of the world available for the price of a phone call or a short drive. The selection at the supermarket or grocery store has exploded, with even the most mundane supermarket in small towns offering aisles of international food that have never been seen before in history.

Of course, any discussion of food is by definition a complex one, and the acknowledgment must be made of the less fortunate that live in “food deserts†where the only available food within 30 minutes is at a convenience store; and those that are euphemistically classified as “food insecure†– meaning hungry. Yes, here in America where we are constantly being told that we must “feed the world†with industrial agriculture, we have a dirty little open secret – 1 in 7 or 49 million of our own people don’t have enough to eat, or don’t know where their next meal will come from.

Today we will look at a slightly different picture, that of food as it relates to civilization and how it can affect all of our lives in positive or negative ways. Food can support or topple governments, as vividly demonstrated by the fairly recent events of the “Arab Spring†uprising in the Middle East where food prices and availability brought down established governments in a matter of weeks.

Henry Kissinger’s famous quip from the 1970s rings as chillingly true today as it did then, “If you control the oil you control the country; if you control food, you control the population.â€

In light of that, let’s look at some excerpts from Dr. Vandana Shiva’s lecture we attended at Arizona State University’s Global School of Sustainability on October 30, 2014. Her lecture was titled “Future of Food: Dictatorship or Democracy?” For those not familiar with Dr. Shiva, she is a physicist, environmental activist, speaker and author. Her newest book is Making Peace with the Earth.

Food is the web of life, with interactions between different organisms. The soil food web is such an amazing contradiction to that extremely false idea that life is a pyramid with man on top. The organisms in the soil are one step beyond us, we are their food. That should bring us a bit of humility!

How true this is! In our everyday lives, we often forget that we continue to be here thanks to about 6 inches of soil that feeds us multiple times a day, every week, all year long throughout our lifetimes. 2015 is designated as the International Year of Soils by the UN General Assembly, in recognition of the overlooked importance soil plays in all of our lives.

How we produce and consume food is probably the most significant impact both on the planet and society.

Food is more important in our daily lives than we probably realize on a regular basis. Not only does it feed and nourish us, it brings us together socially at mealtimes, holidays and festivities as well as having a major impact in our political system and our national policies, both at home and abroad. The Farm Bill and international trade agreements are just two examples of this importance.

When Dr. Shiva was doing research in the Punjab region of India for her 1992 book “The Violence of the Green Revolution”, she realized that

When you can’t choose what you grow, when you can’t decide the methods of production, when you don’t determine the price of what you produce, when your own rivers’ water can’t be released through your decision, then you are living under slavery.

When she said this, it immediately brought to mind the situations of some of our farmers, especially the contracted chicken and pig producers, as well as commodity crop growers who are locked into multi-year contracts that specify everything – the seed, chicks or piglets to be used, what feed or fertilizers, pesticides or herbicides will be applied, the length of time until harvest and what price will be paid by the buyer after harvest. There are often punitive clauses that penalize the grower or farmer if conditions or quotas aren’t met. Some large operations, corporations themselves, do well in these contracts, but family farmers do not often find them beneficial in the long run.

A dictatorship is control of an absolute kind. Look at what is happening to our food system – seed, the first link in the food system is being controlled like we’ve never seen before. It was not controlled before, it was shared. We had public universities breeding seed, and they would share the seed. Farmers would share seed with each other.

The issue of food dictatorship begins with the seed, goes into food, goes into our knowledge, goes into how our decisions are made, because governments become involved with the laws they make.

This is a very important point that is not addressed much in today’s food system discussions; the very beginning of the entire food chain comes down to a seed. We have seen the incredible consolidation of almost an entire industry in a little more than a decade. From dozens of companies, we now have 6 that control 80% of the commercial seed supply worldwide.

In decades past, land grant universities bred new open pollinated varieties and shared them with growers in their state. Those growers further selected for the best traits and passed them along, partly sharing and selling. The USDA had a large breeding and research section that would send seed home with Senators and Congressmen when they went back home on the train. Farmers and growers could subscribe to the USDA’s publication, read about new varieties they were interested in and write for samples of seed to try. Bear in mind, these weren’t “Free†seeds; they were paid for by taxes and funded through the agricultural programs of the USDA. The growers and farmers didn’t pay out of pocket for them, but paid via their taxes.

Now, there are very few public universities doing seed research and breeding that are releasing them to the public. The notable exception was in April of 2014 when the University of Wisconsin, Madison ‘Open Source Seed Initiative’ project released 29 new varieties of seed for 14 different crops. Because this type of program was so unknown, many articles and Facebook posts erroneously trumpeted the “Free Seed Initiativeâ€, creating confusion as to what this breeding program was trying to do. The aim of this project is to get new open pollinated seed varieties into growers hands so that they can become available for the public.

This is what seed democracy and by extension, food democracy, looks like. This is what is happening with every small, independent heirloom seed company that works to bring overlooked heirloom seed varieties to market. It is also what is happening with the explosion of Farmer’s Markets across the US, as well as the sustained double-digit growth in the resurgence of the home based backyard garden. Local food hubs and food production systems are being re-thought, re-engineered and re-designed like never before. Farmers and growers who used to see themselves as ‘competitors’ are now beginning to view each other as ‘collaborators’ or ‘co-creators’ in new ventures, with an improved local food system as the result.

Seed sovereignty is the very basis of food sovereignty, of food democracy. Every UN study shows that small scale agroecology produces more food than industrial chemical agriculture. The United Nations Environmental Program 2012 study “Avoiding Future Famines” defends the ecological foundations of traditional, sustainable agriculture.

Something like 70% of the food we eat worldwide is still grown today by small farmers. This has been true for centuries in places like Russia with its ‘Dacha gardening’ system growing close to 50% of the fresh food by the people, for the people. Food democracy can exist, even under the strictest non-democratic governments!

The biotech companies produce seed that is very costly; it is only the governmental subsidies that produce food that is cheap. There is $400 billion in agricultural subsidies – a billion dollars a day!

If that tax money was diverted from subsidizing toxic food that’s destroying the planet and destroying our health and shifted to growing food that protects our health, protects the planet and generates employment in the process, then we could begin to reverse the agricultural damage to the world.

75% of planetary damage to soil, water and biodiversity and 40% of the greenhouse gases comes from global industrial agriculture. This is the single biggest impact on the planet, and yet ecological farming and local food systems can be the place, maybe, to do the opposite. We can rejuvenate biodiversity, we can save seed, we build up organic fertility of the soil, and we conserve water.

This is big-picture thinking, but on many scales it makes sense in many ways. Voluntary, participatory and evolutionary seed breeding projects that are not corporately involved can be very strong food security and food democracy measures today. In times of changing climactic conditions, the plants must be allowed and encouraged to adapt to the current agricultural conditions. Farmers have done this for centuries, evolving salt tolerant or arid varieties that continue to produce food during changing times.

A perfect example of this was after the 2004 Tsunami in Thailand and Indonesia. Dr. Shiva’s foundation, Navdanya, a participatory agricultural research program – gifted 2 truckloads of salt tolerant seeds to the farmers, who had been told that no agriculture was possible for 5 years by their government agricultural resources. The seeds didn’t just survive; they did extremely well and have been saved and shared all across the region. Seeds are hope, the hope for our future. They are the real diversity, the real insurance for the future, whether it is climate change, to create democracy or deal with pest and diseases.

What is your role in creating a food democracy instead of a food dictatorship? Do what you can – grow a garden or expand it, help others garden, grow a row for the hungry and donate it to your local food pantry, buy at the Farmer’s Market, buy a CSA share from a local grower, and choose the closest grown produce at the supermarket. Each of us individually may not be able to influence farm policy, but we can make a change in our daily food, and that is where real, lasting change starts.

Coconut Geranium on Seed Screen


Seed quality matters, whether you are a home gardener, small-scale grower or large farmer; whether you buy all of your seeds, save some for next season or a combination, this information can help you be better informed, make better choices and buy more wisely.

The marriage of the concepts of heirloom seeds and seed saving is not new by any means, but rather one that has been growing and gaining ground in the past several years. For some, this is a welcome return to a more traditional method of agriculture, while others use heirlooms for their flavor and diversity to improve the breadth of their products and offerings to the public.

Cindy and I have been home gardeners for 18 years and involved with soil restoration and rangeland improvement projects with local ranchers for 20 years. Our interest in food, especially good food, goes back a bit further than that! Our appreciation for seed quality and seed saving came from both our work with soils and interest and enjoyment of good food. Tasting the flavors of our garden produce sparked the interest of how to keep those characteristics that the seed produced for the future, to be able to enjoy them and share with others. Thus our seed saving education began.

Several years after taking over, refining and expanding an established family owned heirloom seed company of 20 years, we’ve gained knowledge from the differences and similarities in seed quality,  production and seed saving from these two different perspectives. We want to share some of these with you; along with lessons we’ve learned along the way that can help improve everyone’s seed quality.

We will work from a point-to-point framework, showing the goals, concerns, differences, and similarities in both types of seed production and preservation approaches.

The foundational goal is the same for both the home gardener and seed company – having a sufficient quantity of high-quality seed stock of each variety needed for next year that is pure and true to type. This sounds simple enough, but in practice is not always easy to accomplish for either one.

We are approaching this from a seed quality standpoint, not just a seed saving one. Saving seed is fairly simple to do, but the results from planting those seeds can be very mixed; without a basis of understanding of seed quality, people can be disappointed and confused as to why they got the results they did. Both the home gardener and the seed company must understand seed quality to be successful in their respective endeavors.

Goals

A plant growing in the dirt on a sunny day.

Antique Hand-Cranked Seed Cleaner


Let’s look at the goals and concerns from both points of view:

The home gardener might state the reason for saving seeds as, “Enough seeds for next year’s planting, reduce the amount of seeds needed to buy, take advantage of selection and adaptation to achieve better production in our local climate.†These reasons are the very roots of why home scale seed production is important on a local and regional scale. A diversity of varieties are kept alive that are simply not possible on a national scale, as some regional adaptation can only happen in a small geographical area and won’t be applicable to a larger audience, but are no less important for the local people in that area.

As a seed company, our goals might be, “Produce a sufficient quantity of enough varieties and volume of seed to sell next season, introduce several new varieties, provide a wider selection for gardeners than they can produce themselves and provide a high-quality standard that maintains our reputation.†This reflects how the seed industry started, by offering varieties that were new, unusual or were not available in an area and offering a professional standard of germination and production that benefitted the gardener and grower.

These are similar goals, but on completely different scales and for different results. Their achievement and success depends on how the concerns or challenges are recognized and approached. We have economies of scale as a seed company with our network of growers, but the home gardener has some advantages that we would have a hard time taking advantage of, like keeping a locally adapted regional variety alive.

There are no one-size-fits-all best solutions to the availability of quality seed. A resilient, robust and diverse seed and food economy require home gardeners, regional and national seed exchange programs to participate alongside independent seed companies to contribute all of their unique advantages and skills. Only in this way can the full expression of the diversity and adaptability of open-pollinated seeds be realized and utilized. This might be considered the definition of seed quality!

An obstacle for the home gardener used to be the lack of access to solid, proven and reliable seed saving information and resources. There were lots of introductory articles, booklets, and classes on seed saving, but little in the way of intermediate or advanced classes, books, forums or articles for the home gardener. Thankfully, this is not the case anymore, as the internet has given the home gardener access to more detailed and advanced information.

A plant growing in the dirt on a sunny day.

Antique Seed Cleaner Screens


A few examples are Seed Savers Exchange, an excellent resource for the home gardener to learn from and exchange seed stock with. There are also online resources usually used by seed professionals but accessible by anyone such as GRIN, the Germplasm Resources Information Network of the USDA  and PFAF, Plants for a Future. There are several books available that are excellent in their education of producing seeds; one is “Seed to Seed†by Suzanne Ashworth that has been one of the standards for seed production and saving for over 20 years. Another newer one is “The Complete Guide to Saving Seeds” by Robert Gough & Cheryl Moore-Gough, which covers flowers, trees, and shrubs.

In addition to the above-mentioned resources, as a seed company, we have access to our growers and other professionals – a group of experienced food and seed producers who have learned through years of training, experience and trial-and-error how to produce the best seeds to continue the traits and characteristics of each variety they grow. These resources are closely guarded, as a highly experienced seed grower is a very valuable resource for any seed company.

Challenges

When looking at the challenges of producing high-quality, viable seed in enough quantities for next year, both the home gardener and seed company face similar concerns. Seed quality should be the primary concern for both. Without high quality, true seed there would be too much variability in all aspects of agriculture, from seed germination, growth, health, pest and disease resistance, food production and the harvesting of more seed. The quality is achieved through proper management, isolation, harvesting, and testing ensuring the viability, vigor and growing true to type of next year’s seed crop.

Management methods

Management for the home gardener starts with the decision of how many plants to use for seed production as opposed to food production, which can be quite different. Ripe vegetables often have immature seeds, while mature seeds are normally found in inedible, overripe or almost rotting vegetables. Some varieties can produce both food and seed by simply letting chosen specimens ripen and mature their seeds on the vine or bush, while the rest are harvested for food, such as a perfect tomato tagged to let ripen for its seeds. Others will need to be kept solely for producing seed, such as a lettuce plant that needs to be allowed to bolt to set seeds.

Minimum Viable Population

A sufficient number of plants, called a minimum viable population, should be used to avoid a genetic bottleneck or the loss of genetic adaptability and diversity that inevitably occurs over time. Sometimes this is hard for the home gardener to do, as often there isn’t enough space for the population needed while allowing for other vegetables to be grown. Our tomato example serves here, as the minimum viable population is 100 plants, way too many for most home gardeners. The rule of thumb is that outcrossing varieties such as tomatoes need 100 plants as a minimum genetic population, while inbreeding ones like peppers need 20 plants. So what is a home gardener to do?

Even modest home garden seed production often results in much more seed than one gardener will use in several years. One very effective solution is participation in member to member seed exchanges either locally, regionally or nationally. This has the dual benefit of introducing a greater amount of genetic diversity to overcome a smaller plant population from any one garden while dispensing extra seed.

As a seed company, this concern is overcome by the number of plants needed to produce the quantity of seed for next year’s sales, and most seed growers who are also food producers have separate fields for seed production, so there is no conflict with seed vs. food growing.

Isolation and Selection

A plant growing in the dirt on a sunny day.

Isolation Cages


To keep seed quality high, isolation and selection are both used as part of quality management. Isolation simply means keeping two similar varieties, such as peppers, from cross-pollinating. Selection chooses the most desirable characteristics to save seed from or removes undesired characteristics from the seed producing population.

Isolation methods can be time, distance or physical. The time method is simply planting two cross-pollinating varieties at different times so that they aren’t flowering at the same time. Distance isolation involves planting far enough apart so that the pollen or pollinators cannot reach each other. Physical barriers prevent the spread of pollen from one plant population to another by cages, pollen sacks or socks, a thorough but time and labor-intensive approach.

Home gardeners often use time isolation by either planting at different times during a growing season, or only planting one variety each season. Distance isolation can become a challenge, depending on the size of the garden or property. Usually, only very dedicated seed savers will use physical barriers.

Our seed company utilizes a network of seed growers to solve the different seed crop isolation requirements. Time isolation is used by those with longer growing seasons while larger growers use the distance approach, having the needed space on their properties. Another solution is several growers producing different seed varieties at the same time. Physical isolation is used extensively when correcting undesirable traits in a variety, during grow-outs to re-introduce a new or rare variety or for traditional seed breeding and stabilization.

Selection is another aspect of quality management in seed production, with two approaches – negative and positive. Negative selection, or rogueing, removes undesirable aspects, characteristics or traits from the seed producing population to maintain the established variety. An example of this is a potato-leaved tomato. Any regular-leaved tomatoes growing in the row would be removed as undesirable for that particular tomato’s characteristics. Another might be the color of the flowers of a vegetable – the purple ones would be removed, as yellow is the color of the correct characteristics. Positive selection involves saving seed with desirable aspects, characteristics or traits such as a large, sweet, striped, early paste tomato. Positive selection over a period of a few years is how local adaptation can be enhanced for the home gardener, and new varieties brought onto the market for seed companies.

Both the home gardener and seed company grower would over-plant slightly to account for selection losses, and perform the selection process as part of their daily gardening and inspection activities.

Germination Testing and Trialing

A plant growing in the dirt on a sunny day.

Seed Germination Testing


Two final aspects of quality seed management are germination testing and trialing or grow-outs, which give proof of the seed sprouting quickly with lots of vigor and growth energy, growing true to type with weather tolerance, disease resistance and good production amount. This becomes “the proof in the puddingâ€, as it shows any weaknesses and confirms the desired characteristics of the variety being produced.

The home gardener can easily test the germination of the current crop of seed early in the winter, as most seed needs to dry completely and age a few weeks before showing the best germination. For most crops a moist paper towel in a sealed plastic bag works very well to test germination. The grow-out can be as a food crop next year so that the production and garden space are not wasted.

We as a seed company will either have the germination tests performed by the grower so that any issues can be addressed before the seed is shipped to us, or we will perform them once we receive the seed from our smaller growers. Either way, all of our seed is tested for germination prior to being sold to our customers. Next spring’s grow-out will be done either by us or the grower, depending on the grower, the seed variety and seed volume.

There are those that would argue that the heirlooms we have today are the result of families saving their seeds and passing them down from generation to generation. This is partly true, but only partly. We have the abundance of heirlooms today thanks to the families that saved them, the local and regional seed exchanges that helped keep them alive and the seed companies that grew them out, advertised them to a wider audience and sold them across the country.

Aunt Ruby’s German Green tomato is a perfect example – grown in northern TN for over 200 years, passed to a great-grandniece, they would have been lost if they hadn’t been passed to Bill Minkey who donated them to Seed Savers Exchange. They grew the seeds out, told their story and they survive today because of that collaboration. Another excellent example is that of the Concho chile from northeastern Arizona. It was grown in the tiny town of Concho, AZ for several hundred years after being traded by the Espejo expedition in 1563 to the local Hopi Indians. Around 2000 it was almost extinct with only a couple of families continuing to grow it. A local lavender farm resurrected it and shared the seeds with us, and we have helped it to reach all across North America and several other countries.

It took the effort of everyone – the gardener, the seed exchange and the seed company to keep these and many other heirlooms alive; one alone wouldn’t have been able to do it. This is the circle of life of the seed, along with those who care for the seed.

This article was originally published in the January 2014 issue of Acres USA magazine!


Pest and Disease Prevention Before Treatment

Pest and disease prevention is a major topic for many gardeners and for good reason. We spend countless hours in planning, planting, tending and harvesting our gardens only to sometimes have a disease or insect bring much of our efforts crashing down.

What many gardeners don’t know or fully realize is the powerful benefits of a systematic, thoughtful and determined effort in cleaning up the garden, tools and debris that remains after the season ends. Properly done, this can significantly reduce the occurrence and damage done by pests and diseases, increasing the enjoyment and production of the garden.

Let’s take a top to bottom look at things that you can do in the very late fall and early winter after the garden is dormant to give your garden a much better head start next season.

Food and Shelter – Two Big Keys in Pest and Disease Prevention

The biggest reasons for cleaning up the garden, removing dead materials and weeds and thoroughly cleaning and treating your gardening tools is to remove the food and shelter that is the foundation of pest and disease prevention. The first steps are sanitation in the colder season, and then preventing their introduction into the garden next growing season.

Pests and diseases don’t just magically show up out of nowhere, though they may seem to! Pests especially need a place to survive the winter and food to keep them alive. Diseases can be a bit more involved to treat, but with some forethought and understanding, it isn’t difficult.

Removing dead plants, weeds, and debris from the garden after it is finished growing is essential in preventing pests from having a convenient winter “home†where they wait for the new season’s growth to show up. Potato beetles, squash bugs, squash vine borers and certain species of aphids are very destructive examples of pests that will overwinter in the garden bed if their shelter isn’t removed. The perfect environment is shown in the lead photo.

We found this out to our detriment with squash bugs, as we use wood chips for our walkways in the trial garden – the perfect winter housing for them! We now only grow squash and pumpkins in the garden every third or fourth year, using straw bale raised beds outside the garden other years. This starves them of a yearly, reliable food source and keeps their population under control.

Another example is the fungus responsible for damping off in young seedlings. The fungus will survive in dead organic matter, often producing spores that can survive over the summer in unwashed and sterilized seedling flats and coming back with a vengeance when new seedlings are planted.

Once the housing is removed, next we need to look at the food sources for pest and disease prevention. Weeds are not only a nuisance, but they are very important sources of food and housing for both pests and diseases, often with the diseases piggy-backing on the pests to get into the garden. One example is cucumber mosaic virus overwintering in chickweed and groundsel, and then coming in next spring. Others are pigweed that harbor grasshoppers, flea beetles and aphids; annual grasses that aren’t grazed or mowed housing cutworms, armyworms, flea beetles, grubs, several species of aphids and the Colorado potato beetle; Russian thistle (tumbleweeds) is an especially good example as it harbors the sugar beet leafhopper, which in turn is a common host for the curly top virus that decimates many garden crops like tomatoes, beets, green beans, squash, cantaloupes, and spinach.

Removing the housing often removes a major food source at the same time, and vice versa, so you don’t often need to do twice the work to be effective in sanitation and prevention. Removal and control of weeds and unmanaged grasses is very important for pest and disease control, not only in the garden but adjacent to it as well.

Clean and Sanitize – Prevention and Treatment

A close up of a saw with a brush on it

Cleaning a Hori-Hori Knife

We now have a good handle on taking care of the food and housing for pests and diseases, so what next? One of the biggest culprits for the introduction of pests and diseases is from them being carried in, either from contaminated plants bought at big box stores or garden centers, from insects that overwinter in firewood, smokers spreading tobacco mosaic virus throughout the garden, or from contaminated tools spreading diseases to other plants and trees.

For smokers, the tobacco mosaic virus can easily stick to the fingers or clothing and be spread to plants in the garden. After smoking, wash hands thoroughly with warm soapy water and ideally wear a different shirt or over-shirt than the one smoked in.

Pruning shears and tools can inadvertently be the cause of a disease spreading, as it picks up and distributes the virus or fungus from one branch and tree or shrub to another. If you are working on cankers or other diseased portions of a tree or shrub, sanitize the tools after each cut to prevent spreading the disease to other parts of the tree with a simple spray or dip of rubbing alcohol or commercially available sanitizing solution. Wiping with antibacterial wipes is also very effective. Do not use bleach or bleach solutions as it will cause accelerated corrosion of metals. If you are fighting an outbreak of disease in your garden it is very prudent to sanitize your tools and gloves after each use in the affected area, especially before using them in other, disease-free parts of the garden.

A person holding a pair of pliers next to a yellow marker.

Sanitizing Pruners with and Alcohol Spray

Sanitizing all of your garden tools – hand tools, shears, pruners, rakes, shovels, wheelbarrows (including tires) is always a good practice at the end of the season, especially if you have had an attack of disease during the season or have an ongoing issue. Many plant diseases only need one single pathway into the garden, and we often unknowingly bring it in season after season; working against ourselves.

Shovels, rakes and larger tools can be cleaned by scraping away any residual mud or dirt, then plunging them in and out of a bucket of sand to remove rust and small amounts of dirt before spraying with alcohol to sanitize before putting away for the winter. Smaller hand tools like pruners and trowels can be wire brushed to clean and remove rust, then alcohol sprayed as well. The bucket of sand treatment might work with some tools. Wheelbarrows should be cleaned inside and out, dirt removed and wire brushed or sanded before spraying with alcohol or sanitizing solution. Don’t forget the tires and handles!

A bunch of tools sitting in the dirt.

Cleaning Gardening Tools with Sand

With these proactive techniques, you will find that dealing with pest and disease issues will become much easier as you close the door to easy entry. A side benefit of doing these procedures will show you different ways that pests and diseases gain entry, making it that much easier and effective to stop them early on.

Garden Tools


Fall and early winter is a great time to clean up the garden tools, do any needed repairs and see if there is any other tools needed for next year.

This includes:

  • Draining the gas from tillers or other power tools, checking oil levels and lubricating moving parts on power and hand tools.
  • Remove the batteries from any timers used.
  • Treat wood-handled tools with tung oil or other preservative.
  • Make sure to bring in any tools that should not be left out in the winter elements.
  • Drain all hoses, connections, soaker hose, drip tape, etc.
  • Collect up all plant markers and store in a box for easy access in the spring.
  • Add your dead plant material to the compost pile.
  • Make sure your seeds are properly dried, labeled and stored.
  • Make a list of seeds you are running low on.
  • Mend any fences, supports or other structures before you need them again in the spring.
  • Properly store your soil amendments and organic fertilizers in moisture proof containers.

Last but not least, enjoy the bounty of your harvest all winter and curl up with a good book!

A close up of many yellow flowers on a plant


Aphids and Nitrogen

Aphids are one of the perennial pests that gardeners deal with, often with very mixed results. What works one year seems to fall flat on its face the next, with the reverse also being true. Aphids are tiny, soft bodied insects that have piercing, sucking mouthparts to feed on plant saps. They live in colonies, most often the underside of leaves and where the tender young growth is on a plant.

By themselves, aphids rarely outright kill a plant but they can inflict serious damage to both its flowers and fruit. It only takes a few aphids sucking on a young flower or fruit to weaken it or damage it beyond being edible. The sap they extract weakens the plant, stunting its growth and food production. The aphids can also be carriers or vectors of diseases or viruses, which they infect the plant with as they pierce the cell walls and extract the plant sap. Just a few seconds is all it takes for a virus to transfer from the mouth of an aphid to the plant.

Aphids will often arrive in a garden or on a plant by flying in. A small number will arrive and leave their wingless young who feed on the plant and immediately lay eggs, increasing the population quickly. The adults will then fly off and repeat this several times. This is why gardeners will often complain that the aphids overwhelmed the garden “overnightâ€. Each adult aphid can produce up to 80 offspring every week!

So what can be done about these insects? There are several methods of dealing with them, broken down into two main approaches – prevention and treatment. The prevention phase happens in the fall and early winter with soil testing and amendments that set the stage for success the next growing season. Treatment is just that – what to do when those pesky insects show up uninvited in your garden!

Aphids Love Nitrogen

Let’s start at the beginning, shall we? Nitrogen is a big, big player in the aphid dance. Aphids love nitrogen, plain and simple. They are attracted to the soft growing parts of a plant that are high in nitrogen, as it is a major factor in plant growth. Aphids are also really attracted to young seedlings, since everything on a seedling is growing and there is lots of nitrogen to be had.

Nitrogen plays a very important part in a plants growth as well as the content of its sap. Soils with excessively high nitrogen create very fast growing plants. This leads to rapid cell wall growth, which are elongated, thinner and much easier for the piercing mouth-parts of an aphid to penetrate than normal. The plant sap will also be high in nitrogen and will be especially attractive for the aphid. It is very important to understand that high nitrogen sap will be lower in overall sugar content – also known as brix – because nitrogen forms amino acids and proteins – such as chlorophyll – but specifically needs magnesium, phosphorus and carbon to form sugars. This can’t happen if there is excess nitrogen, as there aren’t enough of the other elements to form those sugars. Once the soil is amended with the correct nutrients, the plant will increase the brix/sugar levels and the aphids will die from sucking high sugar content plant sap as it is deadly – aphids can’t digest the sugars with no pancreas and thus die.

What all this means is that using high doses of chemical fertilizers will encourage aphids to call your garden home! Almost all commercial fertilizers are high in nitrogen and release their nutrients much faster than compost or other soil amendments, making aphid pressures much worse than they would normally be. They also contribute to lots of flowers with little fruit production or stunted and smaller than normal sized fruit.

It is interesting to note with soybean studies at Penn State University naturally occurring nitrogen-fixing bacteria – called rhizobia – provided a better form of naturally occurring nitrogen than the laboratory bred inoculated strains did. Plants growing in the naturally occurring rhizobia soils had markedly fewer aphids and stress than the inoculated ones. The amount of nitrogen provided by the lab developed rhizobia and the naturally occurring strains were the same, with the natural rhizobia having much lower aphid populations on the plants. They are continuing the study to see why this happens.

There is a concept at work here that we need to briefly discuss so that you can understand where we are going from here. The “Law of the Minimum†shows how interrelated many nutrients and elements are to healthy plants, not just the N,P and K that are listed on fertilizer bags.

The Law of the Minimum states,

“Plant growth is determined by the scarcest, “limiting†nutrient; if even one of the many required nutrients is deficient, the plant will not grow and produce at its optimum.â€

Prevention and Preparation

The preventative method is to have a complete, comprehensive soil analysis done by a professional lab. I’ve mentioned these before, but they bear another – Crop Services International and Texas Plant and Soil Lab are great labs. They are thorough, friendly and will give you the info you need at a reasonable price. From this analysis, you will know exactly what soil nutrients, amendments and trace minerals are needed to eliminate a high nitrogen condition in your soil and plants, and by extension reducing the population and attraction of aphids.

Another, very simple method is to stop using commercially available chemical fertilizers! Without naming names, these come in a bag and sometimes have the word “miracle†attached to them. There are a number of brands that can be bought at any garden center or big box store in their garden section. Well-aged and decomposed compost – especially if you’ve worked with it how we discuss in our articles on compost – will give you a continuous supply of “soil food†to apply to your garden twice a year, in the early spring and again in the late fall. This compost with the amendments will slowly release the nutrients that the garden needs, along with attracting the biological elements in the soil that do the real work – earthworms, pillbugs, beneficial nematodes, fungi and all sorts of other hard-working critters that seriously improve the soil on a continuous basis.

Another aspect of prevention is cultural control, or removing the suitable environments where aphids can overwinter or establish an initial population to then swarm your garden. Standing weeds can be harbors of aphids, so remove them and remove dead plants from the garden in the fall. Don’t wait until the springtime to clean up the garden, as this can provide the perfect habitat for aphid eggs to be sheltered under. Inspect trees and bushes for aphid eggs in the fall, remove them by hand, vacuum or with a strong blast of water.

Treatment Options

Now that you’ve got the prevention and preparation covered, what can be done if and when the nasty aphids arrive? This is where the treatment portion comes in, and it would be wise to prepare for this as well. Early detection is very important for successful treatment, as if the aphids get a toe-hold, it will be much more difficult to rid your plants of several sizable populations instead of just one or two small ones. The incoming flights of adult aphids are random, so consistent inspection is best. This is very easy, just flip over the top, youngest leaves of several plants and look for the clusters of small aphids on the underside. Look around bud areas as well. If you see any aphids, they will be in small clusters or colonies and can be easily dealt with at this stage. Crush them by hand or prune the leaves or buds to remove them. Once you see the first small populations, go back and be very thorough with the rest of your plants, taking the time to examine them well. Trust me on this, the time spent now will save you much heartache, back ache, time and frustration in the very near future!

Aphids will excrete “honeydew†– a sweet, sticky substance – and is sometimes fed on by ants. This isn’t always the case; but in your inspections look for travel pathways of ants up and down the plant where the aphid colonies are. Sometimes the ants will lead you to the aphids that you would have otherwise missed.

Anytime you see any aphids, it is a good practice to set out yellow sticky traps. Aphids are highly attracted to the color yellow, which lures these little monsters into the traps. They are available at most garden centers and will be in squares or strips. Place several of them in the area where you find the aphids, and put out a few more than you might think. They are good inexpensive insurance.

If the aphids have colonized more than about 5% of the bud and young leaves of a plant, or are on more than that amount of your total garden plants, then it’s time for the next round of action.

Beyond physically removing the aphids, there are two approaches to treatment – biological and chemical controls. Biological controls use biology – predatory insects – to eat and control the aphids. Chemical controls are just what they sound like – using sprays of varying toxicity to reduce the aphids’ population.

Using the biological approach first combined with a non-toxic soapy spray is often the knockout punch needed for smaller aphid infestations. Releasing parasitic wasps that lay their eggs inside the aphids, ladybugs, lacewings, soldier beetles and the syrphid fly larvae are all highly effective if done in time, before the aphids’ population explodes. One of the best resources for biological controls is Arbico Organics. They will help you decide what species will work best for your garden situation, how many to release and how many times. Keep in mind that the goal is not to completely eliminate every single aphid, as then the beneficial and predatory insects won’t have a food source. The goal is to keep the aphids controlled, where they aren’t damaging the plants.

Remember, weather can be on your side when dealing with aphids. Heat and high humidity can really knock them back as they are fairly fragile and die off in droves when temperatures are over 90°F.

Soap sprays work by smothering the aphids by coating their skins. Start with a completely harmless soapy water spray like Dr. Bronner’s – using a tablespoon per half gallon in a hand sprayer. Make sure to apply the spray when beneficial insects aren’t around, as they will also be affected. From there, work up to an insecticidal soap like Safer Brand or horticultural oil such as neem oil. With both of these approaches, make sure to cover the underside of the infested leaves well for the smothering effect to work. These are contact controls, and depend on contact with the aphids to work, so they will need to be re-applied as often as needed until you’ve gotten control of the situation. This could mean once a day for a few days, then twice a week for a week or so, then tapering down to once a week. It might well take 2 – 3 weeks to really get a handle on persistent outbreaks, so be patient but persistent!

Moving up the toxicity ladder, multi part sprays such as our Home Garden Bug Solution work very well, but need to be used carefully as they do have a high level of insect toxicity even though they are made with no petrochemical ingredients. If you do need to bring out these big guns, test in a small area to see the effects before spraying your entire garden!

Hopefully you now see that there are a number of ways to reduce and control the pesky aphids in your garden. It all starts with prevention and preparation with improving the soil and balancing the nutrients it needs. From there you now have several new tools in your “pest control†toolbox to help you manage aphids in your garden next growing season.

Diane Campion, Carlo Petrini & Scott Lewis


We were asked to write about our experiences as Slow Food USA delegates to the 2012 Terra Madre conference in Turin, Italy as information and details for the 2014 delegates. Here’s our story!

Terra Madre for the First Time

The Terra Madre gathering was something Cindy and I had heard of several times during our decade long Slow Food membership, most often at Slow Food events in Flagstaff or Phoenix, AZ. Our formal introduction was a presentation by a college student who attended the 2010 event with her family who are farmers from Oregon. The photos and descriptions were sensual and alluring, drawing us into a different world where food is revered and the producers and chefs are celebrated. The young woman was at a loss for words a number of times during the slide presentation and we attributed it to nervousness or lack of public speaking experience. Later on, we would come to realize that there really are no words to describe the entire experience; only bits and pieces, thoughts, ideas, flavors, aromas and sights. Even two years later it is difficult to capture many of the sights, sounds, flavors and aromas with words.

A plant growing in the dirt on a sunny day.

Map of Terra Madre

Once our applications were in, we fervently hoped that we would be chosen as the experiences would be a keystone in our lives, both personally and professionally. You see, we are not only serious foodies, but have an heirloom garden seed business named Terroir Seeds that focuses on why the quality of the soil influences the resulting flavors from the garden so much. We felt that attending Terra Madre, meeting the growers, producers and chefs along with the sights, textures, tastes and scents would better our understanding of food and why its origins are important.

A plant growing in the dirt on a sunny day.

Opening Ceremony Stadium

When the email arrived announcing our selection as Delegates, we began reviewing the events, conference topics and taste workshops along with the International Congress schedule. We had been selected as Congress delegates as well as Terra Madre ones, so had an extra schedule of meetings and presentations from 130 countries around the world. The sheer number of things to do, see and taste was overwhelming! Fortunately, we were able to attend a “Pre-Terra Madre†event hosted by Slow Food Phoenix with other new delegates along with experienced attendees that gave us some very valuable and useful information that made our trip more enjoyable.

A plant growing in the dirt on a sunny day.

Korean Delegate at Opening Ceremony

Probably the single most important tip was that we would be on “Italian time†and not to worry. Things might not seem to be progressing like they would in America, but it would all turn out well in the end. They were right, we did get where we were supposed to be even though there were thousands of people from all around the world speaking many different languages. The logistics must have been a nightmare, but everyone was polite and friendly.

The other great tip was to expect the first day to be very long, exciting and exhausting. We landed in Milan mid-morning and didn’t get to our hotel until after midnight, after a trans-Atlantic flight starting in Phoenix, AZ at 7AM the previous morning. Our schedule didn’t allow us to arrive a day earlier, but if you can it will help to have a full night’s sleep before starting the marathon that is Terra Madre!

A plant growing in the dirt on a sunny day.

Oval Lingotto Building

Another tip that is not immediately obvious, but will prove to be invaluable as time goes on is to take lots and lots of high-quality photos. Documenting the experiences will revive memories that fade shockingly fast. Looking at a single photo, I can still vividly remember the Provolone cheese being opened up early on the second morning. The indescribably delicious and powerful aroma, along with the complex and lasting flavors were an eye-opening experience, showing us that we hadn’t tasted anything close to this in the US.

A plant growing in the dirt on a sunny day.

Handmade Provolone Cheese

When we landed at the airport in Milan, we were with a large group from the USA, along with people from several European, African and Asian countries. The bus ride to Turin was spent getting to know others, finding out what they did for work as well as what things they were doing in their area that related to Slow Food. It was a real eye opener to see how many creative, passionate and dedicated people there were in every conceivable situation all over the world working to make food more accessible, better and healthier for everyone. We felt like we were re-discovering a tribe we belonged to but hadn’t known we had lost. It was a homecoming of sorts, a place the heart knew well but the eye hadn’t yet seen.

A plant growing in the dirt on a sunny day.

Meat Counter at Eataly

After checking in at the Oval Olympic Arena, also known as the Oval Lingotto, we stashed our luggage and wandered over to Eataly for cappuccino and snacks. It was a great introduction to the event, as it seemed to be a Slow Food superstore! Every area in Italy and from other regions of the world was represented, with signs and cards explaining where the food was from and why they were special. We had been advised to eat often the first day and get a cappuccino whenever we started to feel a bit tired. Italian cappuccinos are much smaller than we are used to, so they were the perfect pick-me-up during the entire event.

A plant growing in the dirt on a sunny day.

French Cheeses


Once we had fueled up, we wandered back through the Lingotto Fiere as the booths were finishing set-up. The event is held in part of the repurposed Fiat factory, and is huge. The stroll through the vast building really wet our appetite for the next few days! Several of us made notes on specific booths and stages we wanted to come back to visit. Even after spending most of 3 days in there, we missed seeing a lot. The sheer size is vast, much bigger than the entire Las Vegas convention center or other convention centers we’ve visited, and they are filled with food!

A plant growing in the dirt on a sunny day.

1st Cappuccini

The opening ceremonies were held at the Palasport Olimpico – also known as the Palaisozaki after the Japanese architect Arata Isozaki – where we were bussed and re-deposited our luggage at a baggage claim area. As the arena started to fill up, we talked to more people and snacked on fresh made sandwiches and more cappuccino. The opening ceremony was impressive with a warm welcome from the officials from Turin, along with an incredible flag procession from each country attending. Afterwards, we walked to our group of buses for the ride to the hotel.

A plant growing in the dirt on a sunny day.

1,000 Gardens in Africa Display
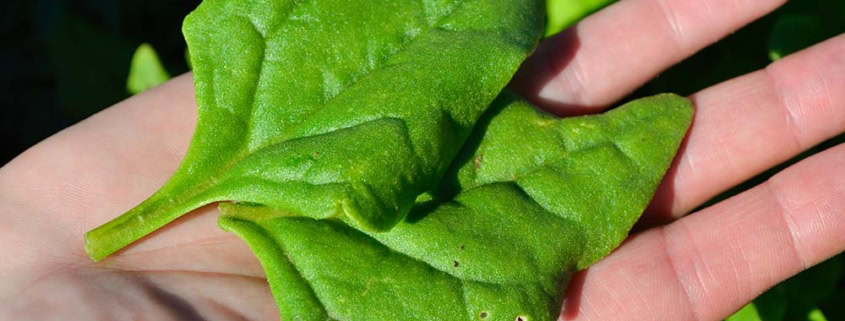
The next 4 days were a whirlwind of food tasting, cooking demonstrations, learning the history of a regionally famous food and bumping into all sorts of people, like Alice Waters, Vandana Shiva and the ever-delightful Carlo Petrini. We were continually impressed with how friendly, helpful and engaging the artisans were, eager to share their knowledge and experience of their particular food, along with delicious samples. It was great to spend a little time at a booth, talking with the family that produced the food and learning more about their lives and how much work or experience went into each taste we had.

A plant growing in the dirt on a sunny day.

Alice Waters at Terra Madre

They were equally interested about our lives in America, with most being fascinated when we said we were from Arizona. Many Italians want to see the Grand Canyon, and a surprising number had been there or in other parts of the southwest. They always wanted to compare food notes, what we ate, what we raised or grew and what we considered to be our “traditional†foods. That was difficult, as the USA is truly the melting pot! They were fascinated at the variety of foods we ate on a regular basis and were impressed that we didn’t live off of McDonalds or other fast foods. Yes, American commercialism at its best!

A plant growing in the dirt on a sunny day.

LaVazza Cappuccini

On the other hand, we received a valuable lesson in viewpoint when we were at the La Vazza booth sampling regional coffees paired with a traditional treat. The young woman guiding us through the selections was a student at UniSG – the University of Gastronomic Sciences that is part of Slow Food in Italy. When we remarked on how wonderful it is to have an event like Terra Madre celebrating traditional foodways, she commented that what we were seeing was indeed special, but everyday Italians were much more like Americans in the respect of wanting convenience and “progress†in their food choices, so traditional ways were declining. We were surprised, mainly because of the image of Italy as a bastion of traditional, honored food systems and regions. During our conversation, we learned that there was a very strong movement in Italy to continue the local and regional foods that had become more sustained and successful. Part of this was due to the influence of Slow Food in Italy!

A plant growing in the dirt on a sunny day.

Pizza Workshop

In talking to the growers or vendors about their foods, taste and flavor were always one of the first things to be mentioned or demonstrated. Those were the primary concern, with everything else being secondary. What a refreshing change for us, where we are used to flavor being heavily advertised but rarely well represented! When we would talk about wanting to bring seeds back and introduce those varieties to the American public, the very first comment – always – was, “It won’t taste the same!†They were right, of course, but we were looking to introduce flavors and different varieties of traditional vegetables that are unknown here. After some discussion, several growers understood what we were trying to do, but always came back to the flavor being different. They were happy to see that we were trying to spread the word about the uniqueness of their foods, however.

A plant growing in the dirt on a sunny day.

Genovese Pesto Demonstration

With all of the centuries of traditional food production, some with defined methods dating back 300 to 400 years in an unbroken line, there were definitely creative twists and experimentation represented. Several craft breweries were showcasing their approach to small batch, handmade beer with unusual herbs and spices, all of which were completely different than what craft brewing is in America, but completely delicious. One family of cheese makers from southern Italy stand out in our memory, as the son was telling us that he had been in the international banking business but had returned to making cheese after the economic downturn. He showed us several of the traditional aged cheeses his family had been making for over 100 years. Then, with a bit of awkwardness, he introduced us to his own creative twists – aging cheese in the local winery’s grape must, or crushed grapes, for a completely different approach and beautiful flavor for his goat cheeses. He said that the local area thought him crazy at first, but were starting to come around after several years of tasting his new cheeses.

A plant growing in the dirt on a sunny day.

Lazio Region Cheesemaker

If one story can sum up our experiences at Terra Madre, it would be this: during the International Congress presentations, just before lunch, a young Palestinian woman spoke about the hardships and challenges her community faced in finding land and enough water to grow fresh food for their villages CSA or community supported agriculture program. As she started speaking, the entire room grew quiet and charged with anticipation, waiting to hear what she had to say. Their village was split by the dividing walls, and her talk was charged with emotion and passion. Despite the incredible challenges, she talked about the successes they had gained, growing more and more food to feed themselves and gain a measure of self-respect and resiliency. We broke for lunch after her presentation.
 

A plant growing in the dirt on a sunny day.

Chile and Garlic Bouquet

Soon after the break a young Israeli man got up to speak, and the room once again became silent and charged with anticipation. After he introduced himself, he stated that not all Israelis supported the current program, nor were all antagonistic against the Palestinian situation. He then described his village’s challenges in obtaining enough land and clean water to grow fresh, healthy food for his community, which was also close to the dividing wall. After a couple of years, they were able to grow more and more food, gaining some independence from the food trucks that so many were living off of.

Both young people exemplified what we saw time and time again at Terra Madre – individuals in all kinds of situations and conditions all around the world working diligently day to day to make a positive difference where they lived, no matter the beginning challenges. It really gave us hope that what Slow Food stands for – good, clean and fair food – is a powerful, positive change in itself.

A plant growing in the dirt on a sunny day.

Salone del Gusto

While we may not agree on many things – religion, politics, race, nationality and economics – we can agree on the foundational importance of food and our need to eat and eat well. Maybe, just maybe, food is that place where we can meet, eat and begin to find more common ground to agree on.

Blossom End Rot


Blossom end rot affects mainly tomatoes and peppers, but can affect other fruiting crops such as eggplant, watermelon and summer squash. This is a perennial problem, meaning that as a gardener, you will deal with this yearly in your garden. There are two approaches to working with blossom end rot – prevention and reaction, or a primary and secondary solution. Unfortunately, most gardeners only realize they have a problem when the fruit are showing black spots on the end. This is the acute phase – once there are problems – and immediate action is needed to prevent further damage to fruit that is just beginning to set.

We will look at the underlying causes of blossom end rot, along with what happens and what can be done about it in the prevention as well as the acute phase.

As mentioned, blossom end rot will affect more than just tomatoes and peppers, but we will focus mainly on those as this is what most gardeners’ experience. Just tuck the other varieties into the back of your mind, and you’ll have a jump start if you see it strike them. In reality, the prevention will most likely have a beneficial effect for everything as you will be creating an environment that won’t support the cause of the problem!

Blossom end rot is caused by a lack of enough available calcium in the fruit at the blossom end. What most often alerts us is a black spot or patch at the blossom end of the tomato or chile, opposite of the stem. This black spot is a secondary issue caused by a fungus attacking the weakened fruit. Contrary to what many think, we aren’t aiming for the eradication of the fungus and resulting black patch, but fixing and preventing the cause of the problem. Correcting the underlying issues that lead to the weakened fruit will automatically prevent the fungus from being able to attack.

Let’s start with the problem and work backwards, to better understand what is needed for both an acute fix and a preventative approach for blossom end rot. Calcium is a very important part of the growth process for plants and the proper development of high quality, tasty fruit as it contributes to healthy cell wall growth, insect resistance and helps to regulate many cell processes. Calcium is non-mobile in the plant once it is imported, meaning the plant can’t move it from one part of itself into the fruit, or from one part of the fruit to another. Thus, the tomato or chile plant needs a continuous supply of calcium as it grows, flowers and produce fruit all through the season.

Blossom end rot usually occurs early in the season with the first or second flush of fruit. It happens just when the plant is at maximum growth and is putting on the first fruit, with a second set of flowers on the way. It is in high gear and needs all of its nutrients available to be healthy, resist pests and disease, as well as grow lots of delicious tomatoes and peppers. The key to preventing blossom end rot is to supply a sufficient, steady amount of calcium to the plant so it can be transported into the fruit continuously. Problem solved!

Not so fast, just how can we make sure that the plant has a steady supply of calcium?

A plant growing in the dirt on a sunny day.

Early Blossom End Rot

Here is where we branch off into the two approaches – the primary and the secondary. The primary, preventative approach is to have enough calcium in the soil that feeds the roots and is transported to the fruit throughout the growing season. That calcium in the soil must be ‘available’ meaning that the roots can actually absorb it and transport it where it is needed. Available means that it isn’t tied up by another mineral or a pH level that won’t ‘let go’ of it. There is more to the story than just adding a calcium amendment to the garden bed!

A very good example of this is where we live in central AZ, there is a decent amount of calcium in the soil that plates out on faucets and glassware as a calcium deposit. Conventional wisdom says not to worry about calcium because it is everywhere. That’s true, but the challenge we have is the pH of the soil is fairly alkaline at 8+ on the pH scale, so the calcium is ‘tied up’, or not available to the plants. This is proven by the weed populations we typically see that only grow in calcium deficient soils.

So what can be done? A comprehensive soil test is one of the best, first steps to take. This is much more than the simple NPK type of test done by university extension offices or the do-it-yourself test kits bought at the local garden center. A complete soil analysis is one that is collected and sent off to a recognized, professional lab that sends back a report on every mineral found along with recommendations on what direction to go and what nutrients to add in what form. They will usually cost from $25 to $75 range, depending on what analysis and information you need. There are several of these labs in the US; the two that we’ve worked with and are familiar with are Crop Services International  and Texas Plant and Soil Lab. From this, you will have a very good indication of where to go next.

Fall is a great time to get your soil tested and amended in preparation for next spring’s season for a few reasons – the soil testing labs are generally not as busy, so results are quicker; and soil amendments will need some time to become integrated and available into the soil nutrients, so fall gives you the needed time, and it is easily incorporated into the traditional fall garden cleanup and prep.

Calcium is closely tied with magnesium, and this will be indicated on the soil analysis. More acidic soils, such as those generally found in the eastern states, will benefit from lime or calcium carbonate, while the more alkaline soils in the western states will need gypsum or calcium sulfate. Lime tends to raise the pH, while gypsum tends to lower it.

Water plays an often overlooked, but equally important, role in the blossom end rot saga. Inconsistent levels and rates of water will greatly vary the amount of calcium and other nutrients available to the plant, increasing the chance of diseases attacking the fruit like blossom end rot. This is one of the reasons we talk a lot about a drip system on a timer – it really helps even out the moisture levels in the soil and greatly reduces the stress on the entire garden, with the happy result of lowered amounts of nutrient and stress related problems. Of course, the weather can also play havoc with all of our carefully laid plans, as heavy and sudden rainfall can cause blossom end rot and splitting of tomatoes, along with a noticeable ‘wash-out’ of flavor and taste.

This is where the acute or secondary approach is needed. Calcium carbonate tablets, or anti-acid tablets (Tums or the equivalent) work great when a couple of them are inserted at the base of a tomato or chile plant, where they will dissolve and make the calcium available to the plant in just a few hours, saving this flush of fruit if done right after the rains, or the next set if done when blossom end rot is first noticed.

Another approach is to feed calcium directly to the roots through the drip system as a liquid fertilizer, usually with calcium chloride or calcium nitrate. This approach works very well in offsetting one of the most overlooked causes of blossom end rot – great weather. That’s right – excellent weather with moderate temperatures and lots of sunshine put the plants into overdrive, and their rapid growth can often simply outstrip the amount of available calcium in the soil, even if you have been proactive last fall. The calcium just cannot be taken up out of the soil fast enough, so feeding through the drip system can be a big bonus during these times. The secondary approach will always be needed, even if you’ve done your homework and amended the soil the previous fall.

Calcium isn’t absorbed very well by the leaves of a plant, especially older leaves. The roots are much better at absorption, plus they can transport the calcium faster than through a foliar approach. For these reasons, stay away from trying a foliar spray to supply calcium to your tomatoes.

Blossom end rot won’t ever quite go away, because of the reasons you’ve seen here. With some knowledge and practice, you can easily create a much better environment in the soil that supports the plants much more fully and then use the supplemental approach to keeping the calcium levels high enough to minimize blossom end rot and keep more of your hard work for your dining table instead of as scraps for the chickens or compost pile!

Wild Galapagos Tomato


We love it when we hear from customers about their gardening/growing projects. One of our tomato varieties, the Wild Galapagos Tomato (Solanum cheesmaniae), is very popular for its production and adaptability to extreme environments. One of our customers has been doing research in Italy on the salt tolerance of the Wild Galapagos tomato as well as other salt tolerant plants. The goal is to develop an aquaponics system that uses salt water instead of freshwater to grow food where there is no fresh water available. Many parts of the world have limited access to fresh water, but ample access to salt water so if salt water could be used to grow food there would be much less hunger!

Here’s some photos of Eddie’s research projects:

A row of plants growing in the middle of a greenhouse.

Growing Wild Galapagos tomato plants under controlled agronomic techniques, about 8-10 times more salinity than usually tolerated by such plants. Plants grew well.


A group of benches sitting on top of a wooden platform.

Saline aquaponics. Tomato trials under saline condition – working towards a fully marine fish aquaponics system.


A close up of some green plants growing in a container

Saline aquaponics. Testing beets on fish water under medium salinity.


Another interesting project is our customer Harry in Anchorage, AK who spent the winter growing the Wild Galapagos Tomato inside under grow lights. Harry wrote to us saying; “I have started a project that I know will be difficult. I am trying to raise a few Solanum cheesmaniae, an outdoor tropical plant, indoors in Alaska in the dead of winter.† He goes on to state “The system is based on multiple artificial lights, with wires and artificial props, and even some duct tape as needed.†Ingenuity is what we love about our customer’s imagination!

After an email exchange, he elaborated a bit,

“I use an array of “daylight” fluorescent lights, mounted on a framework made of do-it-yourself shelving material from the hardware store.  I can’t let the plants sprawl, so I have to make them grow upward, using a system of strings and wires.  As a result, plants that grow from pots less than a foot off the floor are already touching the 8-foot ceiling, and they aren’t stopping!  If I had unlimited space, I could be growing hundreds of plants now, because each tomato (those that I have saved seeds from) has over 20, and often over 50, seeds.  I have given away a potted second-generation plant, and have 8 others growing — one with flowers, and one, now about 7 feet tall, with both flowers and green fruit.

Although I ordered two seed packets from you last October, I used only 10 seeds from one (and got 5 plants, all still living and bearing), and sent some seeds to a friend in CA. One of my colleagues (at work) planted the remainder of the packet, and has 15 plants growing in limited space in his house at a chilly 2500-foot elevation outside of Anchorage.”


He finishes by saying, “The appeal these plants have, to myself and others, is the intensity of the tomato flavor. The flavor grows in your mouth and lasts at least 2 minutes if you don’t eat anything else.”

Here is a photo essay of his project:

A plant growing in the dirt on a sunny day.

A plant growing in the dirt on a sunny day.

 A plant growing in the dirt on a sunny day. A plant growing in the dirt on a sunny day.

 A plant growing in the dirt on a sunny day.


Our customers in Texas report that the Wild Galapagos tomato is the only tomato that keeps producing throughout the heat of the summer! With a daily high of 110°F for over 40 days, the Wild Galapagos was the only tomato to keep going, giving about 2 pints of tomatoes every other day from 2 plants. On the other end of the scale, our customers from the northern tip of Idaho and southern British Columbia and Alberta, Canada say that this is the first tomato to flower and set fruit and is also the last at the end of the season!

This is a very versatile tomato along with its cousin Sara’s Galapagos.  The Wild Galapagos Tomato is one of two indigenous varieties of tomatoes on the Galapagos Islands, and is the only edible one. This is why it’s scientific name is completely different than any other tomato! Sara’s Galapagos is a domesticated variety that was brought back by Sara and Amy Goldman on one of their tomato expeditions, is adapted to the island’s climate and does well in harsher environments.  

A few things to remember about them, they can take anywhere from 4 to 45 days to germinate based on recent reports. Under germination testing these two varieties have taken longer than “regular†tomatoes to germinate under controlled conditions.  Sara’s produces red fruit and the Wild produces a golden yellow-orange fruit. So, get creative and feel to experiment with any of our varieties that we offer – you will be amazed what might happen!

Farm Woman Melon Basket


We are very happy to share an editorial that Stephen wrote for the Spring 2014 issue of Small Farmer’s Journal. SFJ, as it’s known, has had a large influence on us for a very long time. It is one of those jewels of a publication, wrapped up in its plain brown paper cover, but holding viewpoints and articles that expand one’s mind, or perfectly sum up thoughts on a subject, or inspire or educate on something that you hadn’t really thought about before.

We’ve contributed articles before, but were very honored when Lynn Miller asked for an editorial. He didn’t specify the subject, so we went with what was most in front of us at the time, drawn from a number of conversations with customers from all across the country, along with material from a couple of recent presentations. We hope you enjoy it!

Our perspective is somewhat unique, based as it is on contact with home gardeners and small scale growers across the US and Canada, along with a number of other countries. Our phone and email conversations are filled with happenings from all over, from cities with community gardens, church and school gardens, to chefs working with growers to bring fresh, sustainable and locally sourced food to the forefront of their cooking, to prison systems that are going back to raising some of their own food for the lower costs, higher quality food and better rehabilitation that a working garden provides.

Canning classes are oversubscribed, seed starting and planting lectures are full and ordinary people are beginning to ask about how to grow food without using so many chemicals, pesticides and herbicides because of their concern about what they are eating. It is no longer unusual to get an email asking if we are connected in any way to the bio-tech companies, if we use herbicides in growing our seeds or if our seeds come from China.

We are seeing many small, quiet but positive indications that give us hope and encouragement in what we, and those like us, are doing. While multinational industrial food companies continue to march in lockstep with the commercial biochemical industry to control the federal regulatory agencies tasked with keeping them in check, many individuals are rejecting the rhetoric, shrill hype and slick marketing to regain their own choices. As Wendell Berry wrote –  

“We are going to have to gather up the fragments of knowledge and responsibilities that have been turned over to governments, corporations, and specialists, and put those fragments back together again in our own minds and in our families and household and neighborhoods.â€

This is exactly what we are seeing, in many small ways, in every corner of our cities, towns and countryside across our nation. It encourages us and motivates us. These ripples have a cumulative effect, much like the 100th Monkey Principle, where a small group of primates were taught to peel their bananas from the bottom instead of the stem end. They were isolated and out of sight from the mainland, with no identifiable method of communication. Once a critical number of monkeys on the island were consistently peeling their bananas from the bottom, researchers noted that monkeys on the mainland started to do the same. Thus the term – 100th Monkey Principle – where populations change how they do things seemingly spontaneously.

We have no way of knowing where these ripples will end up, who they will affect or how. We do know that they create positive results that continue long after the initial effort or influence.

An excellent example is the Humboldt Elementary school garden in the small Arizona town of the same name. Started by a now-retired teacher almost 20 years ago that was abandoned for a number of years, then re-started last year by a new teacher, it has positively affected kids, parents and teachers already. The local paper has featured it, kids are actively engaged and eagerly look forward to their time in the garden each day, and the growing space is being expanded to grow more.

Whether the influence is simply an appreciation and preference for fresh, local food or extends to the choice to become a grower, rancher or farmer that is biologically friendly, we’ll never know and don’t really need to. Sometimes knowing that we’ve made our corner of the world a little better through our actions is enough. That knowing helps us keep moving on, continuing the work and sharing our knowledge, experience and passion with those who will listen and join with us. As the kid who was told that he couldn’t save all of the starfish washed up on the beach, he replied as he threw another one back, “It made a difference for that one!â€

I heard or read the old phrase, “If you want to change the world, plant a garden†when I was much younger. It didn’t make any sense to me at the time, as I strongly disliked being forced to work in our large garden when I had much better things to do with my free time!

After I grew up, left the Navy and the big cities and made the conscious choice to move back to a small town, those words began to make more sense. The world-changing part wasn’t the garden or the food that it grew, not even the world that it was supposed to change. Obviously, one small garden can’t change or feed the world by itself.

What one small garden can do is share.

It can share its food, the knowledge of how that food was grown, why it tastes as wonderful, rich and delicious as it does and the excitement and contentment that only comes from food you’ve grown. The term “local food†becomes something entirely different and ceases to be a carelessly used sound-bite. That one small garden can become a few, then several, then many across a town, a city, a county and a nation. That small garden becomes a metaphor, an idea and a movement.

It can become the embodiment of how we as individuals can reclaim our decisions from the proxies of government, corporations and stockholders and make it a personal choice to grow our own food and share it with our family, friends and neighbors, improving everyone’s lives that we share. After all, we are only talking about the third most important ingredient in life, after air and water! Food, as with soil, has been denigrated and degraded into a commodity that is not worth our attention, respect and devotion. We are slowly waking up to this fallacy.

Something as simple as showing someone the distances between home-grown and store-bought food through the flavor and nutrition can open their eyes to a new world of food.

Sharing our abundance from the field or garden with a friend or neighbor is a powerful way to start a ripple. For us it costs next to nothing as it is surplus, but is worth a lot to the receiver. They want to reciprocate the sharing as a way to say thanks. This creates a very powerful, positive ripple effect that used to be common in rural and agricultural communities and is becoming more widespread once again.

This occasional sharing becomes something much greater when the surplus is planned, such as an extra row that is planted exclusively to give away or share with others. This creates a very positive upward spiral in the community, as well as strengthening it and making it more resilient and self-supporting.

Others follow the example, as they want to contribute and participate in the abundance. Soon the immediate neighborhood begins to look a lot like Switzerland, where neighbors plan their backyard gardens together to maximize the amount of food grown in their area, and then share the crop together. What is surplus then goes out to the larger neighborhood or community; a perfect demonstration of how to get away from the insidious influence of the industrial petro-chemical agri-business that seems bent on controlling our food supply today. The most deadly effective way to loosen their grasp is by making them completely un-necessary in our lives.

Looking at the marketing machines of mass media backed by billion dollar multi-national corporations and aided by the federal government, many everyday people question the continued existence of individual choice and responsibility today and whether it has any application in our lives. It is a valid question, but the answer won’t come from looking at the usual answers.

Look instead at some of the results that have happened from individual’s choices and actions. How rBGH was pushed out of milk in grocery stores due to mothers continually asking for milk without that synthetic hormone, and asserting that they wouldn’t buy any milk that had it. Enough dairy managers heard the questions, passed it up the line and the management board saw that enough market share and dollars were being lost that they made the business decision to remove it. It is estimated that 7 – 10% of the population of moms made this happen, not a majority in a voting situation, but a large impact on the company’s profits that made the choice clear.

Look also at how hard the processed food industry, helped by the bio-tech industry has fought to defeat GMO labeling initiatives in California and Washington states. The commercial, industrial Ag industry has called these “defeatsâ€, but was forced to spend tens of millions to achieve those victories. Their behind the scenes efforts have been exposed to the public, their “Natural” label subsidiaries that helped fund the anti-labeling efforts have been hit hard and repeatedly, feeling the effects of public outrage as more individuals learn of the corporate shell game being played at the expense of their health and money.

From our perspective, we see much to be proud of, yet much to be very concerned with.

The local, sustainable food movement has seen great growth and increase in popularity and acceptance that has been beneficial to small farmers, growers and communities; at the same time there is more rhetoric being lobbed at the “opposition†from both sides than ever before.

Civil discussion is becoming increasingly more difficult with catch-phrases and sound-bites being deployed instead of rational, thoughtful and open discourse where everyone doesn’t have to agree, but can still get along. Shrilly shouting down the other party with emotional, highly charged word bombs or character assassination is the order of the day. It seems that more folk are content with term-slinging that makes them feel good or righteous, instead of actually understanding what those terms mean or describe.

We see more need for resiliency today than ever before, but for entirely different reasons. Resiliency once was used somewhat interchangeably with self-sufficiency, and it still applies in that respect.

I once heard a great example of resiliency – that of a cabin boy taking a cup of coffee to the captain on the bridge. As the ship is pulling out of port in calm waters, it is an easy task – cup of coffee on the tray, don’t run into anyone, be careful going through the doors and all is well.

Everything changes when he has to do the same thing in 8 – 10 foot seas with a storm moving in with the ship anything but still and calm. Every move, every step must be planned, visualized and then executed with confidence. Elbows, knees and shoulders are used to brace against bulkheads, crossing from one side of the passageway and from one wall to the other as the ship rolls is now normal. Waiting until the top or bottom of a swell before going through a door and bracing himself all the while is what is needed.

The same task or plan under different circumstances makes doing that task completely different.

As Allan Savory taught in holistic management – the very last question of any planning is to ask, “What if we are wrong, what are the early signs that things aren’t working?” Don’t assume that everything will go as planned, and that we have all the answers at the beginning. Don’t assume we are always right.

Our country does not have the resiliency that is needed in so many areas today. Look at recent weather events, with people stranded on the freeways in Atlanta, unable to get home, staying at big box hardware stores overnight, running out of fuel on the freeways. Our stubborn insistence on depending on someone else to provide for us will eventually get us into real trouble.

Another example we should have learned from long ago, but were re-taught during the economic meltdown and ensuing political madness of “The Great Recession†that crashed around us in 2008 was the fallacy of infinite growth, as if the financial markets were not a closed system and existed outside of the realities of the world.

I’ve often said that we will wind up in a sustainable economy with a sustainable agriculture – either by force or by choice. We will either make the choices and changes needed to be able to grow enough of our own food to feed ourselves, or we will suffer until we do learn how to when times get tough. We might be seeing the arrival of those times with food starting this summer, with California in a state of emergency due to severe drought and an estimated 50% of US-grown combination of fruits, nuts and vegetables from there. California grows 70% of the national production of fresh vegetables, according to the CA Dept. of Food and Agriculture for 2012.

For a real-world example of resiliency in action, look at Russian Dacha gardening. This is backyard gardening on a national scale that prevented a famine after the USSR collapsed, taking with it commercial, industrial, subsidized agriculture. They produce 47% of their national food supply on 3% of the land, from home gardens and they’ve done this for hundreds of years with hand tools and human labor. According to official government statistics in 2000, over 35 million families (approximately 105 million people or 71% of the population) were engaged in dacha gardening. These gardens provide 92% of Russia’s potatoes, 77% of its vegetables, 87% of the berries and fruit, 59% of its meat and 49% of the milk produced nationally, in a nation that has an average of just less than 100 days of growing season a year. So tell me again, please, exactly how small scale agriculture doesn’t work?

Would we in the US fare as well if the cost of diesel fuel doubled or water scarcity significantly increased food costs? Or would we go the way of the Cubans, where a significant portion of the population died of starvation and everyone else lost 30lbs until they figured out how to grow food in the cities; using every available scrap of soil, planters, lawns, parks, flower beds and spots from curb to sidewalks to grow enough food to feed themselves.

So, what can we do as individuals? Can we truly make a difference? These questions always, inevitably arise in these discussions. The answer is – of course we can make a difference, we already do each and every day that we share our knowledge and abundance, that we create those positive ripples, sending them out into the world to reinforce other ripples from unknown people just like us.

This isn’t just some socially responsive, feel-good response. Looking around us and seeing the unprecedented growth of Farmer’s Markets, community supported agriculture (CSAs), food hubs, community gardens, school gardens and backyard gardens shows us something that terrifies the conglomerates – people are becoming interested in their food once again, and are tired of being lied and marketed to by the industrial food corporations and their lackeys in the government.

It is a radical thought in today’s world where the health care industry pays no attention to food while the food industry pays no attention to the health of their products that improving and healing the soil in our gardens and farms and growing some of our own food will noticeably improve our own health without the costs, paperwork or side effects.

Looking at it from that perspective, it really feels good to be a radical, doesn’t it? After all, if you aren’t on some sort of government watch list these days, you really aren’t trying hard enough!

Monarch Butterfly on Milkweed


Milkweed Cold Stratification

Our friends at Painted Lady Vineyard and The Xerces Society have provided these detailed instructions to cold soak and stratify your milkweed seeds to get better and faster germination!

Slow soaking and rinsing milkweed seeds removes a naturally occurring chemical from the seed surface to enable quick germination. In nature, this chemical prevents premature sprouting during extreme conditions such as prolonged drought or extreme cold.The  stratification process mimics environmental conditions for the seeds that would naturally germinate at the end of a long wet winter.

A sterile, clean environment is required to prevent mold from growing in the stratification process. Mold destroys the seeds. Handle seeds and vermiculite in sterile conditions. Rubber, non-latex, gloves should be used. Use sterile water, containers, and tools.

Note: It is best to read through the entire process once or twice to familiarize yourself with the process, then assemble the tools needed before starting.

Procedure

1. Pre-chill one gallon of distilled water. If more than one species of seed is being germinated keep species separate—label the jars, one for each species. Mix each species with one cup of pre-chilled distilled water. Soak for 24 hours in the refrigerator. By keeping species separate throughout process, site specific planting will be an option and plant identification is made easy.

2. After 24 hours, pour seeds into a clean strainer. Wearing sterile gloves, rinse with distilled water. Drain excess water.

3. Add one cup vermiculite into the sterile containers with lids. Slowly add approximately 1/3 cup distilled water to each container of vermiculite until just moist but not dripping. Mix rinsed seeds into vermiculite using your gloved hands. Seal container and label accordingly. Store in refrigerator for 30 days.

4. Plant entire mixture of seeds and vermiculite or sift seeds out. Plant at 1/4†depth in prepared seed bed when soil temps are warm (70°F+). These temperatures usually occur when the daytime air temperature reaches around 80 degrees. When nighttime temperatures are 65 – 70 °F your soil temps should be very close to the same temperature. Water the newly planted seeds often until germination becomes evident. Keep up with your watering until plants are established.

A plant growing in the dirt on a sunny day.For germination, water lightly and frequently to prevent top of soil from drying out. When seedlings are about 1 inch tall, reduce the frequency of watering to 2 or 3 times weekly.

Increase the amount of water per application to achieve greater soaking depths for development of healthy tap roots. Alternate soil moisture from good deep soakings to moderately dry in between watering. Roots need a balance of oxygen. Reduce frequency of watering over time as plants become established. Supplemental water may be discontinued as seasonal rains return.

Encourage and enjoy! By doing this you are playing an important role in life on earth. And watch your milkweed patch for monarchs, their eggs, the caterpillars and then …. the butterfly again!

NOTE: Please do NOT use pesticides on milkweeds. Monarch caterpillars must munch on milkweed leaves in their natural lifecycle. Established perennial milkweeds grow back year after year from same roots.

Thanks to Native American Seed  for these instructions which have been modified only slightly to suit the seeds grown here.

Many thanks to the Xerces Society for Invertebrate Conservation for their support of this milkweed seed production program, and to Painted Lady Vineyard for growing the Spider Milkweed for seed.


Seed Germination – Challenges and Rewards

Seed germination issues happen every spring and challenge many new and experienced gardeners and growers. Over the years we have found a lot of commonality in why our customers have problems with seed germination. The four biggest issues are soil temperature, moisture levels, knowledge or experience and patience. We’ve put this guide together to help everyone learn where the problems lie and make changes to become more successful.

We have a vested interest in you being successful both in starting seeds and in your gardening efforts. After all, we put our name and reputation on each and every one of the seed packets we send out. If you fail, we also fail; so we really want to help you succeed!

We know our seed quality and spend a lot of time, energy and effort to make sure you get the best possible seeds. When you have problems with seed germination, if we simply send you replacement seeds without helping to correct the issues, you will get the same results and no one will be happy! We aren’t asking these questions to make things difficult, but to help you. Also, if you learn some of these critical skills and steps, you will be much more successful overall.

Seeds are amazing; they have everything needed to continue their species stored right inside their seed coats. From their accumulated travels they have all the adaptations, the environmental and seasonal conditions they have encountered and grown through encoded into their DNA. Everything they need to sprout when the time is right is built right inside their shells. Within that hard seed coat is enough food energy to help them break dormancy and carry them into their first several days as seedlings. All the enzymes they need to convert the stored energy into food is there as well; they have the fats, carbohydrates, protein, enzymes and hormones needed to get the seed off to a great start. As home gardeners and small scale growers, our job is to provide the proper conditions, ensuring maximum germination into strong and healthy seedlings ready to be transplanted into the garden when the conditions are right.

Seed Germination Basics –  What You Need To Know

Not all seeds are alike; likewise, many of them need somewhat different conditions to germinate. Some seeds are simply more difficult to germinate and require patience, attention to detail and time to be successful with. Pay attention to the seed packet directions – if it says, “Outdoor sowing recommended,” there is a reason! You will have a much harder time getting them to start inside, regardless of the professional greenhouse set-up you might have. Corn, melons and cucumbers are great examples.

Other seeds really need to be planted in the fall, lightly covered with soil and left alone – like most herbs and flowers. Duplicate the natural systems of seeds scattering in the fall and overwintering in the soil, then sprouting in the spring, and you will have less work and worry with a better, more vibrant garden.

Very few varieties of seed will have 100% germination. Under carefully controlled conditions, we might see 97% germination rate for tomatoes, but you might see 90% in your home. This doesn’t mean the seeds you get are weaker, just that your conditions are most likely different than what we used in our germination tests. We always beat the Federal Germination Standards!

This is why we pack more seeds in a packet for some varieties; it reflects the Federal germination rate. For instance, the standard germination rate for Okra is 50% – which is why we give you around 100 seeds – there is plenty of seed to ensure an abundant harvest. The minimum germination rate for peppers is 55% – we will stop selling it long before it drops to 70% in our tests. This is one of the reasons we pack 40 seeds per packet for peppers, as not all will germinate. We pack our seeds to give you the best germination rate possible, combined with our knowledge of how that variety grows to ensure a great crop in your garden; another reason to wonder what results you will get with 10 seeds per packet from other companies.

What Happened To My Seed Germination?

A plant growing in the dirt on a sunny day.Now that we have some information, where do we start in evaluating why our seed germination failed? When seed germination doesn’t happen, there are a few things to consider.

Have none of the seeds germinated? If this is the case, there is one of two potential answers. The more likely answer is an environmental condition is preventing the seeds from sprouting. We will look at those below. The second cause is that the seeds are old, leftover from several years ago, forgotten in a box or cupboard or stored in extreme temperatures that have destroyed the seed germination potential. Extremes of heat can kill seeds in a short time, which is why we recommend storing them in a cool, temperature and moisture stable environment.

If only a few of the seeds germinate, it is most likely from being impatient or planting older seeds that have less viability. Most garden seeds have a high germination rate for the first 2 – 3 years, with the exception of hulless pumpkins, leeks and onions. Once the germination drops to about 75%, their ability to sprout will drop considerably faster. Of course, when you see the first few pepper seeds pop up in 3 – 4 days, then nothing for another day or so and you give up, you lose out on the rest of the seeds emerging at the end of the week! Have a bit of patience, observe the seeds progress each day and check our Germination Guide or the back of the seed packet to see how long they really should take. Many times a couple more days makes all the difference in germination rates.

Other conditions such as improper soil temperature and moisture, or a combination of the two, are the majority of the reasons that seeds don’t germinate in a timely manner. Planting too early, too deep, watering too much or too little are common mistakes made. Other factors include soil preparation, birds and/or rodents stealing the seeds.

If you are in doubt as to the viability of seeds, whether they are an unknown seed that was given or traded to you, or you’ve “discovered†them in a closet or back shelf, do a paper towel seed germination test.

Wet a paper towel and wring most of the moisture out of it. Fold it in half and then lay it open. Arrange the test seeds – usually 10 or so –  along the fold, then re-fold the towel over the seeds. Roll the folded towel into a tube, then seal it into a zip-lock type of clear plastic bag. Put the bag of seeds in a constant, very warm temperature location – such as the top of a refrigerator, freezer or in the oven that has a pilot light. You need about 85 – 90°F. Record the date started and check the progress daily, opening the bag to check the moisture level. You should see water droplets on the inside of the bag, add a little more water when you don’t. Check the germination rate and amount of days needed against our Germination Guide. If the seeds germinate well, you can plant them directly by cutting them out of the paper towel, and then you know they are viable.

A plant growing in the dirt on a sunny day.Let’s look at the major factors that a seed needs for germination. They are moisture, temperature, air, light and soil. For a more in-depth look at these factors, read our article “Starting Seeds at Home: A Deeper Look.â€

Moisture – A dormant seed only contains about 10 – 15% moisture, so it must draw water from the soil that surrounds it. As the moisture is absorbed from the soil or seed starting media through the seed coat, enzymes are activated that convert the stored nutrition reserves and softens the seed shell, allowing oxygen to penetrate the seed coat, starting the process of growing. The moisture levels are critical at this early stage – they must remain constant for the sprouting process to continue and for the seedling to survive.

Uneven moisture levels can seriously delay sprouting of a seed, and even a few minutes lack of moisture as a seedling can kill it, as it has no method of storing water like a mature plant does. During the germination process, a seed needs much more moisture in the soil than when it has sprouted, so be aware and decrease the moisture levels as young seedlings emerge and mature.

Temperature – Germination will only occur in a specific range of maximum and minimum temperatures for each variety. Our Germination Guide lists these, along with the optimum temperature each one needs. The temperature we are talking about is the soil temperature, not the air temperature above the seed tray or garden row. Slightly cooler temperatures can double or triple the time needed for germination – even as little as 5°F cooler can be the difference between a 7 day or a 14 day seedling emergence!

When starting seeds inside, a bottom heat such as a seed sprouting heating mat on a thermostat is invaluable. In the garden, double check the soil temperature with a soil thermometer before spending the time and effort in carefully planting your seeds and being disappointed later.

Air – Seed germination requires large amounts of oxygen to activate the metabolic process of converting the stored nutrients into energy. Oxygen that is dissolved in water and from the air contained in the soil is used. If soil conditions are too wet, an anaerobic condition can be created and seeds may not be able to germinate due to lack of oxygen.

Light – Some seeds need light for germination, while some other seed varieties are hindered by light. Most wild species of flowers and herbs need darkness for germination and should be planted slightly deeper in the soil while most modern vegetable crops prefer light or are not affected by it, and are planted shallowly to allow small amounts of light to filter through the soil.

Soil – It is the medium for successful seed germination. In the germination tray, it may be absorbent paper (blotting paper, towel or tissue paper), soil, sand or a mixed media made specifically for seed germination. The substratum absorbs water and supplies it to the germinating seeds. It should be free from toxic substances and should not act as a medium for the growth of micro-organisms. It needs to be loose, allowing the moisture to easily reach the seed and for the seed to move as it grows without spending lots of energy in moving the soil to reach the surface.

A few things to consider –

1. Keep seed packets in a cool dry place. Do not store in your garage, potting shed or near a heat source such as a heater or appliance.

2. Review the seed packets individual instructions and develop a planting schedule based on your local weather and growing season.

3. Re-seal any seed packets that you are starting indoors, such as pepper, eggplant, and tomatoes. This will allow you to start more seeds later if you want to stagger your plantings, etc.

4. It may be better to over plant and then share plant starts with neighbor and friends, than to under plant and be caught short.

5. Download the  Terroir Seeds Garden Journal to get a jump start on tracking your garden this year.

 Questions to Answer

And finally, a few questions to answer to help us help you in determining what went wrong and how to correct it:

Did you follow the germination instructions on the seed packet? Go back and read them again; we sometime spend hours in researching and experimenting to find the best methods, temperatures, etc.

What was the soil temperature? Not the air temperature, but the soil temperature? Were there fluctuations? If so, how much? Not knowing this is a critical error that is a major cause of seed germination failure.

How moist/damp was the soil? For seed starting, the soil needs to be damp to the touch. You should be able to see a small pad of moisture on your fingertip after you lightly touch the soil. It shouldn’t be a drop of water, but an easily observed spot of dampness. Was it too dry/too wet? Did it get dry during the day/night, or was there constant moisture?

What seed starting mix are you using – a complete soil, Miracle-Gro mix. sterile seed starting mix, home-grown or something else?

Are the seeds still physically in the ground? If you don’t know, dig a few up to check. Are birds, squirrels, rodents eating/stealing the seeds or seedlings? Many times we have heard that our seeds aren’t germinating, when they have been eaten! You may need to use a paper cup with the bottom cut off to protect the seedling from birds/rodents until it is more mature.


Once you have answered these questions, we can help you determine what has prevented your seeds from germinating. More often than not you will know what to change just from reading this.

Wendell Berry


Wendell Berry – Poet, Author, Farmer, Philosopher

Let’s start this conversation off with one of Wendell Berry’s quotes that has had a profound impact on me and what has become Terroir Seeds:

“We are going to have to gather up the fragments of knowledge and responsibilities that have been turned over to governments, corporations, and specialists, and put those fragments back together again in our own minds and in our families and household and neighborhoods.â€~ Wendell Berry

I heard or read the old phrase, “If you want to change the world, plant a garden,†when I was much younger. It didn’t make any sense to me at the time, as I strongly disliked being forced to work in our large garden when I had much better things to do with my free time!

I do remember the planting time during spring – readying the rows, digging the small irrigation ditches, making sure that the water would flow all the way to the end of the row. Then the planting of the seeds and transplanting seedlings into their places. We watered our 1/4 acre garden with a gas powered well pump from an old abandoned well that we had cleared up and found water in.

Neither of my parents came from farming or ranching backgrounds. My father wanted to grow our own food because of his concern about the health of grocery store produce in our small town and the proliferation of commercially prepared foods. This was the late 1970s and early 1980s. Most of the knowledge that we used came from our Mother Earth News subscription, along with the advice of a couple of older family friends. Looking back, I see that there was a distinct lack of knowledge and experience even then, but there was a desire to do something different. For all of his faults, my father had it right this time. 

Ours was a typical “spring and summer” garden. We planted as soon as we could in the spring and then watered, weeded and waited until the garden came alive and threw way too much produce at us. Then it was cooking, canning and drying seemingly non-stop until the garden sputtered to a stop, usually after the first couple of hard frosts. After that we cleared the dead plants away and waited until the next spring to try again. I remember the dreaded summer break routine of hoeing and weeding after breakfast until it got hot, then again in the late afternoon into early evening. We were gardening in soil that had been fallow for decades, so the seed bank of weeds was tremendous. We didn’t really understand how to manage soil fertility, so we hoed and pulled weeds constantly. 

After High School I joined the Navy and left the small town behind just as soon as possible. Six years later – after lots of travel, some growing up and the Gulf War, I left the Navy, the big cities and a failed marriage behind and made the conscious choice to move back to a small town. That was when those words about a garden began to make more sense. I began to realize the world-changing part wasn’t the garden or the food that it grew, not even the world that it was supposed to change. Obviously, one small garden can’t change or feed the world by itself.

I learned the magic of what one small garden can do is share.

It can share its food, the knowledge and experience of how that food was grown, why it tastes as wonderful, rich and delicious as it does and the excitement and contentment that only comes from food you’ve grown. The term “local food†metamorphoses into something entirely different, ceasing to be a carelessly used sound-bite and growing into many delicious food bites that nourish us – body and soul. 

That one small garden becomes a few, then several, then many across a town, a city, a county and a nation. That small garden becomes a metaphor, an idea and a movement. That small humble garden becomes a much-needed, deep seated sense of security in a world where very little has the feel of permanence or security today, regardless of social status or financial standing. It gives us grounding and a sense of place, of belonging to and being part of something much bigger, older and better than us.

That small backyard home garden becomes the embodiment of how we as individuals can reclaim our decisions from the proxies of government, corporations and stockholders and make it a personal choice to grow our own food and share it with our family, friends and neighbors, improving everyone’s lives that we share. After all, we are only talking about the third most important ingredient for life, after air and water! Food, as with soil, has been denigrated and degraded into a commodity that is not worth our attention, respect and devotion. We are slowly waking up to this fallacy.

“Odd as I am sure it will appear to some, I can think of no better form of personal involvement in the cure of the environment than that of gardening. A person who is growing a garden, if he is growing it organically, is improving a piece of the world. He is producing something to eat, which makes him somewhat independent of the grocery business, but he is also enlarging, for himself, the meaning of food and the pleasure of eating.â€~ Wendell Berry, The Art of the Commonplace: The Agrarian Essays 

When we garden, we take an active part in the production of our food and quit passively waiting for it to be grown, processed and delivered to us on our whim. As Joel Salatin said in Folks, This Ain’t Normal, “The average person is still under the aberrant delusion that food should be somebody else’s responsibility until I’m ready to eat it.†Even the smallest container garden starts the reconnection process for that person. They learn and observe what it takes to grow even the smallest amount of food, whether it is a single plant of leaf lettuce or a handful of kitchen herbs. Through success and failure, they begin to realize that food doesn’t just pop into existence at the grocery store regardless of seasonality or weather conditions.

The very act of gardening on any scale forces us to pay attention to the world around us, to observe what is happening and learn more about the interconnected nature of all things. We become aware – perhaps for the very first time- of the enormous complexity of our world, and the realization of the folly of simplistic, reductionist, single solution thinking when applied to complex systems, even such a small one as a garden. 

That awakening can be the most beautiful, wondrous experience or one of the most frightful of our lives, depending on how we react and adapt to change. For those who come to see the beauty in growing food, their lives will never be the same. They will acquire a quiet sense of accomplishment, of progress and resiliency that is almost impossible to describe or talk about, but is implicitly understood by another who has made the same journey, whether as a child in a farming or ranching family or one who has made the conscience decision to take the road less traveled.

Our tech driven, always on, instant gratification society is shown to be artificial when we learn that we absolutely cannot plant carrot seeds the day before we want to serve carrot salad to our dinner guests. Everything takes its own time and there are things in life that absolutely cannot be rushed, “right sized”, or optimized to serve our timeline and agenda. As advanced a society as we are today, with as much progress as we’ve made, we are still human beings in a world that is larger than us, that doesn’t march to our drumbeat.

When we begin to garden, we begin to heal our part of the world starting with our own space and lives. As we gain knowledge, experience and success we can start to apply those lessons learned in the garden to other areas of our lives and offer our hard-won experiences to others so that they can hopefully learn from our mistakes. We come to re-connect with the idea that we belong in the world and to the world; we are not separate from and should not be disconnected from it. The idea that human kind shouldn’t be in the wilderness or nature is fully revealed as folly as we learn that not only are we part of the world, we are inseparable from it, no matter how hard some of us try. Rachel Carson said it so well, “Man is a part of nature, and his war against nature is inevitably a war against himself.”

To look at it from a different angle, I leave you with this thought that brings us full circle to the beginning of our conversation:

“Until we understand what the land is, we are at odds with everything we touch. And to come to that understanding it is necessary, even now, to leave the regions of our conquest – the cleared fields, the towns and cities, the highways – and re-enter the woods. For only there can a man encounter the silence and the darkness of his own absence. Only in this silence and darkness can he recover the sense of the world’s longevity, of its ability to thrive without him, of his inferiority to it and his dependence on it. Perhaps then, having heard that silence and seen that darkness, he will grow humble before the place and begin to take it in – to learn from it what it is. As its sounds come into his hearing, and its lights and colors come into his vision, and its odors come into his nostrils, then he may come into its presence as he never has before, and he will arrive in his place and will want to remain. His life will grow out of the ground like the other lives of the place, and take its place among them. He will be with them – neither ignorant of them, nor indifferent to them, nor against them – and so at last he will grow to be native-born. That is, he must reenter the silence and the darkness, and be born again. ~Wendell Berry, The Art of the Commonplace: The Agrarian Essays


The Carrot's Odyssey


Ellen once again shows her agricultural research on the travels and history of carrots. We love these types of articles, packed with information and education, as they really show just how rich our culinary world is today, gives hints and history of where they originated or traveled on their journey to where we find these foods and ingredients today.

All too often, we forget how fortunate our modern world is to have this vast array of incredible foods at our side, without paying the price of cultivating an unknown vegetable variety that required much adaptation, selection and breeding to make it widely edible and tasty.

For example we don’t know, or have forgotten, that the tomato and chile – two of the world’s most treasured foods – originated in Central America before being spread throughout the rest of the world. Many other stories and histories of food – vegetables, herbs and flowers that they are prepared from – have traveled long distances and have adapted into new climates and cultures to become what we consider today to be ordinary.

Let’s celebrate the odyssey of the carrot, as told by Ellen! Make sure to visit our Carrot department and grow your own tasty varieties!

Carrot (Daucus carota)

The carrot belongs to the Umbellifereae family, a large family made up of 2,500 species of plants that put up a characteristic “umbel†seed stalk. Queen Anne’s lace is an easily identifiable member of this family with its white, lacy-looking seed heads. The flowers form an upside-down umbrella shape, hence “umbelâ€. Dill, chervil, parsnip, parsley and carrot are all edible, while some umbellifereae are poisonous. Most members have highly aromatic leaves and flowers.

The carrot has a come a long way from its wild state. An early depiction of a carrot would have been a small fleshy white to pink-purple root that is slightly branched with dense leaves. Wild carrots are found in Europe, present day Afghanistan, and have become naturalized in North America. Carrots from Europe were white, while those from Afghanistan were yellow and violet. The roots were first used as medicine, and then later as food.

In the 1100’s carrots were introduced to Spain from Syria. As carrots spread throughout Europe, the French bred a golden yellow carrot. The orange carrot that is ubiquitous today was found in Holland, presumably a cross between the yellow and violet carrots of the time. Orange carrots were bred with popularity as a patriotic tribute to the royal colors of the Dutch at the time when they were fighting for independence from Spain.

In the 1600’s, the carrot continued its migration onboard Mennonite pilgrim ships to America, where it was cultivated for years in Pennsylvania’s hills before it spread to other parts of colonial America. Today, California hosts the largest production of carrots in the country with 70,000 acres in production. The carrot is one of our most important commercial crops in the umbelliferae family.

What do we do with all these carrots? Nearly 70 percent of them are made into baby carrots while the rest are cut into coins for freezing, juiced, or sold fresh. The remaining biomass is fed to cattle.  

Carrots in the Garden

Growing carrots can be a frustrating experience in the garden for beginning gardeners due to slow germination rates and the need for regular, even watering. However, it seems there is a steep learning curve with carrots—once you’ve grown a successful crop, there is little more as pleasing as harvesting the roots from the garden and eating them on the spot.

There are many shapes of carrots to try, each adapted to certain soil types. There are short rounded carrots, long and slender ones, and the Oxheart carrot that grows to 6 inches long and up to a pound in weight! Danvers is a popular heirloom variety of carrot that originated in Connecticut and was traditionally inter-planted between onions, upon the belief that carrots increased yields and productivity of onion fields. The carrot is still used today to break up the soil, and many gardeners plant onions, leeks, or radishes after harvest in the improved soil. Danvers remains a favorite in New England for its cold hardiness and its ability to produce in heavy soils.

My first exploration into seed saving was with carrots. Unknowingly, I left a few carrots in the field and they came up again in the spring, the greens growing tall with a slightly thicker stalk. In the summer they began to send up a magnificent seed stalk that reminded me of Queen Anne’s lace I grew up seeing up and down the eastern seaboard.

The seed is harvested from the primary and secondary umbels. While there are other seed heads on the plant, these two are the largest seed heads and produce the highest quality seed. When the seed was formed and dry, I collected it into a paper bag—it wasn’t like the carrot seed I was used to planting though, it had little hairs all along the outer edge of the crescent-shaped seed. And it smelled amazing! It turns out commercial carrot seed is cleaned of all the little hairs, called “beards†for ease of packaging. Here is a couple pictures of the seed I saved, with beards, and commercially cleaned seed.

A plant growing in the dirt on a sunny day.A plant growing in the dirt on a sunny day.

Carrots are a wonderful food for fall gardens. They over-winter well under a bed of straw and their orange color is said to help in adapting the “fall†organs to seasonal changes. Indeed, many orange vegetables are found in the fall—from carrots to winter squash to sweet potatoes. In Vichey, France, carrots were prepared at every meal to aid in liver detoxification. The roots are also known to aid digestion, night blindness and to relieve constipation.


Are you hungry for something with carrots after reading that? Head on over to our Recipes with Carrots section for some delicious treats!

Bloomsdale Spinach


After Ellen’s article about “Alternative Spinach Greens” she now tells us more about the original spinach. Grown in the cooler season in a rich soil, spinach is delicious – juicy with a nice crunch to it; a mildly sweet flavor and no bitterness. Sort of like a bolder leaf lettuce.

There is little written about the history of spinach. It is a common sight in the grocery stores and at farmers markets. In most areas it is hard to find spinach year round at market, because its season is so short lived, just 6 weeks or so.

Spinach seed germinates best in soils that are 40- 70 degrees F and prefers cool days and nights. At 40 degrees F it may take spinach two-three weeks to germinate, but most seeds will sprout. Whereas waiting for warmer soil temps to plant spinach one will see a decrease in germination and faster emergence of seedlings.

Spinach does well from March through May and again September through November. Spring plantings should be planted 6 weeks before the last frost in moist, nitrogen-rich soils. Consistent watering will produce a long harvest and the best looking leaves. When temperatures get warmer, watering twice a day and the cooling effects of shade cloth will help prolong harvest. Spinach’s season is short and perhaps that played into its status as the first vegetable to be frozen for commercial use.

Fall plantings also do well and will regrow in the spring, providing a few extra and welcome harvests early in the spring when everything is just getting started.

There are two types of leaves on spinach. Smoothed leaf spinach produces an oblong, dark to light green leaf. Savoy-types have slightly crinkled leaves with thicker dark green leaves. Regardless of what kind of spinach you grow, spinach is a well-loved vegetable.

The vegetable was probably bred from Spinacia tetranda, a wild edible green found in Nepal. In 647 AD spinach was taken from Nepal to China where it was referred to as the “Persian green.†Spinach was introduced by the Moors of North Africa to Spain in the 11th century. By the Middle Ages, spinach was grown and sold throughout the rest of Europe, and in England was known as the “Spanish vegetable.†It was not until the 1400’s that spinach became a staple in Mediteranean cooking.

Catherine de Medici, Italian royalty of the 1500’s, preferred spinach over other greens. When she left her home in Florence to marry into the French royal family she brought cooks with her to prepare her favorite spinach dishes. Dishes that are served with a bed of spinach are known as “a la Florentine†in her honor.

Breeding work with spinach began in earnest in the early part of the 20th century when breeders started selecting and hybridizing spinach varieties with disease resistance and those that are slower to bolt. One of the best-known varieties came from that period: ‘Bloomsdale Long Standing,’ a slow-bolting, savoyed spinach that is popular today.


Stephen recently did an interview on seed saving with an emphasis on quality on The Survival Podcast with Jack Spirko. He does a different kind of podcast, what I call a “thinking persons preparedness” show. There is much more of the everyday, common sense preparedness approach; that of being ready for a severe weather event,  a loss of power for a short period of time or a traffic tie-up on the freeway and how to get through them with less drama and a higher level of comfort and security.

One major item for rational preparedness folks is gardening, as being able to provide food for yourself and your family or neighbors is a big thing. Not only in a disaster event, but if the power goes out or if there is some reason that the supermarket near you can’t be stocked for a few days, being able to enjoy good food is very powerful. Sure, a person can survive on MREs (officially known as Meals Ready to Eat, but we knew them as Meals, Rarely Edible in the Navy), but that is a very short term “survival” approach as you can’t grow them and they aren’t very healthy for extended periods of time. They were designed as combat rations where a person was getting maybe 1 – 2 hours of sleep a night, moving constantly with a lot of equipment on them and under the continual stress of combat. In these conditions, you really do need each and every one of those 3,750 calories that 3 MREs provide. Many of the folks I knew would eat 4 – 5 a day while in active combat conditions!

Seed saving is very popular today, but there are some gaping holes in much of the information and knowledge today. The techniques of seed saving are being addressed, with little attention given to the foundational quality of those seeds.  Saving seed is fairly simple to do, but the results from planting those seeds can be very mixed; without a basis of understanding of seed quality, people can be disappointed and confused as to why they got the results they did.

I show why there are no one-size-fits-all best solutions to the availability of quality seed. A resilient, robust and diverse seed and food economy requires home gardeners, regional and national seed exchange programs to participate alongside independent seed companies to contribute all of their unique advantages and skills. Only in this way can the full expression of the diversity and adaptability of open pollinated seeds be realized and utilized.

Listen to the Seed Saving for Quality Interview for the full story! Jack does an introduction that is about 14 minutes long, if you want to skip directly to the show. This was originally an article in Acres USA January 2014 edition, and has been developed into a presentation and will be taught as a class later this summer.


New Zealand Spinach


Spinach is either loved or hated, there doesn’t seem to be much middle ground. This is probably the result of either being subjected to slimy canned spinach as a child, or having escaped those trials at the dining table.

The good news is that love of spinach can be learned, especially when that spinach is freshly grown from your own garden, picked only minutes before showing up in a salad, sandwich or other dish.

Several visitors to our garden have proclaimed that they don’t like spinach, all the while munching on a few fresh leaves of the hated green.We have learned not to announce what we are handing out to be tasted, letting them try and taste before discussing it. More than one has been very pleasantly surprised to hear that they actually do like spinach, when it is fresh.

What many don’t know is that spinach is a cool season crop, but for most of the country that means it can be grown twice a growing season, as an early spring green and then again as a fall and winter crop, planted at the end of the summer and enjoyed well into the colder seasons. Some gardeners will enjoy their fresh spinach past Thanksgiving and almost until Christmas, even in the northern states with a cold frame, row cover or hoop house.

The downside is that spinach becomes bitter rapidly when the temperatures are above about 80°F, but that is where the spinach alternatives arrive to rescue the summer salads. None of them are true spinach, but they are all heat loving, deliciously crunchy greens that can be enjoyed during hot weather.

Ellen contributes another article from her internship, giving us her take on these greens!

One of my favorite fall vegetables is spinach. The hearty, meaty leaves come as a welcome contrast to everything that is typically getting ready for winter at this time. Spinach that is planted in the fall will grow for a few weeks in the springtime, giving two harvests off of one planting!
    
    We are used to seeing lettuce and salad greens all year in the supermarket. The reality is that salad downright prefers to grow in cool weather. Much of the supermarket lettuce is grown in artificial conditions or in climates that are cool year round. When I was in New Mexico, I ran an acre kitchen garden for Real Food Nation, a farm-to-table style café. One of our main crops was lettuce, for salads. While it is possible to grow salad greens in the heat of July, it takes a little coaxing, and in the arid high altitude desert, a little too much water for my conscience. I prefer to grow lettuce in spring and again in fall, when it really wants to grow. The heads that come off these plantings are always stunning.

    How many of you have planted lettuce, or spinach, in the summer time, and noticed the leaves remain stunted, or wilt, or even start growing pointed leaves? When temperatures get warm enough, cool weather greens begin to exhibit physiological changes. They are getting ready to send up a seed stalk, bolt, and produce seed. It can be frustrating to tend to a planting only to miss out on eating any of it.

    But it is also a good reminder from Nature to plant – and eat – within season. Lots of people would like to grow lettuce all summer and to eat fresh spinach all year long. In some places this is possible, but in most climates this is not the case. However, just because we can’t grow lettuce in the summer doesn’t mean we have to stop eating salad in the summer! I’ve put together this list of heat-loving greens to try planting for summer greens. Each plant is adapted to growing in hot climates and are steady producing greens through the hot season.

    Malabar spinach, New Zealand spinach, amaranth, and huauzontle, or Red Aztec spinach are all plants to try. Below is a brief introduction to each and planting directions and tips can be found elsewhere on the website.

 A plant growing in the dirt on a sunny day.   Red Aztec Spinach (Huauzontle, or Chenepodium berlandieri): This ‘spinach’ was widely cultivated all over the Americas by Native Americans as a vegetable. In the Andes it has been cultivated for 5,000 years and is now known for the food seeds it produces, quinoa. Red Aztec is used as a green that is heat tolerant and drought-resistant. The lower leaves turn bright red as they mature and hold their color in cooking (only 30-60 seconds in boiling water). Seed-heads can be stir-fried and the seeds can be used for red tortillas or for sprouting. In New Mexico, the young green leaves of wild huauazontle are eaten widely in the summer, when the plants grow best.
    
    A plant growing in the dirt on a sunny day.Malabar Spinach (Basella rubris): This vining plant from India does best in hot and humid climates and provides a summer supply of cooking and raw greens. There are two cultivars of Malabar spinach, one is red-vined and the other green with deep, shiny leaves. Parts of the red veined variety of Malabar spinach is used as ink and as a potent dye. The plants leaves have a slight mucilaginous texture, which is remediated by using a salad dressing with vinegar.

   A plant growing in the dirt on a sunny day.Amaranth (Amaranthus hybridus): One of my favorite greens to grow–and not always green! The oval, decorative looking leaves of this plant are anywhere from deep fushia to light green with white and pink centers. I always have people asking about these plants when they’re in the garden. These plants thrive in the heat, and may be grown for their seeds, which are used as a grain. Leaves are eaten steamed when young.

    A plant growing in the dirt on a sunny day.New Zealand Spinach (Tetragonia Tetrogonoides): I first saw this plant in New Zealand, where it is called ice plant. It is a succulent herb with a pleasant watery texture and grows well through heat and frost alike. People rave about this plant in containers, as it has a sprawling habit and doesn’t need any fussing with to cascade over a wall, or the side of a pot. Makes a great ground cover between other plantings! While New Zealand spinach may be eaten raw, some prefer it as a cooked vegetable.
    
    In addition to these wonderful heat tolerant “spinach†plants, the heirloom spinach cultivars are not to be missed. I have grown Bloomsdale and Monstreux de Viroflay varieties. Both gave good quantities of slightly crinkled deep green leaves.

Humboldt Elementary School Garden


Today we have a wonderful story that was sent to us by one of our customers who spearheaded the rehabilitation of an elementary school garden in a small Arizona town.

What this story means to me are the far reaching impacts of positive ripples. Small actions that are taken thoughtfully and with full intention can have far reaching and amazing results, most of which won’t be seen by the person starting those ripples.

When we consider the potential results and implications from this small school garden, we can see effects on the young students, the parents and the faculty and staff. From something as simple as the garden brightening the day of a student or teacher; the crunch of a freshly dug carrot enlightening a parent on what good food should taste like, to the foundational change of a student’s life to pursue agriculture as a result of the experiences, tastes and memories of their first school garden, we cannot imagine the number of possibilities or the cumulative effects that they can have.

This is the perfect example of what we talk about in many different ways – that of personal choice, taking responsibility for our own actions, and helping to create a more positive, better and more healthy world through our daily lives, even if it is small things.

Bart wanted to make sure that we mentioned that all garden work takes place during recess, not instructional time, and that all expenses are paid from donations and not school funds. Here’s Bart’s story about Humboldt Elementary and their school garden!

A plant growing in the dirt on a sunny day.The school garden at Humboldt Elementary School in Humboldt, AZ was started about 20 years ago by Linneal Nick, one of our former teachers, who raised some money to have the ground leveled and a raised bed built.  She is now retired and the garden has not been used for several years.  It consists of a raised bed, 40′ long, 8′ wide and two cement blocks high located on the south side of a warehouse building on the edge of our campus. 

   I teach music at the school, and wanted to start a garden club because of my own love of gardening, which began in the early 60s, despite my role as an “indentured weed puller” in my father’s garden.  A few years later I had a 4-H garden, and in college I worked in a greenhouse growing willow leaves for a professor doing research on subspecies of White Admiral butterflies.  As an adult, I’ve gardened in upstate NY since 1973, and here in Arizona for the last four seasons.

A plant growing in the dirt on a sunny day.   My wife (retired math instructor from NM State, Las Cruces) and I started the garden club in August, with 3rd graders, because my lunch period corresponds with theirs.  We have 20 minutes during the recess that follows lunch, 3 times a week, to work in the garden.  Unfortunately our ordinary Arizona soil was used to fill the original bed, so our original task was digging up the beds with pick and shovels, and shoveling the dirt through a homemade screen to sift out the rocks.  We mixed in peat-moss, compost and natural fertilizers, and planted radishes, beets, beans, peas and zucchini.  In flats, we started buttercrunch and romaine lettuce, onions, marigolds, and red and green cabbage.  We bought and transplanted a variety of herbs and three cherry tomato plants, and periodically the children get to transplant various plants into 2 quart pots to take home.

A plant growing in the dirt on a sunny day.   Every work period we have a variety of tasks to do:  watering the plants, weeding, planting, picking up litter, eating peas and radishes, tending the birds at three feeding and watering stations, sifting soil, planting bulbs for spring, and–our biggest project–digging the hill next to the garden into four terraces, just like farmers around the world have done for centuries.  This, believe it or not, is a favorite job.  Third graders LOVE to swing picks, rake rocks, and shovel dirt!   We lay out perpendicular lines using a knotted rope to make a 3-4-5 triangle, just like the Ancient Greeks did.  

   On another side of the garden, we dug a bed for pole beans at the base of a 15′ high retaining wall, topped by a chain link fence.  This gives us room for a 20′ high trellis, so come spring, we’ll see how high a beanstalk can grow.

   Other plans for the future include a compost bin, worm bed, cold frame, pit greenhouse, gazebo, roof water catchment, shallow pond, and a 30 seat rustic amphitheater for use as an outdoor classroom; also roses, grapes, berries, fruit and shade trees; along with native plants to provide food and shelter for the birds.

   Parents and community members are welcome to help out, but I have done no direct organizing in this respect as it is not one of my strengths.

   We had few nights of vandalism by two kids new to the area.  Three school windows were broken, two of our garden pickaxes were stolen and used to destroy our soil sifter and a door, a portion of the garden was trampled, and plants in flats were strewn about.  The perpetrators were soon caught by our sheriff’s deputies, and we don’t expect further problems from them.  The garden area and school is surrounded by chain link fencing to afford some measure of protection.

   Anyone who would like to volunteer, donate, or ask questions is welcome to leave a message at my school phone, 928-759-4436 or contact me by email.

A plant growing in the dirt on a sunny day.The bulletin board is in the teachers’ workroom.  I change it every couple of weeks to let them know what we’re doing.  The garden, unfortunately, is on the edge of the campus, and off the beaten path.

A plant growing in the dirt on a sunny day.Another update to the school garden!

A plant growing in the dirt on a sunny day.Our compost bin made out of pallets tied together, with the original school garden in the background.

A plant growing in the dirt on a sunny day.

How about the choreography of those two pickaxers?  They’re digging up a bed for pole beans next spring, at the base of this 15′ retaining wall, which has a chain link fence on top, so that allows for a 20′ trellis altogether.  How high will beanstalks grow?

A plant growing in the dirt on a sunny day.Checking out the progress of recently planted seeds. Watch them grow day by day.

A plant growing in the dirt on a sunny day.Transplanting time! Learning how to carefully move the fragile seedlings into a larger container so it can continue to grow.

A plant growing in the dirt on a sunny day.More transplanting fun!

A plant growing in the dirt on a sunny day.The original school garden growing some fresh veggies once again!

Strawberry Rhubarb Pie


 Ellen shares her research and experiences with rhubarb, that unusual but loved garden vegetable.

A deep red stalk is more popular among consumers, but often has poor growth and yield. Green varieties are often much more productive. People often assume red stemmed rhubarb is sweeter than other colors but color and sweetness are not necessarily related. The Victoria variety, which is probably the greenest variety, often produce some very sweet stems.

It is interesting to note that the Victoria variety, also known as Large Victoria is easily raised from seed, but the best flavor is often the second year or later. Pull the plant when the flavor starts to diminish and replant. It has juicy, medium sized greenish to red leaf stalks, is a heavy producer and is excellent for farmer’s markets or market gardeners.

Rhubarb (Rheum)

Rhubarb is one of my favorite food plants; its red-green stalks beckon summer on and strawberry-rhubarb pie is one of my favorites. During a trip to Chile, I was introduced to nalka, the Chilean wild rhubarb. The plants grew well along the coast and coastal rivers. We cooked the stalks with sugar the same way garden rhubarb is traditionally cooked. The stalks were so bitter and tough we had a hard time eating them. Rhubarb is a seed-bearing perennial that is thought to originate in Alaska. Rhubarb was first known as a medicinal plant 5,000 years ago. The Chinese prized dried rhubarb root for its astringent, laxative properties.

In the last two hundred years, rhubarb has been cultivated as a vegetable (some consider it to be a fruit because it pairs so well with fruits). Only the young stalks are eaten as the leaves of the plant contain high amounts of oxalic acid, an acid that is present in much lesser quantities in other vegetables such as spinach, sorrel, and beet greens. Oxalic acid has a somewhat sour taste.

There are two types of rhubarb that have been cultivated, the difference between the two groups are the color of the stalk and the size of the plants. “Victoria†varieties vary in color from green to light red with a green interior. Red rhubarbs, such as “Canada Red†are smaller plants, with less disease resistance. The stalks are a deep red inside and out.

Rhubarb is usually propagated by cuttings but can be grown from seed. Rhubarb plants grown from seed sometimes do not exhibit the same characteristics as the parent plants. Rhubarb comes quickly in the spring, when temperatures begin to warm up and is harvestable 6 weeks or so after the weather turns. Plants do not grow in hot weather, and will wilt through the summer. In cooler areas, or in beds with high moisture and well-fed soil, rhubarb can be harvested again in the fall.

Harvesting from plants less than three years old will cause the plant to grow less vigorously and to produce fewer stalks. Rhubarb can be harvested twice a year, if half of the plant biomass is left intact.

My favorite way to eat rhubarb is undoubtedly in strawberry rhubarb pie. There is something unreal about the combination of the sweet and sour tastes!


Strawberry Rhubarb Pie
Author: Ellen Brand
Ingredients
  • 1 pound 454 grams rhubarb, cut into 1/2 inch (1.5 cm) pieces
  • 1 pound 454 grams fresh strawberries, cut into 1 1/2 inch (4 cm) pieces
  • 3 tablespoons 30 grams cornstarch
  • 3/4 cup 150 grams granulated white sugar
  • 1 teaspoon fresh lemon juice
  • 2 tablespoons 28 grams unsalted butter, cut into small chunks
Instructions
  1. Preheat oven to 400°F. Pre-chill pie crust in refrigerator.
  2. Cut and place strawberries and rhubarb in a large bowl.
  3. Mix cornstarch and sugar together and turn in the fruit to the mixture.
  4. Remove the chilled pie crust from the fridge. Pour the fruit mixture into the prepared pie shell. Sprinkle the fruit with about 1 teaspoon of lemon juice and dot with 2 tablespoons of butter.
  5. Add lattice as top crust, bake at 400°F for 45 minutes, or until the crust is a golden brown color and the fruit juices begin to bubble.
  6. Transfer pie to wire rack to cool. When fully cool (several hours later) the juices will gel.
Recipe Notes

Pie should keep for up to three days at room temperature but I have never, ever seen one last that long!

Discover the secret to successful seed planting. Learn how the orientation of seeds can significantly impact their germination and growth.

Raised Bed with Compost


We are sharing an article that we’ve written for magazine publication and has been in the October 2013 issue of Acres USA as well as the Fall 2013 edition of Small Farmer’s Journal. Compost is one of the foundational cornerstones of any successful garden, but has been over-thought and made much too complex by people wanting to make it “faster” or sell you some piece of equipment or machinery to make it “better”. It really is simple to make and doesn’t take any equipment, only needing time to accomplish. After all, who turns and works the compost in nature?

This is about our experiences and what we’ve learned from about 15 years of composting. Enjoy!


What We’ve Learned from Compost

Having been gardening for 15 years and composting for almost as long, we quickly realized that with our climate and native soils, improving the soil’s health and quality were one of the most important things we could do to help our garden. We are located in North-central Arizona, which is a semi-arid high grassland environment. Historically there would be 18 – 20 inches of moisture per year, but we have been lucky to see 10 – 12 inches in a good year over the past 20 years. There is almost always a south-westerly breeze which pulls moisture from any unprotected ground. The soils are really varied in structure with many different types in close proximity to each other. It is not uncommon to have a good productive soil with a caliche or high sandy soil within 20 – 50 feet. Our garden is a good sandy loam, with decomposed granite about 30 feet to the east and a heavy clay caliche soil 20 feet to the west.

A plant growing in the dirt on a sunny day.Good, aged compost has helped us build the health and fertility of our soil and overcome many of the challenges we face in our garden. It improves the soil structure, brings the micro nutrients and biological life to the soil, along with earthworms and larger soil dwellers. Mulching the compost helps to retain needed moisture and brings the soil moisture level from about 2 inches down to the surface of the soil/mulch interface. We use a combination of straw and wood chips for our mulch.

There is much we have learned that we have applied to our approach in creating great compost, along with observations and education we have sought out along the way. We are happy to share some of our experiences and knowledge about compost.

We don’t turn our compost, partly from being busy and not wanting to invest in machinery or equipment, also partly from research, reading and talking with those who have learned how to create some incredibly rich, earthy compost that looks like highly fertile soil. Most compost tumblers are too small for our needs and a tractor or turning equipment is an expensive purchase for the occasional use.

Our compost piles will age for at least a year before being added to the garden. We have learned that the slow aging is more beneficial to the decomposition process as well as not losing nearly as much nitrogen to off-gassing as happens with the hot and fast methods. Another benefit is the decomposition is much more thorough, destroying weed seeds, pathogens and any unwanted chemicals much better in a slower composting setup. In our climate, we need to water our compost occasionally to keep it going. This is easy to gauge, as the rich earthy smell goes away when the moisture level drops. We water about every 2 weeks on average during warmer weather. (Cautionary note for those that use city water with chlorine in it: chlorinated water will kill the micro-organisms in the compost and soil that you are working to help! If you have chlorinated water, either fill buckets and let them sit overnight to off-gas the chlorine or buy a chlorine filter that attaches to the garden hose to remove it. Thanks to Marguerite from IL for pointing this out!)

A plant growing in the dirt on a sunny day.In our research and education of how to make great compost, we consistently saw traditional, proven methods from different countries, climates and approaches that worked. Many of them were very similar, adjusted to adapt to the particular environments of where they were used. The French intensive method used 3 feet of fresh horse manure and straw to heat the cold frames over the winter in Paris, then were pulled out and added to the compost piles to finish decomposing. In the fall the aged compost was added back to the growing beds for the upcoming winter. The Russian dacha gardening tradition shows how continuous composting and mulching with wood chips will improve the soil, overcoming both heavy winters in the north and drought conditions in the south.

Another thing that we found is that European traditions and older American traditions applied compost thickly, about 3 – 4 inches at a minimum, while modern gardening applies it rather thinly – like expensive imported marmalade on toast – and then wonder why they don’t get the results they expect.

After the year of aging and decomposing, our compost looks and smells like rich dark soil. This is especially pleasing to see in comparison to our pale tan native soils! Once we apply it to the garden beds, we mulch it with several inches of straw, watered well to keep it in place. Recently we have begun experimenting with wood chips as mulch, with good results. The wood chips help retain and gain moisture better than the straw, with the added benefit of attracting earthworms faster. The wood chips act like a layer of permeable insulation, attracting the cooler and moist early morning air that sheds its water when it meets the warmer temperature of the soil. This moisture travels into the soil and is retained. It is surprising to see and feel how moist the soil is under 2 – 3 inches of wood chip mulch when there has been no rainfall or drip irrigation at all!

Our approach to making the best compost possible is to combine or “stack†techniques, similar to the bio-tech industry, but it is much more effective with no worries about future side-effects! We will walk you through the different techniques we use and why we use them.

A plant growing in the dirt on a sunny day.We have used straw bales as the container for our compost system for years, but have recently started using shipping pallets to more effectively utilize the composting area. The pallets are almost 3 times as tall as the straw bales and will give more compost in the same footprint. Wood chips are put down first, about 3 – 4 inches thick. These help retain moisture at the bottom of the pile before it seeps into the soil, as well as helping to attract earthworms and adding nutrients as they break down. We will scatter wood chips throughout the pile as we add horse manure. The nitrogen of the manure helps in the breakdown of the lignin in the wood chips, creating richer and more fertile compost.

Our two horses provide the bulk of the manure, along with the occasional load of cow manure. We are careful to get our cow manure from non-feedlot sources to avoid any contamination from antibiotics, glyphosate or industrial chemicals. This has supplied enough finished compost for our 14 thirty foot long raised bed garden that is our home and trial garden for our heirloom seed business. We apply compost twice a year, mid fall and early spring.

Straw is used to mulch the top of the pile and provides aeration as more manure is added to the top. About 1 – 2 inches of straw is added across the top about every two feet of depth. This is continued as the pile grows in height.  As the straw bales that make up other bins start to fall apart, they are added to the new piles.

Milk is diluted 50/50 and sprayed on the pile to help feed the microorganisms and jump starts the decomposition process. The amino acids, proteins, enzymes and natural sugars that make milk a food for humans and animals are the same ingredients in nurturing healthy communities of microbes, fungi and beneficials in compost and garden soil. Raw milk is the best, as it hasn’t been exposed to heat that alters the components in milk that provide a perfect food for the soil and plants, but any milk will work. Using milk on crops and soils is an ancient technique that has been lost to modern industrial agriculture.

Molasses adds readily available sugars to the compost that will skyrocket the microbial activity, with the addition of needed mineral content. We use one cup of molasses to a gallon of water and spray onto the pile once it is about 1 – 2 feet tall.

Coffee grounds are added routinely as the pile builds to help with moisture retention and buffer our alkaline soils. Traditionally, coffee grounds were seen as an acidic addition but recent research shows that coffee grounds act more as a buffer, moderating either an acidic or alkaline pH toward a more neutral one. In arid regions coffee grounds can be added up to 25% by volume of the pile. They are a good nitrogen source to help keep the decomposition going as well as being a natural earthworm attractant! Sourcing the coffee grounds comes from local coffee houses, restaurants, Starbucks, etc.

A plant growing in the dirt on a sunny day.Hardwood lump charcoal or Bio-Char is added as the pile grows to help the compost in many ways. The most obvious benefit is to add carbon to the soil. Charcoal has a lifetime benefit of several hundred years, as shown by Brazilian university studies on the Amazonian “Terra Preta†sites in the rainforest. It must be hardwood lump charcoal and not briquettes, which are processed with chemical fire accelerators, sawdust and other industrial waste. We like to crush it to about the size of a grain of corn to increase its surface area and effectiveness.

Charcoal acts like a sponge for the first 6 months or so, absorbing minerals and nutrients from the surrounding soil or compost while it “charges†or “activatesâ€. After that it becomes an active beneficial component of the soil, providing housing and food sources for the microbial communities. Mycorrhizal Fungi will colonize charcoal and help to monitor the surrounding soil health, moving nutrients around as needed by plants. It was previously thought that mycorrhizae would only colonize the roots of plants, but it has been found that they will also inhabit charcoal. This will help them live throughout a winter when little root life or activity is present. The charcoal is sourced in 40 pound bags from buying clubs such as Costco or Sam’s Club, and can be obtained in larger quantities directly from the manufacturer.

A plant growing in the dirt on a sunny day.Trace minerals are added such as Azomite or Elemite to increase the available mineral and trace elements that are often low in today’s feed. This helps the decomposition of the pile, is absorbed in the charcoal and carries over to help feed the garden soil.

Once the compost pile is at the top of the bin, we cover it with a generous layer of straw and build a new bin. Then we pretty much ignore the active pile except for watering when it needs it. Every couple of months we check the pile to see how it is progressing, and see how much it has started to drop in height. Once the pile is finished it will have dropped about 1/4 to 1/3 of its original height.

This system has evolved over several years to the present one and has continually produced better and better compost. This approach may sound like a lot of work, but with the system set up there is very little additional work after cleaning the horse pens. We usually get a full wheelbarrow of fresh manure every other day, and we rotate the addition of minerals, charcoal and wood chips on top of the wheelbarrow load which is then dumped onto the pile, putting the additions underneath the load. Once we have about 2 feet above the last straw layer, we add a few inches of straw. The scent of the active pile is that of a handful of rich fertile earth, so we gauge when to water when we can’t “smell the earth†as we walk by. The additional time needed to add to the nutrients range from the time it takes to add a couple of shovelfuls of wood chips or a scoop of Elemite to the wheelbarrow, to a couple of minutes to crush a few handfuls of charcoal.

No matter what your scale, from backyard home gardener to small acreage, these concepts can be scaled up or down to suit your particular needs and animals. Look to your neighborhood or community for feedstock and supplies for the compost pile. Most horse owners will be happy to give away their excess manure, as most do not compost it and it becomes a waste management issue. Some farms will have excess straw or broken bales that are not useful for them but would be excellent feed for your compost pile.

Good composting – like much of good agriculture – takes a certain amount of patience and observation, letting Mother Nature work her miracles on her schedule. Think about how nature decomposes and composts leaf litter in the forest or grasses in the pasture, they aren’t “done†in 30 to 60 days! Once the cycle is established, you will always have some great compost becoming available for the next feeding of your garden soil.

Industrial Agriculture


What if we are seeing the peak of industrial agriculture, sort of like Peak Oil? What if this is as good as commercial, chemical, industrial and corporate agriculture gets? There are some early signs that this may, in fact, be true. Yes, the USDA shows that all agriculture added around $444 billion to our economy in 2012, but that doesn’t mean we are growing more food to feed more people, unlike the mantra of corporate ag of “feeding the world.” Industrial, commercial agriculture is growing more commodity crops – like #2 field corn that is not eaten directly, but pulled apart in labs and re-synthesized to make over 600 ingredients in packaged foods – for ethanol, for export or to feed animals in confined feedlots.

Surprisingly, the American Farm Bureau Federation was the one saying to their constituent farmers to get ready for a slowdown, or even a pull-back from the high water mark of today. Several reasons go into this prediction;  less demand for corn ethanol in gasoline, less imports of commodity crops of soybeans and corn from China and increasing restrictions on GMO crops of corn, soybeans and cotton in more countries around the world. Bob Young, the American Farm Bureau Federation’s top economist told a group at the annual meeting in Billings, MT that,”You’d almost have to view this period as ‘This is the best of times.’ I’d also tell you that whatever goes up like that, sooner or later, more than likely, one has to expect, one has to think about getting ready for it to go the other way.â€

I’ve said many times that we will wind up in a sustainable economy with sustainable agriculture, either by choice or by force. Either we will figure out how to grow enough food to feed ourselves without stripping the soil of its nutrients and wrecking the planet or we will be thrown off that cliff and find ourselves at the bottom, picking ourselves up and trying to figure out how to feed those that remain. The same goes for the economy, we will learn to live within our means or face the consequences. 

I, for one, want to be able to choose how we move forward; to learn how to grow enough food to feed ourselves in an intelligent manner, eliminating the horrible 40% of food that is wasted in today’s systems.

The bright spot in all of this is that local, sustainable agriculture is taking off like never before, with no signs of slowing down. From younger people with no farming experience getting into growing, returning veterans taking up farming and growing both for food production and to heal themselves, urban agriculture plots and micro-farms forming CSAs or Community Supported Agriculture shares, to ever-increasing numbers of people switching to eating more organic produce and the double digit growth of Farmer’s Markets across the country, sustainable agriculture is really beginning to hit its stride.

All of this is the result of independent, de-centralized, non-governement directed, led or supported efforts of people all across the country who are working to make their own lives better and in the process, making those around them better as well. As Richard McCarthy, Executive Director for Slow Food USA says, “We need to celebrate those who are working to make a better food system, wherever they are.”


Move Over, Big Ag: Sustainability’s Moment Is Here

Agriculture poised for a decline, economist says

Buche de Noel with bean inside


Ellen has been busy learning about what a family run seed company is like with packing seeds, pulling orders and helping us prepare for “seed season.†She has also been engaged in learning and writing about the varied history of several varieties of seeds and their uses.

Today we share her article about beans with a unique twist, in how a bean features prominently in a treasured family tradition and makes the day for a lucky person. Enjoy!


Beans (Phaselous vulgaris)

When I was young, Christmas season marked its appearance with a yule log, the traditional cake of the holiday season in France. I remember looking in awe at the “bûche de Noel” covered in chocolate frosting, shaped to look like it had bark, covered in chocolate shavings or powdered sugar and dotted with marzipan mushrooms.

My favorite part of this holiday tradition was the hunt for the bean that was baked somewhere in the length of the log. Whoever found the bean was the Queen or King for the day, and everyone had to do as they said. In some places, a tiny statue of Christ is tucked into the cake batter in place of a bean. I found the bean once, and as the youngest in the family, enjoyed being Queen of my two older brothers and my parents.

In France, the bûche de Noel is served on the Twelfth Night and is the edible representation of the single log (oak is common) that is traditionally burned from Christmas Eve till New Years Day. It is said that burning the yule log ensures a plentiful harvest in the upcoming season.

The symbolism of the bean takes us back to the time of our ancient ancestors. In Ancient Egypt, the dead were buried with beans to ensure their return from the afterlife. The bean field was the place where the souls of the dead awaited reincarnation. The legumes were an offering in wedding ceremonies, wishing the bride and groom a male child who could carry the line of the ancestors. Beans have been seen as a potent symbol of the embryo and of growth in many societies.

It is interesting to note that beans and peas are both members of the pea family (Fabacea). Each has its distinct growing habits—most notably that beans love the heat, whereas peas prefer colder weather. Beans take on two growth habits, that of the bush bean which grows just as you would imagine, and pole beans, those that have a climbing tendency, winding and trailing their way up stakes, porches, railings—whatever is around.

Wild beans exhibit bush, climbing, and sprawling habits and disperse their seed once pods are dry. The pod splits at the bottom and spirals outward as it opens, dispersing seed. I have yet to see this method of seed dispersal with agricultural dry beans so I suspect humans have bred this trait out of the bean for ease of harvest. It is much easier to pick beans in their pods than to search the ground for them!

Dry beans should be harvested once the pods have turned yellow and dried, and the seeds have matured from green to their mature coloration. If you have never grown dry beans, there are hundreds of beautifully colored beans to choose from, mottled purples and browns to white speckled beans each with their own shape. Beans have a distinctive life cycle, beginning with the sprouts that emerge from the ground with triumph, pushing soil aside almost defiantly. All green or “string†beans will mature to dry beans if left on the plant long enough. The process of deciding when it is time to harvest is an opportunity to watch seed mature and transform.

In the Americas, beans are traditionally cultivated with squash and corn, a trifecta of beneficial relationships known colloquially as a Three Sisters garden. The beans’ nitrogen-fixing capability provides nutrients to corn and squash plants, while squash leaves provide shade for plant roots, and corn stalks provide trellis for climbing beans. Some say that squash’s large prickly leaves make it difficult or uncomfortable for animals to raid corn plants.

Current gene bank counts of beans are as high as 40,000 varieties, although just a few handfuls of them are widely cultivated. Bush beans are preferred over pole beans today for mechanical harvest because of their clusters of straight pods that are low to the ground. This large number provides us the luxury of picking a bean that is suited to the climatic uniqueness of the area we cultivate. Growing regionally-adapted varieties, such as the tepary bean in our area around Prescott, Arizona, is a hands-on learning experience; a way to see how plants have adapted to thrive with climatic stresses. Here, our most notable stresses are intense sunlight and an average 10 inches of rainfall per year. There are many varieties that have become accustomed to this weather and thrive in it! Some varieties to try are the Anasazi bush bean, the tepary bean, and any of the cattle beans.

Black Friday


There’s a popular info-graphic floating around Facebook that says, “Black Friday: Because only in America, people trample others for sales exactly one day after being thankful for what they already have.†Sounds a bit ironic, doesn’t it? Sadly, it is all too true.

This year we don’t have to wait until the next day for the sport of standing in line, pushing, shoving and trampling others that get in our way of that penultimate prize, the super-sale item that is so hot right now. We can start the festivities on Thanksgiving Day, while we are still full of cheer from our festive meal!

So why do we, as otherwise intelligent and thinking people, engage in this idiotic behavior? A large part of the reason is founded in our modern culture of consumerism. This culture was largely founded by the partnership of mainstream media and corporate marketing and says that in order to be happy, we must buy stuff. It doesn’t really matter what we buy, only that we must buy or we simply cannot be happy. Or successful. Or whatever else is important in our lives. This is the sum of our economic system today: buy things. This is the foundation of the ridiculousness that is Black Friday.

Compounding this is the marketing messages we are subjected to: buy things at this wonderful sale or you will lose out. If you aren’t in line at 11pm Thanksgiving night for the midnight opening, you won’t ever be able to buy at this price again. Never mind that you just might not need what is being sold; you will be a loser if you’re not there. Ignore that fact that the sale is false – 60% off of a 300% markup on something that will be broken, out of date or out of fashion in 3 – 6 months, if not sooner.

What to do about this conundrum? Very simple; don’t participate. Yes, I know, how in the world will you live another moment knowing that you weren’t one of the first in line for half off Blu-Ray players, or buy one get one free cargo shorts? After all, it very well might bankrupt you to pay regular sales prices the very next day! Abstaining from participating in the madness might do a few things for you. It might give you some time to sleep in, have a relaxing breakfast and spend some time with your family or friends. You know, those people that you text, instant message, Pin to their boards with recipes and ideas for the bathroom, along with “like†and comment on their walls. Those people.

Another option that has been ignored until lately is shopping locally. If you absolutely just have to get out there the day after Thanksgiving and spend money, then go see your friendly neighborhood Mom and Pop store. They will most likely also have some sales on things that can’t be found at the big box stores, along with a smile and a warm welcome.

The online world will also be patiently waiting with no lines, shoving or trampling. There might be the same junk on sale, but there are also some jewels to be found. Sure, you might not be able to take your plunder home right now, but you won’t have cost some employee their holiday, and you will get to enjoy your treasures twice; once when you buy them and again when they arrive at your door in a few days, with no lost sleep or black eyes.

Staying away from the malls and Wal-Marts will give you the smug satisfaction that you haven’t been instrumental in forcing someone to give up their holiday in order to ring up the must-have worthless material purchases that are killer deals for today only. It validates the idea that there are some things that are more important than consumerism and material stuff, things, toys and gadgets. Opting out of Black Friday may give you more than just a few more hours to enjoy some quiet time with your family. It just might give you a little more humanity.

A plant growing in the dirt on a sunny day.

Black Friday

A person holding up a stalk of wheat.


History

White Sonora Wheat is enjoying a resurgence of popularity today all across the country, thanks to restoration efforts in Arizona and South Carolina. Introduced in the early 1700s by Jesuit Father Eusebio Francisco Kino to the Sonoran region of Mexico and Southern Arizona, White Sonora Wheat was the staple wheat for the western United States for almost 200 years, from the early 1700s to the 1900s. Starting in the early 1800s, California planted Sonoran wheat almost exclusively.

Its popularity was partly due to its resistance to Fusarium fungus, drought tolerance and its exceptionally sweet flavor for baking. It was also prized as a brewing grain, again for its flavor it gave the beer. During the Civil War, much Sonoran wheat was exported from Arizona and California to the eastern states making up for lost production due to the war.

A close up of some green grass

Several factors contributed to its demise as the staple variety of wheat, from expanded cattle ranching in Mexico, the droughts and loss of water as a power source in the 1950s, the closing of many flour mills in Sonora in the mid-1960s, the Green Revolution with its hybridized wheat varieties and the switch from wheat production to vegetables as dams closed off the rivers in northern Mexico. By about 1975, there were no more commercial sources of White Sonora Wheat available.

Modern Interest

A lot of attention is being paid to wheat today, mainly due to the rise of gluten intolerance or celiac disease in which a person cannot digest the gluten part of wheat in their diet. For a more in-depth look at this issue, read my article “What’s Wrong with Our Wheat?â€.

This is one of several areas where White Sonora Wheat really shines, as it is lower in gluten and higher in protein than today’s super-hybridized dwarf varieties. White Sonora Wheat is an extremely flavorful semi-hard white spring wheat that can be used for whole wheat flour in breads, cakes, pancakes, tortillas, and more. By many accounts this is the best flour for cakes, breads and tortillas ever. Because it is a white wheat, not a hard red wheat, it makes lighter products that have a sweeter and lighter flavor than those typically associated with whole wheat. The berries can also be boiled and used like rice or sprouted for wheat grass.

A person holding a small plant in their hand.


Another advantage the White Sonora Wheat has is a thinner, more paper-like husk, unlike other ancient cereal grains that require a mill to remove the husk and then can be ground. When we recently visited our grower, we were shown a large bag of the wheat that had just been harvested, with no other cleaning or sorting. You can see the video below, and see the weed seeds among the wheat, but also the very few seed heads that have any husks on them. The husks are removed by the mechanical action of the harvester, with the remaining ones rubbed off easily with a couple of fingers.

Processing and Cleaning

For the home gardener or small scale grower, this can be done fairly easily with some hand or kitchen tools. Depending on how much wheat you have to process, a kitchen food processor such as a Cuisinart fitted with the plastic dough blade can separate the husks from the grains. Pulse the blade to prevent from breaking too many of the grains and making it harder to separate the wheat from the husks or chaff. Fill the bowl up about 1/2 to 2/3 full and work in batches.

A close up of a food processor on top of some beans


Another method is to use a 5 gallon bucket with a paint mixer attachment on a hand power drill, either the spiral or traditional cross or paddle type. Use a moderate speed and move the mixer around the bucket to create the friction that loosens the husks. You will need to stop and check the progress, but will quickly get a feel for how long to use the mixer.

White Sonora Wheat has a root structure much like a perennial prairie grass with long taproots and a web of smaller feeder roots, unlike the simple and shallow hybrid roots of today’s wheat. These longer taproots bring water and nutrients from deeper in the soils, making the plant less susceptible to moisture fluctuations. It also helps to open up the soil when the wheat is harvested as the root system decays, leaving behind a network of air and water passages. The wheat can thrive on marginal soils and actually produces better flavor on these soils, though production volume is lower than modern ones.

With all of its advantages, flavor and nutrition, ease of growth and harvest, along with being adapted to dry climates and improving the soil, it is easy to see why White Sonora Wheat is regaining its rightful popularity! It is usually planted as winter wheat in areas with mild winters and as spring wheat everywhere else.

Customer Processing Method

One of our customers graciously sent some photos showing how he processed the wheat after harvesting it. He started with 3 oz. and the end results are pretty impressive! Thanks to Paul from California for sharing these with us!

A man is washing his toilet outside

He starts with dumping the uncleaned wheat into a sack or heavy pillowcase – heads, chaff and remainder of stems – all of it.

A man is washing his toilet outside

Then using a large, lightweight wooden mallet, he applies physical friction to the bag and wheat, loosening the hulls. This isn’t a pounding action, and he tries not to hit through to the bottom of the sack, only gently thumping the top and going down about halfway into the wheat.

A man is washing his toilet outside

After a few minutes of friction, this is what the wheat berries look like – very much the same as what comes out of the combine, but with some stalks and stems in the mix.

A man is washing his toilet outside

Next is winnowing the wheat, or separating it from the husks or chaff. The basics of this process haven’t changed since it was written about in the Bible – use a breeze to blow the lighter chaff off of the heavier wheat berries. Paul said he had to repeat this step a couple of times, but got a really clean batch of wheat.

A table with four jars of food on it.

Here are the results! Pretty good harvest from a 3 oz. start. This is fairly typical return with wheat, it should be in the range of about 40:1, meaning if you plant 1 oz. your harvest should be around 40 oz. 

Farm to School Program


We are constantly talking about and promoting local, sustainable agriculture and the power of an individual’s choice. Many of the things that are going right in our world of agriculture, food, nutrition and health are the direct result of the intersection of local agriculture and an individual’s choice. One such example is the local Yavapai County Farm to School program that is in the beginning stages as a result of Paradigm Permaculture Coalition’s work.

Here is the press release for their work and first fundraiser, to be held this October 18th and 19th. We are pleased to share this with everyone as an invitation to help this particular program, but also to be inspired and invited to work within your local community to create something similar!

Dear Northern and Central Arizona Friends and Customers:

We are excited to be involved with a new grass-roots organization based right here in Yavapai County, the Paradigm Permaculture Coalition with the goal of bringing a Farm to School program to Yavapai County. Getting fresh, local foods into our schools here and across the nation is important in growing the next generation. We wanted to share with you more about this organization and upcoming events in October that we hope you will support.

History

Farm to School is a nationally recognized and USDA supported program with its inception in 1996-1997. A Farm to School initiative in Yavapai County was seeded in 2012 by a group of local educators and concerned citizens. The Yavapai County Farm to School Grant Advisory Committee applied for the 2012-2013 USDA Farm to School Planning Grant. In 2013, this group of invested partners grew to include Quad-City school districts, local agencies, and non-profits that are in alignment with providing nutrition education, access to fresh local produce for school meal programs, and hands-on gardening activities for school children. The committee applied for the 2013-2014 Planning Grant and will be notified in October if a recipient. The outcome of these efforts was the founding of Paradigm Permaculture Coalition. We are a 501c-3 in partnership with Cornucopia Community Advocates located in Sedona.

Mission & Vision

Paradigm Permaculture Coalition is an educational organization that inspires regenerative living practices in the desert southwest by promoting locally based agriculture through education, community outreach and networking. The term Permaculture was coined over 25 years ago by Bill Mollison and David Holmgren, as a “Perennial Agriculture for Human Settlements” or a conjunction of “permanent-culture, permanent-agriculture”.  This is a technology that mimics eco-systems and therefore, society via a system of zones or guilds.

We envision healthy relationships, happy hearts, and empowered people through the lens of permaculture principles of:  care of the earth, care of people, and a fair share for all. These actions encourage abundant growth and distribution of local and regional food, provide experiential education opportunities, and enrich local economies that nourish our communities for future generations.

Get Involved: Farm to Table Fundraiser

Our inaugural event will celebrate National Farm to School Month while informing parents, local educators, administrators, businesses and government officials through the engagement of an experiential education field day and ‘Cultural Connections through Local Food’ fun-raising event.

Mark your calendars for October 18th and 19th, 2013. Friday evening fun-raiser will feature local foods dinner, keynote speakers, multi-media presentations, silent auction and raffle. Saturday’s field day will include a visit to the Prescott Farmers Market, a tour of a local farm, and a luncheon with Q & A Farm to School Panel. These comprehensive groups of speakers are instrumental in their own Southwest communities, working toward Farm to School efforts. They offer us valuable information to guide our initiative in the planning and implementation for Yavapai County.

Friday, October 18, 2013 5:30 pm to 9:00 pm

Cultural Connections through Local Food – Yavapai County Farm to School Fundraiser

This fun filled evening will feature informative agricultural presentations by speakers from the Dine’ and Pima Indian Tribes, multi-media presentation on Farm to School, silent auction and raffle, with local foods dinner.  $20/per ticket, a portion of which is tax-deductable. All proceeds go toward the successful development of a Farm to School program in Yavapai County. Register for the Yavapai County Farm to School Fundraiser here!

Saturday, October 19, 2013 8:00 am to 3:00 pm

Educational Field Day

To include a visit to the Prescott Farmers Market, a tour of Mortimer Family Farm in Dewey, Chino Valley Farms in Chino Valley and a luncheon buffet with Q & A Farm to School Panel. This comprehensive group of speakers is instrumental in their own Southwest communities, developing and enhancing Farm to School programs. The panel will also include individuals working in our local school districts and Health Department to address food safety issues. They offer us valuable information to guide our initiative in the planning and implementation for Yavapai County. Register for the Educational Field Day here!

Thank you for supporting this project, please forward this email to your friends and neighbors to help spread the word!